Nomadic Matt's Travel Site
Travel Better, Cheaper, Longer

Mylio Photos: An Amazing Photo Tool for Travelers
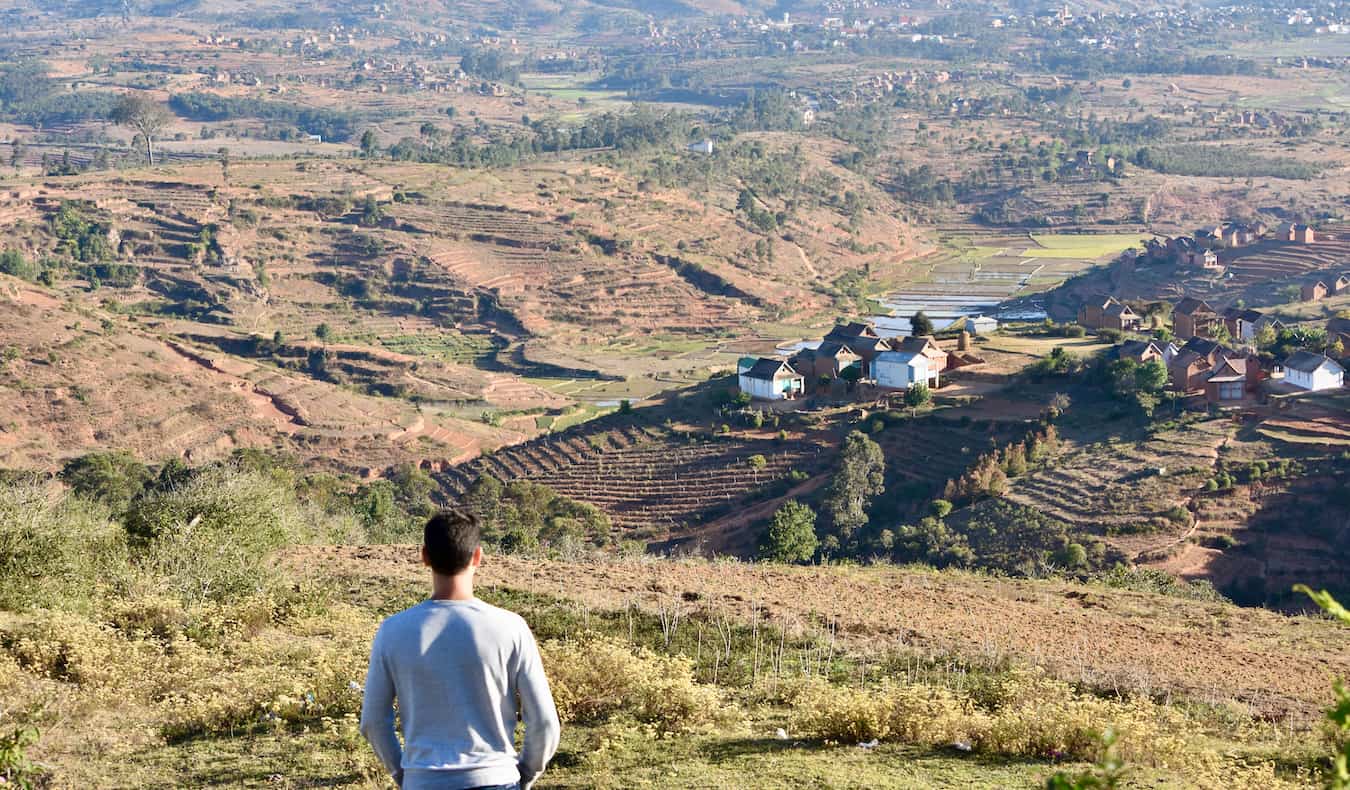
I’m bad at taking photos. That’s not to say the pictures I take are bad (though there’s debate on that too!). Rather, I always forget to take photos for this blog whenever I’m traveling.
I’ve gotten better in recent years (thanks to the team here constantly reminding me). But that means I take a lot of photos — photos of me for my social media, pictures of landscapes and monuments for the website, menus so I can update prices on the blog, and everything in between.
After over 15 years traveling the world , I have thousands and thousands of pictures on my hard drive.
I actually went through all my photos in 2022. It took TWO MONTHS of sorting and arranging them into folders, separating them by date and destination, and removing duplicates and those I didn’t want to keep.
It was a hassle. But it didn’t have to be.
Enter Mylio Photos .
Mylio Photos is an app that makes it easy to save, store, edit, organize, and protect all your travel photos — as well as important documents, like passport scans and visa applications. It’s pretty new and I wish I had found it sooner because it would have saved a lot of time. But, hopefully, it can do that for you!
Mylio Photos is designed to simplify your life as a traveler, so you don’t have to waste time uploading pictures and transferring them from device to device.
If you’re like me and have tons of pictures — ones you want to keep safe and organized — here’s how Mylio Photos can help ensure you don’t lose those travel memories.
What is Mylio Photos?
Mylio Photos is an app that turns your computer, phone, tablet, and/or storage device into a convenient and powerful system for managing a lifetime of memories.
With it, all your photos and videos — from any source — are cataloged into a single library that’s accessible on all your devices.
Did you take photos in Paris on your iPhone but videos on your tablet? With Mylio Photos, they will sync automatically to your laptop, so you don’t have to transfer them. Every photo is available on every device. All the time.
Most travelers (including me, until recently) don’t have a system in place for organizing their photos or keeping them safe from device failure, theft, or loss. We just share some on social media and then dump the rest on a hard drive or in the cloud.
As a result, many travelers struggle to find specific pictures, having to browse multiple folders for the image they need. I can’t count how many times I’ve hunted through folders to find a photo, only to come up empty-handed.
While dumping pictures in the cloud is simple, it’s not exactly the best solution. The disadvantages are worth considering:
- Cloud storage requires you to pay more as you add more photos. Some cloud plans have limited storage.
- Some solutions have nice features on desktop (Adobe Lightroom), but limited ones on mobile devices.
- Some solutions don’t allow syncing between MacOS, iOS, Android, or Windows platforms.
Mylio Photos allows travelers to avoid all these limitations. It’s the simplest way to organize, protect, and preserve your travel photos and videos.
Why Use Mylio Photos?
With Mylio Photos , travelers turn their smartphones, computers, and storage devices into a secure, connected library of photos, videos, and other important documents. Travelers can easily sync their Android, iOS, Windows, and MacOS devices; add cloud storage; and even back up media from Facebook and Instagram.
In a nutshell, here’s what Mylio Photos can do for you:
- Collect : It brings all photos and videos together in a beautiful library, including those taken before “the iPhone era.”
- Select : It cleans up your library, removes duplicates in seconds, tags people, and adds events and places. Keep only the photos you need and want to preserve.
- Protect : It automatically backs everything up to your devices. And if you want to add cloud storage (like Google Drive), Mylio Photos will encrypt everything so the data stays with you and nothing is shared with “Big Brother.”
- Access : No matter which device you work on, updates are automatically synced to reflect changes instantly.
Most importantly, photos and videos stay on each device and are not “kept hostage” in the cloud. Mylio Photos shrinks raw photos to less than 5% of their original file size so your phone/tablet/laptop won’t get filled up — all while preserving full editing capabilities if you want to edit/adjust any photos or videos. (The app protects and preserves the originals for when you need them too. It’s all automatic with no attention needed).
If you do need additional storage beyond your devices, you can also link Mylio Photos to the cloud or to a physical hard drive for additional storage.
And because the app stores everything on your devices, the price doesn’t go up when users add more files or connect more devices.
Moreover, you can store e-books and PDFs in your account, allowing you to access reading material offline whenever you need it. This is perfect for those long flights or trips to destinations where Wi-Fi may be unreliable.
How Mylio Photos Works
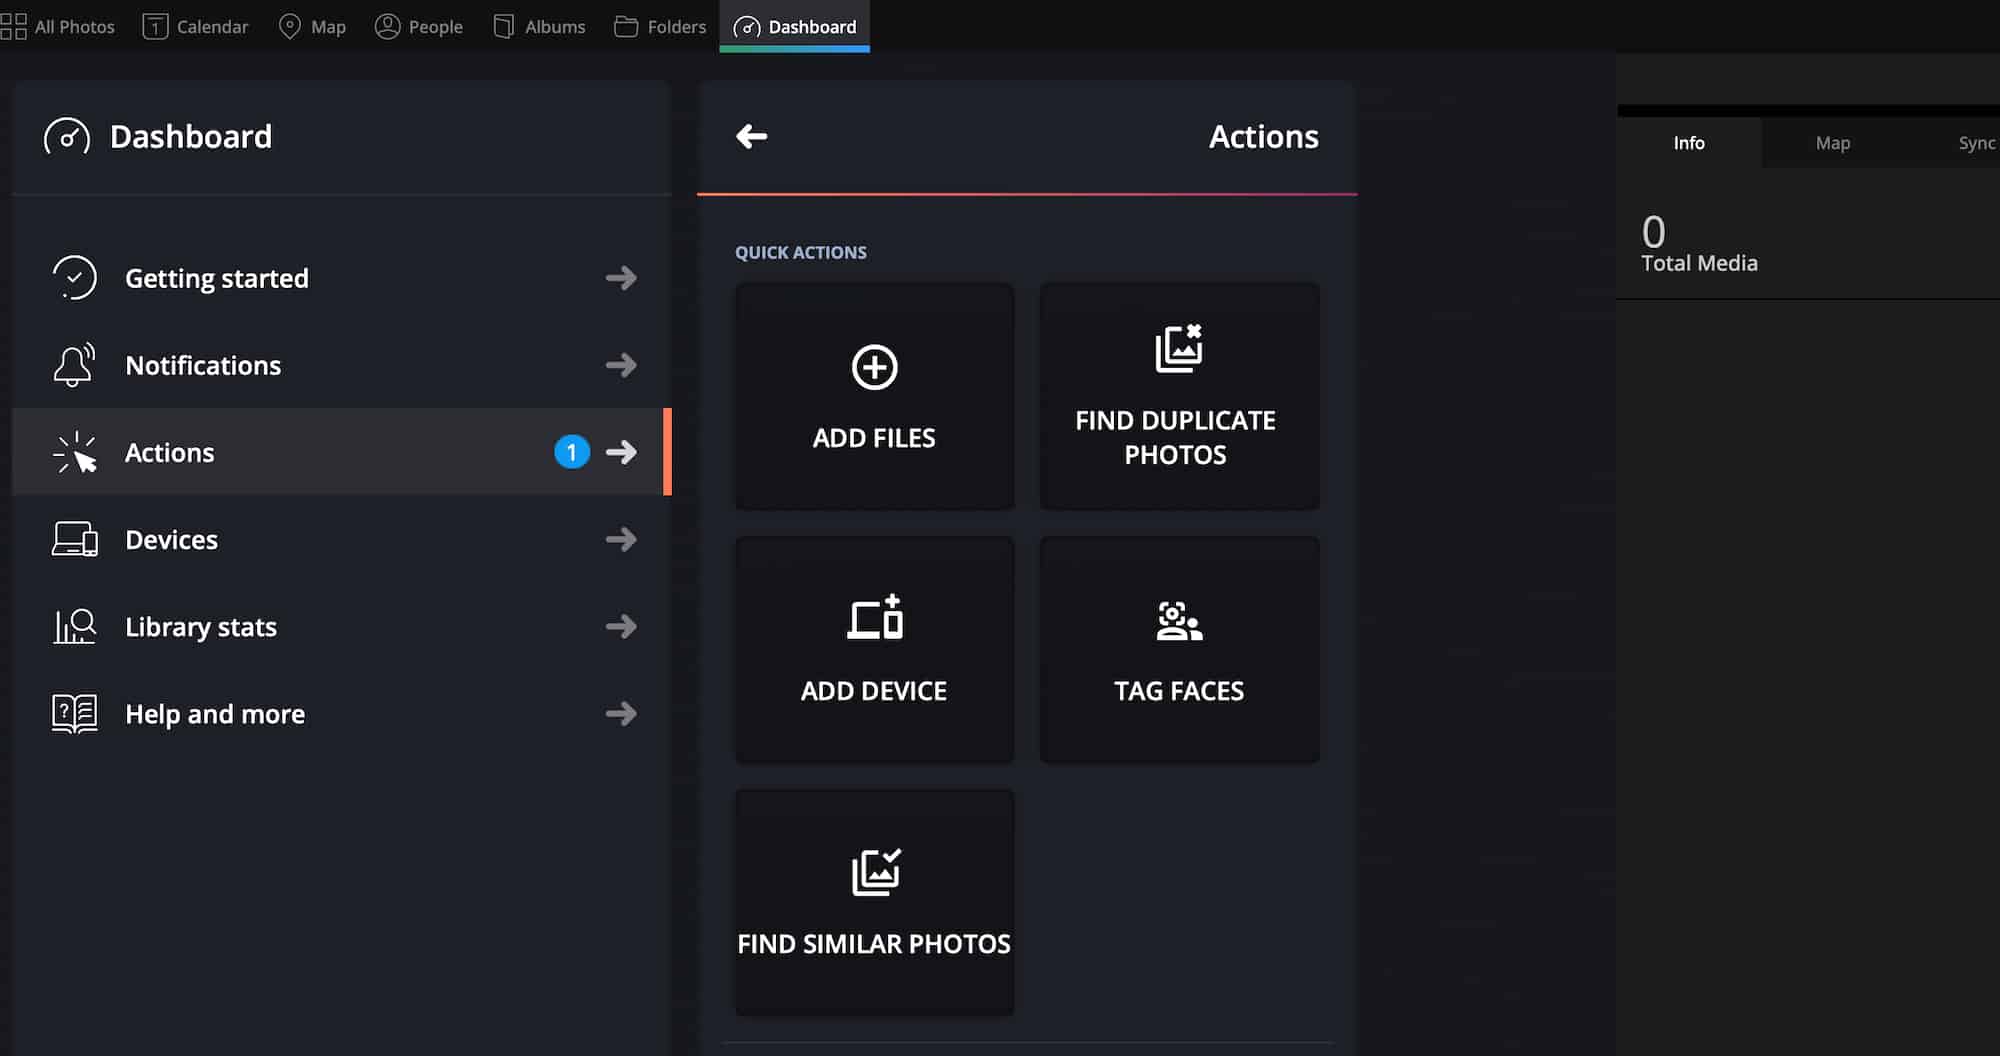
Once you sign up for an account at mylio.com , you can download the app onto your device(s). Here’s what the dashboard looks like:

You can then start dumping in your photos. You just drag and drop. It’s super straightforward:
Here’s a look at a handful of photos I’ve added so far. Notice how the app automatically arranges them by date:
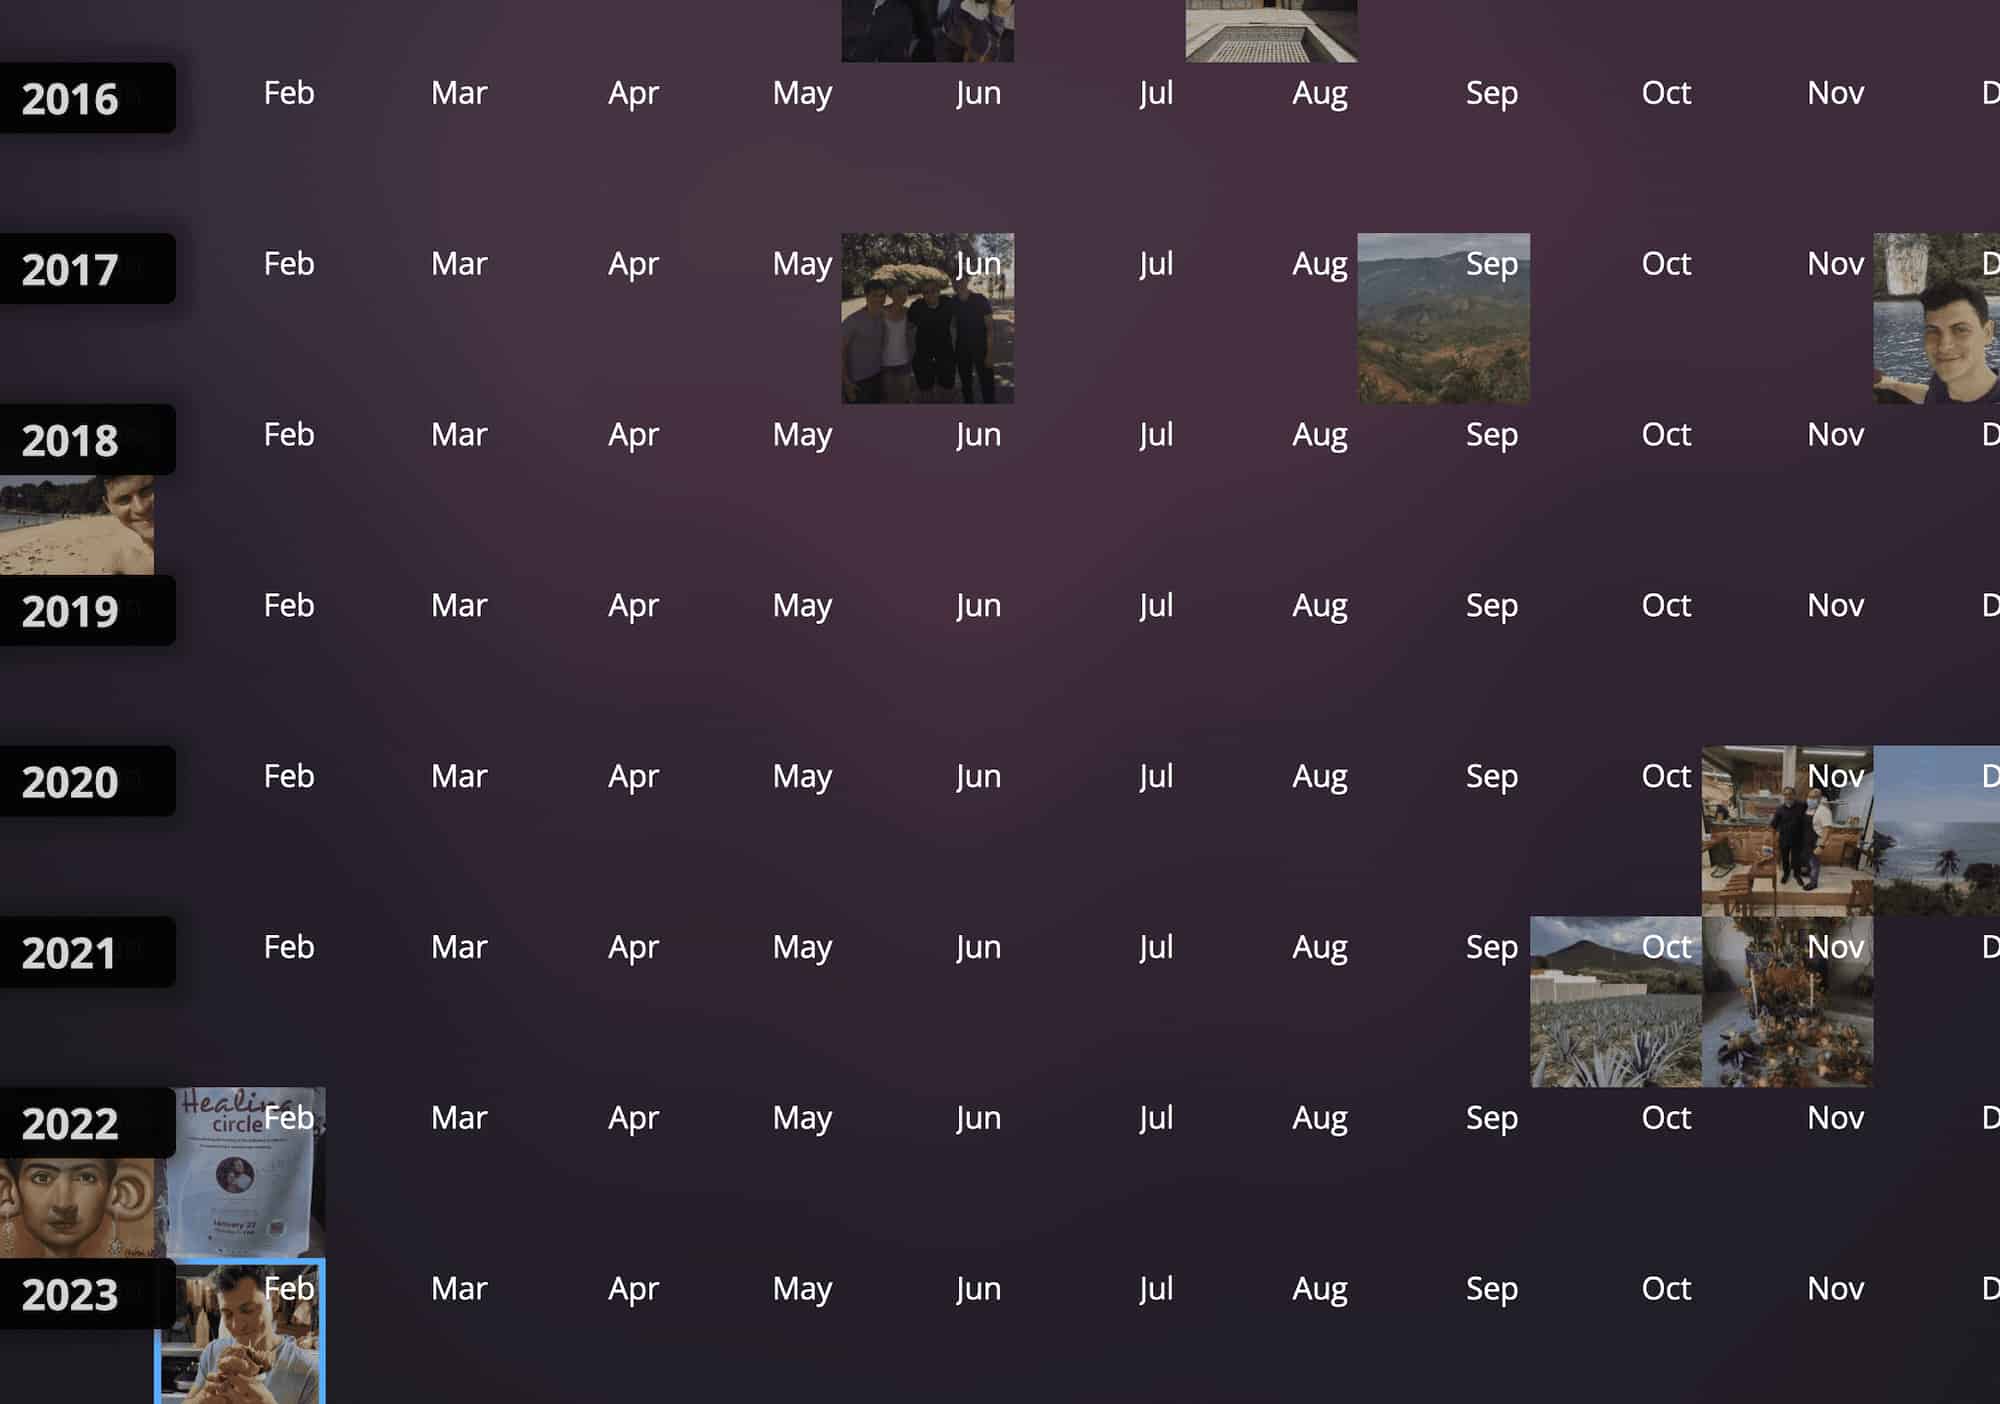
While you can arrange things by folders and albums, the main calendar view will have everything arranged by date as well, so you can see exactly when your pictures were taken.
You can also see exactly where they were taken also:
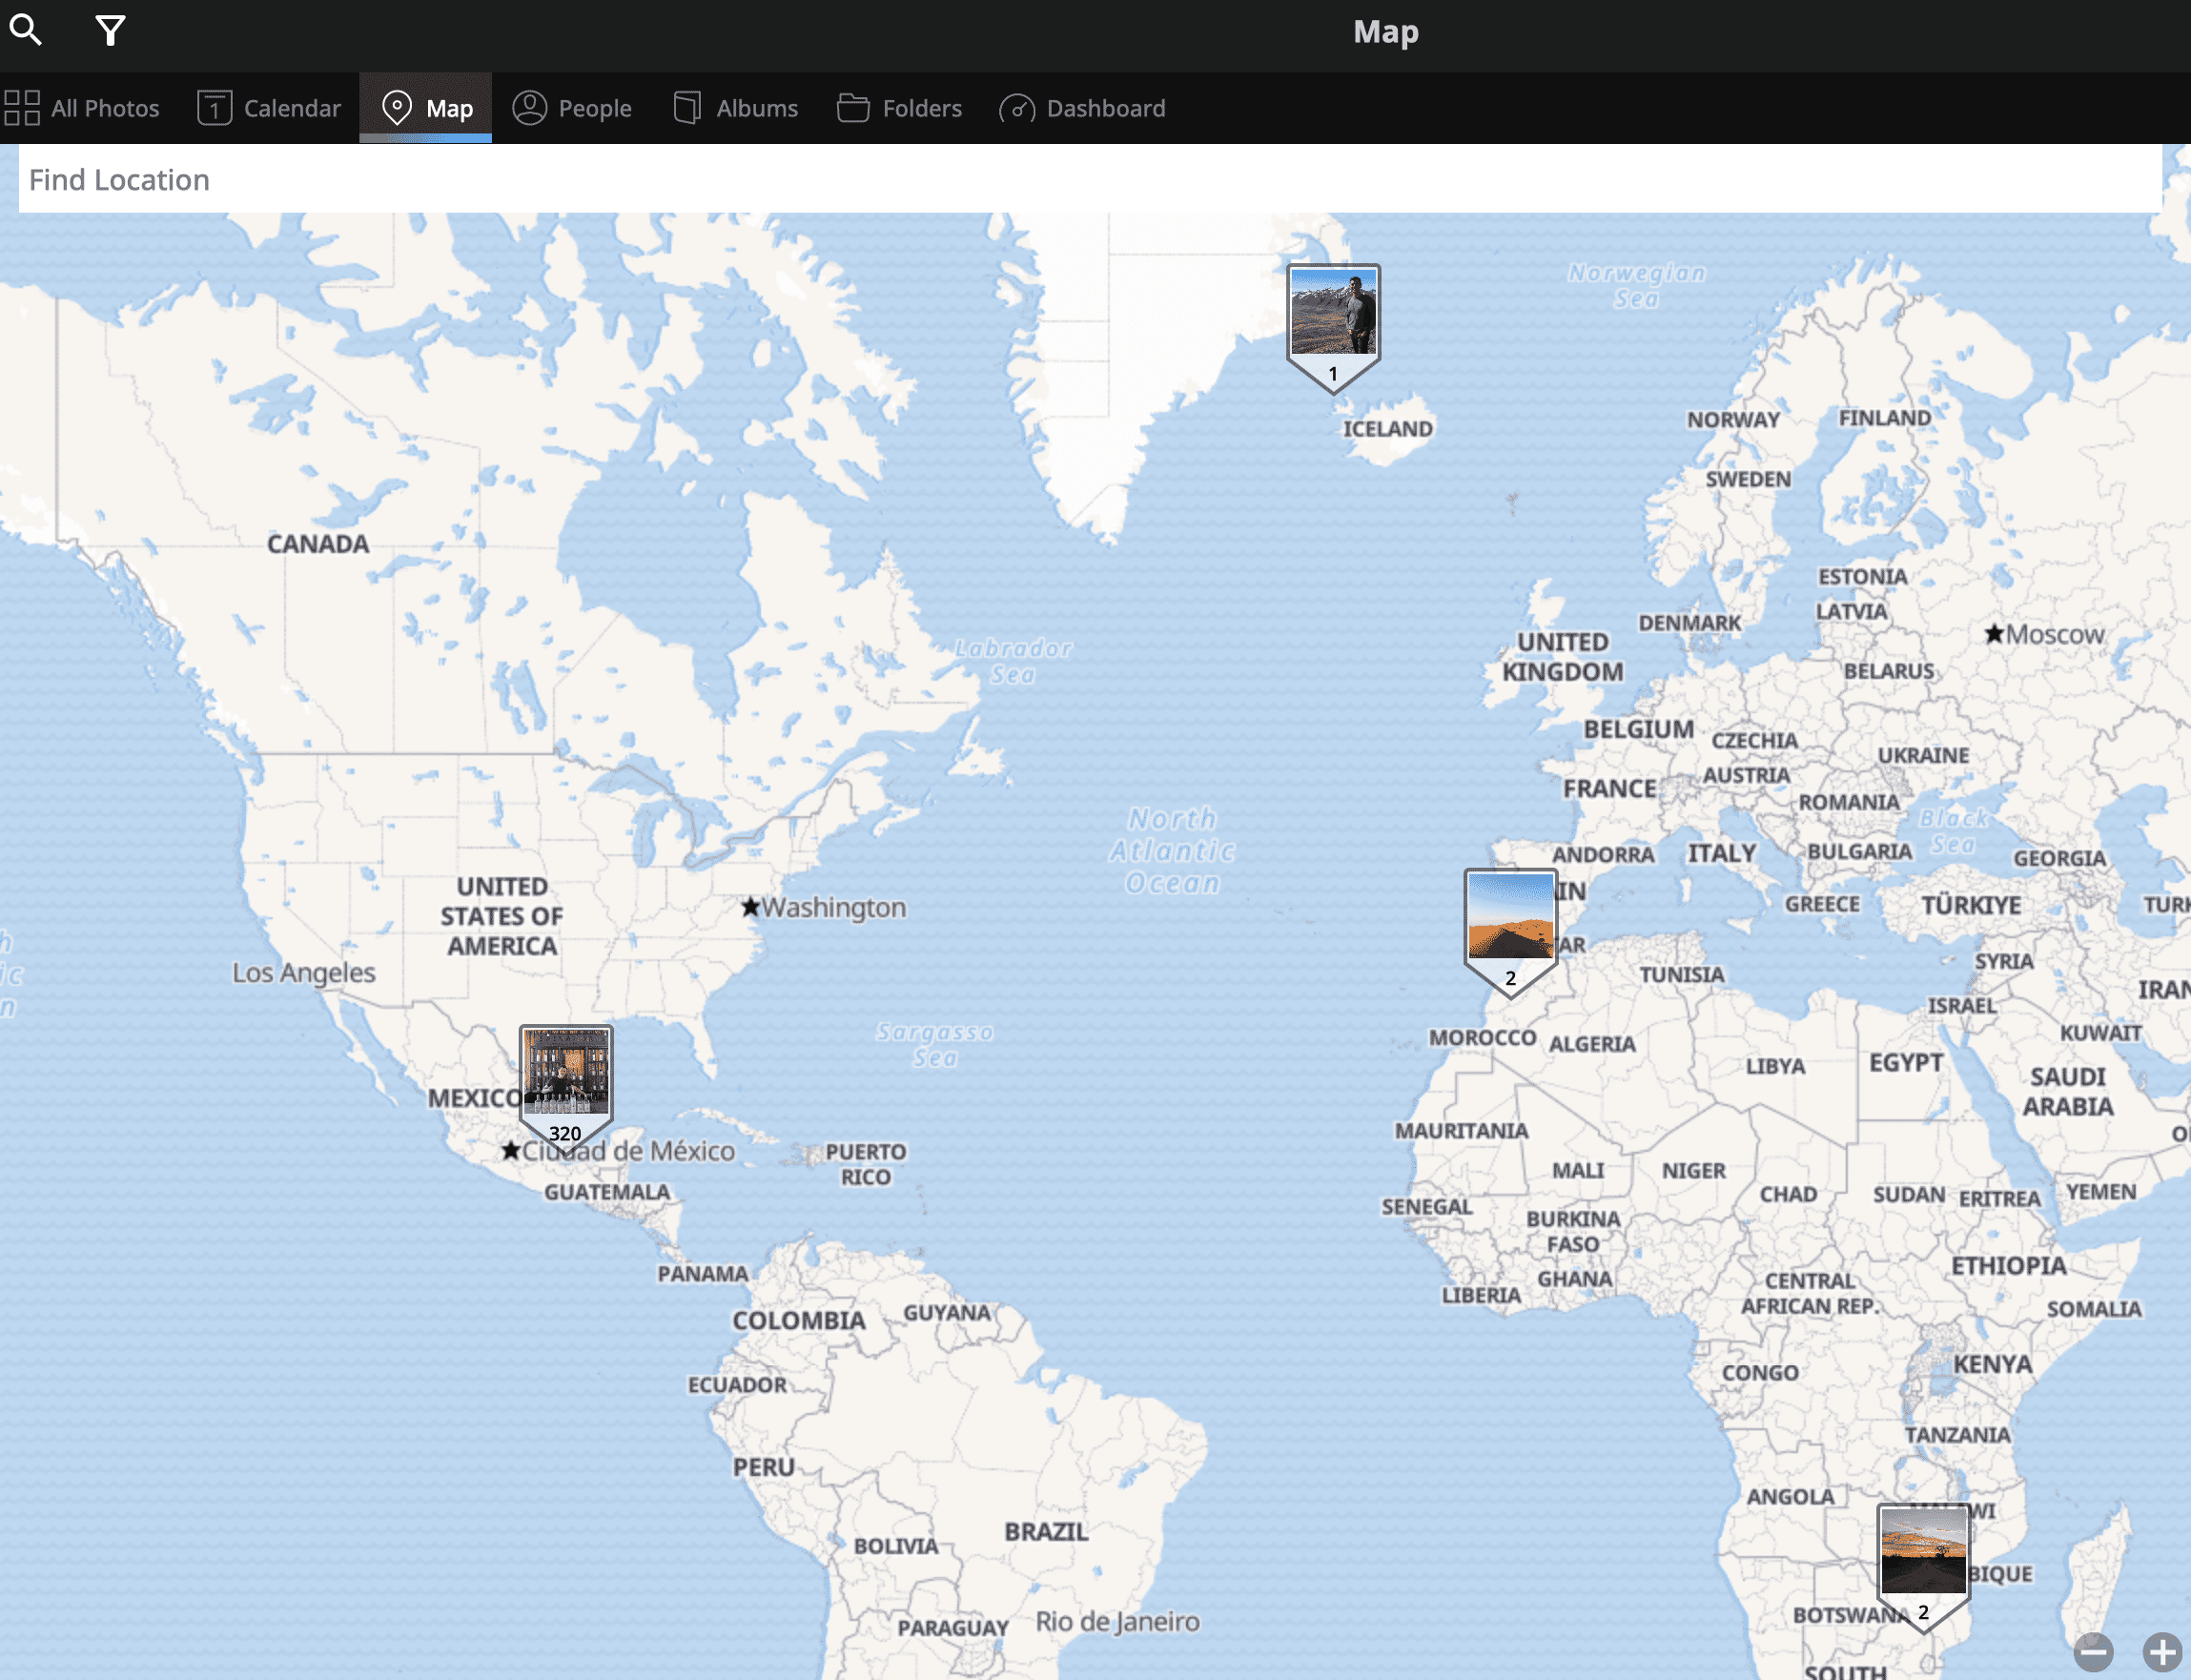
You can zoom in to see specific destinations within each country too:
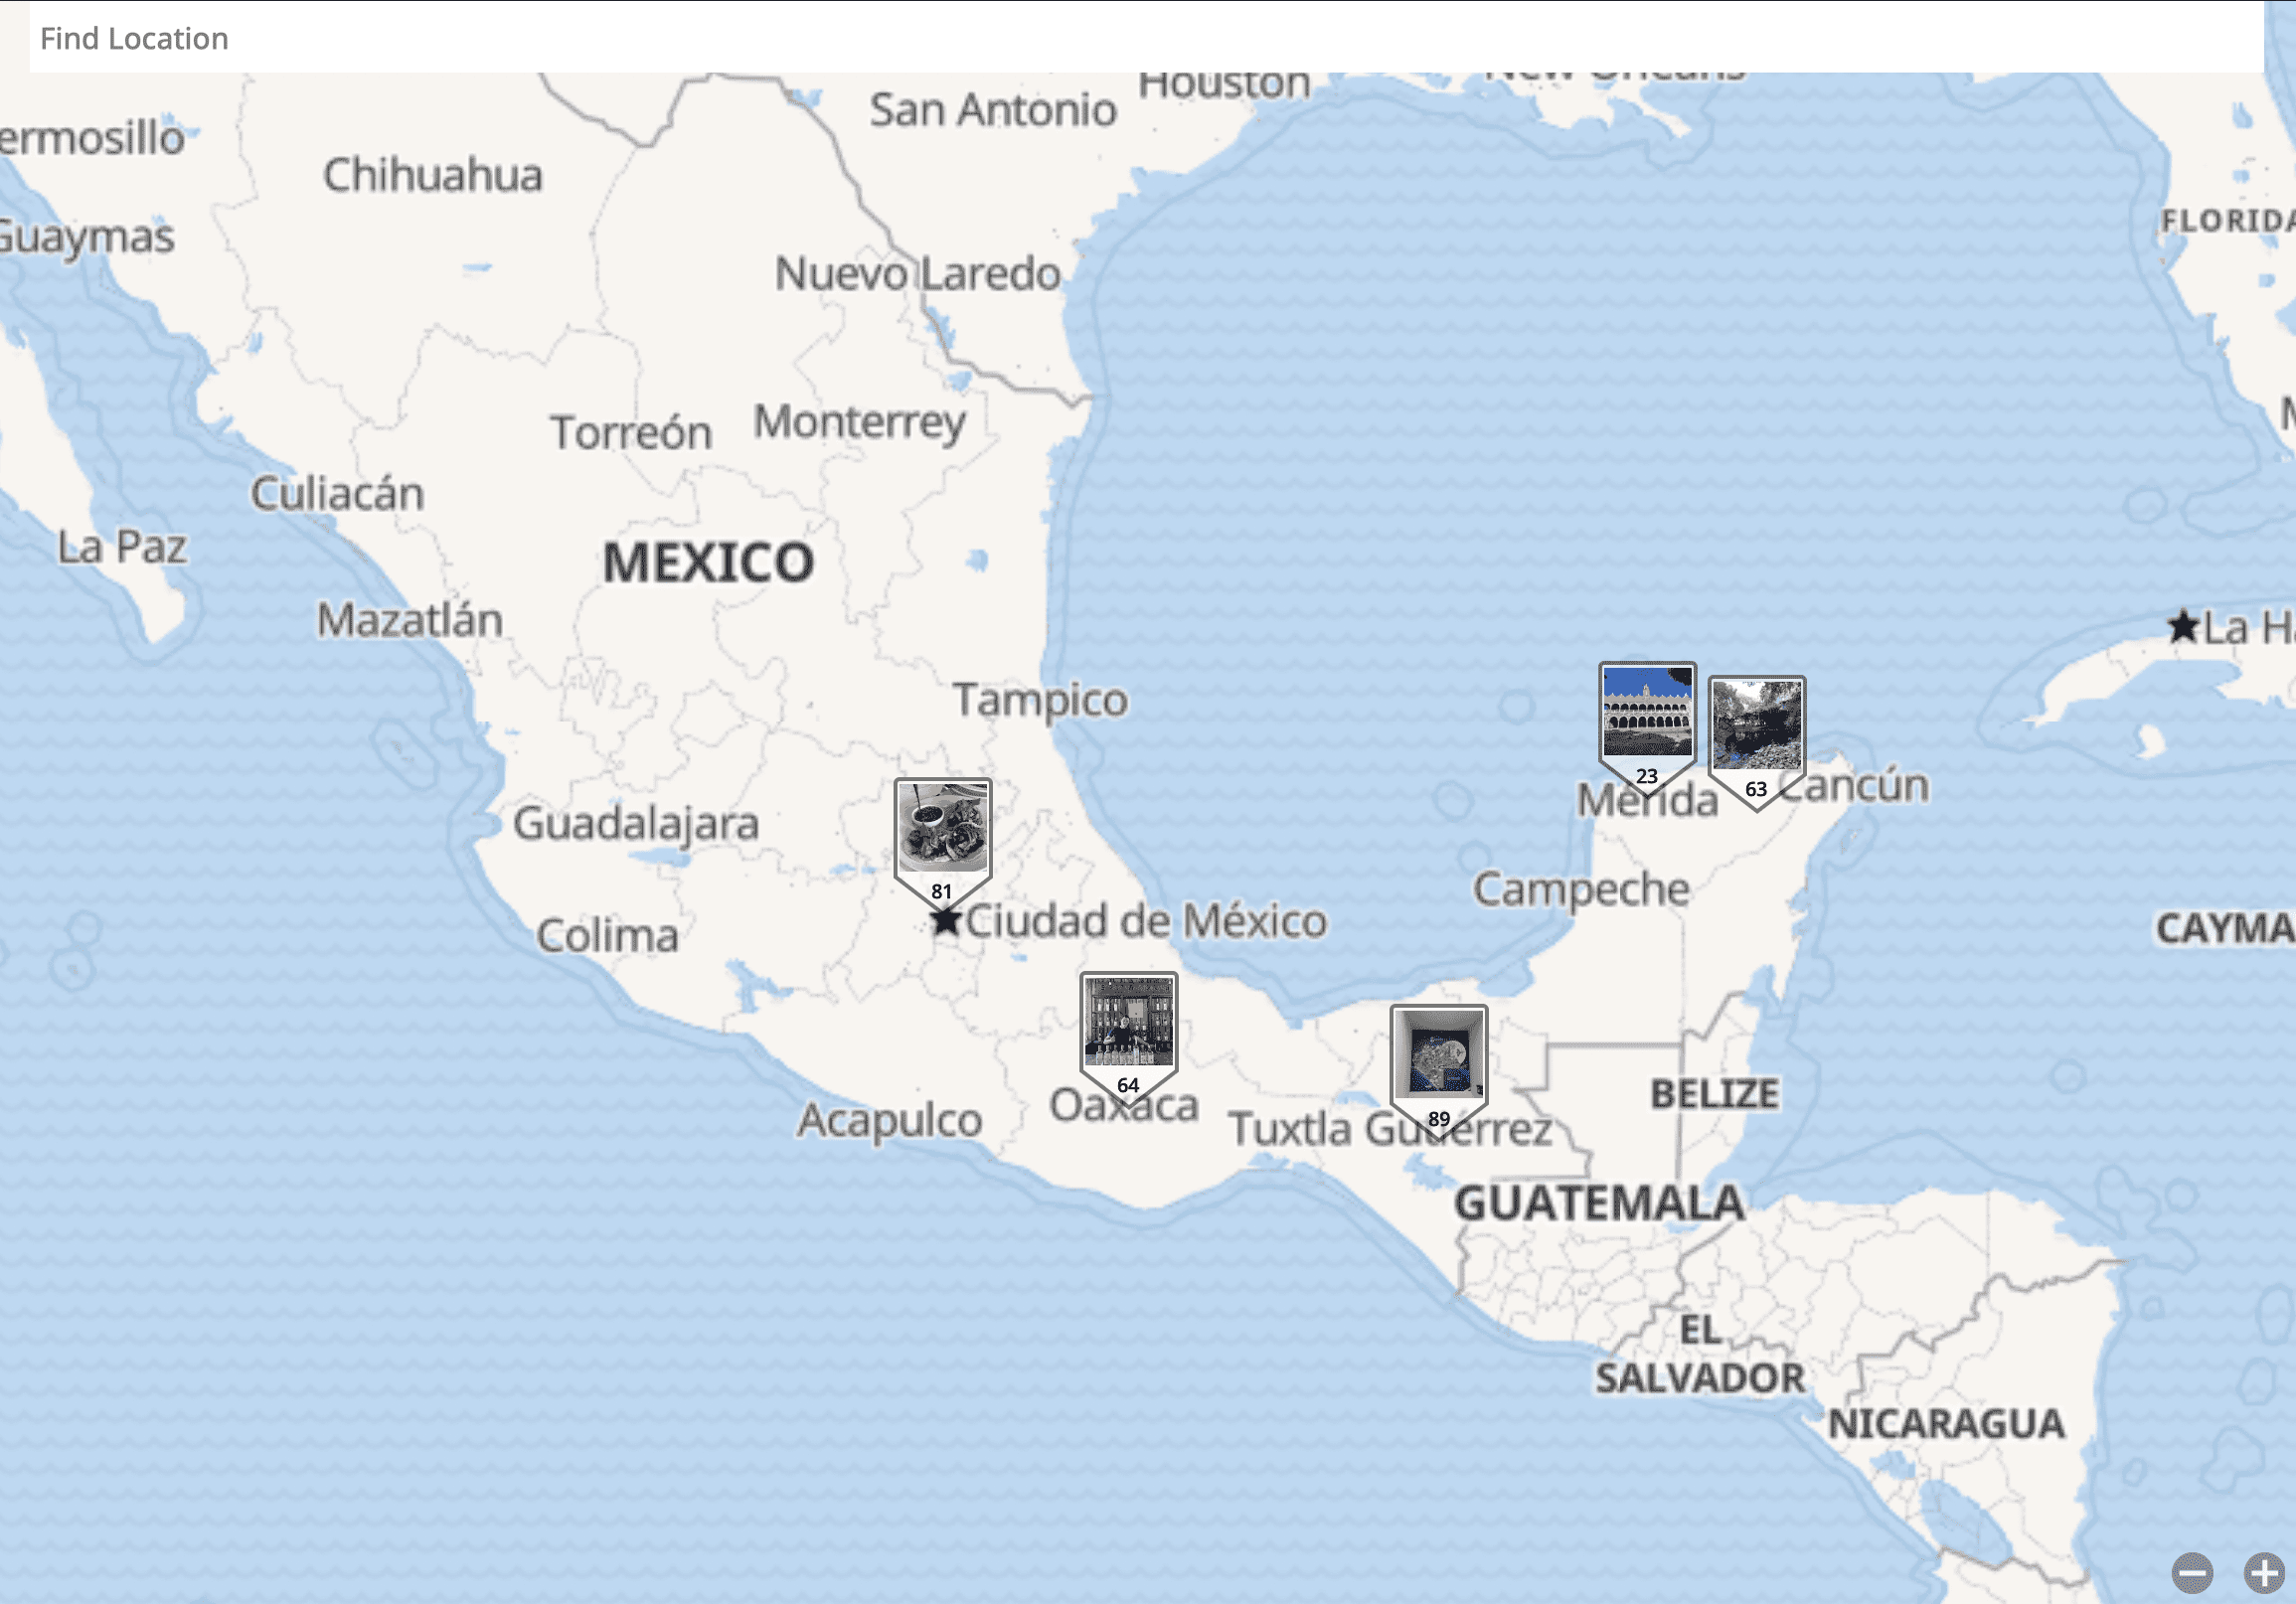
This is especially helpful if you can’t remember where you were for certain parts of your trip. You can manually tag any old photos that are not automatically added as well.
And if you need to edit photos before you share them, you can do so directly in the app:
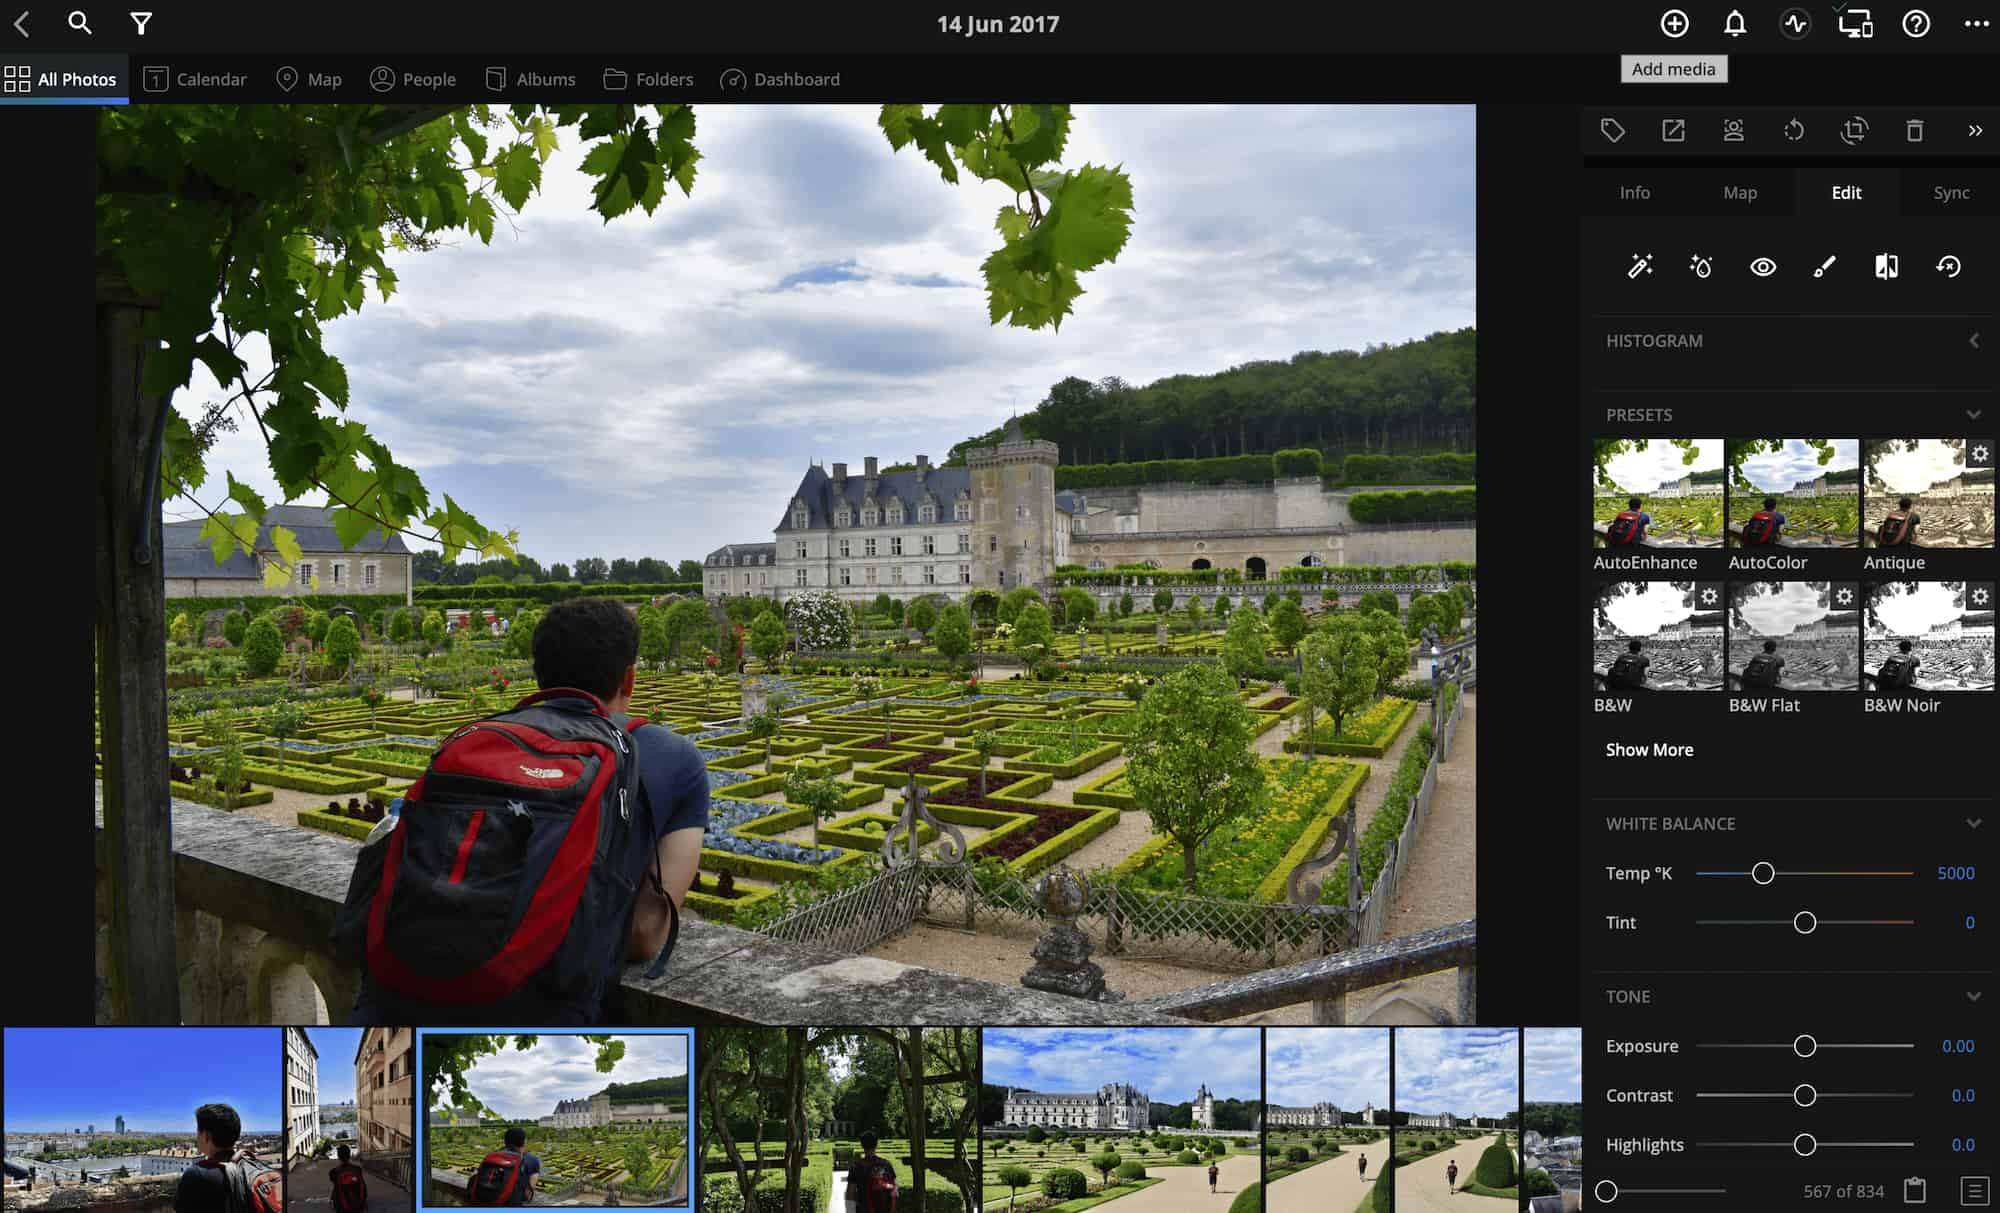
And since all your photos are connected, if you edit one on your desktop, it will also be edited on your tablet and smart phone. It’s all linked!
And while Mylio Photos is great for photos, you can also add other documents, such as scans of your passport, visa documents, flight or train tickets, and more, ensuring all your vital travel documents are safe and secure and accessible across all devices.
Mylio Photos has facial recognition too, so once you’ve tagged people a few times, this feature kicks in and allows you to sort and search photos by person — not just place or date.
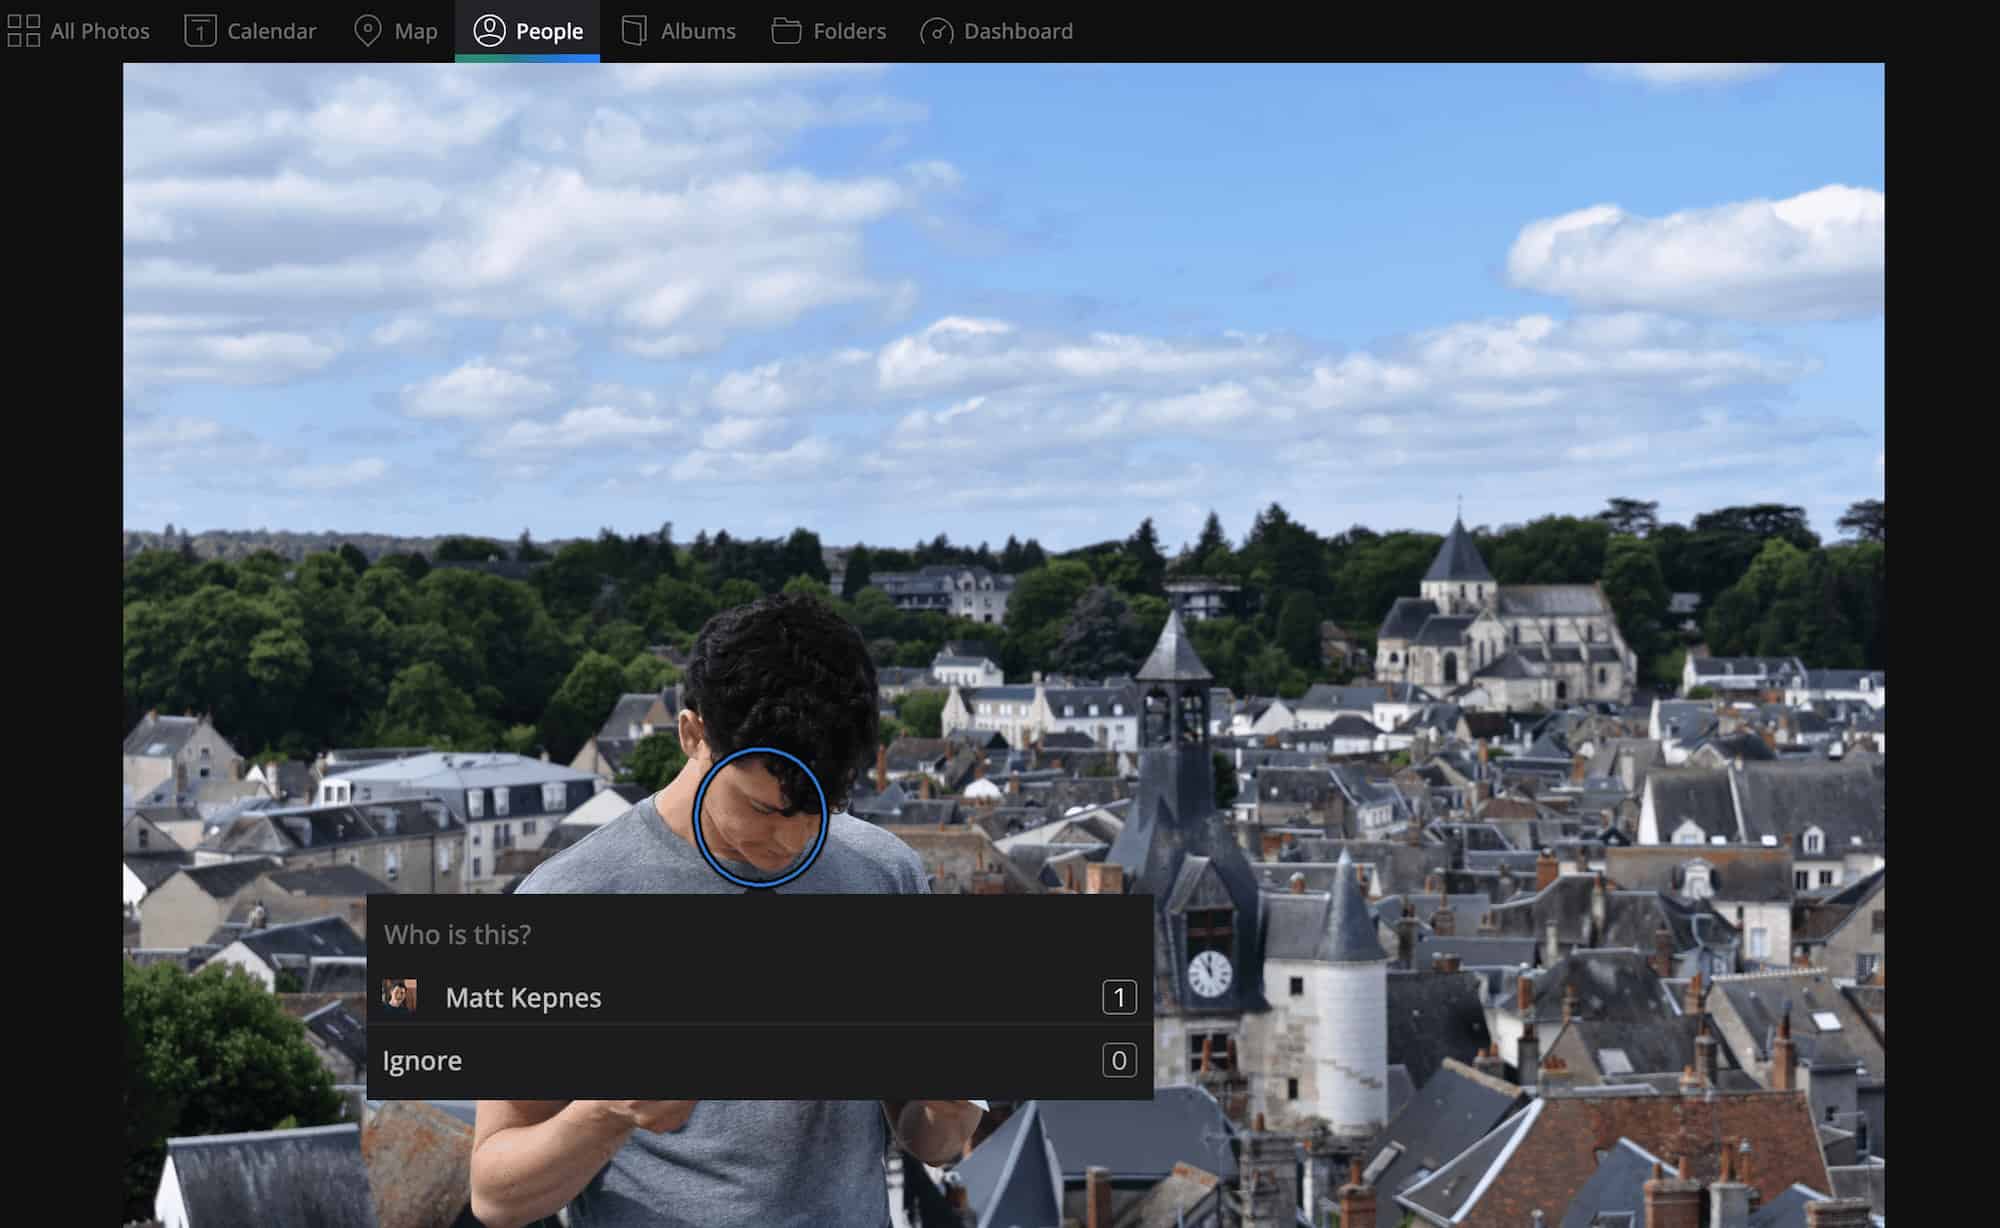
I tagged myself once and it flagged over a hundred photos with me in it. If you travel with friends or family often, this makes sorting (and finding) pictures much easier, as you can simply type in “mom” or “dad,” and all the pictures tagged with them will pop up.
Who is Mylio Photos For?
Obviously, Mylio Photos is best for travelers who take a large number of pictures — including travel professionals. The safety and accessibility features make it a no-brainer for people working across multiple devices. It makes sharing on social a breeze too.
However, even if you’re just an average traveler, Mylio Photos can help you better sort, save, and organize your photos. The calendar and map-view options make finding and sharing them super simple.
And since it’s cheaper than cloud services like Dropbox, you’re getting a ton of value for even less money!
In short, if you travel often and love taking photos, Mylio Photos is an app worth downloading!
It’s never been easier to take amazing photos of your travels, allowing you to capture and save incredible memories from around the world.
But it’s also never been more tedious to save and organize them safely and securely.
With Mylio Photos, you can not only easily store and save your photos but also edit and access them anytime. And using the geotagging and calendar features, you can easily drift down memory lane any time you want to revisit a trip.
If you want to ensure that your best travel memories are safe and secure, check out Mylio Photos . (This is not an affiliate link btw.)
Book Your Trip: Logistical Tips and Tricks
Book Your Flight Find a cheap flight by using Skyscanner . It’s my favorite search engine because it searches websites and airlines around the globe so you always know no stone is being left unturned.
Book Your Accommodation You can book your hostel with Hostelworld . If you want to stay somewhere other than a hostel, use Booking.com as it consistently returns the cheapest rates for guesthouses and hotels.
Don’t Forget Travel Insurance Travel insurance will protect you against illness, injury, theft, and cancellations. It’s comprehensive protection in case anything goes wrong. I never go on a trip without it as I’ve had to use it many times in the past. My favorite companies that offer the best service and value are:
- SafetyWing (best for everyone)
- Insure My Trip (for those 70 and over)
- Medjet (for additional evacuation coverage)
Want to Travel for Free? Travel credit cards allow you to earn points that can be redeemed for free flights and accommodation — all without any extra spending. Check out my guide to picking the right card and my current favorites to get started and see the latest best deals.
Need Help Finding Activities for Your Trip? Get Your Guide is a huge online marketplace where you can find cool walking tours, fun excursions, skip-the-line tickets, private guides, and more.
Ready to Book Your Trip? Check out my resource page for the best companies to use when you travel. I list all the ones I use when I travel. They are the best in class and you can’t go wrong using them on your trip.
Got a comment on this article? Join the conversation on Facebook , Instagram , or Twitter and share your thoughts!
Disclosure: Please note that some of the links above may be affiliate links, and at no additional cost to you, I earn a commission if you make a purchase. I recommend only products and companies I use and the income goes to keeping the site community supported and ad free.
Related Posts
Get my best stuff sent straight to you!
Pin it on pinterest.
8 of the best apps to edit and retouch your travel photos

Editor's Note
Editor's note: This post has been updated with the latest information.
These days, you can't just pop an Instagram filter on your photo and upload it — the horror! It's better to use an editing app first. If not, how will all your friends know how very blue the Mediterranean appeared, how incredibly chic your hotel seemed or how those clouds really popped over the Bangkok skyline and river? With so many ways to edit your travel photos, it can be hard to know which apps to use — or even how to use them.
Related: 7 useful apps to organize and store travel photos
Whether you want to edit those meals captured in Italy or your favorite plane snaps, selfies or sweeping beach panoramics, this TPG guide to photo retouching apps can help, whether you're a professional photographer, absolute beginner or anything in between.
1. Snapseed
Best used for shots of landscapes, Snapseed has some very intense pre-set filters in the "looks" section, but the fun really starts when you play with the tools. If you select "tune image" you can edit things like brightness, warmth, ambience, highlights and shadows. In the "details" section, you can edit the structure and sharpen your photo.
The "selective" button allows you to edit just one part of the photo, like increasing the brightness in only one area that seems a little dark. Playing around with the app is the best way to learn how to use it, so practice on some photos pre-trip until you figure out the perfect balance.
Download for free on Apple or Google Play .

2. Facetune and Facetune2
Ever wondered why influencers look so perfect among stunning backgrounds? If you want to look like a boho-chic beachy goddess or muscled Abercrombie model traveling the world, Facetune is your app. A favorite of the Kardashians, the app allows you to completely edit your look. From teeth whitening to wrinkle and skin smoothing to reshaping your waistline, you can become a much more glamorous version of yourself. You can also patch any spots to cover tattoos, scars or other imperfections. You'll look so hot, no one will even bother to notice the Taj Mahal or the Statue of Liberty behind you. Just don't go overboard.
Download Facetune for $5 on Apple . Download Facetune2 on Apple or Google Play for free but expect to pay additional subscription costs for access to premium features.
Related: 20 best travel apps to download

You may notice a lot of #VSCO hashtags on Instagram . You can join in the VSCO fun by using this editing app, which also has its own camera. You can share all your edited photos to your own VSCO grid, which is the app's photo-sharing platform, similar to Instagram. Photographers will be a fan of the manual camera options, where you can edit the shutter speed, white balance, focus and ISO before snapping. Small icons at the bottom of the editing screen are options for changing the skin tone, contrast, sharpness, exposure and more. You can even edit raw images within the app.
Download for free on Apple or Google Play , which gives you access to 10 free pre-sets and most editing tools. For access to additional pre-sets, advanced photo editing tools and video editing options, you'll have to pay additional costs or a subscription fee.

4. A Color Story
This app has a simple, geometric interface that makes using it a pleasant experience. Upload your photos and edit them with many different tools for adjustments such as clarity, contrast, grain, blur and vibrance plus pre-set filters and effects you can download for free or purchase at an added cost. The app, similar to VSCO, has its own grid where you can view all your edited photos, and you can connect this section directly to Instagram for easy uploading and sharing.
Download for free on Apple or Google Play . Extra filter packages come at an additional cost or pay for a yearly subscription that offers 400 filters.

A little different than some of the other apps on this list, Prisma turns your photos into works of art (literally) by making them look as if they were paintings. Using styles from artists such as Munch, Picasso, Van Gogh, Levitan and more, your photos won't stay photos for long — they'll be turned into sketches, paintings and creative combinations of ornaments and patterns.
Download for free on Apple or Google Play , but if you want to save the photos in HD or have access to more artistic photo styling options, plan to pay for a monthly or yearly subscription.

Aptly titled, this app was created specifically for shooting and editing food photos. If you're the kind of person who needs to document every single morsel you eat on social media or feels like photographing your lunch is more important than eating it, this app will make your meals look extra enticing. Search from over 30 different filters, titled to match what kind of food or dining moments you're capturing, like a picnic, chewy, BBQ, sweet, fresh and tropical. Foodie is especially useful when dealing with bad lighting in restaurants, ensuring you'll get the perfect mouthwatering shot despite all odds.

7. Enlight Quickshot and Enlight Photofox
Budding photographers will love Enlight Quickshot, which allows you to do things like replace the sky in your photos with a new one or add special effects. The editing tools are easy to use but cover a lot of ground, including options to adjust color, tone and details, like structure, sharpen, shadows and more. Even if you're not really a photographer, the app has plenty of tutorials to help.
More advanced photographers will love Enlight Photofox, which is similar to Quickshot but offers further editing options to make your photos more artistic, with ready-made art filters and artistic editing tools like blend and sketch.
Download Enlight Photofox and Enlight Quickshot for free. Unlock extra features with pro subscriptions at an added cost.

8. Afterlight
One of the most straightforward apps for those wanting to quickly adjust or add a filter, upload a photo or take one with Afterlight's camera. Then, choose from several editing tools ranging from basic to advanced, or select one of the 10 free filter options. For those who want to add stickers or text, the artwork tab has a variety of options. The app is connected to Twitter and Instagram, allowing you to share your newly edited photos directly from Afterlight to other social media feeds.
Download on Apple or Google Play for free, but you'll need a paid subscription to access some of the coolest fusion filters like double exposure or dust, as well as the 130 pre-set filter library.

Bottom line
Regardless of your level of photography or preferred photo style, there's an app on this list that can help perfect your shot. Make sure to check out our other app posts for further reading on how apps can be useful for travelers.
- Best translation apps for travelers
- Best photo storage and organization apps
- Best flight booking apps
- 20 essential apps for all travelers
- Best hotel booking apps
- Best apps for foodie travelers
- Best mapping apps for getting around a new city
- Best apps for solo female travelers
- Best apps to travel with (or like) a local
- Best apps for aviation geeks
9 Best Apps for Travel Photography (in 2023)
A Post By: Kevin Landwer-Johan

Your smartphone is one of the best travel photography accessories you own. When equipped with the right apps, your phone can save you time, put you in the right place for amazing images, and enhance the photos you’ve already taken.
But which apps are best for travel photography ? How do you pick the apps that are right for you?
Fortunately, whether you have an iOS or Android phone, there are plenty of apps perfect for travel shooting. Below, we share a roundup of our favorites – all of which are guaranteed to make your trip, and the photos you take, better than ever.
The best travel photography location apps
When you first arrive in a new location, it can be challenging to find your way around the area. That’s where location apps will come in handy, such as:
1. Maps.ME (for iOS and Android )
Maps.ME is a great mapping app that you can use without an internet connection. Once you have Maps.ME installed on your phone, you can download maps for pretty much any location.
These maps will provide you with turn-by-turn directions for each destination – and the app relies on open-source software, so it’s always up to date.
The app will direct you to your hotel or any other specific address, and it can also help you find points of interest, trekking trails, etc.
Maps.ME is free for both Android and iOS devices.

2. Citymapper (for iOS and Android )
Most of us don’t have endless time at each location; the faster and more efficiently we can arrive at each location, the more time we have to be out and about. Citymapper is a clever little app that helps you make the most of your travel time.
With the Citymapper app installed on your phone, you can find the nearest bus stops and train stations. You can even book tickets and compare travel time and prices across different transport modes. And if you prefer to walk, scooter, or ride a bike, the app can help you with that, too.
Bottom line: Citymapper is a terrific app for navigating around larger cities pretty much anywhere in the world – and it’s free for both Android and iOS devices.

3. Spot (for iOS )
Casual photographers are often satisfied with snapshots of the most touristy places – but more serious photographers want to discover interesting locations that are off the beaten path. They know that these less-popular locations will offer the opportunity to capture unique photos that don’t appear on every other Instagram feed.
So how do you find these hidden gems? You can use apps like Facebook and Instagram to search through location-tagged photos. But in my experience, there are better ways to locate top-notch areas. For instance, you can use the Spot app!
This free app is like a social media platform that shows you the locations photographers love; in fact, the developers boast that their app will help you find “the best places in the world.” Users are able to upload photos and share the cool places they visit. The app also pulls data on locations based on discussions elsewhere on the web.
You’ll even get recommendations for nearby places to eat or grab a coffee. And the app offers a strong social aspect; you can follow other users, see places they’ve visited, and build your own lists to share. In other words, Spot is more versatile and diverse than just a location tracker.
Spot is only available for iOS devices.

The best apps for travel photography editing
Sharing photos on social media is all part of today’s travel culture. Naturally, these photos must look stellar, so editing must be done on the fly.
Any rundown of the best apps for travel photography should include a selection of post-processing apps . Here are our picks:
1. VSCO (for iOS and Android )
Learning to use new editing apps, especially those that are very comprehensive, can be tricky. But not VSCO; you’ll notice how easy the app is to navigate as soon as you fire it up.
There are plenty of quick and easy presets for enhancing the colors and contrast in your pictures. And once you’ve applied a preset, you can tweak it to match each photo you work on. You can also save your adjusted presets for later use.
There’s a free version of VSCO, but if you want more control over your images, consider grabbing the paid version, which offers extra tools and filters.

2. Snapseed (for iOS and Android )
Snapseed is the go-to photo-editing app for many professional and amateur photographers. It’s quick and easy to use, it offers a great selection of filters and presets, and you can create pretty much any edit you imagine.
The app offers tons of options for manual adjustments. The tools let you manage curves, apply vignettes, do selective edits, and so much more. You have a great deal of control over how your images look, and Snapseed even includes a feature that allows you to batch edit photos for a faster workflow.
Snapseed is free for both Android and iOS devices.

3. Lightroom Mobile (for iOS and Android )
If you already have an Adobe subscription, then this editing app is a must-have. If you don’t own an Adobe subscription, you can still use the app, but the functionality is (slightly) limited.
Lightroom Mobile is easy to use for both beginners and experienced photographers. It provides tons of tools and features that give you plenty of control over your wonderful travel photos.
Within the app, you have dozens of adjustment options; you can clone unwanted elements, correct exposure issues, enhance contrast, and reduce noise. And the split toning, masking, and sharpening options make Lightroom Mobile one of the more advanced photo-editing apps available.
LR Mobile is free for both Android and iOS phones with limited functionality. But you can unlock the app’s full functionality with an Adobe Photography subscription .

A few more handy travel photo apps
These three additional apps are bound to make your travel photography experience more enjoyable:
1. PhotoPills (for iOS and Android )
PhotoPills is like a toolbox for photographers. Take a peek inside, and you’ll be amazed at the array of features to help you make better travel photos.
The app can help you calculate exposures , explore and manage the locations you want to visit, produce time-lapses, and much more. It’s basically an all-around photography assistant you can carry in your pocket.
Do you need to know what time sunset is? Do you need to determine the phase of the moon? PhotoPills maps all of this out for you based on the date and location. It will help you plan your photos and execute them, too.
PhotoPills is a paid app available for both Android and iOS devices.

2. WeatherBug (for iOS and Android )
WeatherBug isn’t strictly a photography app, but it’s one that photographers love – and it can certainly help you capture better photos while traveling.
WeatherBug helps you take the guesswork out of weather prediction. There’s nothing worse than heading to a sunrise location you’ve been wanting to capture for months only to find the sky obscured by clouds. Thanks to this app, you’ll know how the weather will pan out, so you can plan your shoots for the most suitable times.
WeatherBug will give you a forecast for up to ten days in advance. And it’s customizable, so you can tweak it to best suit your needs.
WeatherBug is free for both Android and iOS devices.

3. Phonto (for iOS and Android )
Phonto is a fun little app that lets you add text to your photos. It’s simple to use, and it’s a great way to enhance your travel shots with some fun text! There are tons of different fonts available, and you have the option to rotate, resize, and generally manage the text to get the effect you want.
In my opinion, adding text to your travel photos with Phonto will make them stand out on social media. Plus, it can let people know how much fun you’re having!
Phonto is free for both Android and iOS devices.

The best travel photography apps: final words

Hopefully, you found this list helpful – and you’re ready to download one (or more!) of our favorite travel photography apps.
The apps we’ve shared will ensure you find the right locations, plan your photoshoots, edit on the fly, and more.
So enjoy your travels! And capture some amazing photos.
Which apps do you plan to get? Share your thoughts in the comments below!

Read more from our Tips & Tutorials category
Kevin Landwer-Johan is a photographer, photography teacher, and author with over 30 years of experience that he loves to share with others.
Check out his website and his Buy Me a Coffee page .

- Guaranteed for 2 full months
- Pay by PayPal or Credit Card
- Instant Digital Download

- All our best articles for the week
- Fun photographic challenges
- Special offers and discounts

Get photo for US Visa 2x2 inch (600x600 px, 51x51mm) in 2 seconds
- Guaranteed to be accepted on the official website travel.state.gov and in the printed form
- You will get your photo in several seconds
- Your result photo will fully match the requirements and example listed below (image size, head size, eye position, background color, size in kilobytes)
Image Upload Error
Requirements
Do not worry about the photo size requirements. Visafoto.com guarantees compliance. It makes correct photos and fixes background.
Install Visafoto (7ID app) on your phone!
Passport photos, visa photos and ID photos. QR code storage, PIN code storage, signature file maker.

7ID Website with more information >
- WORK WITH US
Photo Presets
The Mandagies
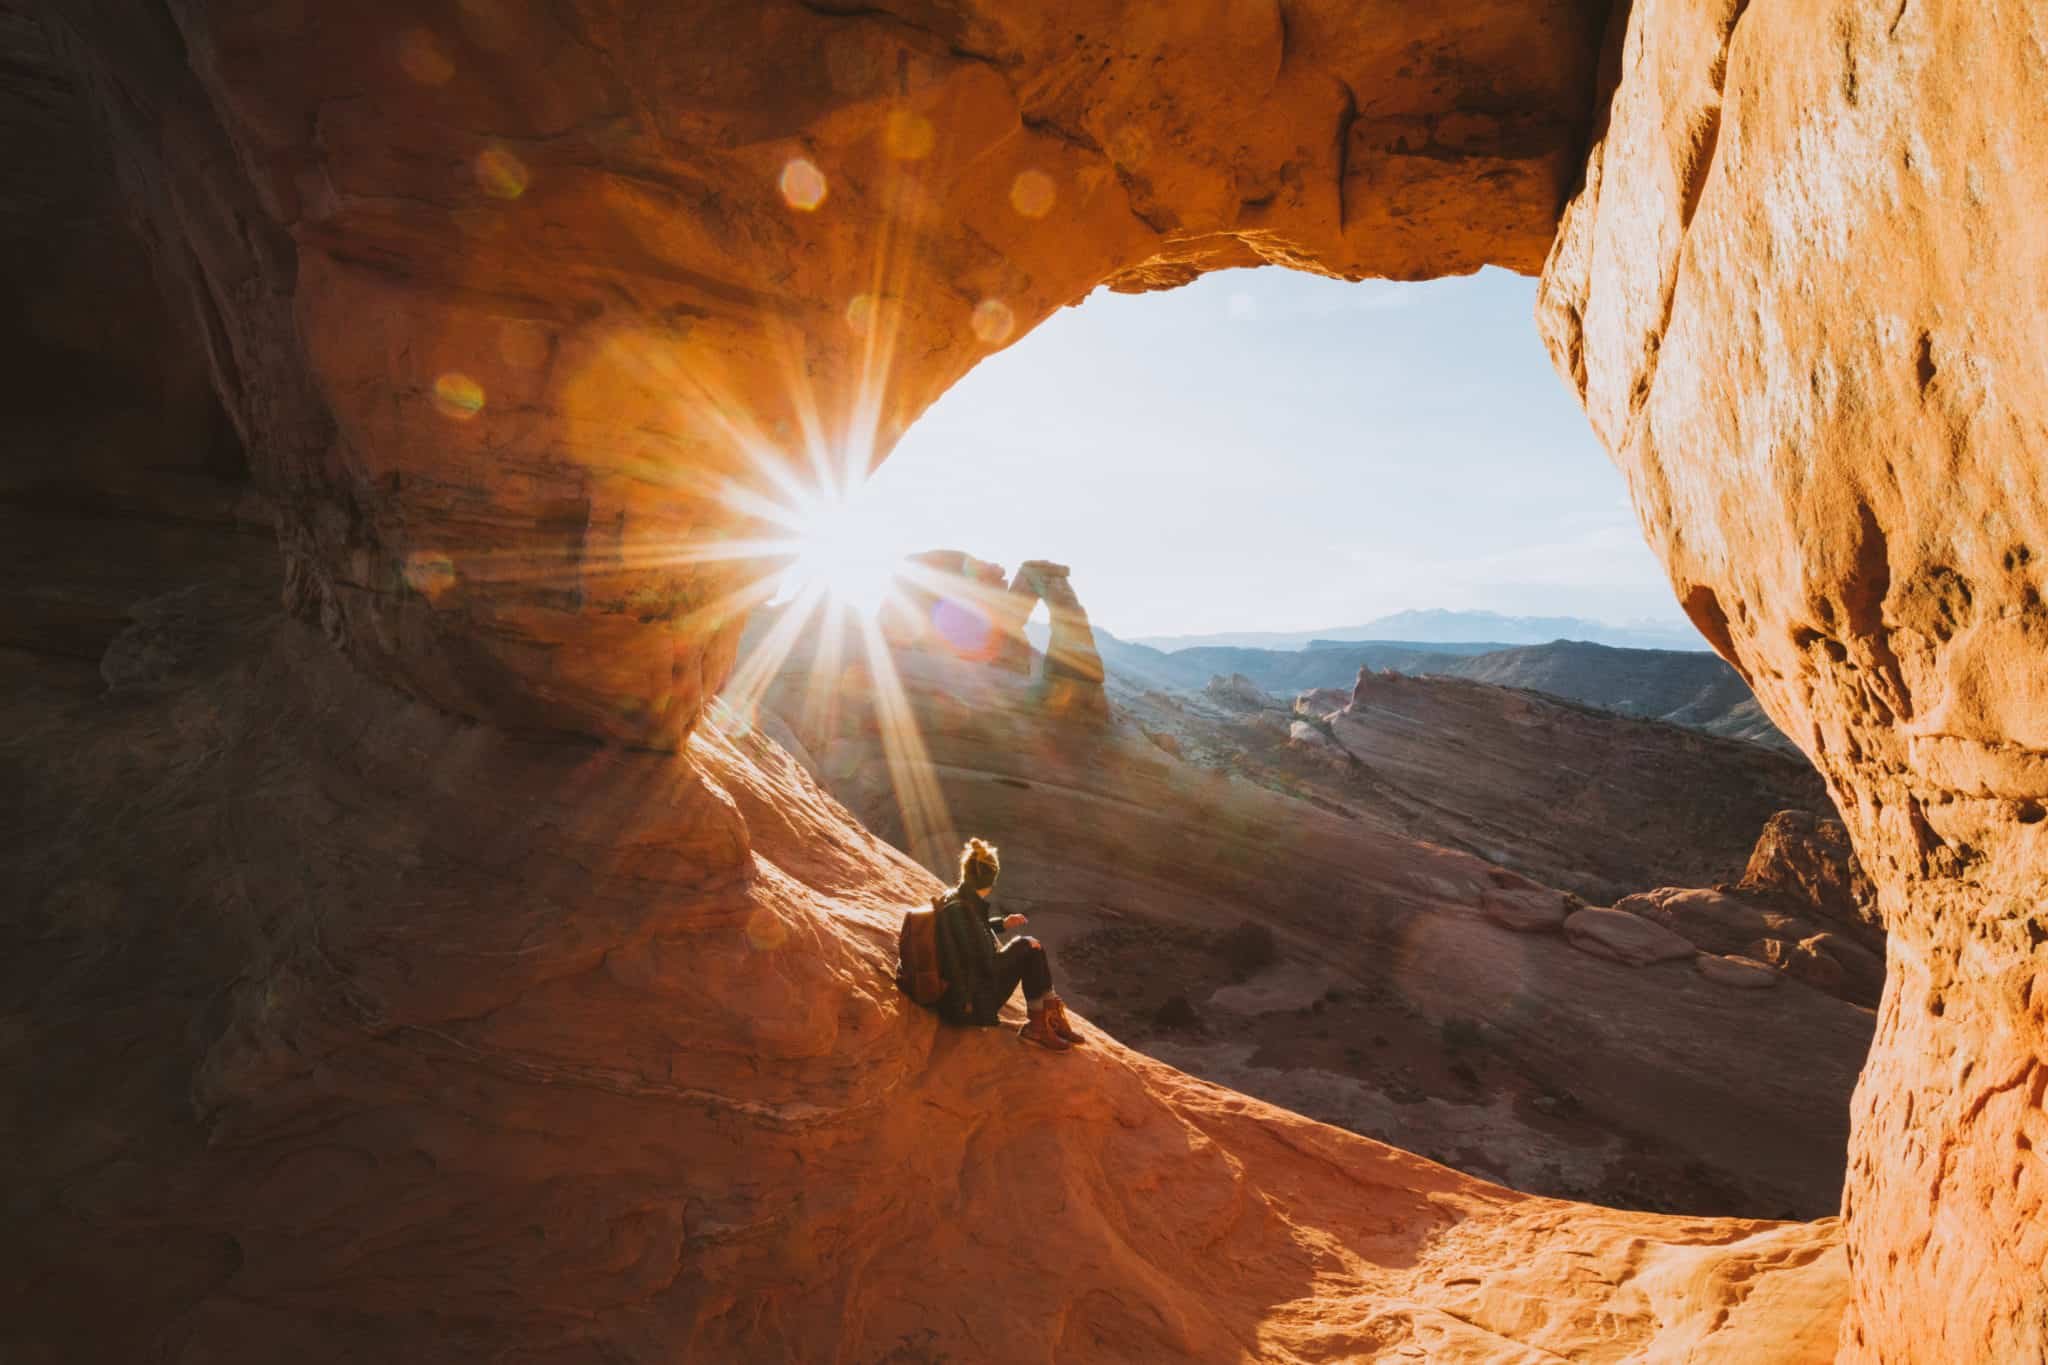
12 Incredible Photo Editing Apps For Busy Travel Photographers
Post Summary: photo editing apps for travelers + tips to edit quickly on the go!
Let’s face it, there’s a high chance you’ve taken pictures on your latest vacation.
And we totally get it – those sandy beaches, tall mountains, or bustling cities are too good not to share. Berty and I have even made a full-time job out of sharing beautiful travel photos!
Normally for us, editing photos require a computer, multiple hard drives, essential photography accessories , and fast wifi. However, we’ve done our fair share of testing mobile editing apps so that we can be more efficient on the road.
Berty and I have experimented with so many and we’ve FINALLY found our favorites!
If you’ve stumbled upon this post for easy travel photography solutions, you’re in the right place.
In this post, we’re sharing the 12 best photo editing apps for travel photography , and additional tips on how you can stay organized and share on the go.
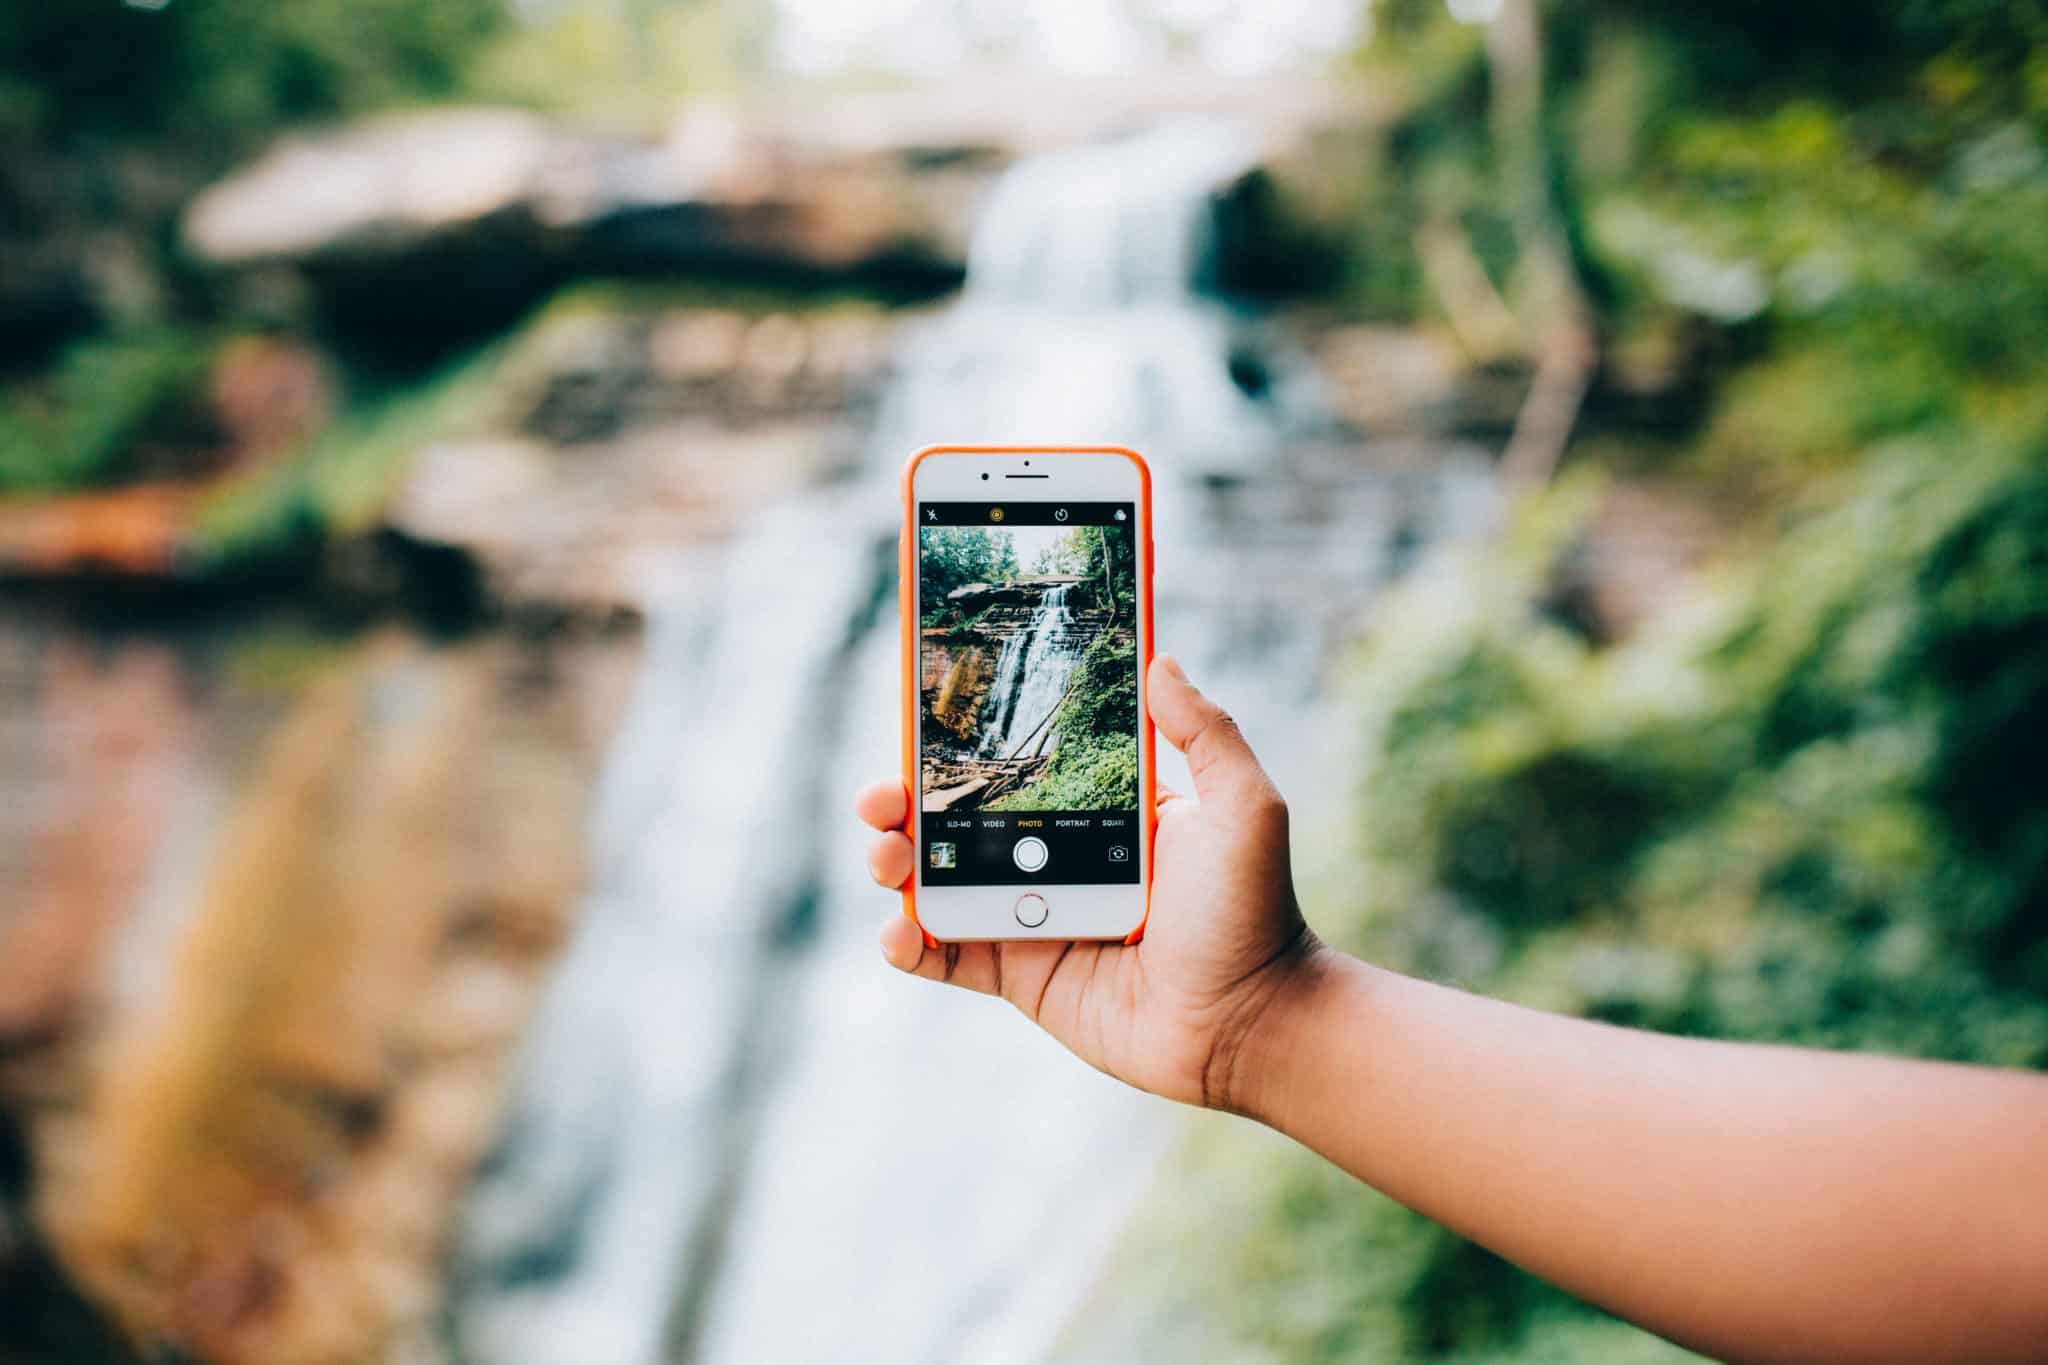
This is our master list of the top photo editing apps, scheduling, and sharing tools for travel photographers.
This post covers everything from editing photos on your mobile phone to sharing them on social media, and finally, scheduling them out for those times that wifi is unreliable.
As new photography apps come, we will try to update this post with the latest and greatest!
To the best of our knowledge, all these apps listed below are available on both iOS and Android smartphones. We’ll make sure to note if that’s not the case!
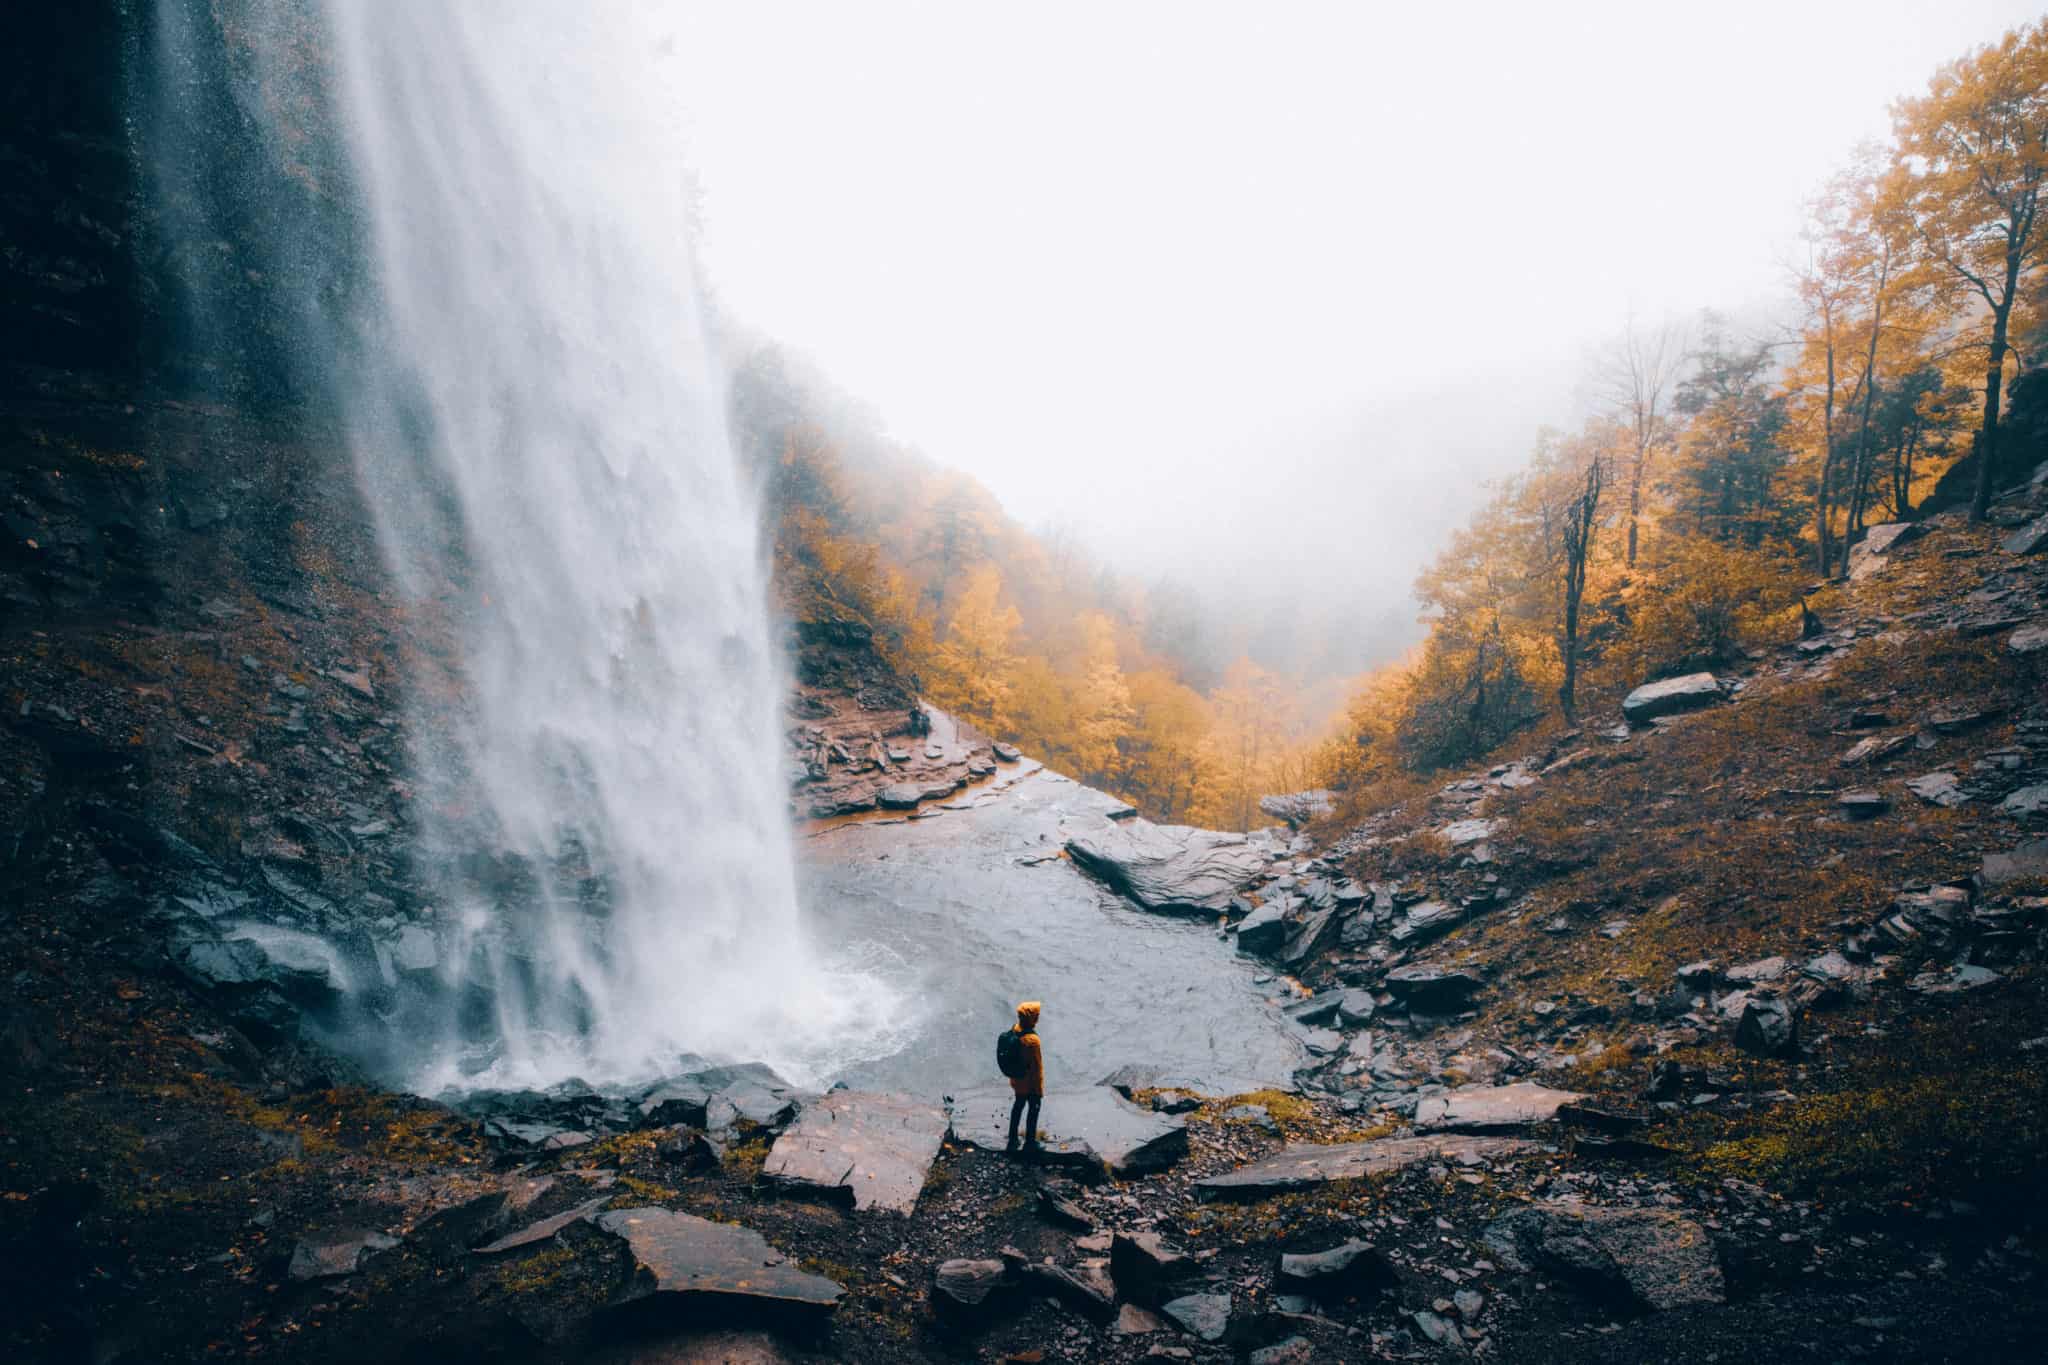
1. Instasize
( download instasize here. ).
Price: Free Trial // $4.99 monthly for Premium (to unlock all the tools)
Instasize is an all-in-one photo and video editing app for creative photographers. Basic stories are out – take your creativity to the next level and make one-of-a-kind stories and static images to showcase your unique style!
With over 130 filters for photo and video, it’s one of the most comprehensive photo editing apps on the market. Resize your images, add borders (they are the OG for the Instagram white border trend!), make custom layouts, and even retouch your photos in one powerful tool.
We feel like they are constantly coming out with new features! Our next goal is to use their video editing tools to make engaging Reels for upcoming Instagram stories.
If you’re looking for one app to use for both image editing AND short form video , Instasize is definitely for you.
- Pros: Really intuitive design, easy to use. A huge platform of features, for both photo and video editing.
- Cons: Limited use in the free version. You need to get Premium to make the most of this tool!
2. Adobe Lightroom CC (Best app for professional photographers)
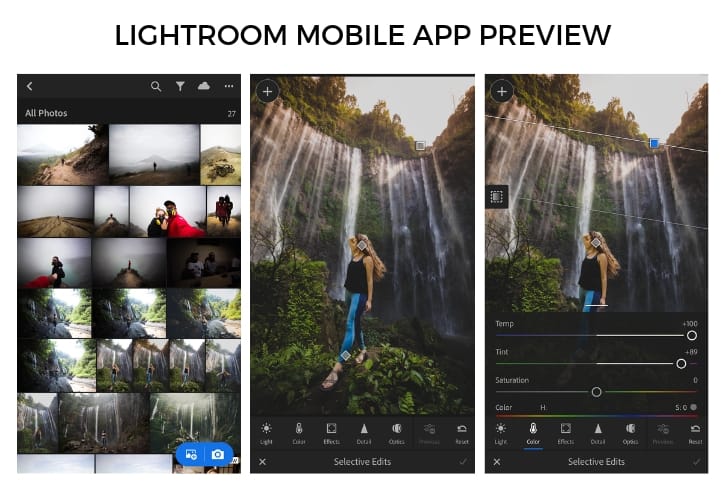
( Download Adobe Lightroom CC Mobile Here. )
Price: Free (To access Adobe Creative cloud storage , you pay a subscription)
Adobe Lightroom CC is one of the most powerful mobile editing tools out there for professional photographers .
With the ease of use from desktop to mobile versions, you can download your own presets on both devices and get the same editing results wherever you go.
Along with custom preset creation, Adobe Lightroom CC has several advanced photo editing tools like tweaking tone curves, gradient, and effects to make a photo exactly how you want.
Become an experienced photo editor right from your phone!
Note: We don’t generally use Adobe Photoshop in our current work, but there are mobile versions available. Click this link to see the whole Adobe Photoshop series.
- Pros: Professional photography editing capabilities, easily transfer work from desktop to mobile (with subscription).
- Cons: Can be difficult to make precise changes on mobile, a steep learning curve if you are new to Adobe, subscription use only.
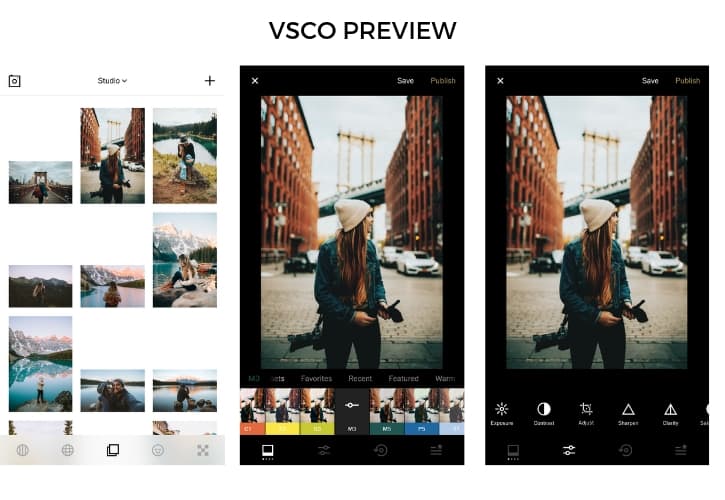
( Download VSCO Here. )
Price: FREE (with in-app purchases)
VSCO is loved by everyone from amateurs to photographers to designers!
VSCO’s incredibly on-trend filters and presets will have your photos insta-worthy in a matter of seconds. This photo editing app also has the option to purchase limited edition filters, so you can use one for each of your travel destinations.
VSCO also has a highly involved community that supports artists and their work! You can submit your own creations to their journal and have your own curated feed as another social platform to share your photographs.
We find that this is a great app to discover new artists and photographers.
- Pros: User-friendly, simple interface, able to copy and paste presets for multiple images.
- Cons: Limited use until purchasing more filters.
4. Snapseed
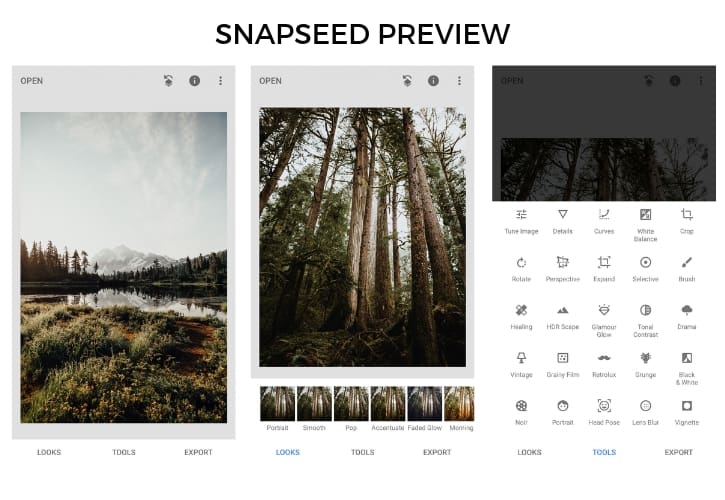
( Download Snapseed Here. ) (Only available for iOS)
Price: FREE
One of the best free photo editing apps for its wide array of capabilities. It has sophisticated photo editing and social media sharing all in one app!
Snapseed (owned by Google) has an easy-to-use interface with quick and simple image adjustment tools like crop, saturation, and sharpness. You also have the ability to tweak more advanced details like colors, hiding blemishes, double exposure and more.
Snapseed provides everything from ready-made filters to tweaking every detail possible. So whether you’re a beginning photographer or a professional, try this free photo editing app!
- Pros: Huge array of photo editing features and filters. Ability to save your editing preferences (like presets) so your feed and aesthetic looks consistent. The app is completely free.
- Cons: So simple it’s confusing sometimes. It can a while to test all the features to see what exactly they do. You can only upload and edit one photo at a time.
5. TouchRetouch (Best Photo Correction App)
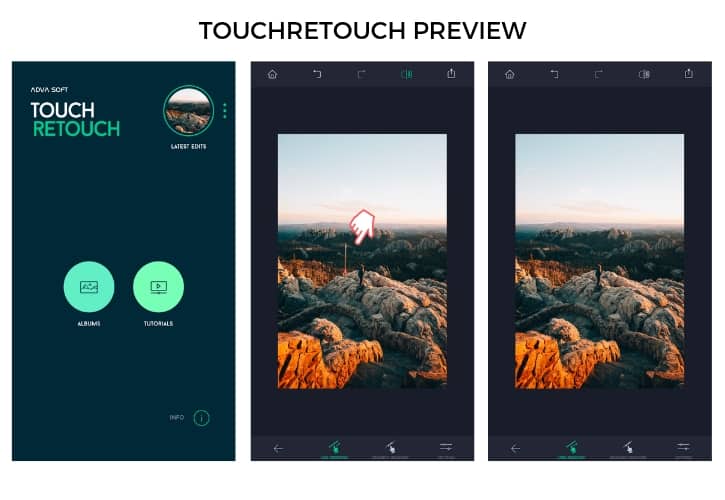
( Download TouchRetouch here. )
Price: $1.99 In Apple Store
Say you’ve taken a photo, loved it, but later realized there’s an irritating telephone wire across your serene mountainscape. Do you bag the whole picture? No!
TouchRetouch makes it easy to remove objects from a photo by using your finger to erase those blemishes out.
We use this tool for quick fixes and last minute observations in already-edited photos. We commonly use TouchRetouch to edit out logos, and things like garbage cans or signs.
The app makes it easy to erase and allows you to zoom in and use a “magnifying” tool for incredibly accurate precision.
You can also get creative with this app and come up with quirky and fun ideas like floating people or oceans in a jar!
- Pros: Tutorials provided in-app, intuitive user experiences, quick fixes for obvious photo eyesores.
- Cons: Takes some practice for precision, not free (but worth the price).
6. CannonConnect
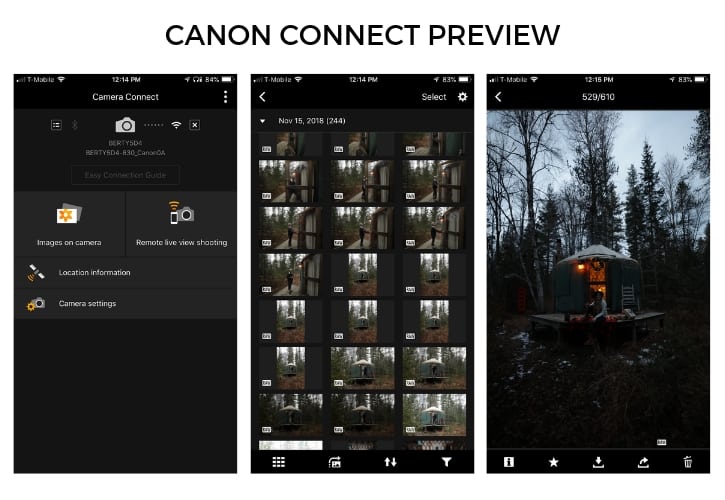
( Download CannonConnect Here. )
If you own a Canon camera with wifi capabilities, which is basically everything newer than a Canon 5D Mark III (even the new entry-level Rebel T6 has it!), you have the ability to transfer raw photos directly from your camera’s memory card to the camera roll on your phone .
Berty and I use this app very heavily while traveling . We love to pull photos from the memory card to edit and share with our Instagram followers in as close to real-time as possible.
CannonConnect also acts as a live viewer if your camera is on a tripod. You can snap the shutter from your phone, or even use it to capture the perfect selfies!
- Pros: Immediate access to photos, the ability to transfer files without an intermediary device.
- Cons: Photos can quickly take up memory on phone because of huge raw file image sizes, only for Canon users.
The Best Photo Scheduling Apps
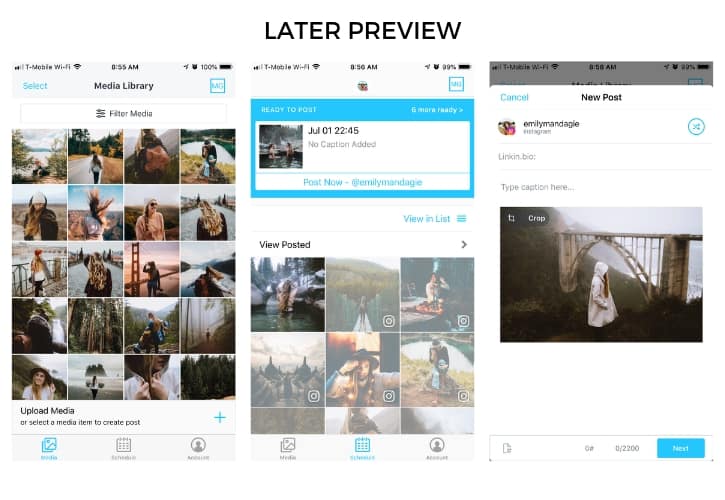
( Download Later here. )
Price: FREE for 30 day periods, monthly plan for extended use.
Later is not a photo editing tool, but rather a photo scheduling app. Once you’ve edited your photo to perfection, what’s the use if you don’t share it? 😉
This app allows you to manage your time for minimal planning and more time for other productive activities.
There are options to auto-post to Instagram, reminder notifications to post, and tools to draft up several pieces of Instagram content all in one app!
More Features: Later has a super helpful blog with productivity and marketing tips. They also have a desktop version that provides more features. On a computer, you can now easily reply to comments!
- Pros: convenient auto-posting feature, downloading unlimited quantities of photos, has a desktop version available.
- Cons: Difficult to see feed preview before it goes live,
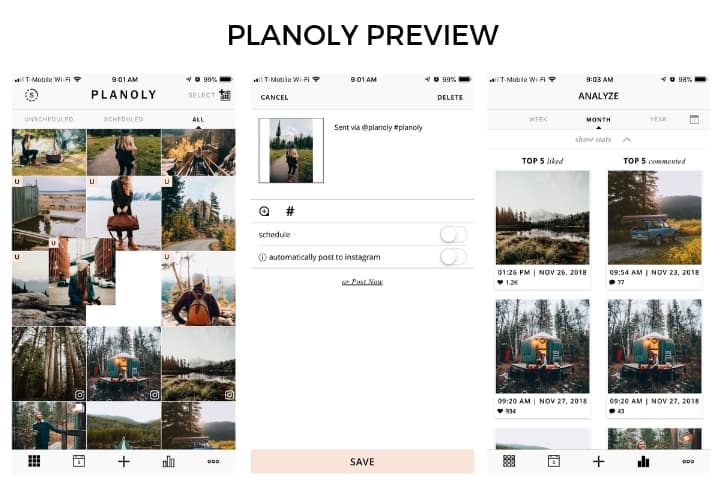
( Download Planoly here. )
Price: FREE for 30 uploads per month, monthly plans after that for extended use.
Why another scheduling tool?
For starters, the free plans for Later and Planoly only allow one account – after that, you’ll have to pay for it.
Therefore, we use one tool for each account @themandagies and @emilymandagie to save a few bucks and keep it free. Marketing hack!
We really like to use Planoly because we are able to see our Instagram feed before it goes live.
We can upload photos we want to publish, then drag and rearrange them in different combinations until we like the way they all look together.
If you’re into feed aesthetics and making things look cohesive, you’ll definitely benefit from this photo editing app.
- Pros: Easily arrange your Instagram feed before it goes live, auto-posting, in-app stats for top performing photos.
- Cons: No ability to tag photos before they go live, limited use of the app without paying for the subscription.
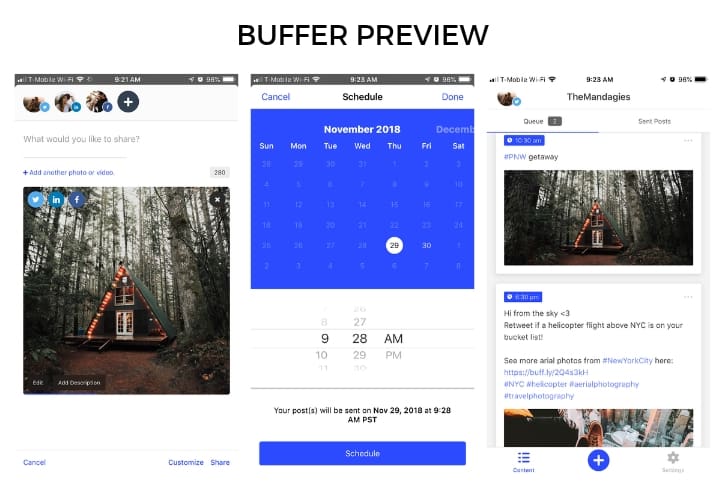
( Download Buffer App Here )
Price: FREE for the first 3 channels. (Subscription to add more)
Not all content does well across all social channels. This is why we like to use a split-scheduling tool called Buffer.
Buffer is a one-stop shop for photographers who want to share their images across multiple social channels without having to open 5+ apps on their phone.
For each channel, you can customize what content goes out and when. Example: We like to share a mini-photo album on Facebook , maybe two on Twitter with some hashtags, and one on Instagram .
With Buffer, you can easily personalize your captions and content for each social profile.
- Pros: One app does all the scheduling, easily view what goes live and when, customizable for each account.
- Cons: Limited to three channels unless upgrading to the paid version.
Best Photo Design Apps Smartphones
10. canva (best user-friendly graphic designer app).
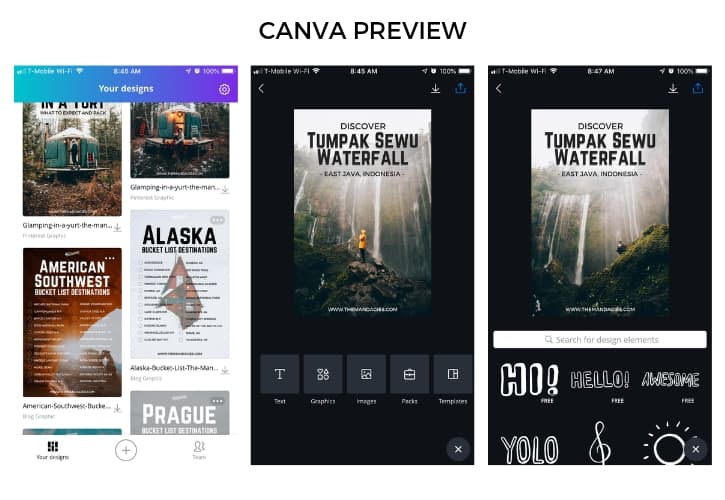
( Download Canva Here. )
Price: Free. (Option to subscribe monthly for more tools)
Canva is our #1 tool for creating images with a text overlay.
We especially use this for the pins we share on Pinterest. Canva just had a huge upgrade, so there are tons more free fonts, images, and graphics to use in your designs.
Note: There is a paid version, but I wouldn’t bother with it unless you will be constantly using it for graphic design. You essentially just pay for shortcuts, the ability to download fonts and resizing images quickly.
In our opinion, the subscription isn’t worth the simple tools it provides if you are just using the app occasionally.
- Pros: Ease of use between the mobile app and desktop, ability resize images for any social platform.
- Cons: Mobile version is a little more difficult to navigate, requires wifi.
11. Unfold (Best Instagram Story Sharing App)
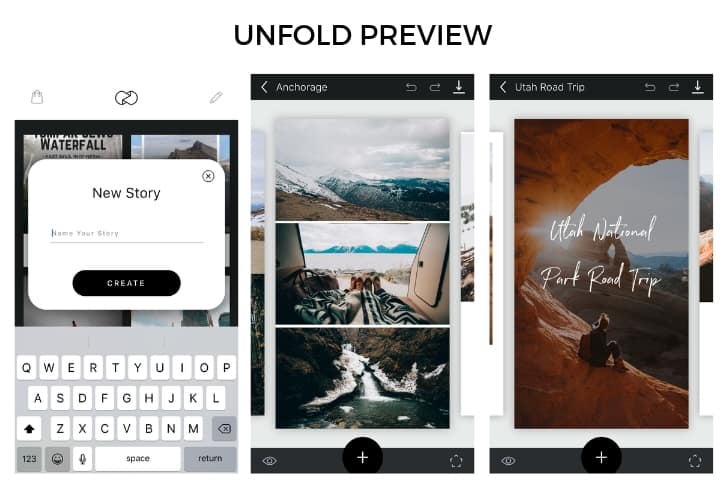
( Download Unfold Here. )
Price: FREE with in app features for purchase.
Unfold is a story creation & design tool , mostly used for Instagram stories but the app can also be used for Snapchat too.
Unfold has tons of creative effects to make your stories ultra-cool, engaging and stylish.
Some new filters and updates include polaroid frames, ripped paper layers, and computer crop frames. They occasionally have limited editing frames for unique story designs.
With this app, you can create one-of-a-kind social stories and share everything from video, collages, and professional photography galleries.
There are endless creative ways to use this app!
- Pros: Easy to use, extremely customizable, makes Instagram stories look professionally created.
- Cons: Basic templates until payment for more, clips shorter than 15 seconds repeat over.
12: *Bonus: Instagram (Best Social Media Photography App)
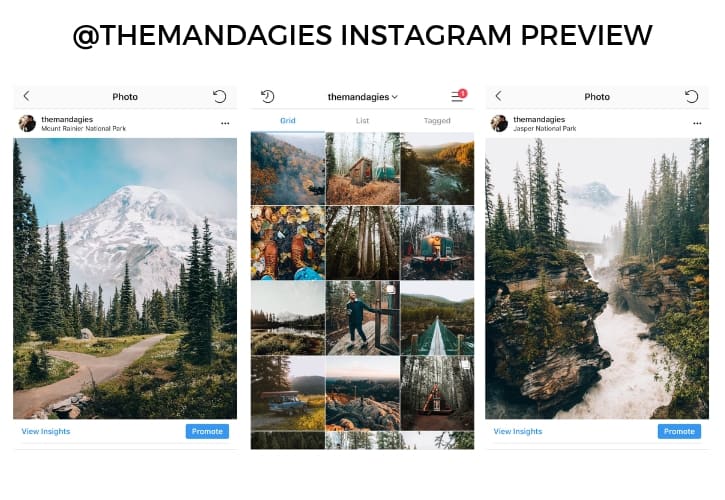
It’s no surprise that Instagram is the largest photo sharing app out there.
With over 1 billion users on Instagram , you have the opportunity to share your work with the world.
Not only is this a great tool to connect with other like-minded photographers, with the help of Instagram and these photo editing apps, you can also share your best pictures online!
For more photo editing inspiration, follow us at @themandagies to see how we edit, share, and schedule our photographs!
FINAL THOUGHTS
Modern technology has made it easy for the average smartphone user to become a travel photographer.
Smartphones can sometimes be as good as their camera counterparts, and the average consumer now has access to creating beautiful photography in the palm of their hand .
We hope this post can inspire you to take what you have and simply start creating! One of the hardest parts of growing as a creative photographer is just beginning.
We encourage you to take these simple mobile tools and use these as stepping stones in your journey.
Do I need all of these photography apps to be a good photographer?
Absolutely not! Many of these apps have similar features and capabilities, so try experimenting and see which photo editing apps work best for you!
What are some of your favorite photo editing apps? Let us know in the comments below!
More travel & photo tips.
8 Easy Tips To Capture Amazing Travel Photos
10 Road Trip Tools and Planners For Your Next Trip
12 Crucial Tasks Photographers Should Do During Slow Season
Our Complete List Of Travel Photography Gear
How To Shoot A Doors Off Helicopter Flight In NYC
20+ Of The Best Instagram Spots In NYC
The Photography Guide To Cuyahoga Valley National Park, Ohio
Change Language: Change to Tagalog
Apply for a U.S. Visa
In the philippines.
- Bank and Payment Options
- DS-160 Information
- Appointment Wait Times
- Photos and Fingerprints
- Visa Waiver Program
- Security Regulations
- Apply for a Visa
- Pay My Visa Fee
- Complete My DS-160
- Schedule/Change My Appointment
- Change Document Delivery Address
- Download My Appointment Letter
- Track My Passport
- Apply for Emergency Appointment
- Renew My Visa
- Visa Information
- Check My Visa Status
- Applying for an Appointment
- Submitting 221(g) Documents
- Priority Interview Program
- Crew and Manning Program
- Group Appointments
- Diplomatic and Government Officials
- Visas for Children
- U.S. Embassy, Manila
- Passport/Visa Collection Locations
- Document Drop-off Locations
- Bank Locations
- Holidays and Closures
- Rights and Protections
- Useful Links
You are here: Home / Photos and Fingerprints
Applicants for nonimmigrant visas at the U.S. Embassy are required to upload an electronic photograph as part of completing and submitting their DS-160 application form on the www.state.gov website. You should also carry a copy of your photograph to the Embassy on the day of your interview.
- Frame subject with full face, front view, eyes open
- Make sure photo presents full head from top of hair to bottom of chin; height of head should measure 1 inch to 1-3/8 inches (25 mm to 35 mm)
- Center head within frame (see Figure 2 below)
- Make sure eye height is between 1-1/8 inches to 1-3/8 inches (28 mm and 35 mm) from bottom of photo
- Photograph subject against a plain white or off-white background
- Position subject and lighting so that there are no distracting shadows on the face or background
- Encourage subject to have a natural expression

Figure 2. Head Position & Placement
For Digital Images Uploaded to the DS-160

The head height or facial region size (measured from the top of the head, including the hair, to the bottom of the chin) must be between 50% and 69% of the image's total height. The eye height (measured from the bottom of the image to the level of the eyes) should be between 56% and 69% of the image's height.
Image pixel dimensions must be in a square aspect ratio (meaning the height must be equal to the width). Minimum acceptable dimensions are 600 pixels (width) x 600 pixels (height). Maximum acceptable dimensions are 1200 pixels (width) x 1200 pixels (height).
Well-Composed Photos

Specifications of photograph required for the visa application form
Frequently Asked Questions about Photos
Fingerprinting
All visa applicants, except those traveling on official government business, who are under the age of 14, or who are over the age of 79, are fingerprinted by the U.S. Embassy as a part of their visa interview. During the visa application process, usually at the interview, an ink-free, digital fingerprint scan will be quickly taken.
©2010 CGI Federal Inc.
- NIV Information
- NIV Application
- Immigrant Visas
- Special Visa Cases
- General Information
Photo Editor
Photo effects and tools for enhancing your photos
Collage Maker
Combine multiple photos into one with a grid layout
Graphic Designer
Templates for creating banners, flyers, cards, & more
Getting Started
Master the basics of BeFunky
Learn what all you can do with BeFunky
BeFunky Plus
Unlock our most powerful features
Learn BeFunky
Photo editing and design tips and techniques
Step-by-step guides for all our features
Inspiration
Projects to inspire your creativity
Updates about our new features
Learn Inspiration
The Ultimate Guide to Capturing Viral Travel Photos
By Rach DePaoli | Inspiration

Travel photography has evolved immensely over the years due to the popularity it amassed via Instagram in such a short time. Not too long ago, it seemed like our feeds were filled with popular professional travel photographers, as well as amateur Instagram photographers trying to make it big.
With the popularity of travel photography came pre-made filters from professional photographers. Once these hit the market, everyone began editing their travel photography in a few main ways and since this time, travel photography has really settled into its recognizable niche.
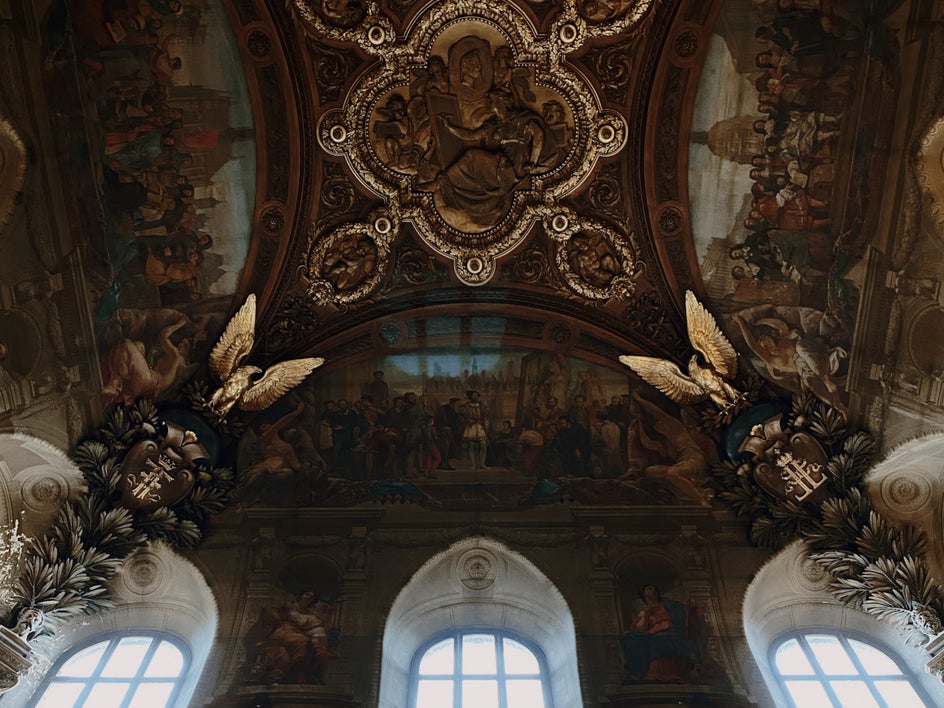
Within the realm of travel photography editing, two main aesthetics emerged, have stayed, and have defined what we know as travel photography today. We have light and airy photos, and we have dark and moody photos. One of the similar editing techniques that both of these aesthetics have in common is that their shadows have a matte effect to them. Travel photography is now a part of our everyday culture and it continues to inspire people’s future holiday and vacation plans.
Whether you’ve got a trip planned or you want to practice travel photography in your own city, we’re sharing all our best tips for nailing the shots and then will also show you how to achieve this popular travel photography aesthetic using BeFunky’s Photo Editor .
4 Tips for the Capturing Viral Travel Photography
Traveling to a new place is exciting and well worth documenting. Follow these tips to enhance your travel photography and editing skills. Later, we will take one of our travel photos and show you a few of BeFunky’s Photo Editor tools that are perfect for travel photography.
1. Venture off the Beaten Path
When you are traveling to a place you’ve never been before, research some of the main places you want to visit. To do this, I often search for ‘2-Days In [City of Choice], including the city you’ll be traveling to. This is going to give you plenty of hits of the top things to do in this city. Once there, if you are in a city that accommodates walking, walk to each destination and take your time getting there.
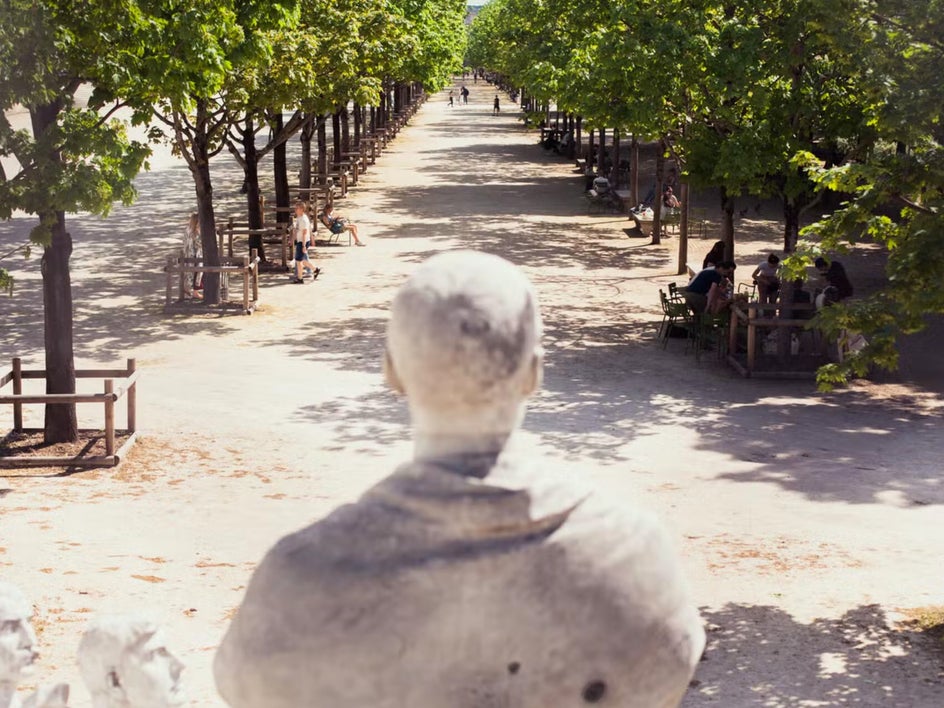
Stop at any place, restaurant, building, or view that catches your attention along the way. I do this each time I am in a new city and have found the most wonderful places, some just by scent alone!
2. Get a Different Perspective
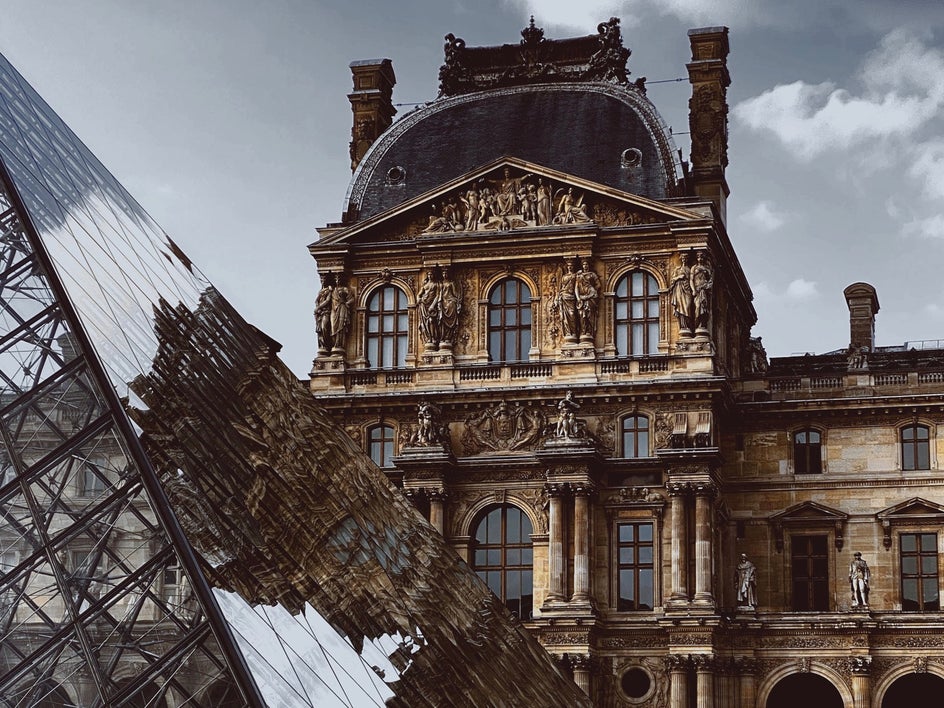
If you’ve seen one picture of the Eiffel Tower, you’ve seen them all. Since our feeds are inundated with travel photography, the shots that stand out are the ones that are innovative. Work your angles and find a unique point of view. The pictures below show the same subject as the focal point from two very different perspectives.
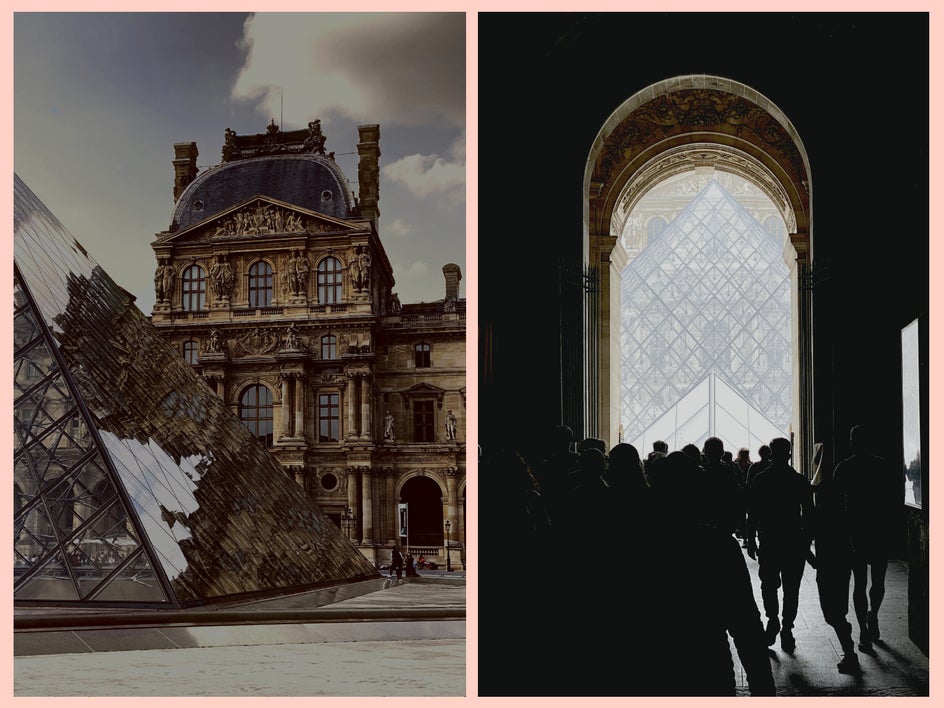
Once you arrive at the place you want to be, take some time walking around your subject to see it from a different perspective. If there are trees nearby, try using the foliage as a buffer in the foreground with your subject in the distance. See what happens when you lay on the ground and shoot upwards towards your subject to display its grand size.
When I started photographing, I was nervous about looking weird getting into certain positions on the ground, standing on objects like chairs, or squatting. Let me reassure you that all great photographers do this. Do what you have to do to get the shot and don’t worry about what other people think. There was a reason why Ansel Adams said, “A good photograph is knowing where to stand.”
3. Pay Attention to Lighting and Time of Day
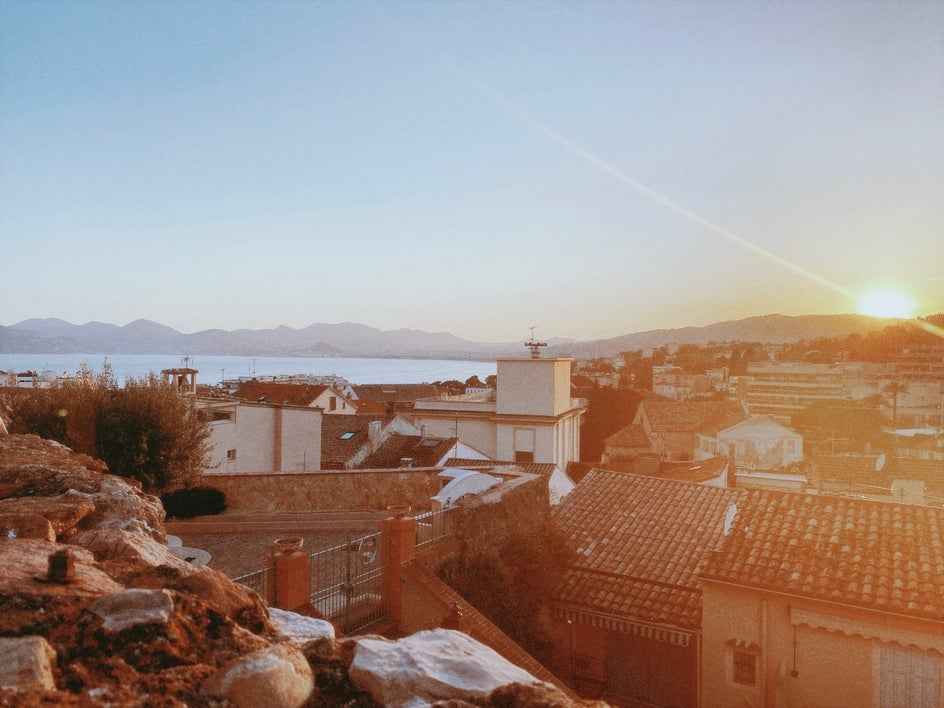
Match your lighting to your mood. This one is key, no matter if you are having a photo shoot in your hometown or are taking travel photographs around the world. Lighting can set the whole mood of your frame. Be mindful of the mood you want to capture and use the light to your benefit. I would normally say the best time to take photos is in the early morning or evening, or when it is overcast when the light is soft. Lately, though, I have been loving harsh mid-day lighting with contrasted shadows. If you are trying to capture the romance of a place, waiting until golden hour helps to bring alive certain elements you’re photographing that broad daylight may not.
4. Shoot In Your Own Backyard
When most people think of travel photography, they immediately imagine someplace far off in other parts of the world. As practice, try taking photos like a travel photographer in your own city. Sometimes we don’t think of our hometown as a place to travel to, but not only will it help you prepare for taking epic photos in other places, your own city could easily give someone else a case of wanderlust!
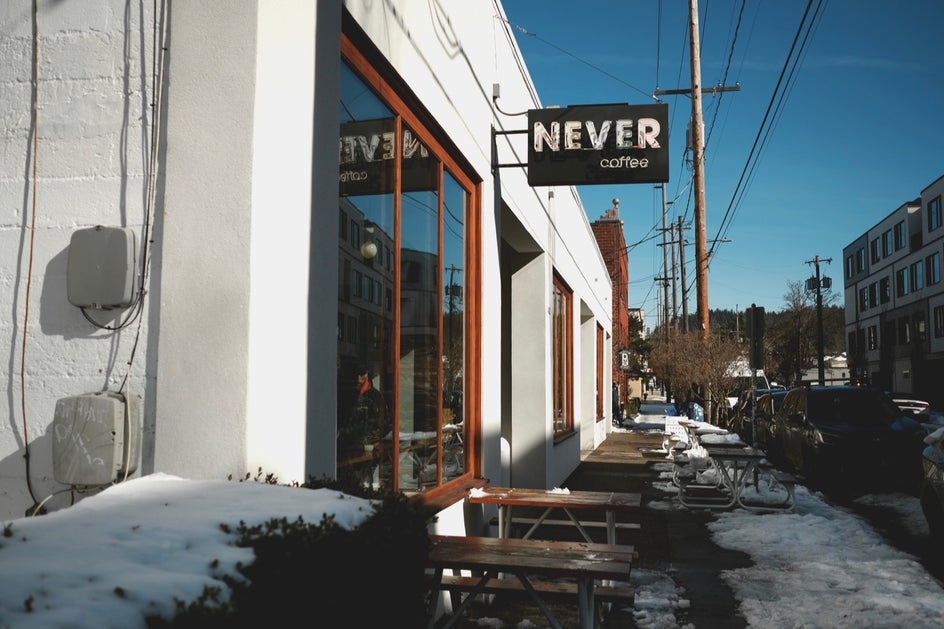
Walk around your neighborhood and try taking unique photos of something you see every day, like inside your house, your favorite coffee shop, or the best viewpoint within walking distance. Practice capturing these places at different angles, at momentous times of the day, and in different weather conditions.
The Best Photo Editing Tools For Travel Photography
The process of creating a great photograph doesn’t end with pressing the shutter release. To bring out important details of your images, fix problem areas, and enhance the overall mood of your photo, you’ll need BeFunky’s Photo Editor . These are our favorite tools to help enhance your travel photography:
The Crop Tool
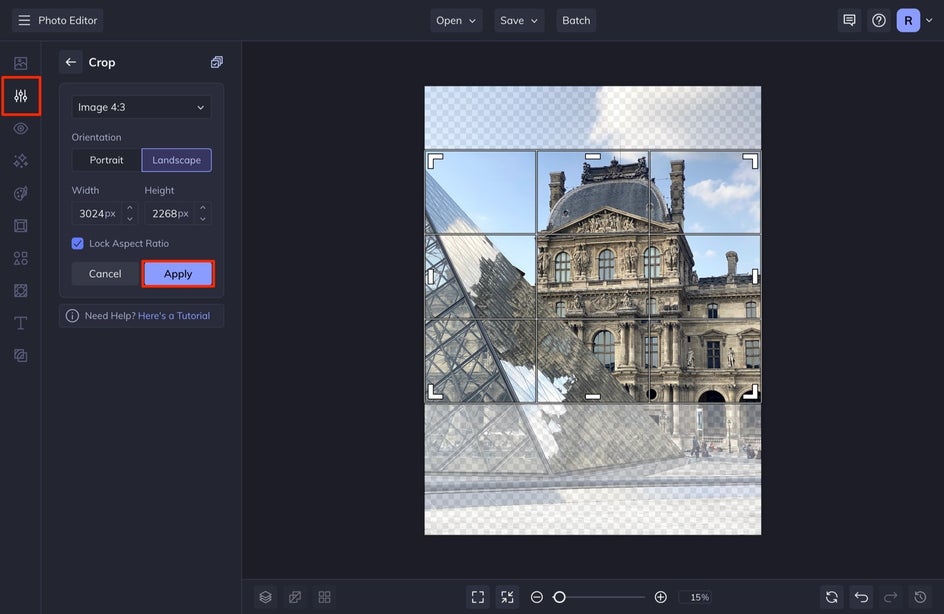
Composition is everything. What most people don’t realize before traveling to certain monuments or places around the world is that the reality of a monument’s surroundings often looks completely different. For example, the photos you often see of the Taj Mahal are from the same angle. The reason for this is that on the opposing side of the frame, the ground is covered with trash. The Pyramids of Giza, as another example, look like they are sitting in the middle of a desert, but are backed right up into a city.
The Crop tool can help you to reposition your focal point or crop out unwanted items in your shot. After selecting it from the Edit menu, drag and resize the Crop target to fit within the area you want to highlight. Everything outside of this target will be eliminated from the photo.
The Levels Tool
To quickly enhance the brightness, shadows, highlights, and contrast of your photo, click on the Levels tool in the Edit menu.
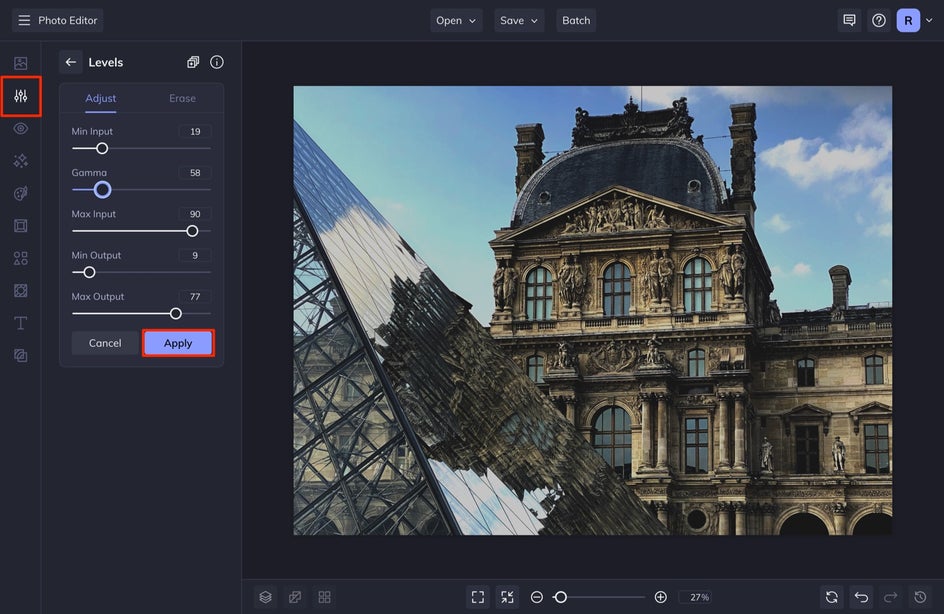
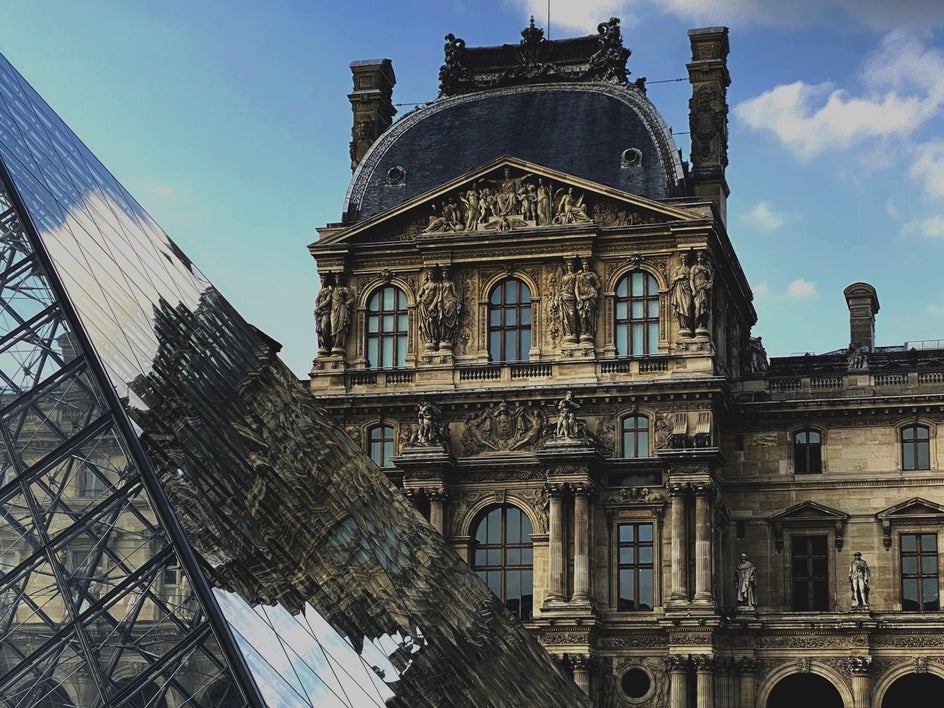
This tool is exceptional for adjusting your photo exposure and also creating that matte look you see regularly in travel photography. If you want a deeper tutorial for this tool, check out A Professional Photographers Tips for Fixing Exposure With the Levels Tool .
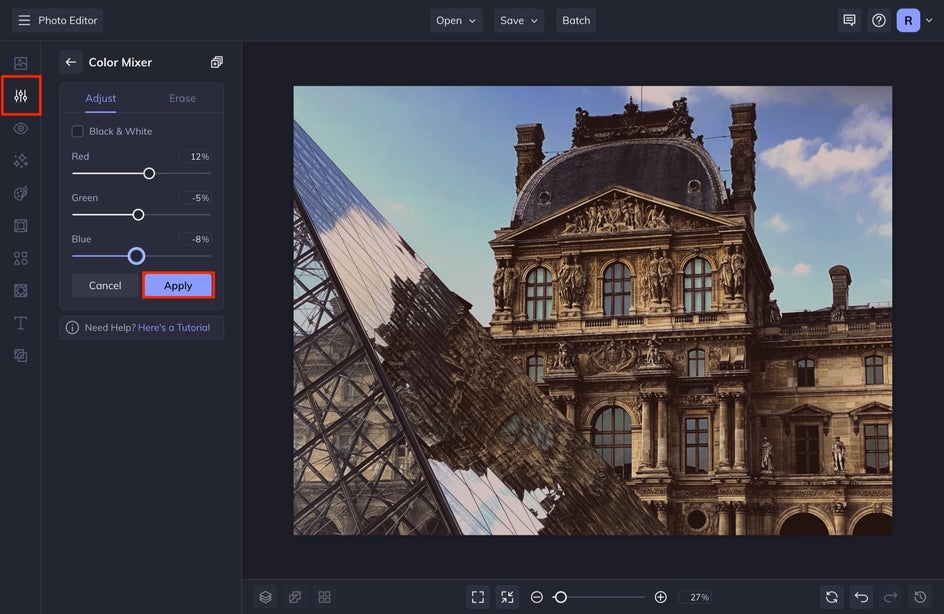
The Color Mixer Tool
The Color Mixer Tool helps to balance out the Red, Green, and Blue in your image. This makes your image’s color richer and helps to correct the colors that your camera may otherwise not be able to capture correctly.
The Clone Tool
The Clone Tool is by far one of my favorites for travel photography. This tool makes it easy to remove unwanted objects in your photo and disguise those areas with another part. If you have a person’s head in your shot, you can seamlessly remove it with the clone tool.
To use it, select Clone from the Touch Up menu on the left. A circular target will appear for you to select the area of the photo you want to use to cover up the unwanted area. Then an additional cursor will appear for you to click and drag over the unwanted object, painting over it with a different part of your image.
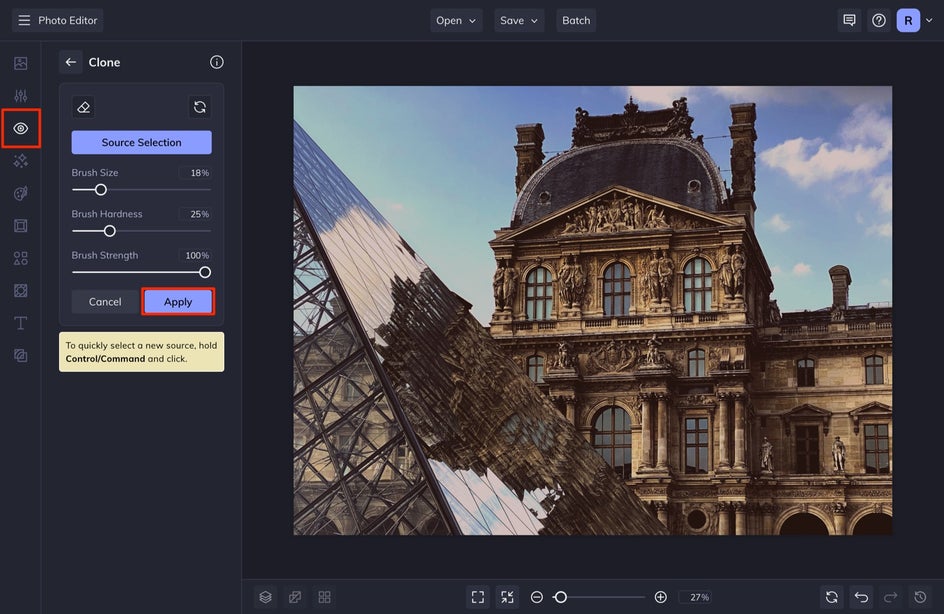
Check out this tutorial for a deeper look at the Clone tool.
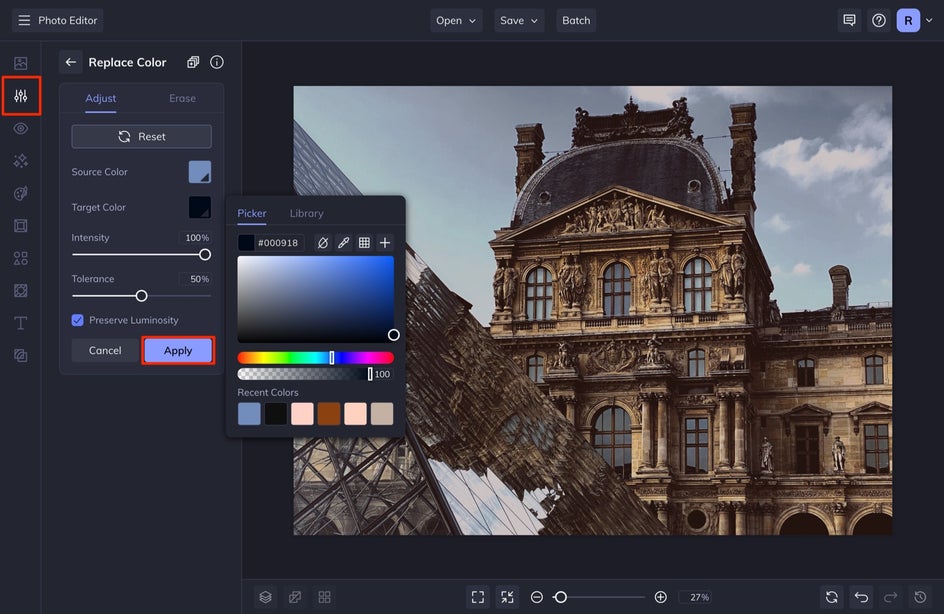
The Replace Color Tool
This tool is amazing for desaturating certain colors that are distracting from the overall subject. This can also help you create the right color profile for your image, making your image more aesthetic. You can make grass darker, and desaturate the sky, making a moodier image.
The Vignette Tool
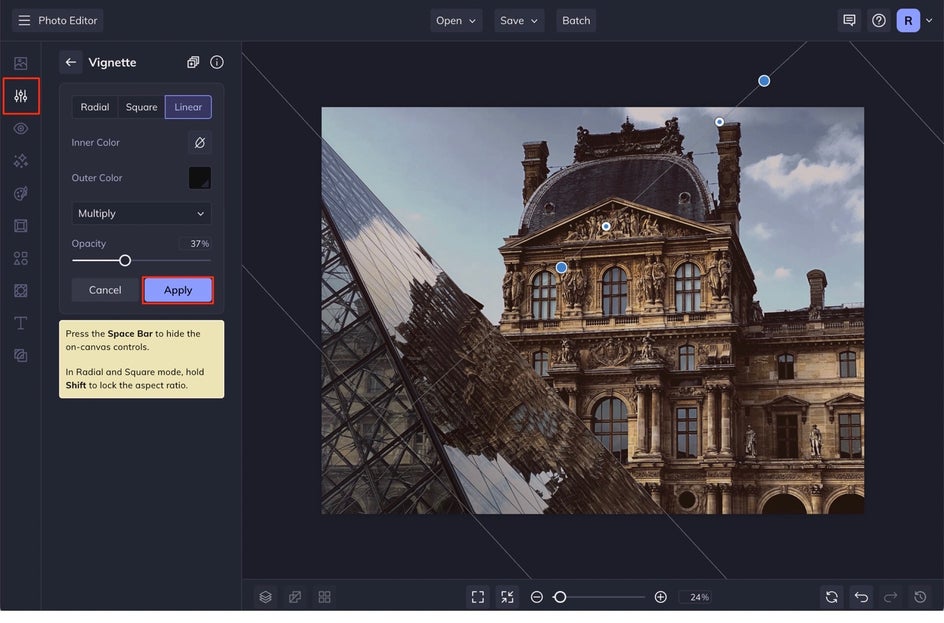
With photography, you always want to draw your audience's eye to the focal point of your choosing. Using a vignette can be a very helpful tool to accomplish this, as it’ll slightly darken the edges of your photo to subtly direct the viewer’s gaze where you want it to go.
To use one, click on Vignette in the Edit menu and select either the Radial, Square, or Linear tab. Most vignettes are circular in nature, but you can get creative with the Square or Linear vignettes if you want! Drag and resize the vignette target on your image so that the focal point is in the center, then adjust the Opacity, Color, or Blend Mode from the menu.
Once you are all finished, make sure to save your image by going to the top of your screen, selecting Save , and then Computer .
Capturing Travel Photos Just Got Easier
These photography shooting and editing tips are the ones that I’ve used for over a decade and truly work to produce the kinds of viral travel photographs you see littered on your feed. With just a few simple edits in Befunky’s Photo Editor , your travel photos are ready to be added to your travel or lifestyle feed.
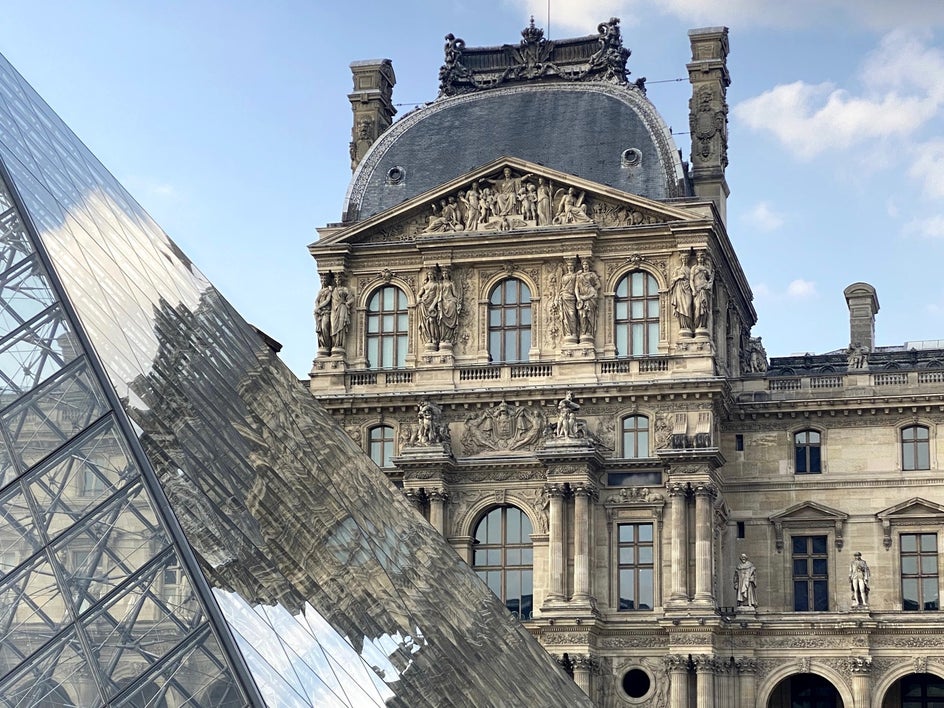
Photo Editing, Simplified.
Please enable JavaScript to view the comments powered by Disqus.
Recommended Posts
Tips for Capturing and Editing Nature Photography
Nature photography is an ever-changing field. New techniques and gadgets are…

How to Capture and Edit Flat Lay Photography Like a Pro
Learn the five steps to capturing the perfect flat lay, plus all the edits you need to…
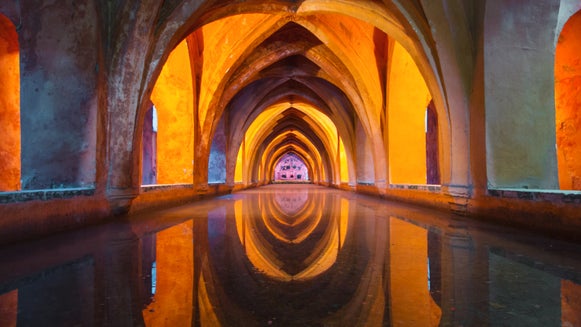
4 Tips for Mastering Reflection Photography
Reflection photography, also referred to as mirror photography, is when you use…
Photo Editing. Simplified
Welcome back please sign in.
New to BeFunky? Register here
Forgot your password?
Register with BeFunky
Already registered? Sign in here
The emails you've entered do not match
Please enter a password of at least six characters
By creating an account you agree to our Terms of Use
Reset Your Password
Enter your email and we'll send you a link to reset your password
If you remember your password you can sign in here
- List of Embassies
- Help Center
- US Passport Photo
- US Visa Photo
- Canadian Passport Photo
- Canadian Visa Photo
- Chinese Passport Photo
- UK Passport Photo
- German Passport Photo
- Australian Passport Photo
- Kenian Visa Photo
- French Passport Photo
- Indian Passport Photo
- Brazilian Passport Photo
- Israel Passport Photo
- DV Lottery Photo tools
- Schengen Visa Photo
- Ethiopian Visa Photo
- French Visa Photo
- Indian Visa Photo
- German Visa Photo
- Korean Visa Photo
- Australian Visa Photo
- Indian Passport Photo Requirements
- Indian Visa Photo Requirements
- Canadian Visa Photo Requirements
- French Passport Photo Requirements
- France Visa Photo Requirements
- Australian Passport Photo Requirements
- Jamaican Passport Photo Requirements
- Chinese Passport Photo Requirement
- British Passport Photo Requirement
- Remove background
- Universal Size Photos
- Photos for Other Documents
- Student IDs and University Diplomas
- Who we are?
- How it works
- Why choose us?
- All Documents
- US Passport
Make US Passport Photo for Free
Original US Passport photos online with our easy-to-use service. Simply upload a photo from your smartphone, and we'll turn it into a perfectly-sized passport photo that meets all official requirements. 100% guarantee acceptance of your photos.
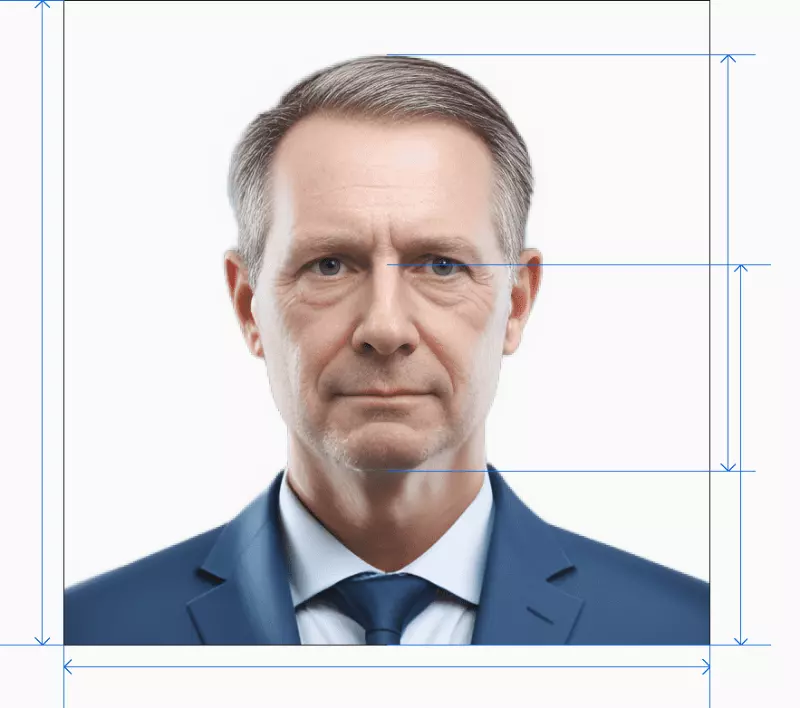
Source: official website travel.state.gov
Get photo for: US Passport 2x2 inch (51x51 mm)
Government Photo Compliance Guaranteed
Protection and security of your dataю Online service for processing photos from your phone for official government documents using artificial intelligence and official
US Passport Photo Maker
Integral to the application process is the requisite photograph, utilized by customs control for your identification. Armed with the correct steps, it's feasible to take this photo from the serenity of your living space using a smartphone or digital camera. Read ahead to decipher the procedure!
Steps to Make US Passport Photos Online
If you’d like to make your own photo for a US Passport, saving you the trouble of making an appointment with a professional photographer and turning up in person, there are a few important steps you’ll need to follow. We’ve broken them down for you below:
- On PhotoGov.com, first choose what sort of document you are preparing a photograph for—i.e., a passport, visa, etc.
- Next, take your photograph and upload it to our US Passport photo maker. Make sure you follow the necessary guidelines for creating a biometric picture.
- Refine your picture using our platform. PhotoGov.com automatically optimizes your photograph to help ensure it meets the necessary criteria, such as even lighting and image centering.
- Download your image. You are now ready to use the digital file as you like.
Guidelines and size requiements for a US passport
For successful US passport applications, it's vital to follow US passport photo requirements. Key criteria include a recent photo (taken within the last month) sized 2x2inch, a light and plain background, a neutral expression, and an unobstructed, full-face view, background color - White. Refrain from wearing glasses, headgear, or casting shadows, except for religious reasons. Abiding by these US passport photo requirements helps ensure a smooth application process.
The table below shows the official basic and main technical requirements:
- Name of document: US Passport 2x2 inch (51x51 mm)
- Country: United States
- Type of document: passport
- Quality: 300
- Back ground color:
- Photo size: Width: 2inch, Height: 2inch
- Approve for requiments US: Yes
- Image definition parameters: Correct for requiments
- Printable: Yes
- Suitable for online submission: No
https://travel.state.gov/content/passports/en/passports/photos/photo-composition-template.html
*Data from government agencies
US Passport Photo — Size and Requirements
Here is a deep dive into the nitty-gritty of the general photo requirements. Whether you’re a seasoned traveler or a first-time applicant, understanding these requirements is crucial to take passport or visa photos that are accepted on the first try.
Technical requirements if you are going to process the photo yourself through Photoshop or other services:
In the , a photo for photo must be 2x2 inch in size. Photographs that deviate from these requirements will not be considered and will have to be retaken by the applicant.
US Passport procedures require colored photos to facilitate accurate identification by officials. Moreover, these pictures should prominently feature a neutral, white, or near-white background.
Resolution and file size (in KB or MB)
It’s important that your US Passport photograph is high-quality and clear, as this will make it easier for border officials to make it out and compare it to you. To that end, you should ensure that you use a resolution of no less than 300 DPI (dots per inch). Ideally, you should use a resolution of at least DPI, but between 300 and should be fine. Just remember, the clearer and more satisfactory your picture, the less likely your application is to be rejected; aim for a file size of between 1 MB and 15 MB.

Attire, clothing, dress code
When you take a picture for a US Passport, there is a particular dress code you must adhere to. The main points of this dress code are that you must:
Wear normal, everyday clothes.
Avoid wearing uniforms or camouflage clothing.
Avoid head coverings or headgear.
Avoid eyeglasses, including both sunglasses and spectacles.
If you adhere to these simple instructions and ensure that your picture is well-lit and of a high quality, your photograph should be satisfactory.
Image definition parameters
It’s essential that the photo quality is satisfactory. Ensure your picture is clear and properly focused, free of blur or noise. You should also make sure that it isn’t visibly pixelated and that it has been printed onto either matte or glossy photographic paper, as opposed to plain printer paper.
Background, contrast, and shadows
An US Passport picture must have both sufficient detail and high contrast. So, to ensure that your photograph is suitable, be sure to take it against a plain, neutral background, either white or off-white in color. This is important, as it helps you stand out in the picture. Additionally, be careful that there is no shadow in the photo, particularly any obscuring the face.
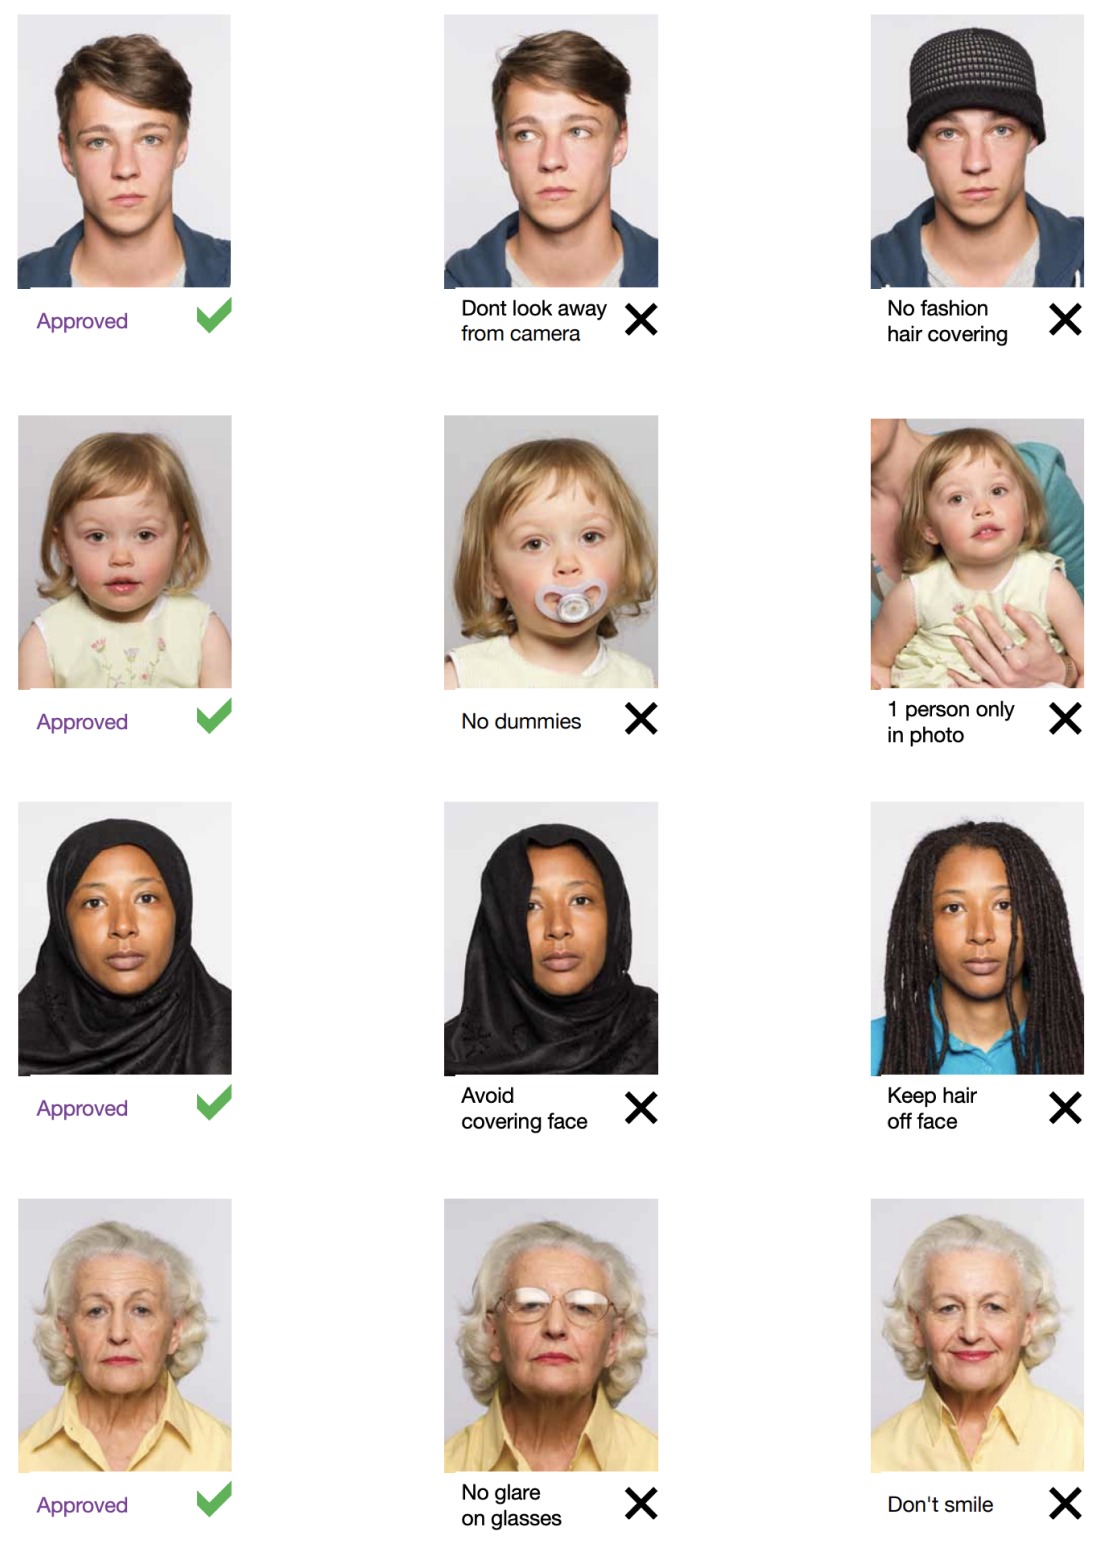
Example photos:
Below are examples of correct and incorrect photos
How to Take Your Own US Passport Photo
If you don’t want to go through the trouble and expense of locating and hiring a professional photographer to take your picture, you can simply take your own from home. So long as you follow the below instructions carefully, you can capture the perfect passport photo yourself:
1. Take a picture of yourself
Open up the PhotoGov.com photo service and take your picture. Make sure you’re not wearing any headcovers or glasses, do not wear a uniform, and keep your expression neutral. Ensure that the area is well-lit and that you are standing against a neutral background.
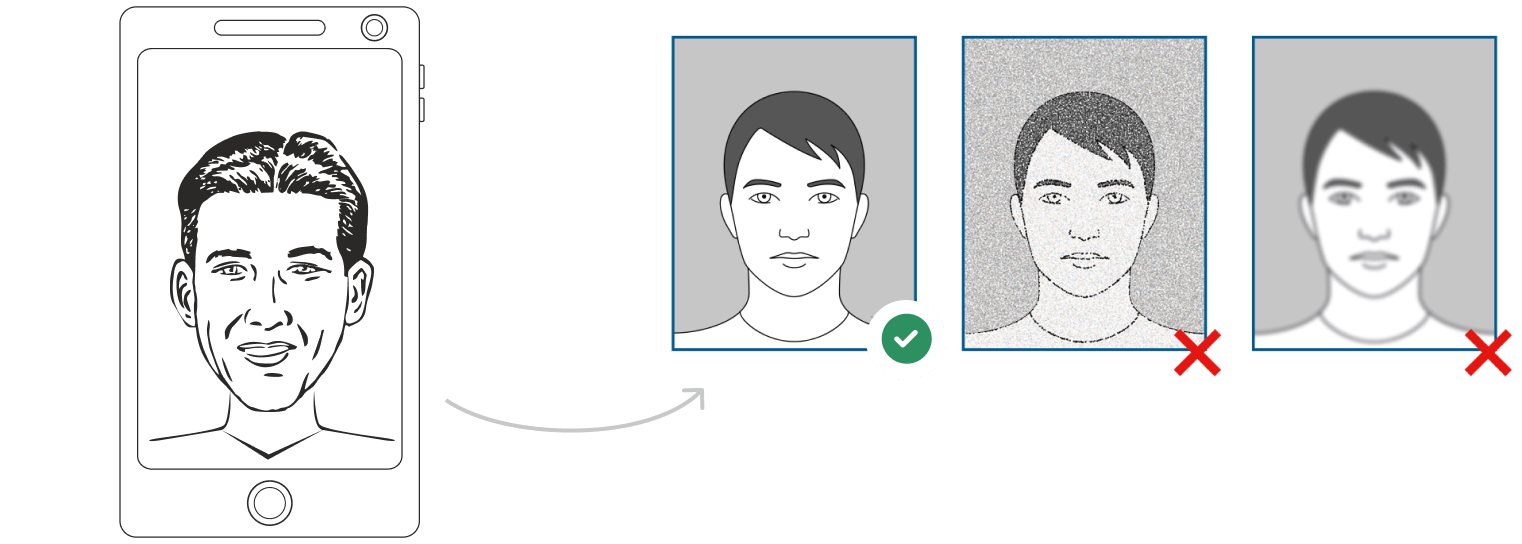
Clean background. More light. Not a blurry photo. Watch "How to take a photo" (00:46)
2. Upload your photo to PhotoGov AI
Next, upload your image and process it through our site.
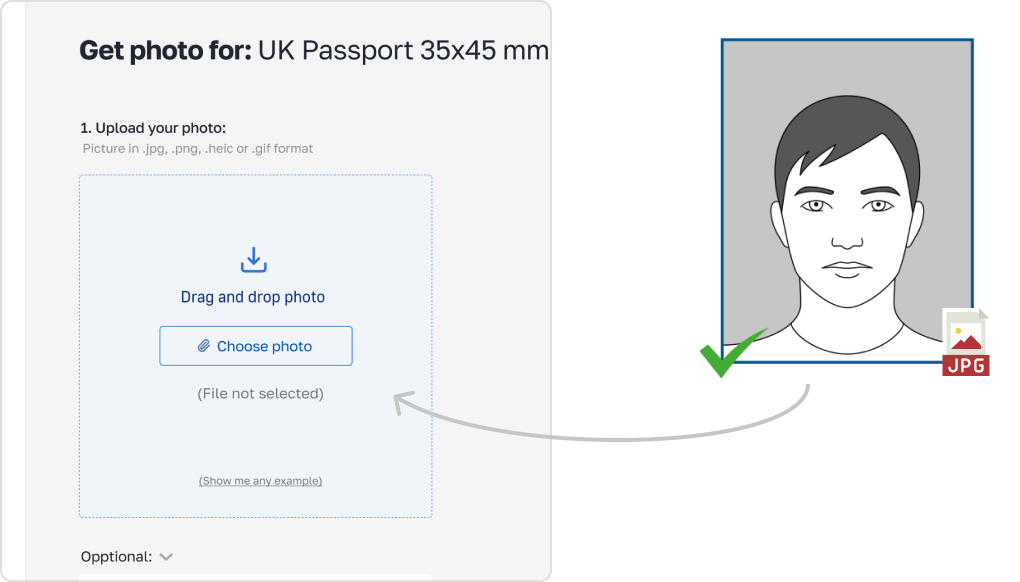
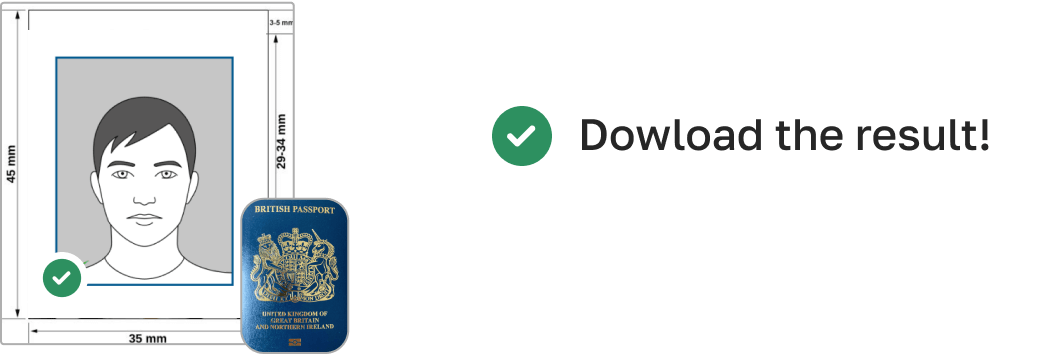
3. Receive your Passport Photo
Finally, you can download your ID photo. These images can be printed off, or you can simply use them as digital photos.
US Passport Photo-Making Tips
Body-camera distance.
For optimal clarity in a passport photo, the individual's upper body, along with their head and hair, should be fully discernible for quick identification. Your camera should ideally be positioned 5-7 feet (1.5-2 meters) away. Consider capturing a few photos from different points to determine the perfect one.
A passport photo is essentially a facial capture, but the posture you assume has its bearing on the final shot. It's crucial to stand upright yet not come across as rigid. Keep your gaze focused straight into the camera, ensuring your face is visibly clear.
For the best results, your snapshot should be under uniform lighting and should avoid shadowed areas. It's vital for the clear visibility of your facial traits. It's ideal to have balanced lighting both laterally and from the fore and aft perspectives.
Can I Take My passport Picture at Home?
Should you be keen to put in the necessary work, crafting a professional-grade passport photo at home is well within your grasp. Follow this straightforward guide:
- Dress in line with the accepted standards.
- Ascertain optimal lighting in your chosen spot.
- Stand against a neutral-toned backdrop to ensure clarity.
How to Take a US Passport Photo Using a Phone
If your smartphone's camera delivers clear, high-quality photos, it's fit for your passport image needs. However, avoid the temptation of selfies. Instead, abide by these steps:
- Entrust someone to capture the shot for you.
- They should maintain a gap of 5-7 feet, ensuring only the top half of your body is in the frame.
- You can also utilize a tripod, positioning it 5-7 feet away and making necessary adjustments for the optimal photo.
How to Take US Passport Photos for Babies and Kids
Getting passport photos of children and babies might seem tricky, but they're bound by most of the usual guidelines. They should be dressed appropriately, and their photos should shine in clarity and lighting. However, the State Department often relaxes the rules a bit around the neutral expression criterion for them.
If you are photographing a newborn:
Spread a white sheet out over the floor.
Place the baby down on the sheet and take their photograph against it.
For slightly older babies:
Prop them up in a child’s chair against a white sheet.
If they are still unable to hold up their head, prop it up for them using a hand behind the sheet. Ensure no one else is visible in the shot.
Tools based on artificial intelligence
PhotoGov Features
Our in-built cropping feature allows you to trim new passport photos and ensure that they don’t have uneven edges. This allows you to neaten up your picture and ensure it’s the proper size for your passport.
You can also resize your picture as needed through PhotoGov, meaning that the end result will be a perfectly proportioned image that will fit just right into your passport. Additionally, you don’t need to worry about stretching or squishing the image and ruining the quality.
Background removal
If you can’t find a neutral background against which you can take a satisfactory picture, don’t worry; we have a background removal tool that can help you achieve the same results.
Auto-adjustment
With the click of a button, you can have our auto-adjustment tool immediately optimize your image to meet brightness, color, and contrast standards.
How Can I Convert My Photo to passport Size?
There are myriad ways to modify image sizes, but for the best results, consider our passport photo software - PhotoGov. With it, you can trust that you'll receive a crisp, correctly proportioned final photo, sans any visual degradation from stretching or compressing.
Why Choose Us?
User-friendly interface.
Sorting out your passport application is complicated and stressful enough without having to contend with confusing software. PhotoGov’s simple layout and user-friendly design will help streamline the process for you.
Wide editing functionality
With cropping, resizing, auto-adjustment, and background removal functions, PhotoGov makes getting a passport picture as easy as possible. Using our platform, you can ensure that your photograph meets all the necessary requirements with just a few clicks of your mouse.
Large selection of documents
As well as offering photographs for passports, we can also take care of ID, visa, citizenship, license, and work permit photos.
No Expensive Equipment
With our online passport photo service, you don't need any expensive photography equipment to get high-quality passport photos. All you need is a smartphone or digital camera and an internet connection, and you can upload your photo to our platform and have it processed in seconds.
No Need to Go to a Photo Studio
Our online service eliminates the need to visit a photo studio or photo booth to get your passport photos taken. This can save you time and money on travel, and means you can get your photos taken from the comfort of your own home or office.
No Specialized Skills Required
You don't need any specialized skills or knowledge to use our online passport photo service. Our platform uses advanced AI and machine learning algorithms to process your photo and ensure that it meets all official requirements. This means you don't need any experience with photo editing software or photo composition to get high-quality passport photos.
I Already Have a Digital passport Photo. How Do I Print It?
A digital snapshot isn't ready to be printed on just any paper. For the best results, you'll need to get it printed on high-quality matte or glossy photographic paper. You have the choice of either visiting a dedicated photo service or using our custom tool to do the printing at home.
Where to Get a passport Photo
Pharmacies and drug stores.
Major drugstore chains such as Walgreens, CVS, and Rite Aid grant prompt passport image capture services on their premises. Though not on the house, they commonly set prices near the $15 range.
Shipping centers
Prominent logistics services such as UPS, FedEx, and other closeby shipping locales feature passport photography offerings comparable to pharmacy-based ones. With a usual rate of about $15, it's a handy option if you're looking to outsource your passport photo needs.
Post offices and other passport acceptance agents
Handling passport applications naturally leads post offices and like-minded bodies to also cater to photography needs. Consistent with the pricing trend we've highlighted, these services often come at a cost of approximately $15.
Retail stores
It's not uncommon to find dedicated passport photo booths in a variety of retail locations, ensuring you get images up to the mark. The pricing model can differ among these establishments, yet most offer competitive rates.
How many photos are required for a US Passport 2x2 inch application?
You only need to submit one photo with your US Passport 2x2 inch application, though you should make sure it is of good quality and that it meets all their specifications. Different documents may require you to provide a greater number of photographs, so you should always make sure to double-check exactly how many you need before filing an application. Please note that you will still need to submit a photograph when applying for a passport renewal, even if your appearance has not changed much.
What are the usual passport photo prices?
If you want to get your photo taken at a pharmacy, shipping center, retailer, or other establishment with a photography booth, you can expect to be charged around $15. However, if you’re thinking about hiring a photographer to take your picture for you, prices will vary and will likely be considerably more expensive. Is money a little tight these days? Remember that PhotoGov provides free professional photography services for passports and other documents. When you use our platform, you can also avoid the hassle of having to get your picture taken in person.
How do I make sure my passport picture meets official requirements?
- Wear a neutral expression.
- Adhere to the dress code.
- Ensure your picture is of high quality.
- Do not edit your photo.
What is the recommended method for capturing a digital passport photo?
To obtain a fitting digital snapshot for an American passport, focus on balanced light conditions, dodge any shadows, settle for a basic white or near-white setting, and aim for a high-quality capture with an impassive countenance. You can rely on online resources to optimize and format the photo in line with requirements.
How recent must my photo be?
To ensure your application sails through smoothly, make certain your photo mirrors your present appearance and is not older than six months. Using antiquated images can throw a wrench in the application's progress or lead to its denial.
Can a mobile app help create a correct photo ?
Absolutely, there exist mobile apps crafted with Passport and Visa photo specifications in mind.
How do I get a ready photo for my document using PhotoGov?
If you're looking to obtain a compliant photo for your document, PhotoGov has laid out clear steps on their platform. Post completion, the service payment can be made via your bank card. Almost instantly, a superior quality electronic image will be emailed to you. PhotoGov offers assurance on your photo's alignment with document standards. For documents that come with no-cost photo adjustments, you won't be billed. Simply input your email details, and in less than a minute, your processed photo will be mailed to you.
Passport Pictures for Other Countries
United states 27 doc..
- US Passport 2x2 inch (51x51 mm)
- US passport card 2x2 inch
- CIBTvisas visa photo (any country)
- Travisa visa photo (any country)
- US Electronic Diversity Visa Lottery (600x600 px, 2x2 inches, white bg)
- US Green Card (Permanent Resident) 2x2
- US Visa 2x2 inch (600x600 px, 51x51mm)
- USA Form I-130 2x2 inch
- USA Re-entry Permit 2x2 inch
- USA advance parole 2x2 inch
- USA crew visa 2x2 inch
- Visa Headquarters visa photo (any country)
- VisaCentral visa photo (any country)
- VisaHQ visa photo (any country)
- US NFA ATF form 2x2 inch
- USA FOID 1.25x1.5 inch
- USA SAT 2x2 inch
- USA bar examination 300x300 pixels
- USA PADI certification card 45x57 mm (1.75x2.25 inch)
- US Citizenship (naturalization) 2x2 inch (51x51 mm)
- US Employment Authorization 2x2 inch (51x51 mm)
- USA CCHI ID badge 3x3 inch
- US NY Gun License 1.5x1.5 inch
- US NY MTA Metrocard for Seniors
- USA Nursing License 2x2 inch
- US Veteran ID Card 2x2 inch
- USA welding certificate 2x2 inch
Popular Visas and travel document:
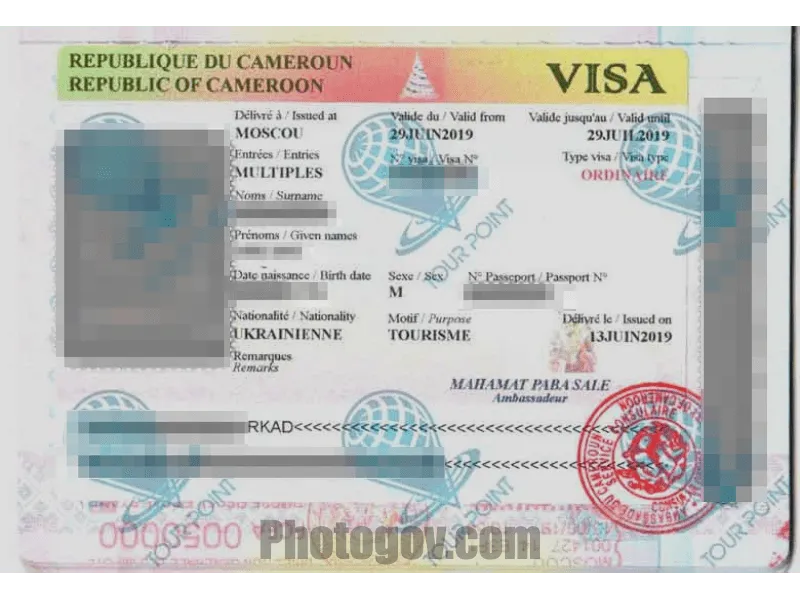
- Country: Cameroon
- Size: 40x40 mm (4x4 cm)
- Online: Yes
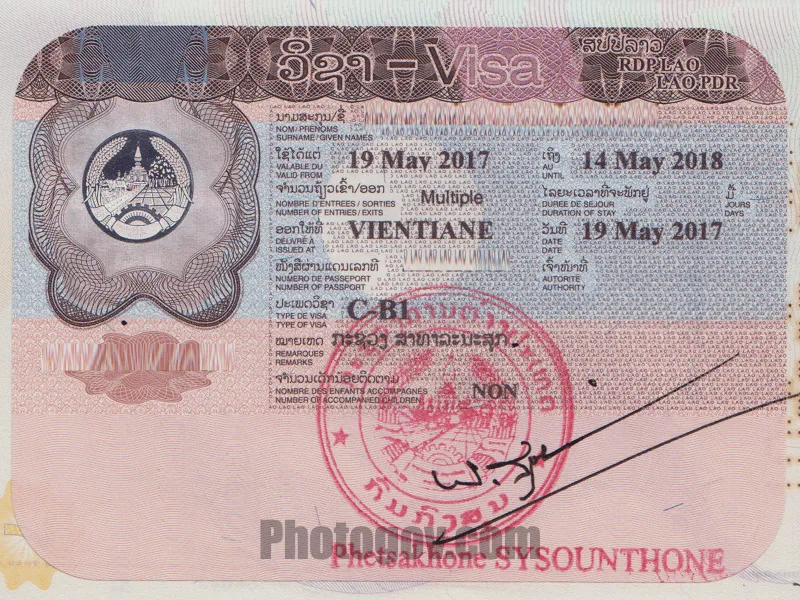
- Country: Lao People's Democratic Republic
- Size: 2x2 inch
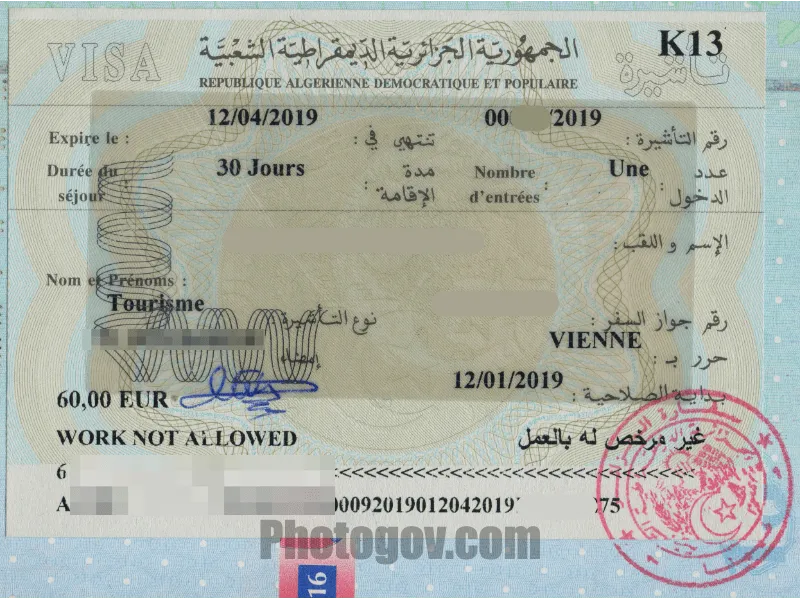
- Country: Algeria
- Size: 35x45 mm (3.5x4.5 cm)
- Country: Belarus
- Size: 40x50 mm (4x5 cm)
Other goverment documents:
- Country: Philippines
- Doc: Acknowledgement of employment contracts
- Size: 30x40 mm (3x4 cm)
- Country: Ireland
- Doc: Age card
- Doc: ATF form
- Country: United Republic of Tanzania
- Doc: Bank card
Passport Photos
All passport photos.
- All Visa Photos
Other Services
- All Documents Requirements
- Universal Passport Size Photos
- Remove Background
- Payment guide
- How it works?
The information of PhotoGov is protected and protected by law from copying and misuse
- Czech Republic
- Falkland Islands
- Latin America
- New Zealand
- North America
- South Georgia
- Kilimanjaro
- Adventure Travel
- Archaeology
- City Guides
- Itineraries
- Portrait Photography
- Tips and Advice
- Travel Photography
- Travel Stories
- Unhelpful Guides
- Wildlife Photography
- Work With Me
Travel Photography On The Road – My Photo Editing Workflow Tips
As a travel photographer, one of the things I have to consider is how I am going to backup, catalogue, and even edit my photos (and occasional videos) while travelling.
Contents (click to view)
All travel photographers have their own travel photo editing workflow, but since a few people have asked about mine, I thought I’d pop it all down in this blog post so you can see what works for me.
Of course, there is no right or wrong way to do any of this, but after 20 years as a photographer, this is the system I have ended up with, and so far it seems to work well. You may have your own routine that you’re happy with, or you may be interested in learning what other photographers do so you can get ideas and adapt your own workflow. Either way, I hope this helps!
NOTE: This is a review of my experiences using Adobe Creative Cloud. I was given a year’s subscription by the lovely people at Adobe – but I have been a Creative Cloud user since it came out (and before that I used Adobe Creative Suite), so it was already an application that I knew and loved. All opinions are honestly held and I don’t accept freebies or payment in exchange for positive reviews.
Travel photo editing with Adobe Creative Cloud
The core of my travel photography editing workflow is Adobe Creative Cloud. This is a suite of applications for all kinds of creative projects, from photo and video editing to graphic design, web development, animation and much more.
Adobe also offers cloud-based editing and storage, fonts, stock images and online tutorials, so it’s adaptable to whatever you do and however you choose to work. In fact, there are so many options it’s a bit overwhelming, and I’ve barely even scratched the surface of all the different ways you can use it.
There are various packages ranging from a smaller (and cheaper) bundle of apps aimed just at photographers, to one that includes every programme in the Creative Cloud suite. For the last few years, I’ve subscribed to the photography package, which includes Bridge, Lightroom, and Photoshop.
- Adobe Bridge: The central hub of the Creative Cloud suite. It’s really just a file management programme where you can view, sort, label, and organise your images.
- Adobe Lightroom: The application I use the most. Lightroom is where I back up my images, do all my photo editing and then export the images at different sizes depending on what’s needed.
- Adobe Photoshop: Photoshop is a more advanced image editing tool, with many more advanced functions, most of which I don’t use. As a travel photographer I only make basic adjustments to my images as I prefer to keep them as real and authentic as possible. So I only use Photoshop very rarely.
For creating videos, the other programme I use is Premiere Pro. This isn’t included in the photography package, so you need to get a separate subscription or simply buy the ‘All apps’ package.
- Adobe Premiere Pro: This is Adobe’s answer to Final Cut Pro or Avid Media Composer. While it has some very high-powered editing capabilities, it’s also simple and user-friendly enough for a novice like me who just wants something with a bit more oomph than Apple’s iMovie or any other basic, free, video editing software.
Backing up images as a travel photographer
If you’re only going away for a week or two, it’s entirely possible not to do any backing up at all. A single memory card (or perhaps two) is plenty for most people, and then you can download all your images when you get home.
However, if your camera gets lost, damaged or stolen and you haven’t backed up, you’d lose all your images! And if, like me, you travel for longer than a couple of weeks, or you take a lot of images, or you’re shooting high-resolution RAW files, you’ll soon run out of memory card space.
So that’s why, even if I do nothing else while I’m travelling, I back up. Every day.
Storing images while travelling
Adobe Creative Cloud, as the name implies, offers the ability to store your images in the cloud and edit remotely on the go.
Many people use this option, but it’s not something I do. I’m often travelling in remote places with rubbish wifi, and since my RAW files are huge and I sometimes take many hundreds of images in a single day, it would be impossible to upload them all.
For example, when I spent three months travelling in Guatemala , I ended up taking over 12,000 photos. Uploading them all to the cloud would have been impossible!
So I always travel with two portable 2TB hard drives and I back up my photos to both of them every day. Then I can wipe the memory card and use it again.
It’s important to have two, so that you’re fully protected. Portable drives can and do fail, so I always back up everything twice, in case one breaks or gets stolen. Best practice is to keep them separate from one another, so that if you lose one, you still have the second.
Backing up with Adobe Lightroom
Lightroom is not just an editing tool; it’s also where I back up my images. In the Library module, you can import, rename, label and organise all your files. So as soon as I get back from a day’s shooting, the first thing I do is grab the card out of the camera, plug it into my card reader, and use Lightroom to download all the files.
I organise them by year, then by date and location, and then within that folder I’ll have different folders for file types, such as RAW files, iPhone photos, videos, and later I’ll add folders for exported high-res images for printing or low-res ones for Instagram and this site.
As Lightroom imports them, it will also rename them to something more searchable than a string of numbers, add my name and contact information to the metadata, and apply a preset (about which more in a bit).
Organising with Adobe Lightroom
Once the images are all imported, the next stage for me is sorting, classifying and deleting. I take a LOT of photos, and I definitely don’t need to keep them all! I only rarely delete in camera, so the first step is to go through and get rid of duplicates, dull images, or ones that are just rubbish. I aim to delete 50% of the images I’ve taken during this first pass.
As I go through, I also give the images a star rating, from 1* to 5*. One star for anything I think I will want to edit, two to four for ones that are quite good, and five stars for the images that leap out at me as the very best.
Then, as soon as possible, I go back through the ones I’ve starred and edit them.
Read more: 30 Beautiful Pictures Of Guatemala And The Stories Behind Them
Using presets in Adobe Lightroom
The two main areas of Lightroom that I use are the Library and Develop modules. In the Library I can sort, tag and label my images. There is also a basic editing function, but I prefer to do all my editing in the Develop module.
As I mentioned, all my images get a preset applied as I import them. A preset, as the name suggests, is group of pre-set photo editing settings, that you can apply to give all your images a similar look, to save you having to manually apply the same settings to every image.
You can create your own, use the selection that comes free with Lightroom, or download them from other photographers on the internet.
I like bold, colourful images, so my preset corrects the exposure where necessary and adds a little boost of brightness, contrast and vibrancy. Not too much – I still want them to look authentic and not over-processed – just a bit to give the image a bit of punch and take away any flatness.
But you can choose the look that suits you – whether that’s with more or less contrast, brighter or more subdued highlights, black and white, or any other style.
Read more: Using The Canon R5 For Wildlife Photography: A Full Review
Travel photo editing with Adobe Lightroom
But the software doesn’t always get it right, and my preset won’t correct things like a wonky horizon, high-ISO noise, or unsatisfactory framing. So the most important part of my editing process is to go through the images I’ve starred, one by one, and give each a very quick polish. That includes checking I’m happy with what the preset has done and adjusting it if not, correcting the white balance, cropping, reducing noise or adding a mask to bring out details in the sky.
I probably spend no more than about 30-60 seconds tweaking each image, but I might edit 100 images at a time, so it soon adds up!
Most of those images will never get published or shared, and sometimes people ask me why I don’t only edit the ones I know I’m going to put on this blog or my Instagram .
The answer is that sometimes an image doesn’t come into its own until you edit it. There have been plenty of occasions where I thought a photo wasn’t that great, but with a bit of polish, suddenly it becomes a keeper.
I really like working in Adobe Lightroom because the whole process is so quick and simple. You can tweak as little or as much as you like using the various sliders, and you can also edit a group of images in bulk or copy and paste adjustments from one image to another.
Read more: Ethical Travel Photography: How To Capture With A Conscience
Exporting with Adobe Lightroom
Once I’m happy with my edits, I can then use Lightroom’s export function to export the corrected RAW files. You can save different presets, so I have one for Instagram, one for the blog, another for high-res jpegs, and so on.
As you export you can also get Lightroom to pop a watermark on, which is very handy if, like me, you’re posting a lot of images online and want to digitally sign your work.
Travel photo editing workflow – back home
I’m not much of a party girl and, especially if I’m travelling solo, I’m quite happy spending my evenings editing photos. So if I’m lucky, I can sometimes manage to get a lot of editing done while still on the road. When I went to photograph animals in Antarctica , I managed to get all my editing done before we returned to dry land!
Once I get home, there is one more job to do, and that’s store everything correctly. I have two big external hard drives (again, master and backup), so I copy all the images from my portable hard drive to the master drive.
At this point, the Lightroom catalogue will still try to connect with the portable drive, and if I unplug it, Lightroom will think the images are missing. So the final task is to use the ‘Find Missing Folder’ tool in the Lightroom library module to redirect it to the folder’s new location on my master hard drive. This way I won’t lose any of the hours of editing I’ve done – which would be a disaster!
Creating travel videos using Adobe Creative Cloud
While in Guatemala I volunteered as a photographer for Trama Textiles , a non-profit cooperative based in Xela that works with weaving communities.
During the Civil War many Maya women lost their husbands, fathers and brothers, so they had to fend for themselves. Weaving gorgeous textiles using the traditional back strap loom is the main way they can support their families.
Organisations like Trama Textiles help them to get fair prices for their work, and sell their products online. They also support them with grants and fundraising to help them survive and look after their children.
My role was mainly to photograph products for the online shop, and take photos of the weavers at work for newsletters and promotional materials.
But I was also asked to make a short film documenting their journey towards creating products made entirely with natural dyes instead of chemical dyes.
I shot the film using my iPhone 13 Pro, and edited it using Premiere Pro, Adobe’s editing programme that comes as part of the Creative Cloud package.
Travel video editing tutorials and tips
If you’re a regular reader of this blog you’ll know that my main job for the last 18 years has been directing documentaries . That means I have sat in more edits than I can remember – but I always work with a professional editor.
So although I have a very good understanding of the editing process and how to cut a film together, I’m not all that familiar with the various editing programmes themselves.
Three years ago I volunteered in Uganda , and filmed and cut a few short videos using a Canon camera and Adobe Premiere Pro, but it’s been a while since I used it.
So my memory of the programme and where the various tools and functions are was rather rusty!
Fortunately Adobe offers loads of practical guides and online tutorials to help you get started, and if ever you’re stuck on a particular action, a simple Google search will quickly bring up advice on how to do it.
Editing travel videos using Premiere Pro
Since this was the first time I’d used Premiere Pro in a while, I took full advantage of the online tutorials while cutting my short film.
I learned how to import my footage, how to sort and label it, and how to select part of a clip and put it on the timeline. I also learned how to add transitions, effects and music, and how to add captions.
This is all pretty basic editing, and I found it quite easy to learn how to do it in Premiere Pro.
The programme has many more advanced features that I didn’t use, but I can definitely see myself using it again if I want to make more short videos for Instagram or YouTube in the future. It’s much more responsive and you have a lot more choice and control than in free applications like iMovie.
If you’d like to see how the film turned out, here it is!
Where to next?
Interested in more travel photography tips? Why not try these?
- 25 Brilliant Tips For Travel Photography
13 Top Tips For Taking Great Travel Photos Of Markets
- 60+ Awesome Antarctica Photography Tips
- 19 Easy Wildlife Photography Tips For Beginners
Or if you’d like to find out more about my adventures in Guatemala, how about one of these?
Yaxha Guatemala: The Magical Mayan Ruins You Need To Visit
- Backpacking in Guatemala: All You Need To Know Before You Go
- Visiting San Andres Xecul, Guatemala: Home Of The Famous Yellow Church
- The Thrilling Volcan De Acatenango Hike In Antigua Guatemala
Bella is a multi-award-winning travel writer, wildlife photographer and science and history documentary director from London. Among many awards and nominations she won Blogger of the Year at the British Guild of Travel Writers’ Awards 2023 and Best Photography at the Travel Media Awards 2020. Her work has been published by National Geographic, Wanderlust, and BBC Travel among others. Her films have been shown around the world including on the BBC, Discovery and PBS.
Further Reading...
Farming Pearls in Australia – The Lustrous Australian Pearls
Alfombras In Guatemala: A Guide To The Colourful Sawdust Carpets
A guide to flores guatemala: why i loved this maya town.
Some of the links on this site are affiliate links. This means that if you click through and make a purchase, I will earn a small commission at no additional cost to you. Passport & Pixels is a participant in the Amazon Services LLC Associates Program. As an Amazon Associate I earn from qualifying purchases.
- Anniversaries
- Baby Showers
- Cards and Stationery
- Father's Day
Photo Books
Wedding invitations, relive your adventures with travel photo books.
Written by Shutterfly Community Last Updated: Nov 28, 2023
Shop Trending Categories
Canvas Prints

Graduation Announcements
Why shutterfly is your best choice for travel photo books.

When it comes to cherishing your travel memories, Shutterfly is the perfect choice for your travel photo books. With our dedication to quality and an array of customization options, you can craft a unique travel photo book that truly encapsulates your adventures.
One of the primary reasons to opt for Shutterfly is our outstanding printing and binding quality. We believe that your travel photos deserve the best treatment, so we use premium materials and cutting-edge printing techniques to ensure vibrant colors and crisp details on every page of your photo book. Our robust binding ensures that your travel memories will stand the test of time.
Not only do we offer superior quality, but we also provide a wide range of customization options to make your vacation photo book truly unique. With Shutterfly, you can select from various sizes, layouts, and cover options to craft a photo album that perfectly mirrors your personal style. Whether you favor a traditional design or a more contemporary look, our customization options allow you to create a vacation photo album that caters to your preferences.
Creating your travel photo book with Shutterfly is also an effortless process, thanks to our user-friendly design tools. Our intuitive interface makes it easy for you to upload your photos, organize them in your desired sequence, and add captions or text to enhance your storytelling. You don’t need to be a design guru to craft a stunning travel photo book with Shutterfly. You can even have one of our designers do it for you with our free photo book designer service that will create your album in just 24 hours.
Insights for Crafting Magnificent Vacation Photo Albums

When it comes to cherishing your travel memories, nothing compares to a beautifully curated photo book. Whether you’re creating a keepsake for yourself or a thoughtful gift for a loved one, a travel photo album is the perfect way to showcase your adventures. Here are some insights to help you craft magnificent custom photo books that truly encapsulate your journeys.
Choosing the Best Photos
Before you start crafting your high-quality photo book, it’s crucial to carefully select the best photos from your trip. Take your time to review all of your pictures and select the ones that genuinely stand out. Look for images that provoke emotion, narrate a story, or capture the unique beauty of a location. Remember, quality trumps quantity, so be selective and choose only the best shots.
Structuring Your Story
A travel photo book isn’t just a collection of pictures; it’s a visual narrative of your journey. To create a captivating story, structure your photos in a logical and meaningful way. Begin by arranging them chronologically or by location, depending on what makes the most sense for your trip. Consider adding captions or short descriptions to provide context and bring your story to life. This will help you and your viewers relive the memories and connect with the places you visited.
Selecting the Right Layout and Themes
The layout and theme of your travel photo book play a critical role in its overall aesthetic appeal. Shutterfly offers a wide range of customizable layouts and themes that can enhance your photos and complement your travel story. Select a layout that allows your images to shine and a theme that reflects the mood and vibe of your trip. Whether you prefer a sleek and modern design or a more rustic and vintage look, Shutterfly has options to suit every style.
By following these insights for crafting magnificent travel photo albums, you can showcase your adventures in a unique and visually enchanting way. With Shutterfly’s easy-to-use design tools and superior-quality printing, you can bring your travel memories to life and create a keepsake that will be cherished for years to come.
Keeping Your Memories Alive with Travel Photo Albums

When it comes to preserving your travel memories, Shutterfly is the perfect partner. With our wide range of options and easy-to-use tools, crafting a magnificent travel photo book has never been easier. Let’s explore some of the features that make Shutterfly the best choice for preserving your travel memories.
Adding Captions and Descriptions
One of the best ways to enhance your travel photo book is by adding captions and descriptions to your photos. Shutterfly’s user-friendly interface enables you to easily add text to each image, adding context and storytelling to your travel memories. Whether you want to jot down a funny anecdote, share intriguing facts, or simply provide a location description, captions and descriptions will bring your photos to life.
Amplifying Photos with Filters and Effects
Make your travel photos even more visually enchanting by using Shutterfly’s filters and effects. With a wide range of options to select from, you can enhance the colors, add vintage vibes, or create a dreamy atmosphere. Our intuitive editing tools allow you to experiment with different filters and effects, ensuring that your book perfectly captures the mood and emotions of your journey.
Travel Photo Book Inspiration
When it comes to preserving your travel memories , there’s nothing quite like a beautifully designed photo book. Whether you’re embarking on a road trip with your besties, a family trip to Disneyland, or jetting off to your honeymoon, creating a travel photo book is the perfect way to preserve those precious moments. Let’s explore some inspiring ideas for each of these travel experiences:
Road trips are synonymous with open roads, breathtaking landscapes, and unforgettable adventures. A road trip photo book can showcase the diversity of your journey, whether it’s a coast-to-coast trip or scenic drives through national parks. Include photos of breathtaking vistas, roadside attractions, and candid shots of your travel companions.
Family Vacations
Family vacations are filled with laughter, bonding, and cherished memories. Whether you’re exploring a theme park, relaxing on a tropical beach, or visiting historical landmarks, a family vacation photo book can encapsulate the joy and togetherness. Include photos of the whole family, candid moments of fun, and snapshots of memorable activities.

International Adventures
Traveling to new countries and experiencing different cultures is an enriching adventure. An international travel photo book can showcase the beauty of foreign landscapes, vibrant cityscapes, and unique traditions. Include photos of iconic landmarks, local cuisine, and candid shots of the locals you meet along the way.
Romantic Getaways
Whether you’re celebrating an anniversary, honeymoon, or simply enjoying a romantic escape, a photo book can capture the romance and intimacy of your special moments. From sunset beach walks to candlelit dinners, include photos that evoke the love and connection you share. Don’t forget to add captions that express your heartfelt emotions.
Related Resources on Travel Photo Books
With Shutterfly’s user-friendly design tools and superior quality printing, creating a travel photo book has never been easier. Choose from a wide range of templates, layouts, and embellishments to personalize your book and bring your travel memories to life. Start creating your vacation photo book today and relive your adventures for years to come!
Additional Resources:
- Travel Keepsakes
- Free Photo Book Designer Service
- Annual Photo Books
Explore Categories

Graduation Invitations

Custom Photo Blankets

Save the Dates

Coffee Table Books
Written by Shutterfly Community | View all posts
★ Lifestyle Expert
Shutterfly Community is here to help capture and share life's most important moments. Discover thoughtful gifts, creative ideas and endless inspiration to create meaningful memories with family and friends.
Visit their Website . You can follow on Instagram and Pinterest .
- Student Successes
- My Learning
7 Best Travel Apps for Photographers in 2024 (Updated)
You can also select your interests for free access to our premium training:
Travel apps for photography can help you with anything from finding the best photo spots to editing while on the move. Here are a few of the best apps for travel photography options you need to download before exploring beautiful destinations on your bucket list.
7 Best Travel Apps for Photographers
We list travel apps for both iOS and Android. And there is a mix of free and paid apps.
7. Snapseed

- App Type : Photo editor
- Price : Free
- Platform : iOS and Android
This is one of the best photography apps out there because of its features. It lets you do anything from color grading to adding all sorts of effects to make your travel photos look professional. Snapseed may be from Google, but it also supports iPhones . That means you don’t have to worry about any compatibility issues. And the good news is that all the tools it offers on Android are also available on the iPhone. Like any other editing app , Snapseed has all the basic tools you need, from adjusting exposure to correcting the white balance . But what differentiates it from the rest is the plethora of effects that it features. For instance, it has dozens of presets that let you create anything from retro film effects to classic black and white images . It also has advanced editing tools such as HDR . This lets you create vivid pictures even in challenging lighting conditions. Apart from the editing tools, Snapseed also includes frames and text tools to personalize your images. Using it allows you to create scrapbook-style images by adding borders and captions .
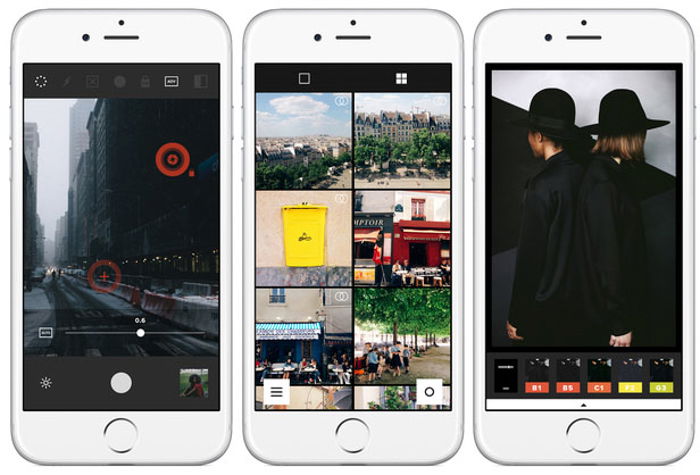
- Price: Free but has in-app purchases
While traveling, you don’t want to spend too much time on your phone editing your images. That’s why VSCO is one of the best apps for photographers because it’s so easy to use. Unlike Snapseed, VSCO doesn’t offer a lot of tools for advanced editing. Instead, it offers a streamlined experience. It lets you add presets and tweak basic exposure settings quickly. To use VSCO, all you have to do is tap a preset you like and adjust the sliders to alter the amount of effect you like on your images. You can also use sliders to change the brightness, contrast, saturation, highlights, and other exposure parameters. VSCO’s main selling point is its ability to recreate a film look . Its presets are based on real film stocks, making the result authentic. Apart from basic adjustments, you can also add fade and grain, among other effects, to help you customize the vintage style of your photo.
5. Pro HDR X (Discontinued)
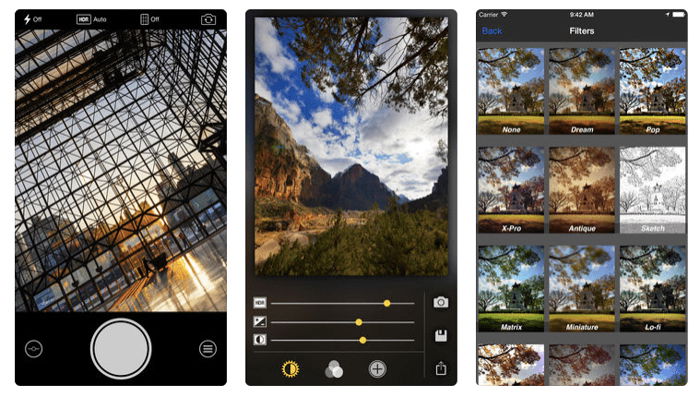
- App Type : HDR ( high dynamic range ) camera and editor
- Price : $1.99
When you’re doing travel photography, a big chunk of photos are landscapes. And Pro HDR X is what you’ll need to make your images look more vivid and alive. HDR, or High Dynamic Range, is a technical term that describes the ability of an image to faithfully display shadows and highlights. Your phone cannot accurately capture the darkest and brightest elements, especially in bad lighting conditions. That’s why you’ll need Pro HDR X to make calibrations and ensure that your final image has rich blacks and bright whites. To create vivid landscapes, Pro HDR X captures three images with different exposures. It then automatically combines those pictures into one that has all the correct shadows and highlights. Just remember to only use Pro HDR X for static shots, preferably on a tripod . If you include moving subjects in your frame, they’ll end up blurry since the app sandwiches the three photos it takes into one image.
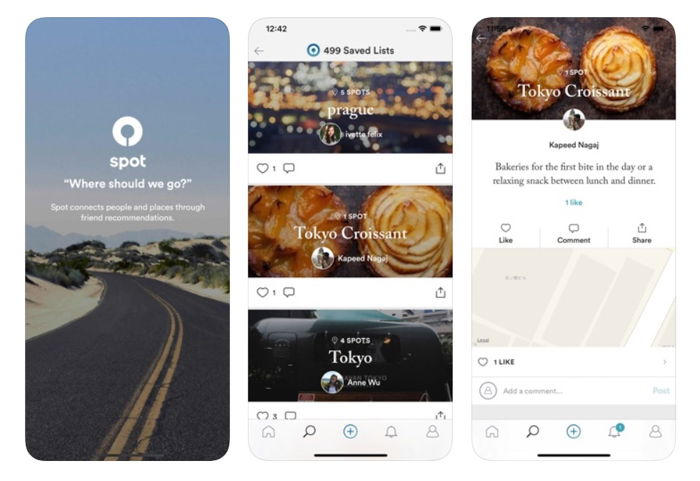
- App Type : Photo sharing and social media
Looking for the best locations when traveling can be intimidating, even for veteran travelers. When you’re in a place you haven’t been, it’s easy to get lost and miss the beautiful gems you want to capture. Spot helps you locate picturesque destinations while traveling. Consider it a social media platform where photographers can share the local spots they discover in the areas they visit. Apart from featuring well-known destinations such as Paris , Spot showcases places that other people may not know about at all. This cool app even has maps to help you locate where the photos were shot. It’s for planning your shoots, especially if you want to include unique places in your portfolio . Spot also lets you share the places you discovered on your travels. When you upload your photos to the app, you get to add locations and even include tips to help your fellow photographers track the exact spot where you took the pictures.
3. Citymapper
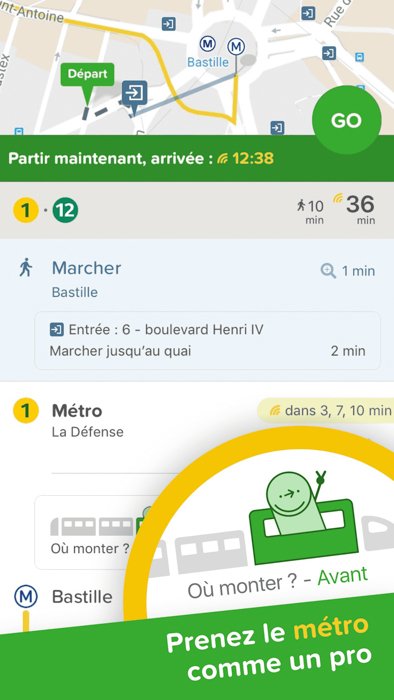
- App Type : GPS
When you’re doing travel photography, your ability to navigate places is just as crucial as your ability to take pictures. Knowing how to get there in the quickest way possible allows you to cover more areas. You can always use Google Maps to help you figure out where to go. But it doesn’t have all the information you need to get there. Citymapper shows you everything from routes to various transportation options to reach your destination. One of the biggest features of Citymapper is that it shows you the nearest train and bus stations. And it guides you on how to get there. It even shows the arrival and departure times, so you don’t miss your bus or train. Citymapper is available in major cities from Asia to Europe . The only catch is that it won’t be much use if you happen to be in lesser-known destinations. But if you happen to find yourself shooting around New York or Paris , this app is definitely for you.
2. PhotoPills
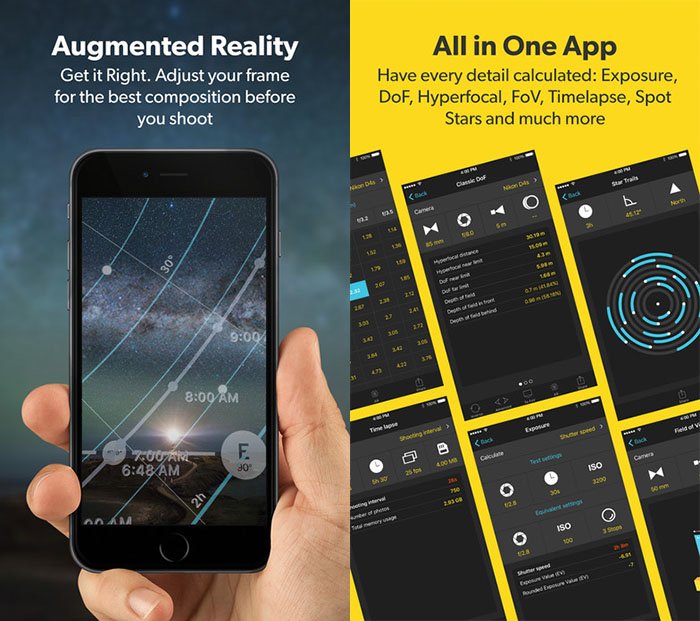
- App Type : Sun and moon tracker, photography assistant, and calculator
- Price : $10.99
Think of PhotoPills as your photography instructor and assistant. It has all the tools you may need, from taking photos of the stars to calculating your depth of field . One of its main features is the sun/moon/ star tracker . It helps you figure out where the sun or the moon will be at your location at any time of the day. If you want to know where the moon will rise and set, you have to get your phone out. What’s great about PhotoPills is that it uses augmented reality to show you where the sun or moon will be in a real environment. Even if you use the app in the middle of the day, you can see a digital rendition of the moon on your screen like it’s there. PhotoPills is also perfect for tracking the Milky Way . You can use it to figure out its location so that when the night comes, you can go to the exact spot where you expect it to appear. Apart from the tracker, it also has calculators for DOF, FOV, Hyperfocal Table, Long Exposures , Time Lapse and Star Trails . So if you don’t like fumbling around to get your settings correct, you’ll find this app useful.
1. Weatherbug
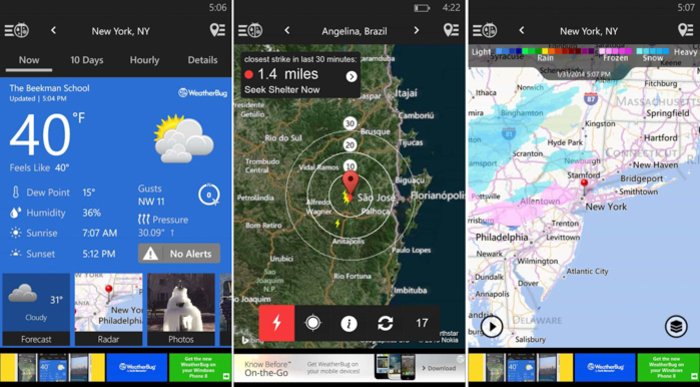
Weatherbug isn’t exactly photography-related. But you’ll find yourself using it a lot, especially in places with unpredictable weather. One of the best reasons to use it is that it’s free. And it offers a forecast for up to ten days. That means it’s perfect for helping plan your itinerary for more than a week in advance. Another advantage of using Weatherbug is that it has 18 weather maps. They include wind, temperature, and lighting models, among others. And it even has a Doppler radar that shows real-time snapshots of what’s going on without resorting to news updates. But what truly makes Weatherbug indispensable to photographers is that it features weather widgets that you can customize according to your needs. For instance, you can activate traffic updates in your area if you’re in a busy tourist spot. You can even keep track of pollen count and air quality if you are allergic or have a health condition.
When doing travel photography, you must have all the tools to capture the places you visit. And having good photography apps on your phone would allow you to do just about anything, even when you move around a lot. You should also include non-photography travel apps that you’ll find useful when navigating new places. Remember that as a travel photographer , you need to be as skilled at looking for the perfect destinations as you are with your camera. Check out our Next Stop: Travel Photography e-book to learn how to take print-worthy photos!
Update April 12, 2024
Information for u.s. citizens in the middle east.
- Travel Advisories |
- Contact Us |
- MyTravelGov |
Find U.S. Embassies & Consulates
Travel.state.gov, congressional liaison, special issuance agency, u.s. passports, international travel, intercountry adoption, international parental child abduction, records and authentications, popular links, travel advisories, mytravelgov, stay connected, legal resources, legal information, info for u.s. law enforcement, replace or certify documents.
Get a Passport
Renew or Replace a Passport
Get My Passport Fast
Prepare to Apply
Passport Help
Legal Matters
Get or replace a passport
Prepare to apply, rush my passport, after i apply, passport news and alerts, special passport acceptance fairs, processing times.
Routine: 6-8 weeks*
Expedited: 2-3 weeks and an extra $60*
*Consider the total time it will take to get a passport when you are booking travel. Processing times only include the time your application is at a passport agency or center.
- It may take up to 2 weeks for applications to arrive at a passport agency or center. It may take up to 2 weeks for you to receive a completed passport after we print it.
- Processing times + mailing times = total time to get a passport
Urgent Travel: See our Get my Passport Fast page.
External Link
You are about to leave travel.state.gov for an external website that is not maintained by the U.S. Department of State.
Links to external websites are provided as a convenience and should not be construed as an endorsement by the U.S. Department of State of the views or products contained therein. If you wish to remain on travel.state.gov, click the "cancel" message.
You are about to visit:
The best photo magazine subscription deals in 2024
Get a great camera magazine mailed to you every month - and see your photography improve!
Getting a photography magazine is a great way to help improve your picture-taking knowledge, and to keep up with the latest kit and trends. The publishers of DigitalCameraWorld.com have four monthly magazines aimed at photographers – all with their unique spin on the world of digital imaging.
With this huge range of titles on offer, there's something for everyone, regardless of skill level and camera system - and we can send the magazine direct to your door as soon as it is printed (or you can go digital, and have it sent to your phone, tablet or computer for you to read electronically, if you want to go paper-free).
There are plenty of other offers available too, from print and digital magazine subscriptions to bookazines , binders and back issues . Digital editions of the magazines are particularly cost-effective for those living outside the UK – and will get to you quicker.
With most titles publishing 13 issues per year, a magazine subscription really is the gift that keeps on giving – whether for yourself, partner, friend of family member.
The photo magazines below are sister brands to Digital Camera World, meaning they're staffed by experts in their field, and deliver a great mix of tutorials, tips, buying advice, reviews and inspiration in every issue.
The best photography magazine subscription deals
Digital Camera is the definitive guide to digital photography. Every issue comes packed with expert advice, in-depth tutorials, free gifts and inspirational images. Digital Camera has the sole aim of helping you become a better photographer.
PhotoPlus: The Canon Magazine is the world's only monthly newsstand title that's 100% devoted to Canon, so you can be sure the magazine is completely relevant to your system. Every issue comes with downloadable video tutorials too.
N-Photo is 100% Nikon-devoted, and 100% editorially independent. If you're a Nikon owner and want to improve your images, get the best buying advice and reviews, see some of the world's best Nikon photography, N-Photo is the title for you.
Whether you're a part-time amateur or a full-time professional, Digital Photographer aims to challenge and motivate you to take your best shots. Our in-depth features are designed to take your photography to the next level - and this is a great gift for anyone who wants more inspiration for their picture-taking.
Best design magazine deals
As well as our photo magazines, we also publish two great magazines for digital creatives…

ImagineFX is the leading title for digital artists. Its 13 issues per year offer exclusive inspiration, advice and interviews with some of the world's leading artists, and as a subscriber, you'll get access to every single issue, direct to your door or device!
3D World is an unmissable magazine for CG artists, or anyone interested in the world of VFX. It offers unrivalled behind-the-scenes access into the making of films, plus top tips and in-depth tutorials.
Best books on photography 50 best camera accessories, gadgets and gifts for photographers
Thank you for reading 5 articles this month* Join now for unlimited access
Enjoy your first month for just £1 / $1 / €1
*Read 5 free articles per month without a subscription
Join now for unlimited access
Try first month for just £1 / $1 / €1
Get the Digital Camera World Newsletter
The best camera deals, reviews, product advice, and unmissable photography news, direct to your inbox!
Chris George has worked on Digital Camera World since its launch in 2017. He has been writing about photography, mobile phones, video making and technology for over 30 years – and has edited numerous magazines including PhotoPlus, N-Photo, Digital Camera, Video Camera, and Professional Photography.
His first serious camera was the iconic Olympus OM10, with which he won the title of Young Photographer of the Year - long before the advent of autofocus and memory cards. Today he uses a Nikon D800, a Fujifilm X-T1, a Sony A7, and his iPhone 15 Pro Max.
He has written about technology for countless publications and websites including The Sunday Times Magazine, The Daily Telegraph, Dorling Kindersley, What Cellphone, T3 and Techradar.
Related articles

IMAGES
VIDEO
COMMENTS
Submit & Proceed with Application Crop Manually Close Tutorial Photo Requirements Download image to your device
Auto-crop the photo to fit the US visa size (free online tool) Full document requirements for photos; ... Official photo requirements for US visa travel.state.gov (.PDF) 2inch 2inch 1.29inch 1.18inch. Source: official website travel.state.gov Get photo for: US Visa 2x2 inch (600x600 px, 51x51mm) Step 1/4. Government Photo Compliance Guaranteed ...
Prepare Photo for Submission. Please refer to the Department of State's image requirements. To assist in preparing your image, you may click on the icon to the right to use a Department of State photo cropping tool. You may use this tool to resize, rotate, and/or crop a photo on your computer to meet the Department of State's head-size and ...
TSG Photo Tool is a web-based application that allows you to upload and edit your photo for U.S. Department of State applications, such as visas and passports. You can use this tool to adjust the size, orientation, and quality of your photo to meet the specific requirements. TSG Photo Tool is easy, fast, and secure.
Mylio Photos is an app that makes it easy to save, store, edit, organize, and protect all your travel photos — as well as important documents, like passport scans and visa applications. It's pretty new and I wish I had found it sooner because it would have saved a lot of time. But, hopefully, it can do that for you!
8. Afterlight. One of the most straightforward apps for those wanting to quickly adjust or add a filter, upload a photo or take one with Afterlight's camera. Then, choose from several editing tools ranging from basic to advanced, or select one of the 10 free filter options.
The best apps for travel photography editing. Sharing photos on social media is all part of today's travel culture. Naturally, these photos must look stellar, so editing must be done on the fly. Any rundown of the best apps for travel photography should include a selection of post-processing apps. Here are our picks: 1. VSCO (for iOS and Android)
It makes correct photos and fixes background. Make a USA visa photo in 1 click for both online (DS-160, DS-260) and offline visa applications forms and get a fully compliant professional result: a 2x2 inch (51x51 mm, 5x5 cm, 600x600 pixel) image with white background no more than 240KB that meets all requirements.
YouCam Perfect, available for free on iOS and Android, is a photo editor app with various editing tools and filters to assist you in creating the perfect travel photos. The YouCam Perfect app comes with beautifying tools, including lipstick options, eyeliner, eyeshadow options, and smooth skin effects to help you get the perfect travel selfies. 3.
Price: Free Trial // $4.99 monthly for Premium (to unlock all the tools) Instasize is an all-in-one photo and video editing app for creative photographers. Basic stories are out - take your creativity to the next level and make one-of-a-kind stories and static images to showcase your unique style! With over 130 filters for photo and video, it ...
Digital Image Head Size Template. The top of the head, including the hair, to the bottom of the chin must be between 50% and 69% of the image's total height. The eye height (measured from the bottom of the image to the level of the eyes) should be between 56% and 69% of the image's height. Image pixel dimensions must be in a square aspect ratio ...
Photos and Fingerprints. Applicants for nonimmigrant visas at the U.S. Embassy are required to upload an electronic photograph as part of completing and submitting their DS-160 application form on the www.state.gov website. You should also carry a copy of your photograph to the Embassy on the day of your interview. 7 Steps to Successful Photo.
4 Tips for the Capturing Viral Travel Photography. Traveling to a new place is exciting and well worth documenting. Follow these tips to enhance your travel photography and editing skills. Later, we will take one of our travel photos and show you a few of BeFunky's Photo Editor tools that are perfect for travel photography. 1.
Auto-crop the photo to fit the US passport size (free online tool) Full document requirements for photos; ... Official photo requirements for US passport travel.state.gov (.PDF) 2inch 2inch 1.29inch 1.18inch. Source: official website travel.state.gov Get photo for: US Passport 2x2 inch (51x51 mm) Step 1/4. Government Photo Compliance Guaranteed ...
Travel photo editing with Adobe Creative Cloud. The core of my travel photography editing workflow is Adobe Creative Cloud. This is a suite of applications for all kinds of creative projects, from photo and video editing to graphic design, web development, animation and much more. Adobe also offers cloud-based editing and storage, fonts, stock ...
Creating your travel photo book with Shutterfly is also an effortless process, thanks to our user-friendly design tools. Our intuitive interface makes it easy for you to upload your photos, organize them in your desired sequence, and add captions or text to enhance your storytelling. You don't need to be a design guru to craft a stunning ...
And there is a mix of free and paid apps. 7. Snapseed. App Type: Photo editor. Price: Free. Platform: iOS and Android. This is one of the best photography apps out there because of its features. It lets you do anything from color grading to adding all sorts of effects to make your travel photos look professional.
Routine: 6-8 weeks* Expedited: 2-3 weeks and an extra $60* *Consider the total time it will take to get a passport when you are booking travel. Processing times only include the time your application is at a passport agency or center.. It may take up to 2 weeks for applications to arrive at a passport agency or center. It may take up to 2 weeks for you to receive a completed passport after we ...
Chris George has worked on Digital Camera World since its launch in 2017. He has been writing about photography, mobile phones, video making and technology for over 30 years - and has edited numerous magazines including PhotoPlus, N-Photo, Digital Camera, Video Camera, and Professional Photography.