How to Reset Safari on iPhone, iPad and Mac

Safari no longer has a reset button. This means that if you want Safari to return to its default settings, you would have to find a workaround.
This workaround will require that you take multiple steps to remove the history, clear the cache and disable extensions and plugins, and other aspects of the browser.
In this guide, we share with you how to take all these steps and effectively reset Safari to its default settings.

1. Reset Safari on iPhone and iPad
To reset Safari settings on your iPhone or iPad, follow these simple steps:
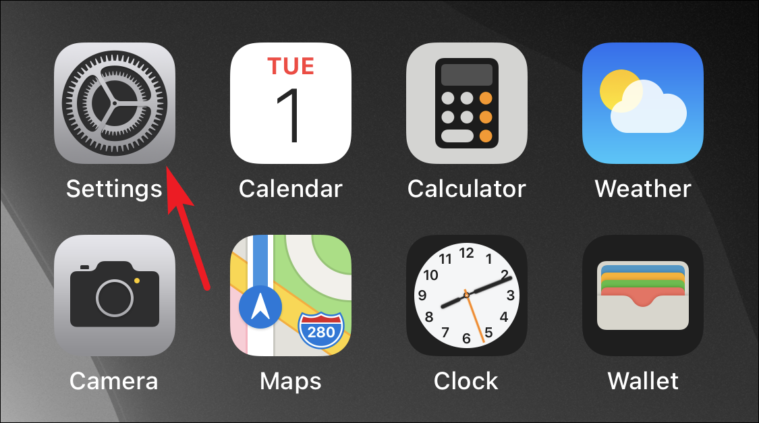
Step 1: Open the Settings from the Home screen.
Step 2: Scroll down and tap “Safari”.
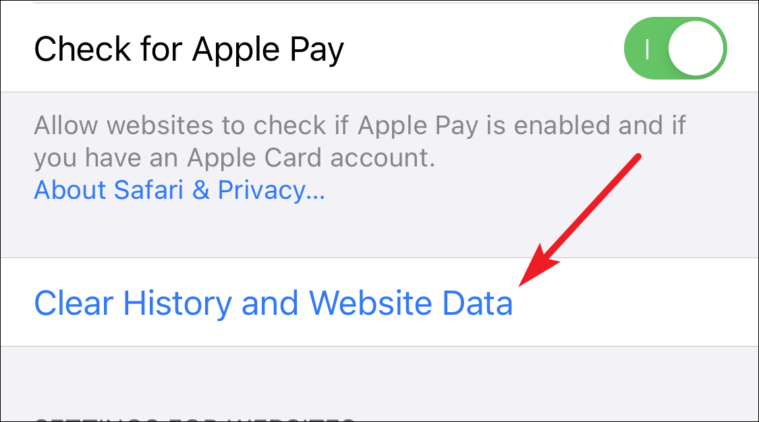
Step 3: Then tap “Clear History and Website Data”.
Step 4: Tap “Clear History and Data” again to confirm.

2. Reset Safari on Mac
2.1. remove browser history.
While your browser history can help you auto-complete URLS and other items while browsing, it is often a good idea to clear your browser history for privacy reasons. Deleting your browser history resets the browser by deleting the following:
- All webpage history
- The sites that aren’t marked as permanent
- All cookies and website data
- A list of all the downloads
- Recent searches
- Any sites added to Quick Website Search
To remove the browser history, follow these simple steps:
Step 1: Open Safari and then select “History > Clear History and Website Data”. Then click “Clear history” in the popup that appears. You can also click on Safari > Clear History to do it.
Step 2: If you would like to clear the history for a particular period of time, then you must select a value in the “Clear” dropdown menu.
Step 3: If you want to clear a particular website, go to History > Show History and then select the website before clicking “Delete”.
2.2. Clear Your Safari Cache
You can also clear your Safari cache. When you do this, Safari will forget any websites stored and reloads each page you visit. Here’s how to do it:
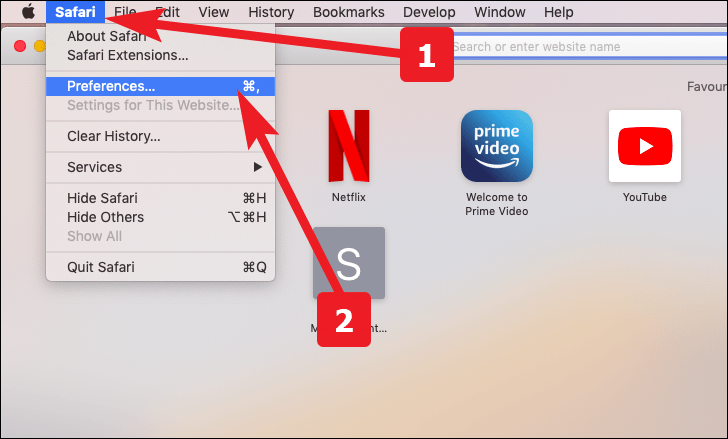
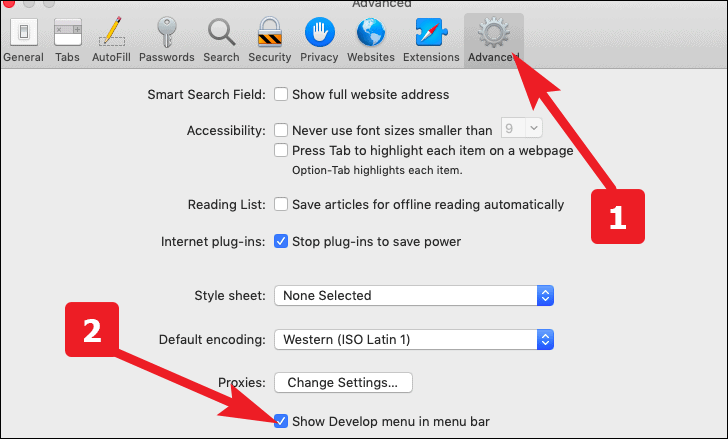
Step 1: Go to Safari > Preferences > Advanced and then click on “Show Develop menu in menu bar”.
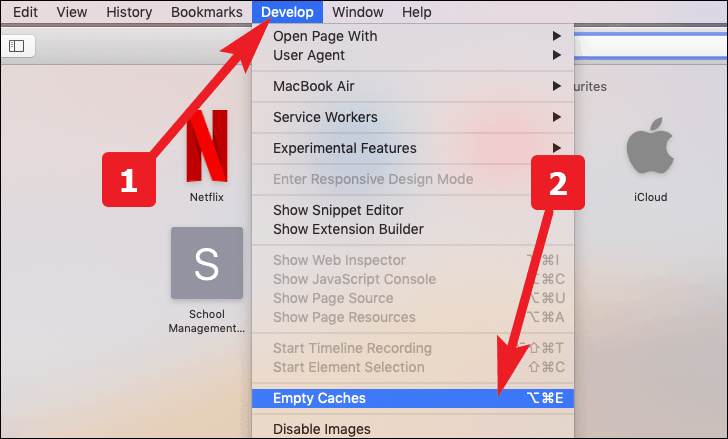
Step 2: Go back to the browser window and then click “Develop > Empty Caches.
2.3. Turn Off Plugins within Safari
To turn off the plugins within Safari, follow these simple steps:
Step 1: Open the Preferences window in Safari and then click on the “Websites” tab.
Step 2: Uncheck the box next to each plugin to turn them off.
2.4. Delete Extensions
Finally, you may want to disable or delete the extension. Disabling them is much easier than deleting them since all you have to do is go to Safari > Preferences > Website and deselect the plugins you no longer want to use.
But if you want to delete them completely, follow these simple steps:
Step 1: Close Safari.
Step 2: Go to this path: “/Library/Internet Plug-Ins/” or “~/Library/Internet Plug-Ins/”.
Step 3: Use Cmd-A to select all plugins and then press “Delete” to remove them.
- How to Fix Face ID Not Working on Banking Apps
- Can’t Get Face ID to Work? 9 Ways to Fix ‘Move iPhone Lower’
- Soundmap Not Loading? How to Fix Loading Issues (NEW)
- What to Do Next If iPhone Face ID Not Working After Water Damage
- How to Find Lost/Stolen iPhone without Apple ID Signed In
Leave a Comment Cancel reply
Your email address will not be published. Required fields are marked *
Save my name, email, and website in this browser for the next time I comment.
- Full Guide for Xiaomi Recovery Mode
- [FAQ] How To Turn Off Samsung Without Password?
- How to Send Fake Location on WhatsApp for iOS and Android
- Solved! iPhone & iPad Says Incorrect WiFi Password but It Correct!
- How to Make Certain Contacts Ring on Silent Android 2024

How to Reset Safari to Default Settings on Mac and iPhone
Scratching your head to reset Safari to default settings? Don't know where to begin? Well don't worry, we have got your back!

Safari is an exceptional browser and there are no two ways about it. With Apple leading the charge against ad trackers on the internet with its anti-tracking policy, Safari has been a safe haven for users who want to protect their privacy.
That being said, while Safari might win the race when it comes to protecting its users but more often than not is not able to match up to its competitors in the game of extensible features.
However, many of us are extensively using safari on a daily basis. Some want to hold on to that last ounce of privacy on the net, and others do not want to install a 3rd party browser on their Macs or iPhones.
Whatever may be your case for using Safari. One thing is for sure, with years of use, Safari accumulates tons and tons of website data which might slow down your browser or in worst cases, your devices as well.
Reset Safari to Default Settings on Mac
To everybody’s shock, there’s no ‘Reset Safari’ button on any of the apple devices. As a result, we are bound to perform a list of steps not every user might be comfortable with. Anyways, resetting Safari consists of resetting 3 components :
- Website Data
We are going to reset the components on a first-come-first-serve basis. So let’s get started.
Reset History
First, Launch Safari from the Launchpad or from dock of your Mac.

Next, click on the ‘History’ tab from the menu bar. Next, click on the ‘Clear History…’ option from the list.

After that, choose ‘all history’ option from the drop-down. Then, click on ‘Clear History’ button.

Reset Website Data
First, Launch Safari from the Launchpad or from the dock of you Mac.

Next, click on the ‘Safari’ tab present on the menu bar. Now, click on the ‘Preferences’ option from the list.

After that, go to the ‘Privacy’ pane and click on ‘Manage Website Data’ button.

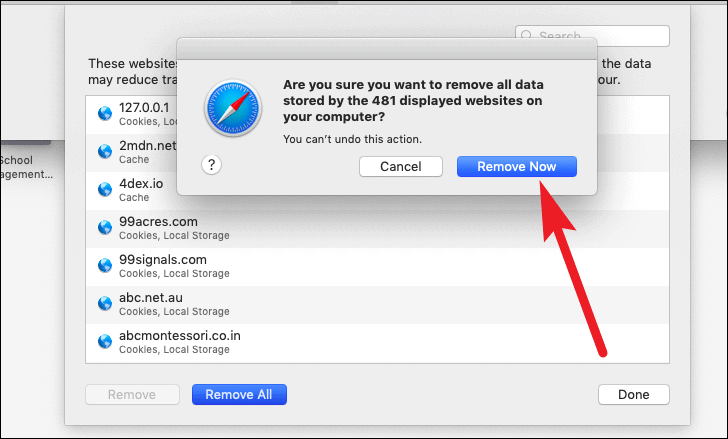
Now, click on ‘Remove All’ button from the bottom left corner of the pane.

Next, click on ‘Remove Now’ button to confirm.
Reset Cache

Next, click on the ‘Safari’ tab from the menu bar. Then, click on the ‘Preferences’ option from the list.
After that, go to the ‘Advanced’ pane. Now, check the ‘Show Develop menu in the menu bar’ option.
As a result, the ‘Develop’ tab would now be visible in the menu bar. Click on it, and then choose the ‘Empty Caches’ option from the list.
Reset Safari to Default Settings on iPhone
Resetting safari is pretty straight forward on iPhone and requires just couple of steps.
Launch the ‘Settings’ app on your iPhone from the home screen.
Next, scroll down and locate ‘Safari’ from the list and tap on it.

After that, scroll down till you find the ‘Clear History and Website Data’ option on the screen and then tap on it, once located.
Now, tap ‘Clear History and Data’ from the pop-up alert menu to confirm.

8 best AI image generators in 2024

11 Ways GPT-4o is a Game Changer

How to Use Gemini Code Assist in VS Code
Get all the latest posts delivered straight to your inbox., member discussion.

What is Call Arc in Arc Search and how can you access it

How to use AirPlay on Windows

How to Get Google's Circle to Search (Kinda) on iPhone

What Does Time Sensitive Snapchat Notification Mean and How to Turn It Off

How to Enable Advanced Tracking and Fingerprinting Protection in Safari on iPhone
- PRO Courses Guides New Tech Help Pro Expert Videos About wikiHow Pro Upgrade Sign In
- EDIT Edit this Article
- EXPLORE Tech Help Pro About Us Random Article Quizzes Request a New Article Community Dashboard This Or That Game Popular Categories Arts and Entertainment Artwork Books Movies Computers and Electronics Computers Phone Skills Technology Hacks Health Men's Health Mental Health Women's Health Relationships Dating Love Relationship Issues Hobbies and Crafts Crafts Drawing Games Education & Communication Communication Skills Personal Development Studying Personal Care and Style Fashion Hair Care Personal Hygiene Youth Personal Care School Stuff Dating All Categories Arts and Entertainment Finance and Business Home and Garden Relationship Quizzes Cars & Other Vehicles Food and Entertaining Personal Care and Style Sports and Fitness Computers and Electronics Health Pets and Animals Travel Education & Communication Hobbies and Crafts Philosophy and Religion Work World Family Life Holidays and Traditions Relationships Youth
- Browse Articles
- Learn Something New
- Quizzes Hot
- This Or That Game
- Train Your Brain
- Explore More
- Support wikiHow
- About wikiHow
- Log in / Sign up
- Computers and Electronics
- Tablet Computers
How to Fix a Frozen Safari on iPad
Last Updated: May 16, 2022
This article was co-authored by Gonzalo Martinez and by wikiHow staff writer, Darlene Antonelli, MA . Gonzalo Martinez is the President of CleverTech, a tech repair business in San Jose, California founded in 2014. CleverTech LLC specializes in repairing Apple products. CleverTech pursues environmental responsibility by recycling aluminum, display assemblies, and the micro components on motherboards to reuse for future repairs. On average, they save 2 lbs - 3 lbs more electronic waste daily than the average computer repair store. This article has been viewed 83,473 times.
Has Safari frozen on your iPad? When Safari freezes, you can try closing the app and loading it again. But, if your iPad is completely frozen, resetting is usually the quickest way to get everything working properly again. If you are experiencing consistent freezes, you can adjust some of Safari's settings to try to avoid future crashes. This wikiHow article gives you some troubleshooting steps to fix a frozen Safari browser on iPad.
Restart Your iPad

- Finally, press and hold the Top button until the Apple logo appears.
- If your iPad has a Home button, press and hold the Home and Top buttons at the same time until the Apple logo appears. [1] X Research source
- Restarting your iPad is a quick fix for many troubleshooting issues, but if Safari keeps freezing, continue to try the other steps.
Restart Safari

- If your iPad has a Home button, press it quickly twice and it'll show you a screen of the apps running in the background. Swipe on Safari to close it.

- If you're noticing that Safari is still freezing or lagging, continue on to the next troubleshooting steps.
Check for Updates

- If you noticed Safari still freezing or lagging after you updated iOS or if you didn't have the option to, continue on to the next troubleshooting steps.
Clear Your Safari Data

Close Unused Tabs

Turn Off Autofill

Disable Safari Suggestions

Disable iCloud Syncing

- Your Safari bookmarks, tabs, and history will no longer sync, but neither will any corrupted Safari files.
Turn off JavaScript

Close All Background Apps

- Swipe an app to close it.
Clear Your iPad's Storage Space

Avoid Specific Websites That Make Safari Freeze

Try A Different Browser

Make An Apple Bar Genius Appointment

Expert Q&A

You Might Also Like

- ↑ https://support.apple.com/guide/ipad/force-restart-ipad-ipad9955c007/ipados
- ↑ https://www.reddit.com/r/applehelp/comments/smepz4/safari_and_icloud_apps_freezing_on_ios_devices/
- ↑ https://discussions.apple.com/thread/8359454
About This Article

- Send fan mail to authors
Reader Success Stories
Aug 30, 2016
Is this article up to date?
Jan 1, 2018

Featured Articles

Trending Articles

Watch Articles

- Terms of Use
- Privacy Policy
- Do Not Sell or Share My Info
- Not Selling Info
wikiHow Tech Help Pro:
Level up your tech skills and stay ahead of the curve
How to reset the Safari browser on your iPhone in 2 different ways
- You can reset Safari on an iPhone by clearing cookies and erasing your browsing history.
- There are two ways to reset your Safari data: through the Safari app itself, and through the Settings app.
- Both methods will let your clear both your browsing history and cookies.
If you're looking to clear your Safari data, simply removing your Frequently Visited sites isn't going to address privacy concerns if you have cookies stored, for instance.
Fortunately, it's easy to reset all your browsing history and settings. Here are two ways to do it, one directly through Safari, and the other through your iPhone's Settings.
How to reset Safari on iPhone through the browser
1. At the bottom of an open Safari page, tap the book icon .
2. At the top of the menu that opens, tap the clock icon to open your history.
3. Tap Clear at the bottom of the page. A prompt menu will open to warn that you'll clear your history, cookies, and other data over a selected time period. Tap All time to reset your browser.
How to reset Safari on iPhone through the Settings app
1. Open the Settings app on your iPhone.
2. Search for or scroll down to Safari and open it.
3. Tap Clear History and Website Data in blue about halfway down the page.
4. A prompt menu will pop up. Tap Clear History and Data and wait a few moments while the iPhone processes your request. Once it does, all your data will have been cleared.
- Main content
- Irresistible Tech Gifts for That Special Dad
- Killer Smartphone Deals We Love
How to Manage Browsing History on Safari for iPad
Protect your privacy on your mobile device
:max_bytes(150000):strip_icc():format(webp)/ScottOrgera-f7aca23cc84a4ea9a3f9e2ebd93bd690.jpg "reset safari on ipad")
What to Know
- Open Safari . Select the Bookmarks icon.
- Choose the Clock icon to open the History pane displaying the list of sites visited during the past month.
- Select Clear and indicate which entries to delete using one of the four options: The last hour, Today, Today and yesterday, and All Time.
This article explains how to manage browsing history on Safari for iPad, including how to view and delete the iPad Safari history, cookies, and stored website data. This article applies to all iPad devices with iOS 10 or iPadOS 13 or later. The process for managing browser history in Safari on an iPhone is slightly different.
How to View and Delete Your iPad Browser History in Safari
Reviewing your iPad browser history is a straightforward process. Safari stores a log of websites you visit along with other related components, such as the cache and cookies. These elements enhance your browsing experience, but you may want to delete your browsing history for privacy reasons.
You can manage your web browsing history on the iPad in two ways. The easiest option is to do it directly in Safari:
Open the Safari web browser.
Select the Bookmarks icon (it looks like an open book) at the top of the screen.
Select the clock icon to open the History pane. A list of sites visited over the past month appears.
To delete a single website from the browser history, swipe left on its name.
Select Clear at the bottom of the panel to reveal four options: The last hour, Today, Today and yesterday, and All time.
Select your preferred option to remove the browsing history from your iPad and all connected iCloud devices.
How to Delete History and Cookies From the iPad Settings App
Deleting the browser history through Safari doesn't remove all the data it stores. For a thorough cleaning, go to the iPad Settings app. You can also delete the browsing history and cookies from the Settings app. Clearing the history this way deletes everything Safari saved.
Select the gear icon on the Home screen to open the iPad Settings .
Scroll down and select Safari .
Scroll through the list of settings and select Clear History and Website Data to delete the browsing history, cookies, and other cached website data.
Select Clear to confirm, or select Cancel to return to the Safari settings without removing any data.
How to Delete Stored Website Data on iPad
Safari sometimes stores additional website data on top of a list of web pages you visited. For example, it can save passwords and preferences for frequently visited sites. If you want to delete this data but don't want to clear the browsing history or cookies, selectively delete specific data saved by Safari using the iPad Settings app.
Open the iPad Settings app.
Scroll to the bottom of the Safari settings screen and select Advanced .
Select Website Data to display a breakdown of the data each website currently stores on the iPad.
Select Show All Sites to display the expanded list if necessary.
Select Remove All Website Data at the bottom of the screen to delete the site data at once, or swipe left on individual items to clear items one at a time.
Get the Latest Tech News Delivered Every Day
- How to Manage Your Browsing History in Safari
- How to Clear Private Data, Caches, and Cookies on Mac
- How to Clear Search History on iPhone
- How to Delete and Clear Cookies on an iPhone
- Managing History and Other Private Data in Safari for macOS
- How to Clear Your Search Bar History
- How to Clear Cookies on iPad
- How to Manage History and Browsing Data on iPhone
- How to Reset Safari to Default Settings
- Manage Browsing History and Other Private Data in IE 11
- How to Clear Cache on an iPad
- Manage Browsing History and Private Data in Firefox
- How to Control iPhone Safari Settings and Security
- How to Delete Cookies in Every Major Browser
- How to Clear the Browsing History in Chrome for iPad
- How to Change Settings in iOS Dolphin

How to view and clear your web browsing history in Safari on iPhone or iPad
Clearing your browsing history on iPhone and iPad in Safari has been a straightforward affair for years now.
Sometimes you want to clear your history to get rid of bloat and streamline your browsing experience. Other times, you're trying to hide a gift purchase from a loved one.
Apple makes it very easy to clear your browsing history on both the iPhone and iPad and we're here to show you how. Here's how you can make a fresh start in Safari and debloat your web browsing experience.
What you'll need
On the latest models, web browsing is smoother than ever before thanks to ProMotion in the iPhone 15 Pro and faster chipsets like the M2 found in the iPad Air 6 . If you're looking for a new Apple device, we highly recommend one of the following:
iPhone 15 Pro $999 at Apple
Grab the best iPhone available right now starting from $999. With a gorgeous titanium finish and the most powerful chip ever in an iPhone, you won't be disappointed with the 15 Pro. View Deal
iPad Air 6 13-inch | $799 $754 at Amazon
With an M2 chip and a 13-inch screen option, the new iPad Air 6 is one of the best iPads available right now. Normally $799, you can pick up the 13-inch model for nearly $50 off at the moment — don't miss out. View Deal
How to find your web-browsing history
Viewing your web history in iOS 17 and iPadOS 17 is very easy to do, here's how:
- In Safari, tap the Bookmarks button in the toolbar that's below the address bar.
- Tap the History icon in the upper right corner. Here, you can view your entire web history.
- Use the History search bar to find previously viewed pages.
How to clear your web browsing history
If the time calls to wipe most or all of your web browsing history in Safari, here's how to do it on both iPhone and iPad.
To note, the below steps will be the same if you attempt to wipe your web browsing history on an iPhone 15 Pro Max or an iPad Mini 6 , all Apple devices require the same steps.
- In Safari, tap the Bookmarks button.
- Select the History icon in the upper right corner.
- Tap Clear and select how much history you'd like to clear: the last hour, the last day, 48 hours' worth, or all recorded history.
One more thing… A feature no one talks about
Privacy on the web matters more than ever in these modern times. Websites store the pages you click on, especially when you sign into a page that can contain personal information about you.
It's great to have a feature like this in Safari — but it would be good to have this automated in iOS 18 . If Apple's web browser could automatically clear history after 24 hours it would be very useful, as you wouldn't leave a trail behind.
Regardless, it's still a good feature, and one you should use every week.

Resetting Safari on an iPad
If you feel that you are not experiencing the optimal experience of FamilySearch on your iPad, you can reset Safari to refresh your browser. Steps
- Open the Settings app on your iPad.
- Select Safari , and tap Clear History and Website Data .
- On the alert that appears, tap Clear .
To enjoy the full benefits of using FamilySearch.org on your iPad, be sure your iPad is not set to private browsing. The maximum benefits for use of FamilySearch on an iPad are included in the Family Tree and Memories apps.
How-To Geek
How to clear your history in any browser.
Looking to delete your browsing history?
Quick Links
Clear browsing history in google chrome for desktop, clear google chrome browsing history on android, clear chrome browsing history on iphone or ipad, clear browsing history in safari on iphone and ipad, clear browsing history in mozilla firefox, clear browsing history in microsoft edge, clear browsing history in safari on a mac, key takeaways.
Press Ctrl+Shift+Delete to clear your browsing history on a Windows PC, or press Command+Shift+Delete on a Mac. Check your browser's settings to find this option on a mobile device.
All web browsers remember a list of the web pages you've visited. You can delete this list at any time, clearing your browsing history and erasing the tracks stored on your computer, smartphone, or tablet. Each browser has its own separate history, so you'll need to clear the history in multiple places if you've used more than one browser.
In the future, you can use private browsing mode to browse sensitive websites without your browser saving any history. You won't have to clear your history afterward.
To clear your browsing history in Chrome , on Windows , Mac , or Linux , click the three-dot menu icon found in the top-right corner of the browser, hover your mouse cursor over "More Tools," and choose "Clear Browsing Data." You can also press Ctrl+Shift+Delete to open this screen on Windows, or press Command+Shift+Delete on a Mac.
On a Mac, the backspace key is labeled "Delete." Pressing the Delete key beside the Home and Edit keys doesn't work.
To delete your entire browsing history, select from "the beginning of time" in the drop-down box at the top of the screen and check the "Browsing history" option. You can also choose to clear other private data from here, including your download history, cookies, and browser cache.
To clear your browsing history in Google Chrome on Android tap the three-dot menu icon, then select "Clear Browsing History."
The default settings will clear your browsing history, cookies and site data, and your cached images and files from the last 15 minutes once you tap "Clear Data."
If you want to customize what information is removed, tap "More Options." You'll need to choose a time range that you want to delete from the drop-down list at the top of the screen. Select "from the beginning of time" to clear everything.
Ensure the "Browsing history" option is checked here and tap the "Clear Data" button. You can also choose to clear other types of personal data from here, including cookies and cached files.
To clear Chrome's history on your iPhone , or iPad , tap the three-dot menu icon, then select "Clear Browsing History." Choose what information you'd like to delete and a time range, then tap 'Clear Browsing Data.'
To clear your browsing history on Safari on an iPhone or iPad , open the Settings app and then navigate to Safari > Clear History and Website Data. Tap the "Clear History and Data" option to confirm your choice.
This button will clear all sensitive browsing data, including your cookies and cache.
To clear your browsing history in Firefox on the desktop, click the three-line menu icon in the top-right corner of the browser and then navigate to History > Clear Recent History. You can also press Ctrl+Shift+Delete to open this tool on Windows or press Command+Shift+Delete on a Mac.
To delete your entire browsing history, select "Everything" at the top of the window and check "Browsing & Download History" in the detailed list of items to clear. You can also choose to clear other types of private data from here, including your cookies, browser cache, offline website data, and website-specific preferences.
To clear your browsing history in Microsoft Edge , click the Three-Dot Menu > History, then select the trash can icon. You can also press Ctrl+Shift+Delete to open these options on Windows or Command+Shift+Delete on Mac.
Ensure the "Browsing History" box is checked and click "Clear." You can also choose to clear other types of private data from here, including your download history, cached data, cookies, and tabs you've set aside . Just check the type of data you want to delete and click the "Clear Now" button.
To clear your browsing history in Safari on a Mac, click History > Clear History from the menu bar at the top of your screen. Select the time period you want to clear history from and click "Clear History." To clear everything, select "all history".
Safari will delete your browsing history as well as your cookies, cached files, and other browsing-related data.
If you're using another browser, you should be able to easily find a "clear browsing history" option somewhere in its menus or on its settings screen.
You are using an outdated browser. Please upgrade your browser to improve your experience.
How to use Reader Mode in Safari on iPad

Reader Mode in Safari can help to simplify your reading experience.

Whatever your reasons may be, something about a website just may not jibe with your eyes, and that is precisely where Reader Mode on Safari comes in. Reader Mode makes getting past this issue a breeze and makes reading articles on your iPad much more pleasant.
How to use Reader Mode in Safari
Actually opening up Reader Mode is very simple, and quite literally requires just two taps. With any largely text-based web page open in Safari, you need only tap on the "Aa" icon in the left-hand side of your address bar. Once that's been tapped, you'll see the option to "Show Reader." Once you've tapped "Show Reader" the web page will convert into a succinct block of text with pictures intact.

The "Show Reader" option is available on almost every primarily text-based web page. For websites like Instagram or Amazon, Reader Mode wouldn't do anything worthwhile for you even if you could enable it.
When entering Reader Mode, all the ads and suggested content from any given website will be stripped out in favor of a succinct reading experience. With that in mind, there are still some issues you can bump into. Some webpages, despite being mostly text, won't show up properly. In some instances this can be due to how the website is written, and in others it may just be that the text on the page is embedded within an image.
Another issue that can crop is multi-paged articles and how they "cooperate" with Reader Mode. For the most part, Reader Mode will only show you the first page of a multi-paged article when turned on. For these kinds of pages, you will have to turn Reader Mode on and off to progress through the article.
How to customize Reader Mode in Safari
Once you're in Reader Mode, you may find yourself wanting to make a few cosmetic adjustments. Doing so is as simple as returning to the menu you used to open Reader Mode. Once you have the menu opened up, you'll be greeted with a few key options, including:
- Adjusting the font
- Adjusting the font size
- Changing the background color
- Individual website settings

All of these options do exactly what it sounds like they would do. The individual website settings don't offer much that pertains to Reader Mode, but there is one absolutely game changing setting you can enable here.
That setting is "Use Reader Automatically." What this option will do is make it to where Safari automatically displays pages from that website in Reader Mode. Pages that can't normally be viewed in Reader Mode will still show up as normal, but the moment you enter a page that can be viewed in Reader Mode, the change will happen automatically.
With Reader Mode in your arsenal, you'll have a much better reading experience across the web on your iPad.
Do you people even try this feature cause it still doesn't work properly for your site. Kind of hilarious you're telling us how to use a feature that your site does not properly support. Whatever is in your formatting does not show bullet points or other special elements in Reader mode. And has not for months. I even tried emailing you but seems nobody is listening or cares over there. I stopped reading your site because it doesn't support Reader mode properly. For example in this article the 4 bullet points do not show when enabling reader mode.
Top Stories

Killer deal: 16-inch MacBook Pro with M2 Max chip, 32GB RAM drops to $2,599

iPhone 16 Pro: Top 5 features that will matter the most to users & upgraders

iOS 18 AI boost could be called 'Apple Intelligence'

Apple Vision Pro will get a polish, not an overhaul at WWDC

How hard is it to break into the Apple coding world?

What to expect from WWDC 2024's week of AI updates
Featured deals.

Amazon's best Apple Studio Display deal is back at $1,299.99
Latest news.

Save $900 on the loaded M2 Max MacBook Pro with a 38-core GPU, 32GB unified memory and 1TB of storage. This blowout deal delivers the lowest price on record for the premium laptop.

Get a Thunderbolt dock with 1TB of fast storage for your Mac for $129.99 today
If you want both a Thunderbolt dock for your MacBook Pro as well as external storage, A big deal on the WD Black 1TB D50 Game Dock is like buying a SSD and getting the dock for free!

Apple's WWDC kicks off on Monday, detailing various anticipated features that Apple has been incrementally rolling out over the past several years. But what is it like to actually be an app developer in the Apple world of app platforms? What does it take to ship an app? How is WWDC useful to developers?

This September, all eyes will be on Apple's iPhone 16 Pro lineup. Here are the top five new features and upgrades that matter the most.

iOS 18 & macOS 15 are going to look to the past for new wallpapers
Not everything will be new at WWDC — Apple is planning to revisit some of its iconic iPhone and Mac wallpapers as part of the latest updates.

Ahead of WWDC, Apple highlights its collection of developer resources
In preparation for the 2024 Worldwide Developers Conference, Apple wants to remind developers of its commitment to supporting app creators across the globe.

In depth with iPad Air, iPad Pro and the future of iPadOS on the AppleInsider podcast
Now that the new iPad Air and iPad Pro have been thoroughly used in real-world tests, it's time to see how they measure up — and exactly how iPadOS is holding them back. Or at least, how it's holding them back as we wait to see what WWDC brings.

Adobe has clarified controversial shrinkwrap license terms, but the damage may have already been done
After a terms of service update that infuriated artists, and an initial statement that poured gasoline on the fire, Adobe has made a clear statement about its new use terms.

Classic game 'Sniper Elite 4' heading to Mac and iOS for the holidays
Rebellion is finally bringing the tactical shooter "Sniper Elite 4" to Mac, iPhone, and iPad, a mere seven years after its original release.

Apple's 2024 Design Award winners run the gamut of classic puzzle games to immersive experiences
Ahead of WWDC, Apple has announced the winners of its latest Apple Design Awards, celebrating the best in apps and games from around the world.
Latest Videos

iPad Air (2024) review: Not the cheapest, and not the best, but still great

AirPods Max vs. Sonos Ace: premium personal audio, compared

Retro gold rush: which emulators are on the App Store, and what's coming
Latest reviews.

VITURE One XR glasses review: Good versatility with accessory limits

Heybike Hero review: sparing almost no expense in a carbon fiber e-bike
13-inch ipad pro review: hardware of the future running software of the past.

{{ title }}
{{ summary }}
Apple’s Worldwide Developers Conference to kick off June 10 at 10 a.m. PDT with Keynote address
The Keynote will be available to stream on apple.com , the Apple Developer app, the Apple TV app, and the Apple YouTube channel. On-demand playback will be available after the conclusion of the stream.
2023 iMac: Safari not working properly under Sonoma
Replaced my 2017 27" iMac running Ventura with a 2023 24" iMac (reconditioned) running Sonoma. After restoring my Time Machine backup, I have these issues with Safari:
- Although set to start by opening "all windows from last session", it doesn't. And "Reopen all windows from the last session" on the History menu is grayed out.
- It doesn't save tab groups. I set up three, quit Safari. When I relaunched - no tab groups.
- My Reading List was empty. I successfully restored them by reloading the Reading List Archives from the Safari Library in my backup.
- I had 6 weeks of research for Substack columns in my tab groups on Ventura. None of that showed after restoring the backup. Restoring a known good history.db backup had no effect. I'm hoping that if I can get Safari working with previous windows and tab groups, I may be able to restore those.
- My Home page is the home page of a web site I've constructed on my computer - but Safari can't open it on startup. Initially, it said it couldn't open the file, and on one attempt it gave me a 405 error. The Home button did nothing. Dragging the file into the Safari window, I was told it couldn't open it. Double-clicking the file was successful, after which the Home button worked, and new windows opened with the correct file - but it continued to fail when I relaunched Safari. NOTE: After the upgrade to Sonoma 14.5, it improved in that it now opens with a blank page, not an error, and clicking the Home button works, after which new windows open properly. However, it still doesn't work on launch.
NOTE: When troubleshooting my previous iMac, running Monterey, at one point we wiped the disk and installed Ventura. After I restored from my backup, Safari didn't show the history or reading lists, the same as when I restored to Sonoma. In that case, though, I was able to restore the tabs, tab groups, and reading list by restoring selected elements from a known good backup in the Safari library. But until Safari works properly under Sonoma, I'm stuck.
iMac 27″ 5K, macOS 13.6
Posted on Jun 3, 2024 9:51 AM
Loading page content
Page content loaded
There are no replies.
Tips & Tricks
Troubleshooting, sysmond on mac using high cpu here’s the likely reason & how to fix it.

sysmond, which as you may have surmised from the process name, is short for System Monitor Daemon, is part of Activity Monitor. Thus, if you use Activity Monitor to keep a watch on your Mac system resources, processes, CPU usage, Energy use, Disk, Network, and critical to our discussion here – Memory usage, you may find that sysmond is using a lot of system resources in and of itself.
Let’s dig into sysmond a bit to learn more about what it is, and why it sometimes uses a very large amount of CPU, and how you can correct that.
What is sysmond?
As the name implies, sysmond is a system daemon that runs in the background of MacOS to monitor system activity. sysmond will keep track of all system resources and processes and that information is presented to the user typically through Activity Monitor.
If you see sysmond running, it’s likely because you have Activity Monitor open on your Mac. This can be whether it’s actively open, or even if you just use it for the Dock monitor feature .
Why is sysmond Using High CPU?
There are two likely reasons why sysmond is using high CPU on your Mac.
First; if you’re using the “Memory” tab in Activity Monitor in particular, you may notice that sysmond can use a lot of CPU. Presumably this is because sampling memory is a CPU intensive activity.
In modern MacOS versions you can typically reproduce this easily by opening Activity Monitor, then switching to the Memory tab, waiting a few seconds, and then switching quickly to CPU, in which case you may immediately see sysmond at a high CPU utilization, upwards of 100% – but it should quickly drop back to a reasonable level if you stay in the CPU tab, or the other system activity tabs, except for “Memory”.
Additionally, if you have Activity Monitor update frequency set low , which makes it much more useful for reporting and troubleshooting, this also causes sysmond to be more active because the daemon must sample processes more often and faster to report them.
Conceivably, there are other reasons why sysmond may be using a lot of CPU as well, like if you’re using a third party system monitor.
What’s the easiest way to get sysmond to use less CPU?
If you continuously find sysmond is using tons of CPU, first try switching away from the “Memory” tab in Activity Monitor.
You can also try reducing the sample speed and update frequency, but that’s not always desirable.
Another option is to simply quit out of Activity Monitor, or any other system monitoring apps or processes you are using.
If you continue to find sysmond is aggressively using CPU, you might try restarting the Mac as well.
I personally use Activity Monitor often enough myself that I setup a keyboard shortcut to open it , and while I see sysmond often when viewing the Memory tab, it’s rarely using large amounts of CPU outside of that.
Have you seen sysmond running and using a lot of system resources on your Mac before? Was it because of Activity Monitor’s Memory tab or something else? Share your experiences and observations in the comments.
Enjoy this tip? Subscribe to our newsletter!
Get more of our great Apple tips, tricks, and important news delivered to your inbox with the OSXDaily newsletter.
You have successfully joined our subscriber list.
Related articles:
- Troubleshooting macOS High Sierra Problems
- Messages Using High CPU on Mac, Slowing Performance: 6 Troubleshooting Tips
- How to Prevent macOS High Sierra from Automatically Downloading
- Get Extended CPU Information from the Command Line
One Comment
» Comments RSS Feed
I have not experienced that on my M2 MacBook Air or Mac mini M2. My biggest memory user is Safari and boy does it eat up RAM. But that does seem typical for browsers these days where using RAM when possible seems to relate to getting the best performance. I don’t mind as long as my Mac does not use a lot of swap memory.
Leave a Reply
Name (required)
Mail (will not be published) (required)
Subscribe to OSXDaily
- - How to Download & Install Windows 11 LTSC ISO
- - How to Share Folder from Windows in VMWare Fusion to Mac
- - 15 Keynote Keyboard Shortcuts for iPad
- - How to Install Java on Mac with M3, M2, M1 Apple Silicon Chip
- - Install & Run iTunes, Aperture, or iPhoto in MacOS Sonoma with Retroactive
- - PSA: Updating to MacOS Sonoma or iOS 17 May Enable iCloud Keychain
- - iOS 17.5.1 & iPadOS 17.5.1 Update Released to Fix Reappearing Deleted Photos Bug
- - MacOS Ventura 13.6.7 & macOS Monterey 12.7.5 Updates Available
- - iOS 16.7.8 & iPadOS 16.7.8 Updates for Older iPhones & iPads Available
- - iOS 17.5 & iPadOS 17.5 Updates Released with Bug Fixes
iPhone / iPad
- - How to Find a Misplaced Apple Watch with iPhone’s Ping My Watch
- - How to Change the Voice of ChatGPT on iPhone, Mac, iPad
- - Can I Keep My MacBook Pro/Air Plugged in All The Time?
- - sysmond on Mac Using High CPU? Here’s the Likely Reason & How to Fix It
- - How to Factory Reset Mac (MacOS Sonoma & Ventura)
- - How to Fix the Apple Watch Squiggly Line Screen
- - What Does the Number Badge Mean on Microsoft Edge Icon?

About OSXDaily | Contact Us | Privacy Policy | Sitemap
This website is unrelated to Apple Inc
All trademarks and copyrights on this website are property of their respective owners.
© 2024 OS X Daily. All Rights Reserved. Reproduction without explicit permission is prohibited.
iPad User Guide
- iPad models compatible with iPadOS 17
- iPad mini (5th generation)
- iPad mini (6th generation)
- iPad (6th generation)
- iPad (7th generation)
- iPad (8th generation)
- iPad (9th generation)
- iPad (10th generation)
- iPad Air (3rd generation)
- iPad Air (4th generation)
- iPad Air (5th generation)
- iPad Air 11-inch (M2)
- iPad Air 13-inch (M2)
- iPad Pro 10.5-inch
- iPad Pro 11-inch (1st generation)
- iPad Pro 11-inch (2nd generation)
- iPad Pro 11-inch (3rd generation)
- iPad Pro 11-inch (4th generation)
- iPad Pro 11-inch (M4)
- iPad Pro 12.9-inch (2nd generation)
- iPad Pro 12.9-inch (3rd generation)
- iPad Pro 12.9-inch (4th generation)
- iPad Pro 12.9-inch (5th generation)
- iPad Pro 12.9-inch (6th generation)
- iPad Pro 13-inch (M4)
- Setup basics
- Make your iPad your own
- Keep in touch with friends and family
- Customize your workspace
- Do more with Apple Pencil
- Customize iPad for your child
- What’s new in iPadOS 17
- Turn on and set up iPad
- Wake, unlock, and lock
- Set up cellular service
- Connect to the internet
- Sign in with Apple ID
- Subscribe to iCloud+
- Find settings
- Set up mail, contacts, and calendar accounts
- Learn the meaning of the status icons
- Charge the battery
- Show the battery percentage
- Check battery usage
- Use Low Power Mode to save battery life
- Read and bookmark the user guide
- Adjust the volume
- Learn basic gestures
- Learn advanced gestures
- Find your apps in App Library
- Switch between apps
- Zoom an app to fill the screen
- Quit and reopen an app
- Drag and drop
- Open two items in Split View
- Switch an app window to Slide Over
- View an app’s windows and workspaces
- Multitask with Picture in Picture
- Move, resize, and organize windows
- Access features from the Lock Screen
- Perform quick actions
- Search on iPad
- Get information about your iPad
- View or change cellular data settings
- Travel with iPad
- Change or turn off sounds
- Create a custom Lock Screen
- Change the wallpaper
- Adjust the screen brightness and color balance
- Customize the text size and zoom setting
- Change the name of your iPad
- Change the date and time
- Change the language and region
- Organize your apps in folders
- Add, edit, and remove widgets
- Move apps and widgets on the Home Screen
- Remove or delete apps
- Use and customize Control Center
- Change or lock the screen orientation
- View and respond to notifications
- Change notification settings
- Set up a focus
- Allow or silence notifications for a Focus
- Turn a Focus on or off
- Customize sharing options
- Type with the onscreen keyboard
- Dictate text
- Move the onscreen keyboard
- Select and edit text
- Use predictive text
- Use text replacements
- Add or change keyboards
- Add emoji and stickers
- Take a screenshot
- Take a screen recording
- Write and draw in documents
- Add text, shapes, signatures, and more
- Fill out forms and sign documents
- Use Live Text to interact with content in a photo or video
- Use Visual Look Up to identify objects in your photos and videos
- Lift a subject from the photo background
- Subscribe to Apple Arcade
- Play with friends in Game Center
- Connect a game controller
- Use App Clips
- Update apps
- View or cancel subscriptions
- Manage purchases, settings, and restrictions
- Install and manage fonts
- Buy books and audiobooks
- Annotate books
- Access books on other Apple devices
- Listen to audiobooks
- Set reading goals
- Organize books
- Create and edit events in Calendar
- Send invitations
- Reply to invitations
- Change how you view events
- Search for events
- Change calendar and event settings
- Schedule or display events in a different time zone
- Keep track of events
- Use multiple calendars
- Use the Holidays calendar
- Share iCloud calendars
- Take photos
- Take Live Photos
- Take a selfie
- Take a Portrait mode selfie
- Take videos
- Change advanced camera settings
- Adjust HDR camera settings
- View, share, and print photos
- Use Live Text
- Scan a QR code
- Scan documents
- See the world clock
- Set an alarm
- Use the stopwatch
- Use multiple timers
- Add and use contact information
- Edit contacts
- Add your contact info
- Send Contacts on iPad
- Use other contact accounts
- Hide duplicate contacts
- Export contacts
- Get started with FaceTime
- Make FaceTime calls
- Receive FaceTime calls
- Create a FaceTime link
- Take a Live Photo
- Turn on Live Captions
- Use other apps during a call
- Make a Group FaceTime call
- View participants in a grid
- Use SharePlay to watch, listen, and play together
- Share your screen in a FaceTime call
- Collaborate on a document in a FaceTime call
- Use video conferencing features
- Hand off a FaceTime call to another Apple device
- Change the FaceTime video settings
- Change the FaceTime audio settings
- Change your appearance
- Leave a call or switch to Messages
- Block unwanted callers
- Report a call as spam
- Connect external devices or servers
- Modify files, folders, and downloads
- Search for files and folders
- Organize files and folders
- Set up iCloud Drive
- Share files and folders in iCloud Drive
- Use an external storage device, a file server, or a cloud storage service
- Share your location
- Add or remove a friend
- Locate a friend
- Get notified when friends change their location
- Notify a friend when your location changes
- Turn off Find My
- Add your iPad
- Get notified if you leave a device behind
- Locate a device
- Mark a device as lost
- Erase a device
- Remove a device
- Add an AirTag
- Share an AirTag or other item in Find My on iPad
- Add a third-party item
- Get notified if you leave an item behind
- Locate an item
- Mark an item as lost
- Remove an item
- Adjust map settings
- Get started with Freeform
- Create a Freeform board
- Draw or handwrite
- Apply consistent styles
- Position items on a board
- Search Freeform boards
- Share and collaborate
- Delete and recover boards
- Get started with Health
- Fill out your Health Details
- Intro to Health data
- View your health data
- Share your health data
- View health data shared by others
- Download health records
- View health records
- Log menstrual cycle information
- View menstrual cycle predictions and history
- Track your medications
- Learn more about your medications
- Log your state of mind
- Take a mental health assessment
- Customize your Sleep Focus
- Turn Sleep Focus on or off
- View your sleep history
- Check your headphone audio levels
- Use audiogram data
- Back up your Health data
- Intro to Home
- Upgrade to the new Home architecture
- Set up accessories
- Control accessories
- Control your home using Siri
- Use Grid Forecast to plan your energy usage
- Set up HomePod
- Control your home remotely
- Create and use scenes
- Use automations
- Set up security cameras
- Use Face Recognition
- Configure a router
- Invite others to control accessories
- Add more homes
- Get music, movies, and TV shows
- Get ringtones
- Manage purchases and settings
- Magnify nearby objects
- Change settings
- Detect people around you
- Detect doors around you
- Receive image descriptions of your surroundings
- Read aloud text and labels around you
- Set up shortcuts for Detection Mode
- Add and remove email accounts
- Set up a custom email domain
- Check your email
- Unsend email with Undo send
- Reply to and forward emails
- Save an email draft
- Add email attachments
- Download email attachments
- Annotate email attachments
- Set email notifications
- Search for email
- Organize your email in mailboxes
- Flag or block emails
- Filter emails
- Use Hide My Email
- Use Mail Privacy Protection
- Change email settings
- Delete and recover emails
- Add a Mail widget to your Home Screen
- Print emails
- Use keyboard shortcuts
- Get travel directions
- Select other route options
- Find stops along your route
- View a route overview or a list of turns
- Change settings for spoken directions
- Get driving directions
- Report traffic incidents
- Get cycling directions
- Get walking directions
- Get transit directions
- Delete recent directions
- Get traffic and weather info
- Predict travel time and ETA
- Download offline maps
- Search for places
- Find nearby attractions, restaurants, and services
- Get information about places
- Mark places
- Share places
- Rate places
- Save favorite places
- Explore new places with Guides
- Organize places in My Guides
- Clear location history
- Look around places
- Take Flyover tours
- Find your Maps settings
- Measure dimensions
- View and save measurements
- Measure a person’s height
- Set up Messages
- About iMessage
- Send and reply to messages
- Unsend and edit messages
- Keep track of messages
- Forward and share messages
- Group conversations
- Watch, listen, or play together using SharePlay
- Collaborate on projects
- Use iMessage apps
- Take and edit photos or videos
- Share photos, links, and more
- Send stickers
- Request, send, and receive payments
- Send and receive audio messages
- Animate messages
- Send and save GIFs
- Turn read receipts on or off
- Change notifications
- Block, filter, and report messages
- Delete messages and attachments
- Recover deleted messages
- View albums, playlists, and more
- Show song credits and lyrics
- Queue up your music
- Listen to broadcast radio
- Subscribe to Apple Music
- Listen to lossless music
- Listen to Dolby Atmos music
- Apple Music Sing
- Find new music
- Add music and listen offline
- Get personalized recommendations
- Listen to radio
- Search for music
- Create playlists
- See what your friends are listening to
- Use Siri to play music
- Change the way music sounds
- Get started with News
- Use News widgets
- See news stories chosen just for you
- Read stories
- Follow your favorite teams with My Sports
- Subscribe to Apple News+
- Browse and read Apple News+ stories and issues
- Use Offline Mode to read downloaded stories
- Manually download Apple News+ issues
- Solve puzzles in Apple News
- Solve crossword and crossword mini puzzles on iPad
- Solve Quartiles puzzles
- Search for news stories
- Save stories in News for later
- Subscribe to individual news channels
- Get started with Notes
- Add or remove accounts
- Create and format notes
- Draw or write
- Add photos, videos, and more
- Scan text and documents
- Work with PDFs
- Create Quick Notes
- Search notes
- Organize in folders
- Organize with tags
- Use Smart Folders
- Export or print notes
- Change Notes settings
- Delete, share, or copy a photo
- View and edit Photo Booth photos in the Photos app
- View photos and videos
- Play videos and slideshows
- Delete or hide photos and videos
- Edit photos and videos
- Trim video length and adjust slow motion
- Edit Live Photos
- Edit Cinematic videos
- Edit portraits
- Use photo albums
- Edit, share, and organize albums
- Filter and sort photos and videos in albums
- Make stickers from your photos
- Duplicate and copy photos and videos
- Merge duplicate photos
- Search for photos
- Identify people and pets
- Browse photos by location
- Share photos and videos
- Share long videos
- View photos and videos shared with you
- Watch memories
- Personalize your memories
- Manage memories and featured photos
- Use iCloud Photos
- Create shared albums
- Add and remove people in a shared album
- Add and delete photos and videos in a shared album
- Set up or join an iCloud Shared Photo Library
- Add content to an iCloud Shared Photo Library
- Use iCloud Shared Photo Library
- Import and export photos and videos
- Print photos
- Find podcasts
- Listen to podcasts
- Follow your favorite podcasts
- Use the Podcasts widget
- Organize your podcast library
- Download, save, and share podcasts
- Subscribe to podcasts
- Listen to subscriber-only content
- Change download settings
- Make a grocery list
- Add items to a list
- Edit and manage a list
- Search and organize lists
- Work with templates
- Use Smart Lists
- Print reminders
- Use the Reminders widget
- Change Reminders settings
- Browse the web
- Search for websites
- Customize your Safari settings
- Change the layout
- Use Safari profiles
- Open and close tabs
- Organize your tabs with Tab Groups
- View your tabs from another device
- Share Tab Groups
- Use Siri to listen to a webpage
- Bookmark a website
- Bookmark a website as a favorite
- Save pages to a Reading List
- Find links shared with you
- Annotate and save a webpage as a PDF
- Automatically fill in forms
- Get extensions
- Hide ads and distractions
- Clear your cache and cookies
- Browse the web privately
- Use passkeys in Safari
- Check stocks
- Manage multiple watchlists
- Read business news
- Add earnings reports to your calendar
- Use a Stocks widget
- Translate text, voice, and conversations
- Translate text in apps
- Translate with the camera view
- Subscribe to Apple TV+, MLS Season Pass, or an Apple TV channel
- Add your TV provider
- Get shows, movies, and more
- Watch sports
- Watch Major League Soccer with MLS Season Pass
- Watch multiple live sports streams
- Control playback
- Manage your library
- Change the settings
- Make a recording
- Play it back
- Edit or delete a recording
- Keep recordings up to date
- Organize recordings
- Search for or rename a recording
- Share a recording
- Duplicate a recording
- Check the weather
- Check the weather in other locations
- View weather maps
- Manage weather notifications
- Use Weather widgets
- Learn the weather icons
- Find out what Siri can do
- Tell Siri about yourself
- Have Siri announce calls and notifications
- Add Siri Shortcuts
- About Siri Suggestions
- Change Siri settings
- Set up Family Sharing
- Add Family Sharing members
- Remove Family Sharing members
- Share subscriptions
- Share purchases
- Share locations with family and locate lost devices
- Set up Apple Cash Family and Apple Card Family
- Set up parental controls
- Set up a child’s device
- Get started with Screen Time
- Protect your vision health with Screen Distance
- Set up Screen Time
- Set communication and safety limits and block inappropriate content
- Set up Screen Time for a family member
- Set up Apple Pay
- Use Apple Pay in apps and on the web
- Track your orders
- Use Apple Cash
- Use Apple Card
- Use Savings
- Manage payment cards and activity
- Power adapter and charge cable
- Use AirPods
- Use EarPods
- Use headphone audio-level features
- Apple Pencil compatibility
- Pair and charge Apple Pencil (1st generation)
- Pair and charge Apple Pencil (2nd generation)
- Pair and charge Apple Pencil (USB-C)
- Pair and charge Apple Pencil Pro
- Enter text with Scribble
- Draw with Apple Pencil
- Take and mark up a screenshot with Apple Pencil
- Quickly write notes
- Wirelessly stream videos and photos to Apple TV or a smart TV
- Connect to a display with a cable
- HomePod and other wireless speakers
- iPad keyboards
- Switch between keyboards
- Enter characters with diacritical marks
- Use shortcuts
- Choose an alternative keyboard layout
- Change typing assistance options
- Connect Magic Trackpad
- Trackpad gestures
- Change trackpad settings
- Connect a mouse
- Mouse actions and gestures
- Change mouse settings
- External storage devices
- Bluetooth accessories
- Apple Watch with Fitness+
- Polishing cloth
- Share your internet connection
- Make and receive phone calls
- Use iPad as a second display for Mac
- Use iPad as a webcam
- Use a keyboard and mouse or trackpad across your Mac and iPad
- Hand off tasks between devices
- Cut, copy, and paste between iPad and other devices
- Stream video or mirror the screen of your iPad
- Use AirDrop to send items
- Connect iPad and your computer with a cable
- Transfer files between devices
- Transfer files with email, messages, or AirDrop
- Transfer files or sync content with the Finder or iTunes
- Automatically keep files up to date with iCloud
- Get started with accessibility features
- Turn on accessibility features for setup
- Change Siri accessibility settings
- Open features with Accessibility Shortcut
- Enlarge text by hovering
- Change color and brightness
- Make text easier to read
- Reduce onscreen motion
- Customize per-app visual settings
- Hear what’s on the screen or typed
- Hear audio descriptions
- Turn on and practice VoiceOver
- Change your VoiceOver settings
- Use VoiceOver gestures
- Operate iPad when VoiceOver is on
- Control VoiceOver using the rotor
- Use the onscreen keyboard
- Write with your finger
- Keep the screen off
- Use VoiceOver with an Apple external keyboard
- Use a braille display
- Type braille on the screen
- Customize gestures and keyboard shortcuts
- Use VoiceOver with a pointer device
- Use VoiceOver for images and videos
- Use VoiceOver in apps
- Use AssistiveTouch
- Use an eye-tracking device
- Adjust how iPad responds to your touch
- Auto-answer calls
- Change Face ID and attention settings
- Use Voice Control
- Adjust the top or Home button
- Use Apple TV Remote buttons
- Adjust pointer settings
- Adjust keyboard settings
- Control iPad with an external keyboard
- Adjust AirPods settings
- Adjust double tap and squeeze settings for Apple Pencil
- Intro to Switch Control
- Set up and turn on Switch Control
- Select items, perform actions, and more
- Control several devices with one switch
- Use hearing devices
- Use Live Listen
- Use sound recognition
- Set up and use RTT
- Flash the indicator light for notifications
- Adjust audio settings
- Play background sounds
- Display subtitles and captions
- Show transcriptions for Intercom messages
- Get live captions of spoken audio
- Type to speak
- Record a Personal Voice
- Lock iPad to one app with Guided Access
- Use built-in privacy and security protections
- Set a passcode
- Set up Face ID
- Set up Touch ID
- Control access to information on the Lock Screen
- Keep your Apple ID secure
- Use passkeys to sign in to apps and websites
- Sign in with Apple
- Share passwords
- Automatically fill in strong passwords
- Change weak or compromised passwords
- View your passwords and related information
- Share passkeys and passwords securely with AirDrop
- Make your passkeys and passwords available on all your devices
- Automatically fill in verification codes
- Sign in with fewer CAPTCHA challenges
- Two-factor authentication
- Use security keys
- Control app tracking permissions
- Control the location information you share
- Control access to information in apps
- Control how Apple delivers advertising to you
- Control access to hardware features
- Create and manage Hide My Email addresses
- Protect your web browsing with iCloud Private Relay
- Use a private network address
- Use Advanced Data Protection
- Use Lockdown Mode
- Receive warnings about sensitive content
- Use Contact Key Verification
- Turn iPad on or off
- Force restart iPad
- Update iPadOS
- Back up iPad
- Reset iPad settings
- Restore all content from a backup
- Restore purchased and deleted items
- Sell, give away, or trade in your iPad
- Install or remove configuration profiles
- Important safety information
- Important handling information
- Find more resources for software and service
- FCC compliance statement
- ISED Canada compliance statement
- Apple and the environment
- Class 1 Laser information
- Disposal and recycling information
- Unauthorized modification of iPadOS
- ENERGY STAR compliance statement
Open and close tabs in Safari on iPad
Note: If you’re using the Compact Tab Bar layout, the menus and other items may look different from what’s described in this guide. See Change the layout of Safari .
Open a link in a new tab
Touch and hold the link, then tap Open in Background.
View a tab’s history
You can see which webpages you previously visited in this tab.
Tip: To close all tabs in this Tab Group at the same time, touch and hold Done, then tap Close All [number of] Tabs.
Open a recently closed tab
IMAGES
VIDEO
COMMENTS
Content blockers are third-party apps and extensions that let Safari block cookies, images, resources, pop-ups, and other content. To get a content blocker: Download a content blocking app from the App Store. Tap Settings > Safari > Extensions. Tap to turn on a listed content blocker. You can use more than one content blocker.
This article explains how to reset Safari to default settings by removing Safari's history and cookies, clearing the cache, and disabling extensions. Instructions apply to Safari versions 11 through 14 and iOS.
Discover more info: https://www.hardreset.info/devices/apple/apple-ipad-102-2021-wi-fi/Would you like to clear Safari stored info? Do you wonder how to clear...
1. Reset Safari on iPhone and iPad. To reset Safari settings on your iPhone or iPad, follow these simple steps: Step 1: Open the Settings from the Home screen. Step 2: Scroll down and tap "Safari". Step 3: Then tap "Clear History and Website Data". Step 4: Tap "Clear History and Data" again to confirm. 2.
Reset Cache. First, Launch Safari from the Launchpad or from the dock of you Mac. Next, click on the 'Safari' tab from the menu bar. Then, click on the 'Preferences' option from the list. After that, go to the 'Advanced' pane. Now, check the 'Show Develop menu in the menu bar' option. As a result, the 'Develop' tab would now ...
Restart your iPad to hopefully fix Safari. Check your data connection. If your iPad is a Wi-Fi model, check you're connected to a Wi-Fi network with internet access. If your iPad has a cellular connection, check it has a signal and is working correctly. Tap Settings > Cellular and check the toggle next to Safari is On. Check Airplane mode.
Tap it. Next, you'll see a list of every web browser app installed on your device that supports the default browser feature. Tap the name of the browser you'd like to use as your default. After that, tap the "Back" button once and exit "Settings." From now on, whenever you tap a web address link, it will open in the browser app you chose.
Restart Safari. Close Safari from your list of apps. Swipe up from the bottom of your screen (if your iPad does not have a Home button) and swipe to close Safari. If your iPad has a Home button, press it quickly twice and it'll show you a screen of the apps running in the background. Swipe on Safari to close it.
1. Open the Settings app on your iPhone. 2. Search for or scroll down to Safari and open it. 3. Tap Clear History and Website Data in blue about halfway down the page. 4. A prompt menu will pop up ...
Clear Cache in Safari. To get started, open the "Settings" on your iPhone or iPad. Select "Safari." Scroll down and select "Clear History and Website Data." Note that this will also delete all browsing history and cookies . Tap on the pop-up to confirm.
#ResetSaFarioniPhone To Day In This vedio I Will Show you How To Reset SaFari Browser on iPhone & iPad1 Launch Setting App2 Scroll Down To Find Safari And T...
#Safari #iPhone #Reset Learn how to reset Safari browser on iPhone/iPad. You need to reset 2 things from settings. You need to delete cookies and history and...
Open the iPad Settings app. Scroll down and select Safari . Scroll to the bottom of the Safari settings screen and select Advanced . Select Website Data to display a breakdown of the data each website currently stores on the iPad. Select Show All Sites to display the expanded list if necessary. Select Remove All Website Data at the bottom of ...
Whether you're using Safari on an iPhone, iPad, or Mac it's easy to view a list of all your recently closed tabs. This way, you can find the particular websites you still want to visit from the list and restore those tabs in Safari. On an iPhone: Open Safari and tap the Tabs button (two overlapping squares) in the bottom-right corner.
In Safari, tap the Bookmarks button in the toolbar that's below the address bar. Tap the History icon in the upper right corner. Here, you can view your entire web history.
Steps. Open the Settings app on your iPad. Select Safari, and tap Clear History and Website Data. On the alert that appears, tap Clear. To enjoy the full benefits of using FamilySearch.org on your iPad, be sure your iPad is not set to private browsing. The maximum benefits for use of FamilySearch on an iPad are included in the Family Tree and ...
Key Takeaways. Press Ctrl+Shift+Delete to clear your browsing history on a Windows PC, or press Command+Shift+Delete on a Mac. Check your browser's settings to find this option on a mobile device. All web browsers remember a list of the web pages you've visited. You can delete this list at any time, clearing your browsing history and erasing ...
With any largely text-based web page open in Safari, you need only tap on the "Aa" icon in the left-hand side of your address bar. Once that's been tapped, you'll see the option to "Show Reader ...
Enable Web Inspector on iOS : Open the Settings app on your iPhone or iPad. Scroll down and tap Safari. Scroll to the bottom of the page and tap Advanced. Tap the toggle next to Web Inspector to the On position. Enable Safari Developer Mode on Mac : Open Safari on your Mac. Click Safari in the top left corner of your Menu Bar.
Double-clicking the file was successful, after which the Home button worked, and new windows opened with the correct file - but it continued to fail when I relaunched Safari. NOTE: After the upgrade to Sonoma 14.5, it improved in that it now opens with a blank page, not an error, and clicking the Home button works, after which new windows open ...
sysmond, which as you may have surmised from the process name, is short for System Monitor Daemon, is part of Activity Monitor. Thus, if you use Activity Monitor to keep a watch on your Mac system resources, processes, CPU usage, Energy use, Disk, Network, and critical to our discussion here - Memory usage, you may find that sysmond is using a lot of system resources in and of itself.
On your Mac, do one of the following: macOS 13.3 or later: Choose Apple menu > System Settings, click [your name] at the top of the sidebar, then click iCloud.Below Apps Using iCloud, click Show All or Show More Apps, then turn on Calendars. macOS 13 to 13.2: Choose Apple menu > System Settings, click [your name] at the top of the sidebar, click iCloud, then turn on Calendars.
Reset iPad settings; Restore all content from a backup; Restore purchased and deleted items; Sell, give away, or trade in your iPad; Erase iPad; ... Open and close tabs in Safari on iPad. In the Safari app , use tabs to help you navigate between multiple open webpages. Note: ...