
17 Train Photography Ideas for Your Next Trip
June 18, 2023
Go from bland to Bond with these easy tips for how to take great photos from inside trains. Consider it your train photography guide, ready to go.

How to Take Better Photos from Moving Trains
Over the years, I’ve taken on plenty of train photography assignments, zooming across rivers, mountains, tunnels and twisting landscapes, camera in hand.
Forget the daily commute, some of the best rail journeys in the world stir the photographic impulse like nothing else on earth. But how do you take good photos from trains?
Since we all travel with a camera these days, even if it’s only our mobile phone, I thought I’d share what I’ve learnt.
Here are my 17 tips to take better photos from a moving train
Inside Train Photography Guide
1) prepare to look like a fool.
Yes, I know I lured you in with talk of James Bond but in reality you’re just going to look… strange. Deal with it and move on.
While taking photos of a beautiful sunset makes you blend in with the crowd, taking photos from a train will attract stares. Don’t let them put you off. Throw shame out the window and click on.
2) Don’t get in anyone’s way
Unless you’re the paparazzi (in which case you won’t care) this should apply for all photo situations really. Don’t be a wallflower, put yourself where you need to be, but don’t become a nuisance.
Why? Well, beyond general human decency there’s some self-interest at stake here too. Rules concerning taking photos on trains are sometimes complicated (if in doubt, check them out) but trouble usually results from misinformed paranoia.
Avoid getting entangled in a conversation with a guard or member of the police by behaving with respect to everyone around you and not shoving a lens in their face (unless they smile and pose, in which case, game on!)
3) Sit on both sides of the train
It’s difficult to tell where the great scenery is going to appear. In an ideal world you’d take the journey twice to get the perfect shot. Or find a source who can tell you in advance where the best bits are. Bet let’s face it, that’s unlikely for most of us most of the time.
Far better is to look around when you get on the train and search for a spot where you can run from left to right as fast and as often as needed. And yes, see point one again for what you will look like while doing this.
4) Don’t use flash
Turn it off. Even “non fancy” cameras like iPhones and point and shoots usually let you silence this beast. Flash can only reach a metre or so and so there’s really no point*. You’re shooting for the scenery beyond right?
5) Avoid the Glass
Glass windows reflect patterns from inside the train and the muck on their surface will ruin your shot. In the old days, this used to be easy: you could just pull down the window. Nowadays, I’ve noticed more and more trains have fixed windows for some spurious reasons like stopping people splattering their skulls against a tunnel while they were concentrating on taking a photo.
But if you can, find the option for shooting into thin air. It removes so many problems. Just make sure your camera is attached to your body and that you don’t splatter your skull against a tunnel because you’re too busy taking a photo…
You might need to use the best camera for backpacking to snap pics free of any signs of blur and reflections instead.

6) Embrace the glass
But I thought you just said…
If you can’t get rid of it, you’re going to have to work with it. Get your lens flat against the glass. Don’t dilly-dally about getting close-ish to it. Get right up against it. I could explain why this helps. But then I’d have to kill you…
6) Cover the furniture
The biggest culprits for reflections in glass are usually brightly coloured tables, arm rests and clothes (usually yours.) Travel with a couple of black jumpers (sweaters? US?) to cover up these pesky objects. And heretofore return to point one…
7) Be Ready
This kinda applies to all photography but it’s especially important here. What does ready mean?
8) Lens cap off
9) battery charged – spare available, 10) fresh, clean memory card – with spare available..
You don’t want to be scrabbling about for these things. You need them right there, ready to go. Passengers take a dim view of you pulling the emergency cord just because you want to go back and have another go at the right shot.
11) Shoot Fast
If you can, set your camera to take as many photos as possible with the shutter button held down. Why? Well, things change fast. And you want to see this don’t you:

The difference is less than a second…
12) Shoot faster
Switch your camera to action mode if you have it (usually the athlete caught mid stride) or better yet get out of auto altogether and use manual settings.
It obviously varies but a good rule of thumb is a shutter speed (Tv is shutter priority on most cameras) of 1/2000 for crisp scenery shots and 1/750 for blur but not too much blur. Start with those and play around.

13) Get the weather right
Tricky to control, even for Bond. But moody and overcast is better than sunshine or rain. Too much sun will drive you crazy with shadows and reflections. And rain? Well rain will quickly smudge itself across either the windows or your lens. Most of the time if you’re on the road, you won’t have the chance to avoid this. But if you do have the choice? Aim for the clouds.
14) Don’t forget the rule of thirds
This standard photography chestnut works just as well when shooting from a train. Can’t quite remember what it is? Divide the frame you’re shooting into thirds horizontally and vertically and aim to get the most “interesting” point of your shot where the lines intersect.
If you’re able to lean out (or stand on the station) then the point where the parallel tracks reach a point works well. If you’re confined by glass then make sure not to put your horizon in the middle. Aim for a third.
Need more information? Check out this article on the photography rule of thirds here.
15) Build a tripod
Moving trains, well, move. And bumps and jitters aren’t good for photographs. Steady your camera as much as you can by resting your elbows on the windowsill and table and bracing your back against the seat or the wall. If forced to stand, do the same thing but keep your knees bent to absorb the shocks that way. Yes, I know. Return to point one.
16) Take a break
It’s easy to go a little goggle-eyed and become travel sick with all those focus on moving objects. Take lots of little short breaks to look around or just close your eyes long before you hit this stage. Your temples will thank you.
17) Stand at the back of the train
I have to thank Ralph Velasco for this one. From the back of the train you have a chance of catching the rest of the train curving in front of you if you’re able to lean out the window. Which, let’s face it, looks cool.
And kind of like something you’d see in a James Bond film…Maybe.
How to Take a Photo of a Moving Train
Ah, so you’re not ON the train. You want to take a better photo OF the train as it whizzes past. OK. So, work out whether you want…
- The foreground in focus, with the train a blur
- The train nice and crisp, the background scenery blurred
- Everything in focus
- Nothing in focus/big blobby mess.
For option one. Get your camera very, VERY still. Use your body as a tripod or actually use a tripod. Set a longish shutter speed so that the movement of the train is blurred. Make sure the person or object in your foreground can stay still for this time.
Option two. Choose a fast shutter speed and practice swooshing your camera around to mimic the movement of the train. The idea is that you move in time with the train, blurring the background and keeping the train in focus.
This takes a bit of practice. Steady your body as much as you can, press the camera tight against your face and spin on your heels.
For option three, you need a fast shutter speed and good reflexes. And for number four.. C’mon now!
How about you? Do you have any tips for taking photos on a train?
*Never say never. There are some exceptions. But for most people, most of the time: never.
21 thoughts on “17 Train Photography Ideas for Your Next Trip”
Great site I have just booked Transiberian train trip st petersberg to Beijing looking for best camera or new lens any suggestions
Oh – that sounds wonderful! It’s a journey I’d love to do some day. I’m very happy with my Canon 7D but it’s a bit on the heavy side if you’ve only a passing interest in photography.
Leave a comment Cancel reply
This site uses Akismet to reduce spam. Learn how your comment data is processed .
- Student Successes
- My Learning
How to Take Excellent Train Photography (Locomotive Photos)

You can also select your interests for free access to our premium training:
Trains are a diverse subject for photography. You can take pictures of everything from a steam train to Japan’s bullet trains. In this article we’ll show you how to take excellent train photography. From the right settings to use to getting more creative with your transportation images.
Steam Train Photography
Steam trains aren’t widely used these days, and are mainly tourist attractions. One of the first things you’ll need to figure out is where and when these trains run. If you’re lucky and from the U.K., you’ll not have a big problem finding these. Otherwise, some travel could be involved.
Research Train Routes to Find the Best Photography Locations

Study the Train Line’s Path for Possible Viewpoints
Once you know the location of the train stations, you’ll want to find out where the line runs. This will either mean using Google maps, or perhaps the train line’s website. You’ll want to find out which roads and footpaths run parallel to the train track. You’ll now want to explore the public access areas for possible viewpoints of the train.
Using Natural Light in Steam Train Photography
This might be better put as use the light in the right way. You’ll find light from different directions will offer you different things, especially with steam involved.
- Sunlight behind you – Great for lighting up the scene in front of you, and keeping the train well-lit. This will work well with interesting vegetation in front of you.
- Sunlight to the side, and behind – This type of light is best for steam train photography. You’ll have the train lit by the sun, and somewhat reflecting the light. You’ll also pick up more texture in the smoke.
- Sunset and sunrise – Depending on the train’s schedule, photographing during sunset or sunrise can make for dramatic photography .

Use Longer Focal Lengths
It’s a great idea to have a lens with decent focal length for train photography. Locations accessible to the public may mean you’ll really need to zoom in. This is not a bad thing though. You can now compress the scene, and show the train surrounded by the countryside it’s passing through.
Photograph the Details to Create Atmosphere

Use Shutter Speed for Creative Motion Blur

Composition for Steam Train Photography
Once again composition will depend on the type of photo you want to take. One thing to avoid is including modern day elements. These will distract the viewer from the mood you’re attempting to create.
- Front and to the side – The classic composition for any sort of train photography. You’ll capture the train coming towards you, with a decent amount of context provided by the countryside.
- Side on – This angle is a great way to get a nice photo of the train, and the carriages behind it. If you can get an angle where you’re below the train, so you’re aiming towards the sky, it will give you a more minimal photo .
- From a bridge – This is a location where you can get a head-on angle of the train, a nice alternative from the majority of photos that will be side-on.

Include a Human Element

Overground Trains
Overground trains make for great photography as well. Whether you’re photographing commuter trains, fast intercity, or the modern Maglev trains, there will be something of interest for you.
Take Photos of Train Platforms

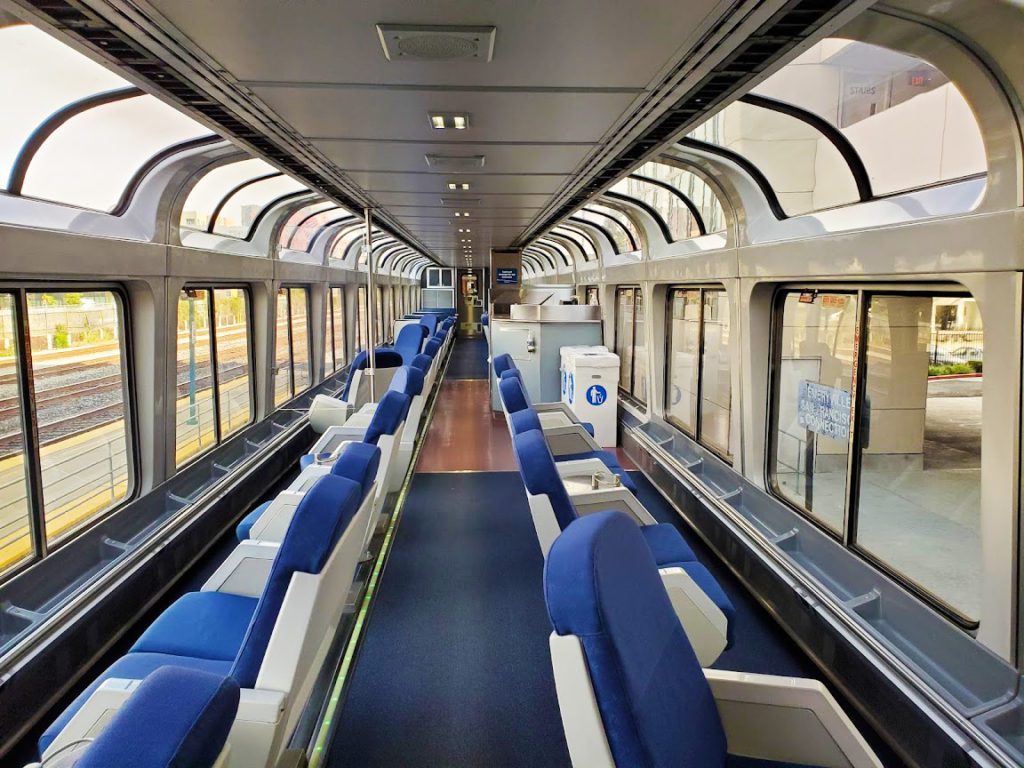
Photograph Train Interiors

How to Find a Vantage Point for Train Photography

Include Train Light Trails

Underground Trains
Photographing underground trains can be just as much fun, if not more so than overground trains. The discipline is different though. Once again these are private areas you’ll likely be able to take the odd photo in, but for anything more you’ll really need permission from the train operator.
Low Light Photography

Photograph Tunnels for a Sense of Symmetry

Include Motion Blur

Iconic Signs

Photograph Daily Life at the Train Station
A train network is a living ecosystem, and a node for people’s daily lives. Many stations serve more than just the trains themselves. This will offer more photography opportunities. You’ll find the majority of western stations to be quite sanitised. But in other parts of the world, you’ll find much more life.
- Train station platforms – These can often include vendors selling their wares. At some stations, you may even see people sleeping on the platform, as they wait for a late overnight train.
- Train markets – Markets found at train stations, that then spread out beyond the perimeter of the train station, are not uncommon when you travel. In Thailand there is a famous market that runs so close to the track that vendors have to move their products when an oncoming train approaches.

Safety Around Trains

Full Steam Ahead!
You’ve now traveled from the beginner’s station, all the way to the knowledgeable pro . It’s time to go and put what you’ve learned into practice, and take some excellent train photos. Have you taken many train photos before? Do you have any advice about how to get the best results? Which pitfalls, if any, did you encounter? Share your thoughts and photos in the comments section.
TRAVEL GUIDES
Popular cities, explore by region, featured guide.

Japan Travel Guide
Destinations.

A Creative’s Guide to Thailand
Creative resources, photography, videography, art & design.

7 Tips to Spice up Your Photography Using Geometry
GET INVOLVED
EXPERIENCES

#PPImagineAZ Enter to Win a trip to Arizona!
The journal, get inspired, sustainability.

How to Be a More Responsible Traveler in 2021
Resources - creative , travel stories, how to photograph your next train journey.

- Published December 13, 2017
Train travel offers a special kind of ambience, no matter the final stop. On your next train ride, instead of putting your camera away, keep it by your side to document the unique aspects of your journey.
This guide will help you plan how to best document your next train ride — just remember, getting there is half the fun!
STARTING THE JOURNEY
While others rush to get on the train and wait in their seats, take your time observing the departure rituals. Point your camera at the train itself, watch as others board, and keep an eye out for the station’s unique details.
Note which direction the light is coming from, adjust your ISO accordingly, and increase your shutter speed for action shots. But don’t forget to hop back on the train in time to leave!

ON THE TRAIN
Once the train has pulled out of the station, focus your attention on the inner happenings of the compartments. Many read, some play cards, others chit chat — the ways passengers pass their time is varied and always photo-worthy, so take notice when your fellow travelers are doing something interesting.
Dining cars are also full of photographic opportunities. From the food itself to the people eating it, and the design of the interior — capture this part of the journey, then grab a snack for yourself, too.
The details are what make a journey memorable. Whether you’re traveling on a commuter train or staying in a roomette on an overnight journey, don’t forget to snap shots of the accommodations inside the train. These shots will add context and interest to your collection of train photos. While others may not notice the chairs, tables, doors, or small details that surround them, make sure you do!

FELLOW PASSENGERS
It can be easy to hide behind your camera and the relative anonymity it provides, so challenge yourself to meet your fellow passengers. Trains are full of people — young and old, commuters and vacationers — why not say hello?
Your fellow train travelers are just as interesting as your surroundings. Introduce yourself, strike up some conversations, and ask to take their picture. Use a wide aperture and high shutter speed to capture a shallow depth of field in your portrait shots, and always consider the lighting as well (it’s constantly changing on a moving train!).
OUT THE WINDOW
Trains often provide what other modes of transportation can’t: stunning views and the opportunity to capture them.
Visit the observation car to watch the landscapes slip by. Photograph the observation car in the early mornings or late afternoons to capture both interior and exterior scenes (or, manually adjust your camera’s aperture so that both views are well-lit).
When shooting through the windows, get as close to the glass as possible, and shoot straight ahead to reduce glare. Use a wider aperture and faster shutter speed to avoid blurring your subject matter. If you step back from the window, you can experiment with their reflections as well.
CLASSIC TRAIN SHOTS
Naturally, you’ll also want to photograph the journey itself. Look for ways to safely snag shots of the train tracks while waiting to depart, or head to the back of the train and see if you can photograph out of a rear-facing window.
The last compartments on the train are also great for another type of classic train shot: the “around the bend” photo. As the train takes a turn, find a window and get ready to shoot. Make sure you know which direction the train will be turning and find a spot on the corresponding side.
For “around-the-bend” shots, you’ll want to be as far back on the train as possible in order to capture more of the train in your photo. Increase your shutter speed to produce crisp images without the blur caused by the train or shaky hands.

THE ATMOSPHERE
Train travel is associated with a certain romantic atmosphere, which is guaranteed to find its way into your photos. Keep your camera out and enjoy the ride!
Trending Stories
The pursuit of self on south africa’s spectacular otter trail, two hours from: reykjavic, from the arabian sea to your plate: seafood in varkala , explore by region, explore by map.

SIGN UP TO OUR NEWSLETTER
Get your weekly dose of armchair travelling, straight to your inbox.
© Passion Passport 2024
18 Tips for Shooting from a Train
A Post By: Ralph Velasco
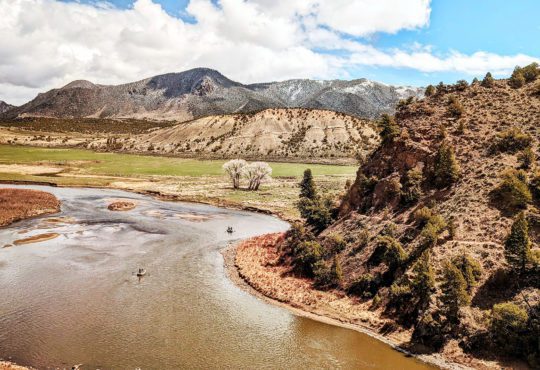
Getting successful images from a moving train can be quite tricky, and a real test of one’s patience and persistence. Recently, I had a chance to take what is considered one of the great train rides of the world, the Ferrocarril Chihuahua al Pacifico, better known as El Chepe, which winds through Barrancas del Cobre (the Copper Canyon), one of Mexico’s many natural wonders.

The canyon gets its name from the copper color of some of its 3,000 plus foot walls, which can be seen in all their glory from many vantage points along the route, not because of copper mining in the region, as some people claim. It’s been compared to the Grand Canyon in the United States, but my assessment is that it’s a cross between the sheer cliff walls and alpine vegetation of Yosemite National Park and the deep and layered gorges of the Grand Canyon, but with a convenient train ride between them.
Each day its complete route in the northwest of Mexico travels from the capital city of Chihuahua, in Chihuahua state, to Los Mochis, in the neighboring state of Sinaloa (a second train does the reverse route). I was on assignment to shoot the cultural and travel images for a cookbook on the regional cuisine of Mexico, and so the portion that I experienced went from Divisadero, Chihuahua, to El Fuerte, Sinaloa, which is often referred to as the most scenic part of the journey.
Some facts about this remarkable railway journey include:
- Length: approximately 400 miles (660 km)
- Maximum altitude: 7,900 feet (2,400 meters) at Divisadero
- Construction started circa 1900
- Completed: 1961
What You Need to Know There are many considerations to be aware of in order to get even acceptable images when shooting from a train, but of course the idea is to go beyond acceptable and to really capture the essence of what is likely to be a once-in-a-lifetime photo opportunity for most people.
The following are some tips that should help you to successfully capture impressive images from any moving train, but specifically El Chepe:
1. Watch Your Gear – First of all, and this should go without saying, but be sure that someone is watching your gear and other valuables back at your seat so that you can concentrate on getting great photos.
2. Don’t be afraid of traveling to Mexico in the rainy season (I’ve heard different estimates of this season, but it runs from approximately June to October). There are a number of advantages at this time of year, namely the trains, hotels and other places you’ll want to visit will be less crowded, but more importantly, you’re certain to have wonderful clouds and interesting weather that will add great dimension and interest to your photos (remember, rainbows only come out after it rains). Additionally, because of the rains, this otherwise hot, dry and brown part of the country turns an almost neon green with the abundant rains that pass through.

3. Try to get a good spot to shoot from on the correct side of the train. On El Chepe, this was the left side in the direction of travel from Divisadero to El Fuerte, although, because the train was not crowded at all, I found myself going back and forth between both sides trying to capture the many potential shots that abounded. If there are other people vying for position where you are, better to stake a claim and not move, or you’ll certainly lose your spot.

4. Look to shoot from an open window , not through the glass from your seat (on El Chepe, this required moving to the compartments at the ends of the train cars, where there were open windows and unobstructed views. The windows at our seats didn’t have that capability).

5. Try to be in the last car of the train so that you can shoot forward and show the whole train in the frame , including the engine, rounding a curve to that side (i.e. left side/left curve, right side/right curve). Because I was traveling off-season, our train was very short, consisting of just the locomotive, a cafeteria car and two passenger cars. To give the illusion of additional length I shot our train about halfway across this bridge (see below). Being in the last car may also give you the ability to shoot straight out the back of the train, which can offer another unique perspective.

6. Keeping Tips 3 and 4 in mind, look up the track for openings in the foliage that will allow you to anticipate when you’ll have a clear shot. On a number of occasions I’d be ready to shoot only to find that a large grouping of trees, telephone poles and wires, bushes or buildings blocked the view when I eventually pulled the trigger.

7. Caution Part 1 : Be acutely aware when sticking your head out of open windows to shoot (or for any reason), especially when looking up track, in the direction of travel. Carefully look ahead for overgrown tree branches and other objects that can inflict severe injury, especially to the face and eyes.

8. Caution Part 2 : If possible, wear clear safety glasses, or even swimming goggles, to avoid not only trees, but bugs, dust and other debris that can fly into your eyes at high speed, which actually happened to me. I caught a bug in my eye and lost about 10 minutes of prime shooting time trying to clear it, although that was the least of my problems as it could have been much worse. Eyewear can also help against the high winds created by a fast moving train. Bonus: Sunglasses can be an option, but not if the sunglasses themselves are polarized and you’re using a polarizing filter, which I suggest in Tip 10. If this is the case then you’ll get all kinds of strange effects in the viewfinder and it can be difficult to really evaluate what the scene looks like. Again, I recommend clear goggles or safety glasses.
9. Caution Part 3 : Don’t wear your camera around your neck, but use a loose hand strap or similar. The reason I suggest this is that again, those trees can be a real problem, and if your camera strap were to get caught around a tree branch as the train’s moving quickly down the line, well, I hate to think what could happen.
10. On sunny and partly cloudy days , use a polarizing filter to darken blue skies and make clouds really stand out. Be aware, however, that a polarizer will definitely give you slower shutter speeds, so when shooting in the shadows, when your camera will want to use a slower shutter speed, you’ll have to be keenly aware of maintaining a minimum shutter speed that will still allow you to handhold the shot (see Tip 13, and be sure to take off those sunglasses).

11. Use a medium to long zoom lens allowing you to quickly shoot from wide landscapes to more detail shots, and everything in between. You’re not going to want to be changing lenses in these conditions or fussing with several camera bodies. If you only have wide (i.e. 18 – 55 mm) and long (i.e. 55 – 200 mm) lenses to choose from, err on the wide side, you’ll likely be shooting more big landscapes than close-ups.

12. Take advantage of the stabilization features built in to many cameras or lenses. This allows you to shoot at slower shutter speeds and can reduce the effect of the constant shake you’ll surely experience on a moving train.
13. Keeping Tip 11 in mind, be aware of maintaining a minimum shutter speed of 1/125 of a second or faster (Auto ISO comes in real handy here). Without getting into too much detail, this is especially important if zoomed in on your subject, so know the Reciprocal Rule (not to be confused with the Rule of Reciprocity) which states that in order to successfully handhold a shot you need to shoot at a shutter speed of 1/focal length of the lens or faster (assuming a full framed sensor. Multiply by your lens’ crop factor if using a cropped sensor). Example: If you’re zoomed in at 200 mm, technically you should have a shutter speed of 1/200 second or faster (1/300 second on a camera with a 1.5 crop factor), but using the stabilization features on your gear will help, as will adhering to the next tip.
14. Take care to minimize the movement of the train by keeping your arms loose so they cushion any bouncing or shake and act as a shock absorber for your camera. Conversely, brace yourself by maintaining a wide stature with your feet.
15. Exposure Tip 1: Because of the massive cliff walls and deep canyons, you’re likely to encounter very high contrast lighting conditions with deep shadows and bright sunlight. To address this, shoot with the matrix metering (a.k.a. evaluative or multi-zone) exposure setting so that your camera evaluates the whole scene when determining exposure and not a small portion of the scene. This should average out your exposure and offer great results.

16. Exposure Tip 2: Know how to instinctively use your histogram (I can’t stress this enough for better photography in general). Be keenly aware of proper exposure because you’ll likely be shooting images that include everything from dark shadows (where you’ll want to maintain detail and reduce noise) to extreme highlights (be aware of overexposure, especially of clouds and light colored canyon walls and other bright subjects).
17. Shoot RAW. RAW is a lossless format and so the image file includes all the information from the scene you’re shooting, that’s why the files are typically 2 to 3 times the size of JPEGs. Should the scene have extreme contrast, the advantage of this is that you’ll be able to recover slightly blown out highlights and/or bring back detail in the shadows (see image here with extreme shadows in blue and blown out highlights in red. The second shot shows the image after adjustment). There are a lot of other advantages, and just a few disadvantages, to shooting RAW, so I highly recommend that if your camera has this capability that you do so most, if not all, of the time.

18. Don’t forget to put the camera down. Take a minute every now and then to enjoy the scenery, and not by looking through the viewfinder of your camera, but by actually seeing with your eyes. I’m confident you’ll discover a whole new appreciation for whatever scene it is that you’re experiencing.
Shooting from a train – or car, boat, or other moving form of transportation – can be an extremely rewarding experience, but it can take considerable practice. Before you embark on your next railway journey, be sure to get out and practice in your hometown, where the stakes are likely not as high. If at all possible, I’d recommend taking a local train ride that presents similar conditions to what you’d expect on location, so that you’re not learning in the heat of the moment, when there may not be a second chance to get it right.
Oh, and bring plenty of memory cards, you’ll need them…

Read more from our category

is a travel photography instructor and international guide who has led trips to Morocco, Bhutan, Nepal, Cambodia, Spain, Central Europe, Mexico and Egypt, plus ten fully-licensed People-to-People programs to Cuba. His latest eBook is called Essence of a Place: A Travel Photographer’s Guide to Using a Shot List for Capturing Any Destination . Ralph is the creator of the My Shot Lists for Travel app for iPhone, iPad and iPod touch®.
Some Older Comments
- Guaranteed for 2 full months
- Pay by PayPal or Credit Card
- Instant Digital Download

- All our best articles for the week
- Fun photographic challenges
- Special offers and discounts

How To Take Amazing Photos and Videos on An Amtrak Train
Photography on a moving train can be very rewarding if you are able to capture memories of your trip, but also very challenging without the right equipment and techniques. I’ve been working as a professional photographer for the last 16 years and here are my recommendations for taking great photos and videos on your trip.
- 1.1 Problem #1: Glare
- 1.2 Problem #2: Shaking and Movement
- 1.3 Problem #3: Lighting
- 2.1 Photo Camera
- 2.2 Best Lenses For The Train
- 2.3 Sample Images With The Canon R System
- 2.4 Video Camera
- 2.5 Video Camera Accessories
Understanding Techniques
There are 3 main problems that ruin photos and videos taken on a moving train, so we will break those down and give you the solution to each. Then we will break down which gear is best to use on the train.
Problem #1: Glare
On thing you’ll be fighting, especially if you have a sunny day, is glare when shooting through the window. Glare is especially bad if you have windows in front of and behind you while the sun is out. Most people think shooting their pictures from the observation car is the best idea, but in reality it is the worst place on the train for glare due to all the windows.
I prefer to shoot pictures on a sunny day either from a sleeper car room or a coach class seat. The reason is that there is a curtain on the window and you can pull it behind your camera to block any glare from the other side. Think of it as something like a photographers blind, like hunters use.
Problem #2: Shaking and Movement
Obviously the train will be moving unless you are taking pictures of a station, so to get something good you need to reduce the shaking and lessen the effect of the movement on your lenses.
To reduce the shaking you’ll want a fast shutter speed and to have your camera as stable as possible. A fast shutter speed can be achieved by shooting as a lower f stop or raising the ISO of your camera. A fast prime lens is the best choice for this. Secondly, to reduce shake you’ll want to either have a stabilized lens or have your camera mounted to the train, which will reduce any movement introduced by you holding it.
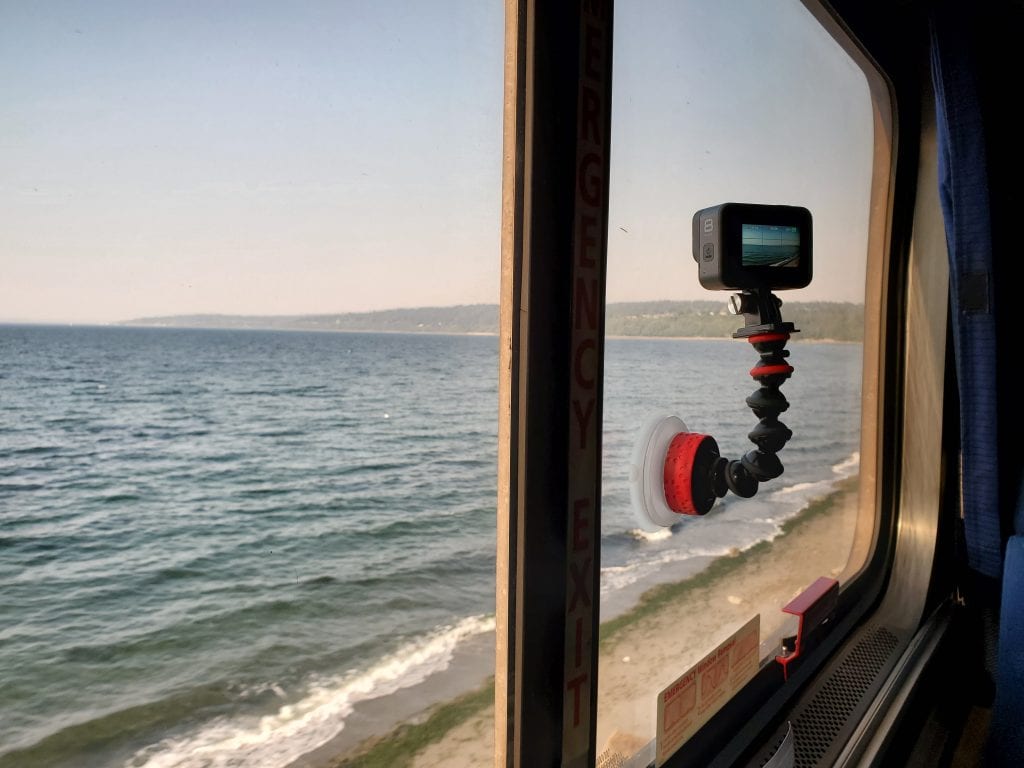
Larger DSLR type cameras can’t be mounted, so make sure your lens has image stabilization. Smaller cameras, video cameras, phones and GoPro cameras can be mounted to the window and triggered remotely with your phone or on a self timer.
The longer the lens you use in focal length, the more blur will show up in your photos on a train. So, if you are trying to take pictures of an eagle with a 500mm lens, you have more problems than shooting a landscape with a 24mm lens. It is a personal preference how far you can go without reducing the quality of your photos, and largely depends on how well you’ve minimized the shake. But, if you want to ensure sharp photos, the shorter your focal length the better.
Problem #3: Lighting
Your lighting should be fine shooting out the windows, but if you are taking pictures of people or the actual train on the inside you might need some artificial light. The best choice is just to shoot during the day, but we carry a few different lighting options for shooting photos and videos in the evening.
The Camera Gear We Recommend
Photo camera.
There are many directions you could go with a camera, but I think it is wise to first consider which system offers the best lenses to do the job you want. For my money, the Canon R series lenses are some of the finest available, and they let you upgrade your camera as you want while keeping the same lens. For that reason if I were buying a new camera today I’d choose one of the Canon R series mirrorless cameras, whichever fit my budget best.
The two higher priced cameras R6 and R5, both have IBIS, which stands for In Body Image Stabilization. That means that any lens you put on the camera will be stabilized. If you choose the cheaper RP, you can still get stabilization by buying a lens that has it. You’ll be choosing from:
- Canon RP (Budget, $999)
- Canon R6 (Mid Range, $2,499)
- Canon R5 (Professional, $3,899)

- Lightest, smallest full-frame EOS camera
Last update on 2023-04-14 / Affiliate links / Images from Amazon Product Advertising API

- High Image Quality featuring a New 20 Megapixel Full-frame CMOS Sensor.

- High Image Quality featuring a New 45 Megapixel Full-frame CMOS Sensor.
I’ve used the Canon R system professionally for the last few years and love it. All of these cameras use the same lenses, which are the amazing RF lenses from Canon.
Best Lenses For The Train
There are three affordable lenses that make sense for the train. The Canon RF 35mm, 50mm and 85mm. All three are cheap, fast, sharp, and light. Of the three lenses, only the 50mm is not stabilized, which is why it is the cheapest. Yes, you could buy a zoom lens, but you’d be sacrificing speed on the lens for that convenience, which as we said above was the biggest enemy of sharp pictures on a train.
One of my favorite lenses for landscape photography is the Canon RF 35mm 1.8 lens . It is fast and light, and is an incredible bargain for the money ($499).

- Compact macro Lens with 0.5x Magnification Ratio
The second lens you should consider, is the Canon RF 50mm 1.8 lens . It offers a little more reach than the 35mm and is even cheaper at $159. This lens is almost a must have at that price. It is not stabilized though, so keep that in mind.
](https://m.media-amazon.com/images/I/21wlPHyNwcL._SL160_.jpg "train journey photography")
- Compact, Lightweight Fixed 50 millimeter Focal Length Lens.
The third lens is the Canon RF 85mm 2.0 , which comes in at $499. It provides even more reach than the 50mm, bringing those far away landscapes closer.

- Bright f/2 Aperture Mid-telephoto Macro RF Lens with Beautiful Bokeh.
Once you get beyond these three prime lenses, the prices start to go up astronomically. The best fast zoom lens is the Canon RF 28-70mm 2.0 ($3,399).

- Bright, constant f/2 USM zoom Lens
Sample Images With The Canon R System
Video Camera
We both carry a GoPro Hero 11. We’ve tried just about every small video camera on the market and this one is the best for our needs. If you like the quality of our videos, this is what we use.

- Revolutionary New Image Sensor: expansive field of view ever on a HERO camera out of the box. This gives you an extra-large canvas for your creativity by capturing more of the sky and horizon in every shot. Zoom in, crop your shots, change digital lenses, adjust aspect ratios and more while keeping the rich textures and sharpness of your footage.
Last update on 2023-04-12 / Affiliate links / Images from Amazon Product Advertising API
It has a screen on the front and back making it easy to video yourself or your surroundings. It is also very easy to mount to the train using a suction cup. (Note: Don’t buy the GoPro suction cup, the arm is too small for window mounting, buy the Joby one below.)
Video Camera Accessories
By far the most asked question we get concerning video is how we get the video to be stable. We use the Joby Suction Cup Mount , which happens to hold the above GoPro Hero9 Black camera perfectly. If ever there was a must buy accessory, this is it.

- CAPTURE SUPERIOR PERSPECTIVES. Look at life from a different point of view with as you mount this suction cup action camera mount to any non-porous purpose. The flexible GorillaPod Arm maneuvers 360 degrees letting you get the angle you want, for the shot you need.
Last update on 2023-04-13 / Affiliate links / Images from Amazon Product Advertising API
On one GoPro we use the GoPro Media Mod . The Media Mod is a housing with a built in microphone. If you’ll be doing any talking on camera, this will provide much better audio than the built in microphone the camera has. Note though that the Media Mod does make it harder to switch the battery and the storage card. The housing must be taken off to do so. This is why we only use it on one of our two GoPro cameras.

- Built-in directional mic highlights voice audio and reduces ambient noise
- Tough, weather-resistant construction withstands the elements
- 2 cold-shoe mounts to attach your favorite lights, mics or LCD screens
- 3.5mm mic port lets you add an external mic for enhanced audio
- HDMI-out port to monitor or play back your footage
Then we attach the GoPro Light Mod to the Media Mod for difficult lighting situations. If you’ll be filming people at night it can be helpful. To use the Light Mod, you need to have the Media Mod attached.

- 4 levels of brightness—up to 200 lumens—for crisp detail
- Built tough and waterproof to 33ft (10m)
- Built-in rechargeable battery with up to 6 hours of runtime
You’ll need at least 2 batteries, so we recommend buying an extra official battery. The camera comes with one, and you’ll want to buy another. We each have 3 for a total of 6 with us at all times. They do run down faster than you’ll think.

- Advanced 1720mAh lithium-ion battery boosts camera performance over standard GoPro batteries across a wide temperature range
- Increases recording time for HERO11 Black, HERO10 Black, and HERO9 Black with up to 40% improvement in HERO10 Black using high-performance settings [1]
Allie uses the GoPro Shorty Tripod to hold the camera when filming, while I use the above suction cup mount to hold the camera. Either will work, and are better than just holding the small camera with your hand.

- The pocket-size Shorty (4.6in, 11.7cm) is the perfect partner for on-the-go activities, travel and more
- Extend Shorty up to 8.9in (22.7cm) for group shots, selfies and other hard-to-reach angles
- Prop Shorty up on any level surface with its built-in tripod
- English (Publication Language)
You’ll likely want a bigger SD card than the one that comes with the camera, so we recommend at least a 128 GB Sandisk Micro SD card . We carry many of these cards in different sizes.

- Up to 160MB/s read speeds to save time transferring high res images and 4K UHD videos (2); Requires compatible devices capable of reaching such speeds
If you have questions about your camera setup drop us a comment below and we’ll be happy to give some advice!
This post contains affiliate links, which pay us a small commission when a product is sold.

Robert Marmion
You might also like.
Everything We Use In Our Travels
Amtrak Vacation Itinerary: 12 Day United States Grand Loop Tour
Best Amtrak Trips From Baltimore
Best Amtrak Trips From Miami
Best Amtrak Trips From San Antonio
Best Amtrak Trips From Dallas
Watermarkup Blog

Best Tips for Train Photography
Table of Contents
Types of Train to Photograph

Trains are machines that travel on rails. They are mostly used for transporting passengers and freight. The most common types of trains are locomotives, passenger trains (commuter trains), and freight trains.
– Locomotive is the name given to the engine of a train. The locomotive is powered by a diesel engine or a steam engine. The engine is attached to the wheels, which roll on the rail.
– Passenger trains are trains that transport passengers. Most passenger trains have one or two engines. The passenger cars are attached to the locomotive, and they can hold anywhere from 10 to 40 passengers.
– Freight trains are trains that transport goods. The freight cars are usually longer than the passenger cars, and they can hold thousands of pounds of cargo.
You can choose to take photographs of any types of train that you like. Or you can choose to take photos of stationary trains or running trains for your railway photography.
Take the opportunity.
Train photography is very popular , but it can be tricky to get a booking. Be persistent and creative. Do your homework. Find out what kind of trains your destination has and which trains will be leaving the next day. Make a list of stations that you can visit and look for ways to get there. You may even have to book early. If it’s a big railway station, ask at the information desk if you can visit on an off-peak train. If the trains are packed and noisy, it may be easier to take pictures during the day. It’s also a good idea to take a camera with a zoom lens .
Take lots of photos.
A train journey can last more than eight hours. Try to get as many perspectives and views as possible. Look for subjects that are moving at speed, such as when a train leaves a station. Photograph details of the station and surrounding area, such as the buildings, the people waiting for the next train or the train itself. Try to photograph the landscape from different angles. You might use the train’s onboard lighting system to illuminate the scene in different ways.
Keep your eye out for good shots.
If you are taking photos in a tunnel or a dark room, set your camera, so you have a bright light behind you. This will make your picture much brighter than if you were shooting at night. For a great shot of a city skyline , find a window with a view of the building opposite. If you see a moving object, such as a pigeon, keep your camera steady. Don’t point the lens directly at it. Instead, position your camera, so the subject is at the very edge of the frame and then gently move it until the picture comes together.
Be prepared.
You might need to carry extra batteries and memory cards . Check that the camera is working properly before starting the journey. Take your camera out of its case to check that it has a good strap and that the zoom lens works. It may be useful to take a small spare lens to put in your bag in case your main lens breaks or gets knocked out of focus.
Think about what you will do with your photos.

Do you plan to email them to someone? If so, make sure you know who you will send them to. You may also want to have them printed onto a CD or DVD, so you can look through the shots later. If you are going to have them printed, do try to get as many as possible into the same size. The bigger the prints, the better.
Read and follow guidelines.
Before you start photographing trains, spend time reading up on your subject. Find out more about the train system you wish to photograph, the various types of trains and how they work. Get some basic camera training and look at photos of other people’s work. You can find lots of tips on the National Railway Museum website and on the internet.
Get the right kit.
Make sure that you have enough equipment to capture the best images of your train journey. This includes a quality tripod, a good zoom lens, a good camera body, a good flash and batteries, and a memory card, with a capacity of at least 4 GB. If you’re shooting film, make sure you have film in your camera and the right chemicals for your film.
Try to get as close to the action as possible.
Train photography is best done from close-up, looking straight down the line. Take advantage of the close-up perspective and zoom into the scenery, so that you can capture interesting details, such as the rails, signals and engines. Try to include people, too. Don’t forget that trains look their best when there is a lot of detail, so make sure you take time to find the right spots.
Keep it simple.
Don’t overload yourself with too many lenses. Instead, choose one or two that work well together, with a wide angle lens for landscapes and a long telephoto lens for closer shots. To ensure that you can easily keep track of your train, carry just one camera body. And, when photographing people , always try to get their permission before taking pictures.
Add the human element to your train photograph
It is better for you to include some people, passengers, or the train crew in your train photograph. The human element will make the train photographs more exciting and lively.
Taking the Train Decor
It is a good idea to take photos of the train decor. You can include some passengers in your photos, which makes the photo more real.
Master the basics.

Most train journeys take place at rush hour and on weekends. This means that trains will be packed and noisy. You need to be able to capture these busy times without being disturbed by the hustle and bustle of the surrounding passengers. It is also essential to remember that your train ride will probably take quite a while, so you need to plan in advance, so you don’t miss out on the best moments.
Many photographers believe that the most important aspect of taking photographs is having a clear idea of how they want the finished photograph to look. However, in reality, it is more important to learn how to use your camera correctly than to have a clear idea of what you want to photograph. Your camera will always be there for you to practice and develop your photographic skills, but you will only get the best results by practicing with a camera you are comfortable using. This question explores some of the best tips and tricks to help you become a better photographer .
First, you need to decide what you want to take a picture of. There are many types of subjects that you can photograph on a train journey; from landscapes and cityscapes to people and wildlife. The most important thing is that you have a clear idea of what you want to capture in your photograph. In the following section we’ll look at how to photograph a landscape or a scene with lots of detail.
You’ll also need to think about how you will take your photograph. Different camera models allow for different shooting methods; for example, you can choose between shooting with the auto or manual mode, using the zoom function or the wide angle setting. You’ll also need to decide if you want to photograph on a tripod or not, and whether you want to use flash or not. Some photographers like to use a long lens, while others prefer a shorter lens that gives them a greater depth of field and less chance of getting blurry images . You may find it easier to use a telephoto lens instead of a wide angle lens. The more advanced your photographic skills, the more you can experiment with different settings and shooting styles, but always remember to use a tripod and keep your camera steady when taking pictures of moving objects.
Once you’ve decided what you want to photograph, you’ll need to consider how to take it. If you’re photographing a landscape, you might decide to zoom in and shoot only the main elements or you might decide to take a picture from a distance and zoom in later to capture all the details. Similarly, if you’re photographing a cityscape, you may choose to shoot from a higher vantage point or you may decide to zoom in close to capture the detail of the architecture. Your choice will depend on the subject you are photographing and how you feel about it.
Finally, once you have taken your photograph, you will need to edit it. Many photographers like to create their own unique style and use photo editing software to change their photographs in many ways. This question is not intended to cover how to use Photoshop or other image-editing software, but instead focuses on some simple tips that you can follow when editing your images. Firstly, you’ll need to look at how the colors in your photograph are working together. You might think that the shadows, midtones, and highlights all look good, but they can be too bright or too dark. Using the levels tool in the edit menu will help you balance the brightness of the image. The histogram is also useful to check, and will show you where the image is getting brighter or darker. If you find that one part of your photograph is very bright, this could be due to overexposure, so use the exposure compensation tool to bring down the brightness. If a part of the image looks too dark , it could be that there is something covering the lens, so you should try and change the lighting or remove the object. If your image is too dark, you can use a program like Photoshop to add light or dark tones to areas you want to make brighter.
As you can see, being a good train photographer isn’t as hard as it may seem! By using simple techniques like these, you’ll soon be able to take better pictures of anything you’re photographing.
Is photography allowed on trains?
The rules and regulations are different in many countries and different train stations. You must know the rules before starting to take photographs in any train station.
For example, photographs are allowed at some railway stations in India, except flash photography , which is not permitted at any time. This is because it could distract train drivers and train dispatch staff and is potentially very dangerous.
Some train stations and local authorities prohibit photography and videography near running locomotives and on top of any train. But some will allow you to take photographs and record videos in public access areas of some train stations.
Some train stations state clearly that taking photographs on stations is permitted for personal use; for any commercial photography , permission must be sought from the railway company.
For example, the Indian National Railways (INR) allows you to film and take photography for personal use in designated areas. The INR will reserve the right to confiscate cameras, film and other equipment if you don’t comply with their regulations.
In general, you should always know regulations and check with the train stations where you want to take photographs.
How do you become a train photographer?
1. For anyone who wishes to pursue a career as a professional photographer, the first step is to find an educational program that fits his or her goals. Become familiar with the basics of photography , and then purchase a camera and other equipment.
There are a number of different paths one can take. All photography courses and degrees will teach students the basics of equipment use and composition, but they will vary widely in the amount of time spent on theory versus practical applications. It is also possible to get experience working with professional photographers through internships or apprenticeships.
2. Develop a complete portfolio of your work in order to get hired by people who are not close friends or family members.
Entry requirements vary by company; however, most hire those with a photography-related degree or with at least one year of experience as an assistant photographer.
3. To become a train photographer, you need to have a passion for trains and a good eye for photography.
If you love trains, then you will love photographing them. To become a train photographer, it’s not required that you know how to drive or operate the train.
If you are an avid train enthusiast, you should have some knowledge about different types of trains and railway systems in general. Moreover, knowing some basic photography techniques will help you take better photos and increase your chances of getting published in magazines or book covers.
You need to be patient when taking photos of moving subjects like cars or trains because they move quickly, and it takes time for them to stop or come into focus properly on film or digital media. If you want great photos of moving objects, then use a tripod so that you get sharp images without blurriness caused by shaking hands when taking photos with handheld cameras.
4. Think about what kind of photos you want to take and how you want to do it. Do you want to just photograph trains and share them with friends? Or would you like to make money at it? Do you want to be a freelancer or work for a magazine or other publication?
If you want to make money at it, then there are three ways: advertising (you sell the rights), stock photography (you sell your photos) or licensing (you get paid by companies who use your photo). Each has its own challenges.
Stock photography is easier in some ways because there’s less competition and stock agencies will accept almost any photo as long as it meets their technical requirements. You’ll have more luck if your photos have something special about them, such as unusual angles or interesting lighting. But this isn’t always possible — sometimes you just have to take pictures of things that are already interesting.
Advertising can be lucrative but requires that you find clients who need what they call in the business “eye candy.” This means they want images that look nice but aren’t necessarily important in any other way.
Always carry your camera with you. You never know when a great photo opportunity will come up, so make sure you’re always ready with a camera in hand.
5. Bring extra batteries and memory cards with you when out shooting trains. You never know how long it will take to get the perfect shot, so having extra batteries and memory cards can save you from missing out on the action!
6. Be prepared for rain or snow by bringing an umbrella or waterproof jacket with you on your next train trip!
7. If possible, bring along a tripod so that you have more control over your shots than if shooting handheld only — especially if you’re trying to capture high-speed trains passing through tunnels or other dark areas where light may be limited (or nonexistent).
Where can I take steam train photos?
There are a lot of locations where you can photograph steam train photos. You need to use a map or Google Maps or use the Internet to search for the train station in your local area.
Where you take your photo depends on what you want to capture. If you want to photograph the steam engine itself, then choose a place where it will be stationary and not moving too quickly. This might mean standing on top of a bridge or waiting at a railway crossing. For a wide-angle shot of the whole train, look out for a suitable vantage point such as an embankment or open field.
Time of day. You can’t always choose when trains run, but there are some things you can do to make sure that your shots are perfect. Morning and evening light is best for photographing steam trains because it’s softer than midday sunlight and won’t cast shadows across your images. Sunset shots can be very atmospheric if there are clouds in the sky. However, avoid shooting during the day unless there are other special effects happening like snow or rain; they will just make everything look overexposed instead of adding atmosphere as they would at nighttime when using long exposures with low ISO settings.
Get there early. You don’t want to miss out on prime photo opportunities because you were late getting there! Arrive early so that you have time to find the best spot for your shot. You can also ask other photographers where they took theirs (but don’t get into conversations about who has the best camera!).
How do you take pictures of trains at night?
Try to figure out what your camera is telling you by shooting a test exposure. If it’s too dark, increase the exposure time; if it’s too light, decrease the time.
Make sure that you have enough space between the train and the tripod so that you don’t accidentally blur out your subject in one of the shots. If you are using a remote shutter release, make sure that there is no interference with other devices around.
When you shoot at night, try to use a tripod to keep the camera steady. If you don’t have one, try to brace yourself against something solid so that your body weight won’t jostle the camera. Shoot in RAW format for better quality images and adjust exposure with your editing software
If you’re looking to capture a nighttime scene with your digital camera , try taking a series of long exposures.
Set your camera ISO to 400. Put your camera in manual mode and adjust the settings for long exposures (you can use the recommended settings from above, or experiment with different settings). Set your camera to take multiple shots in a row (a single shot would be blurry).
When you’re snapping photos of a moving train, use a shutter speed of approximately 1/30th. Follow the train smoothly as you shoot and take the photo when you feel that it is the right moment to shoot.
Use aperture priority mode (Av) and set your aperture to f/2 or faster (this will depend on how fast your lens is). The higher the f-stop number, the less light enters the camera and thus gives you more depth of field (how much of the image is in focus).
How do you shoot a moving train?
The train is a long, thin object, and shooting it is a difficult task. You need to find the best position from which to shoot the train, and you also need to be very steady. You’ll need a tripod, a camera, and a high shutter speed .
Train photography requires a tripod. And you can use a long lens, and you’ll be able to capture the train with a high shutter speed. You’ll also need a remote shutter release cable.
Find a good location. You will need to find a good location where the train tracks intersect or cross roads or other objects. If you are looking for something simple, then try taking shots of trains while they’re on the tracks. This can be done from either inside or outside your car as long as there isn’t much traffic around. Or if you want more variety, try taking pictures from different angles such as up close or far away from the train! The best thing about trains is that they always go in straight lines, which makes them easier to photograph than cars or other moving objects in the road.
Make sure that your shutter speed is slow enough to capture motion blur when shooting moving subjects like trains. If you’re unsure what shutter speed to use, just set your camera on aperture priority and let it do its thing automatically.
Tips to edit your train photography
Train photography editing is a very challenging and time-consuming task. It is also like editing other types of photography. If you want to edit your train photography, you should learn the basic skills first. Once you understand the basics of photo editing , you’ll be able to edit your photos in an organized and efficient manner. Here are some tips to get you started:
– When you are learning how to edit photos, it’s important to learn the basics first. Learn how to use the most basic tools and techniques first. This will allow you to practice, experiment, and learn more efficiently.
– Once you’re familiar with the basics, you should move on to more advanced techniques. As you gain experience, you will become better at editing your photos , and you’ll be able to improve your skills faster.
There are many ways to edit your photographs, such as:
– Adding special effects
– Adjusting contrast, brightness, saturation, and color
– Retouching the subject
– Cropping the image
– Reducing noise
– Adding borders and frames
– Adjusting the white balance
You will have options to choose based on your needs and your photos. Sometimes it is better to use one technique first, after that you can try other techniques.
Things you need to remember when editing train photography:
- Is your subject (train) clear enough and easy to see? How can you make it brighter or draw more attention to the subject?
- Are there any unnecessary things you can remove from your photos?
- Will cropping your photos make the train subject more focused on?
- Should we apply any effects or filters to the photos?
- And many more.
Best lens for steam train photography
Steam trains are amazing. They’re so much fun to photograph, and you don’t even need to be an expert photographer to capture them in action. All you need to do is be patient, and wait for the perfect moment to happen.
When you’re shooting steam trains, the first thing you need to do is set up your tripod. That way, you can use a slow shutter speed, and capture the trains as they pass by. The faster the train moves, the more blurry your photo will be.
When shooting steam trains, the train is the most important thing. You should use a wide-angle lens to capture the full train. Be patient when you’re shooting steam trains. The train will go by, and you’ll have a chance to capture the moment.
Train Photography Ideas
Train photography involves photographing trains in various locations, and poses that show the trains in action. Some of the most popular train photos are those that feature the front of the train, with the engine in full view. The engine is often featured in the foreground, while the rest of the train is shown in the background. Other popular train photography ideas include the train crossing a bridge , crossing a river, or pulling into a station.
When you take train photos, you should be aware of the different types of trains. Different types of trains have different features, and different types of photography are required. For example, a freight train will require more dramatic lighting , and a passenger train will require less.
Some ideas for you to try:
- Include some passengers in your train photographs
- Take photos of the train decor
- Take the train that is running
- Take the train steam engine
- Choose a vintage train to take photographs
- Take photos of an overground train.
- Take photos of the train rider
- Take photos of train tracks
- Take photos of a train in autumn weather
- Take photos of heritage railways or a train station

I hope this article about train photography has helped you. I really enjoyed writing it, and I’m sure you did too!
I am going to keep sharing my thoughts and opinions about the internet and digital marketing. I’d love to hear what you think.
Thanks for reading this article and I hope you’ve learned something new.
Related posts:
- Landscape Photography: The Ultimate Guide
- Best Tips to Photograph the Moon and the Supermoon
- Tips for Perfect Flower Photography
- Best Tips, Techniques, and Ideas for Amazing Desert Photography
- Best Iceland Photography Locations and Tips
- Best Tips for Great Outdoor Photography
- The Ultimate Guide to Better Adventure Photography
- Portrait vs Landscape – Which Should You Choose?
- Best Places for New Zealand Landscape Photography
- Post-Processing Landscape Photography Tips

How to Take Photos from Trains: A Photo Guide from the Via Rail

For the second time in my life, I had the brilliant opportunity to take the VIA Rail across Canada from Toronto to Edmonton. And well I would have loved to make the journey all the way across to Vancouver, I really can’t complain. This trip always has a way of grounding me and allowing my stressed to wash away, or at least be put on the back burner for a while. I thought, that since I did a general article on the train journey last time, I would give a bit of a guide on how to take photos from a moving train here on the site. Of course, there’s also a little bit of information about the train journey across Canada below as well.
I think it should be noted, too, that though these tips for train photography focus on the VIA Rail journey across Canada, they really could be applied to any train journey in the world. Anyways, below the video are the photo samples from the journey across Canada, so be sure to check out both!
Tips for Taking Photos from Moving Trains
#1: get rid of the glare.

Whenever you’re shooting through windows you’ll have glare. However, in trains you’ve got really thick panes of glass which means it’s even worse. There are a few tricks you can use to get rid of this. One of them is to get your lens as close to the window as possible. Another trick is to turn on all the inside lights in your cabin. Also, you can try shielding the glare with a towel, sheet, or even just your hand. Glare ruins cool photos, try to get rid of it.
You can also use a polarizing filter. That will cut out some of the reflection. I always keep one with me in my camera gear kit , just in case.
#2: Use a Faster Shutter Speed than Usual

When you’re taking photos from a train, the outside world speeds by meaning that you need a quicker shutter speed to capture it sharply. Now, if you’re familiar with the basics of photography you’ll know that there are three components to gathering light for the right exposure: aperture, ISO, and shutter speed. Thus, if you need to speed up the shutter speed you’d need to increase your ISO, open up your aperture, or some combination of both, to compensate for the decrease in light. Personally, I just bump the ISO to compensate because I don’t want to lose any depth of field. Remember that if you double your ISO, your shutter speed will double too.
#3: Use the Movement to your Advantage

In photography movement is only your enemy if you don’t know how to take advantage of it. When you’re in a fast moving train, you can take that speed and play with it with slower shutter speeds. You can do fun things like creating a motion blur for outside the train windows to make the world look like it’s flying by. You can also, if given the opportunity, get your camera outside the train window and shoot a still looking train with motion on the side. On this trip, I also shot the train tracks this way. Motion is your friend, so take advantage of it.
#4: Focus on the Details

It’s easy to look out the window of a train and want to capture it all. However, you need to also try to capture the smaller things out there. Otherwise, you’ll end up with just a lot of photos that look really similar. On a train ride like the VIA Rail get out a longer lens and try to pick out some of the details in the landscape like the farms, cabins, and tractors.
#5: Don’t Forget the Inside of the Train

You could easily just sit staring out your window all day shooting out at the world beyond, but part of photography is capturing the whole pictures. Of course, that includes taking photos inside the train as well. In tight spaces like trains, I like to pull out a really wide angle lens like the 10-20mm Sigma (16-35mm instead for full frame) and give a nice full view of life in the train. Capture things like your suite, the dining car, the viewing areas, etc.
#6: Stabilize!

No matter what kind of photography you’re doing stabilization is so important. Whether you’re doing travel photography in Iceland or whether you’re taking photos on Safari in South Africa , you need to keep your camera still to get the highest quality photos. On trains, it’s as important as anywhere as the vehicle is always bumping around and shaking too. Personally, I like to use a monopod well shooting in trains. A monopod is great because it gives you added stability, but still lets you be completely mobile. I also like that in the tight spaces of the train it doesn’t get in the way of other passengers. I used my 3 Legged Thing Brian tripod and pulled off the detachable monopod for most of the trip.
#7: Get Out of the Train Whenever Possible

When trains like the VIA Rail stop, you should be getting out. Even if it’s just a 5-10 minute stop, jump off the train and do some shooting. It’s the best way to broaden the variety of your images from the journey. Capture the staff helping passengers, capture the train itself, and capture the little towns you stop in. Jumping off the train for a couple minutes isn’t just good for your images either, it’s probably nice to grab a breathe of fresh air anyways.
#8: Don’t Forget the People

We can easily get so focused on the landscapes, scenery, and train itself that we forget about the human element involved in a train journey. And, yes, I know it’s a bit difficult to take photos of people for some. However, without capturing the people on the train, your journey’s images are incomplete. Muster up some courage and ask people if you’d be able to take their photo. Grab the staff, the conductor, and the passengers. Hell, bust out and grab a selfie.
#9 Join a Travel Photography Workshop?
If you’re keen to get better at photography but also have an awesome travel experience, you should join one of my travel photography tours out in the world. I go to some really incredible places – many of which have train journeys – and we have a lot of fun with our photography no matter where in the world we end up.
What’s Next on the Photography Blog ?
I’m now in Western Canada for a while. I’ve got a couple really cool projects coming up from here in Alberta . I’ve also got a bunch of gear reviews and more tips and tutorials. Stay tuned and subscribed.
Working my photography and writing some blog posts your articles are a big help!
Thanks David, I’m glad they are working for you!
These photos are a treat! Trains are my favourite mode of travel, after boats of course, so I always remember to carry a polarizing filter to fend off the glares.
I’ll take trains over boats any day of the week. Love the train rides anywhere in the world. And, yeah, that’s another good piece of advice for taking photos from a train, pack your polarizer.
Thanks a lot for sharing your experience Brendan, very useful tips!
These pictures really are great. Love your tips, I am going to do two long train rides next week so i can practice them straight away.Hope to get some decent pics to use on our blog.
I hope so too Tikva, enjoy your train trips!
Hi. Just wanted you to know that your video about taking photos from a train was featured in a recent VIA Rail blog post. Lots of travellers have commented on how helpful this advice is. Here’s the link: http://www.viaevolution.ca/2014/11/13/stories-from-the-train/
Thanks for that Malcolm! I love the Via Rail, can’t wait until my next time! 😀
Hi Brendan,
Train trips are awesome always as we can see many landscape, lakes, people, etc during our journey. And your tips for taking photo was really good. Will checkout on the next train journey.. 🙂
Blogging is definately not my day job. Im trying to promote my business by attempting to write about it. But crap could it be ever difficult. I really do admire your posts, and I had to comment to just give you kuddos on wonderful content and information.
Leave a Reply Cancel reply
Your email address will not be published. Required fields are marked *
Notify me of follow-up comments by email.
Notify me of new posts by email.
This site uses Akismet to reduce spam. Learn how your comment data is processed .
Why Sign In? Subscribers, sign in to access exclusive content. Unlimited Members, sign in to enjoy sitewide access.
Railroads & Locomotives Photography Tips Mirrorless cameras in railfan photography
Mirrorless cameras in railfan photography

Mirrorless characteristics & advantages
Email Newsletter
Get the newest photos, videos, stories, and more from Trains.com brands. Sign-up for email today!
Mirrorless cameras in railfan photography: The mirrorless camera revolution might be the biggest conversation in photography since the introduction of the digital camera more than 45 years ago, but will mirrorless camera technology evolve to become the new norm, or does it simply give photographers more options?

Brief history of mirrorless cameras
Mirrorless technology was introduced to the marketplace in 2008 with the release of the Panasonic Lumix DMC-G1 . Fujifilm entered the mirrorless arena with its X-series in 2011, as did Nikon with its Nikon 1. Canon entered the market in 2012 with its EOS M lineup.
Early on, the convenience of a mirrorless camera made them attractive to amateur and hobbyist photographers, while serious and professional photographers remained loyal to the DSLR. But as the mirrorless technology has improved, some DSLR-dependent shooters are branching out and embracing the electronic viewfinder, lightweight design, and portability offered by mirrorless cameras, produced by Fuji’s X, Nikon Z, and Canon’s R mirrorless brands, among other brands.
To better respect the relationship of DSLRs and mirrorless cameras, we have summarized the key characteristics of each camera type below.
DSLR characteristics & advantages
• Optical viewfinder • Image stabilization minimizes camera shake • Manual settings placement • Longer battery life • Durability under adverse conditions • Broad selection of interchangeable lenses
Mirrorless characteristics & advantages
• Electronic viewfinder • Compact, lighter design • Continuous live view features • Fast auto focus, shutter speeds • Simplified lens mount adapters • Superior video quality
Opinions of mirrorless cameras among railfans
TRAINS recently surveyed regular contributors, as well as gauged several well-known rail photographers who have transitioned to mirrorless. In our conversations, it was clear that many were initially drawn to the mirrorless camera for its lightweight and compact design.
“I do a lot of hiking for my photography, so keeping weight down is helpful … In early 2014, I sold all of my Canon gear and took the plunge with Fuji. I haven’t looked back. It made photography fun again,” says Scott Lothes of Madison, Wis., with the Fujifilm X-T20.
“What made me switch was pretty straightforward: form factor … I do a lot of hiking to spots, so the lighter the load and more room in my camera bag is very beneficial,” says Ben Sutton of Pittsburgh, Pa., with the Canon R5.
Image quality and auto-focus are comparable with no defined winner
After surveying photographers, the consensus was that image quality with mirrorless cameras is comparable to that of a DSLR. But advancements in technology may give mirrorless cameras an edge in the long run as new models further improve autofocus, image resolution, and high-ISO sensitivity. In some instances, some photographers believe mirrorless quality may already be superior. But in summary, it’s a draw.
“I’d say [mirrorless] image quality is comparable or slightly better. The Fuji files are sharper straight from the camera than anything I saw out of my Canons. I do occasionally see the smaller sensor of the Fuji struggle to resolve large areas of extremely fine detail, like blades of grass in a distant field, but that takes some serious pixel-peeping and only comes up in those kinds of texture-heavy situations,” Lothes says.
“Image quality is roughly the same … and I did get the benefit of faster ISO speeds and cheaper image stabilization features [compared to the Canon 5D Mark II],” says J. Alex Lang of Pittsburgh, Pa., with the Fuji X-2 Pro.
“The [Canon] R5 is basically a mirrorless version of the 5D series,” Sutton says. “The migration was seamless.”
Mirrorless cameras in railfan photography: Embracing the electronic viewfinder
In replacing the optical viewfinder, the new electronic viewfinder may be the single most noticeable change. Some of the perks of the EVF include a real-time live image preview that allows you to alter settings without taking your eye out of the viewfinder. In other words, no more test shots as you wait for the train to come into view, because the end result is shown in real time, all within the viewfinder. For some, this is welcomed.
“The ability to change the exposure in the viewfinder, in the moment, has been a game changer for me. I find that I have more ‘keepers’ with the EOS R than I ever had with a DSLR,” says Jeff Terry of Newport, Minn., with the Canon R. “Even better is that I can have the histogram displayed for me in the viewfinder itself, so I know right away if I’m going to clip the highlights.”
“The electronic viewfinder is great if you’re doing a lot of running and gunning because you don’t have to set your exposure, chimp the photo, and adjust. You can see the changes in front of you,” says Justin Franz of Whitefish, Mont., with the Canon R.
But Sutton warns not to be too reliant on the tech-heavy mirrorless.
“The EVF is something to get used to. It can do exposure simulation, but you can really mess up an exposure if you don’t pay attention to your meter,” Sutton warns.
DSLRs come out on top for durability, battery life
While the small, compact design of a mirrorless camera is attractive to many rail photography consumers, the bulkiness of a DSLR gives the impression its heavy design is able to withstand more trackside abuse compared to its lighter successor. And as for battery life, the DSLR is far superior.
“Battery life was definitely better with my DSLRs; it’s an Achilles’ heel of mirrorless cameras,” Lothes says.
“My [mirrorless] Canon R eats up batteries like you wouldn’t believe,” Terry says.
“I haven’t had any situations in terms of drops or anything like that, but the [Canon] 5D Mark III feels like it could handle accidental situations a little better,” Sutton says.
Mirrorless cameras in railfan photography: Who prevails in the lowest of light?
Railroading is a 24/7 sport and low-light photography is a dramatic time to capture trackside action. Knowing which camera is proficient at the darkest hour is crucial for most any semiserious shooter.
“The grittier, the darker, the rainier, and the muddier the better,” Sutton says. “The 5D Mark III was excellent in that regard, but when adding the R series, specifically the R5, to my arsenal, my style was elevated tenfold. I knew mirrorless tech and updated Canon sensors could handle higher ISO and lower light pretty well, but when I started shooting with it in those conditions, I was in another realm.”
“For low light, I might give a slight edge to a full-frame DSLR compared to my APS-C mirrorless cameras, but honestly, it’s a slight edge. The mirrorless is definitely as good or better than the APS-C DSLRs I’ve used. I have not tried any full-frame mirrorless cameras, so I can’t speak for their capabilities. I don’t hesitate to shoot at up to ISO 6400 with my Fujis, and that’s as high as I ever went with any of the Canons that I’ve owned,” Lothes says.
“Low-lighting conditions are evenly matched, although I give my Canon 6D a slight edge in that department,” Terry says. “I still use [the DSLR] for night photos.”
Photographers still have the option to choose between DSLRs and its vast collections of interchangeable lenses or make the plunge to mirrorless, but camera makers’ focus on mirrorless tech will ultimately make the purchasing decision for consumers in favor of mirrorless cameras in railfan photography. Manufacturers are spending more research and development on the mirrorless realm. It was announced in early 2022 that Canon’s 1D X Mark III will be the maker’s last DSLR, with the company focusing on mirrorless cameras going forward.
“I figured the end was coming for the Canon SLR — eventually — but I wasn’t expecting it to come this soon,” says Franz.
7 thoughts on “ Mirrorless cameras in railfan photography ”
Olympus have been leading the way with mirrorless cameras for years but not mentioned in the article, why? The OMD em-1 to em-3 cameras and he new OMD 1 lead the way in image stabilization and weather sealing so are ideal cameras for railfans, and a lot lighter!
For me, when choosing a digital camera, no matter if its for stills are video, the # 1 feature the camera MUST have is in addition to the electronic view finder, is an optical view finder. The reason: Because trying to look at a electronic view finder out in the sun, is impossible. The picture is complete washed out, and you can hardly even see it its working or not.
Are you looking through the viewfinder or at the back screen? I have seen too many people with cameras held out at arm’s length so they can see the screens and then complain that their videos are shaky.
I use a Nikon D750 and so far very happy with results. I will agree it is heavy especially when I use my 24-120 mm F4 VR lens. I get very sharp pictures. I also have a 50mm F1.4 which is very sharp and also lighter. Someday I would like to shoot with mirrorless and compare the results. Certainly the lighter the better at trackside.
Olympus has been selling mirrorless cameras for years now and I have to agree that the EVF ability to show you the exposure results is one of its prime advantages.
I use a Fuji XT-4 for my train and animal photography. I love its ultra-fast focus and excellent image quality.
As a contributor to Trains and other magazines, including many automotive titles, I can say that Mirrorless is the way to go. I have always been a Nikon shooter but picked up a Sony APS-C camera along the way. Although very light in form factor, the menus and ergonomics left lots to be desired. When Nikon introduced the Z6 cameras (The Nikon 1 doesn’t count!) we were off to the races.
I never intended on using Mirrorless to lighten my load and believe me, the current pro series of cameras including the Nikon Z6 II and the flagship Nikon Z9 are no lightweights. What they do offer is blackout-free shooting and with the Z9, up to 120 frames-per-second in a reduced file size and 20 fps in standard size. Track focusing is now a thing, with the camera’s 3D AF system. It can also be switched for tracking photography that can follow focus with animals, people and vehicles. A train is a vehicle and the Z9 locks on right away.
The Z9 is a pro camera with a premium price tag, but there are other models within the Nikon lineup that offer stellar imagining capabilities too. Best of all, Nikon lenses all the way back to non auto focus models, can be used with the FTZ or FTZ II adapter.
Stay safe when shooting!

Preston Cook archive finds home at Barriger Library

From the Cab: Careful, I might break your camera

EMD NW5: a light road-switcher diesel that didn’t

Valpo Dummy commuter train
Shop our Hobby Store
Members enjoy 15% off any purchase in our store. Join Today !

How Diesel and Electric Locomotives Work
After reading this book, you will understand what is happening inside the next locomotive you see!

Great American Steam Locomotives: Articulateds DVD
Articulateds capture the heart and minds of anyone who comes out to see them.

Steam Across America
See historic power come alive in this all-new special issue from Trains magazine!

Milwaukee Road Metal Sign
Celebrate the Milwaukee Road with this metal sign
Stay updated
Get updates and special offers via email from Trains.com brands!
Traveling Exhibitions
The Center for Railroad Photography & Art creates partnerships with photographers and museums to bring multiple forms of beautiful and significant railroad art to venues across the country. Stemming from a core focus to preserve and present significant images in railroading, our traveling exhibitions include both solo and group shows that span the history of railroading in the United States and beyond.
Since the first United States railroad thundered into action in 1829, American industry spread across the continent as tracks were driven down from coast to coast. The birth of railroads helped catapult the United States – and the world – into a new industrial age that defined modern society, as we know it. Following quick on its heels, the art of photography flourished in the late nineteenth century to capture not only memories but the beautiful forms of everyday life as well. Over the past century artists have aspired to document the enormous impact railroads have played in American history, society, and culture. Through appealing topics that encompass the almost 200-year-old history, the Center’s array of traveling exhibitions taps into not only significant educational themes profitable to all ages, but also introduces visitors to the stunning and evocative world of railroad photography.
If you would like to find out more about bringing one of our shows to your venue, please contact the Center at 608-251-5785 or send an email to info [at] railphoto-art [dot] org .
Current Exhibitions
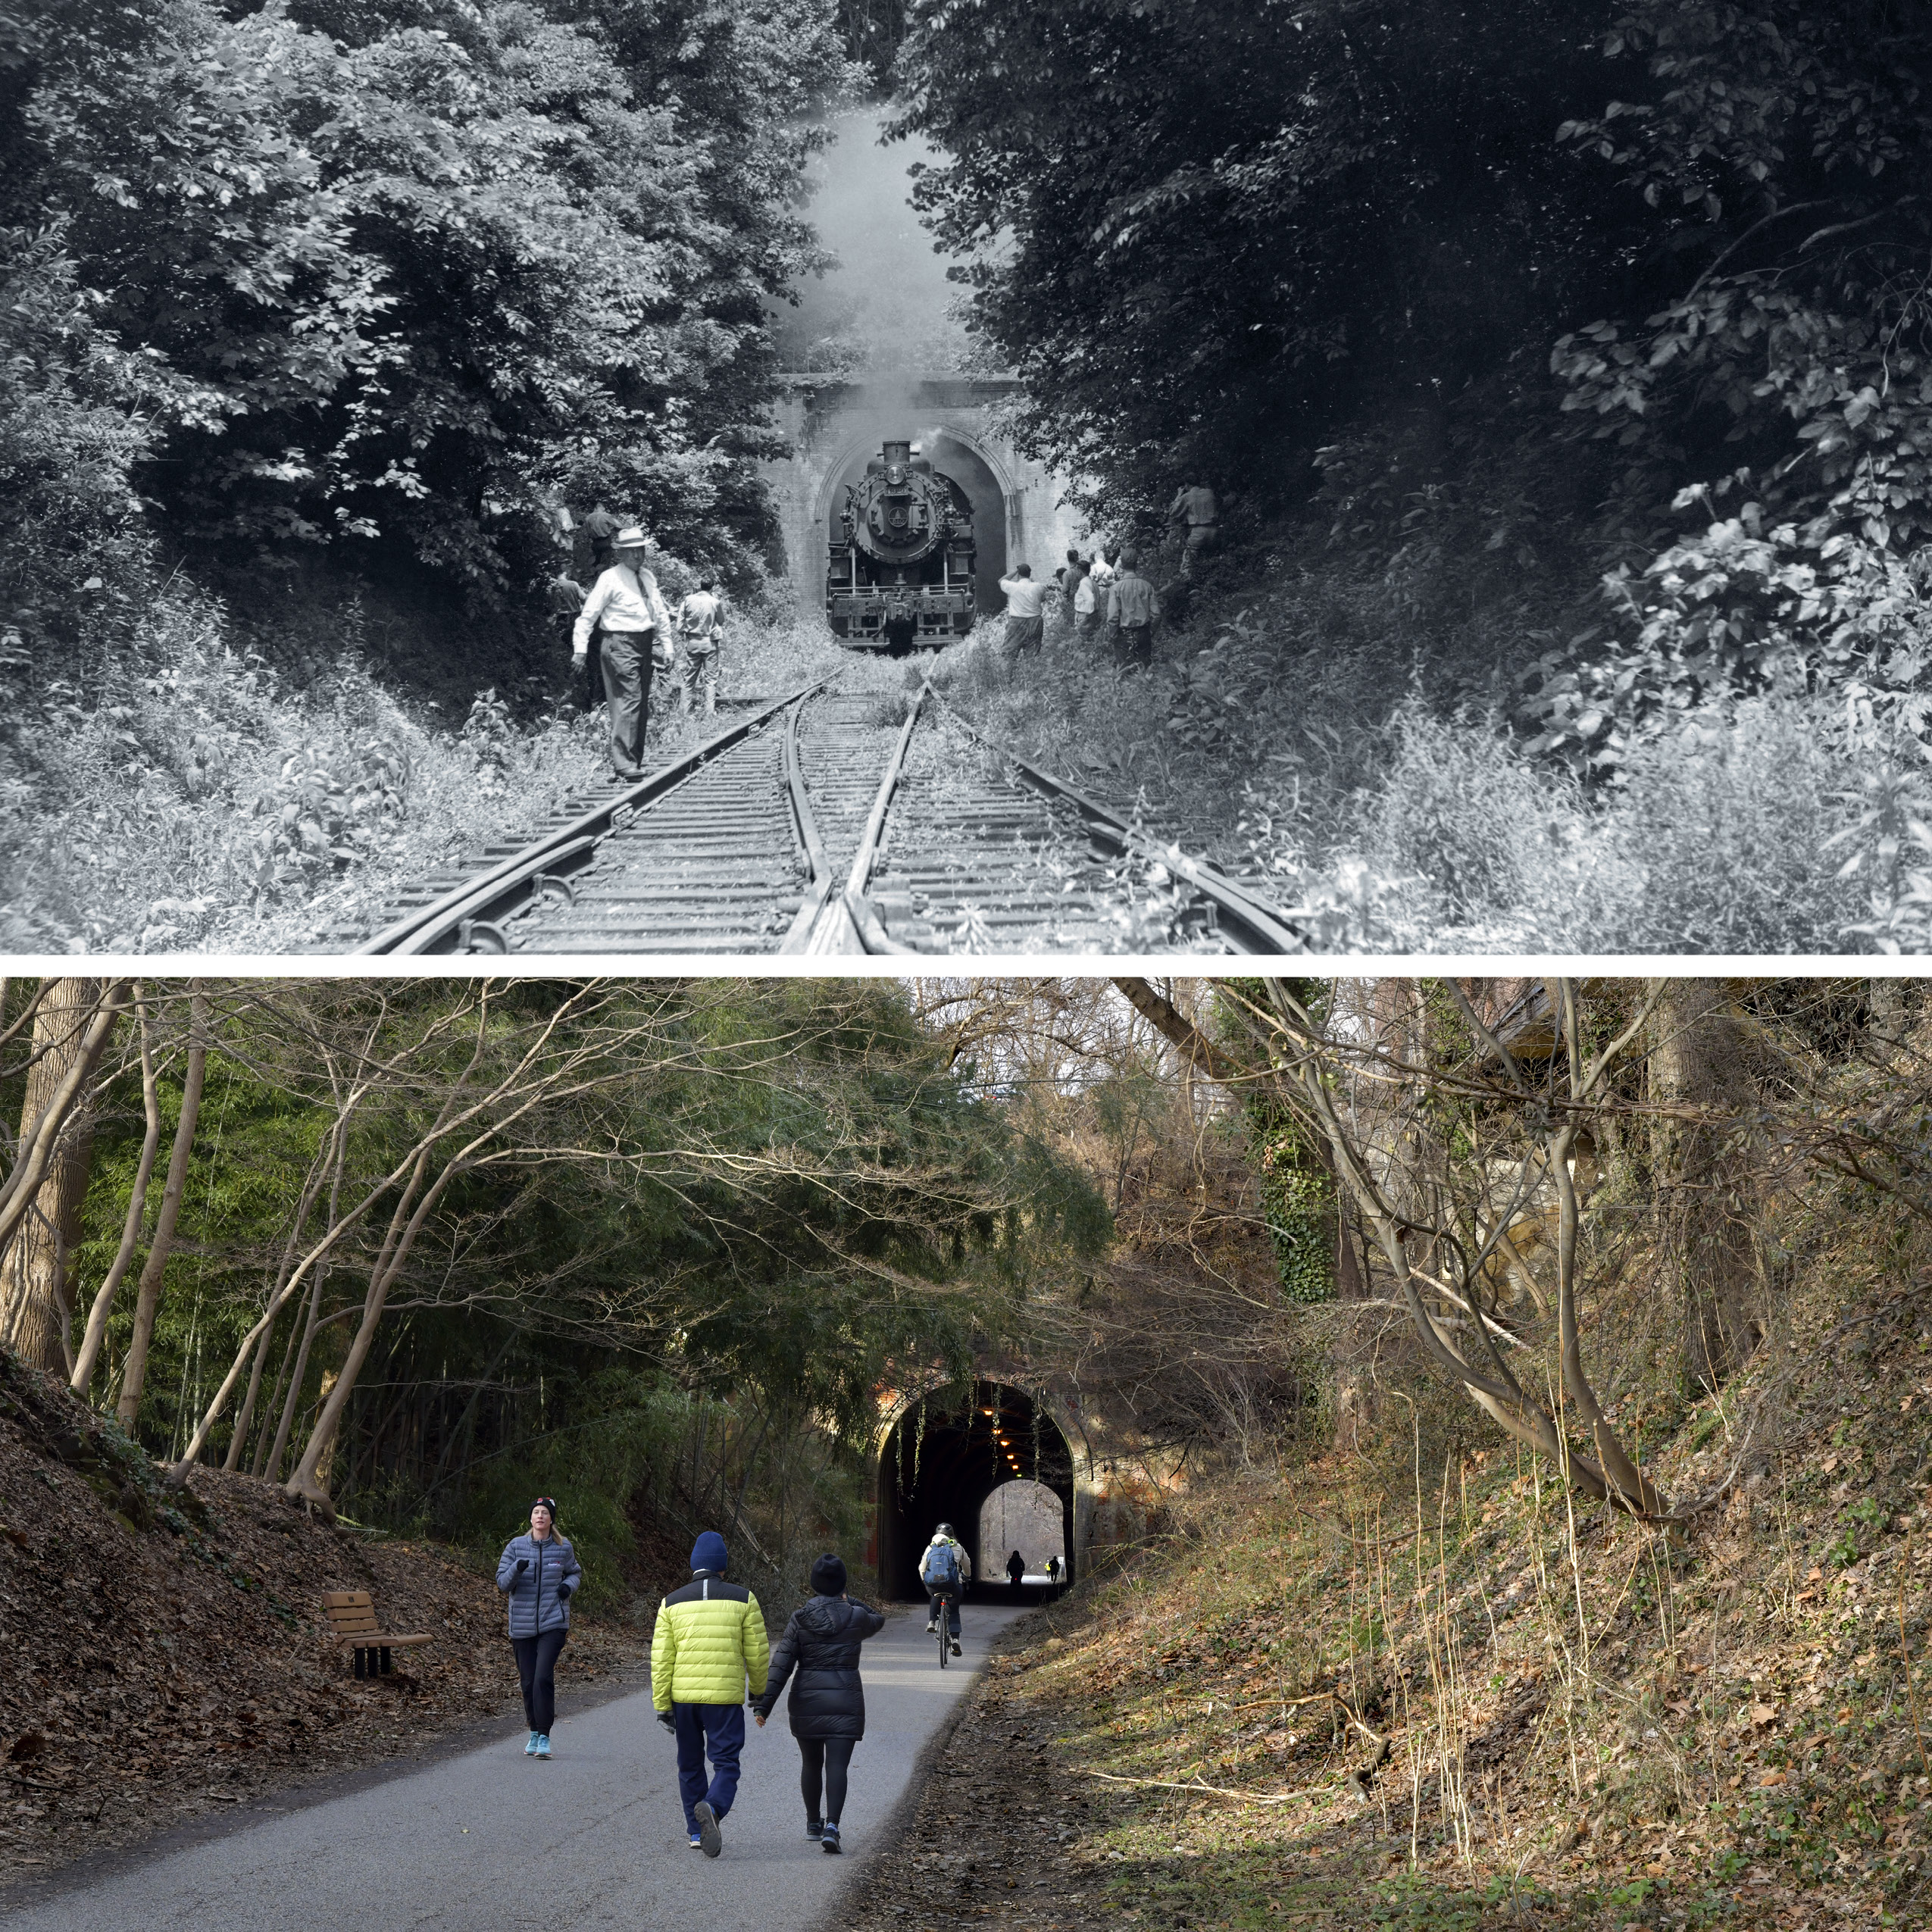
Rails || Trails is a traveling photography exhibition that explores the lasting ways railroads connect people and places through the rails-to-trails movement in the United States. The mission of the exhibition is to educate the general public about the prolific influence that railroads have left on the United States’ history, geography, economy, and community structures through the lens of the rail-trail movement and its presence in both rural and urban life.
The exhibition spotlights 24 rail-to-trail transitions across 19 states. The photography features collections from the Center for Railroad Photography & Art, the Denver Public Library, the Museum of History & Industry, the Historical Society of Western Virginia, and many more. We are also proud to feature the photography of members of the Center for Railroad Photography & Art who assisted in the creation of this exhibition.
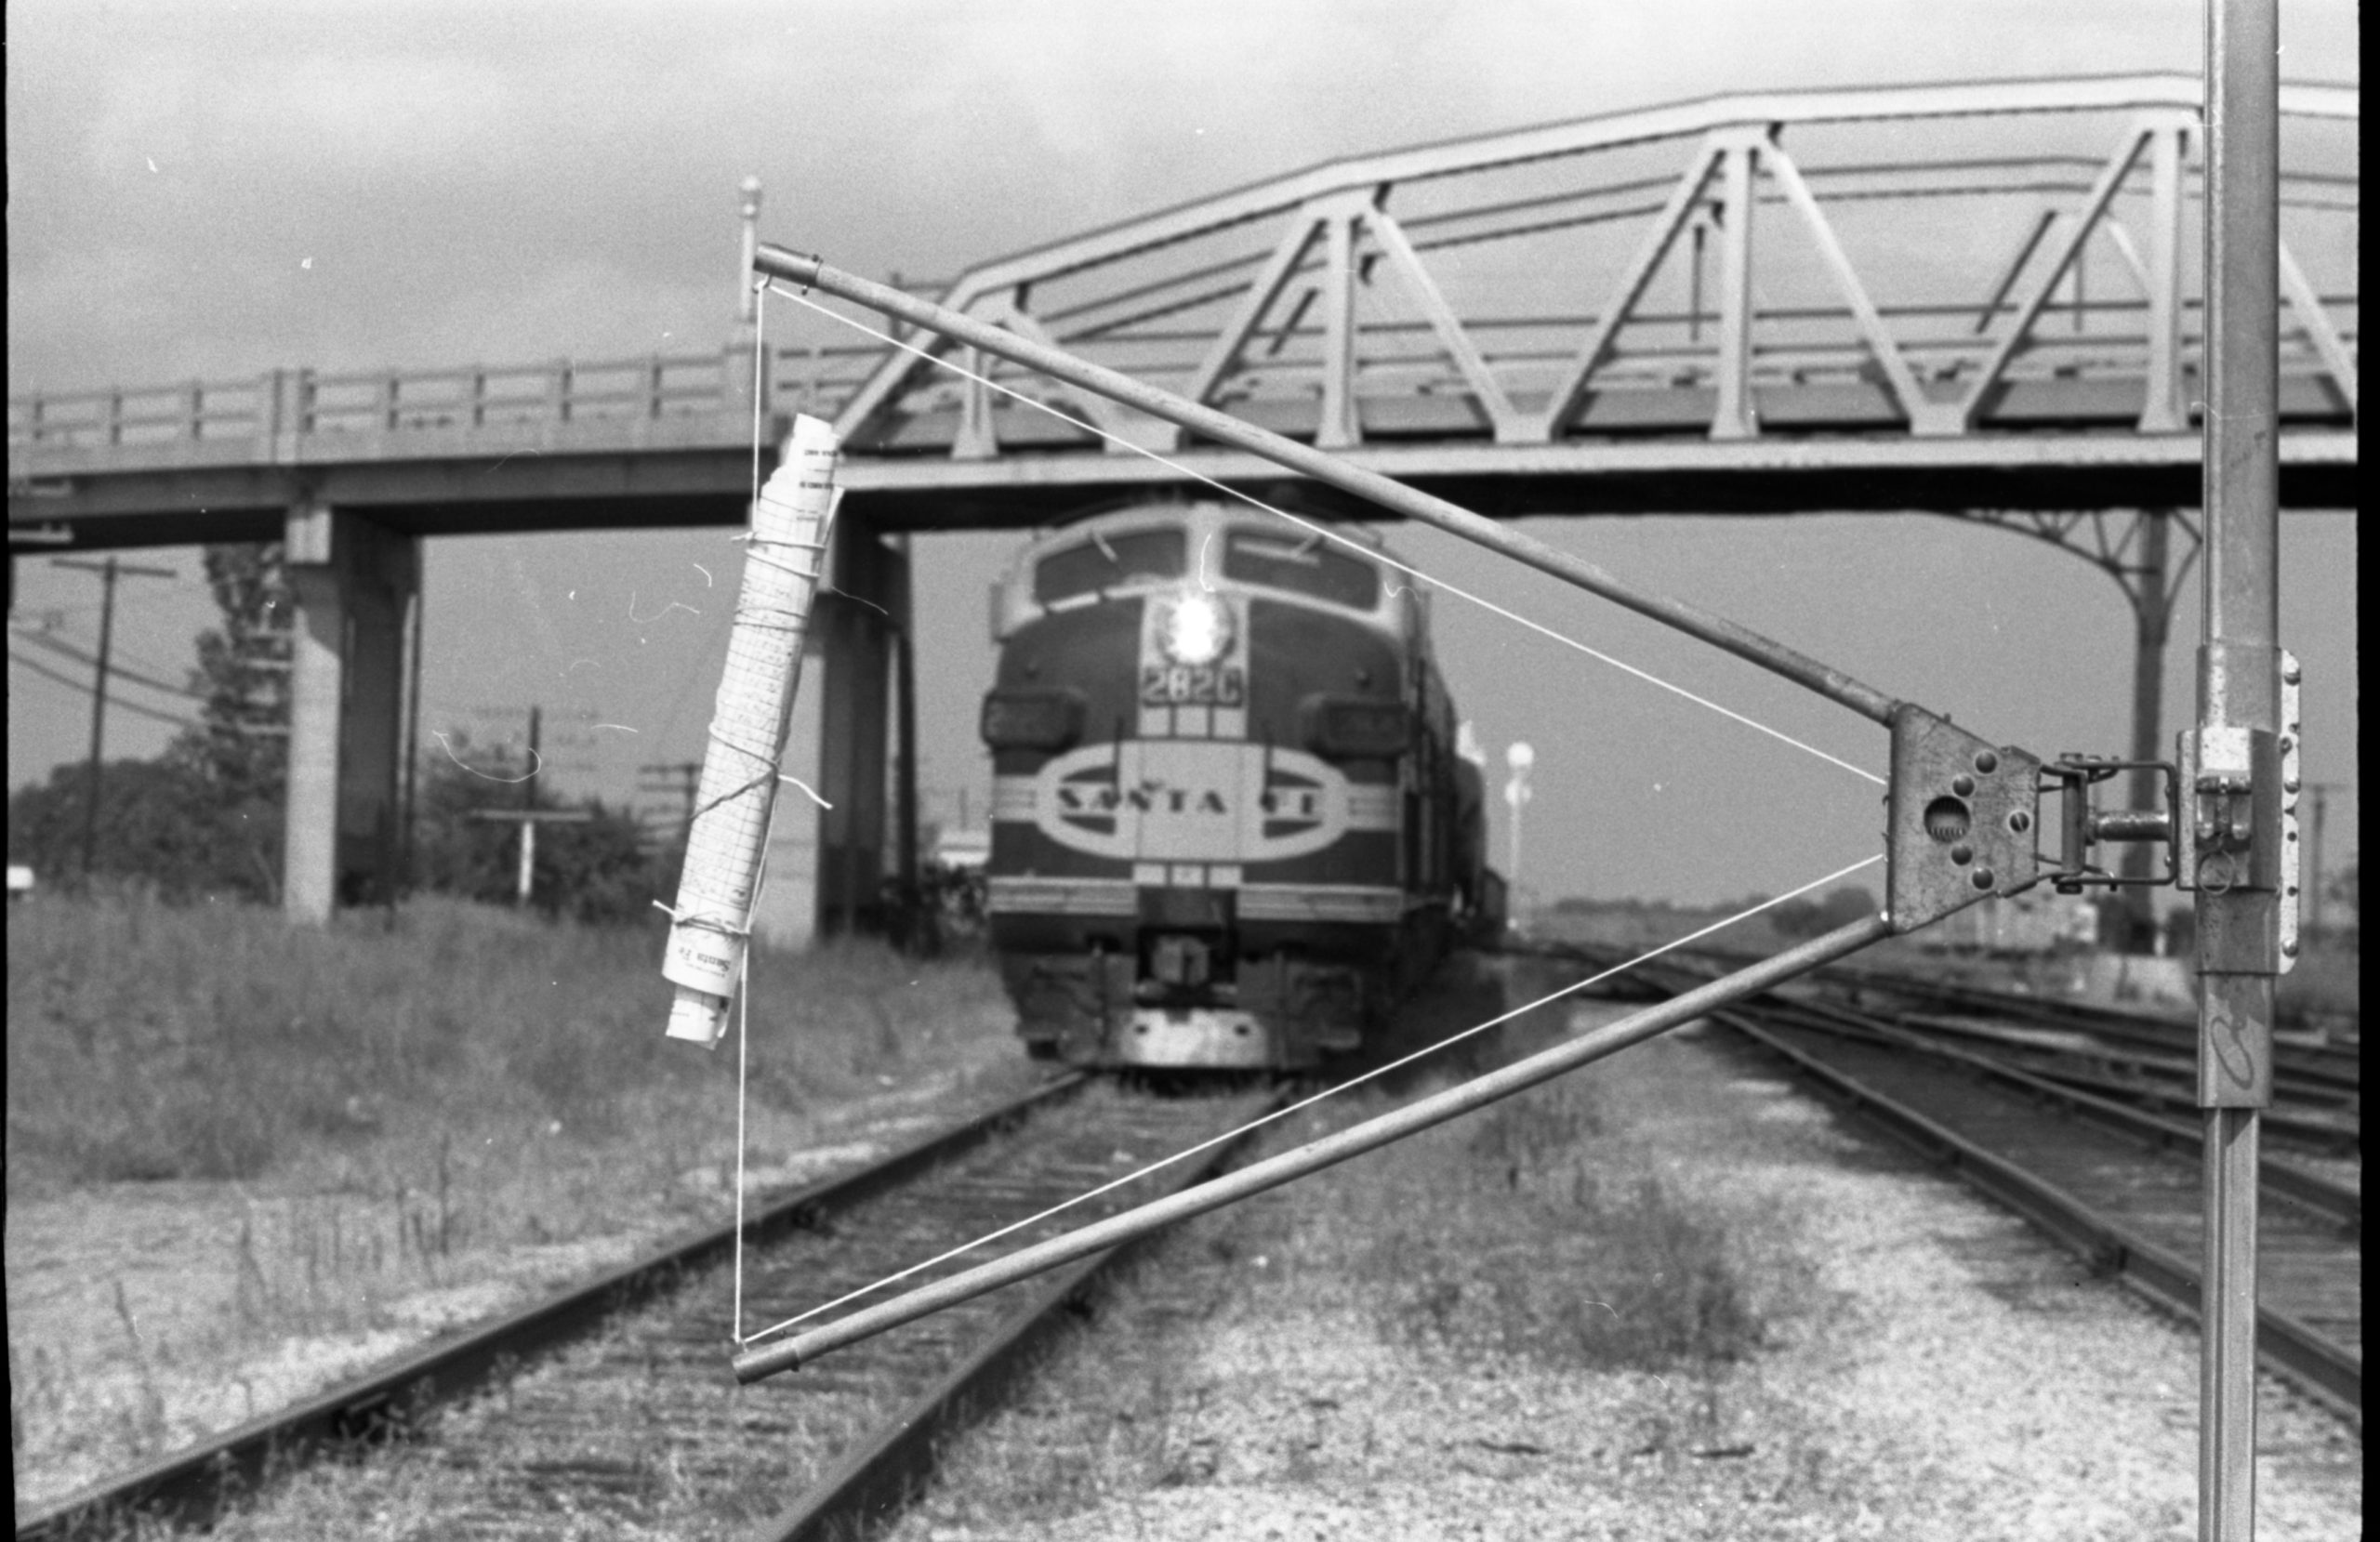
Wallace W. Abbey: A Life in Railroad Photography
The exhibition Wallace W. Abbey: A Life in Railroad Photography serves as a platform to present the life work of one of America’s most dynamic railroad photographers. Abbey’s unique role as a photographer, journalist, historian, and railroad industry executive allowed him to capture often overlooked perspectives spanning primarily from the 1940s through the 1970s. He offers a full understanding of all aspects of railroading and delivers his visual ideas in an exciting presentation enjoyable to the railroading community and the general public alike.
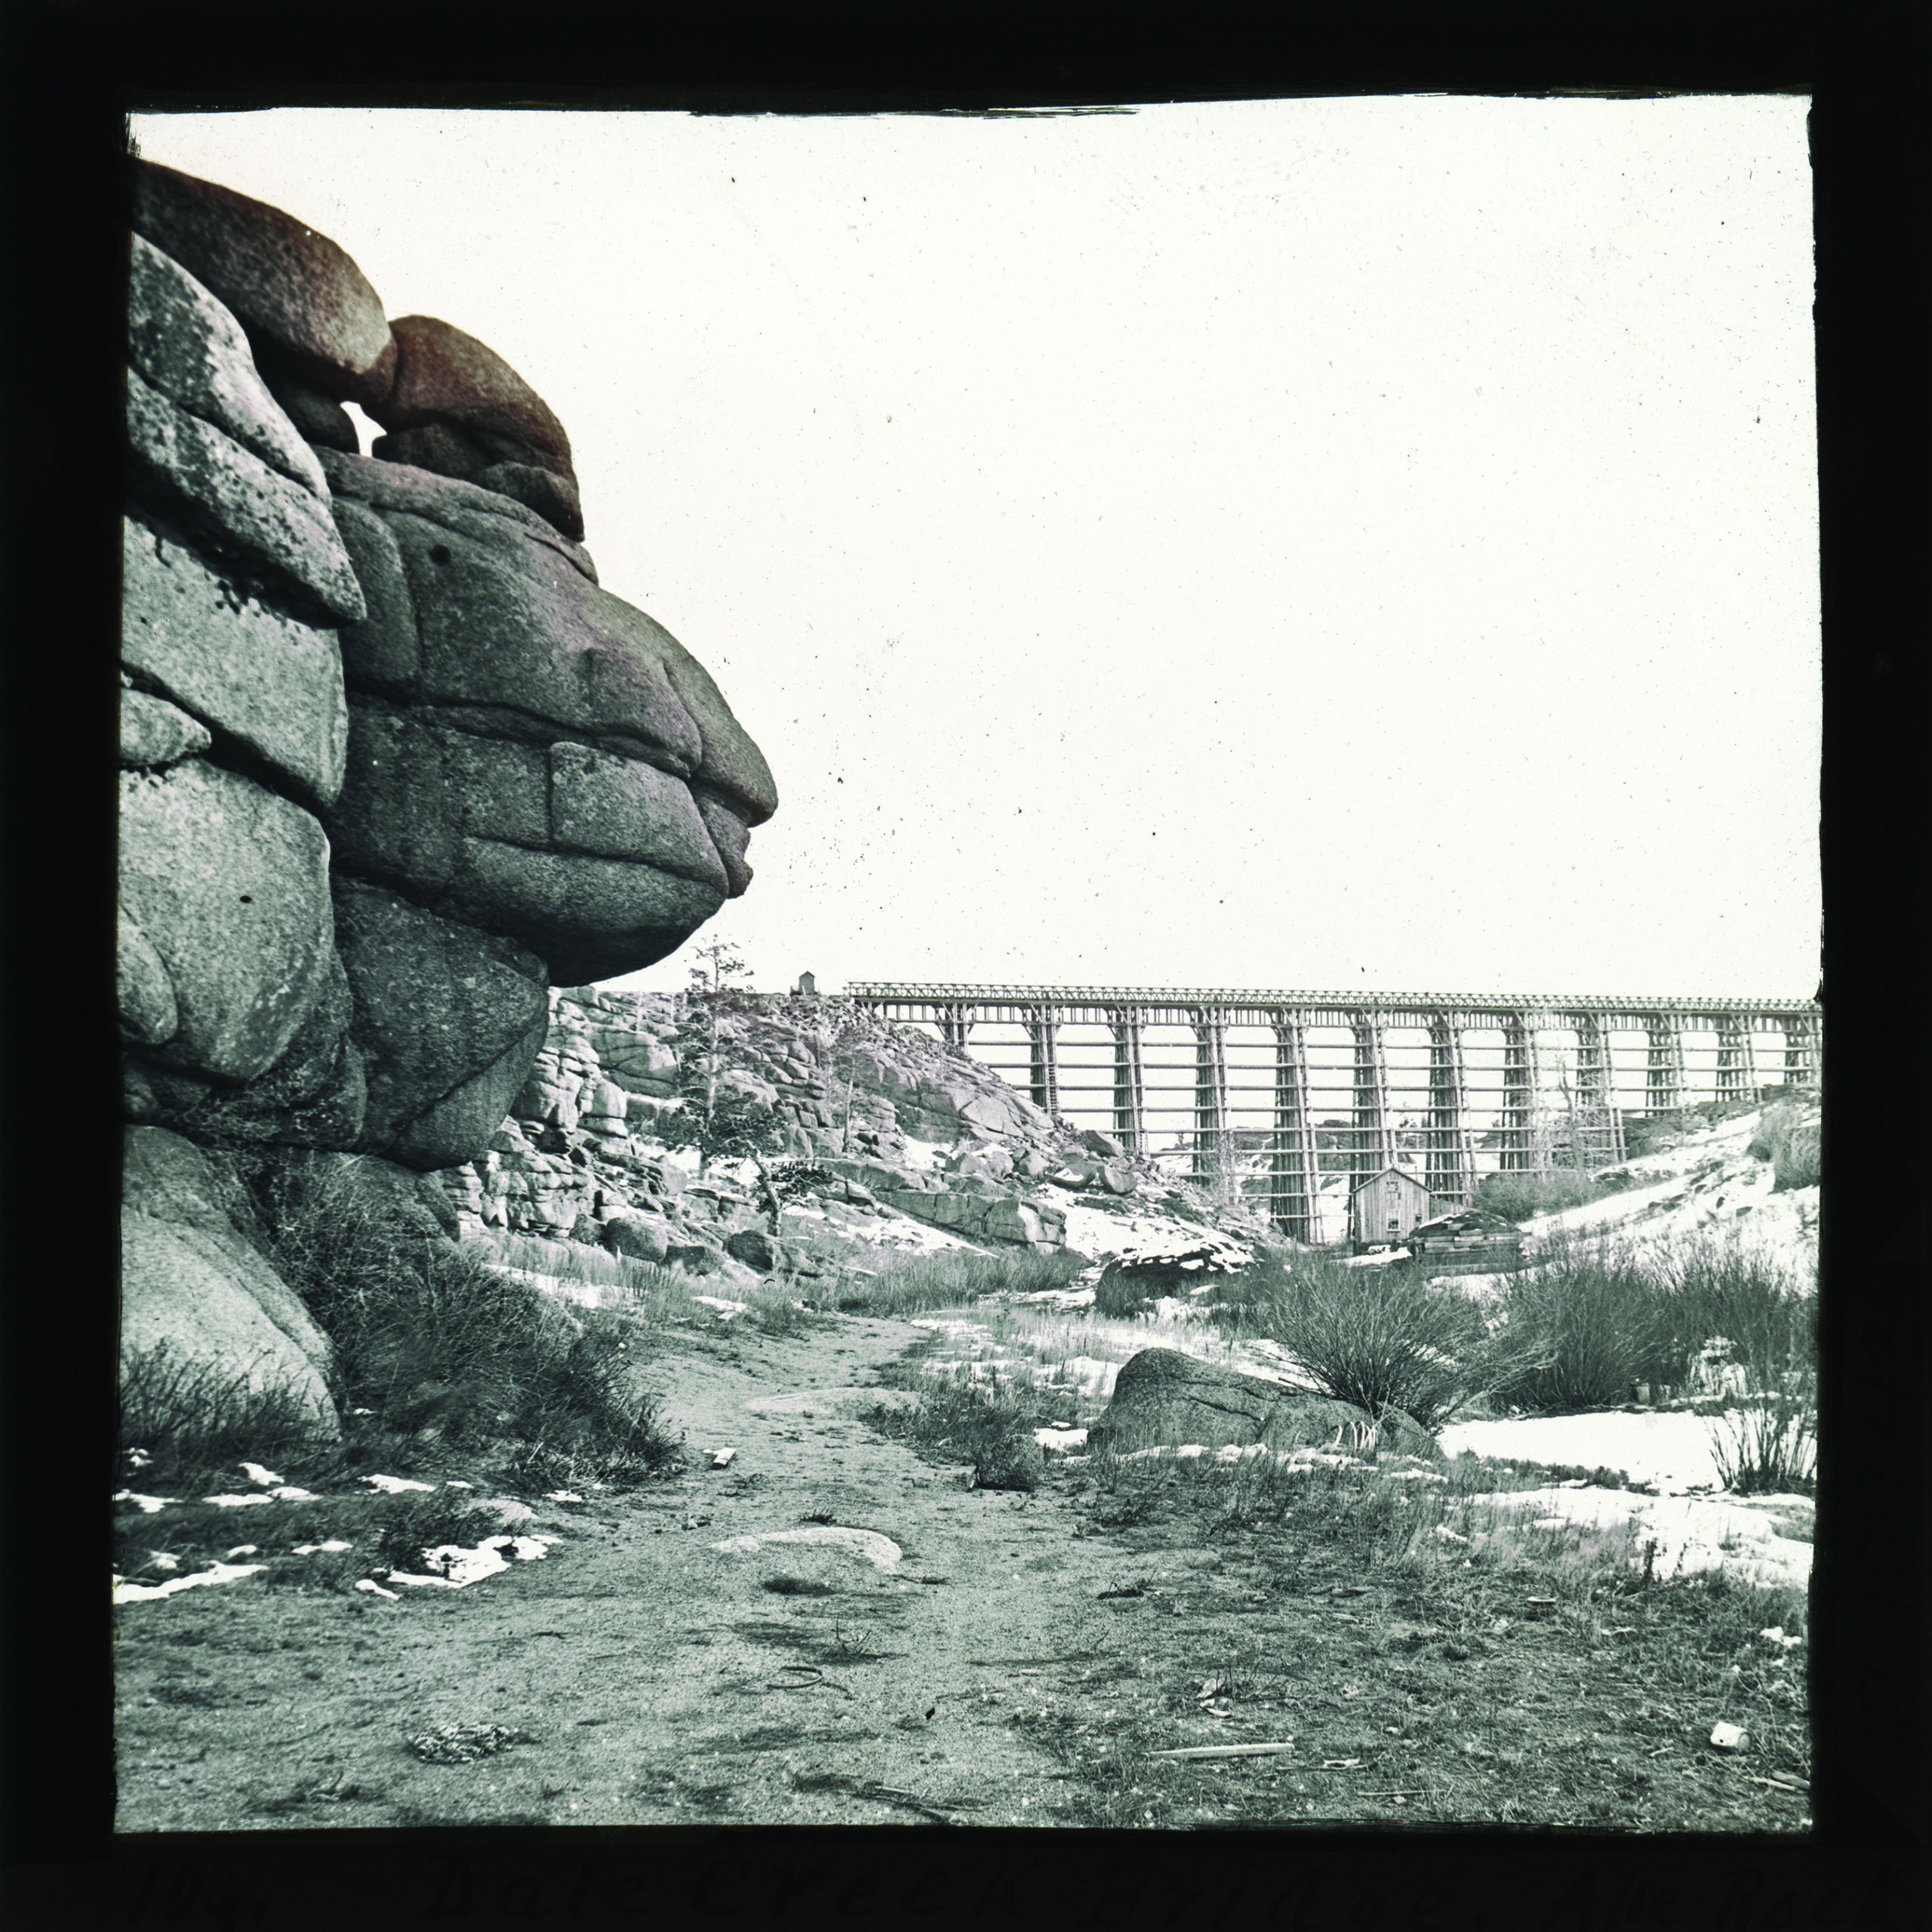
After Promontory: 150 Years of Transcontinental Railroading
Following the meeting of the Central and Union Pacific Railroads in Promontory, Utah, on May 10, 1869, an era of transcontinental railroad building began. Their construction swept away the dominance of native tribes, ended the open range, and restructured the West into a network of resources and industries dependent upon clusters of urban centers. After Promontory: 150 Years of Transcontinental Railroading examines the significance and lasting impact of the transcontinental railroads on the American West. The exhibition takes a wide view, considering the events at Promontory to be the start of a larger phenomenon, an entire era of transcontinental railroad construction that stretched for nearly fifty years. At its core is the assertion that, collectively, the transcontinental railroads profoundly reshaped the human geography of the West, giving birth to the region we recognize today.
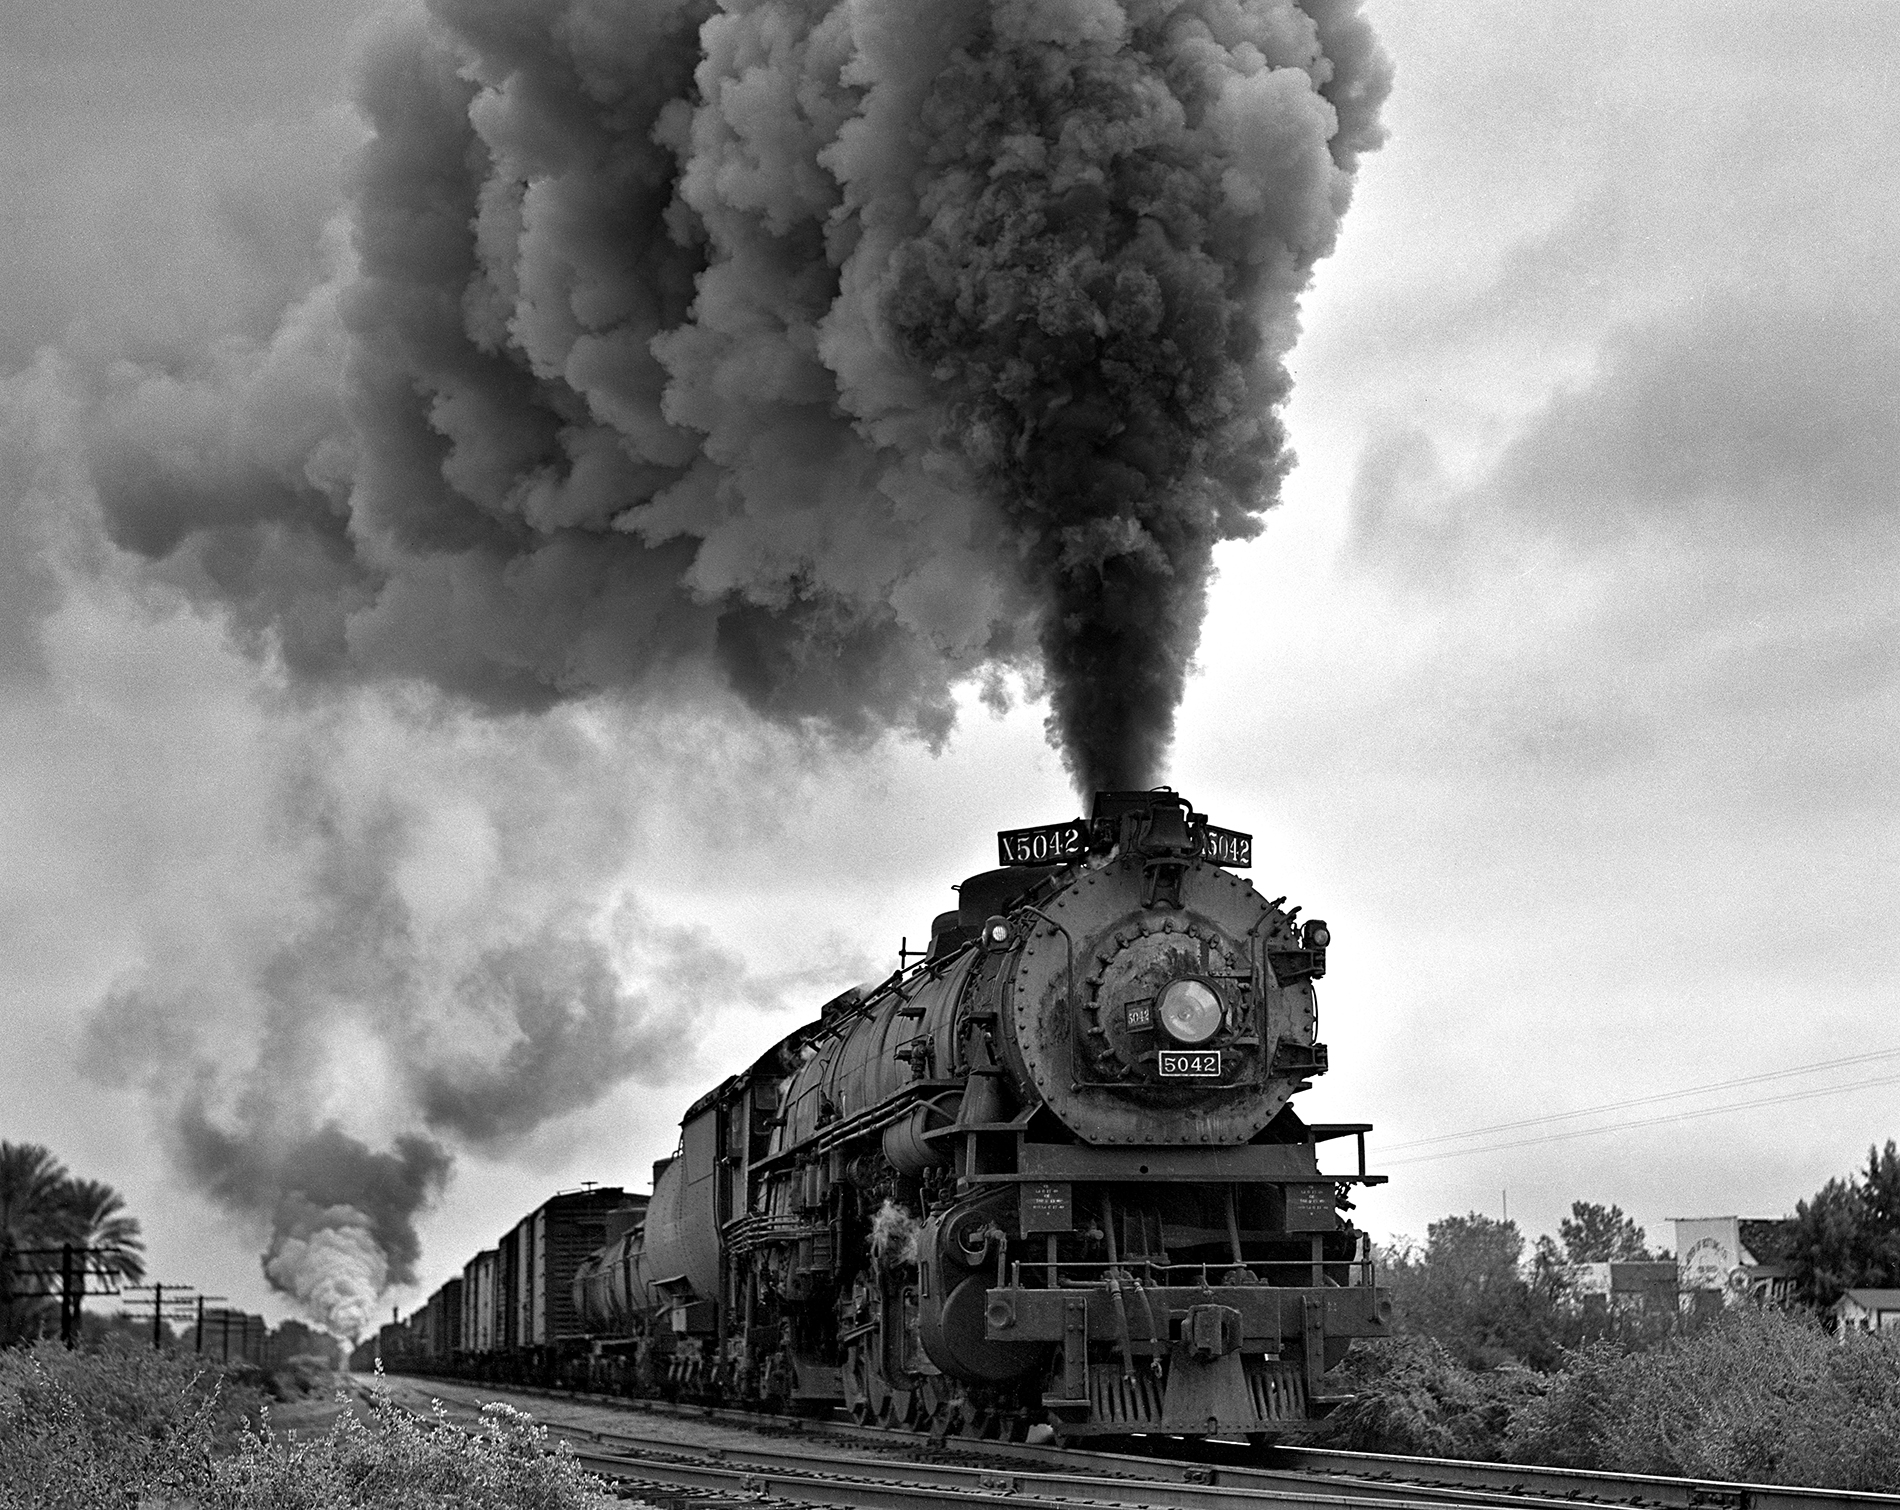
Beebe & Clegg: Their Enduring Photographic Legacy
With dramatic images and sweeping promotional strategies, Lucius Beebe—joined in 1941 by his life partner Charles Clegg—introduced railroad photography and the world of railroading to wide popular audiences. Their pioneering efforts established a broad market and wide appreciation for rail photography, leading to its far-reaching appeal in print today. At a time when railroad books were almost unknown, it took a celebrity writer of the stature of Lucius Beebe to transform the seemingly prosaic subject of railroads into books that beguiled the public. Beebe and Clegg pioneered the genre of railroad books, brought their material to mass-market audiences, and established themselves as household names.
Online exhibition
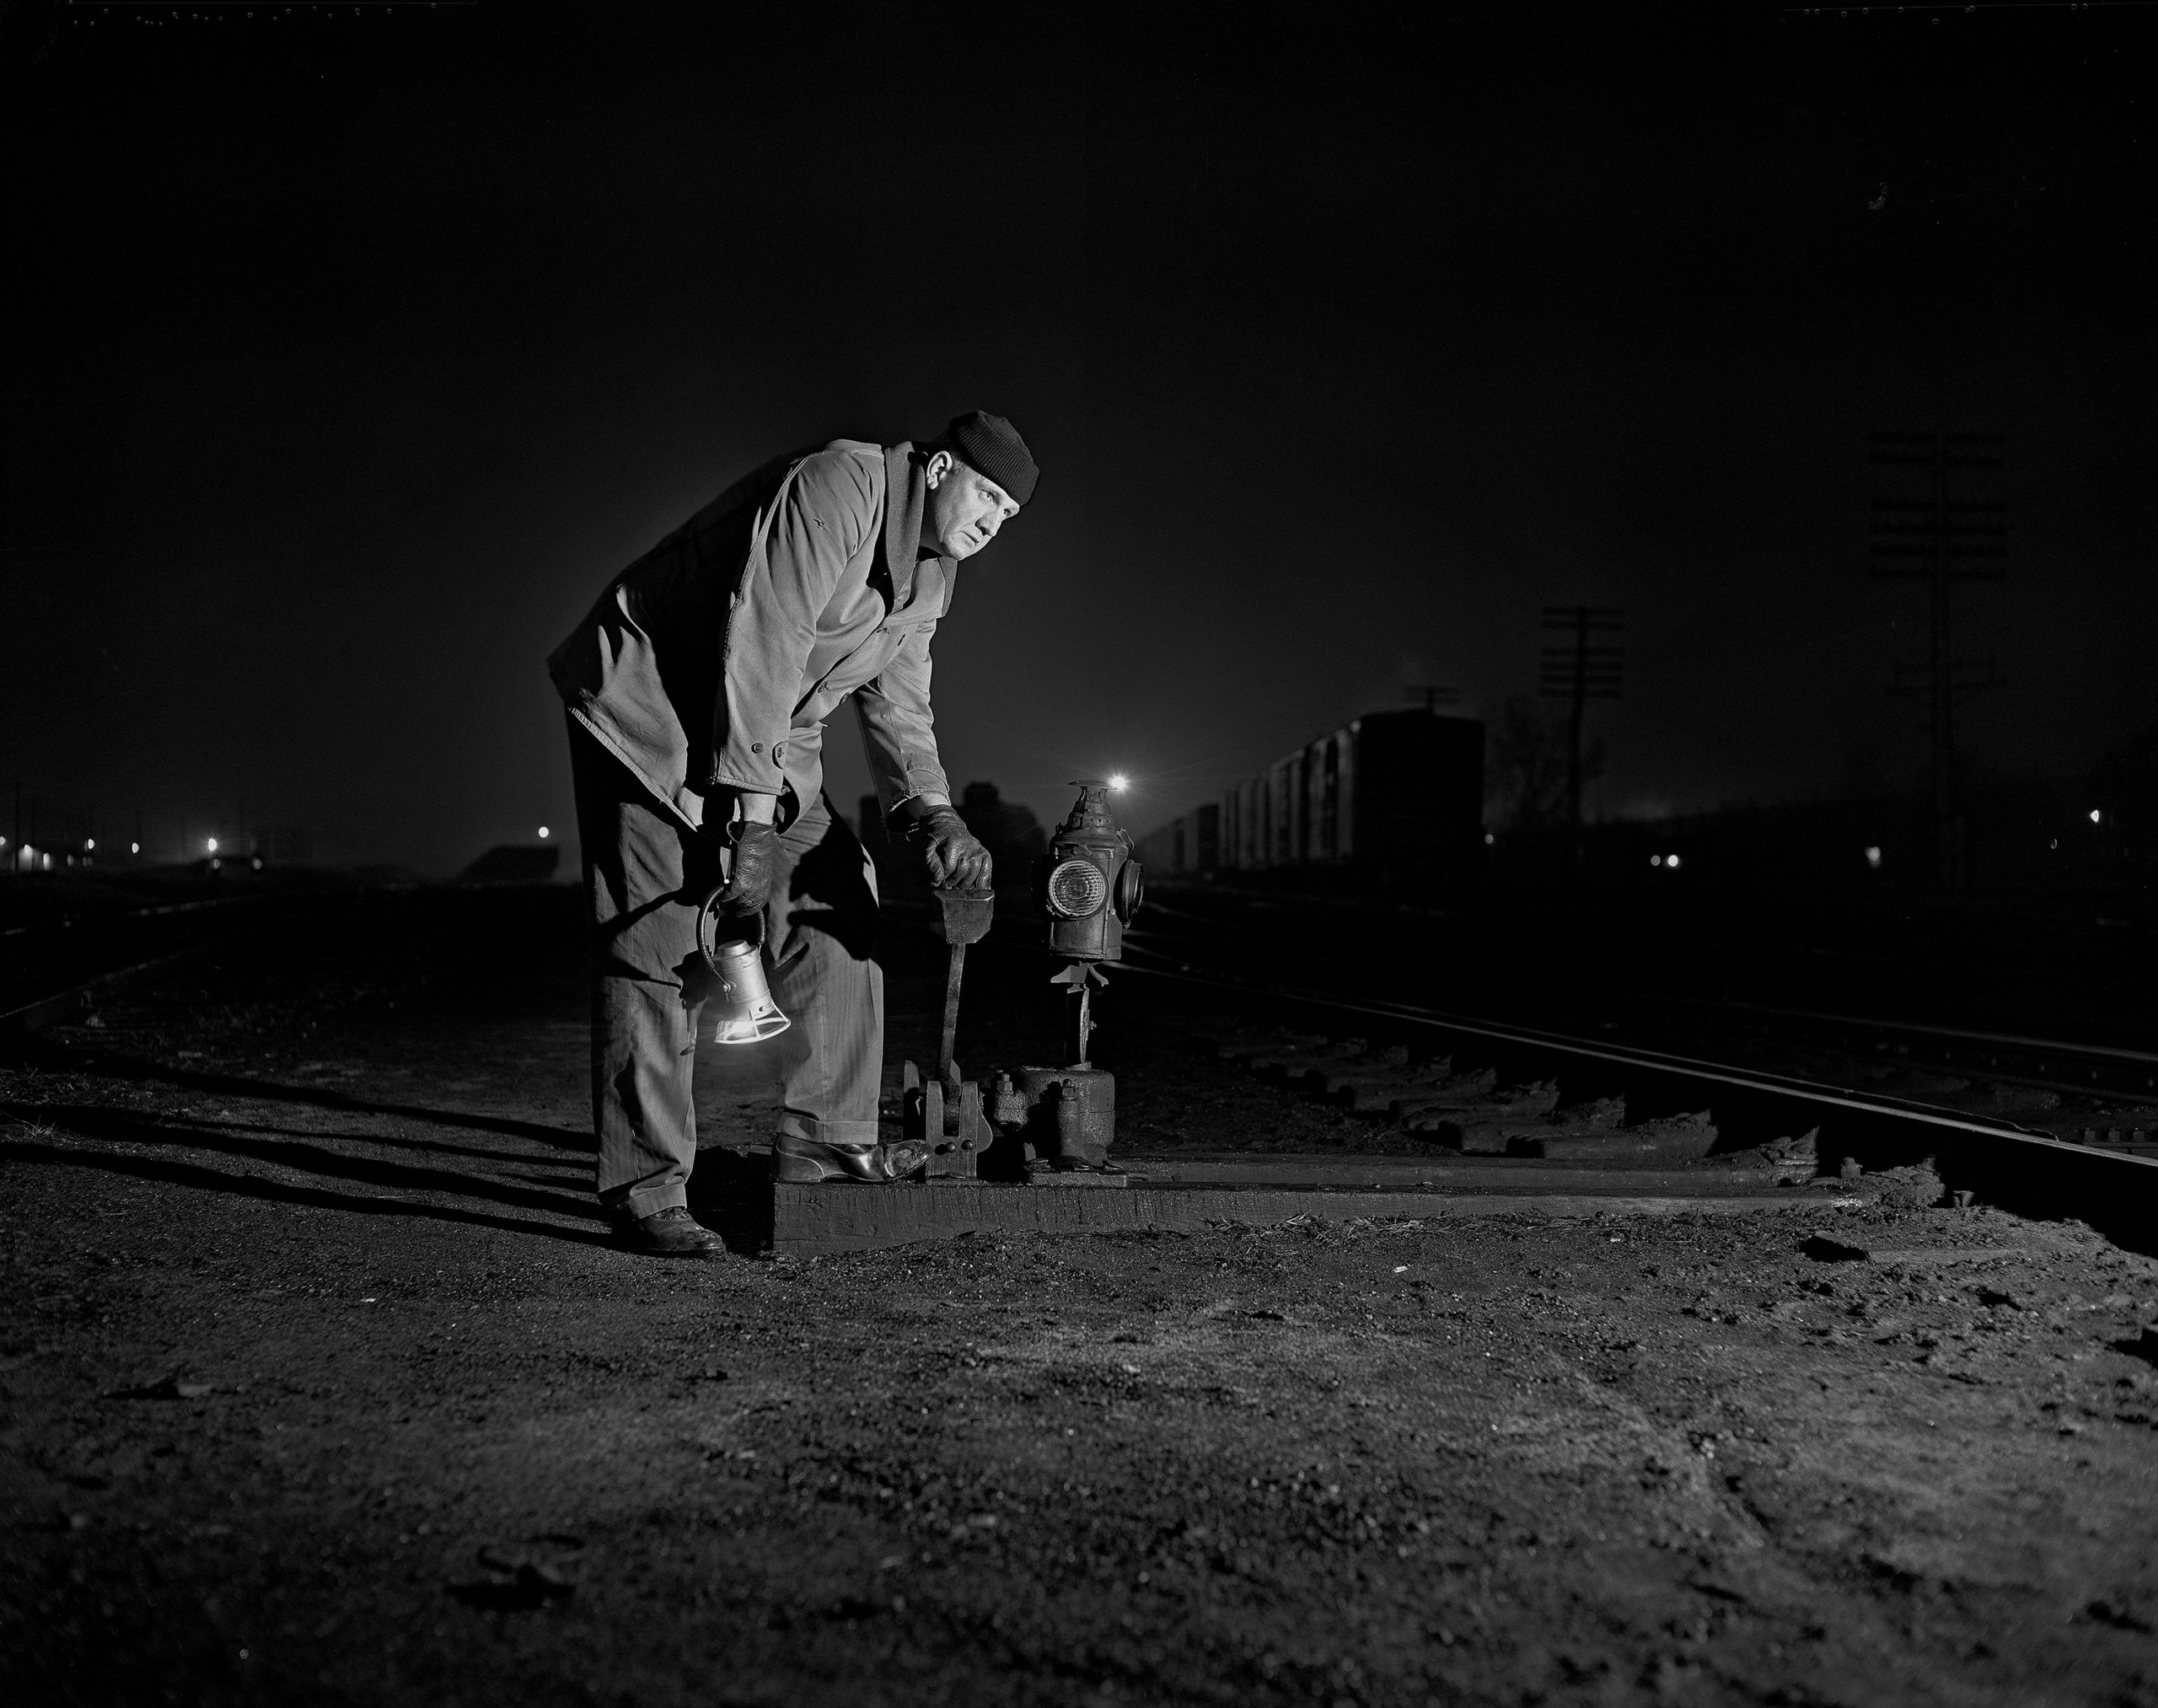
The Call of Trains: Railroad Photographs by Jim Shaughnessy
Shaughnessy and a small crew of his colleagues distinguished themselves from other railroad photographers of their generation by starting to think more photographically, exploring the camera’s potential more creatively. Shaughnessy made conscious decisions to see beyond trains, embracing the “ugly beauty” of industrial environments. This decision set him apart from most amateur photographers of the day. His aesthetic choices demonstrated the desire to include the human element, the desire to place trains and locomotives in a broader context, and the desire to explore the railroad after dark.
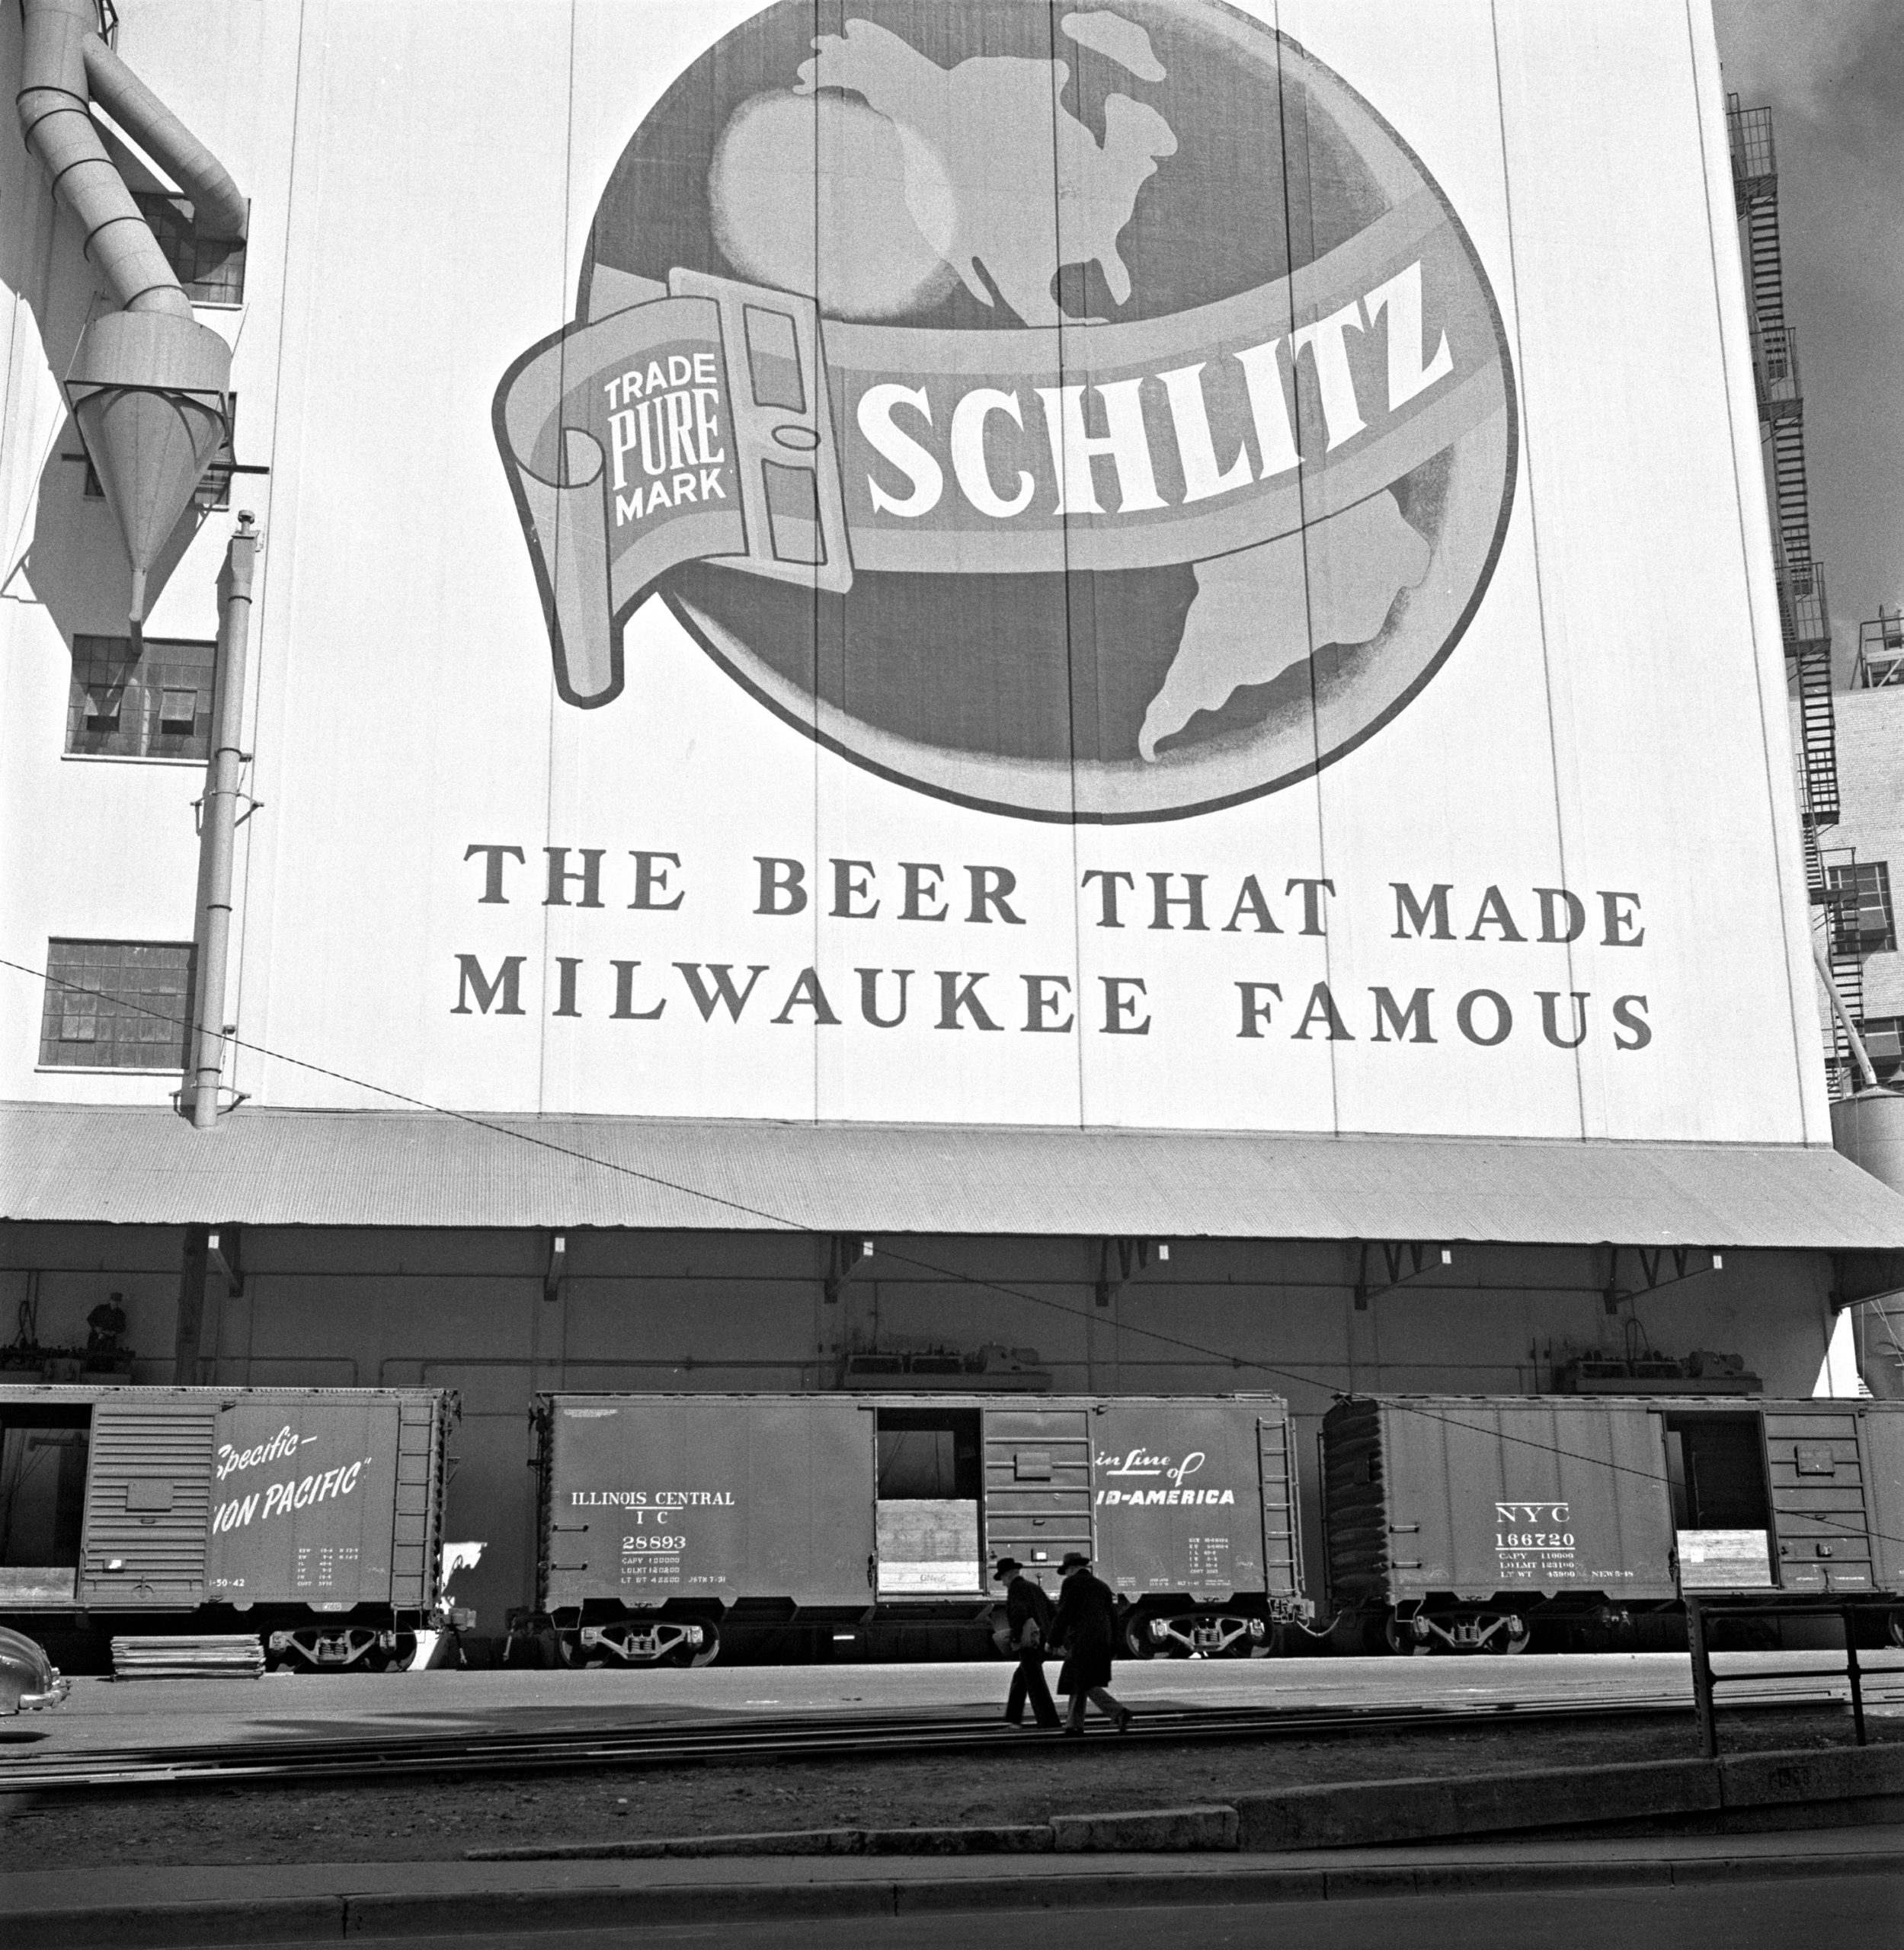
Milwaukee’s Beer Line
Since statehood, beer has played an integral role in the growth of Wisconsin industry while bringing Milwaukee national fame. What might be less obvious, but no less important, was the profound role that rail transportation played in this story. Milwaukee’s Beer Line narrates the rise, fall, and rise again of Milwaukee’s beer industry through the eyes of the Milwaukee Road’s Beer Line.
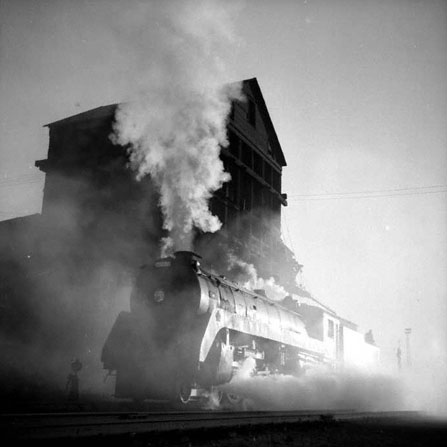
Railroads and the American Industrial Landscape: Ted Rose Paintings and Photographs
With stunning and evocative watercolors, Ted Rose became one of the nation’s greatest railroad artists during the last third of his life. Much earlier, as a young man, he demonstrated a flare for photography that foreshadowed his later success with brushes and easels. In both media, Rose captured the dynamism, nobility, and beauty of North American railroading in everyday life. The majority of Rose’s photography spans a five-year period in the 1950s and 1960s that coincided with the end of regular steam operations. Drawn to the steam locomotive like so many railroad enthusiasts, Rose tracked down some of their last vestiges across the continent, beginning in the United States before moving to Canada and finally Mexico.
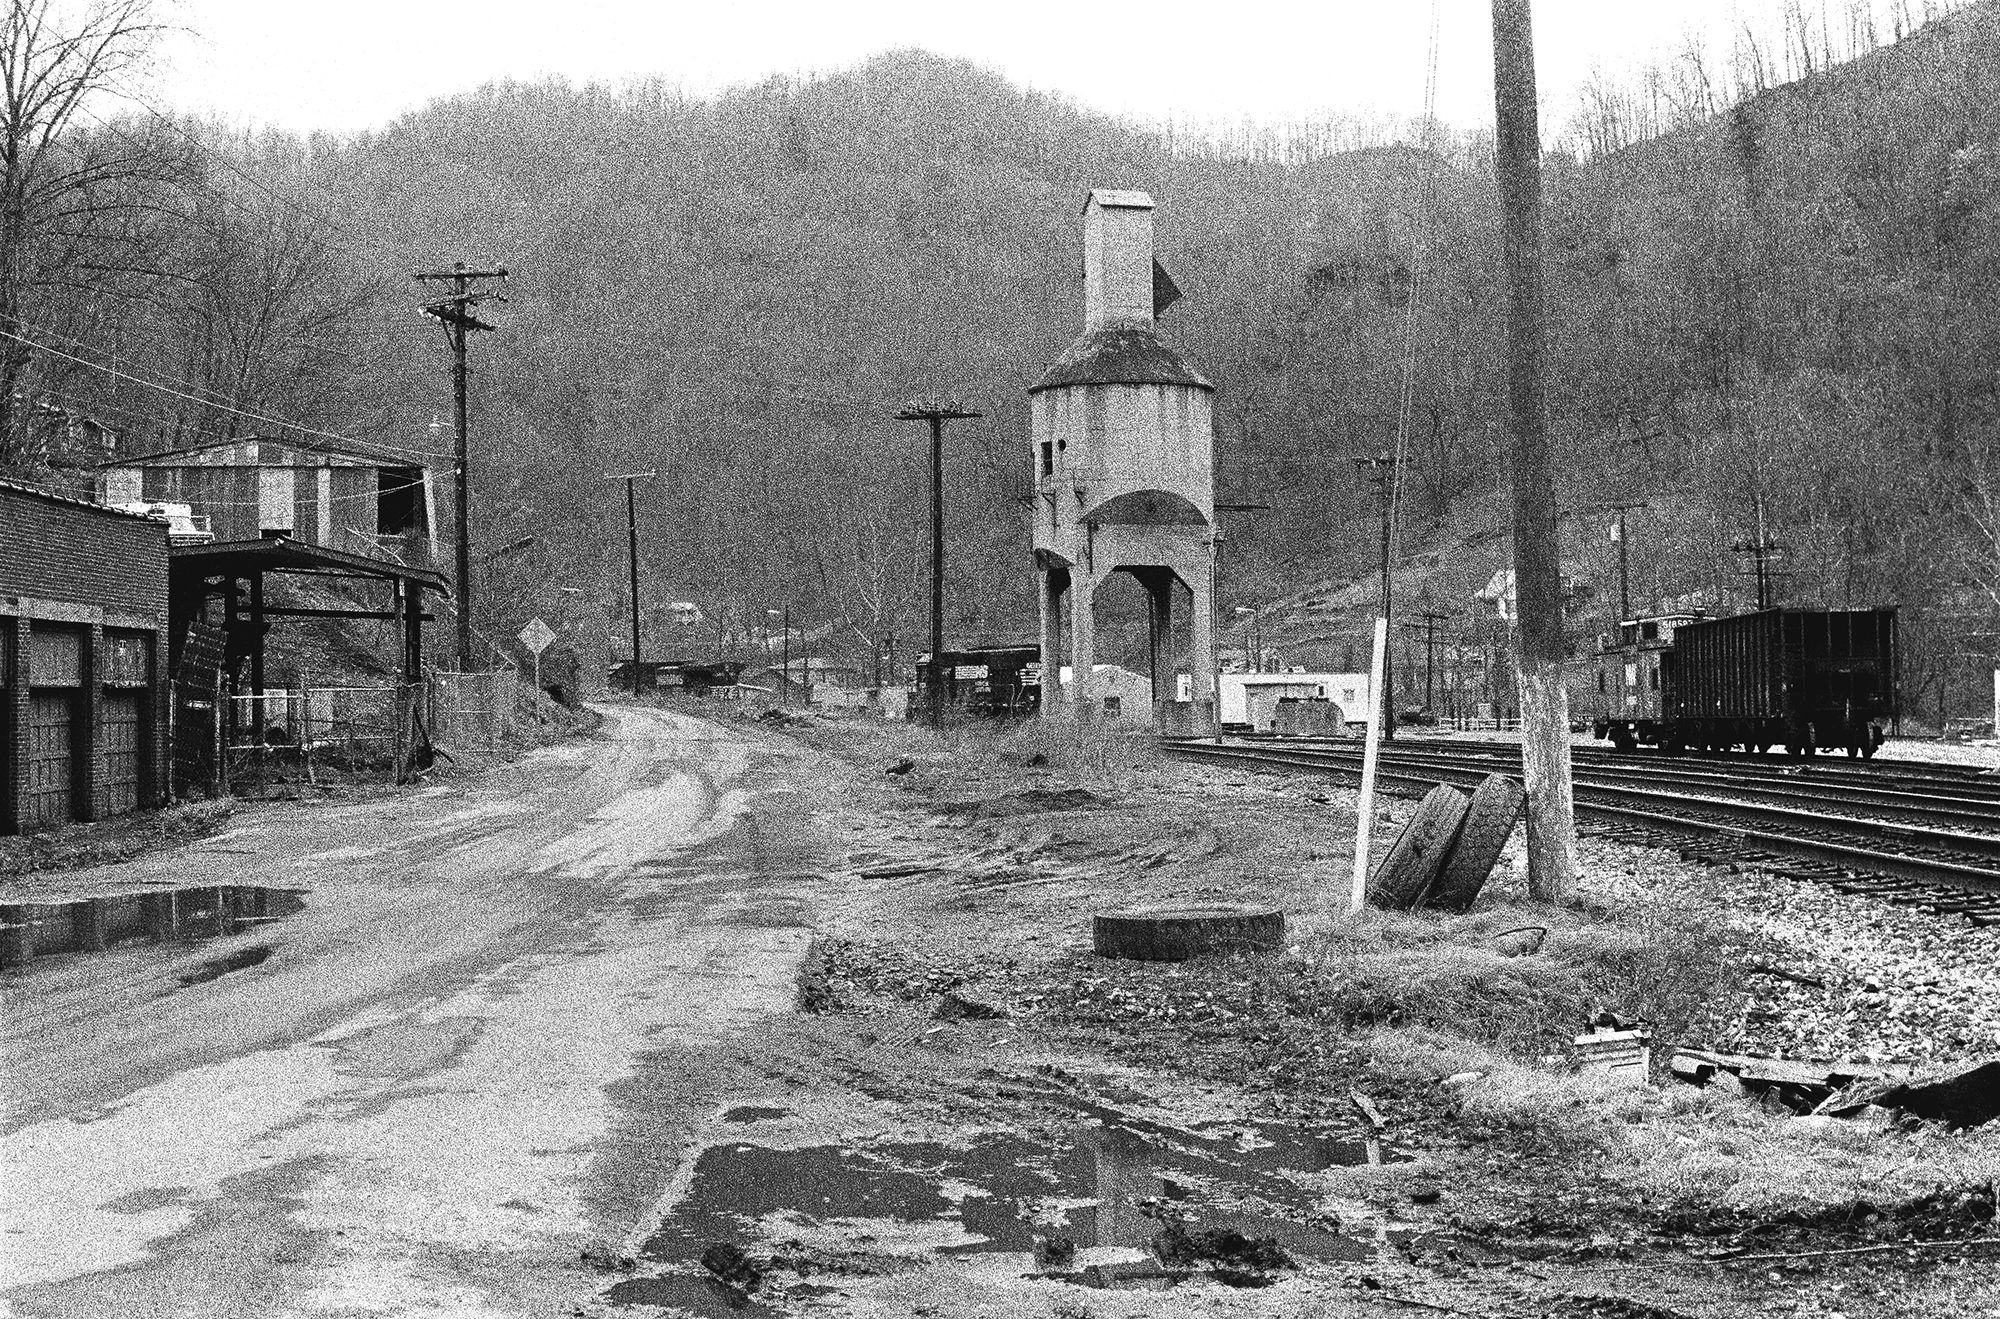
The Railroad and the Art of Place: Photographs by David Kahler
The exhibition The Railroad and the Art of Place: Photographs by David Kahler traces industrial rail lines across America’s Appalachian coal country. Once thriving economic centers, Kahler’s view of small-town West Virginia and Kentucky illustrates the ebb and flow of communities dependent on railroad traffic amidst the decline of the once powerful coal industry. Desolate, yet beautiful, Kahler’s photographs expertly capture the raw emotions attached to the railroad industry. Along with the loss of major coal productions in the region and the resulting economic vacuum it created as it disappeared, the railroad continues to serve as a financial lifeline and a reminder of a richer past.
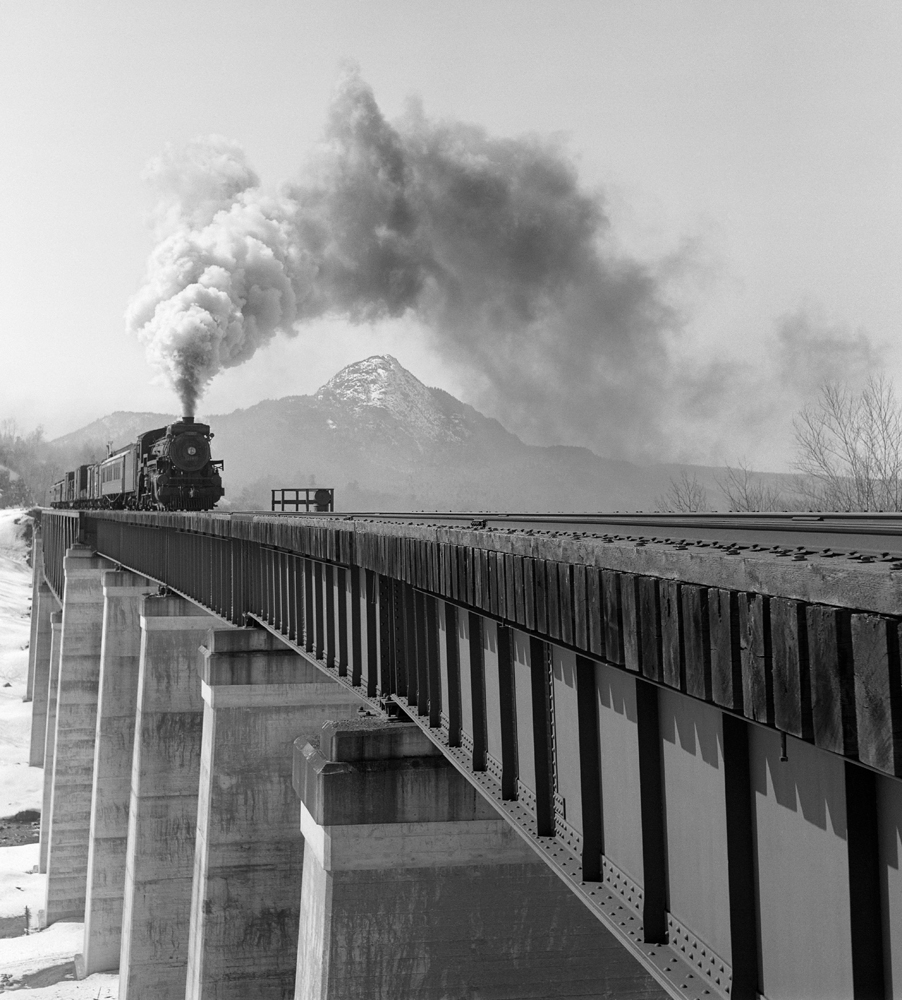
Requiem for Steam: The Railroad Photographs of David Plowden
Renowned photographer David Plowden traces his fascination with railway steam power back to his childhood memories. A fervent interest in railroading led him to a profession behind the camera. He worked as an apprentice to O. Winston Link and studied with Minor White and Nathan Lyons before striking off on his own in the 1960s. Sixty years later, the art community widely recognizes Plowden as one of America’s greatest landscape and industrial photographers.
Partnered Exhibitions
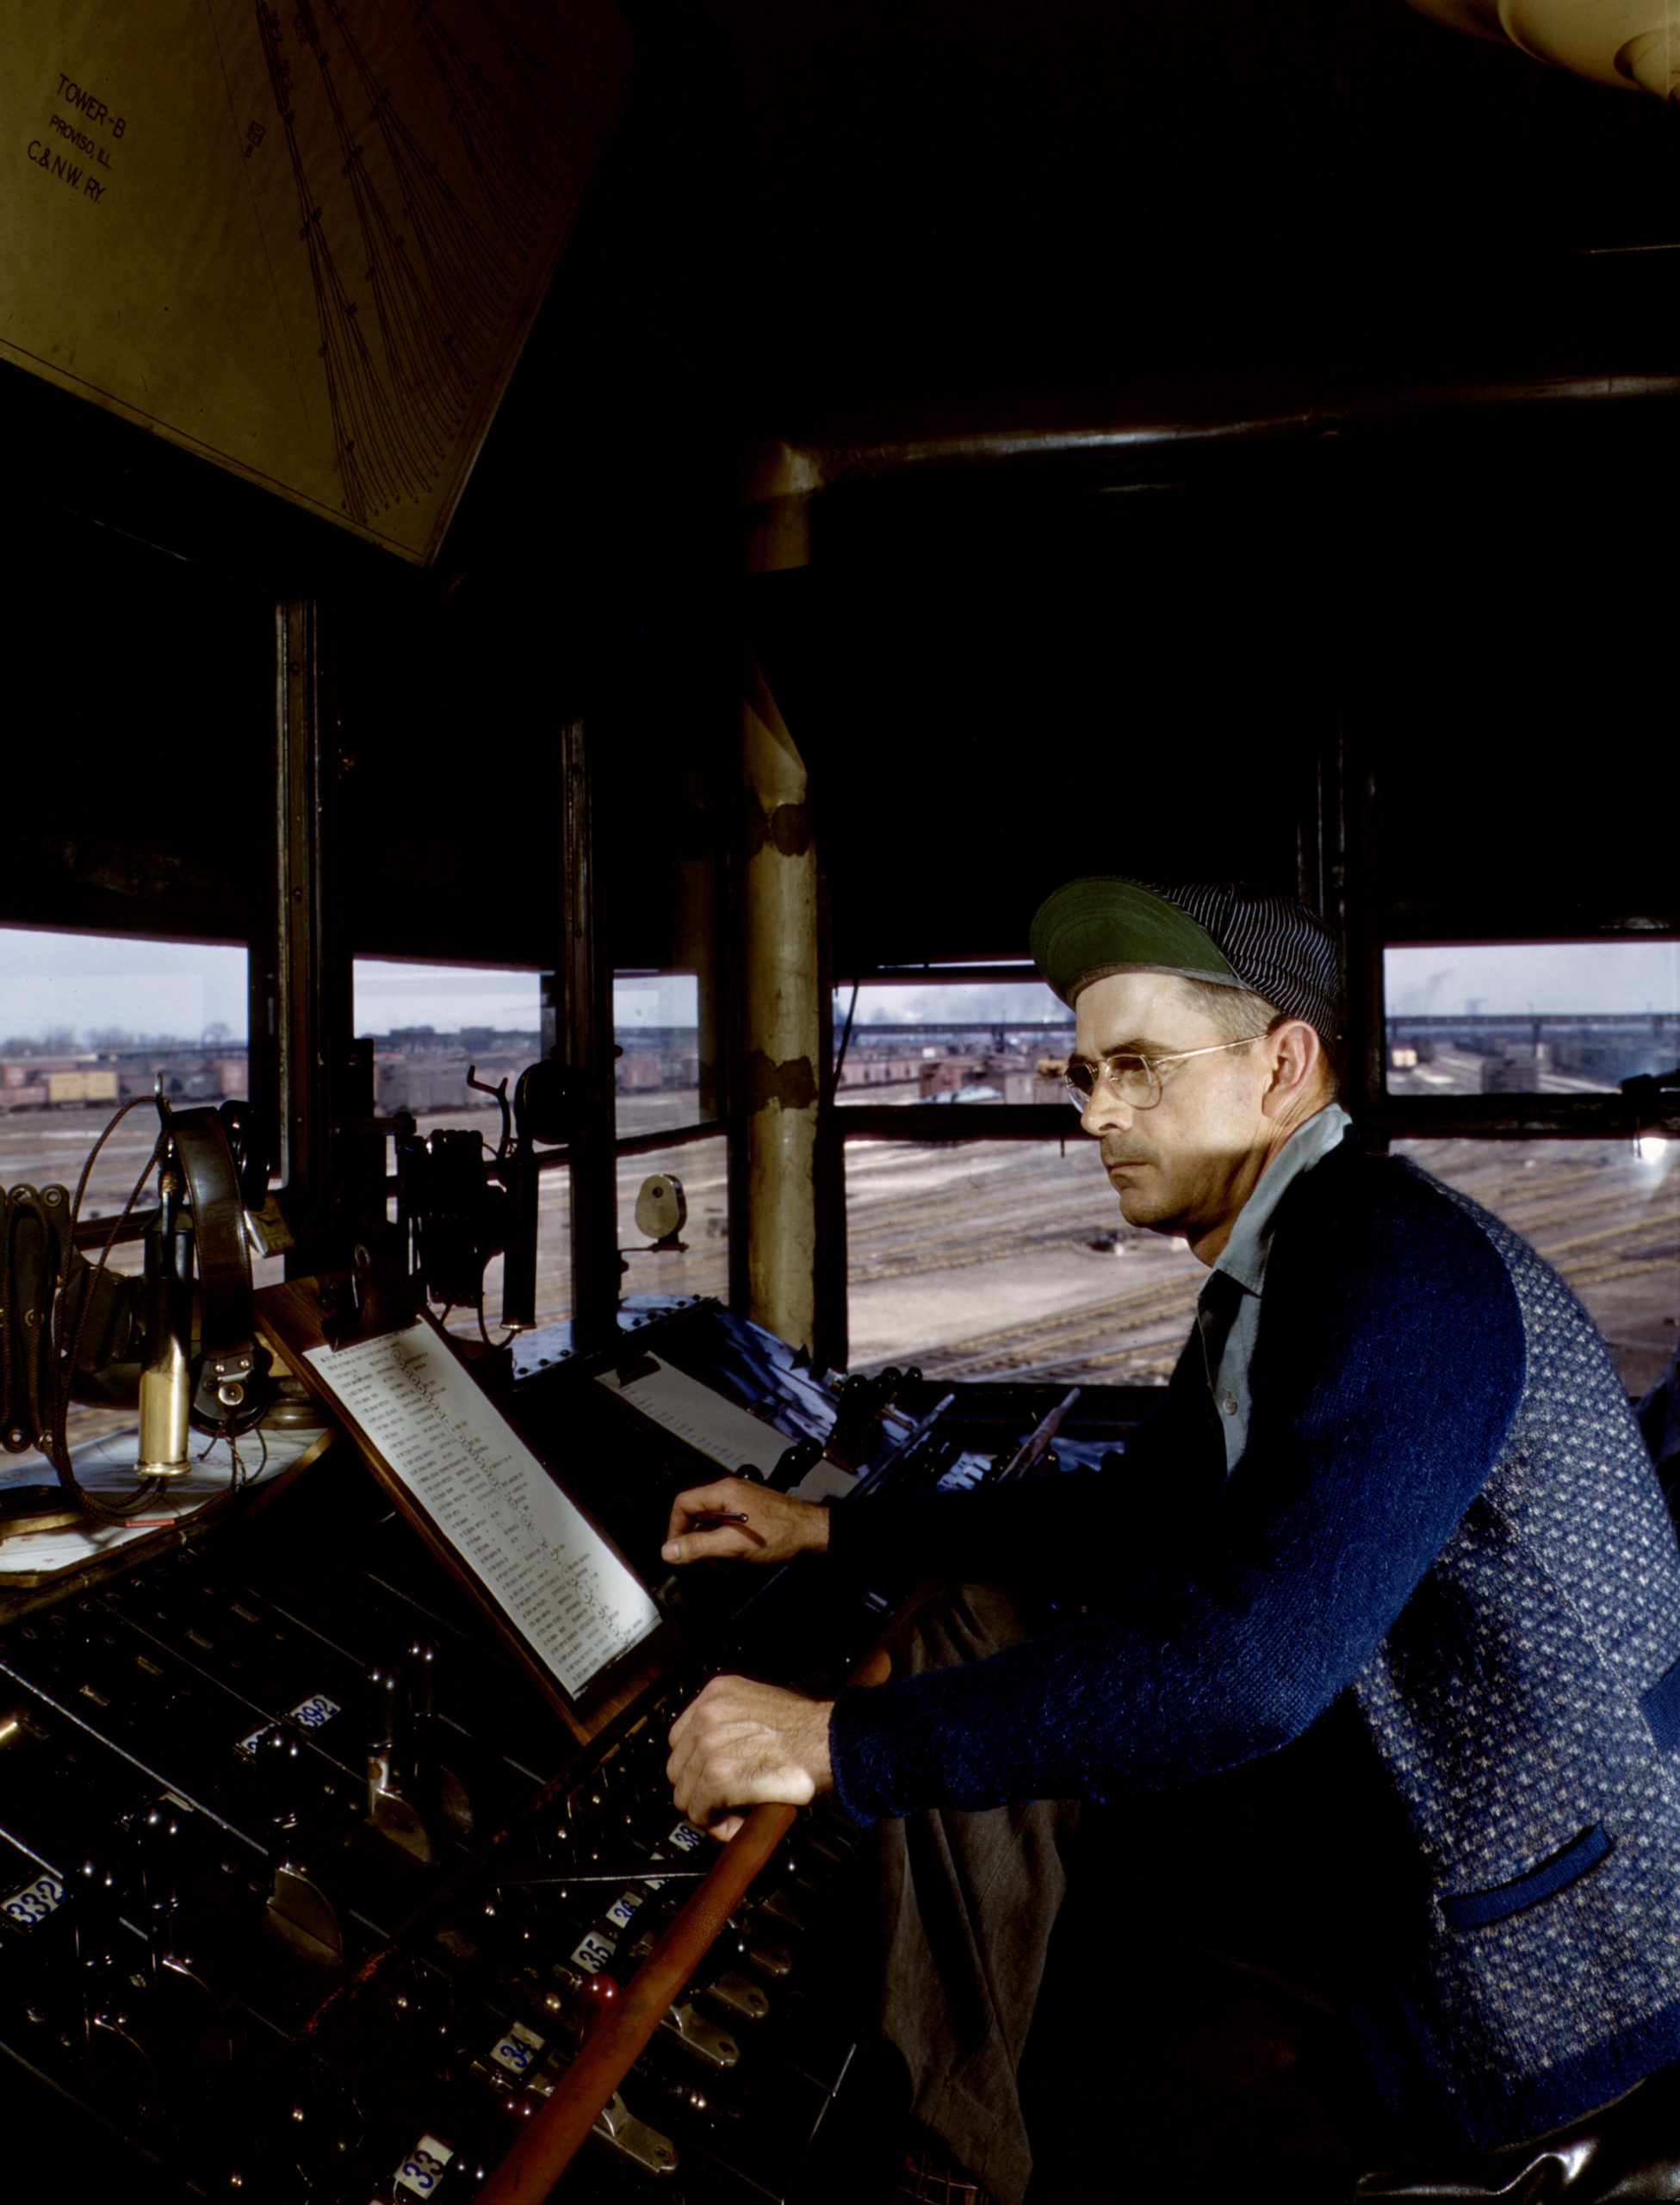
Railroaders: Jack Delano’s Homefront Photography
Railroaders: Jack Delano’s Homefront Photography demonstrates that the railroad industry—like ethnic, religious, and neighborhood enclaves—fostered its own communities and networks. Through the stories of the lives of the men and women of railroading, this collaborative exhibition between the Center for Railroad Photography & Art and the Chicago History Museum demonstrates how the people of one industrial community represent, in microcosm, the vastness of Chicago society and, by extension, American society as a whole. The exhibition features some sixty of the remarkable images created in 1942–1943 by photographer Jack Delano as part of his assignment to document the nation’s railroad story for the Farm Security Administration-Office of War Information.
* Exhibition circulated by the Chicago History Museum
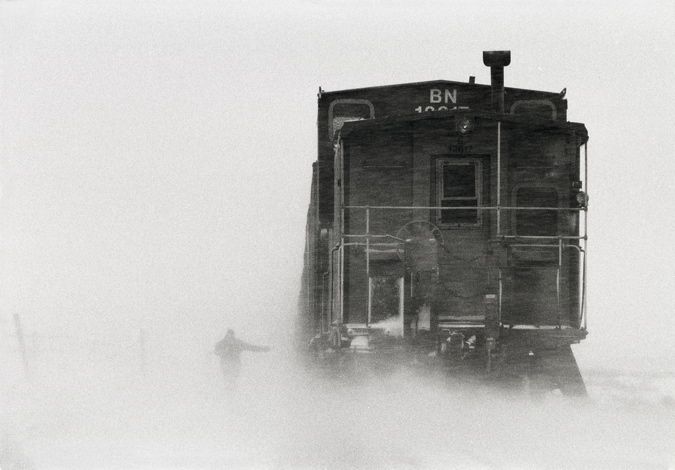
Steam – An Enduring Legacy: The Railroad Photographs of Joel Jensen
Photographer Joel Jensen has owned a lifelong fascination with steam locomotives. Infused with a deep appreciation for rural America that grew from his father’s penchant for two-lane roads, Jensen’s interests extend far beyond the locomotives to encompass the landscapes they traverse, the industries and communities they serve, and especially the people who keep them running. His photographs are as much a tribute to the crews, shop workers, and volunteers, as they are to the locomotives themselves.
Past Exhibitions
Along the Line: 1930s Railroad Photographs by John Walker Barriger III
Representations of Railroad Work, Past and Present
Trains Around the World: Railroad Photographs by Fred M. Springer
Trains that Passed in the Night: The Railroad Photographs of O. Winston Link
Arts & Culture | July/August 2022
These Photographs Capture the Indescribable Glory of Trains
America’s fascination with trains is fast-tracked in this study of passing freight
:focal(2836x945:2837x946)/https://tf-cmsv2-smithsonianmag-media.s3.amazonaws.com/filer_public/08/70/08704008-2fc8-473f-b27e-194ac3f2e905/julaug2022_g01_mallonpassingfreight.jpg "train journey photography")
Photographs by Stephen Mallon
Text by Terence Monmaney
Is there any disputing the idea that Americans can get a little obsessed by trains? From a tot’s crayoned red caboose to the self-described train nerd’s bucket list (Alaska Railroad’s Denali Star? Check. Grand Canyon Railway? Yup. Napa Valley Wine Train? Cheers!), the romance of the rails exerts a pull only slightly less powerful than G.E.’s legendary 8,500-horsepower “Big Blow” locomotive.
Stephen Mallon, a photographer in the Hudson Valley of New York, has long been in the thrall of trains, among other large machines. Over the last four years, as work or pleasure set him in motion across the United States, he sought out locales—scenic, industrial, rural, urban—where he could do his own special trainspotting.
The result is a series of striking portraits of freight cars and locomotives. He created each one as a train rolled by. Back in his studio, he cropped the picture to isolate one car, composing it as if it were a still life. The approach might sound fanciful, but, as Mallon says, every passing train is unique, a never-seen-before combination of cars, place and time. “This project is never going to be repeatable,” Mallon says of the visual novelty. He’s also cognizant that some carriers seem headed for the end of the line.
For now, some 1.7 million freight cars and locomotives are at large in the United States, and what marvelous contraptions they are, as you can see through Mallon’s lens: cars designed just to transport automobiles, or chemicals, or gravel, or what have you. The immensity, power and speed of this thundering enterprise are all thrilling. It’s also gratifying to think about these great steel conveyances hauling stuff across the land and to be reminded that, yes, we’re connected.
Reporting and research for the accompanying text was done by Teddy Brokaw.
/https://tf-cmsv2-smithsonianmag-media.s3.amazonaws.com/filer_public/10/f8/10f86b7a-f698-42d0-881d-12b22a6db905/julaug2022_g05_mallonpassingfreight.jpg "train journey photography")
Get the latest Travel & Culture stories in your inbox.
Stephen Mallon | READ MORE
Specializing in photography of construction sites and machinery, Stephen Mallon has exhibited work widely, including shows at the New York Transit Museum and the East River Ferry.
Terence Monmaney | READ MORE
Terence Monmaney is an executive editor of Smithsonian magazine.

Railroad Gallery
Newest collection of licensable train photography.
Search our Railcar Gallery for photos of rolling stock!
Top Photographs and Awards

Old Fashioned and Newfangled Power
Sebastian Segiel
The old meets the new at Jim Thorpe's Wye. RDG #2102 pulls into Jim Thorpe passing the PIJT with R&N #2023.

Thunder at Nesquehoning Tunnel
Ethan Brodie
Reading & Northern T-1 2102 wasting no time hauling a 14-15 car Rambles Excursion bound for Reading making some noise thru the roof at Nesquehoning Tunnel

Blasting out of Nesquehoning Junction
Mark Turkovich
Reading 2102 blasts up the steep grade out of Nesquehoning Junction as it begins its return trip to Reading on a sunny May afternoon.

Blasting Through Barnesville
Reading 2102 charges up the grade at Barnesville on a sunny May morning with its first Iron Horse Ramble of the year.

Photo of the Day
By: Rick Doughty UP 1943 East Spirit of the UP unit climbs the summit of King Hill with the MHKPC-25 manifest. The specially painted unit in support of our troops is appropriate for Memorial Day 2024.

Photo of the Week
By: Rick Doughty UP 8875 north is stopped at Garwood siding with an empty CanPotex train. The consist is an even 3 UP and 3 CP units. UP 8875, CP 9358, UP 8923, UP 8623, CP 8617, CP 8809.

Photo of the Month
By: Rick Doughty Rio Grande SD40T-2 5373 is the point unit of the 3 SSW (Cotton Belt) units: 9662 (GP60), 7281 and 7279 (GP40-2) at the Tucson Yard engine facility. Storm clouds are forming to the east as the monsoons continue on this September 1998 afternoon.
Railfan's Choice Awards

By: Dillon Hulvey

By: Jason Wilson

By: Sebastian Segiel

By: Mark Turkovich
Featured Photographers
Rick doughty.

Rick Doughty (62) I have been photographing trains since 1975. My favorite railroad is the Denver & Rio Grande Western. My photos have been featured in CTC Board, Railfan & Railroad, Railroads Illustrated, many railroad book and motive power annuals. I also enjoy severe weather photography and storm chasing. I play drums for my local church. I live in southern Idaho with my wonderful wife Stacey, who enjoys going with me on train watching adventures.
Lifetime Merit: 111900

Lifetime Merit: 10580
Vinny Oelkers

Northern Iowa Railfan Nikon D3100 Located in Garner IA
Lifetime Merit: 10410
Trans-Siberian from Moscow to Vladivostok with a Professional Photographer

- Photos and videos sent by email
- Entrance to the Kremlin and Red Square
- Local expert guide in your language in every city
- Airport-hotel Transfers (at the beginning and end of the tour)
- Professional Photographer from start to end of the tour
- Train tickets to all the destination cities in the tour in “coupe” class
- Transportation to the attractions in every city that are not in walking distance
- Tour leader from start to end of the tour
- Anything not clearly mentioned in the program
- Travel Insurance
- Russian Visa
- We send a car for you to the airport to the hotel where you will be staying, there you will meet your guide, that nigh you will be free and the tour starts the next morning.
- Sheremetyevo - A.S. Pushkin international airport, Khimki, Moscow Oblast, Russia, 141400
- Moscow Domodedovo Mikhail Lomonosov Airport, Gorod Domodedovo, Moscow Oblast, Russia
- Vnukovo International Airport, Moscow, Russia
- Not wheelchair accessible
- Confirmation will be received at time of booking
- Not recommended for travellers with back problems
- No heart problems or other serious medical conditions
- Not recommended for pregnant travellers
- Travellers should have a moderate physical fitness level
- Time duration in every city may vary depending on the train schedules
- Lone travelers may have to share rooms
- This tour/activity will have a maximum of 50 travellers
- All sales are final and incur 100% cancellation penalties.

- TagliaRamone 0 contributions 5.0 of 5 bubbles Breathtaking! After taking the "RUssian Churches" Tour, I decided to go and try with the Ethnography Museum. It was so fantastic to see the Russian people´s lifestyle throughout history. If you like anthropology or ethnology this is the place to be! Read more Written 12 March 2020
- TagliaRamone 0 contributions 5.0 of 5 bubbles Great experience! Highly recommended! We had a great experience and loved the Kazan Cathedral! Our guide was really nice and knowledgeable, always asking if we had any doubt and offering us interesting facts about the different sites. Great opportunity to visit the Russian churches! Read more Written 12 March 2020
- sasaozz 0 contributions 5.0 of 5 bubbles Great Saint Petersburg tour with a fantastic host! I visited Saint Petersburg, Russia for the first time in April 2019 with a friend, neither of us had been to Saint Petersburg before and neither of us spoke/understood Russian. I found Antonio’s tour (in English) online about 1-2 weeks prior to travelling to Russia and I booked the tour through the website. He contacted me shortly thereafter to confirm the booking and we exchanged information to communicate through WhatsApp once I was in the city. The initial deposit was through the site and then the balance was paid the day of the tour – it was seamless. Antonio is friendly, courteous, professional and reliable. He was at the meeting spot well before the start of the tour. My friend and I both enjoyed the tour and found Antonio to be very engaging, humorous and very good company. He is extremely knowledgeable of local history, architecture, interesting facts about local attractions, and Saint Petersburg in general. He was very helpful in giving us pointers to navigate the city on our own and providing useful tips. As two women travelling alone to Saint Petersburg, we weren’t quite sure what to expect, but Anotinio also provided us with advice on orienting ourselves in the city. He’s a perfect tour guide, city host and photographer – offering to take pictures of us at each of the key stops on the tour. We enjoyed his company so much that he joined us for souvenir shopping and we invited him to dinner with us at a local Georgian restaurant of his choosing in a neighbourhood outside the city centre! He was so helpful in negotiating prices in Russian with the souvenir shop and local street vendors, and ordering in Russian at the neighbourhood restaurant. Essentially, we had a fun Saint Petersburg experience beyond the tour. I would definitely recommend Antonio’s tour to anyone looking for a thorough tour of Saint Petersburg with a knowledgeable, friendly, cheerful host!! Read more Written 27 January 2020
- alexis1337 0 contributions 5.0 of 5 bubbles Guide really knew the place I had a tour this morning and the guide really knew the place very well. We had some Spanish speaking Russians in the group, they were surprised since the guide commented stuff new to them. If you have the chance to book a tour with these people go for it, you are in for a quality tour. Read more Written 24 January 2020
- CParrilla123 0 contributions 5.0 of 5 bubbles Amazing experience Professional, dynamic, funny, interesting...I absolutely recommend it to everyone! The guide was able to adapt to every situation and in a few time he had us eating out of his hand, making it a perfect tour! Without any doubt I will repeat this experience when I will be back to Peter! Read more Written 23 January 2020
- irma_esguerra 0 contributions 5.0 of 5 bubbles Tiring but worth it The winter palace and hermitage museum tour was a long walk but really worth it. You will get to see rare paintings or famous painters. These 2 places are wonderful and amazing. The best part was we got to buy good copies of the paintings. Really really nice Read more Written 23 October 2019
- Albina S 0 contributions 5.0 of 5 bubbles Impecable and perfect! We had a 6 hours Hermitage tour with Antonio. It was the best tour we have ever had, the guide is very professional and shows great knowledges about every masterpiece you can see in the museum. He exposes in very interesting and entertaining way. Very recommended!! don't lose your chance to spend a great time enjoying this tour!! Read more Written 18 August 2019
- Flozinny 0 contributions 1.0 of 5 bubbles Cancelled at last minute We booked one day in advance and received a confirmation email. Two minutes before it was supposed to start, they sent a cancellation email. Really disappointing. They said that the tour was full, but we were there, and there was nobody. Read more Written 5 August 2019
- Eleanor R 0 contributions 5.0 of 5 bubbles Expert local knowledge and professional guide A fantastic tour that drew on expert local knowledge. It was a great way to get to know St. Petersburg’s famous landmarks and less-known, local haunts. Antonio is a professional guide, who has a wide breadth of knowledge about the city. I would definitely join another of Antonio’s tours if I were to come back to St. Petersburg. Read more Written 10 June 2019
- Ross M 0 contributions 5.0 of 5 bubbles Amazing!! I’ve lived in Saint Petersburg for a few months now, but had never had a formal tour of the city. I decided to spend a Saturday getting to know the city, and I am so glad I did. Antonio was nothing but professional and very personable. I would recommend this to anyone who wants an in depth and enjoyable tour of this beautiful city. Read more Written 9 June 2019
Trans-Siberian from Moscow to Vladivostok with a Professional Photographer provided by Cheap Tours Russia

- [ May 28, 2024 ] LTG awards contract to replace KLUB-U locomotive safety system
- [ May 28, 2024 ] Design contract for Madrid-Extremadura conventional line
- [ May 28, 2024 ] Singapore awards USD 392 million contract for CRL station
- [ May 27, 2024 ] EOI launched for extension of Dnipro Metro
- [ May 27, 2024 ] SBB orders additional Flirt Evo trainsets
RECOMMENDED EVENT:
Copyright @RailwayPRO Communication Platform. All rights reserved
- train tickets
Moscow to Zelenograd by train
Travel from Moscow (Russia) to Zelenograd (Russia) by train (38km): schedule and information to the train connection. Compare fares and buy your ticket.
To travel from Moscow to Zelenograd by train, read the following information. You can find the timetable and ticket prices online via our booking links.
Your travel route could be like that.
1 Moscow (Russia) - Zelenograd (Russia)

The following links could be interesting for you.
train connections : popular connections travelled by other users
1a Travelling from Moscow (Russia) to Zelenograd (Russia)
To travel in Russia by train, buy your ticket online via one of the given booking links. There you find exact schedules and ticket prices. The price depends on the type of train and the time you travel and can vary a lot. For most trains you can chose your seat if you book online. And it is the easiest way if you do not speak the Russian language. Good to know: in Russia you will find very interesting long-distance trains, travelling overnight. They usually offer: 1st class sleeper with 2-berth compartments, 2nd class Kupé with 4-berth compartments and 3rd class Platskartny with open-plan dormitory cars.
From one metropolis to another in four hours
From russia with snow, an overnight journey in the russian grand express, travel in less than four hours between the two russian metropolises, with the rzd night trains, travel in style with russian railways, need a cheap place to sleep we recommend booking.com, find a cheap flight compare prices on kiwi.com.

Do you have questions about the connection between Moscow and Zelenograd? Does something not work as it should? Just ask in our forum and get competent answers from our rail travel experts.
Train Routes
- Bosnia-Herzegovina
- Czech Republic
- Netherlands
- Switzerland
- United Kingdom
about railcc : We are real travellers and offer honest and well-grounded tips and tricks for your train journey.
Train tickets
- search train route
- night train
- train company
Rail passes
- Britrail Pass
- German Rail Pass
- Swiss Travel Pass
- Renfe Spain Pass
- Balkan Flexi Pass
Travel guide
- travel tours
- train types
- train travel in ...
- ferry connections
- bus tickets
- Interrail Global Pass
- Interrail One Country Pass
- first time Interrail
- how to Interrail
- Interrail train reservations
- Interrail night trains
- Interrail ferries
- Interrail buses
- Interrail country overview
- Interrail offers and discounts
- Eurail Global Pass
- Eurail Select Pass
- Eurail ONE Country Pass
- how to Eurail
- first time Eurail
- Eurail train reservations
- Eurail night trains
- Eurail ferries
- Eurail buses
- Eurail in ...
- Eurail offers and discounts
- about railcc
We speak more than 30 languages
rail.cc is partner and friend of

IMAGES
VIDEO
COMMENTS
3) Sit on both sides of the train. It's difficult to tell where the great scenery is going to appear. In an ideal world you'd take the journey twice to get the perfect shot. Or find a source who can tell you in advance where the best bits are. Bet let's face it, that's unlikely for most of us most of the time.
In this case, select a shutter speed of around 1/30th. Follow the train in a nice smooth motion and take the photo when you're ready. Whichever shutter speed you decide to use, it's often a good idea to slightly overexpose the photo. That way you'll get more details of the train.
6. People mimic your behavior when they see your photos on the Web and social media. Now that we have that out of the way, here is a fantastic introduction to our railroad photography tips from Dennis Livesey. "Photographing trains is a particular, (some would say peculiar) form of photography.
CLASSIC TRAIN SHOTS. Naturally, you'll also want to photograph the journey itself. Look for ways to safely snag shots of the train tracks while waiting to depart, or head to the back of the train and see if you can photograph out of a rear-facing window.
The views were spectacular, particularly as we moved through the snowstorm. Photographing from the very last car of a train is also a great idea. It may be possible to catch a picture of the engine as the train curves around the bend. The back window is a view unlike any other, with the tracks stretching back through the frame.
Tell your story again and again by following these travel photography tips on your next getaway. 1. Get Comfortable With Your Camera Before You Go. Add getting familiar with your camera's features to your list as you prepare for train travel. Even if you are not a beginner and have had your phone or camera for years, there may be hidden ...
Caution Part 1: Be acutely aware when sticking your head out of open windows to shoot (or for any reason), especially when looking up track, in the direction of travel. Carefully look ahead for overgrown tree branches and other objects that can inflict severe injury, especially to the face and eyes. 8.
I've been working as a professional photographer for the last 16 years and here are my recommendations for taking great photos and videos on your trip. Contents [ hide] 1 Understanding Techniques. 1.1 Problem #1: Glare. 1.2 Problem #2: Shaking and Movement. 1.3 Problem #3: Lighting.
Photographer Albert Dros took a 9-day train ride across Europe and shot images of scenes he saw through the train car window. Reviews ... Train travel is fast, comfortable, and sustainable and the ...
Most train journeys take place at rush hour and on weekends. This means that trains will be packed and noisy. You need to be able to capture these busy times without being disturbed by the hustle and bustle of the surrounding passengers. ... Tips to edit your train photography. Train photography editing is a very challenging and time-consuming ...
Travel photography is all about being at the right place at the right time. Since you won't be confined to a seat, you'll have the freedom to roam around and gain new perspectives en route to your destination. ... During your train journey, you'll likely be making several stops at various stations along the route. When the train stops, you ...
It's the best way to broaden the variety of your images from the journey. Capture the staff helping passengers, capture the train itself, and capture the little towns you stop in. Jumping off the train for a couple minutes isn't just good for your images either, it's probably nice to grab a breathe of fresh air anyways.
Number Six. If you are using a DSLR, try experimenting with some of the settings. Use slower shutter speeds like 1/30 or slower to create blur in the train or to pan the train with to create blur in the background. This can create a sense of motion in your images which train images usually lack.
Join my Patreon for travel guides + extra content: https://patreon.com/joeallamGet my Lightroom presets, LUTs + more: https://allam.co/storeFollow me on http...
DSLRs come out on top for durability, battery life. While the small, compact design of a mirrorless camera is attractive to many rail photography consumers, the bulkiness of a DSLR gives the impression its heavy design is able to withstand more trackside abuse compared to its lighter successor. And as for battery life, the DSLR is far superior.
Railways connect people and places, linking cities and towns, travelling vast distances through the countryside. These first two series will take you from grand railway stations, in Europe and Canada to the wide open expanses of Australia. Explore both collections to be inspired to travel, and marvel at the magic of rail.
Traveling Exhibitions. The Center for Railroad Photography & Art creates partnerships with photographers and museums to bring multiple forms of beautiful and significant railroad art to venues across the country. Stemming from a core focus to preserve and present significant images in railroading, our traveling exhibitions include both solo and ...
Cajon Junction, California Stephen Mallon. Autorack — An articulated car hauls automobiles near the photographer's home in Newburgh, New York. Today 75 percent of all new cars and light trucks ...
Lifetime Merit: 8960. Railroad Gallery is the newest source of railroad photography and a marketplace for images from the world's best railfans. With no screening in place, photographers are free to upload any railroad image that they have taken and share them with the world.
Skip to main content. Review. Trips Alerts Sign in
The draft version of the train has already been finally selected and approved. This is an 8-car train that will travel at a maximum speed of 400 km/h and an operating speed of 360 km/h. This train can be doubled, from an 8-car or 16-car version, with four types of cars. Practically now design documentation is being carried out."
The price depends on the type of train and the time you travel and can vary a lot. For most trains you can chose your seat if you book online. And it is the easiest way if you do not speak the Russian language. Good to know: in Russia you will find very interesting long-distance trains, travelling overnight. They usually offer: 1st class ...
When it opens, the 680km high-speed line will cut journey times between the two cities from four hours to 2h 30min, with trains travelling at a maximum of 400km/h. The 82km Moscow Central Diameter D3 line will connect the city's Zelenograd and Ramenskaya districts and will have 43 stations.