CDL Pre-Trip Inspection Checklist
Studying this Class-A CDL pre-trip inspection checklist is an important part of truck driver training. Before getting your Class-A CDL and finding an entry level truck driving job , most states will require students to pass a DOT (department of transportation) pre-trip inspection test and a general knowledge test .
Each company’s pre-trip inspection varies slightly. Most likely you will have to do the coupling system, light check and in-cab inspections plus one of the remaining three sections.

Pre Trip Inspection Checklist
Download free and print it! Printable Pre Trip Inspection Checklist (PDF)
There are many sections to learn but the test is not as difficult as it may seem. Studying our simplified Class-A pre-trip inspection checklist and taking classes at your local CDL training school will get you prepared.
Engine Compartment
Driver door fuel area, coupling area, light check, in-cab inspection and brake tests, belt driven alternator, belt driven water pump, brake chamber, brake lining, caste nuts and cotter pins, coolant reservoir, gear box and hoses, gear driven air compressor, gear driven power steering pump.
- General Hoses
Leaf Springs
Power steering fluid reservoir, shock absorber, slack adjuster and push rod, spring hanger, steering column, what to check for:.
When checking the engine compartment, you will always want to make sure the following components are properly mounted and secured. You should also make sure they are not cracked, bent or broken. The items you will need to check for include:
- Make sure all of the wires are connected. The belt should not be cracked or frayed and the free play on the belt should be between ½ to ¾ of an inch.
- The free play on the belt should be between ½ to ¾ of an inch. Also check all the hoses running to and from the water pump to make sure nothing is leaking.
- The brake chamber should not be leaking air.
- The brake drum should be properly mounted and secure.
- The brake hose is rubber, so it is important to make sure it is not leaking air.
- Check for oil or debris on the lining. There should be at least ¼ of an inch of friction material.
- Make sure all three caste nuts and cotter pins are present.
- The reservoir should not leaking and must be filled to the manufacturer’s specifications.
- Make sure the drag link is properly mounted and secure, and not cracked, bent or broken.
- The gear box and hoses should have no abrasions, bulges or cuts, and should not be leaking.
- Although the air compressor is hard to see, you must make sure it is properly mounted and does not leak.
- The steering pump is located in the same place as the air compressor and is also gear driven. Ensure the steering pump is not leaking.
General Hoses (Passenger and Driver’s Side)
- The hoses should be secure at both ends. There should be no abrasions, bulges or cuts. Fluids run through these hoses, so it is important to make sure they are not leaking.
- The hub seal (or axle seal) should not be leaking and should be filled to the manufacturer’s specifications.
- Make sure none of the leaf springs have shifted.
- Check for leaks under the truck.
- There should be no lug nuts missing. Look for rust trails, powder residue and cracks around the bolt holes.
- The oil level should be filled to the manufacturer’s specifications.
- Make sure the pitman arm is properly mounted and secure. It should be not cracked, bent or broken.
- Make sure this reservoir is not leaking and filled to the manufacturer’s specifications.
- The rim cannot have any unauthorized welds.
- Make sure the shock absorber is not leaking. If it is leaking, the leak will be at the point where the top and bottom portion of the shock meet.
- With the brakes released and pulled by hand, the push rod should never move more than one inch.
- The spring hanger should be properly mounted and secure.
- Make sure the steering column is properly mounted and secure. It should not be cracked, bent or broken.
- Look for abrasions, bulges or cuts on the tread or sidewalls. Tread depth should have a depth no less than 4/32 of an inch. Tires must be properly filled to the manufacturer’s specifications. This can be checked with an air gauge.
- Make sure the tie rod is properly mounted and secure, not cracked, bent or broken.
- Make sure all are accounted for.
Back to top of Engine Compartment
Catwalk and Steps
Door and hinges, drive shaft, exhaust system, frame and cross members, spring mount.
Again it is important to make sure these items are properly mounted and secure. Look for cracks, bends, and breaks.
- The actual airbag is rubber, so it is important to check for abrasions, bulges, cuts and leaks, in addition to any missing mounting bolts.
- The axle seal should not be leaking and should be filled to the manufacturer’s specifications.
- Make sure to mention the brake chamber is not leaking air.
- Make sure the brake drum is secured properly. Also look for cracks, bends and breaks.
- Check the brake hose at both ends to make sure it is not leaking air.
- There should be no oil or debris on the brake lining. There should be at least ¼ of an inch of friction material.
- The cat walk and steps should be clear of any loose objects.
- Physically demonstrate that the doors open, close and latch properly. Door seals should not be worn, torn or rotten.
- The drive shaft should not be twisted and the u-joints should be free of any debris.
- The tread and sidewalls should have no abrasions, bulges or cuts. The tread depth should be no less than 2/32 of an inch. Tires should be properly filled to the manufacturer’s specifications. This can be checked with an air gauge.
- The exhaust system should show no signs of leaks.
- There should be no unauthorized holes or welds. Bundle up the cross members to ensure none are missing.
- Fuel should not be leaking from the tank and the cap should always be on tight.
- Rust trails could indicate loose bolts, while powder residue and racks around the bolts could mean the bolts have been over-tightened.
- Mirrors should be clean for best visibility.
- Make sure the mud flap is secured properly. Also look for cracks, bends and breaks.
- Make sure to mention there should be never be any unauthorized welds.
- The shock absorber should be secure at both ends and not leaking. If it does leak, it will leak in the middle.
- With the brakes released and pulled by hand, the push rod should not move more than one inch.
- If you are equipped with duals, check to see there is proper spacing between the tires and there is nothing stuck.
- The spring arm should be secure at both ends.
- The spring mount should be secure at both ends.
- Make sure the torque arm is secured properly. Also look for cracks, bends and breaks.
- Make sure to check and mention that no U-bolts are missing.
Back to top of Driver Door Fuel Area
Electric Line
Locking jaws, mounting bolts, release arm, sliding fifth wheel locking pin.
- Air lines should be secure at both ends with no abrasions, bulges or cuts. They should not be leaking, dragging or tangled.
- Make sure the apron is properly mounted and secure. Look for cracks, bends and breaks.
- Make sure there is enough space between the tractor mudflap and the trailer landing gear so that they don’t hit each other when making a turn.
- The electric line should be secure at both ends. There should be no abrasions, bulges, cuts or exposed wires.
- The gap is not an actual item, however there should be no space between the apron and the skid plate.
- The seals should be in good condition with no cracks, signs of rotting, or leaking air.
- Make sure the king pin is properly mounted and secure. Look for cracks, bends and breaks.
- You must physically check that the locking jaws is fully locked around the king pin.
- No mounting bolts should be missing.
- Make sure the platform is properly mounted and secure. Look for cracks, bends and breaks.
- The release arm should be in the fully locked position.
- The skid plate needs to be properly lubed.
- The pin must be in the fully locked position.
Back to top of Coupling Area
Header Board
Landing gear, rear door and hinges.
- Shock Absorbers
Tandem Frame and Release
Trailer tire.
- Again make sure the airbag has no abrasions, bulges, cuts or leakings. The airbag should not be missing any mounting bolts.
- The brake chamber should be properly mounted so that is does not leak air.
- The brake hose should be secure at both ends with no abrasions, bulges, cuts or leaks.
- Check for oil or debris on the brake lining. There should be at least ¼ of an inch of friction material.
- There cannot be any missing cross members.
- The header board cannot have any holes or missing rivets.
- The landing gear must be fully raised and the cradle handle secure.
- Rust trails indicate loose bolts. Powder residue and cracks around the bolt holes could be an indication of over-tightened bolts.
- The rims cannot have any unauthorized welds.
- The rear door should open, close and latch properly. Door seals should not be worn, torn or dry rotten.
- The shock absorber should be checked at both ends for leaks.
- When the brakes are released and pulled by hand, the push rod should not move more than one inch.
- Release handle and locking pins should be in the fully locked position.
There should be no abrasions, bulges or cuts to the tread or sidewalls. Tread depth should be no less than 2/32 of an inch. The tire should be properly filled to manufacturer’s specifications and checked with an air gauge.
- Front of the truck
- Both sides of the truck
- Rear of the truck
- Both sides of the trailer
- Rear of the trailer
Back to top of Trailer
The five functions are:
- Left turn signal
- Right turn signal
- Four way flashers
- High/low beams
- Brake lights
Back to top of Light Check
- Airbrake Test
Air Pressure Gauges
Emergency equipment, heater and defroster, lighting indicators, oil pressure gauge, parking brake, service brake check, water temperature gauge, windshield and mirrors, windshield wipers and washers.
The last section is In-Cab Inspection and Brake Tests. For the In-Cab Inspection you will once again want to make sure all of the following components are properly mounted and secure. As well as the following:
Air Brake Test
There are three stages to an air brake test:
- Applied Pressure Test – When doing the Applied Pressure Test, you will want to build the air pressure to governor cut out. Put the truck in the lowest gear, turn the engine off and immediately turn it back on. Push in the tractor and trailer valves which will then release the parking brakes. Push and hold the brake pedal, allowing the gauges to stabilize. When the gauges have stabilized, announce the Primary and Secondary PSI. Listen for air leaks while doing this.
- Warning Light and Buzzer – Pump down on the brake pedal until the warning light and buzzer comes on. This is typically at or before 60 PSI.
- Tractor/Trailer Protection Valve Pop Out – Pump down on the brake pedal until the tractor and trailer protection valves pop out, this will be between 20 and 40 PSI.
- The air pressure gauges should build to governor cut out.
- Your truck should have a fire extinguisher, three red reflective triangles and spare electrical fuses.
- Demonstrate both the heater and defroster are working properly.
Horns (Air Horn and City Horn)
- Blow both horns to make sure they are working.
- Check the left turn, right turn, four way flashers and high beams; also point these out on the dashboard.
- Make sure transmission is in neutral and then fully depress the clutch. Turn the key on, check the ABS light, announce when it comes on and off, and start the engine.
- The seat belt should not be ripped or frayed and should adjust and latch properly.
- The engine oil pressure gauge should rise to normal operating range.
- Trailer Parking Brakes – Set the trailer brake, release the tractor brake, then tug lightly on the trailer.
- Tractor Parking Brakes – Set the tractor brake, release the trailer brake and tug lightly on the trailer.
- Release both the tractor and trailer brakes. Drive at idle speed. Apply the service brake to make sure you come to a complete stop and that it doesn’t pull to the left or right when applying the brakes.
- The voltmeter should be charging between 13 and 14 volts.
- The water temperature gauge should also rise to normal operating range.
- The windshield and mirrors must be clean, with no obstructions and in proper adjustment.
- Demonstrate the wipers and washers are working properly by spraying the windshield.
Back to top of In-Cab Inspection and Brake Tests
During a CDL pre-trip inspection, truckers inspect many aspects of their commercial vehicle, including the overall safety of the vehicle; major hoses, fluid levels, and vehicle belts; the clutch or gear shift; and emergency equipment. The driver demonstrates their knowledge by walking around the vehicle, checking various safety components and explaining why each part should be checked for safety.
Reference and practice tests:
- Printable Pre Trip Inspection Checklist (PDF)
- CDL General Knowledge Practice Test
- Pre Trip Inspection Practice Test
- CDL HAZMAT Endorsement Practice Test
Edited for 2024 on 12/5/23

Trucker's Blog | A Complete Trucking Guide
- Privacy Policy
- Trucker Store
- Write for us

7 step air brake test
Scroll Down to download 7 Step Air Brake Test Cheat Sheet pdf
What is the 7 Step Air Brake Test?
A commercial driver must perform a pre-trip inspection before taking a truck trailer on any public road. The most important part of the pre-trip inspection is the 7 step air brake test.
Please note that this article is not an actual air brake test, this is just for practice.
Always do the 7 step air brake test in order. Initially, it is difficult to memorize the 7 steps air brake test, but the word “LAGASS” makes it easier to remember the steps in the 7 step air brake test. The abbribation ofpsi “LAGGASS” is
- L for Low Air Warning Device.
- A for Air Pressure Buildup.
- G for Governor Cut Out.
- G for Governor Cut In.
- A for Air Loss Rate.
- S for Spring Brake Test.
- S for Service Brake Test.
Tractor Trailer Pre-Trip Inspection
How to do a 7 step air brake test?
Before starting the air brake test, park the vehicle on a flat surface, apply spring brakes and wheel chokes. Start testing with the low air warning device.
1. The low air warning device test
There is an indicator on the vehicle’s dashboard that warns the driver when the air pressure drops below the required level. This device can be an audible warning, an indicator or both.
How to test the low air warning device?
- Make sure the air pressure is above 90psi.
- Turn the imagination switch on or keep the engine running.
- Pump down the brake pedal and keep an eye on the dashboard(where the visible indications appears, mostly on the dashboard, in some vehicles in the gauges) and air pressure gauges.
- A visible and or audible signal must activate on or before 55psi.
If the low air warning device does not activate, it is a major defect.
2. The air pressure build-up test.
This test evaluates the working of the air compressor. When travelling on the road, the air pressure drops with the frequent use of brakes. But, the air compressor keeps filling up the air tanks as per instructions from the governor to meet the required air pressure. The compressor must fill the required air within a time constraint, called air pressure build-up. Air pressure build-up depends on your province, in Ontario it is 85psi – 100psi in 2 minutes engine running in between 600 to 900 rpm.
How to test air pressure buildup?
- Make sure the engine is running in between 600rpm to 900rpm.
- Pump down the brake paddle and lower the air pressure to 85psi.
- Now keep watching the needles in the air pressure monitoring gauges.
- The needles must start moving and go from 85psi to 100psi within 2 minutes. The air pressure must build up from 85psi to 100psi within 2 minutes.
3. Governor cut-out test
What is the governor’s cut-out test.

When the required air pressure in the air brake system is reached, the governor shuts off the air compressor, this is called a governor cut out. We hear a “thesis.” sound when the governor cuts out. This noise comes from the governor cut out and the discharge from the air dryer. The minimum governor cut-out is 100psi, and the maximum is 145psi.
Note down the governor’s cut-out reading.
How to test the governor cut-out?
- Keep the engine running from 600 to 900rpm.
- Watch the needles moving and open the driver’s window.
- Listen to the (“thisssss”) sound. This is the governor cut-out.
- The minimum governor cut-out is 100psi, and the maximum is 145psi.
Why is the governor’s cut-out test important?
If the governor does not cut, the air pressure in the brake system will continue increasing, which can damage the brake system. But if the governor fails and the air pressure continues to rise,the safety valve(on air tanks) opens up at 150psi and saves the air brake system.
4. Governor cut-in test
What is the governor cut-in test.
The moment the compressor throws air into air, tanks are called governor cut in. The governor must cut in at 20psi to 25psi below the governor cut-out. The governor cut-in and the cut-out is the normal operating range(NOR) of an air brake system.
How to test the governor cut in?
- Pump down the brake paddle and lower the air pressure 20psi to 25psi from the cut-out reading.
- Now, look at the air pressure monitoring gauges. The governor is cutting in if the needles move, which means the air compressor started throwing air into the air tanks.
- If the needles do not start moving, pump down the peddle again and lower the air pressure by 5psi and watch the needles again.
- Repeat the above until the air pressure reaches 80psi.
The minimum governor cut in is 80psi. Means governor must cut in at 80psi.
5. Air loss rate test.
What is the air loss rate test.
The air loss rate test is a measurement of air leakage from the air brake system.
How to test the air loss rate?
- Make sure the vehicle is on the level surface and the air pressure is within the normal operating range(cut-out and cut-in).
- Apply the wheel chocks.
- Turn the engine off.
- Release the spring brakes.
- Apply and hold the service brakes for a minute.
- Open the window and listen for the air leaks.
- The air brake system in a tractor-trailer must not lose more than 4psi in a minute after an initial loss.
The air loss rate limits are 3psi (straight truck, bus), 4psi (tractor-trailer) and 6psi (tractor and two trailers) in a minute.
6. Service brake test.
What is a service brake test.
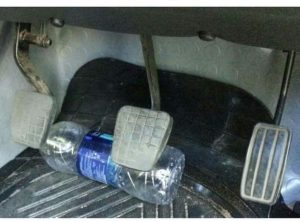
The service brake test is a test of a vehicle’s stopping ability. Your brake paddle is a service brake. Check the brake peddle for rust, debris and the cleanness of the area. The debris under the brake paddle, loose objects on the floor can create dangerous situations.
How to check the service brakes?
- Apply the spring breaks.
- Remove the wheel chocks.
- Now release the spring brakes and put the vehicle in drive.
- Let the vehicle roll and apply the service brakes.
The service brakes must hold the vehicle in parallel.
7. Spring brake test
What is the spring brake test.
The spring brakes test is the test of the parking brakes. There is a push/pull yellow knob on the dashboard for the tractor parking brakes.
How to test the spring brakes?
- Put the vehicle into the transmission and let it roll for a yard.
- Apply the spring brakes pulling the yellow knob.
The spring brakes must hold the vehicle in parallel and smooth.
Why is the spring brake test important?
Spring brakes are parking brakes. If they are not working, we won’t be able to park the vehicle.
The next steps in air brake testing are… 1. Draining the air tanks. 2. Pushrod measurement. You can find both steps in the link below.
How to adjust air brakes
Download in cab 7 step air brake test pdf here
CDL 7 Step Air Brake Test video (please read the air pressure buildup time 2 mins in the video)
Trucking in Canada
7 step air brake test pdf air brakes practice test pdf Air Loss Rate Air Pressure Buildup cdl air brake test cheat sheet cdl air brake test pdf cdl air brake test pre trip cdl air brake test video cdl air brakes study guide Governor Cut Out how to do air brake test on tractor trailer how to pass the air brakes test in cab air brake test Low Air Warning Device Service Brake Test Spring Brake Test
3 Leave a Reply
This resource outlines a structured approach to conducting an air brake test, which could be valuable for drivers or technicians responsible for ensuring the proper functioning of air brake systems. Are there any common pitfalls or mistakes?
[…] 7-step-air-brake-test […]
Never see this message again.
- Free Practice Tests
Commercial Driving
- Introduction
Getting a CDL
- Fees and costs
CDL Types & Permits
Endorsements & Restrictions
CDL Exam Preparation
Written exams
- General Knowledge
- Combination
- Doubles/Triples
Practical exams
- TSA background check
- Retake policy
CDL Maintenance
ELDT Training & Certification
CDL how-to guides
Free Air Brakes CDL Test Practice: Questions & Tips for Aspiring Commercial Drivers
Get ready to ace the CDL Air Brake Test with our free questions. Understand every aspect of air brake systems and test requirements to ensure safety and compliance on the road.

Written by Andrei Zakhareuski. With over 16 years of expertise, Andrei leads Driving-Tests.org, a top online resource for driver education. His leadership has established vital partnerships with over 2,600 libraries, educational bodies, and state agencies.
In a hurry? Jump to a free Air Brakes practice test:
- Alabama - AL - Alabama Air Brakes Practice Test
- Alaska - AK - Alaska Air Brakes Practice Test
- Arizona - AZ - Arizona Air Brakes Practice Test
- Arkansas - AR - Arkansas Air Brakes Practice Test
- California - CA - California Air Brakes Practice Test
- Colorado - CO - Colorado Air Brakes Practice Test
- Connecticut - CT - Connecticut Air Brakes Practice Test
- Delaware - DE - Delaware Air Brakes Practice Test
- District of Columbia - DC - District of Columbia Air Brakes Practice Test
- Florida - FL - Florida Air Brakes Practice Test
- Georgia - GA - Georgia Air Brakes Practice Test
- Hawaii - HI - Hawaii Air Brakes Practice Test
- Idaho - ID - Idaho Air Brakes Practice Test
- Illinois - IL - Illinois Air Brakes Practice Test
- Indiana - IN - Indiana Air Brakes Practice Test
- Iowa - IA - Iowa Air Brakes Practice Test
- Kansas - KS - Kansas Air Brakes Practice Test
- Kentucky - KY - Kentucky Air Brakes Practice Test
- Louisiana - LA - Louisiana Air Brakes Practice Test
- Maine - ME - Maine Air Brakes Practice Test
- Maryland - MD - Maryland Air Brakes Practice Test
- Massachusetts - MA - Massachusetts Air Brakes Practice Test
- Michigan - MI - Michigan Air Brakes Practice Test
- Minnesota - MN - Minnesota Air Brakes Practice Test
- Mississippi - MS - Mississippi Air Brakes Practice Test
- Missouri - MO - Missouri Air Brakes Practice Test
- Montana - MT - Montana Air Brakes Practice Test
- Nebraska - NE - Nebraska Air Brakes Practice Test
- Nevada - NV - Nevada Air Brakes Practice Test
- New Hampshire - NH - New Hampshire Air Brakes Practice Test
- New Jersey - NJ - New Jersey Air Brakes Practice Test
- New Mexico - NM - New Mexico Air Brakes Practice Test
- New York - NY - New York Air Brakes Practice Test
- North Carolina - NC - North Carolina Air Brakes Practice Test
- North Dakota - ND - North Dakota Air Brakes Practice Test
- Ohio - OH - Ohio Air Brakes Practice Test
- Oklahoma - OK - Oklahoma Air Brakes Practice Test
- Oregon - OR - Oregon Air Brakes Practice Test
- Pennsylvania - PA - Pennsylvania Air Brakes Practice Test
- Rhode Island - RI - Rhode Island Air Brakes Practice Test
- South Carolina - SC - South Carolina Air Brakes Practice Test
- South Dakota - SD - South Dakota Air Brakes Practice Test
- Tennessee - TN - Tennessee Air Brakes Practice Test
- Texas - TX - Texas Air Brakes Practice Test
- Utah - UT - Utah Air Brakes Practice Test
- Vermont - VT - Vermont Air Brakes Practice Test
- Virginia - VA - Virginia Air Brakes Practice Test
- Washington - WA - Washington Air Brakes Practice Test
- West Virginia - WV - West Virginia Air Brakes Practice Test
- Wisconsin - WI - Wisconsin Air Brakes Practice Test
- Wyoming - WY - Wyoming Air Brakes Practice Test
CDL Air Brakes Test Overview
- Written Exam
- Practical Exam
- Test Requirements
The written part of the Air Brakes CDL Test focuses on assessing your knowledge of air brake systems, including system components, operation, and safety protocols.
Preparing for the CDL Air Brake Test
Study the Components
Begin with learning about air brake system components and their functionality. Knowing each part’s role is crucial for understanding the entire system.
Practical Experience
Gain hands-on experience with air brake systems, if possible. This could include training courses or practicing with a qualified instructor.
Practice Tests
Utilize free Air Brake practice tests for assessing your readiness and familiarizing yourself with the test format.
Pre-Trip Inspection Practice
Practicing performing a pre-trip inspection is essential, as this is a critical part of the practical exam and daily operation of air brake systems.
Exam Details and Requirements
key components of the air brake system.
Understanding Air Brake Systems
Air brake systems, essential for commercial vehicles, consist of several components. Key parts include the compressor, reservoirs, valves, and brake chambers, each playing a crucial role in the system’s functionality.
Functionality of Air Brakes
When the brake pedal is pressed, air from the compressor travels to the brake chambers. This air pressure clamps the brake pads onto the brake drum, slowing or stopping the vehicle.
Frequently Asked Questions about the CDL Air Brake Test
How to Pass the Test on the First Attempt
To pass the CDL air brakes test the first time, focus on a blend of theoretical knowledge and practical application, including hands-on practice and thorough study of air brake systems.
Validity and Maintenance of Air Brake Endorsement
The air brake endorsement is valid as long as your commercial driver’s license is valid. However, a knowledge test or a refresher course on air brakes every two years is recommended to maintain your endorsement.
Retaking the Test After Failure
If you fail the test, you can retake it after a state-specified waiting period. You may need to pay a retake fee and complete additional training or education.
What is the CDL Air Brake Test?
The CDL Air Brake Test is a specialized segment of the CDL exam focused on a driver’s understanding of the mechanics, operation, and safety protocols associated with air brake systems in commercial vehicles.
The Importance of Air Brake Knowledge
Mastery of air brakes is not just about passing a test – it’s crucial for the safety of the driver and everyone on the road. The air brake system is complex and requires thorough understanding to operate correctly.
Key Topics Covered
Expect to be tested on air brake system parts, inspection protocols, proper usage, and emergency response.
Passing Criteria
You will need a score of 80% or higher to pass, which translates to correctly answering at least 20 out of 25 questions.
Pro Tip : During the test, take your time with each question and remember the practical applications of what you’ve studied. Theory when backed by practical understanding is a winning combo for the CDL Air Brake Test.
Sample Air Brake Written Exam Questions
To give you a taste of what to expect in the actual CDL Air Brake Test, here are some sample questions. Use these to gauge your understanding and practice answering.
Question 1: Air Brake System Pressure
At what psi does the air compressor governor typically cut-in to maintain air pressure?
- Correct Answer: A) 100 psi
Question 2: Brake Lag
How much lag time is there in an air brake system?
- A) Less than one second
- B) Between 2-3 seconds
- C) Up to half a second
- Correct Answer: C) Up to half a second
Question 3: Air Tank Draining
Why is it important to drain water from compressed air tanks?
- A) To prevent air pressure from becoming too high
- B) To prevent freezing in cold weather
- C) To improve fuel efficiency
- Correct Answer: B) To prevent freezing in cold weather
Question 4: Brake Fading
What causes brake fading or failure?
- A) Overheating due to excessive use
- B) Cold weather conditions
- C) Improper brake fluid level
- Correct Answer: A) Overheating due to excessive use
Question 5: Spring Brakes
When do spring brakes usually activate?
- A) When air pressure falls below 45 psi
- B) When air pressure rises above 60 psi
- C) When air pressure falls below 20 psi
- Correct Answer: A) When air pressure falls below 45 psi
Remember, these questions are just samples. For more comprehensive preparation, utilize the full suite of practice questions available at Driving-Tests.org .
The key to success is a blend of comprehensive study, practical understanding, and a calm approach to the test. Utilize all available resources and take the time to fully grasp the intricacies of air brake systems.
After the Test
Once you’ve passed the test, you’ll be equipped to drive vehicles with air brakes, a skill that expands your employability and opportunities within the commercial driving industry.
Ready to start preparing? Visit Driving-Tests.org for comprehensive study guides and free practice tests to ensure you’re ready to ace your CDL Air Brake Test.
Secure your CDL with confidence!
Our exclusive CDL Premium program offers comprehensive online training with an ELDT certificate, authentic exam questions, and a solid Pass Guarantee, starting at only $49. Ideal for first-time applicants, seasoned drivers, and those new to the U.S. road rules.
Explore CDL Premium
Was this page helpful?
- In a hurry? Jump to a free Air Brakes practice test:
- CDL Air Brakes Test Overview
- Preparing for the CDL Air Brake Test
- Exam Details and Requirements
- Key Components of the Air Brake System
- Frequently Asked Questions about the CDL Air Brake Test
- Sample Air Brake Written Exam Questions
- After the Test

- All Companies
- Driver Training
- All Freight Types
- Lease/Purchase
- Message Board
- Truck Driver Salary
- How to Become A Truck Driver
- Will I Be Successful?
- Truck Driving Schools
- CDL Practice Tests
- Get Your CDL
- Get Your First Truck Driving Job
- Your First 100,000 Miles
- Advanced Tips
- Sign Up Here
Select Location x
Please tell us your location.
Location not set
The Complete Pre-Trip Inspection Checklist
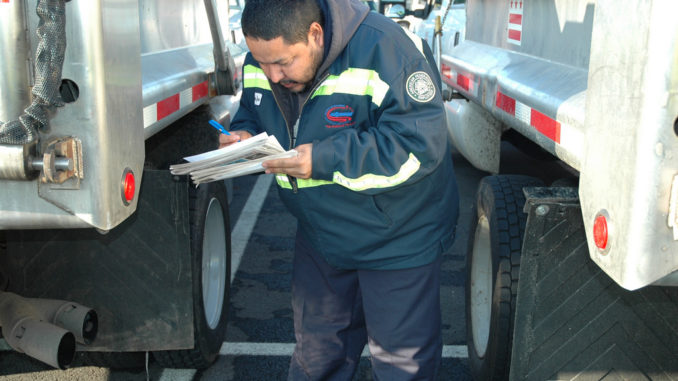
Due to heavy memorization, the pre-trip inspection is one of the hardest aspects of the CDL test. Also called the “Vehicle Inspection Test,” the pre-trip is one of the tests that trucking students fail the most.
With this pre-trip inspection checklist, we tell you everything you need to know and what you need to check for.
Engine Compartment – What to Check For:
When checking the engine compartment, you always want to make sure the following components are properly mounted and secured. You should also make sure they are not cracked, bent, or broken. The items you need to check for include:
Belt-Driven Alternator
All of the wires are connected. The belt is not cracked or frayed, and the free play on the belt is between ½ to ¾ of an inch.
Belt-Driven Water Pump
The free play on the belt is between ½ to ¾ of an inch, and all the hoses running to and from the water pump are tightly clamped. Ensure nothing is leaking.
Brake Chamber
The brake chamber is not leaking air.
The brake drum is properly mounted and secure.
The brake hose is rubber; it is not cracked and is not leaking air.
Brake Lining
Check for oil or debris on the lining. There should be at least ¼ of an inch of friction material.
Caste Nuts and Cotter Pins
All three caste nuts and cotter pins are present.
Coolant Reservoir
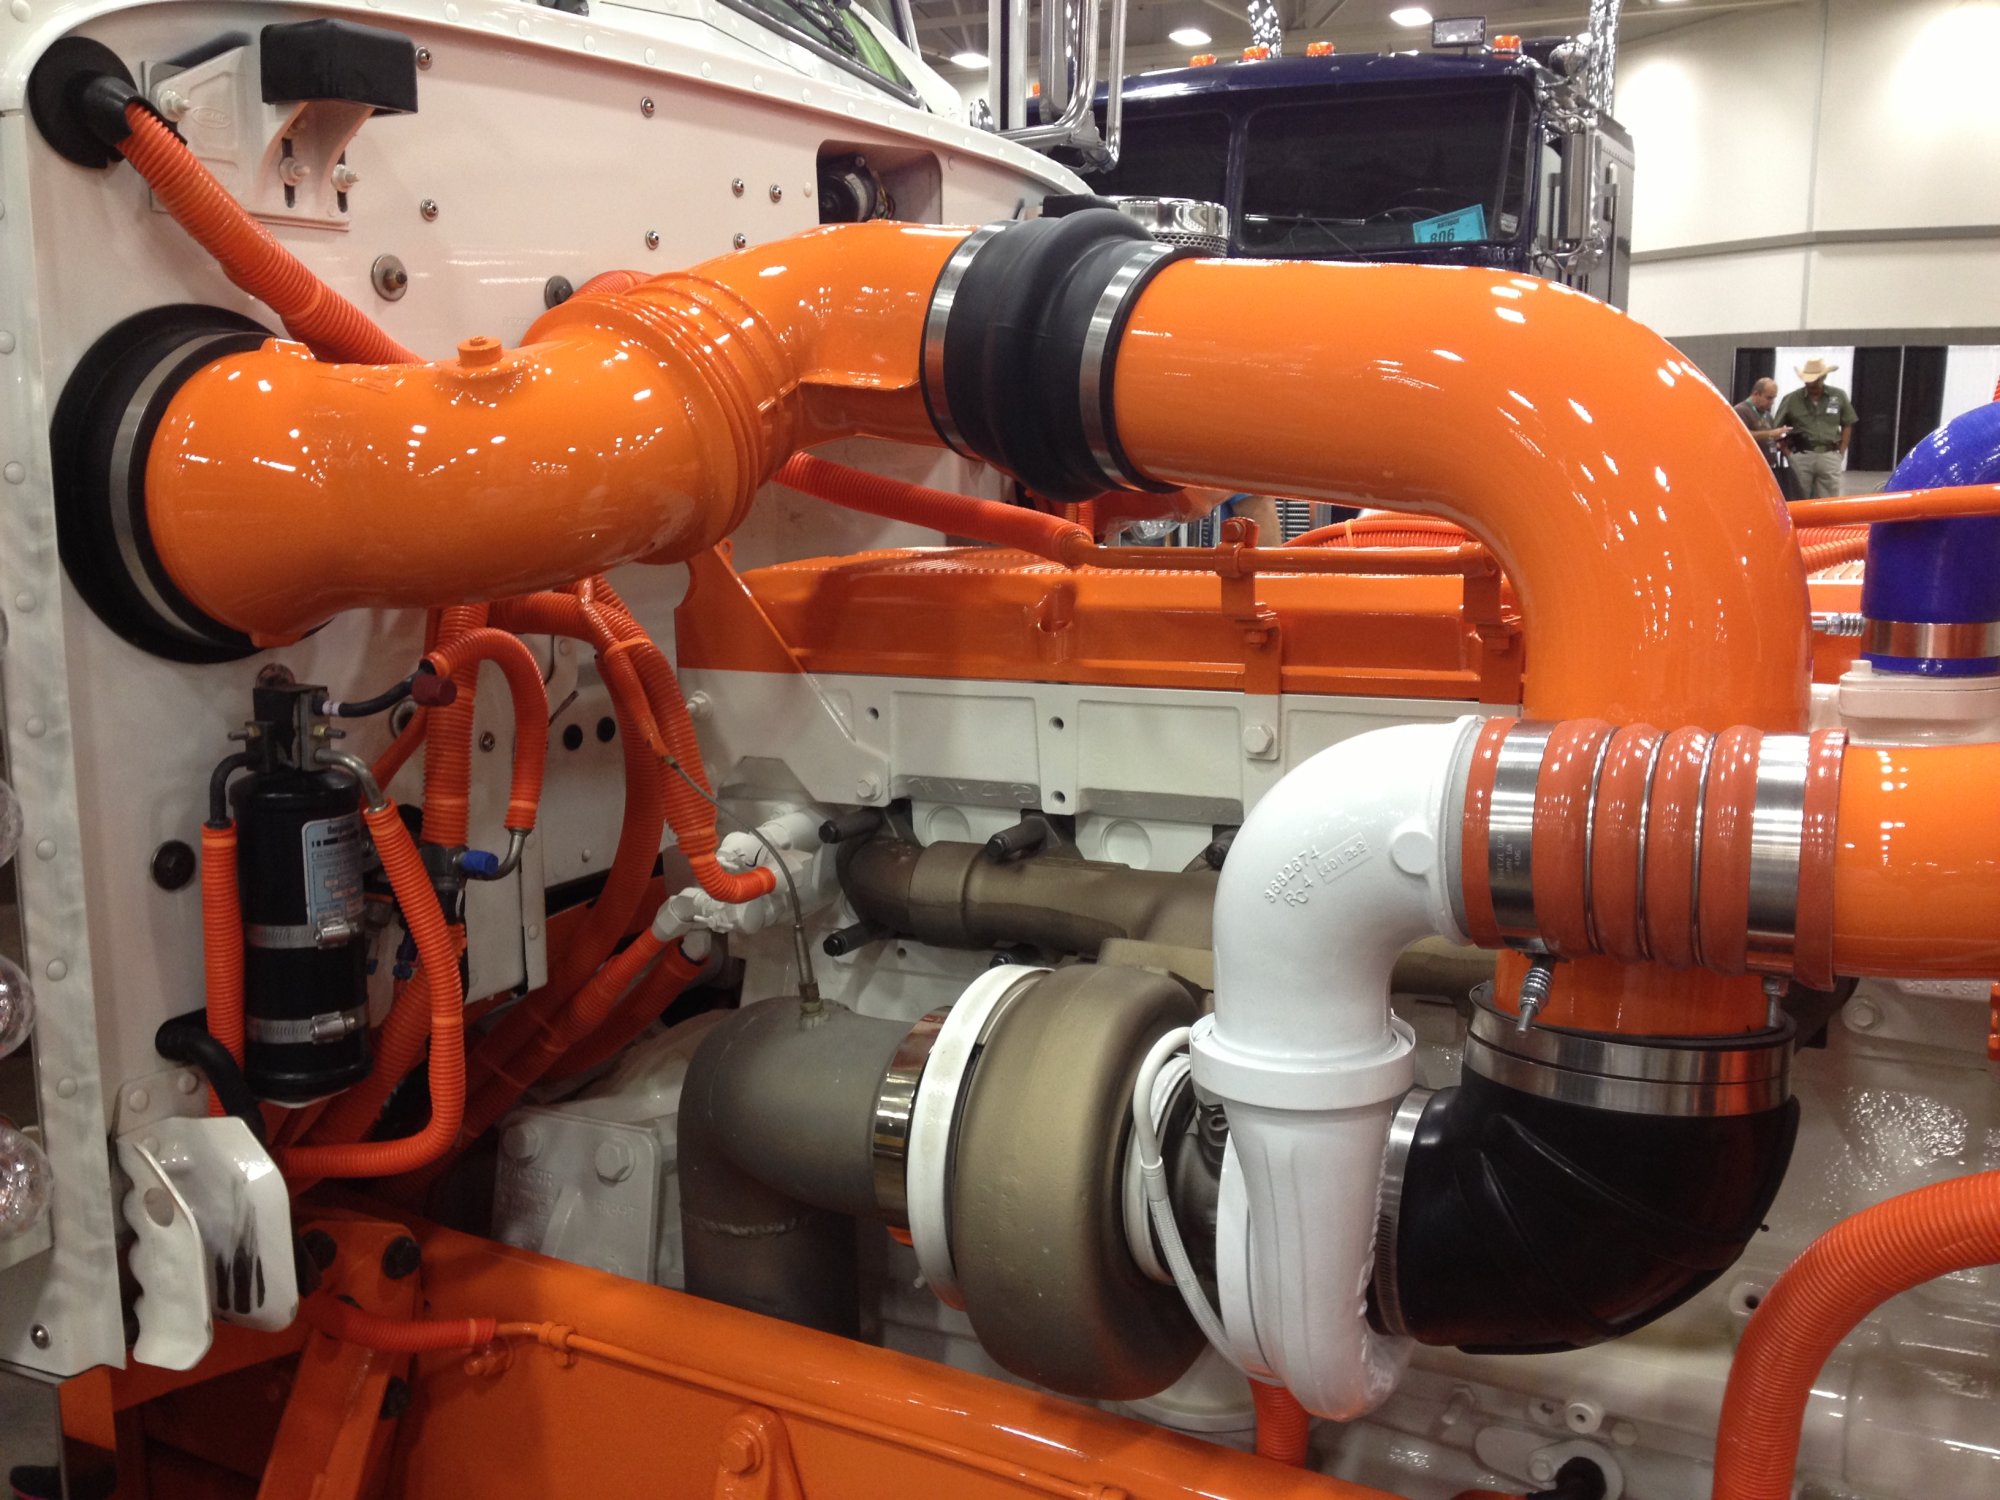
The reservoir is not leaking and is filled to the manufacturer’s specifications.
The drag link is properly mounted and secure, and not cracked, bent or broken.
Gear Box and Hoses
The gear box and hoses have no abrasions, bulges or cuts, and are not leaking.
Gear-Driven Air Compressor
The air compressor is properly mounted and does not leak.
Gear-Driven Power Steering Pump
The steering pump is properly mounted and not leaking.
General Hoses (Passenger and Driver’s Side)
The hoses are secure at both ends and are not leaking. There are no abrasions, bulges, or cuts.
The hub seal (or axle seal) is leaking and is filled to the manufacturer’s specifications.
Leaf Springs
None of the leaf springs have shifted or are bent or broken.
There are no signs of leaks under the truck.
There are no lug nuts missing. There are no rust trails, powder residue, or cracks around the bolt holes.
The oil level is filled to the manufacturer’s specifications.
The pitman arm is properly mounted and secure. It is not cracked, bent, or broken.
Power Steering Fluid Reservoir
The power steering reservoir is not leaking and is filled to the manufacturer’s specifications.
The rim does not have any unauthorized welds.
Shock Absorber
The shock absorber is not leaking. If it is leaking, the leak will be at the point where the top and bottom portion of the shock meet.
Slack Adjuster and Push Rod
With the brakes released and pulled by hand, the push rod does not move more than one inch.
Spring Hanger
The spring hanger is properly mounted and secure.
Steering Column
The steering column is properly mounted and secure. It is not cracked, bent, or broken.
There are no abrasions, bulges, or cuts on the tread or sidewalls. Tread depth should have a depth no less than 4/32 of an inch. Tires are properly filled to the manufacturer’s specifications. This can be checked with an air gauge.
The tie rod is properly mounted and secure, not cracked, bent, or broken.
Make sure all are accounted for.
Driver Door Fuel Area-What to Check For:
Remember – during the pre-trip inspection, you want to make sure these items are properly mounted and secure. Look for cracks, bends, and breaks.
The actual airbag has no abrasions, bulges, cuts, or leaks. The airbag is not missing mounting bolts.
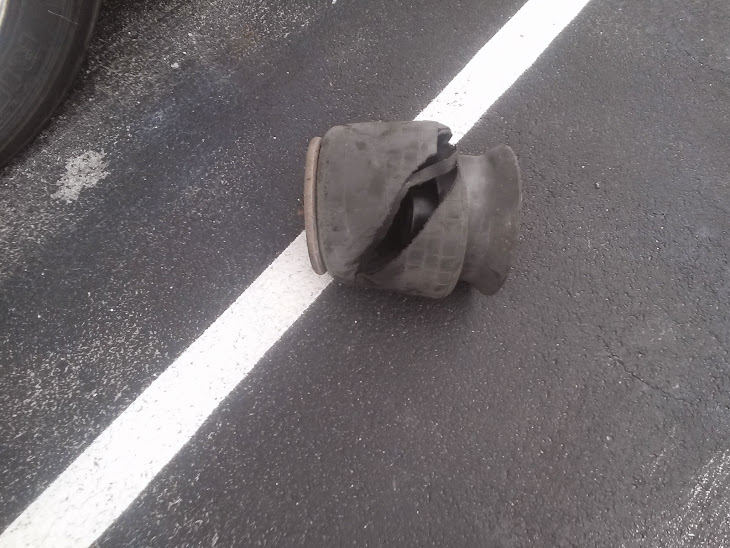
The axle seal is not leaking and is filled to the manufacturer’s specifications.
The brake drum is secured properly and has no cracks, bends or breaks.
Check the brake hose at both ends to make sure it is not leaking air.
There is no oil or debris on the brake lining. There is at least ¼ of an inch of friction material.
Catwalk and Steps
The cat walk and steps are clear of any loose objects.
Door and Hinges
The doors open, close, and latch properly. Door seals should not be worn, torn, or rotten.
Drive Shaft
The drive shaft is not twisted, and the u-joints are free of any debris.
The tread and sidewalls have no abrasions, bulges, or cuts. The tread depth is no less than 2/32 of an inch. Tires are properly filled to the manufacturer’s specifications. This can be checked with an air gauge.
Exhaust System
The exhaust system shows no signs of leaks.
Frame and Cross Members
There are no unauthorized holes or welds. Bundle up the cross members to ensure none are missing.
Fuel is not leaking from the tank, and the cap is on tight.
There are no rust trails, loose bolts, powder residue, or cracks around the bolts.
Mirrors are clean, with no cracks or chips.
The mud flap is secured properly, with no cracks, bends and breaks.
There are no unauthorized welds.
The shock absorber is secure at both ends and not leaking. If it does leak, it is preferable to leak in the middle.
There is proper spacing between the tires and there is nothing stuck.
The spring arm is secure at both ends.
Spring Mount
The spring mount is secure at both ends.
The torque arm is secured properly, with no cracks, bends or breaks.
No u-bolts are missing.
Coupling Area-What to Check For:
Air lines should be secure at both ends with no abrasions, bulges, or cuts. They should not be leaking, dragging, or tangled.
Make sure the apron is properly mounted and secure. Look for cracks, bends, and breaks.
Make sure there is enough space between the tractor mud flap and the trailer landing gear, so that they don’t hit each other when making a turn.
Electric Line
The electric lines are secure at both ends. There are no abrasions, bulges, cuts, or exposed wires.
There is no space between the apron and the skid plate.
The seals are in good condition with no cracks, signs of rotting, or leaking air.
The king pin is properly mounted and secure, without cracks, bends and breaks.
Locking Jaws
Physically check that the locking jaws are fully locked around the king pin.
Mounting Bolts
No mounting bolts are missing.
The platform is properly mounted and secure, without cracks, bends and breaks.
Release Arm
The release arm is in the fully locked position.
The skid plate is properly lubed.
Sliding Fifth Wheel Locking Pin
The pin is in the fully locked position.
Trailer- What to Check For :
The airbag has no abrasions, bulges, cuts or leaks, not missing any mounting bolts.
The brake chamber is properly mounted and does not leak air.
The brake hose is secure at both ends with no abrasions, bulges, cuts, or leaks.
No oil or debris on the brake lining and at least ¼ of an inch of friction material.
No missing cross members.
Header Board
The header board does not have any holes or missing rivets.
Landing Gear
The landing gear is fully raised and the cradle handle secure.
No rust trails, powder residue, or cracks around the bolt holes.
The rims do not have any unauthorized welds.
Rear Door and Hinges
The rear door opens, closes, and latches properly. Door seals are not worn, torn, or dry rotten.
The shock absorber is secure at both ends with no leaks.
When the brakes are released and pulled by hand, the push rod does not move more than one inch.
Tandem Frame and Release
Release handle and locking pins are in the fully locked position.
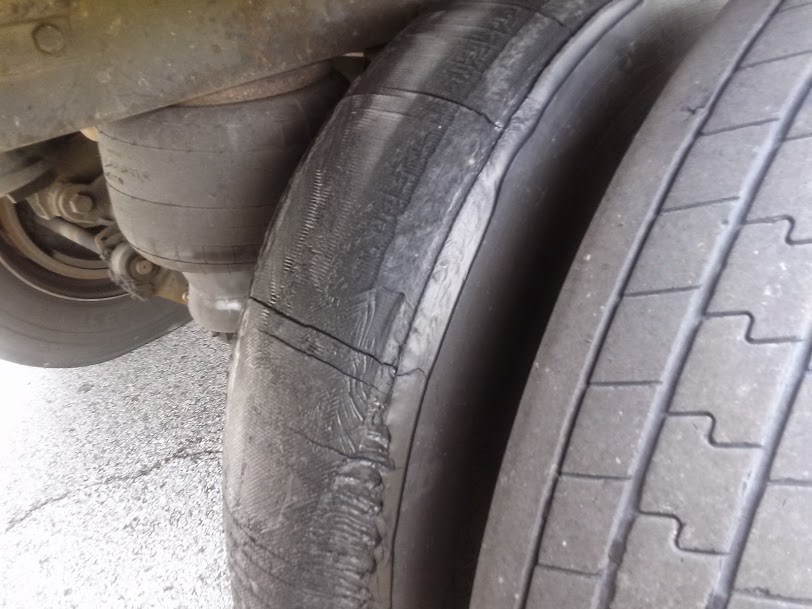
Trailer Tire
There are no abrasions, bulges, or cuts to the tread or sidewalls. Tread depth is no less than 2/32 of an inch. The tire is properly filled to manufacturer’s specifications and checked with an air gauge.
Light Check
There are five locations where you must check your lights. These include:
- Front of the truck
- Both sides of the truck
- Rear of the truck
- Both sides of the trailer
- Rear of the trailer
The five functions are:
- Left turn signal
- Right turn signal
- Four way flashers
- High/low beams
- Brake lights
Inspection and Brake Tests-What to Check For: In-Cab
The last section is In-Cab Inspection and Brake Tests. For the In-Cab Inspection you once again want to make sure all of the following components are properly mounted and secure. As well as the following:
Air Brake Test
There are three stages to an air brake test:
- Applied Pressure Test – When doing the Applied Pressure Test, you want to build the air pressure to governor cut out. Put the truck in the lowest gear, turn the engine off and immediately turn it back on. Push in the tractor and trailer valves which then release the parking brakes. Push and hold the brake pedal, allowing the gauges to stabilize. When the gauges have stabilized, announce the Primary and Secondary PSI. Listen for air leaks while doing this.
- Warning Light and Buzzer – Pump down on the brake pedal until the warning light and buzzer comes on. This is typically at or before 60 PSI.
- Tractor/Trailer Protection Valve Pop Out – Pump down on the brake pedal until the tractor and trailer protection valves pop out, this will be between 20 and 40 PSI.
Air Pressure Gauges
The air pressure gauges build to governor cut out.
Emergency Equipment
Truck has a fire extinguisher, three red reflective triangles, and spare electrical fuses.
Heater and Defroster
Demonstrate both the heater and defroster are working properly.
Horns (Air Horn and City Horn)
Blow both horns to make sure they are working.
Lighting Indicators
Check the left turn, right turn, four way flashers and high beams; also point these out on the dashboard.
With the transmission in neutral, fully depress the clutch. Turn the key on, check the ABS light, announce when it comes on and off, and start the engine.
The seat belt is not ripped or frayed and adjusts and latches properly.
Oil Pressure Gauge
The engine oil pressure gauge should rise to normal operating range.
Parking Brake
- Trailer Parking Brakes – Set the trailer brake, release the tractor brake, and tug lightly on the trailer.
- Tractor Parking Brakes – Set the tractor brake, release the trailer brake, and tug lightly on the trailer.
Service Brake Check
Release both the tractor and trailer brakes. Drive at idle speed. Apply the service brake to make sure you come to a complete stop and that it doesn’t pull to the left or right when applying the brakes.
The voltmeter is charging between 13 and 14 volts.
Water Temperature Gauge
The water temperature gauge rises to normal operating range.
Windshield and Mirrors
The windshield and mirrors are clean, with no obstructions and in proper adjustment.
Windshield Wipers and Washers
Demonstrate the wipers and washers are working properly by spraying the windshield.
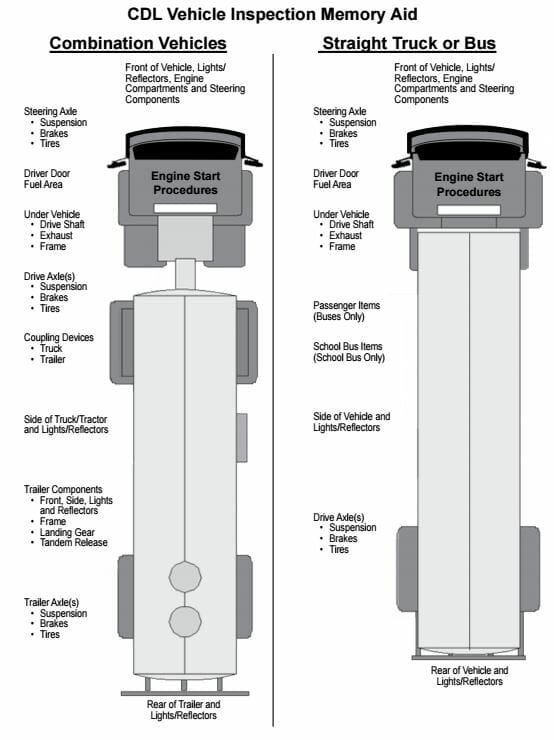
This is a really nice complete list, very useful.
Comments are closed.
Contact ClassADrivers.com
Please use the form below to contact our customer service or sales team.
You can also reach us at (888) 830-2326. Our normal business hours are Monday-Friday 8 a.m. to 5 p.m. (Pacific Time).
Our business address is: Attn: Class A Drivers MH Sub I, LLC dba Internet Brands 909 N Pacific Coast Highway, 11th Floor El Segundo, CA 90245
By clicking the ["Send"] button, you agree to our Terms of Use and Privacy Policy , and to the use of cookies described therein, and you also consent to the collection, storage, and processing of your data in the United States where the level of data protection may be different from that in your country.
CDL Pre-Trip Inspection Test and How To Memorize It
The pre-trip is one of the things that students fear the most and fail the most. Let’s face it, the pre-trip is intimidating because there is so much stuff to memorize. The key to learning the pre-trip inspection is preparation, memorization, and repetition. Don’t go away, in this article I have exactly what you need to make sure you pass it the first time.
It is going to take time for you to memorize everything and the only way to do this is by repeating it over and over.
Hopefully, the school where you are being trained is giving you enough time to practice it everyday you are there.
I can’t stress that enough, regardless of which method you use below you need to repeat it daily and practice on your own.
Don’t expect that your run through once a day with your instructor is enough, it isn’t.
In this article I’m going to give you 8 tips that will help you memorize the pre-trip so you are able to pass it your first time and move on with your driving career.
1. REPETITION!
The only way to memorize the pre-trip is to repeat it over and over. Start with the engine area and work your way around the truck and finally inside the cab.
There is no way around consistent repetition. The more you do it the more you will memorize it. It’s just that simple.
Now that we have established how important repetition is I want you go through the rest of this list and figure out which method (or methods) works best for you and then repeat it over and over.
2. Record Someone Else
You can use YouTube to find a video of someone doing a pretrip and for the most part they work pretty well (more about YouTube later).
Take it a step further though. Ask someone (like and instructor or friend) to do a pre-trip and video record them.
While they are doing it try to use the zoom function on your camera so that you know what the parts look like and what is being checked.
Students that I come across have said that this method works really well because you have quality video and audio. Just watch your recording over and over and this stuff will be engraved in your brain.
Just make sure you are absolutely sure that the person you record knows what they are doing and are showing you everything. You don’t want to watch a video that skips anything that will be on the test.
3. Smaller Chunks
Break down the pre-trip into smaller chunks so that it is not overwhelming. If you think about memorizing everything at once it will be a daunting task.
My suggestion is you learn your air brakes first, then the inside of the cab, the engine compartment, and then the rest of the truck. You can chose any order that you want to as long as it helps you out.
Memorize each part and then tie it all together. You will find that learning the pre-trip is much easier if you do it this way.
4. Use Your Imagination
Do this while in bed before you fall asleep. Warning: the pre-trip is going to consume a lot of your attention during training, even while you sleep!
When you wake up go through a video you found on YouTube or the one you recorded (see #2) and correct any errors you made.
5. Find A Truck
It really helps if you have access to a truck. Pictures alone are not enough. Most of you are probably getting your training through a private school, company sponsored training , or community college.
All of these will give you access to an actual truck and should be taking time each day to practice the pre-trip.
Take advantage of this time with the truck to practice your pre-trip as much as possible. When class ends try to stick around to get in some extra practice, this could be the difference between passing and failing.
6. Watch A Pre-Trip Video On YouTube (not straight through)
There are a lot of videos on YouTube that you can choose from. Let me save you some time, these two (below) is the best because it has good audio and video quality, is accurate, and is easy to follow.
Don’t watch the video straight through over and over. Like I mentioned earlier you should chunk it into smaller sections.
Watch a section, pause it, and list off the names of the parts and things to look for. Play it again to see if you are getting them correct. When you finish one section go on to another section until you finish it.
Don’t move on to a new section until you have memorized the section you started. When you complete all the sections you should be able to watch the whole pre-trip and repeat everything on it from start to finish.
If you want to challenge yourself a little try mixing up the sections so that the sections that was last is now first. This will let you know if you are really memorizing everything.
7. Use A Checklist
Probably the most popular ways to memorize the pre-trip is to use a checklist. No doubt that wherever you are getting your training at is already giving you a checklist to use.
Use it. A lot.
Not all checklists are done in the same order but they should all cover the same stuff. I like this one here (printable PDF document) by the people at Trucking Truth , it’s easy to follow and is accurate.
Every possible thing that you will need to identify during the pre-trip is on this checklist.
8. Use Pictures/Diagrams
There are a ton of picture resources out there that will help you memorize the test. Just do a search for “cdl pre-trip inspection pictures” and you will find a ton of stuff.
The picture I like most are these (link to PDF) by Driver Solutions. The pictures are easy to see and distinct arrows are used to point to each part. Along with pictures is an explanation of what to look for and what to say for each individual part.
What Is The Pre-Trip Inspection?
The pre-trip inspection is an inspection of the commercial vehicle including the cab, engine compartment, and exterior.
A driver of a commercial vehicle is required, by federal law, to complete one every day before driving the vehicle and at least once in a 24 hour period. Every single time you begin driving your truck you will have to complete a pre-trip.
The purpose of it is to make sure that the vehicle is safe to drive.
This gives you a chance to get whatever is wrong fixed. If you miss something and are inspected it could result in citations by the DOT.
A lot of drivers find it to be a pain in the rear but you really need to do it every single time you drive your truck. Don’t listen to the irresponsible driver at the truck stop that tells you it’s okay to skip it. It’s not okay.
How Long Does An Inspection Take?
A pre-trip usually takes about 15-45 minutes to complete. It really depends on the type of truck you are inspecting and your experience.
After several years of driving it’s inevitable that your pre-trip is going to be quicker because you are better at doing it and you know what to look for.
As a new driver you should take your time and make sure you do it right. Make it a habit to always conduct a thorough inspection so that you run into less problems while on the road.
What To Say During The Pre-Trip Test
Knowing what to say is important during the test. There are some specific language the person testing you is going to be listening for. More than likely you already heard these phrases but here is an easy way to remember what to say:
PMS— Properly Mounted, Secure ABC— Abrasions, Bulges, Cuts CBB— Cracked, Bent, Broken
There are some tricks that you can use to make sure you say the right thing, here they are: 1 . If its mounted (almost everything is) use the words, “Properly Mounted, Secure” (PMS) 2. If its rubber use the words, “Abrasions, Bulges, Cuts” (ABC) 3. If it’s metal or another hard surface use the words, “Cracked, Bent, Broken” (CBB) 4. If it has fluid or air going through it or in it remember to say, “Not Leaking”
This language shouldn’t be new to you, hopefully the school that is training you has already taught you this stuff.
What Should You Cover During The Pre-Trip?
The areas that you should cover include the coupling system, light check, in-cab inspection, engine compartment, trailer, and drivers door fuel area. Make sure that you are prepared for all of these.
Also, keep in mind that CDL schools/classes may cover the pre-trip in different orders. It’s okay though, they all cover the same stuff. The order that you practice is probably going to be different from someones in a different school/class.
There is no correct order as long as you memorize everything.
What Will Be Tested On The Actual State Pre-trip Inspection Test?
You will be required to perform a pre-trip for the light check, the in-cab inspection, and the coupling system. These 3 areas you have to complete.
After completing those 3 areas your examiner will have you perform one of the following: the engine compartment, trailer, drivers door fuel door, or the entire vehicle.
You will not know ahead of time which one the examiner will choose. This is why it is crucial that you know all the areas.
What Else You Can Do To Prepare?
Aside from the ways listed above to help you memorize the pre-trip there are some other things you can do.
One thing you can do is try answering some practice tests like these here from Trucking Truth. There are 5 free practice tests you can take.
I really find that these practice tests reinforce what you need to know for the real test. It’s worth your time try them out just to see how you do.
What If You Fail The Pre-Trip?
If you do fail the pre-trip you are able to retake it. Make sure you know why you failed the test, ask the inspector if he/she can specifically tell you what you did wrong.
This is usually never a problem because the inspectors want you to know what you missed so that you can pass the test the next time.
One more thing, don’t be embarrassed because you didn’t pass it on your first try! This happens to a lot of people! You are not the only person that will fail the pre-trip and you won’t be the last.
Study what it is that you missed/did wrong and pass it on your second attempt.
Extra Tips For Passing The Pre-Trip Test
Probably the most common reason people fail the pre-trip is because they are nervous.
The two things that will help you out the most is to always remember that the pre-trip is a verbal contact test.
As you start walking towards the vehicle you should already be looking for any leaks under it, broken marker lights, loose mirror brakes and anything else that seems out of place.
BE VERBAL! Your number one priority is to make sure the examiner knows that you know what you are talking about. The more you talk the greater your chances are to pass the test.
Even if it might seem you are going overboard just keep going. Examiners tend to like when testers are verbal.
http://www.truthabouttrucking.com/fls/Pre_Trip_Inspection.pd
CONTACT! The second most important thing you can do is make contact with the item you are describing. For example, as you are explaining the radiator brace you need to make sure you point to or put your hand on the brace as well.
Your examiner wants to make sure that you actually know what the item is that you are explaining.
Make sure you are pointing the the correct item though! Don’t describe the radiator brace while pointing to the turbo!
Again, make sure you are VERBAL and CONTACT every single item (correctly) that you are describing.
Now go pass that test! Good luck driver!
Privacy Policy
COPYRIGHT © 2019 CDL TRAINING SPOT

CDL Class A w/Air Pre-Trip Inspection Checklist
Pre-trip inspection class a with air brakes.
Once you have completed the federally required Entry Level Driver Training (ELDT) theory and behind the wheel (road and range) mandated training, the next step to gaining your Commercial Driver's License (CDL) are the three basic skills formal tests . The three test and the order for which they must be completed are as follows: the Pre-Trip, Basic Skills (backing manurers), and the Road Course. This article discusses the Pre-Trip Inspection.
During the Pre-Trip Inspection skills test for the air brake equipped Class A Tractor and Trailer, you will have about 95 items to check on a tractor with 2 axles and 2 trailer axles.
A full step by step video demonstration of the Pre-trip inspection procedure. A written checklist can be found below the video to help with your study.
When you are completing the inspection test, you must name and point to or touch each item, and fully explain what you are inspecting (you must ensure the tester knows what you are referring to). You will be graded on whether you know what to check each part for, and not necessarily that you know the specific names of the parts. You will have to check each axle as outlined. There is no order or sequence to the test. If you miss a part, you can go back and identify it.
You cannot use any assistance during the Pre-Trip Inspection Test required for gaining your CDL -- you will be completing the inspection checklist by memory, so ensure you know your stuff!
At the end of this checklist, you will find procedural videos to assist you in understanding the requirements for successfully completing the Class A with Air Brakes Pre-Trip Inspection. Utilizing both the written checklist and the demonstration videos in your study will greatly increase your chance of achieving a passing grade on the Pre-Trip Inspection portion of your Basic Skills test.
Pre-Trip Inspection Class A Checklist Items
This order starts in the engine compartment and inspects only the axles on the driver’s side of the truck. The test requires you to only inspect the driver side unless the item is only on the passenger side; for example, parts in engine compartment and exhaust system.
Engine Compartment
- make sure level is between add and full.
- level is sufficient for operation, between hot and cold mark.
- level is between add and full.
- must say that pump is gear driven, working properly.
- not leaking, securely mounted.
- securely mounted, bolts tight, not leaking.
- belt driven, belt not cracked or frayed, tension is between ½” and ¾”.
- securely mounted, bolts tight.
- wire secure into back of alternator.
- secure to engine, bolts tight, hoses secure.
- must say that it is gear driven.
- works properly, not leaking.
- check under vehicle for oil puddles.
- check motor for excessive leaks.
- check hoses for splits, cuts.
- make sure all clamps are tight.
- check all hoses for leaks.
- make sure to check both sides of engine for leaks/hoses.
Front Truck Axle
- secure, bolts tight.
- not leaking.
- not cut, pinched or leaking.
- fittings are secure, not cracked or broken.
- not bent, bolts tight, no cracks, cotter pins in place, sockets are not worn or loose.
- must check from steering box to wheel.
- none broken.
- all in alignment.
- not rusted.
- nuts tight.
- not broke or rusted.
- not shifted.
- check front and rear mount for cracks and rust.
- check for tight or missing bolts.
- make sure bushings are not torn or missing.
- straight (not bent).
- bolts tight.
- not kinked, cut, swollen or leaking.
- fittings secure.
- not bent, broke or leaking.
- not cracked, dented, rusted or leaking.
- must check clamp ; secure, tight and in place.
- pins in place holding slack adjuster to push rod.
- straight, not broken.
- no more than 1”adjustment (movement) on the push rod .
- Straight, not broken.
- no holes, cracks or welds.
- bolts tight, none missing.
- no signs of grease or oil.
- shoes are sufficient, more than ¼” pad.
- no cracks, no chipped pads.
- no fluid, grease or oil.
- 4/32” tread depth.
- no cuts or bubbles on side walls.
- check top of tire for even wear and flat spots.
- check pressure with gauge.
- check valve stem is not cracked, broke, leaking or twisted and secured with cap.
- no aftermarket welds.
- none missing.
- not loose, no cracks or distorted lug bolt holes.
- no signs of rust trails.
- no loose or missing bolts.
- proper fluid level (if sight glass is installed).
Side of Cab
- door hinges are secure, bolts tight.
- handle works, no damage to side.
- seal is in tack and not torn.
- opens and closes properly.
- securely mounted, brackets not damages, bolts in place.
- mirror is clean, and not broken.
- no fluid or debris on steps.
- straps are secure
- cap is on tight with chain and seal in place.
- must check tank & cap for leaking.
- bracket secure.
- cap is on tight.
- no signs of soot (leaking).
- securely mounted.
- all clamps are tight.
- must check whole exhaust system from the turbo to the top of stack.
Rear of Cab
- no cracks, straight.
- bolts are all tight.
- must also check cross members for same.
- not pinched, cracked, swollen.
- securely hanging, not rubbing.
- metal fittings at tractor secure, not broken.
- rubber grommets at trailer not dirty, pinched or leaking air.
- metal fittings at trailer secure, not broken.
- must check at both ends — tractor and trailer .
- secure, plugged in tight (locked or latched if applicable).
- lines not repaired, taped, cut or pinched.
- securely hanging, not rubbing on frame or cat walk.
- straight, no cracks, bolts are tight.
- U-joint bolts tight and free of foreign objects.
- bolts are tight, not slippery.
Fifth Wheel
- none missing, all tight.
- (bolted to frame) bolts tight, none are missing, not cracked, straight.
- (raised area) no cracks or broken welds, straight.
- in locked (all the way in) position, locking pin is secure if equipped.
- must check there is no gap between 5th wheel plate and trailer apron.
- not broke, dented, chipped, flat.
- sufficiently greased.
- pin is in place at pivot point (side).
- no holes, cracks, chipped and flat.
- look in back of 5th wheel to make sure that jaws are locked around king pin.
- straight, not broke or chipped.
- locking pins fully extended through gear or locking device.
- air-line not kinked, pinched or leaking (if equipped).
- distance between tractor and trailer sufficient for turning without hitting.
Rear Truck Axle
- bushing is not missing or damaged.
- check front and rear mount for cracks.
- not kinked, pinched, weathered or leaking, securely mounted.
- straight, securely mounted, not leaking.
- fitting is secure.
- not cracked or rusted or leaking.
- clamp is secure, tight and in place (must check to get credit).
- no more than 1” adjustment (movement) on the push rod with brakes released (double chamber).
- no holes, cracks, or welds.
- smooth surface, not dented.
- no cracked or chipped pads.
- 2/32” tread depth.
- check pressure with a gauge.
- check valve stem is secure, not cracked, leaking or twisted, and cap is in place.
- no cracks, rust or aftermarket welds.
- none missing, not loose, no signs of rust trails.
- no cracks or distorted lug bolt holes.
- must check there is no debris between tires.
- tires are evenly spaced.
- rims flush (butted) together.
- no cracks or broken welds.
- cross members are straight.
- no holes in trailer floor.
- fully raised.
- no broken welds or cracks, bolts are tight on framing.
- crank handle is secured.
- feet are secure and not broken.
- trailer front has no cracks, holes or dents.
- will secure load in sudden stop.
- no missing bolts or rivets.
Front Rear Trailer Axle-treat same as truck axles .
Rear of Trailer
- opens and closes.
- no cracks, not bent.
- hinge secure, not broken.
- seal in place, not torn (if equipped).
- mud flaps are not torn.
- bolted securely.
- length is sufficient.
Cab Compartment/Engine Start (need to demonstrate all mechanisms)
- if equipped, ABS light should go on and off when you turn the key on.
- if ABS light stays on, then the ABS system is not working properly.
- if equipped, DEF light should go on and off when you turn the key on.
- if DEF light stays on, then there is less than 1/8 fluid level in the DEF tank.
- push in clutch & make sure shifter is in neutral before starting engine.
- if automatic transmission make sure vehicle is in neutral.
- needle moves, check temperature gauge for operation and in safe range.
- check voltmeter for operation and in safe range.
- needle indicating charging.
- needle moves, check oil pressure gauge for operation and in safe range.
- working properly, pressure builds to 120 psi — MUST SAY: governor cut out, or purges.
- must have air pressure built up, and check parking brake by applying and putting truck in low gear or drive (for automatic) and try to move (gently).
- must check both tractor and trailer parking brake individually.
- pull forward at 5 mph and stop with foot brake, check for no pull left or right.
- must be clean.
- no cracks, chips or stickers.
- seal is secure with no leaks.
- no stickers.
- mirrors are adjusted.
- operate properly (must turn on).
- rubber blades are not cracked with good contact to windshield.
- medal arms are secure, no damage.
- washer fluid operates (squirts).
- on dash, check left & right turn arrow.
- 4 way flashers.
- high/low beam indicator.
- blow air and electric horn.
- must turn to hot and feel for air from vents.
- turn on defroster to make sure it works properly.
- feel for air to blow from vent at windshield.
- Reflective.
- spare fuses or breakers (whichever the truck is equipped with).
- not cut, frayed or torn.
- securely mounted at seat, shoulder and floor ( all points ).
- latches securely.
- Must build air pressure to governor cut-out or purges.
- turn off engine, then turn key to on position .
- release both parking brakes (push in truck & trailer valves).
- apply foot brake & keep pressure and LET THE PRESSURE SETTLE. Apply for 1 minute –cannot lose more than 4 pounds in 1 minute, and listen for leaks (must hold for full, timed minute).
- say that low air buzzer will come on at approximately 55 to 60 PSI, pump foot brake (fan) so buzzer will sound.
- say that parking brake will pop out at approximately 20 to 40 PSI, pump foot brake (fan) so buttons pop.
Lights—Amber on Front, Red on Rear ( MUST CHECK ALL LIGHTS , must say color and describe light condition).
- Lights (front of vehicle AMBER )-headlights (high & low beam), right/left turn signal, 4 way flashers, clearance, must turn on, clean, not broken, operating properly.
- Lights (front side of tractor AMBER )-right/left turn signal, put on emergency, flashers, make sure working, amber lenses, not broken, clean.
- Lights (rear of tractor RED )-right/left turn signal, put on 4 way flashers, clearance and brake lights, red lenses, not broken, clean.
- Lights (front side of trailer AMBER )-must turn on, working properly, amber lenses, not broken, clean.
- Lights (rear side of trailer RED )-must turn on, working properly, red lenses, not broken, clean.
- Lights (rear of trailer RED )-must turn on, right/left turn signal, emergency flashers, clearance and brake lights, red lenses, not broken, clean.
Videos are a great way to supplement your learning experience, but attending a certified, formalized truck driving school would be a way of ensuring you gain the knowledge and skills required to achieve your Commercial Driver’s License (CDL). Nothing can replace the actual behind the wheel driving experience! Classes convene regularly, so call (352)794-6080 , and reserve your drive time , now!
Site Navigation
- SMG of Crystal River
- CDL Testing
CDL Testing and Prep
- Steps to Getting Your CDL
- Class A CDL Pre-Trip Inspection w/Air
- Class A CDL Pre-Trip Inspection w/o Air
- Dump Truck CDL Pre-Trip Inspection Class B
- Passenger Bus CDL Pre-Trip Inspection Class B
- Driver's On-road Practical Test
- Commercial Driving Behavior
- CDL Driver Control Skills Test
- Instructional Videos
All CDL Testing & Training
All SMG CDL testing and training is initiated and completed at Interstate Commercial Driving School (ICDS) located at:
SMG Contact Information:
Tel: (352)795-7170
Fax: (352)795-8723

© SMG, Inc . All Rights Reserved.
Mastering Air Brakes: The Ultimate Guide to Acing Your CDL Air Brake Test with ProDriverU
November 17, 2023.

When it comes to obtaining a Commercial Driver’s License (CDL), understanding air brakes isn’t just a part of the curriculum — it’s a critical safety component. Fail to understand air brakes, and you put yourself — and everyone else on the road — at risk. That’s where ProDriverU comes into play. With years of expertise in CDL training, we provide comprehensive educational resources to help you not just pass the air brake test but understand it inside out.
In this article, we’ll explain how air brakes work, discuss why you need an air brake endorsement, share some foolproof tips for passing the CDL air brake test, and more. So, whether you’re preparing for the test or looking to refresh your knowledge, you’re in the right place.
The Basics of Air Brakes
Air brakes are not just any brakes; they are a specialized braking system designed for heavy-duty vehicles. While your regular car uses hydraulic brakes, air brakes employ compressed air for more robust and effective stopping power. Why? Because large vehicles like semi-trucks and buses have greater mass and momentum on the road. The capacity to halt these vehicles safely is essential, not just for the driver but also for the safety of everyone on the road.
Mechanics of Air Brakes
Understanding air brakes doesn’t require a mechanical engineering degree. In the simplest terms, when you press the brake pedal, air is channeled into the brake chamber creating pressure. This pressure activates the brake shoes or pads which, in turn, slow down the vehicle. The key takeaway is that compressed air serves as the ‘muscle’ behind the braking action, making it possible to control large vehicles effectively.
Types of Vehicles That Require Air Brakes
Air brakes are commonly found in:
- Semi-Trucks : Given their size and the kind of loads they carry, air brakes are non-negotiable.
- Buses : Whether it’s a school bus or a long-distance coach, the safety of passengers is paramount, making air brakes essential.
- Heavy-Duty Construction Vehicles : Think dump trucks and heavy machinery where failing brakes are not an option.
- Emergency Vehicles : For fire engines and ambulances, reliable braking can literally be a matter of life and death.
Understanding the basics of air brakes is your first step towards acing that CDL air brake test, and more importantly, becoming a safer, more responsible driver. To get ahead, check out the specialized training modules offered by ProDriverU .
Why You Need an Air Brake Endorsement
Legal requirements.
If you’re planning on operating a vehicle with air brakes, an air brake endorsement isn’t just recommended; it’s legally required. Federal and state laws mandate that any driver operating a heavy-duty vehicle equipped with air brakes must possess an air brake endorsement on their Commercial Driver’s License (CDL). This endorsement signifies that you have passed the necessary tests and possess the knowledge and skills required to safely operate vehicles with air brake systems.
Safety Concerns
Safety is the driving force behind this legal requirement. Air brake systems are complex and offer different handling characteristics compared to standard hydraulic brakes. Misunderstanding or misuse can lead to brake failure or reduced braking efficiency, potentially causing severe accidents. An air brake endorsement assures that you’ve undergone specific training and evaluation, confirming your aptitude in handling these systems safely.
In essence, possessing an air brake endorsement is both a legal and safety obligation that proves your capability to operate large, heavy-duty vehicles with air brakes effectively. It’s not just a piece of paper but a stamp of assurance for you, your employer, and everyone else on the road. To help you achieve this milestone, ProDriverU’s specialized courses are tailored to prepare you thoroughly.
Preparing for Your CDL Air Brake Test
Taking the CDL air brake test is not just another box to tick on your way to becoming a commercial driver. It’s a crucial step that determines whether you’re qualified to drive vehicles with air brake systems. Not preparing adequately can not only result in a failed test but also pose significant safety risks when you’re finally on the road. Knowing the ins and outs of air brakes is essential to not only passing the test but also to operating heavy vehicles safely.
Study Materials
To prepare efficiently, you’ll need a comprehensive set of study materials that cover all aspects of air brake systems. While there are various resources available, opting for trusted providers like ProDriverU ensures you’re getting the most accurate and up-to-date information. Our ELDT Training courses include dedicated modules on air brakes, designed by industry experts to equip you with the necessary knowledge.
Practice Tests
Besides studying, it’s crucial to test your understanding through practice tests. Practice tests simulate the actual CDL air brake test, giving you a clear idea of what to expect. They not only assess your knowledge but also help you improve time management skills, a vital aspect of passing the test. ProDriverU offers a range of practice tests specifically designed to prepare you for the air brake endorsement exam.
By combining comprehensive study materials and practice tests, you’ll be more than just prepared — you’ll be confident. And in tests like these, confidence can make all the difference. So why wait? Start your preparation journey today with ProDriverU and be one step closer to acing your CDL air brake test.
Tips and Tricks for Acing the CDL Air Brake Test
Understanding the components.
Navigating the CDL air brake test can be daunting, but a clear understanding of what to expect can demystify the process. Typically, the test has two main components: a written exam that tests your theoretical understanding and a practical skills test that evaluates your hands-on abilities. The written section covers topics ranging from brake system components to safety protocols. The practical test, on the other hand, will require you to demonstrate competency in pre-trip inspection, brake adjustment, and vehicle control.
Practical Skills to Master
Mastering certain skills can make a world of difference in how you perform on the test. Firstly, get comfortable with pre-trip inspection procedures. This involves checking air leaks, assessing the air compressor, and examining brake components for wear and tear. Secondly, practice adjusting the brake pushrod to ensure optimal braking. Lastly, learn to effectively manage air pressure levels in the brake system to maintain control during your drive.
Test-Taking Strategies
Here are some proven strategies to help you excel in the test:
- Time Management : Use your time wisely during the written test. Read each question carefully and don’t rush.
- Practice, Practice, Practice : The more you practice, the more comfortable you will be. Take multiple practice tests to familiarize yourself with the type of questions that may appear.
- Mindfulness : Stay calm and focused. Nervousness can lead to simple mistakes.
Armed with these tips and a thorough understanding of air brakes, you are on the right track to acing the CDL air brake test.
Real-Life Applications: Using Air Brakes Effectively
Air brakes are not just about passing a test. They are an essential part of daily operations in large commercial vehicles. Here are some real-world tips for using air brakes effectively:
- Gradual Braking : Apply the brakes gently to reduce the risk of skidding, especially on slippery roads.
- Monitor Air Pressure : Always keep an eye on the air pressure gauges. Low air pressure can impair your braking efficiency.
- Use Engine Brakes : In downhill conditions, use engine brakes to assist your air brakes, reducing the risk of overheating.
Maintenance for Long-Term Efficiency
Just like any other vehicle component, air brakes require regular maintenance for optimal functionality.
- Regular Inspection : Consistently inspect the brake linings, hoses, and drums for wear and tear.
- Check for Leaks : Air leaks can lead to reduced braking power. Make it a routine to check for hissing sounds or leaks.
- Adjust the Brakes : Improperly adjusted brakes can cause dragging or over-adjustment, affecting performance.
Understanding real-world applications and maintenance requirements can help ensure you are not just qualified but proficient in the use of air brakes.
FAQ Section: Everything You Need to Know
What is an air brake endorsement.
An air brake endorsement is a certification added to your Commercial Driver’s License (CDL) that signifies you are trained and qualified to operate vehicles with air brake systems. Learn more about us to understand our expertise in CDL training.
How is the CDL air brake test structured?
The CDL air brake test consists of both a written and a practical examination. The written section covers theoretical aspects of air brakes, while the practical test assesses your hands-on ability to operate and inspect air brake systems.

Where can I find a reliable CDL air brakes practice test?
Numerous online platforms offer practice tests, but it’s crucial to choose a reputable source for the most accurate and up-to-date questions. ProDriverU offers comprehensive CDL courses and practice tests designed by experts in the field.
Is an air brake endorsement required in all states?
Requirements may vary from state to state, but an air brake endorsement is generally mandatory for anyone driving vehicles equipped with air brake systems. For state-specific queries, don’t hesitate to contact us .
What happens if I fail the air brake test?
If you fail the air brake test, you won’t receive your air brake endorsement and may have to wait for a specific period before retaking the test. Some states might also require you to undergo additional training.
How does ProDriverU assist in preparing for the CDL air brake test?
ProDriverU offers a robust curriculum that includes all the lessons you’ll need to pass the CDL air brake test . From detailed study materials to practice tests, we offer resources designed to prepare you for every aspect of the exam. Explore the benefits of joining ProDriverU for your CDL training.
What are the key safety measures associated with air brakes?
Key safety measures include:
- Regular Inspections : To spot wear and tear or any malfunction.
- Proper Adjustment : To ensure the brakes engage and release as they should.
- Air Pressure Monitoring : To maintain optimum braking performance.
This FAQ should clarify some of the common questions you may have about air brake endorsements and tests. For more details and study materials, consider ProDriverU as your go-to resource. Visit our homepage for more information.
Secure Your Future on the Road With ProDriverU
Mastering the mechanics and regulations surrounding air brakes is not just another box to tick off in your CDL journey. It’s essential knowledge that ensures your safety and compliance on the road. From understanding the basic operations of air brakes to knowing why an air brake endorsement is legally and practically crucial, this article has provided you with comprehensive guidance every step of the way.
And that’s not all. We’ve also talked about the tips and strategies for passing the CDL air brake test and the practical skills you’ll need once you’re out on the road. Even during those moments when you’re faced with a question or a real-life scenario, our FAQ section aims to clear the air (brakes!) for you.
Now, it’s time to turn this knowledge into action. ProDriverU is your go-to resource for navigating the complexities of obtaining an air brake endorsement. With top-tier study materials, practice tests, and a curriculum that’s designed with you in mind, we’re committed to making your journey to mastering air brakes a smooth one. Why settle for less when you can be the best? Trust ProDriverU for your air brake endorsement and experience the difference in quality and safety.
Related Posts

“Should I Be A Truck Driver?” Decide if Driving is the Right Career for You
December 23, 2022
Do Your Research! Since you probably won’t have an opportunity for experiential learning before going out on the road

5 Safe Driving Tips for Bad Weather
Whether you are driving a car, a motorcycle, or an 18-wheeler, one of the scariest situations is driving during

Hitting the Road: Embracing the Adventure as an Over-the-Road Truck Driver
May 15, 2023
Welcome, future road warriors! Are you ready to take on the open road and embark on an exciting new

Navigating the Challenges: Why Being an OTR Truck Driver is Still a Fun and Rewarding Career
May 17, 2023
Hey there, future road warriors! While embarking on a career as an over-the-road (OTR) truck driver comes with its
Discover the ProDriverU Difference: Our Commitment to Your CDL Training Success
Here at ProDriverU, we understand that choosing the right CDL training program can be a daunting task. That’s why

10 Must-See Attractions for the Adventurous OTR Truck Driver
As an over-the-road (OTR) truck driver, you have a unique opportunity to explore the United States while earning a

- Notice of Right to Opt Out
- Strictly Necessary Cookies
Third-Party Cookies and Sharing
Like many companies, we allow certain third-party advertising partners to place tracking technology such as cookies and pixels on our websites. This technology allows these advertising partners to receive information about your activities on our website, which is then associated with your browser, device, or digital identifier. These companies may use this data to serve you more relevant ads as you browse the internet.
Your Right to Opt-Out
Under California privacy law, you have the right to opt out of sharing data for targeted digital advertising. You can exercise your right to opt-out by clicking Do Not Share My Personal Information. If you opt-out, you will still see ads but they will not be personalized based on your digital activity. Please note that if you disable your cookies or upgrade your browser after opting out, you will need to opt-out again. Further, if you use multiple browsers or devices you will need to execute this opt-out on each browser or device. Additionally, when we detect a Global Privacy Control (GPC) signal from a user’s browser within California, we stop sharing the user’s personal information digital with other companies (except with our service providers). You can learn more about the GPC and how to enable it in your browser from the Global Privacy Control website.
You can also generally opt-out of receiving targeted ads from third-party advertisers and ad networks who are members of the Network Advertising Initiative (NAI) by visiting http://optout.networkadvertising.org/. You may opt-out of receiving targeted advertisements from other companies that perform interest-based advertising services, including some that we may work with, via the Digital Advertising Alliance (DAA) site at http://optout.aboutads.info/.
Privacy Policy
For further details on how we use your personal information, please review our Privacy Policy.
Strictly Necessary Cookie should be enabled at all times so that we can save your preferences for cookie settings.
If you disable this cookie, we will not be able to save your preferences. This means that every time you visit this website you will need to enable or disable cookies again.
What is a Pre-Trip Inspection Checklist for Class A CDL
October 22, 2021
Get Started With Samsara
Key Takeaways
Drivers who have a class A commercial driver’s license (CDL) usually have to complete a pre-trip inspection on their non-passenger commercial vehicles. Having a pre-trip inspection checklist handy helps driver’s know what to expect when they pass their CDL examination and what parts of their vehicle the will need to inspect before heading out on the road.
What is a CDL pre-trip inspection checklist?
A pre-trip inspection checklist helps truck drivers remember all the major systems and parts to inspect before heading out on a route. Knowing how to complete a pre-trip vehicle inspection is an important part of trucking.
Pre-trip inspections for class A licensees
The class A commercial driver’s license (CDL) typically covers non-passenger commercial vehicles . These might include tractor-trailers, tankers, livestock carriers, flatbeds, and more.
The Department of Transportation (DOT) requires drivers to perform a pre-trip inspection before driving a commercial vehicle. Similar to Class B CDL holders, the actual daily pre-trip inspection takes about 15 minutes or less. Typically, the inspection includes the following, with some employers making their own variations.
Brakes and air system
Steering mechanism
Lights and reflectors
Tires, wheels, and rims
Windshield wipers
Rearview mirrors
Emergency equipment
Drivers complete a driver vehicle inspection report (DVIR) recording the completed inspection.
Class A CDL pre-trip inspection checklist
When getting a CDL, drivers need to pass a pre-trip inspection test. It’s more intensive than the inspection drivers perform daily. This pre-trip inspection checklist for a Class A CDL gives drivers an overview of performing an inspection. Check your state’s CDL manual for a complete list of inspection requirements.
Click here for a Class B pre-trip inspection list.
Engine compartment
Fluids - coolant, oil, and power steering : Reservoirs and tanks should not leak. Check hoses for splits or cuts and that they are securely mounted on both ends. Verify proper fluid levels with a dipstick.
Belts - alternator, pumps, compressor : All belts should be securely mounted without cracks or frays. Belt should have no more than 1/2" to 3/4" of play.
Hoses (passenger and driver’s sides) : All hoses, including power steering and coolant hose, should be secured on both ends. They should not have splits, cuts, or leaks.
Air compressor: May be difficult to see. Ensure it’s securely mounted, not broken, cracked or leaking.
Alternator : All wires are properly connected.
Water pump : All hoses are properly connected and not leaking.
Front of tractor/truck
Steering gearbox and hoses : No damage or leaks. Hose should be secured on both ends. They should not have splits, cuts, or leaks.
Steering shaft/steering column : Not bent or broken.
Pitman arm : All caste nuts and cotter pins are present and tight.
Drag link : Rubber is not split and properly greased.
Upper and lower control arms and tie rod : Tie rod should be secure, not cracked or bent.
Front suspension
Spring mounts/spring hanger : Not cracked or broken.
Leaf springs : None are cracked, broken, or shifted.
U-bolts : All accounted for.
Shock absorber : No visible leaks. Leaks will show at the point where the top and bottom of the shock meet. Rubber is not split or shows signs of dry rot.
Airbag : Check rubber for abrasions, cuts or audible leaks plus any missing mounting bolts.
Driver door and fuel area
Mirrors and bracket: Hardware attached properly. Mirror should be clean and not broken.
Door and hinges : Demonstrate door operations, latching properly, hinges intact. Door seals should not be torn or rotten.
Steps : Mounted properly and can hold weight.
Fuel tank: Not leaking; cap is tight with seal intact.
Rear of tractor/truck
Drive shaft : Not twisted, U-joints not broken and free of debris.
Exhaust system: Not loose, no sign of leaks (exterior soot).
Frame : Nothing broken or unauthorized welds.
Catwalk and steps : Properly mounted and clear of loose objects.
Mudflap : Secured, not missing or broken. At the right height.
Coupling area
Air connector: Secure on both ends, no abrasions, cuts, or audible leaks. Connectors should not drag or tangle.
Electric lines : Secure on both ends, no abrasions or cuts. Safety latches in place. Lines should not drag on the catwalk or tangle.
Glad hands : Seals should be in good condition with no cracks, signs of rotting, or leaking air.
Fifth wheel platform : Secure to frame, not cracked, bent or broken. No unauthorized or illegal welds.
Mounting bolts : No missing bolts and mounted tight.
Skid plate: Properly greased.
Release arm : Secure in fully locked position.
King pin : Mounted and secure. No cracks, bends, and breaks.
Locking jaw : Fully locked around the king pin.
Apron : Mounted and secure. No cracks, bends, and breaks.
Sliding 5th wheel locking pins : Pin must be in the fully locked position.
Brake system (both tractor and trailer)
Brake hose : Securely mounted on both ends. No splits, cuts, and not audibly leaking air.
Brake chamber : Not audibly leaking air.
Slack adjuster and push rod : When brakes are released and pulled by hand, the push rod should have no more than 1” of play. It should stay at a 90° angle to the brake chamber.
Brake drum : No bluing from excessive heat.
Brake pads/brake lining : Check for oil and debris on the lining. Minimum brake pad thickness is ¼.”
Wheel system (both tractor and trailer)
Wheel rims : No unauthorized or illegal welds.
Steer tires : Look for cuts, bulges, and abrasions on the tread and sidewalls. Tread depth should be a minimum of 4/32”. Tread should be evenly worn. Check inflation levels on tires with an air gauge, filled to manufacturer’s specifications.
Drive tires : Look for cuts, bulges, and abrasions on the tread and sidewalls. Tread depth should be a minimum of 2/32”. Tread should be evenly worn. Check inflation levels on tires with an air gauge, filled to manufacturer’s specifications.
Valve stem . Properly secured, metal cap in place. Not audibly leaking air.
Lug nuts : All accounted for. Check for rust or cracks.
Hub seal/axle seal : Should not be loose. No visible leaks.
Spacing : If equipped with duals, there must be proper spacing between the tires.
Frame and cross members : Secure, not cracked, bent or broken and none missing.
Header board : Secure and not excessively damaged. No holes or missing rivets.
Landing gear : Must be fully raised and the cradle handle secured. Not cracked, bent or broken.
Doors and hinges: Secured and should open, close and latch properly. Door seals have no separation, no rubber tubing sticking out.
Tandem release : Release handle and locking pins should be fully locked.
Trailers airbag : Check rubber for abrasions, cuts or audible leaks, plus any missing mounting bolts.
Trailer spring mounts/spring hanger : Not cracked or broken
Trailer leaf springs : None are cracked, broken, or shifted.
Trailer u-bolts : All accounted for.
Trailer shock absorber : No visible leaks. Leaks will show at the point where the top and bottom of the shock meet. Rubber is not split or shows signs of dry rot.
Torque arm/radius rod : Secure mounting, bushings intact.
Check all lights on the front, both sides of tractor, truck rear, both sides of trailer, and trailer rear. Turn on to ensure lights and reflectors are working.
Running lights : Walk around the truck and trailer to examine all.
High beams/low beams: Walk around the truck and trailer to examine all.
Turn signals : Signal both right turn and left turn. Walk around the truck and trailer to examine all.
Hazards/4-way flashers : Walk around the truck and trailer to examine all.
Brake lights : Ask the examiner to watch brake lights. Confirm they worked using the side mirror.
License plate lights : Walk around the truck and trailer to examine all.
Reflector tapes : Clean and not worn. Walk around the truck and trailer to examine all.
In-cab inspection and air brake test
Seat belt: No rips or frays and should adjust and latch properly.
Lighting indicators : See lights and reflectors section
Oil pressure indicator : Demonstrate normal operating range.
Water temperature gauge : Demonstrate normal operating range.
Air pressure gauges : Build to governor cut out.
Ammeter/voltmeter : Charging between 13 and 14 volts.
Mirrors : Secure, not cracked or broken. No obstructions and properly adjusted.
Windshield : No more than a 1” crack is permitted. Clean and free of debris.
Windshield wipers and washers: Turn on to show they are working properly.
Horns (city and air) : Show they are working properly.
Heater/defroster : Turn on to show they are working properly.
Safety/emergency equipment : Must have a fire extinguisher, three red reflective triangles and spare electrical fuses. Extinguisher must be fully charged and secured.
Steering wheel : Secured to steering column.
Foot pedals : Free of grease and debris. No obstructions.
Hydraulic brake check : Pump the brake pedal several times. Apply pressure to the pedal and hold for five seconds. The pedal should not move.
Air brake check : Air brake devices vary. Drivers must test three components of the air brake check correctly: applied pressure, warning lights and buzzers, and valve pop-outs.
Parking brake:
Trailer parking brake : Set the trailer brake, release the tractor brake. Put truck in low gear and tug.
Tractor parking brake : Set the tractor brake, release the trailer brake. Put truck in low gear and tug.
Service brake : Release both the tractor and trailer brakes. Drive 3 – 5 mph. Apply the service brake and come to a complete stop. Ensure steering does not pull to the left or right when applying the brakes.
Watch the video below to see how All Aboard America uses the Samsara Driver App to become nearly 100% paperless and save 30 minutes per trip, totaling 500 hours saved weekly.

Watch Video

- Register / Login
- Trucker's Forum
- Paid CDL Training
- Truck Driving Jobs
- CDL Practice Tests
- High Road Training
Pre Trip In Cab Air Brake Test
Topic 5754 | page 1.

- General Category
- Pre Trip in cab air brake test
My first question to tt. I start cdl class in 2 weeks, and have been studying my air brake test. Question is, how many actual air brake test are there?? I have seen 5 to 7 test. It's a little confusing. Second question, do the air brake test go in a set sequence as a standard, or do they jump them around? Hope this does not sound like stupid questions. Just trying to get everything down pat. Overall, i have the air brake procedures down. Thank you for any and all input.
Commercial Driver's License (CDL)
A CDL is required to drive any of the following vehicles:
- Any combination of vehicles with a gross combined weight rating (GCWR) of 26,001 or more pounds, providing the gross vehicle weight rating (GVWR) of the vehicle being towed is in excess of 10,000 pounds.
- Any single vehicle with a GVWR of 26,001 or more pounds, or any such vehicle towing another not in excess of 10,000 pounds.
- Any vehicle, regardless of size, designed to transport 16 or more persons, including the driver.
- Any vehicle required by federal regulations to be placarded while transporting hazardous materials.
Welcome to the forum Gary! Daniel B. has a great post called Pre-Trip Inspection - My Way! A must see! It has a section that explains in detail the air brake test.
Air Brake Test There are three stages to an Air Brake Test #1: Applied Pressure Test #2: Warning Light and Buzzer #3 Tractor/Trailer Protection Valve Pop Out Applied Pressure Test- Build the air pressure to governor cut out. Put the truck in the lowest gear. Then turn off the engine Immediately turn the engine back on. Push in both the tractor and trailer valves. (This will release the parking brakes.) Push and hold the Brake pedal fully. Allow the gauges to stabilize. Announce the gauges have stabilized and the Primary and Secondary PSI. With the Brakes fully pressed, you should not lose more than 4 PSI in one minute. Announce that you are listening for air leaks during that minute. Announce: This test was successful because I did not lose more than 4 PSI in this tractor trailer combination vehicle. Warning Light and Buzzer Test- Pump down on the Brake pedal until the warning light and buzzer comes on, at or before 60 PSI. Announce: This test was successful because my warning light and buzzer both came on at or before 60 PSI. Tractor/Trailer Protection Valve Pop Out Test- Pump down on the brake pedal until both the tractor and trailer protection valves pop out. They should both pop out between 40 and 20 PSI. Announce: This test was successful because my tractor and trailer valves popped out between 40 and 20 PSI.
Also take a look at our High Road Training Program for more information on air brakes and pre-trip inspections.
Pre-trip Inspection:
A pre-trip inspection is a thorough inspection of the truck completed before driving for the first time each day.
Federal and state laws require that drivers inspect their vehicles. Federal and state inspectors also may inspect your vehicles. If they judge a vehicle to be unsafe, they will put it “out of service” until it is repaired.
Combination Vehicle:
A vehicle with two separate parts - the power unit (tractor) and the trailer. Tractor-trailers are considered combination vehicles.
...please notice how many times anchorman said "announce." That was not by mistake, and giving specifics is crucial. You got this!
And oops...props to Daniel! also.

Anchorman forgot one, the static test.
First you run the engine until you hear the brakes pop off at their max pressure (usually around 120psi). Then you turn the engine off and turn the key to the on position. You should lose no more than 3 psi in one minute. (Static test)
Then you apply the brakes to approximately 90 psi on the brake application gauge if the vehicle has one, if not use about half pedal. You should lose no more than 4psi in one minute. (Application test)
Then you fan (pump) the brakes down until you get a warning buzzer/light as the pressure falls below 60 psi.
Then you continue to fan the brakes until the tractor protection knob pops out, between 20 and 45 psi.
Then you start the engine and in low gear gently pull against the spring brakes to verify they are engaged.
This is how I learned it anyway.

Welcome to the forum Gary! Daniel B. has a great post called Pre-Trip Inspection - My Way! A must see! It has a section that explains in detail the air brake test. Air Brake Test There are three stages to an Air Brake Test #1: Applied Pressure Test #2: Warning Light and Buzzer #3 Tractor/Trailer Protection Valve Pop Out Applied Pressure Test- Build the air pressure to governor cut out. Put the truck in the lowest gear. Then turn off the engine Immediately turn the engine back on. Push in both the tractor and trailer valves. (This will release the parking brakes.) Push and hold the Brake pedal fully. Allow the gauges to stabilize. Announce the gauges have stabilized and the Primary and Secondary PSI. With the Brakes fully pressed, you should not lose more than 4 PSI in one minute. Announce that you are listening for air leaks during that minute. Announce: This test was successful because I did not lose more than 4 PSI in this tractor trailer combination vehicle. Warning Light and Buzzer Test- Pump down on the Brake pedal until the warning light and buzzer comes on, at or before 60 PSI. Announce: This test was successful because my warning light and buzzer both came on at or before 60 PSI. Tractor/Trailer Protection Valve Pop Out Test- Pump down on the brake pedal until both the tractor and trailer protection valves pop out. They should both pop out between 40 and 20 PSI. Announce: This test was successful because my tractor and trailer valves popped out between 40 and 20 PSI.
Should the key be on and engine off for this test?
...please notice how many times anchorman said "announce."
Just to be clear, the quote and links in my first post were a reference to a previous topic by Daniel B. I did not say or forget anything as stated in the quotes above. All credit goes to Daniel B. Thank you!
This is what t is in VA
put truck in gear turn off engine turn on the switch push in both tractor and trailer valves
Static Check - lose no more than 3 psi in 1 min
Applied Check - put full pressure on service brake and AFTER initial pressure loss (from putting pressure on brake) you cannot lose more than 4 psi in 1 minute
Low pressure warning light/ buzzer check - fan the breaks BEFORE you get below 60 psi the warning light and buzzer should activate
Spring brake check - continue to fan service brake until pressure is between 20 - 40 psi and the trailer and tractor ales should pop ot (both ca be at same time or trailer first NEVER the tractor valve first)
Air Compressor and Governor check - take truck out of gear then start the engine, raise the RPMs to 1500 once at 85 PSI you hve no more then 45 seconds to get to 100 psi, after 100psi keep RMS at 1500 until the govenor cuts the air compressor off it should be between 120 and 125 PSI
Trailer Brake Check - put truck n low gear and push in the tractor valve, slowly release the clutch until you feel the tractor pulling against the trailor brakes the push clutch back in and pull the tractor valve
Tractor brake check - push in the trailer valve and release clutch until you feel the tractor pull against the brakes push clutch back in.
Service Brake Check - push in both tractor and trailer release clutch until you start to roll the gently push the service brake and you should come to a controlled and straight stop.
Well that is how i have to do at DMV in the morning or i instantly fail. It must be done in that order exactly.
Dispatcher, Fleet Manager, Driver Manager
Department of motor vehicles, bureau of motor vehicles.
The state agency that handles everything related to your driver's licences, including testing, issuance, transfers, and revocation.
Yes.. There will be a time when you start the truck to build the pressure and the turn off the truck, good habit is to turn the key back to on so you can hear the low warning buzzer.. Read Daniels post that anchorman posted. It'll help you a ton.
Gary, there are no stupid questions! Never hesitate to ask about anything that's on your mind.
There are indeed a bunch of different tests you'll be doing and it's awesome that you're getting a head start on all of this. But rest assured the school is going to teach you everything you'll need to know to pass the CDL exam, including the air brake tests.
The most important thing you can do right now to prepare yourself for schooling is to go through our High Road Training Program . Here's how the program breaks down:
To Get Your CDL Permit:
- Rules & Regulations
- Driving Safely
- Transporting Cargo Safely
- Combination Vehicles
- Pre-Trip Inspection
- Driving Exam
To get your CDL endorsements which are optional but we highly recommend you get:
- Transporting Passengers
- Doubles And Triples
- Hazardous Materials
And two sections we've built ourselves with info you'll need for everyday life on the road but the manual doesn't really cover it:
- Weight & Balance
I would recommend going to the DMV and taking your CDL permit test and all of the endorsement tests before you even begin your schooling. That's what a lot of people do and it puts them way ahead of the rest of the class. You'll have a solid grasp on the classroom stuff so you'll be able to focus on learning the driving portion while everyone else is trying to cram the classroom materials at the same time.
So I wouldn't stress too much on the air brake procedures. Instead, get through as much of the High Road as you can. And also, read through our Truck Driver's Career Guide from beginning to end and follow all of the links you come across if you haven't already. You'll learn a ton about what to expect during your schooling and through the first few months on the road.
A written or electronic record of a driver's duty status which must be maintained at all times. The driver records the amount of time spent driving, on-duty not driving, in the sleeper berth, or off duty. The enforcement of the Hours Of Service Rules (HOS) are based upon the entries put in a driver's logbook.
Refers to pulling two trailers at the same time, otherwise known as "pups" or "pup trailers" because they're only about 28 feet long. However there are some states that allow doubles that are each 48 feet in length.
New! Check out our help videos for a better understanding of our forum features
" data-commandafter="
Click on any of the buttons below to insert a link to that section of TruckingTruth:

Why Join Trucking Truth?
- The High Road Training Program
- The High Road Article Series
- The Friendliest Trucker's Forum Ever!
- Email Updates When New Articles Are Posted
Apply For Paid CDL Training Through TruckingTruth
Did you know you can fill out one quick form here on TruckingTruth and apply to several companies at once for paid CDL training? Seriously! The application only takes one minute. You will speak with recruiters today. There is no obligation whatsoever. Learn more and apply here:
- Privacy Policy


- New Drivers - 1st License
- Defensive Driving
- CDL Practice Tests
- Air Brakes Courses—CDL & RV
- Log Books - US & Canada
- CDL Pre-Trip
- Learner's Permit
- Motorcycles
- Newly Licensed Driver
- Driving Test SHORTS
- Smarter Car Care
- SHORT Driving Tips
- Winter Driving
- Crash Analysis
- Air Brake Valves
- United States
- CDL Beginner
- CDL Turning
- CDL Pre Trip Inspection
- CDL Coupling
- Driving Instructors
- Pass CDL Air Brakes - Free
- Can't Log In
- Live Q & A
- Expert Witness
- The Founder
- 100K Campaign
- Smart Driver Success Stories
- Funny Driving Memes
Cannot find your purchased courses? Click here to Login!
- air brakes course
- Pass CDL License
- CDL Air Brakes
Applying the service brakes and doing a leak test will often locate a ripped service brake diaphragm.
How to do a Leak Test for CDL Air Brakes | Air Brake Smart
https://youtu.be/OmWKd0mhG0Q
Closed Caption
Introduction.
Hi there smart drivers, Rick with Smart Drive Test - quick tip for trucking smart.
Your leak test, which you not only have to do as part of your daily pre-trip inspection.
For new drivers you also have to do it as part of your license test.
And for a leak test, after you do all of the other in-cab checks on your air brake system, you're allowed to lose three pounds after the initial drop after you apply the service brakes.
Cart and Checkout
Safety First
So you have your wheels chocked and your brakes--your parking brakes--released.
You make a full service brake application - after the initial drop, on a single unit you're allowed to lose three pounds, on a tractor-trailer you're allowed to lose four pounds, and on a truck with two trailers or multiple trailers you are allowed to lose six pounds in one minute.
So you have to do a leak test.
Now on this truck - this truck is a year old.
It's not a very old truck, it only has about 8,000 kilometers (4,900 miles) on it, so we just did a brake adjustment and we put the service brakes on.
A torn service brake diaphragm can be quickly swapped out by a mechanic!
Release the Parking Brakes
The brakes are released and one of the reasons that you release the parking brakes and chock the wheels and have over 90 pounds of pressure in the system is to detect air leaks.
If you have air leaks on the system you obviously know there's something wrong.
So it has to be repaired and if you lose more than those allowable limits it has to go into a mechanic and be checked because it's going to be out of service and you're not going to be able to operate the vehicle.
No Leak When All Brakes are Released
So you can see right now I have this the parking brakes released and there's no air leaks.
And so one of the things you're doing when you're going around on your pre-trip and you have your wheels chocked--the parking brakes released with over 90 pounds--you're always listening for air leaks because there's a lot of air in the system.
And that's what you're listening for.
So right now the parking brakes are released and there's no air leak, so what I'm going to do is I'm going to apply the service brakes and you'll hear that there's an air leak on this truck.
[MOVES & APPLIES SERVICE BRAKES]
Leak When the Service Brakes are Applied
So as soon as I put the service brakes on and apply the service brakes...I have a stick holding the brake pedal on and you can hear up here on the firewall.
There is a leak in the air brake system - it's not a very big leak, but you can hear that - you could probably even hear that over the diesel engine.
And I suspect because it's up here...
now remember when you're in a car you're sitting down here [HAND INDICATING LOW TO THE GROUND], but when you're in a big truck, you're sitting up here [HAND SHOWING 5' OFF GROUND] this is probably the brake pedal valve that's probably leaking a little bit there.
Don't Work the Day for Free:: Weigh Scale Checklist

• DID YOU KNOW? :: Bus & truck drivers are the only public sector that has its own police force (DOT, CVSE, MTO, etc.);
• SMART :: There's a lot of paperwork you must produce for authorities at the weigh scale;
• SELF-CONFIDENCE :: Bring all paperwork in one hit & impress the diesel bears!
Because in most cases, it's you that gets the fine... NOT the company!
Get It Repaired
And when I take it back--it's not a huge leak; it's a minor leak--but I'll take it back and I'll get them to check it.
So leak test on a big truck - you need to do a leak test.
Most of the time what a leak test is going to tell you is that you have a ripped diaphragm in one of the service brake chambers and a mechanic can switch those out pretty quickly.
Or one of the valve is leaking as you can see here.
So a leak test, you have to do it as part of your pre-trip inspection every day; for new drivers taking a license, you have to do it as part-and-parcel of your in cab pre- checks on the airbrake system.
Question for my smart drivers:
Leave a comment down in the comment section there, all that help us out.
Salutations
I'm Rick with Smart Drive Test.
Thanks very much for watching.
If you like what you see here share, subscribe, leave a comment down in the comment section.
As well, hit that thumbs up button.
Check out all the videos on the channel; check out the videos over here...
check out the videos.
If you're working towards getting your license or starting a career as a truck or bus driver.
Thanks again for watching.
Good luck on your license and remember pick the best answer not necessarily the right answer.
Have a great day.
How to Adjust a Manual Slack Adjuster - CDL Air Brakes
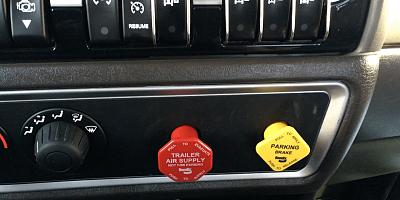
How to do In-Cab CDL Air Brake Pre Trip Inspection
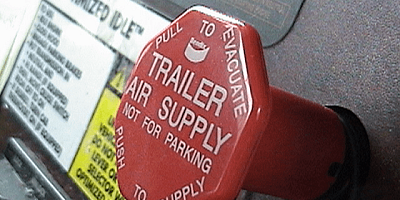
Testing Tractor Protection Valve & System
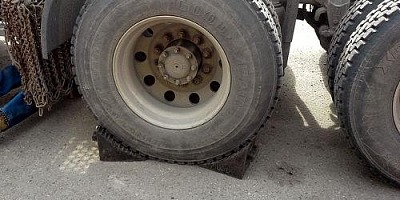
How to Do the CDL Air Brake Pre-Trip | Air Brake Smart
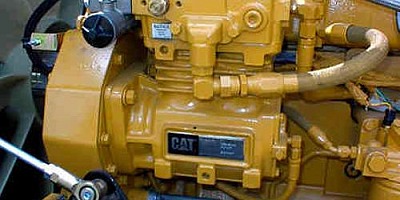
Why Air Brakes Won’t Fail

CDL Air Brakes S. 6.2—Combination Vehicles | New York State

CDL Air Brakes S. 5.4 | New York State
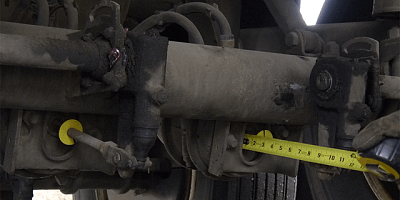
How to Determine Air Brake Adjustment | Air Brake Smart
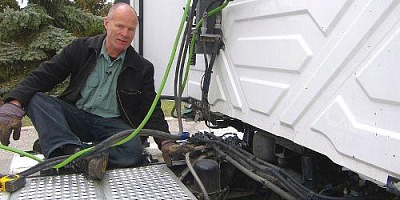
How the Air Dryer Works to Pass CDL Air Brakes Test

CDL Air Brakes Section 5.2 and 5.3 | New York State

CDL Air Brakes Section 5.1 | New York State
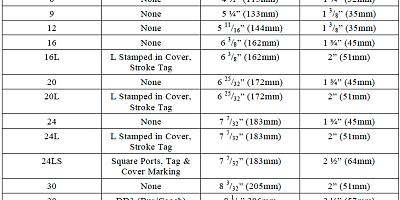
Chart of Air Brake Adjustment Limits
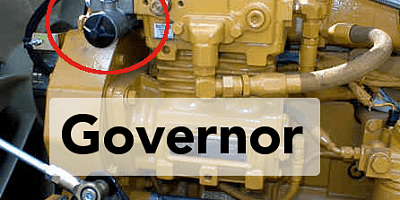
CDL Air Brake Governor

The Compressor and Build Up Test

Air Brakes Explained Simply
Basic CDL Air Brake Components
Brake Fade | Air Brakes
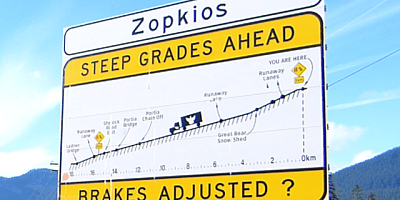
Downhill on Canada's Coquihalla Highway | Trucking Smart

How to Brake Downhill Safely with a Large Vehicle
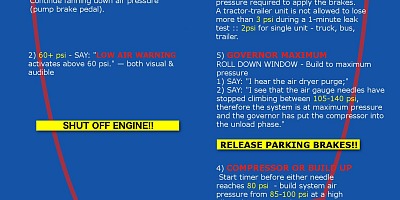
Single Unit In-Cab Air Brake Checks—Infograph
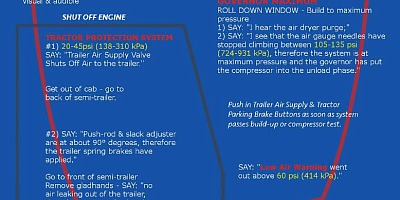
CDL Combination Air Brake Pre-Trip—Infograph

Types of Foundation Brakes

Two-way Check Valves

Trailer Air Supply Valve

Trailer Hand Control (Spike)
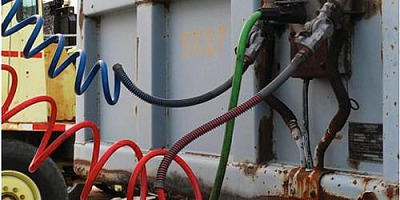
Tractor Protection Valve

Tractor Protection Valve and System

Tractor Parking Brake Control Valve

Stop Light Switch

Spring Parking Brake (Emergency)

Spring Brake Modulator (Inversion) Valve

Slack Adjuster

Safety Valve

Air Tanks (Reservoirs)

Relay Valve

Relay Emergency Valve

Quick Release Valve
Manual Front Wheel Limiting Valve
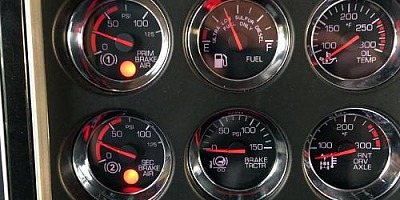
Low Air Pressure Warning

Brake Pedal - Foot Valve OR Treadle Valve

Compounding Air Brakes
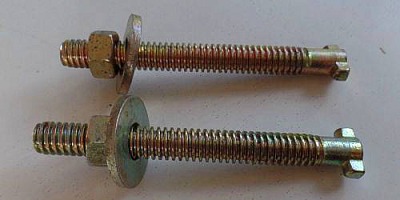
Caging Bolt

Brake Linings & Drums

Bobtail Proportioning Valve

Automatic Front Wheel Limiting Valve

Air Gauge(s)

Air Brake Chambers
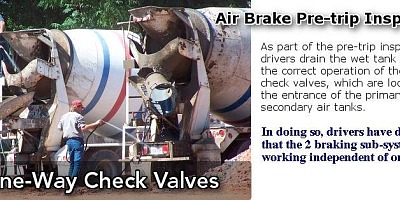
One-Way Check Valves

Air Brake Manual Adjustment – Pry Bar Method

Compressor or Build-up Test (Air Brakes)

Pry Bar - Check Air Brake Adjustment

Applied Stroke - Check Air Brake Adjustment
© Smart Drive Test Inc. 2024.
Contact Us: [email protected]
Get Your CDL Air Brake Checklist

IMAGES
VIDEO
COMMENTS
Now quickly, safety first! Make sure you chock the wheels, pump the air pressure up over 90 pounds per square inch, in order to be able to check the air brake for adjustment, and then release the parking brakes. And make sure that you have the required amount of air to do the outside inspection of the components.
Watch the, brake test, portion of the CDL pre-trip. A series of five brake tests, needed to complete the, brake test portion of your CDL exam. Parking brak...
1) testing the governor ;. 2) the low air warning;. 3) testing that the spring brakes...the emergency brakes rather. That these apply between twenty and forty five psi;. 4) testing the compressor, which is often referred to as the build-up test.. 5) And then building to maximum pressure and doing your leak test..
Air Brake Test. There are three stages to an air brake test: Applied Pressure Test - When doing the Applied Pressure Test, you will want to build the air pressure to governor cut out. Put the truck in the lowest gear, turn the engine off and immediately turn it back on. Push in the tractor and trailer valves which will then release the ...
The Seven-Step Air Brake check is designed to test the governor cut-in and cut-out pressures, air pressure leakage, warning buzzer, brake valves and air pressure rebuild rates. Brakes off means the yellow and/or red valve is pushed in (on = valve out). 1. Engine on / Brakes on - check gauges to make sure governor cuts compressor off at 120 psi.
Inspection of air brakes is 'MUST KNOW' for a CDL license - watch the video! CDL IN-CAB Air Brake CHECKLIST: https://www.smartdrivetest.com/cdl-air-brake-che...
A commercial driver must perform a pre-trip inspection before taking a truck trailer on any public road. The most important part of the pre-trip inspection is the 7 step air brake test. Please note that this article is not an actual air brake test, this is just for practice. Always do the 7 step air brake test in order.
This includes checking the engine compartment, brake system, fuel system, and more. The CDL Pre-Trip Inspection Exam is an integral part of obtaining your commercial driver's license. This guide covers Class A and Class B pre-trip inspections, provides a checklist, and offers tips for memorizing the inspection process.
Learn the Pre-Trip inspection with our free Pre-Trip inspection videos, flash cards, and inspection lists. We'll prepare you for your CDL exams! Register / Login; ... The air brake test will consist of a leakdown test to make sure your air brakes aren't leaking air and losing pressure. It will also test the warning lights and buzzer to make ...
Get ready to ace the CDL Air Brake Test with our free questions. Understand every aspect of air brake systems and test requirements to ensure safety and compliance on the road. ... Pre-Trip Inspection Practice. Practicing performing a pre-trip inspection is essential, as this is a critical part of the practical exam and daily operation of air ...
(Read more about the entire pre-trip inspection process in a previous blog post here.) The LABS test. The LABS test is a method for remembering all the steps to testing the air brake system on a commercial vehicle, which should be done during a pre-trip inspection. LABS stands for Leaks, Alarms, Buttons, and Service Brake.
Air Brake Test. There are three stages to an air brake test: Applied Pressure Test - When doing the Applied Pressure Test, you want to build the air pressure to governor cut out. Put the truck in the lowest gear, turn the engine off and immediately turn it back on. Push in the tractor and trailer valves which then release the parking brakes.
The National Safety Code madates that every driver of a commercial vehicle equipped with air brakes must check push rod travel every day as part of his/her pre-trip inspection. In some jurisdications, drivers must use the applied stroke method; in others, they…. This infograph provides the exact steps and terminology for the in-cab air brake ...
1. REPETITION! The only way to memorize the pre-trip is to repeat it over and over. Start with the engine area and work your way around the truck and finally inside the cab. There is no way around consistent repetition. The more you do it the more you will memorize it. It's just that simple.
During the Pre-Trip Inspection skills test for the air brake equipped Class A Tractor and Trailer, you will have about 95 items to check on a tractor with 2 axles and 2 trailer axles. A full step by step video demonstration of the Pre-trip inspection procedure. A written checklist can be found below the video to help with your study.
All tests for the pre-trip include engine ... 11. Check air compressor and hoses, they are secure with all bolts and clamps present with no leaks. Is unit ... 15. Service brake chamber with hoses are secure with all clamps, bolts and nuts with no dents or leaks. 16. Slack adjusters and push rod are not bent, broken, loose or missing parts.
Mastering certain skills can make a world of difference in how you perform on the test. Firstly, get comfortable with pre-trip inspection procedures. This involves checking air leaks, assessing the air compressor, and examining brake components for wear and tear. ... How does ProDriverU assist in preparing for the CDL air brake test?
1.The driver begins the interior pre trip by making sure the parking brake is set. He turns the key to the on position and starts the bus. 3 2. The driver starts checking gauges on the dash including: ... This successfully concludes the static air pressure test. 4. Applied Brake Test a. Explanation of test: When the spring brake is released ...
When getting a CDL, drivers need to pass a pre-trip inspection test. It's more intensive than the inspection drivers perform daily. This pre-trip inspection checklist for a Class A CDL gives drivers an overview of performing an inspection. ... Air brake check: Air brake devices vary. Drivers must test three components of the air brake check ...
Air Brake Pre Trip Inspection. The air brake pre trip inspection which is required for commercial vehicles equipped with air brakes is probably the most difficult and has to be the most specific for students. It has to be spot on, the rest of it can be kind of a little bit loosey-goosey, but the air brake pre-trip inspection has to be spot-on!
There are three stages to an Air Brake Test. #1: Applied Pressure Test. #2: Warning Light and Buzzer. #3 Tractor/Trailer Protection Valve Pop Out. Applied Pressure Test-. Build the air pressure to governor cut out. Put the truck in the lowest gear. Then turn off the engine Immediately turn the engine back on.
CDL Pre-Trip Air Brake test question. So I had my first cdl pre trip and road test last Monday and didn't pass. I'd done alright up until the air brake portion I didn't release the valves like an idiot but the truck I had rented never made a sound when the air pressure was below 60psi.
A course for truck, bus & RV drivers operating a vehicle fitted with air brakes. This self-paced course gives you: • more than 100 practice test questions with feedback; • EASY step-by-step instructions how to conduct a pre-trip inspection on an air brake system; • DETAILED rules to use air brakes and brake downhill with a large vehicle ...