Popular Articles
- Redux Query Vs React Query (Dec 07, 2023)
- Redux Saga Vs Redux Thunk Difference (Dec 07, 2023)
- Redux-Thunk Vs Redux-Saga Which Is Better (Dec 07, 2023)
- Redux And Local Storage (Dec 07, 2023)
- Redux And Flux (Dec 07, 2023)

Redux Browser Extension
Switch to English
Table of Contents
Introduction
Features of the redux devtools extension, installation and setup, tips and tricks, common errors and solutions.
- State Inspection: It allows you to inspect the current state of your application and how it changes over time.
- Action Inspection: You can inspect the actions dispatched by your application, including the action type, payload, and the state before and after the action was dispatched.
- Time Travel: This feature lets you jump to different points in time in your application's state history, essentially 'undoing' and 'redoing' actions.
- Action Dispatching: You can manually dispatch actions to test how your application responds.
- Filter Actions: If your application dispatches a lot of actions, the log can get crowded. You can filter actions by their types to focus on the actions you are interested in.
- Preserve Log: By default, the extension clears its state when you refresh the page. You can prevent this by enabling the 'Persist State' option.
Advisory boards aren’t only for executives. Join the LogRocket Content Advisory Board today →
- Product Management
- Solve User-Reported Issues
- Find Issues Faster
- Optimize Conversion and Adoption
- Start Monitoring for Free
Redux Toolkit adoption guide: Overview, examples, and alternatives

The UI generated by a React, Angular, Vue, or React Native app is a function of its state. For many frontend developers, Redux Toolkit is the perfect tool for the job.

Redux Toolkit is part of the Redux ecosystem. Redux has been the go-to solution for managing the state of complex apps for years now, but Redux Toolkit bridges the gap between Redux and ease of use. For about a year now, Redux Toolkit has been the official recommended approach for using Redux in your app.
In this adoption guide, we’ll explore Redux Toolkit and its features, pros, and cons. We’ll also discuss its use cases and alternatives to help you better assess whether this is the right tool to leverage in your next project.
What is Redux Toolkit?
Redux Toolkit (RTK) is the official, opinionated toolset for efficient Redux development.
Prior to RTK, developers had to manually wire up Redux stores using a lot of boilerplate code. This included setting up reducers, actions, selectors, actions, and middleware just to get a basic store running. RTK handles these painful tasks by providing a set of utility functions that simplify the standard way you’d use Redux.
The Redux team knew that developers had problems with the complexity of Redux. So, they set out to create a solution that would streamline Redux workflow and make state management simpler for developers and React Toolkit was the result.
Initially released in 2019, Redux Toolkit was created to encapsulate best practices, common patterns, and useful utilities to improve the Redux development experience.
How does Redux Toolkit work?
Redux Toolkit is a wrapper around the Redux principles that we all know. It provides utilities to simplify the tasks that developers tend to hate. Here is a quick breakdown:
- Simplified store setup : RTK’s configureStore function simplifies the process of creating a Redux store with prebuilt configurations and middleware
- Automatic reducer and action creation : The createSlice function allows you to define reducers and actions simply and without all the old boilerplate code
- Intuitive state updates : RTK integrates with the Immer library , which means you can write to state without handling immutability manually
- Middleware : RTK comes with Redux Thunk for asynchronous actions and Reselect for optimized selector functions
- Powerful tools : React Toolkit also comes with utilities like RTK Query for data fetching and caching
The Redux team recently released version 2.0 of Redux Toolkit, which added these features:
- A new combineSlices method that will lazy load slice reducers for better code splitting
- The ability to add middleware at runtime
- Async thunk support in reducers
- The ability to make selectors part of your slice
Further reading:
- Smarter Redux with Redux Toolkit
- Understanding Redux: A tutorial with examples
- Using Redux Toolkit’s createAsyncThunk
- RTK Query: The future of data fetching and caching for Redux
- Exploring Redux Toolkit 2.0 and the Redux second generation
Why use Redux Toolkit?
Let’s be honest: Redux needed to change. It came with excessive boilerplate code, complex setups, and a learning curve that can be steep even for experienced developers in the constantly shifting territory we call frontend development.
Redux Toolkit is the change Redux needed. It adds more to the “pro” side of the pros-and-cons comparison. Here are some reasons to use Redux Toolkit:
- Convenience : Forget writing endless boilerplate for reducers, actions, selectors, and constants. Or tracking down why an action isn’t working correctly by searching its name, then the constant, and then finally finding the issue in the reducer — before forgetting the action name and having to backtrack through the code again. RTK’s createSlice does all the heavy lifting, saving you time and sanity
- Performance : Redux Toolkit inherits Redux’s single source of truth approach and adds tools like memoized selectors and Immer, which lets you modify state immutably without the overhead of creating a new object for every change
- Ease of use : RTK makes state updates more intuitive and reduces the risk of bugs with Immer. The API is clean, the docs are really all you need to use it, and the learning curve (when compared to vanilla Redux) is gentle. I looked at many options to improve Redux in the early days that would do something similar to RTK, tried a few, and gave up. Since running into Redux Toolkit, I’ve used it for a couple of years now and am fully on the bandwagon!
- Community and ecosystem : Just because everyone else seems to be using a library doesn’t mean you should. However, there’s a large community supporting RTK, a tool that works well. If you have an issue or are struggling with implementing RTK, a Google search will usually turn up others who not only feel your pain but also have already found the solution to your problem
- Documentation : Some libraries are well-documented in that they have a lot of resources available, but in format that is confusing and hard to understand. All I want is some real code examples to show me how to use things, please. However, Redux Toolkit’s documentation is both thorough and well-organized, with plenty of examples. The docs will take you from getting started to exploring use cases, parameters, exceptions, and more that I haven’t even needed to check out yet
- Integrations : RTK plays well with others, especially React and TypeScript, and reduces the need to create manual type definitions while giving you type safety
Even so, Redux Toolkit is not a one-size-fits-all solution. Here’s why you might reconsider using RTK in your app:
- Bundle size : RTK adds some more weight to your bundle compared to vanilla Redux. But let’s be honest, compared to the overall size of modern apps and the benefits it brings, this is a small price to pay
- Customization : While it removes the overhead, RTK does add an abstraction layer. If you need deep control over everything Redux does, pure Redux may gave you more flexibility. But for most apps, you won’t need to get that far into the weeds
- Complexity : While Redux Toolkit is easier than vanilla Redux, it still has a learning curve, but there are many resources and a large community to support you. It can be challenging at first, but once you get the hang of it, you will see its value
- Overkill for simple apps : For some apps, you might not need Redux, Redux Toolkit, or any third-party state management library
- Redux immutable update patterns
- 5 key Redux libraries to improve code reuse
- Using TypeScript with Redux Toolkit
- How to build a type-safe React Redux app
- When (and when not) to use Redux
Key Redux Toolkit features to know
Redux Toolkit comes with some powerful features that make using Redux for state management much easier than it was a couple of years ago. Here’s some of the important features you need to know to start using RTK.
Configuring a Redux store
Your Redux store holds the single source of truth for your application state. In the past, you would create this store with createStore . Now, the recommended method is using configureStore , which will not only create a store for you but will also accept reducer functions.
Here is a basic example of how that configureStore works:
Creating slices with reducers and actions
Looking at the example code above, you see that the reducers are imported from “slice” files. These files are where most of the the magic happens. A slice is a function that contains a collection of Redux reducer logic and actions — and more after v2.0 — for a single app feature.

Over 200k developers use LogRocket to create better digital experiences
Here is a basic slice:
Adding thunks to your slices
The code above will allow us to update the Redux state in the app. We just have to dispatch the actions we exported from the slice file. But what if we want to populate the state with data from an API call? That’s pretty simple too.
Redux Toolkit comes with Redux Thunk. If you’re using v2.0 or higher, you can add the thunks directly to your slice. A thunk in Redux encapsulates asynchronous code. Here’s how you use them in a slice, with comments explaining the important parts:
- Async actions in bare Redux with Thunk or custom middleware
Adding selectors to your slices
Most of the time, you don’t want the whole state object from a slice. In fact, I am not sure why you would want the whole thing. This is why you need selectors, which are simple functions that accept a Redux state as an argument and return data that is derived from that state.
In Redux Toolkit v2.0 and newer, you can add selectors directly to your slice. Here’s how:
Then we can import these selectors into other parts of the app:
Using middleware
Redux Toolkit provides a getDefaultMiddleware function that returns an array of the middleware that are applied by configureStore . This default set of middleware includes:
- actionCreatorCheck : Makes sure dispatched actions are created using createAction for consistency
- immutableCheck : Warns against mutations in the state object
- thunk : Enables asynchronous operations and side effects by allowing functions within actions to dispatch other actions or interact with external APIs
- serializableCheck : Warns if non-serializable values are detected in state
You can customize the middleware by passing a middleware option to configureStore , with a callback function that receives the default middleware as an argument. Here is an example:
In Redux Toolkit v2.0 and newer, this middleware can be dynamic, which means you can add it at runtime. Here’s how you do that:
Adding the above code to your store sets the store up to accept dynamic middleware. Now in the rest of our app, we can add middleware at runtime like this:
Debugging with Redux DevTools
I wouldn’t say the Redux DevTools extension, either the Chrome or Firefox version, is necessary for developing with Redux. However, it’s pretty close — debugging your application’s Redux state with console.log statements is possible, but I would recommend Redux DevTools over the console.log approach.
The good news is that when you use configureStore , it automatically sets up Redux DevTools for you. When using createStore , you have to configure Redux to use this extension yourself.
Use cases for Redux Toolkit
Redux Toolkit is really versatile and can be used for a wide range of applications. Let’s talk about some places where it shines.
Managing complex application state
The biggest benefit of Redux is managing state across growing, complex apps consistently. Redux Toolkit makes it simpler to use Redux for this purpose. It’s ideal for:
- Handling data from multiple APIs
- Caching/prefetching data with RTK Query, which comes with RTK
- Communicating across decoupled components
- Undo/redo functionality
- Shared state logic across platforms
Implementing advanced state workflows
Redux Toolkit comes with helpers for complex workflows. Features like createAsyncThunk and createEntityAdaptor will speed up implementing:
- Async data fetching
- Realtime updates
- Optimistic UI updates
An ecommerce app may use these features to update cart quantities optimistically after adding items rather than waiting on API responses.
Migrating existing Redux codebases
If you are already using Redux, it’s time to move to Redux Toolkit, as it’s now the official way to use Redux. The migration process is relatively simple. You can continue to use vanilla Redux as you migrate to RTK one slice at a time.
Redux Toolkit’s new build process
Redux Toolkit did have some issues in the past that made it incompatible with modern JavaScript features, including:
- ESM incompatibility : RTK couldn’t be loaded correctly in both client and server code simultaneously due to missing exports field in the package.json file
- Incorrect .mjs import : Importing RTK in a .mjs file failed due to the use of module but no exports field
- TypeScript node16 module resolution : RTK didn’t work with the new TypeScript module resolution option
The Redux team took action to resolve these limitations in v2.0. Here is what they changed:
- exports field in package.json : Modern ESM build is now the primary artifact, while CJS is included for compatibility. This defines which artifacts to load and ensures proper usage in different environments
- Build output modernization : No more transpilation — RTK now targets modern ES2020 JavaScript syntax, aligning with current JavaScript standards. Additionally, build artifacts are consolidated under ./dist/ , simplifying the package structure. TypeScript support is also enhanced, with the minimum supported version being v4.7
- Dropping UMD builds : UMD builds, primarily used for direct script tag imports, were removed due to their limited use cases today. A browser-ready ESM build — dist/$PACKAGE_NAME.browser.mjs — is still available for script tag loading via Unpkg
For more details on these changes, including the reasons for implementing them, check out my experience modernizing packages to ESM .
Redux Toolkit vs. similar
Well, we already mentioned why you would and why you wouldn’t use Redux Toolkit. Now let’s get to the fun part: comparing Redux Toolkit to similar libraries — and your opportunity to yell at me about these comparisons in the comments 😅
First, a disclaimer: I only have limited experience with these libraries and am trusting the generic “community opinions” and documentation to flesh some of these comparisons out.
First, let’s compare the features of these libraries:
Next, let’s compare them in terms of performance:
It’s also important to consider the community supporting each library:
Finally, let’s compare their documentation and resources:
Overall, Redux Toolkit balances features, performance, and community support, making it a strong choice for many projects.
MobX offers an easier learning curve and potential performance benefits for simpler applications, but requires careful handling of reactivity. Zustand is lightweight and performant for smaller state needs, while Jotai is gaining traction but has a smaller ecosystem.
Here’s a summary table comparing these libraries:
- Introduction to MobX with React
- Managing React state with Zustand
- Using Jotai with Next.js to share state across your app
- Comparing TypeScript state management solutions
- Understanding state management in Next.js
- A guide to choosing the right React state management solution
Redux Toolkit is the official, standard way to build Redux applications today. It eliminates the boilerplate that has traditionally made Redux somewhat of a pain, while retaining and enhancing its benefits for state management.
Alternatives to RTK include MobX, which offers simplicity and potential performance benefits, and Zustand, which is lightweight and performant for smaller state needs. Jotai is also gaining traction with its concise approach but has a less mature ecosystem. And, of course, not every app needs a state management library.
However, while Redux has been around for a while, it still stands out for its strong features, active community, and documentation. Working with Redux is a breeze thanks to Redux Toolkit, making it an easy choice for many types of projects.
I hope this adoption guide was helpful. If you have any thoughts or further questions, feel free to comment below.
Get set up with LogRocket's modern error tracking in minutes:
- Visit https://logrocket.com/signup/ to get an app ID
Install LogRocket via npm or script tag. LogRocket.init() must be called client-side, not server-side
Share this:
- Click to share on Twitter (Opens in new window)
- Click to share on Reddit (Opens in new window)
- Click to share on LinkedIn (Opens in new window)
- Click to share on Facebook (Opens in new window)
- #adoption guide

Stop guessing about your digital experience with LogRocket
Recent posts:.

Signals vs. ngOnChanges for better Angular state management
Angular is evolving in some exciting ways. Explore how signals enhance state management compared to the “old” approach using ngOnChanges .

An advanced guide to Vitest testing and mocking
Use Vitest to write tests with practical examples and strategies, covering setting up workflows, mocking, and advanced testing techniques.

Optimizing rendering in Vue
This guide covers methods for enhancing rendering speed in Vue.js apps using functions and techniques like `v-once`, `v-for`, `v-if`, and `v-show`.

Using Google Magika to build an AI-powered file type detector
Magika offers extremely accurate file type identification, using deep learning to address the limitations of traditional methods.

2 Replies to "Redux Toolkit adoption guide: Overview, examples, and alternatives"
How does Redux Toolkit simplify the process of setting up Redux stores compared to traditional methods?
Please check out the “What is Redux Toolkit?” and “Why use Redux Toolkit?” sections of this guide, which may provide the answer you’re looking for. If there’s anything else we can help with, let us know! Thanks for reaching out.
Leave a Reply Cancel reply

How to Use React DevTools in Safari
Published on Jun 09, 2023 in platforms by Lucien Chemaly 11 minute read
React is commonly used for the frontend in static site generators like Gatsby and now WordPress . React DevTools is a set of developer tools with a multitude of features that can make your workflow more efficient and help you debug and optimize your code.
However, if you use Safari, you may be disappointed to learn that there is no browser extension for React DevTools like there is in Chrome and Firefox.
Fortunately, there is a solution. You can still use standalone React DevTools to connect to your site in Safari. This practical tool is also useful for debugging non-browser-based React applications, like React Native apps. It can help simplify the process of optimizing and debugging your code, making your workflow more efficient.
In this article, you’ll learn how to install and use the standalone version of React DevTools to debug a React application running in Safari. In addition, the article also highlights the differences between the standalone version and the Chrome extension, as well as some limitations of the tools.
Use Cases for Debugging React Apps
The standalone version of React DevTools is a separate application that provides a powerful set of debugging and inspection tools for React applications. It’s independent of any specific browser and can be used across various platforms and environments. This makes it a versatile option for developers who need to debug their React apps in different contexts.
Some of the use cases for the standalone version of React DevTools include:
- Debugging non-browser-based React apps: The standalone version of React DevTools is particularly useful when debugging React Native applications because it is platform-independent and can connect to apps running on iOS or Android devices. For example, you can use it to determine why a specific component of your React Native app isn’t rendering correctly on an iOS device. You can use React DevTools to inspect the component tree, check component props and state, and identify issues with styling or logic that may be causing the rendering problem.
- Debugging React apps in Safari: Safari is a widely used browser, especially among macOS users. Although Safari has its own set of developer tools, it doesn’t have extensions or support for React applications like Chrome or Firefox. The standalone version of React DevTools can be used to debug React applications running in Safari, as it provides developers with a powerful set of tools to inspect components and diagnose issues. For instance, if a specific UI component in your React app doesn’t behave as expected when viewed in Safari, you can use React DevTools to inspect the component in question. You can check its state and props and identify any issues.
- Debugging server-rendered React apps: In most static site generators, React apps are server-rendered, which means components are rendered on the server side and sent as HTML to the client. In these scenarios, the standalone version of React DevTools can help you debug issues related to server-rendered components. For example, if you’re using a solution like Next.js or React Server Components to perform server-side rendering, you can use the standalone version of React DevTools to inspect the rendered components and identify issues related to data fetching, state management, or rendering logic.
How to Debug a React App in Safari
The following tutorial explains how to use the standalone version of React DevTools to debug a React application running in Safari. By the end, you’ll be equipped with the knowledge and tools you need to confidently debug your React application.
Prerequisites
To complete this tutorial, you’ll need:
- A Mac running Safari
- A code editor, such as Visual Studio Code
- Git installed on your machine
- Node.js and npm (the Node package manager) installed on your system
To verify the installation of Node.js and npm, execute these commands in your shell or terminal:
If they aren’t installed, download and install Node.js , which also automatically installs npm. This tutorial uses Node version 18.12.1 and npm version 8.19.2.
Creating a React Demo Application
You’ll first need to set up a basic React demo application, which you’ll run and debug in your Safari browser using the standalone version of React DevTools.
Create a new React project using Create React App by executing this command:
This command will generate a new folder with the specified name and populate it with boilerplate code for a React application.
Change the current directory to your newly created project folder by running the following command:
Execute the following command to start the development server:
Your React application should now be live at http://localhost:3000/ . Use your Safari browser to open the application:

Any modifications made to the source code will trigger an automatic page refresh.
Connecting Standalone React DevTools to Your App in Safari
To connect React DevTools to your app in Safari, you first need to install the standalone React DevTools package using npm from your terminal or shell:
Run React DevTools with this command:
After you run the command, you’ll get the following screen telling you to add an additional script to your React DOM :

This tutorial uses the script with the localhost link ( <script src="http://localhost:8097"></script> ) to connect the React application, but the LAN IP address also works. Since you’re not working with a mobile application, the localhost link will work just fine.
Go to your source project and open the index.html file in the public folder. Add the localhost link just after the <head> tag, then open React DevTools. You should see the following in the Components section:

Creating a User Listing
Once you have connected React DevTools to your application, you can use the various features it provides. These features include the ability to inspect the component tree, examine component state and props, and profile component performance.
As the sample application doesn’t have many components, you’ll only see the App component in the tree. To explore more features of React DevTools, you’ll need to add more components.
To add a User component, create a file named User.js in the src folder and add the following code to it:
This component displays user information, such as first name, last name, age, and date of birth (DOB).
You’ll now create a UsersList component that utilizes the User component to display the list of users. Create a file named UsersList.js in the src folder and add the following code to it:
To populate the list of users, you need to create some dummy data and wrap the UsersList component in the App component. To do this, replace the code in App.js with the following:
Note: The App component renders the UsersList component, which in turn renders each User component for every user in the list.
The application in your Safari browser should look like the following:

Debugging and Inspecting Your App
Now that your application is ready, you can start debugging it with React DevTools.
If you open React DevTools, you should see your application tree. It begins with the App component at the top, followed by the UsersList component, and ends with the User component:

If you click the UsersList component in the tree, the props that are passed to the component will be displayed in the right pane. In this case, the props include the array of users from your dummy data:

Clicking a User component displays the props that it passes (the user object in this case). You can click any of three User components and check their relative props:

When you use React DevTools to debug your application, it’s important to understand the application tree and how it represents the component hierarchy. The application tree can help you quickly identify rendering issues and data flow by providing a visual representation of the components. You can inspect the props and state of each component to pinpoint bugs and troubleshoot issues that may arise.
Additionally, you can pin the location of a selected component in your browser by clicking the eye icon in React DevTools:

Once this has been activated, it will highlight the component in light blue in your browser:

You can also log the selected component in the console by clicking the bug icon in React DevTools:

The following image shows the results in the browser when you click the bug icon:

Using React DevTools, you can gain a better understanding of the structure and behavior of your applications. You can also more easily identify and fix bugs and performance issues. The standalone version is particularly useful because it can be used with any React application, whether it’s running locally or on a remote server, and it provides a separate, dedicated window for debugging purposes. Overall, the standalone version of React DevTools is a practical tool for developing and debugging React applications.
Differences between Standalone React DevTools and the Chrome Extension
If you use the standalone version of React DevTools, you’ll be able to use it with any browser, not just Safari. It also offers more customization options and flexibility compared to the Chrome extension. The following are some other differences between the two versions:
- Cross-platform compatibility: The standalone version of React DevTools is designed to work across various platforms, including browsers and devices, enabling a broader range of debugging and development possibilities. Chrome extensions, on the other hand, are limited to working within the Chrome browser environment.
- Ease of setup and connection: Chrome extensions are designed to integrate seamlessly with the browser, so using the extension version makes it easy to detect and connect to React apps running in the browser. The standalone version of React DevTools often requires manual configuration to connect to the target app, which can be more time-consuming and error-prone.
- Updates and maintenance: These two versions of React DevTools may have different release schedules and update processes. Chrome extensions typically update automatically with the browser, while the standalone version may require manual updates.
Limitations of Standalone React DevTools
It’s also important to be aware that the standalone version of React DevTools has some limitations. For instance, the tool may not work as effectively with certain types of components, such as those built with third-party libraries. You may need to use additional tools or methods to gather the necessary information if the tool provides limited data.
The following are some of the most notable limitations:
- Browser-specific features: The standalone version of React DevTools may lack some browser-specific features, such as network request inspection, JavaScript debugging, or browser performance profiling. For these features, developers need to use the browser’s built-in developer tools or rely on other debugging solutions tailored for the specific browser.
- Integration with browser environment: The standalone version doesn’t have the same level of integration with the browser environment as the extensions. Certain tasks, like interacting with browser APIs or manipulating the DOM, may be more challenging or impossible to accomplish using the standalone version.
- Learning curve: Due to differences in features, interface, and setup process, developers may need to invest additional time in learning how to use the standalone version of React DevTools. This may slow down their development process, especially if they are already familiar with the Chrome extension.
- Performance and resource usage: The standalone version of React DevTools may have different performance characteristics and resource usage compared to the Chrome extension version. Depending on the specific tools and configurations used, developers may experience varying levels of performance and resource consumption, which can impact their development experience.
By keeping these limitations in mind, you can adjust your approach and optimize your code more effectively. For instance, you can use alternative tools or workarounds to gather the information you need.
The standalone version of React DevTools offers a versatile solution for developers who need a powerful and flexible set of debugging tools, whether they’re working on browser-based React apps or non-browser-based applications like React Native apps.
This article introduced the standalone version of React DevTools and demonstrated how to use it to debug a React app running in Safari. You should now be comfortable with setting up, connecting, and using React DevTools to inspect and debug your React applications. With the knowledge from this article, you’ll be able to debug your React applications, regardless of the environment or browser they are running in.
You can find the code that was used in this article in this GitHub repository .
By Lucien Chemaly
Lucien has a Master's and Engineering Degree in IT and Telecommunications from the University of Rennes, France. He teaches seasonal courses for engineering students at the Saint Joseph University of Beirut and has been involved in programming training for private companies. He also writes for Draft.dev.

Build a Blog that Software Developers Will Read
The Technical Content Manager’s Playbook is a collection of resources you can use to manage a high-quality, technical blog:
- A template for creating content briefs
- An Airtable publishing calendar
- A technical blogging style guide
DEV Community
Posted on Jun 12, 2020 • Updated on Feb 27, 2021
How to setup Redux with React (2020)
Redux is probably the most popular global state management library for react by far. It eliminates the problem of prop-drilling and lets us manage the application state in a scalable way.
That’s enough introduction, now lets set it up in a react project!
Note: This article assumes that you understand the basics of redux. If not, please consider checking the redux documentation before moving forward.
What is the goal of this blog?
To understand and set up a classic counter example using redux with CRA .
A bonus section awaits you at the end!
You can clone the final result of this blog from here .
Step 1: Setup your react project
You can set up a react project and configure babel , webpack on your own or instead you can use create-react-app to spin up a react project, and that is indeed what we are going to do now.
Type the above command in your terminal / command prompt. Before this make sure that you have the latest version of node installed in your machine.
here, my-react-redux-app is the name of the project folder.
Now change the directory (cd) to my-react-redux-app and then start ( npm start ) the server by typing it in your terminal / command prompt.
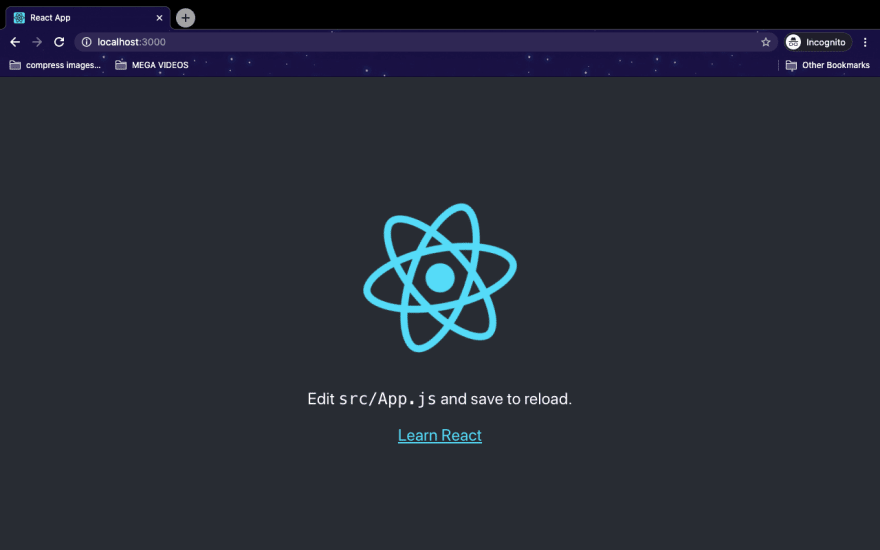
And voila! the react project is now setup. You should be able to see a screen similar to the following in your browser:
Step 2: Install redux and react-redux
Now that we have installed the packages, we can proceed with the setup.
react-redux lets us connect redux with our react application easily.
Step 3: Setup Redux Store in your index.js
In this step, we will be modifying the topmost component in our react project hierarchy i.e the parent of all components. It is important that we do this step on the topmost component because this ensures that our redux store is available to all the components.
Our index.js will look like:
here, we have imported something called ‘‘ Provider ’’ from react-redux.
‘‘ Provider ’’ is a component provided to us by the react-redux library. It wraps around our component. As you can see it also takes a prop called store (which is our redux store).
Before moving ahead, just for the sake of keeping our project structure organized, we will create a folder named redux in our src folder, and all of our redux specific code/logic will be inside this folder. This way we are making our project easy to read, test and scalable when the need arises. Now let's create our store.
create a file named store.js inside the ./src/redux directory. (path — ./src/redux/store.js)
here, we use the createStore() function from redux, to create a store! (well that explanation was a bit redundant 😜 as the name itself is quiet self-explanatory). We can see that we have also imported a file called rootReducer, which we haven't created yet, so let's do that now,
create a file named rootReducer inside the same directory as the store (i.e. path — ./src/redux/rootReducer.js)
here, combineReducers() as the name suggests combines various reducers into a single reducer. In redux, we can create as many reducers as we want. It is ideal to create a new reducer for every operation that doesn't depend on any other action. Since the createStore() in store.js can take only one reducer, hence combineReducer() is used to convert multiple reducers into one.
With this, we have successfully created our rootReducer, but we can see that we have imported a file called counterReducer which again we haven't created yet😗. I know, I know it is a bit tedious but trust me and hang in there! You just have to do this once while setting up redux. Once the setup is done, it is a very smooth experience from there onwards.
counterReducer is the reducer function for the counter example that we talked of at the start. From the next step onwards we will start implementing our counter example.
Step 4: Setup counter reducer/actions/types
Firstly, let's create a folder called Counter in our redux folder (path — ./src/redux/Counter).
Inside the Counter folder, let's create 3 files —
counter.types.js
counter.actions.js
counter.reducer.js
the file names are pretty self-explanatory of what they signify. ( let me know if you have any confusion with this, in the comments section below )
let's create our types for the counter first. We will be needing two types, one for incrementing the counter and the other for decrementing.
here, we export both the constants, so that they can be imported in other files.
Next, let's create actions for the counter.
here, we import our types from counter.types.js file and pass them as types in their respective actions.
Now, let's create the reducer for our counter example.
here, firstly we import our types at the top. then we declare a constant called INITIAL_STATE this is going to be the default state for this specific reducer. After this, we create a function called reducer which takes two arguments — state, action. The State takes an initial value of INITIAL_STATE, and action receives any data (payload) that is passed from our action creator from counter.actions.js file.
Inside the reducer function, we use a switch-case from javascript and inside each case, we return the updated state. We use the spread operator (…) to copy the state into our new object and then add what we want to change in the state.
⚠️ Always remember : We never mutate the original state! Every time we have to make a change we return a new state object.
And in the end, we export our reducer, which is then imported in the _rootReducer.js _file.
With this, our reducer for the counter is ready! From the next step onwards we will write some JSX to display the increment and decrement buttons on our web app.
Step 5: JSX for increment / decrement buttons
To demonstrate the use of redux in our web app we will have to show something on our web app. So we will be writing some basic JSX and then afterward we will connect it with our redux store.
Let's open the App.js file (path — ./src/app.js)
Replace the existing boilerplate code with the following in your App.js
here, we have just added two buttons that do nothing at the moment and we display a static count value.

Now, let's connect the redux state and actions to this component in the next step.
Step 6: Connect redux state/actions to a component
Now that everything else is set up, the final step is to use the redux state and actions in our component.
here, we import the connect function from the react-redux library, we also import our increaseCounter and decreaseCounter actions.
The connect function is a Higher Order Component (HOC) , it basically takes a component and adds some more props to it and then returns the same component with newly added props. Check the last line of App.js file where we export the component, we can see that connect is being used here as follows,
connect takes two functions as arguments which are mapStateToProps and mapDispatchToProps .
Now let's see what these two functions do,
mapStateToProps function as the name suggests maps the redux state to the props of the component it is declared in. So this basically adds whatever state you return from this function to your component. In our counter example , I have returned count from the redux state and hence now I can access count from props inside my App component.
mapDispatchToProps function does a very similar thing, but instead of adding state to props, it adds our actions to props! Whatever actions we return from this function are added to our component. And as you can see that in our example I have returned two actions i.e increaseCounter and decreaseCounter, hence we are able to access them from our props and then I release our actions on the respective button click.
With this now we have a fully functional react-redux app! If you liked the blog or have any queries, please let me know in the comments!
BONUS: Adding redux-dev-tools to the project
First, Download the chrome browser redux extension from here Second, install the redux dev tools package from npm to your project, using the following command,
Third, update your store.js to use the composeWithDevtools as follows,
and that's it! Now you can access chrome dev tools for redux!
The chrome dev tools for redux looks something like this:

Thank you for reading the article! I hope it added some value 😊. You can follow me on twitter to get updates as soon as I post a new article or just tweet me your thoughts! Seeya!
Top comments (18)
Templates let you quickly answer FAQs or store snippets for re-use.
- Joined Jul 28, 2021
App.js Using Redux...
// imports import React from "react"; import { useSelector, useDispatch } from "react-redux"; import { increaseCounter, decreaseCounter, } from "./redux/Counter/counter.actions";
// component function App() { const count = useSelector((state) => state.counter.count); const dispatch = useDispatch();
const handleIncrement = () => { dispatch(increaseCounter()); };
const handleDecrement = () => { dispatch(decreaseCounter()); };
Current Count: {count}
// export export default App;
- Email [email protected]
- Location Texas
- Education H.S. Grad & self-taught
- Work Senior software Engineer at Walmart Technologies
- Joined Nov 26, 2019
This is the better way to go now - the only downside is that I liked being able to abstract the connect function into a containers folder and import my components, then connect them in these separate containers. This allowed the component to simply expect specific props and then if you needed to remove redux, get rid of your containers and ensure your replacement adheres to the requirements laid in each components propTypes. However, I use much less redux than I used to and so I guess it's fair to use the hooks and then if I really want to swap I'll just combine reacts useContext and useReducer with a couple custom hooks. Currently, I still love my redux devTools too much to drop it entirely.
Lastly, redux-devtools-extension is deprecated. Use @redux-devtools/extension
- Education KCA University
- Work Student
- Joined Jan 10, 2022
Yeah this is the best for me
- Location Moscow
- Work it's Works at AO Megapolis
- Joined Dec 15, 2019
I think in 2020 need use @refuxjs/toolkit , not use standart redux . What do u think about this ?
- Email [email protected]
- Location Delhi, India
- Work Frontend Engineer @ Razorpay
- Joined May 30, 2020
I must mention that in 2021 I would definitely use redux-toolkit instead of plain old redux with react. A blog post on redux-toolkit with react is coming soon! stay tuned
Yes, absolutely that is an option too.
How useful would vanilla Redux knowledge be when learning Redux Toolkit? Thanks very much, this blog post is amazing.
It is quite vital to have a clear mental model of how Redux works (Reducers, Actions and Types) and how data flows. This knowledge will really help understand redux-toolkit better, which is just another layer of abstraction.
Thankyou for the appreciation! 🤗 and thanks for reading.
Hello Vikrant, I put console.log() in every file and here's the order everything is firing in:
COUNTER-TYPE TRIGGERED... counter.type.js:5 COUNTER-ACTIONS TRIGGERED... counter.actions.js:18 APP.JS TRIGGERED... App.js:35 COUNTER-REDUCER TRIGGERED... counter.reducer.js:28 DEFAULT: 0 2 counter.reducer.js:23 ROOT-REDUCER... rootReducer.js:12 DEFAULT: 0 counter.reducer.js:23 STORE TRIGGERED... store.js:10 INDEX TRIGGERED... index.js:20
This is not what I expected to see at all. I was expecting index.js to be the first file triggered (instead it's the last one). This thing is bouncing all over the place. I guess that's normal for React/Redux.
I don’t get the context of your example fully, but to clear out redux basics, their documentation is the best, hands down.
@calvinbarajas Not sure either but I would like to note that if you're using console.log then its concurrent so the order of ops may not align with the console output aka the console may not actually be the correct order.
- Joined Jun 28, 2020
amazing post...i did not event need to clone the repo...i just copied and pasted the codes in this post on my editor and everithing is working with no stress in less than 10minutes...lol...thanks
Hahaha, glad it was helpful :)
definitely :)
- Location Dhaka , Bangladesh
- Work Software Engineer at self-Employeed
- Joined Jun 14, 2020
Thank you for your nice content, but i'm still confused from step 6, maybe we can use useSelector for more clear and more easy,
Yes absolutely! That is the way I would suggest in 2021. Use react-redux hooks as much as possible. The "connect" is a Higher Order Component (HOC) which is still available, but now days hooks and functional components are the way to go. Thanks for your comment, I will update the blog with the use of hooks. 😁
- Location Kigali, Rwanda
- Work Software Engineer
- Joined Dec 10, 2020
So helpful thank you.
Glad I could help buddy!👐
Are you sure you want to hide this comment? It will become hidden in your post, but will still be visible via the comment's permalink .
Hide child comments as well
For further actions, you may consider blocking this person and/or reporting abuse

How to Setup a Project That Can Host Up to 1000 Users for Free
JT Dev - Jun 5

React: Design Patterns | Container Components
Andres Z - Jun 4

Node.js Best Practices: A Guide for Developers
Mehedi Hasan - Jun 2

Publish pure ESM npm package written in TypeScript to JSR
fabon - May 12

We're a place where coders share, stay up-to-date and grow their careers.
Navigation Menu
Search code, repositories, users, issues, pull requests..., provide feedback.
We read every piece of feedback, and take your input very seriously.
Saved searches
Use saved searches to filter your results more quickly.
To see all available qualifiers, see our documentation .
- Notifications You must be signed in to change notification settings
Releases: reduxjs/redux-devtools
Major Changes
- 191d419 : Convert d3 packages to ESM
Patch Changes
- [email protected]
- [email protected]
- 👍 1 reaction
@redux-devtools/[email protected]
- [email protected]
- [email protected]
- @redux-devtools/[email protected]
@redux-devtools/[email protected]
@redux-devtools/[email protected].
- f387854 : Revert "Add polyfill for Symbol.asyncIterator ( #1642 )"
@redux-devtools/[email protected]
- 138f4f3 : Fix Hermes support by adding polyfill for Symbol.asyncIterator
- 👍 2 reactions
@redux-devtools/[email protected]
- 4dd0dd2 : Require Node.js 18
- 👍 3 reactions
- 😄 3 reactions
- 🎉 1 reaction
@redux-devtools/[email protected]
- 5cfe3e5 : Update min required React version to 16.8.4
- Updated dependencies [ 5cfe3e5 ]
- @redux-devtools/[email protected]
- @redux-devtools/[email protected]
- @redux-devtools/[email protected]
- @redux-devtools/[email protected]
- @redux-devtools/[email protected]
- @redux-devtools/[email protected]
- @redux-devtools/[email protected]
- @redux-devtools/[email protected]
@redux-devtools/[email protected]
- 3205269 : Add explicit return types
@redux-devtools/[email protected]
Redux devtools extension v3.1.6.
- Fix Symbol.observable mismatch via #1560 and #1568 .

Redux DevTools
705 ratings
Redux DevTools for debugging application's state changes.
The extension provides power-ups for your Redux development workflow. Apart from Redux, it can be used with any other architectures which handle the state. This is an open source project. See the official repository for more details: https://github.com/reduxjs/redux-devtools
4.6 out of 5 705 ratings Google doesn't verify reviews. Learn more about results and reviews.

Dhirendra Dubey May 29, 2024
The frequency of crashes is excessively high.

Nujood Kadhem May 17, 2024
Keeps crashing.

SAU Genisys May 17, 2024
- Version 3.1.6
- Updated December 13, 2023
- Report a concern
- Offered by Redux DevTools
- Size 1.79MiB
- Languages English
- Developer Email [email protected]
- Non-trader This developer has not identified itself as a trader. For consumers in the European Union, please note that consumer rights do not apply to contracts between you and this developer.
This developer declares that your data is
- Not being sold to third parties, outside of the approved use cases
- Not being used or transferred for purposes that are unrelated to the item's core functionality
- Not being used or transferred to determine creditworthiness or for lending purposes
For help with questions, suggestions, or problems, visit the developer's support site

Redux DevTools
Description.
Mavericks Travel
Adventures globally.
- Become a Partner
Verified Listing
Moscow pub and bar crawl.
Username or email address *
Remember me
Register | Lost your password?
IMAGES
VIDEO
COMMENTS
In case you are using Nextjs framework, you can achieve this by opening the console in safari. Type window in it. Expand it. Now just check in the window object property. You will find a key something like '__REDUX' or something like that. In my case it was __NEXT_REDUX_STORE__.
it works properly both on chrome and safari but I can't use redux dev tool. If I change && to || (as below and it works on safari but not on chrome . window.__REDUX_DEVTOOLS_EXTENSION__ || compose Any one can figure out what wrong with my code. Because I need to use dev tool to trace the state of web app and run it on chrome and safari as well
This is a monorepo powered by pnpm and Nx. Install pnpm and run pnpm install to get started. Each package's dependencies need to be built before the package itself can be built. You can either build all the packages (i.e., pnpm run build:all) or use Nx commands to build only the packages necessary for the packages you're working on (i.e., pnpm nx build remotedev-redux-devtools-extension).
It would be amazing to get Redux / React dev tools in Safari to ditch Chrome, especially when relying on battery since it really makes a huge difference in battery life between Chrome and Safari nowadays. I use the stand alone react-devtools package. It took me a little bit of work to figure out how to include it in my webpack build, but then ...
Safari doesn't have DevTools extensions. So the only way it would work there is the extension to include the monitor directly in a page. But you can do that already with vanilla Redux DevTools.
Now we will set up Redux DevTools extension step by step. 1.Adding Redux DevTools extension to our browser (Google Chrome) 2.Installing Dependencies for Redux DevTools & Adding Redux DevTools to ...
The DevTools component you created with createDevTools() has a special static method called instrument(). It returns a store enhancer that you need to use in development. A store enhancer is a function that enhances the behavior of createStore(). You can pass store enhancer as the last optional argument to createStore().
Redux DevTools is a browser extension that allows you to inspect, debug, and modify the state of your Redux application in real-time. It offers several features that make it an essential tool for ...
The Redux DevTools Extension is intended to be a development tool and you should ensure it is not included in your production build. In conclusion, the Redux DevTools Extension is a powerful tool that can greatly assist you in developing and debugging your Redux applications. By understanding its features and how to properly integrate it into ...
Redux DevTool allows us to dispatch actions without writing any code. We can add our actions in dispatcher and it works just like action dispatched via Redux API. This kind of mocking helps in testing side effects and dependent actions. This feature becomes really handy when coupled with locking to the current state.
Debugging with Redux DevTools. I wouldn't say the Redux DevTools extension, either the Chrome or Firefox version, is necessary for developing with Redux. However, it's pretty close — debugging your application's Redux state with console.log statements is possible, but I would recommend Redux DevTools over the console.log approach.
How to Use React DevTools in Safari. Published on Jun 09, 2023 in platforms by Lucien Chemaly 11 minute read React is commonly used for the frontend in static site generators like Gatsby and now WordPress. React DevTools is a set of developer tools with a multitude of features that can make your workflow more efficient and help you debug and optimize your code.
- Open Redux DevTools in a browser - And use the generated React/Redux app to explore some of the various features of Redux DevTools; Want to learn more? Check out our courses below. Learn Redux: https://j.mp/3oFBpDC Create an Advanced Web App with React and Redux: https://j.mp/3Funbvw Use DevTools: https://j.mp/3oG0het - - - - -
here, my-react-redux-app is the name of the project folder. $ cd my-react-redux-app. $ npm start. Now change the directory (cd) to my-react-redux-app and then start ( npm start) the server by typing it in your terminal / command prompt. And voila! the react project is now setup. You should be able to see a screen similar to the following in ...
DevTools for Redux with hot reloading, action replay, and customizable UI - Releases · reduxjs/redux-devtools
Redux DevTools. 4.6 (705 ratings) Extension Developer Tools1,000,000 users. Add to Chrome. Overview. Redux DevTools for debugging application's state changes. The extension provides power-ups for your Redux development workflow. Apart from Redux, it can be used with any other architectures which handle the state. This is an open source project.
Redux Devtools. Developer-Tools 259170 | (10) Get . Description. Redux DevTools for debugging application's state changes. The extension provides power-ups for your Redux development workflow. Apart from Redux, it can be used with any other architectures which handle the state. It's an opensource project.
#Sancharam #Siberia #SafariTV #Santhosh_George_Kulangara #Lal_JoseStay Tuned : https://www.safaritvchannel.com Enjoy & Stay Connected With Us !!---...
The best way to understand it is to take a pint of tasty beer and have a great pub experience in an amazing company. We will visit the best Moscow pubs that serve local craft beer. You can talk with owners, brewers, and beer geeks. We will taste the best Russian beer and visit modern, authentic Russian places. Be ready to spend a beautiful time.
3. I followed the instructions over at the official docs; my app was working just fine in chrome, pointing to localhost:3000. However, now Im running into an issue, because it seems that if a browser doesnt have Redux extension, it won't work. According to the docs, I have written out: import { createStore, applyMiddleware, compose } from "redux";
Disabling the serializableCheck middleware in Redux Toolkit eliminates errors related to non-serializable values in actions. Yes you are right, it's generally advisable to maintain serializability for Redux actions to ensure compatibility and safety. If non-serializable values are necessary, then selectively disable the check for specific actions or payloads using the ignoredActionPaths option ...