
- Find a Location

How To Hook Up a Travel Trailer

Safety Disclaimer: The hole in the hitch latch is where your safety pin should be installed. Only tow with a safety pin in place.
To understand the parts of a trailer hitch, it helps to know the parts on your trailer’s tongue versus those on your tow vehicle . So we’ve separated the parts above to help you identify how this connection comes together.
Here’s a brief synopsis of the hitch parts on a travel trailer:
- Tongue Jack : Provides a leg for the trailer’s tongue weight to rest on when disconnected and functions to raise or lower the tongue as needed for hitching up or leveling your trailer.
- Trailer Coupler: The front component on your trailer’s tongue that attaches to the trailer ball and pivots for smooth towing.
- Hitch Latch: Holds the trailer coupler on the ball once coupled.
- Trailer Wiring Harness : Typically integrated into your tow vehicle’s wiring, this harness connects to the trailer to furnish power to lights, electric brakes, and auxiliary power. The connection is usually a 7-pin round connector or 4-way flat plug.
- Breakaway Cable: A safety cable that connects your trailer’s braking system to a hard point on your tow vehicle. If this connection is broken, the electric brakes on your trailer will activate.
- Safety Chains: Two heavy-duty chains that connect to your tow vehicle’s hitch receiver to prevent the trailer from completely disconnecting if the coupler somehow disconnects from the ball.
- Safety Pin: The safety pin holds the hitch latch in place and remains with the trailer, whether connected or disconnected from a tow vehicle.
And here are the parts on your tow vehicle:
- Trailer Hitch: Bolts onto your tow vehicle to create a coupling point for your trailer.
- Receiver Tube : An integrated component of the bolted trailer hitch that provides the connection point for the ball mount.
- Ball Mount : A two-part accessory comprising a shank and a trailer ball platform. The shank inserts into the receiver tube, and the platform provides a mounting location for the trailer ball.
- Hitch Pin: Inserts through the receiver tube to hold the shank in place.
- Trailer Ball: The hitch ball is the connection point for the trailer coupler to attach to the hitch on your tow vehicle. They come in several standard sizes, so you’ll need the right size to match your trailer’s coupler.
The graphic above outlines the various parts of a travel trailer hitch. This image does NOT include a weight distribution hitch, which is an important accessory for safer, more efficient towing.
Learn why you need a weight distribution hitch once you learn the basics of hitching up a travel trailer.
How To Hitch Up a Travel Trailer
Before we cover the steps to hitch up a travel trailer, it’s important that you load your trailer properly. Improper load distribution is a leading cause of trailer sway and bounce, which create a much more dangerous towing experience.
So if you’re not familiar, check out our video on how to safely load your travel trailer .
Now that your trailer is loaded properly, here are your steps to hitch up a travel trailer:
- Find a partner to guide you and line your tow vehicle’s hitch ball up with the trailer’s coupler.
- Make sure wheel chocks are in place and raise stabilizing jacks if extended. Retract RV steps and slide-outs.
- Remove the coupler pin and lock (if applicable) and open the latch.
Technician Tip: At this point, you can use your tongue jack to lift the unit back up to check that the coupler is correctly latched. This will also assist when connecting weight distribution bars.
- Raise the trailer coupler until it’s higher than the trailer ball on your tow vehicle.
- Back up the tow vehicle until it’s under the trailer coupler. Communicate effectively with your spotter, especially if your tow vehicle lacks a backup camera.
- Place the tow vehicle in Park and set the Emergency brake.
- Lower the trailer coupler onto the trailer ball and close the latch. If the latch doesn’t close easily, you may need to slightly push the trailer and tow vehicle apart to seat the ball correctly.
- Secure the hitch pin, lock the latch, and clip the safety chains to the receiver. Chains should form an X from their mounting locations on the trailer’s tongue to their clipped locations on your vehicle’s hitch receiver.
- Attach the breakaway cable independently to a permanent part of the tow vehicle that’s strong enough to withstand the energy of the cable being pulled (i.e., The chain anchor loops on your truck’s hitch receiver). The connection must be done with a strong locking device like a quick link or a locking carabiner.
- Plug in the trailer wiring and raise the tongue jack to its maximum height.
Safety note: The breakaway cable should never be woven through the safety chain’s links, or it will snap and not close the switch.
And that’s it! But before towing, you should:
- Check the trailer’s running lights , brake lights, and turn signals.
- Check the settings on your tow vehicle’s brake control to verify the connection to the RV and that the settings are correct. Know and follow the manufacturer’s recommendations for your specific brake control.
- Close propane containers and shut off all appliances that run on propane when not connected to a power pedestal (i.e. refrigerator, furnace, water heater, stove, and oven).

Additionally, we highly recommend installing a weight distribution hitch and adjusting it properly for safer trailer towing.
These additional videos will help you with those additional steps for safe trailer towing:
- How to Hook Up a Weight Distribution Hitch
- How to Adjust a Weight Distribution Hitch
With your travel trailer hitched up safely, you’re ready for the open road. Here are a few resources to help you find beautiful destinations for your next RV road trip:
- 8 of America’s Most Scenic Routes and Where to Camp Along the Way
- 5 Blue Ridge Mountains RV Campgrounds You Must Visit
- Exploring California’s Lost Coast in an RV
Do you have any questions about hitching up a travel trailer? Let us know in the comments below.
- Comment (2)
Plug in the trailer wiring to what?

Hi Marianne!
My apologies that this isn’t clear. Your trailer’s wiring harness should plug into your tow vehicle’s 7-pin (or, less commonly, 4-pin) electrical connector. In the included video, Ian completes this step quickly around the 2:36 mark.
Hope that helps!
Leave Your Comment Cancel Reply
Save my name, email, and website in this browser for the next time I comment.
Shop By RV Type

Your Adventure Awaits
Copyright © 2023 cwi, llc all rights reserved.
- RV Glossary |
- Privacy Policy |
- California Privacy Rights |
- Do Not Sell or Share My Personal Information |
- Targeted Advertising Opt Out |
- Terms of Use

- Books & Merch
- Gear We Use
- Advertise With Us
- National & State Parks
- Best RV Campgrounds in New Hampshire
- Best RV Campgrounds in NC Mountains
- Best Florida Beach RV Campgrounds
- South Dakota
- The Great Lakes
- Campers Swear By This Portable Device That Keeps Dogs Safe -The Best Portable Dog Fence for Camping (2024)
- Mosquitos and bugs
- Camping Clothes
- Camping Gifts
- Camping Internet
- 5 Best RV Backup Cameras for RV & Trailer
- 7 Best Screen Tents for Camping (2024)
- Best RV Campgrounds in California
- 5 Best Key West RV Parks
- 9 Best RV Campgrounds in New Jersey
- Camping Reservations
- Campground Comparisons
- Cheap or FREE RV Camping Sites
- Best RV Campground Memberships & Clubs
- Boondocking 101
- Boondocking Adventures
- RV Internet
- What Do Flamingos and Upside Down Pineapples Mean?
- Where to Find FREE or Cheap RV Sites Camping
- RV Winter Camping
- RV Show List for 2024
- 17 Best Camper Vans 2024 (New Class B RVs Available!)
RV Hookups for Beginners (5 Steps for Your First Trip)
Here's an rv hookups for beginners guide to better prepare you for your first rv trip….
- 1 Here's an RV hookups for beginners guide to better prepare you for your first RV trip…
- 2.1 Step 1: Set Your Parking Brake
- 2.2.1 PRO TIP: Always Use a Surge Protector
- 2.2.2 Electrical Hookup Adapters
- 2.3 Step 3: Water Hookup
- 2.4 Step 4: Cable Hookups
- 2.5.1 Do NOT Leave Your Black Tank Valve Open When Hooked Up
- 3 Are You an RV Newbie? Or Thinking of Joining the RV Lifestyle?
Jennifer and I have been doing this for a long time. So, sometimes I take for granted some of the beginner's tasks that are now second nature to me. RV hookups being one of those things.
I realized I should take a step back and cover some basics that RV beginners need to know. And what better way to start than how to connect full hookups on your first stay at a campground?
As a first time RVer, you're probably wondering what steps you need to take and in what order to do them. So, I'm going to share the “general rules” and my best tips the new RVers need to know.
If you buy something through our links, we may get a small commission at no extra cost to you. It helps keep our lights on so we can continue to provide helpful resources for RVers. Read our full affiliate disclosure here.
RV Hookups for Beginners (How to Set Up Your RV)
Like what you see in these videos? We'd appreciate it if you would Subscribe to our YouTube Channel ( easy to do right here ) and consider “ringing the bell icon” to be notified of any new video from us. 🙂 Thanks!
Not too long ago, Jennifer and I made the above video on how to set up your RV at a campground . It covers everything from choosing a site to what to hook up and in what order. It's a great visual guide on what you need to do from start to finish.
For the purpose of this article, however, I'm going to focus only on RV hookups for beginners. These steps and tips are the same whether you drive a motorhome, travel trailer, fifth wheel, or any camper. Hookups are essentially the same wherever you camp, whether it's an RV park, state parks, national parks, or any other place that offers hookups.

Step 1: Set Your Parking Brake
The most important thing to do before you even start hooking up is set your parking brake! Experienced RVers can share plenty of stories where either they or someone else forgot to do this with disastrous (& sometimes funny) results.
The last thing you want is for your RV to “settle” and shift back or forth, putting tension on your cables. Or, worse, roll off and pull out the cables and do costly damage to the campground's panels and connection points.
So, don't repeat the dumbest RV camping mistakes , and set your parking brake!
Step 2: Electric Hookup
The first thing I recommend connecting is your electric hookup. The main reason is so you can start running your air conditioning, heater, fridge, etc. on the power source from your RV campsite instead of from your RV's power supply.
There are usually 3 different plugs on a campsite's electric panel: 20 amp, 30 amp, and 50 amp. Bigger RVs usually use 50 amp and smaller RVs usually use 30 amp. You should know which kind of amp service your RV runs off of. But, if you don't, the plugs have differently shaped prongs, so you should only be able to plug into the correct one.
Once you're plugged in, you flip the breaker switch corresponding to the amp service you need. For instance, you flip the 30 amp breaker after you plug in your 30 amp plug. Then you plug in the other end to your RV, giving it a twist and rotating the collar until it's snug.
BUT BEFORE YOU PLUG IN , here is one of the best RV tips I can give you…
PRO TIP: Always Use a Surge Protector

Always use a surge protector when connecting your RV to power! A lot of people have learned the hard way that campground electrical panels are not always well-maintained or wired properly. They can cause a power surge that can badly damage your electrical system.
Some RVs have built-in surge protectors, but if yours doesn't, I can recommend 30 Amp Surge Guard or 50 Amp Surge Guard . You can get 5% off either of those surge protectors (or any TechnoRV products) with the coupon code RVLIFESTYLE5 .
Plug this portable surge protector into the campground's electric power supply, and then plug your power cable into the surge protector.
Electrical Hookup Adapters
Not every campground provides multiple amp services. Some may only have electrical hookups for 30 amps or 50 amps. That's why it's a good idea to keep an RV plug adaptor in your RV, like this Dogbone adapter for 50 amp male to 30 amp female .

Step 3: Water Hookup
The next hookup on the list is connecting your water hose to the campground's water source. Just like we recommend a surge protector with electrical hookups, we recommend you always use a water filter connected to your fresh water tank.
We use a relatively new system called Clear20 that consists of an inline water filter and the Dirtguard pre-filter that takes out the sediment and particulates before they go through the inline filter. Or, there is a cheaper Clear2o RV water filter system that uses solid charcoal to filter.
To easily connect your water hose, I recommend getting a Fresh water quick disconnect . It's much easier than threading hoses by hand and helps minimize water waste from annoying little leaks. The quick connect snaps right on and off. Couldn't be easier.
Connect the filter to the campsite's water spigot, then connect your fresh water hose to the water filter. Then, using the quick connect, connect the other end of the water hose to your RV.

Step 4: Cable Hookups
If your campground offers cable TV, you can now connect it to your RV. There's nothing special to know here. Simply plug in the cable cord to your RV. If you don't know where your cable port is, consult your owner's manual.
Step 4: Sewer Hookups
Lastly, it's time to do your sewer connection. Not all campsites have sewer connections, so this might not be something you do until you dump your black tank at RV dump stations .
Whether you're connecting at a campsite or the dump station, the process is basically the same. The only difference is how long you leave it connected.
Now, let me warn you, dealing with your black water tank is one of the biggest downsides of RVing. It's just gross. But it needs to be done and is well worth the stinky effort in the end.
That said, I suggest you put on rubber gloves before you connect your sewer line, or what the RV world likes to call the “stinky slinky.” Make sure your gray tank and black tank are closed , then grab your sewer hose.
Connect the end of the hose with the twist-on connector to your RV drain spout. Then run the hose the sewer drain. It's usually easiest to run your sewer hose support as you go. This support helps direct the hose (and its contents) toward the drain.
Now, attach the end of the hose with the elbow connection to the sewer drain. Screw it into position if the sewer drain also has threads (not all do.)
You might also want to review this post from the RV Proctologist !

Do NOT Leave Your Black Tank Valve Open When Hooked Up
This is a mistake that a lot of new RVers make. They understandably think that if they're connected, they might as well leave their blank tank valve open so it can continuously drain. Less poo stored in your RV, the better, right? Wrong!
If you leave your black tank valve open while you're hooked up, it will cause gross and sometimes expensive problems. The most common of which has its own inelegant RV terminology : the poop pyramid.
This happens when liquid waste easily drains out when your valve is left open but solid waste builds up in your tank. Like I said, it's gross. And stinky. And can be expensive to clean out.
So, don't leave your black tank valve open!

Get the Home Study Course today and worry about the road, not the repairs! Every time you move your RV it's like driving through a hurricane during an earthquake. Parts break and many items need to be maintained, this program will show you how you can save time and money by gaining the confidence to take on the majority of the issues you’ll come across. Don’t get caught with your RV in the shop! Learn how you can maintain and repair your RV at your own pace and at the most convenient time for you! This course is produced by the National RV Training Academy.
Are You an RV Newbie? Or Thinking of Joining the RV Lifestyle?

THIS is the ebook to get first – before you purchase anything- to make sure you are heading in the right direction with the right RV and plans.
So, buckle up and get ready for the ride of your life. Consider this not just a guide—but an invitation to discover the joy of RV travel and the freedom of the open road.
You’ll find it all in this 64-page ebook (digital PDF – NOT a print book) The Newbies Guide to the RV Lifestyle
Published on 2022-11-25
Mike Wendland is a multiple Emmy-award-winning Journalist, Podcaster, YouTuber, and Blogger, who has traveled with his wife, Jennifer, all over North America in an RV, sharing adventures and reviewing RV, Camping, Outdoor, Travel and Tech Gear for the past 12 years. They are leading industry experts in RV living and have written 18 travel books.
8 Responses to “RV Hookups for Beginners (5 Steps for Your First Trip)”
June 09, 2023at8:48 pm , Tamarah UHLMANN said:
2005 Fleetwood Wilderness What is the apprx 2in black pipe pointing straight down underneath RV between rear axles?? Unable to determine where or if it needs to be connected
June 10, 2023at8:10 am , Team RV Lifestyle said:
This would be a great question for our RVLifestyle Facebook group. Hard to get specific for every model out there here but the FB group is a very large group of RVers and people ask questions like this all the time, and there is always someone with the same model to help – Here is a link: https://www.facebook.com/groups/roadtreking – Team RV Lifestyle
November 26, 2022at12:11 am , Chris Nintzel said:
At least two chocks in addition to the parking brake.
November 25, 2022at9:18 pm , Bryant Payne said:
For the sewer hookup, I always connect the hose to the campground outlet, then to the RV. This way, when you take off the cap on the RV end, if there is any water, or heaven forbid, a valve wasn’t closed, you only get a mess at the RV end instead of both ends if you catch part of the spill in the hose.
IMHO, surge protecters are basically a waste of money. I have a tester (about $30 on Amazon) that I use to check for proper wiring at the pedestal, and if that’s OK, the power is as good as it is to your house. The electronics in new RVs run off 12 volts, and the surge protector does nothing for them. I’ve been camping for 40 years without a surge protector and no fried RV power systems.
November 26, 2022at3:39 pm , Team RV Lifestyle said:
Thanks for sharing the sewer hookup tip and your feedback – it is appreciated! Team RV Lifestyle
November 25, 2022at10:50 am , michael smallets said:
I would suggest shutting off campsite water (or water pump) when leaving your RV/TT so that if a leak develops during your absence you won’t have water damage
November 25, 2022at11:18 am , Rick Beal said:
I always make the power connection to my coach first, and then connect to the pedestal last (after ensuring the breaker is off). This prevents arcing which can damage your power cord connectors.
November 25, 2022at7:59 pm , Team RV Lifestyle said:
Thanks for adding this tip to the discussion, Michael — Happy Trails! Team RV Lifestyle
Comments are closed.
Related Posts

55 and Older RV Campgrounds: What RVers are Saying

Starlink Internet for RVers: My Install

12 Fun RV Stocking Stuffers for Men & Women
Ultimate RV Setup Checklist (Printable PDF)
Read this page without ads! Go Ad-Free
Our comprehensive RV setup checklist will guide you step-by-step, ensuring a seamless arrival and setup at your campground.
Tip : Download our Printable RV Arrival & Departure checklists and check off each of these steps as you complete them for a stress-free setup and teardown – no WIFI needed!
Arrival at Your Chosen Campground
Upon reaching your destination, follow these steps:
- Check-In and Get Your Campsite Number : Register at the campground office and get your assigned campsite number.
- Use Discount if Possible : If you have memberships with RV clubs like Good Sam, take advantage of these offered discounts.
- Confirm Campsite Has All Requested Amenities : Double-check that your site is equipped with the amenities you need for your stay, such as electricity, water, and sewage connections.
- Get a Map and Rules List for the Campground : Familiarize yourself with the campground layout and its regulations to ensure a smooth and respectful stay.
- Inquire About Points of Interest in the Area : Ask about local attractions, hikes, or events to make the most of your trip.
Arrival at Your Designated Campsite
Once at your site, run down this campsite setup checklist:
- Visually Confirm Site Has Needed Amenities : Do a quick visual survey of your campsite to ensure it’s equipped with all the necessary facilities, like power or sewage hookups.
- Plan Your Entry Path : Plan how you’ll maneuver your RV into position, be it pull-through or back-in.
- Inspect Campsite for Hazards or Obstructions : Check for potential obstacles like tree branches or rocks that could interfere with parking or setup.
- Park Your RV : Position your RV on the site, allowing enough room for slideouts and the awning. Be sure to keep kids and pets in your vehicle when you park, use a spotter to help guide you safely, and take it slow!
- Turn on Your Emergency Brakes if Driving a Motorhome : Secure your vehicle by engaging the emergency brakes.
- Check to Make Sure You Can Reach Hookups : Verify that your RV’s cords and hoses can comfortably reach the site’s water, electrical, and, if applicable, sewer hookups.
- Level RV : Use leveling blocks or your RV’s built-in leveling system to ensure a stable and even living area.
- Connect to Shore Power : Plug in your electrical cord to the site’s power supply to run your RV’s electrical systems.
- Connect Water Lines : Hook up your water lines to access fresh water.
- Connect Sewer Hose : Attach your sewer hose to properly manage waste.
- Turn on the Propane : Turn on your propane supply to power your gas-powered appliances.
- Roll Out Awning : Unroll your awning, taking care to secure it safely.
- Lower Handrails and Entry Steps : Ensure safe entry and exit by lowering the handrails and steps.
- Campsite Setup : Arrange your outdoor furniture and accessories to create your perfect outdoor living space.
Unhitching (If Applicable)
- Chock Tires : Secure your RV from moving unintentionally by placing chocks around the tires.
- Put Support Blocks Down & Lower Jacks : Establish further stability by using support blocks and lowering the RV’s jacks.
- Disconnect the Electrical Cord from the Tow Vehicle : Detach the electrical connection from the tow vehicle to the RV.
- Disconnect the Breakaway Cable from the Tow Vehicle : Unhook the safety breakaway cable from your tow vehicle.
- Unhitch RV : Detach the RV from the tow vehicle.
Now, let’s prepare the inside of your RV:
- Extend Slideouts : Extend any slideouts your RV has to increase living space.
- Turn on the RV Refrigerator : Start cooling your refrigerator to store food safely.
- Turn on A/C or Heater : Based on weather conditions, turn on either the A/C or heater to maintain a comfortable temperature.
- Open Roof Vents : Promote good air circulation by opening your roof vents.
- Light Pilot on the Oven : If your stove has a pilot light, make sure it’s lit and ready for cooking.
- Turn on the Water Heater : Activate your water heater for warm showers and dishwashing.
- Extend Antenna : Raise your antenna for better TV or radio reception.
- Test Water Lines : Turn on faucets to ensure all water lines function properly.
- Set up Furniture : Arrange interior furniture as desired for your comfort and convenience.
- Unpack Items : Remove items from storage and place them in their designated spots for easy access.
Using these steps as your guide, you can ensure that your arrival and setup at any campground go smoothly and efficiently. Combine this with our RV Departure Checklist , and you’ll have your entire camp setup and teardown process completely covered!
Better yet, we have put all of these steps into a simple-to-follow printable RV setup checklist that you can download, print, and reuse over and over as many times as you want!
These PDF checklists are easy to use and come with blank copies, so you can make them work for you and your RV. Get your RV Arrival & Departure Checklists today and take the hassle out of the setup and teardown process!
Common Setup Issues and Troubleshooting
No matter how well-prepared you are, unexpected issues can arise while setting up your RV.
Wrong Electrical Connection
In some instances, your RV’s electrical system might not match the site’s power source, which could lead to power issues. Always carry adapters for different types of electrical connections. Be aware of your RV’s power requirements to prevent damage to your RV’s electrical appliances and systems.
High-Pressure Water
An unexpectedly high water pressure can lead to damaged plumbing within your RV. To avoid this, always use a water pressure regulator when connecting your RV to a water source. This will ensure that the water pressure stays within a safe range.
Power Cord Doesn’t Reach the Pedestal
In certain situations, you might find that your power cord isn’t long enough to reach the campground’s power pedestal. Always carry an extension cord suitable for your RV’s power requirements to avoid such issues. Be aware that using extension cords can lead to power loss, so use them sparingly and only when necessary.
Uneven Leveling
An uneven RV can lead to unstable walking conditions inside and can even affect the functioning of some appliances. Always carry leveling blocks or consider investing in automatic leveling systems to deal with uneven terrain. Should your RV not appear level even after your initial setup, re-adjust and use your leveling system to correct this.
Water Leakage
Water leaks can cause significant damage to your RV. Always check your water system during the setup process to prevent leakage issues. Ensure all connections are tight and the seals are in good condition. If you detect a leak, turn off the water supply immediately, identify the source, and repair it. For securing the connections, consider using plumber’s tape for a more secure fit.
Slide-out Issues
Slide-out rooms in your RV can occasionally encounter problems. Whether they refuse to extend or retract, such issues can be caused by several factors, like low battery voltage, blown fuses, motor failure, etc. Understanding your slide-out mechanism and maintaining it properly can prevent such problems.
Leave a Comment Cancel reply
We highly encourage discussion on our posts and in our RV Community Forums . The most helpful comments are those that you can learn from or that help others out. Please refrain from insults, complaints, or promotional material. See our community guidelines for more information.
Save my name and email for the next time I comment.
Notify me of follow-up comments via e-mail.

Travel Trailer Setup Checklist: Setting Up an RV Campsite for Beginners
As an Amazon Associate, we earn from qualifying purchases. We also earn from other affiliate websites. See our full disclaimer .
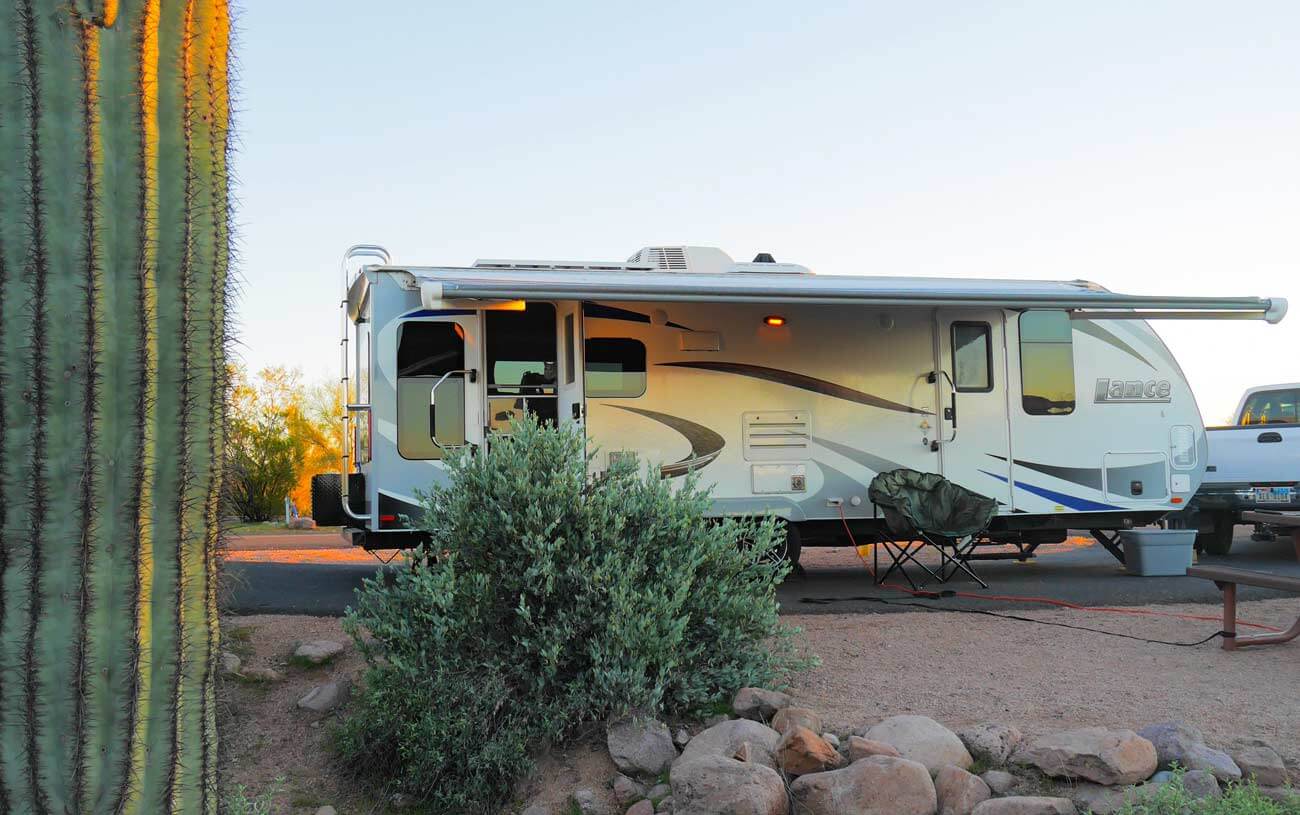
When setting up your RV travel trailer as a beginner, it’s essential to take your time and do it correctly. You don’t want to rush through the setup procedure and wind up with an RV that isn’t set up safely or prepared for an enjoyable camping experience.
We’ll cover everything you need to know – from unhitching the trailer to RV hookups, and give some helpful tips that took us a while to learn!
Below we’ll take you through a step-by-step travel trailer setup, so you are fully prepared to take your RV to a campsite. You can also download our travel trailer setup checklist below.
Arriving at Your Campsite
The first thing you want to do before pulling into a site is to inspect it. If you can choose your spot, drive around until you find one that suits you and ask yourself these three questions.
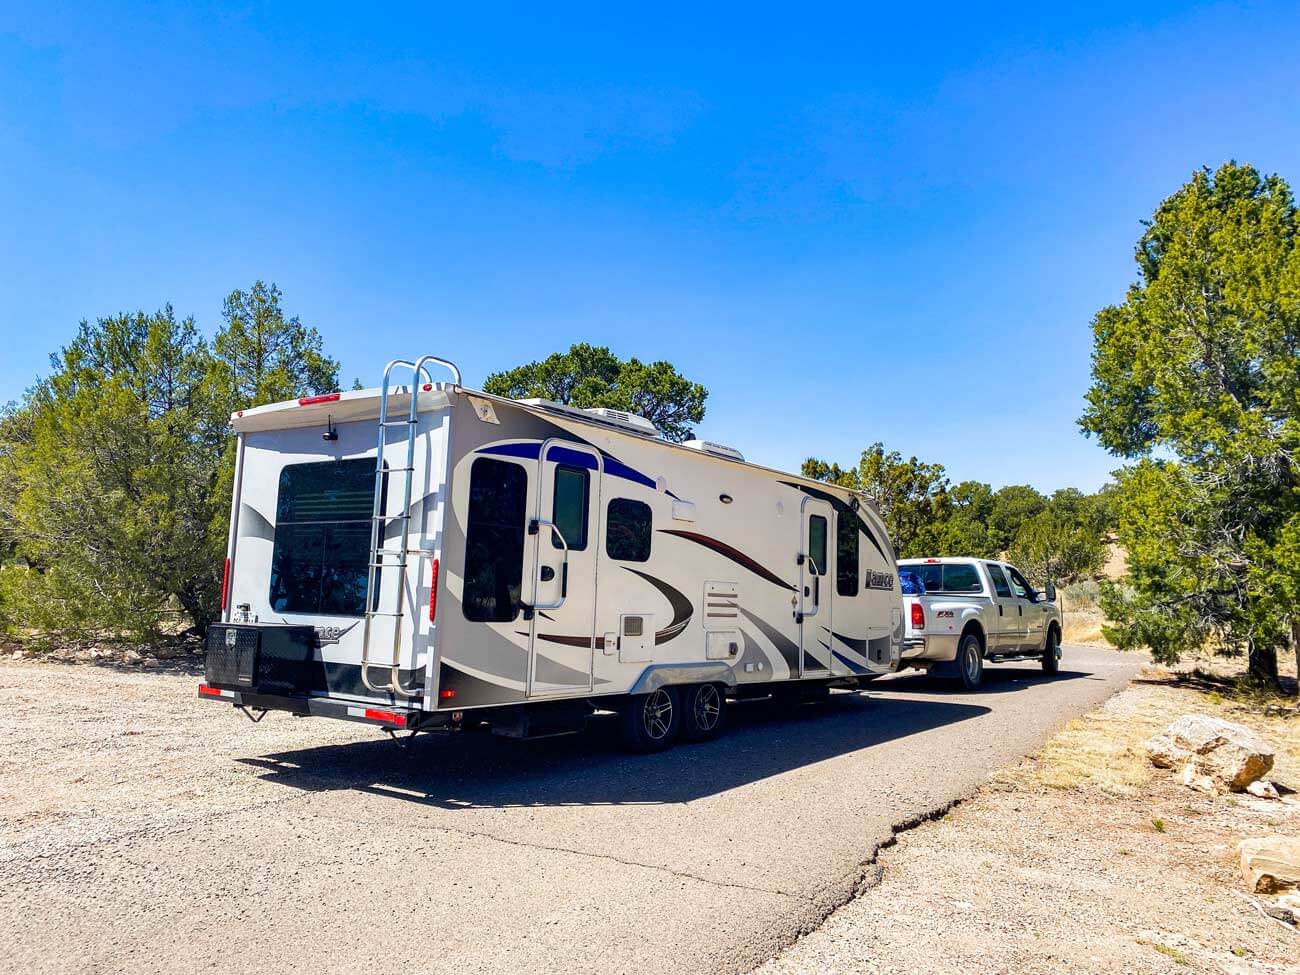
- Is it level?
- Does it have any obstructions for backing in, putting out the awning or slide outs, or using the solar panels?
- Where are the hookups?
You can usually inspect the site from the driver’s seat on a flat, pull-through, concrete pad campsite. However, getting out and surveying the area on foot is best for anything more complicated. We still follow this process at almost every site. It doesn’t pay to be in a rush.
Let’s break down what to look for when answering the above questions.
Is the Campsite Level?
Picture where your RV camper will be in your mind. Take note of sloping and where you might need leveling blocks. Look for bumps and dips to avoid. If a campsite is too crooked, it may be best to drive on or ask the campground if you can be reassigned to a different spot.
Obstructions
Trees, large rocks, camping tables, hookup pedestals, or any other obstructions make it hard to get into a site and can damage slide-outs and awnings. Trees cast shade that can help keep an RV cool but also significantly reduce the output of solar panels and dirty the RV’s roof.
Hookup Locations
Ideally, a campsite will have water, electrical, and sewer hookups on the driver’s side of the RV centrally located where you will park. The passenger’s side is left with room to set up camping gear.
In reality, there isn’t consistency with hookup layouts between campgrounds or even campsites within some campgrounds. Sometimes the hookups can be spread out so far that extra hoses or electrical extensions are needed. We have experienced campgrounds with water and electricity on the driver’s side and the sewer right in the living space on the passenger side.
Try to line up the RV’s sewer connection with the campsite’s. Sewer hoses tend to be the shortest hookups and the most cumbersome to set up. Bends in sewer hoses accumulate particulates and make them harder to keep clean.
RV Leveling and Unhitching
Once you’ve pulled or backed into your campsite, it is time to continue the RV checklist by leveling.
A device like the Levelmate Pro can speed up the leveling process by telling you exactly how many inches one side needs to be raised in real-time, but an RV level or a level from your toolkit can do the job with some patience.
Leveling Side to Side
If you have a towable RV such as a fifth wheel or travel trailer, it is crucial to level the rig side to side across the wheelbase before unhitching.
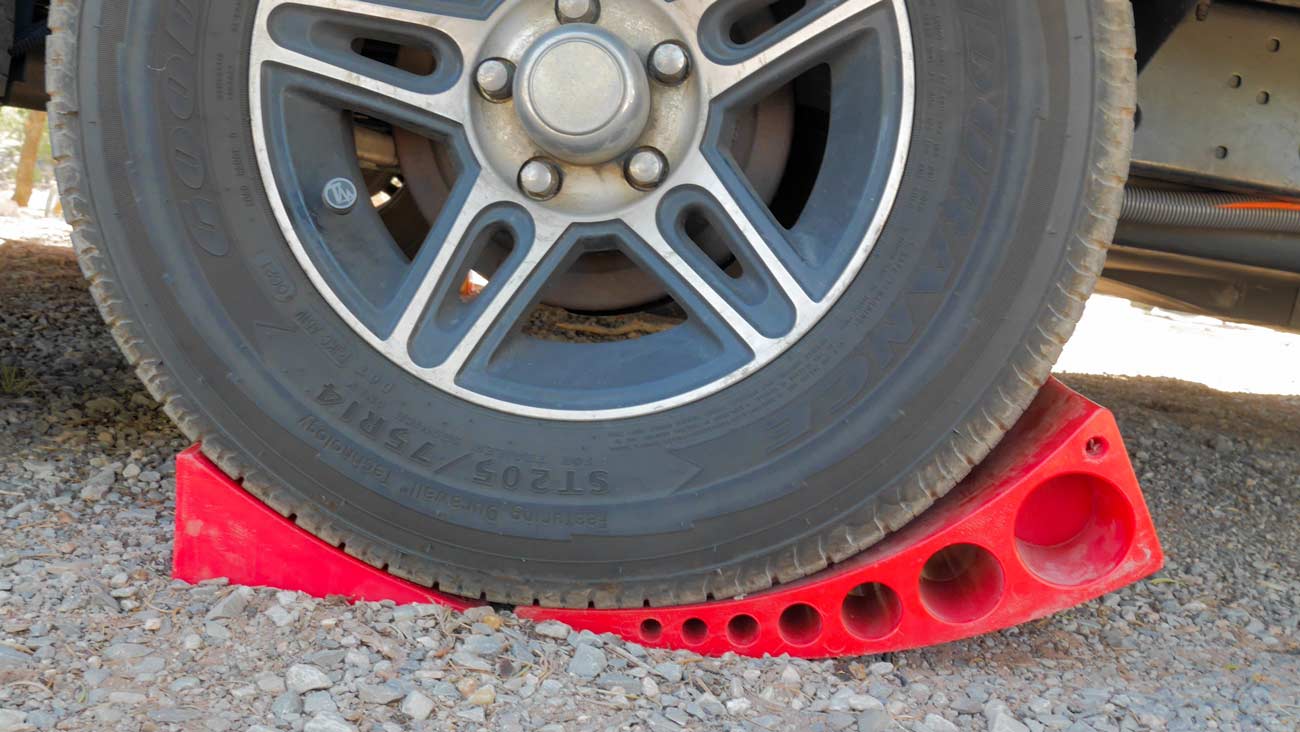
Looking at your leveling device, determine which side needs to be lifted, and place a lifting device such as Lynx Levelers or an Anderson Leveler under the downhill wheels.
Pulling the RV onto Levelers in 3 Steps
- Ensure your vehicle has its parking brake on before getting under the tires.
- Pull forward or reverse onto the leveler slowly. (This is where a spotter comes in handy to let you know when you are on the blocks.)
- Check your level and add or remove blocks until level.
Chock Wheels
Before unhitching, it is imperative to place wheel chocks under the RV wheels. The potential of an accident from a moving RV is not worth skipping this step that only takes a few seconds.
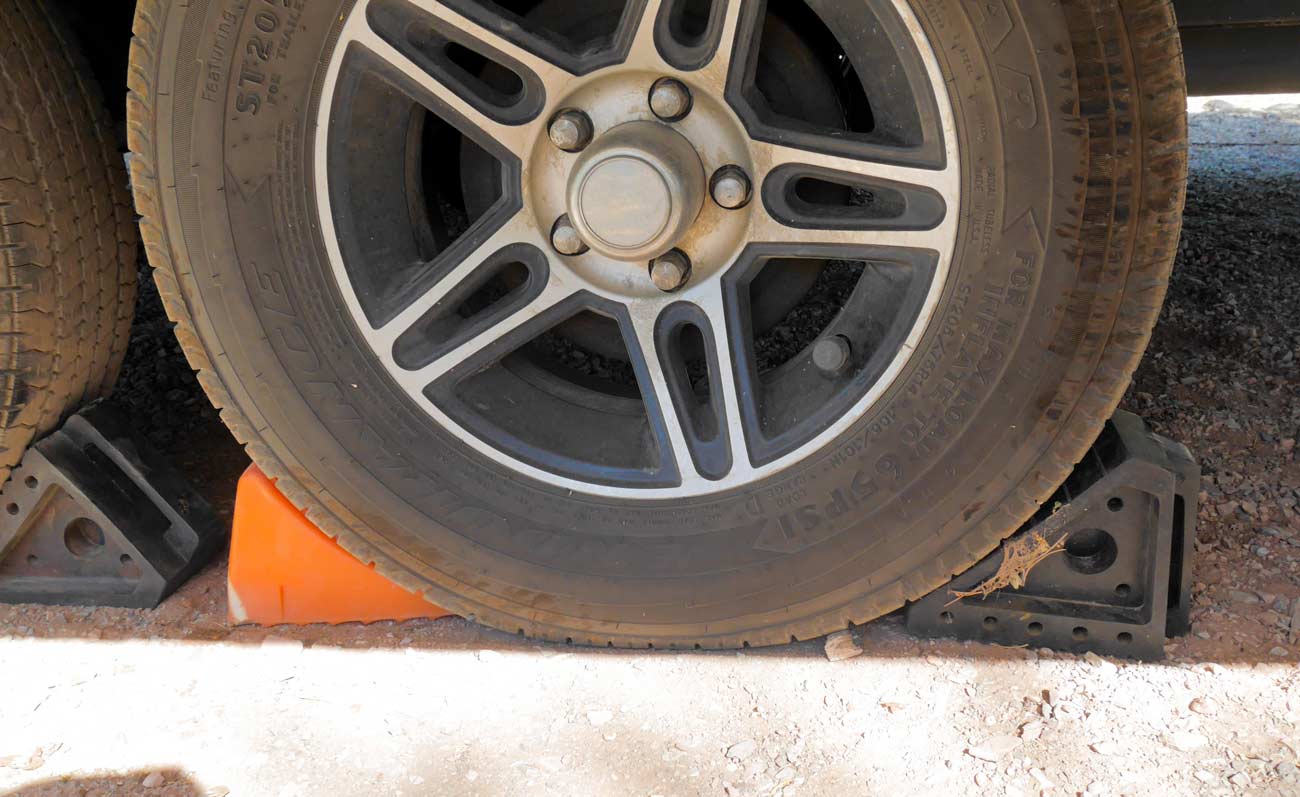
The heavy-duty rubber chocks are more sturdy and grip well. Two sets are recommended on extreme slopes or wet/soft ground conditions.
Unhitch RV and Level Front to Back
Now that your RV is level side to side, it is OK to unhitch the RV from the tow vehicle. Follow these five steps to unhitch and finish leveling your travel trailer.
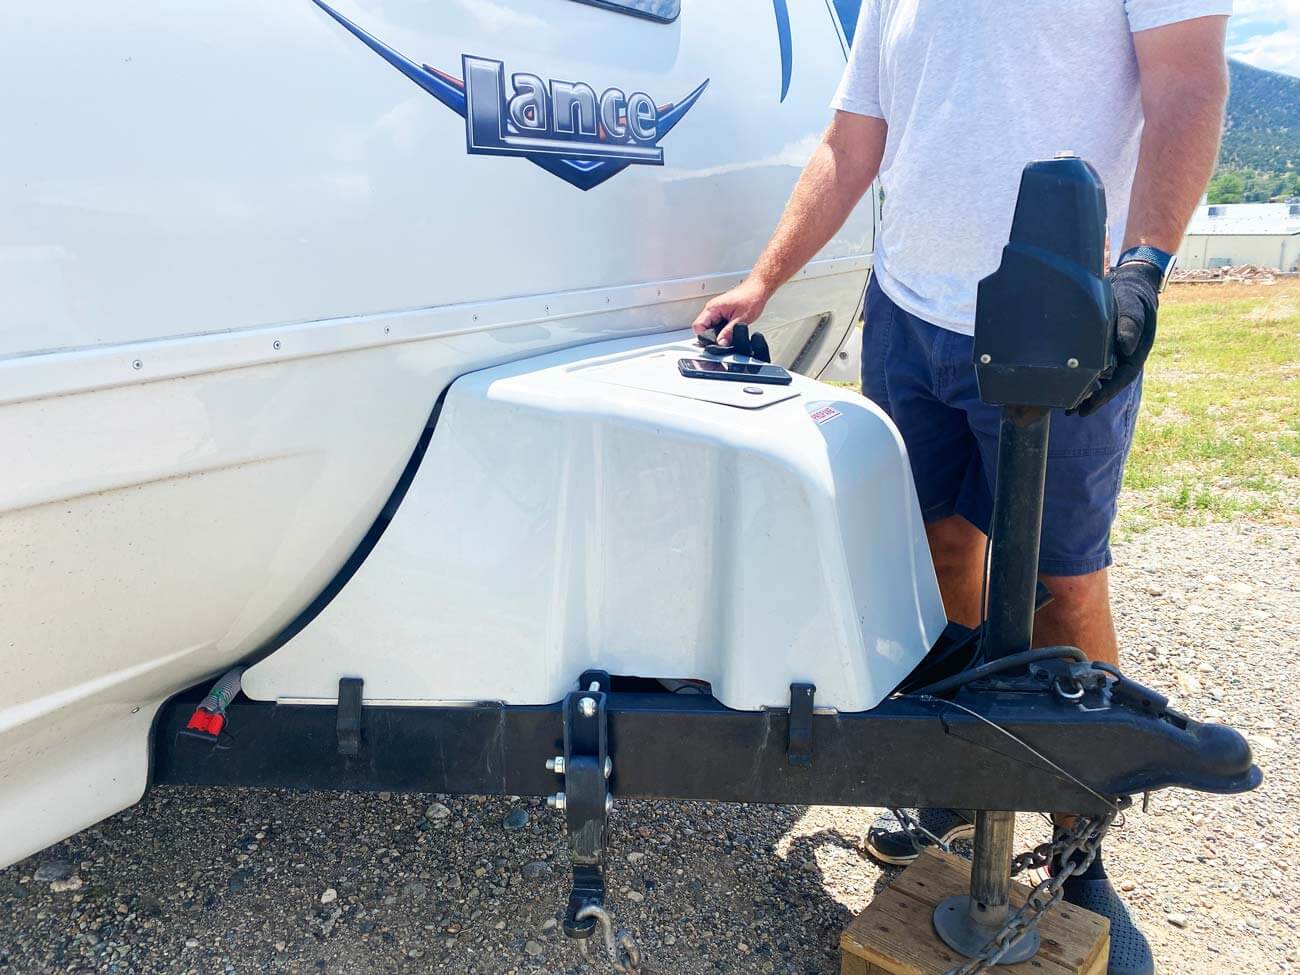
- Extend the tongue jack until pressure begins to be taken off the hitch ball. (Use a tongue jack stand or support block to protect the pad of your jack and reduce the amount of extension required.)
- Unplug the 7-pin electrical connector.
- Remove all equipped weight distribution or sway stopping devices, emergency breakaway brakes, and safety chains.
- Release the hitch ball lever and extend the tongue jack until the tow vehicle can be safely pulled forward.
- Using your leveler again, extend or retract the tongue jack until the RV is level front to back.
Put Down Stabilizers
When level, the stabilizer jacks (sometimes called scissor jacks) are extended to reduce the rocking that occurs in RVs from walking, wind, and other shaking. Stabilizers minimize strain on the frame of an RV when a slide out is moved in or out. Always put the stabilizers down before putting the slide out.
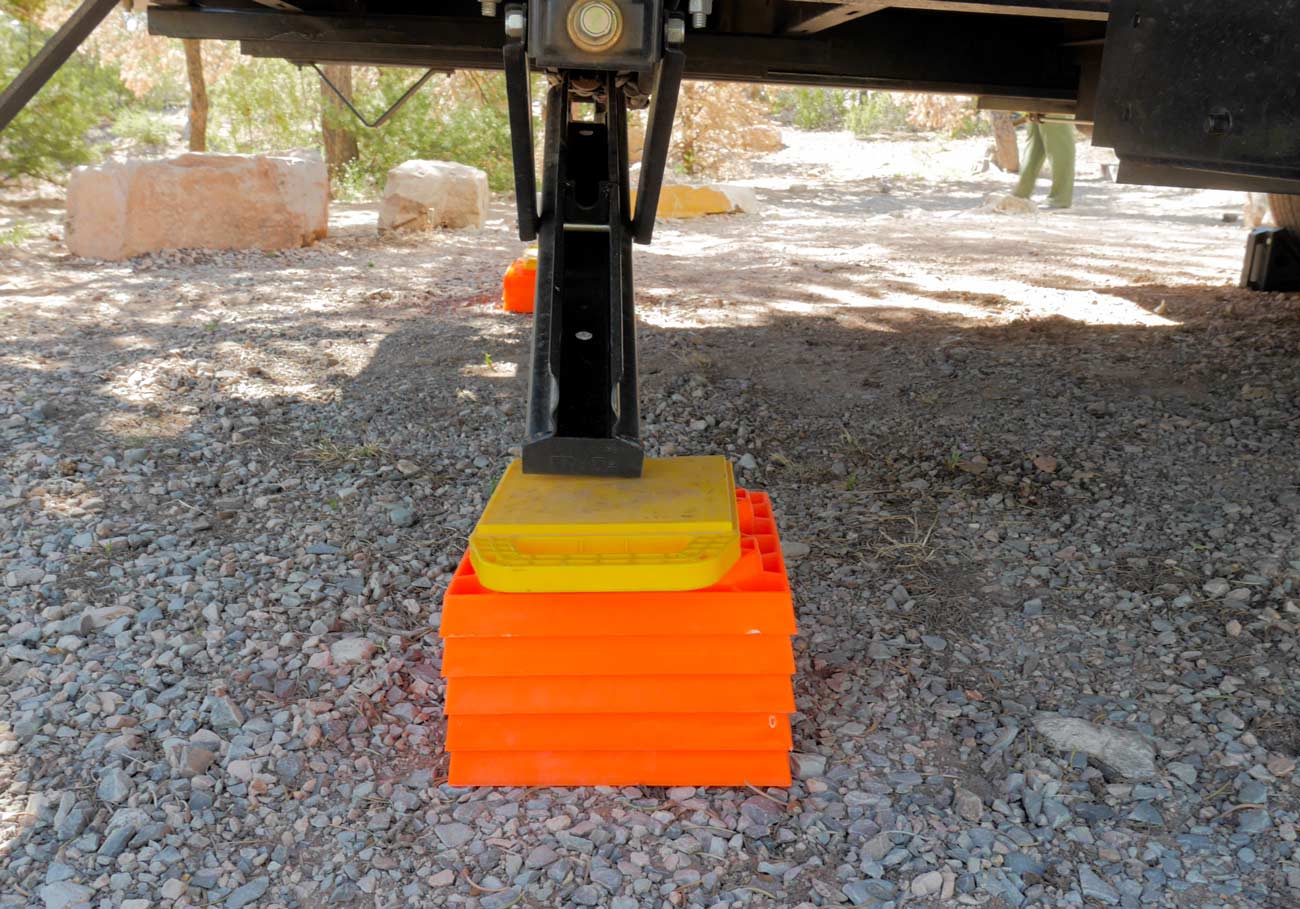
It is important to note that these are not the same as the automatic leveling systems in some motorhomes. If the stabilizer jacks are lifting the RV, you risk damaging the jacks and the RV. Stabilizing jacks support the RV by being pressed firmly to the ground, and no more.
Many RVs come with electric stabilizers that can be raised or extended with a switch. Manual jacks use a turn handle, but this drill adapter makes it less strenuous and speeds up the process. Jack pads are recommended to keep jacks from sinking and reduce exposure to dirt and moisture.
Connect Power
The electrical power cord is usually the first on the list to get attached. Often the slide needs to go out, or the air conditioning needs to come on. Plugging into electrical keeps those bigger loads from hitting the batteries.
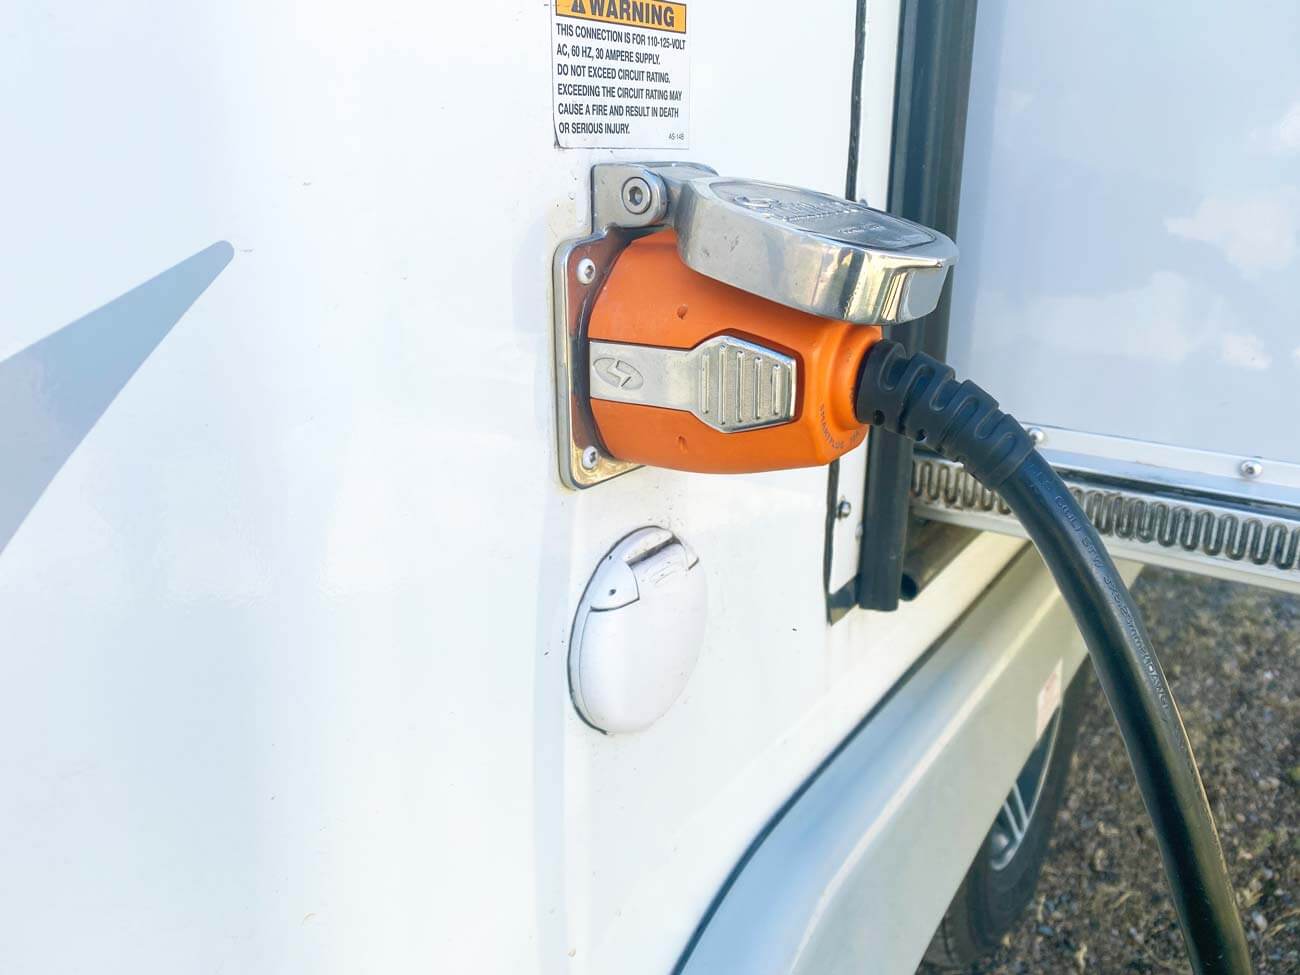
Your RV will require 30 or 50 amp service, but the campground may not have a site with your particular circuit. The good news is that an adapter easily connects a 30 amp plug to a 50 amp outlet or a 50 amp to a 30 amp , allowing you to stay in any available electrical spots.
Using a Surge Protector
You also will want to protect your RV from electrical disturbances with an RV surge protector. There are several types of surge protectors. A basic model surge protector plugs into the power pedestal and is the most affordable. Other versions of surge protectors are installed permanently in the RV , so you don’t need to set up anything at camp.
The pedestal’s breaker should be off until the RV is plugged in securely. Once the breaker is on, the surge protector will take a few seconds to examine the incoming power for problems like bad wiring before allowing electricity to flow. If there is a problem, the surge protector will display an error code and block the electricity.
Connect Water
If your site has a water spicket, a hose can plug directly into the RVs city water inlet or fill up the water tank. Use a hose rated for drinking water . Green water hoses have dangerous chemicals like lead, so skip those.
High water pressure can burst an RVs plumbing. Protect your RV with a water pressure regulator . A basic one does the job but can leave you with poor water flow. An adjustable water regulator set around 45 PSI protects most RVs and keeps the shower flowing nicely.
PRO TIP: Adding a Y-adapter at the spicket is a good tip for several reasons. One, it gives you a place to quickly wash your hands or hook up a black tank flush hose. Second, the lever is much more convenient to turn off and on when filling the water tank.
Water filtration.
Water filtration is a big topic and can be approached in many different ways. At a minimum, protect yourself with an inline one-micron water filter to reduce harmful contaminants, reduce odor and improve the taste. Add a pre-filter for two-stage filtration to reduce sediment, rust, and other particulates.
Advanced Water Filtering
It is debated if water passed through only inline filters is suitable for drinking. There are more advanced and expensive water purification systems if you plan to regularly drink from the RV water tap.
- If you have the countertop space, many people swear by the Berkey system .
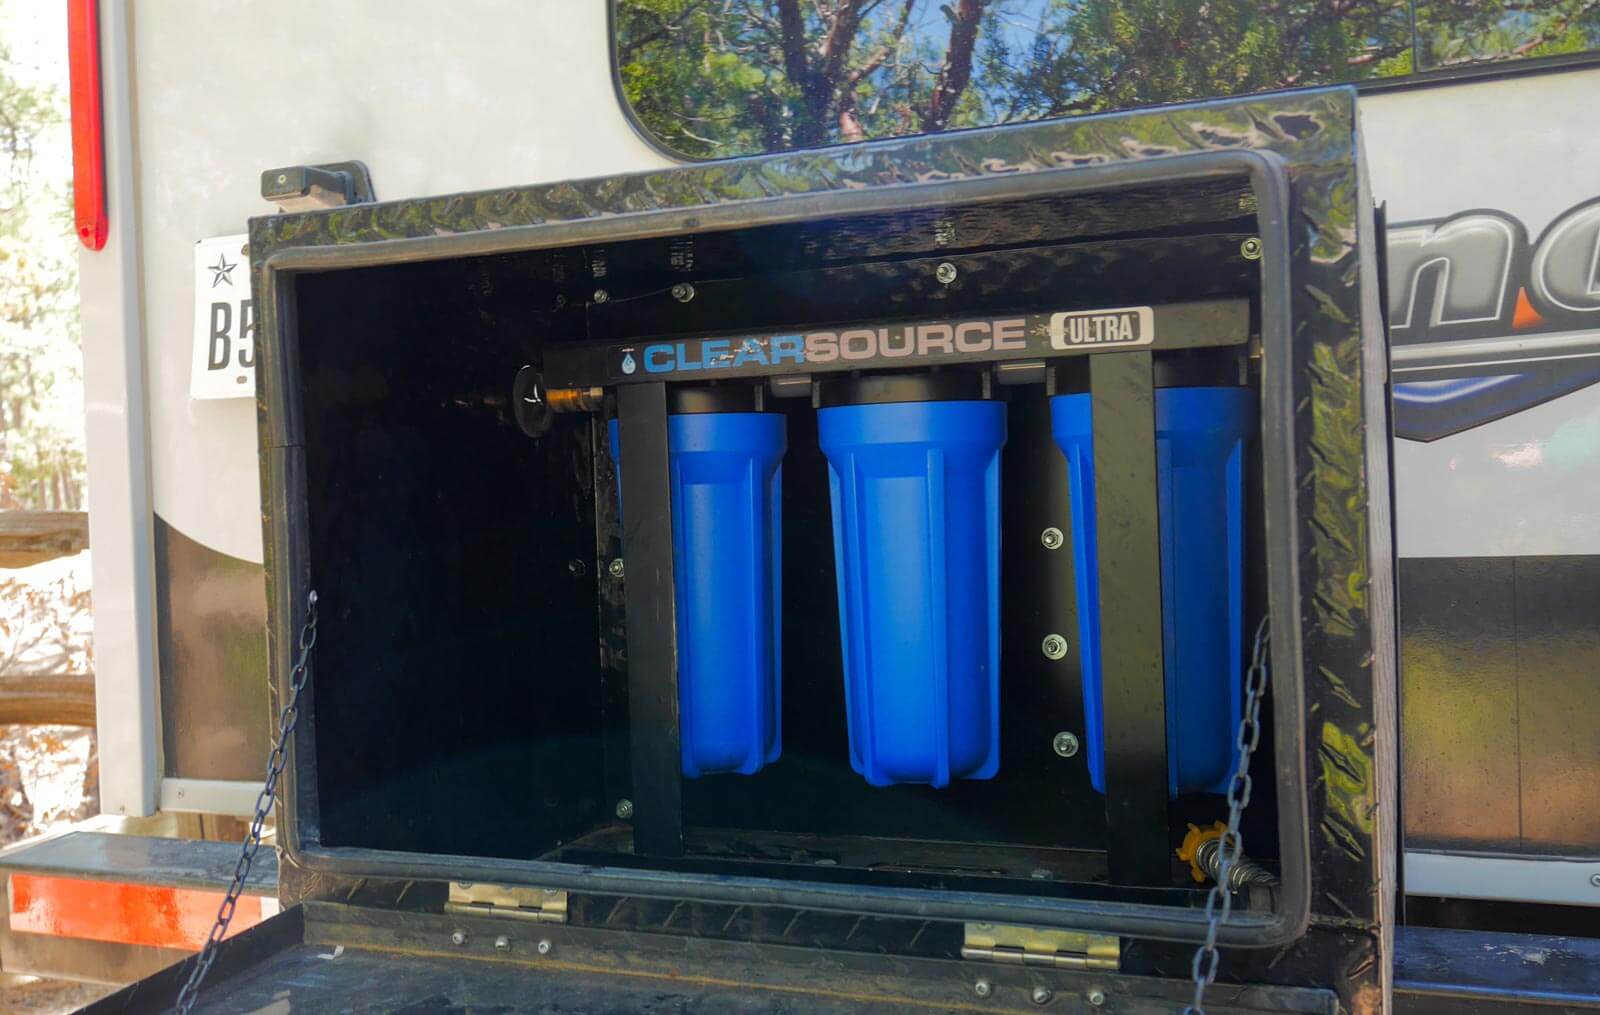
- Advanced water filtration systems that can be installed in storage areas are available from companies like Clearsource .
- Acuva systems use UV light to kill bacteria and viruses and are more compact and mount under the sink.
Connect Sewer Hose
Connecting the sewer at arrival can be a convenient way to dump as needed. If your sewer connection significantly intrudes on another camping spot, try to be courteous and wait until you’re not disturbing your neighbor. A pair of waterproof gloves is recommended to use while setting up your sewer connection.
Setting Up the Sewer Hose Support
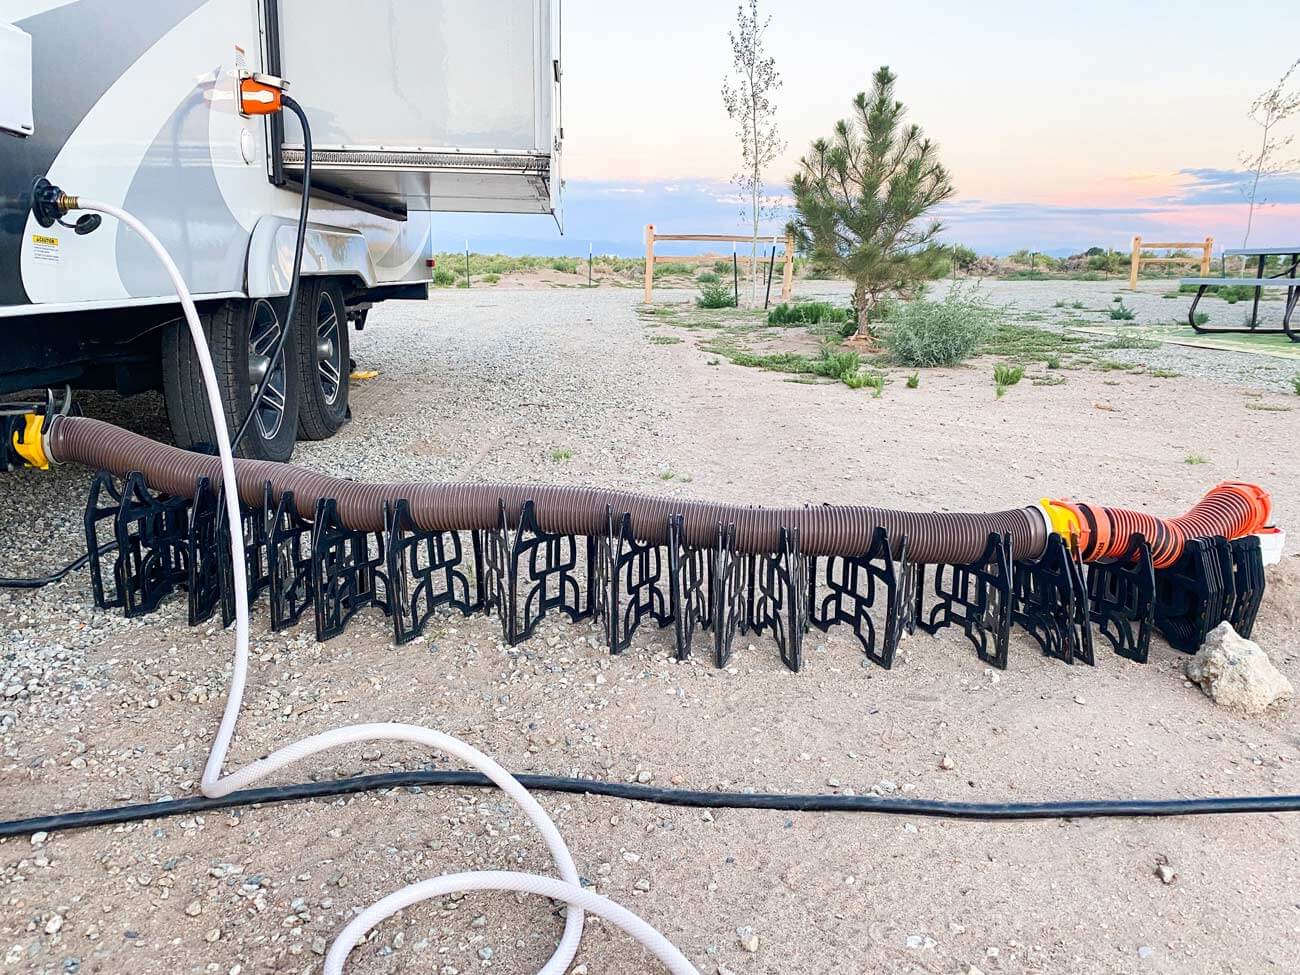
Use a sewer hose support to slope away from the RV to keep things moving and prevent build-up in the sewer hose. Lay out the support evenly, avoiding low spots and turns in the hose to make things clean when it comes time to disconnect.

Connecting the Hose
Attach the hose to the RV first, then lay the hose across the support. Remove the cap from the ground drain, quickly screw a clear elbow adapter into the threads that held the cap, and connect your hose to the adapter.
You’re ready to dump your tanks!
READ NEXT: For a complete list of travel trailer equipment to outfit your RV for travel, check out this list of travel trailer must-haves .
Finish setting up your camper trailer.
There may be items specific to your RV to complete your setup. You may have a slide that needs to come out, a satellite TV to set up, or an internet antenna.
Make your RV campsite setup feel like home with tables, chairs, lights, etc.
If you use your RV’s stove, you’ll also need to open the exhaust vent cover outside the RV.
We hope this guide and checklist will help you feel confident setting up your site. Now, sit back, relax, and enjoy your campsite, knowing it is ready to go!
Want more beginner tips on RVing and how to get started?
Check out our guide to preparing for full-time RV living, including info on choosing an RV, pros and cons of the lifestyle, RV gear lists, downsizing for RV life, and more.
Like this post? Save it on Pinterest for later.
Morgan, the founder of The Home That Roams, has been living nomadically for over five years. She began her journey traveling across the U.S. in a motorhome and cruising on a liveaboard sailing catamaran. Currently, she lives full-time in a travel trailer, sharing resources on RV living and boat life to help others downsize their lives and thrive in an alternative lifestyle.
Leave a Reply Cancel reply
Your email address will not be published. Required fields are marked *
Sign Me Up!
Learn how to live in an rv.
Get weekly tips on how to start traveling full-time in an RV.
View our privacy policy .
Privacy Overview

Most popular camping cities
Most popular camping states, best camping near me, rv hookup dos and dont’s: a beginner’s checklist.

- September 19, 2023
- Campground , camping , campsite , RV

RV hookups are essential to enjoying the comforts of home while on the road. Whether you’re a seasoned RV enthusiast or a beginner, understanding how to connect your vehicle to external resources properly is vital. This comprehensive article will serve as a beginner’s checklist, providing valuable dos and don’ts for a successful RV hookup experience. From essential equipment to safety precautions, maintenance tips, and an exploration of different hookup types, this guide will equip you with the knowledge necessary to navigate the world of RV hookups confidently.
In this article:
Essential Equipment for RV Hookups
Power Cords and Adapters
Water Hoses and Regulators
Sewer Hose and Connections
Dos for Properly Connecting RV Hookups
Conducting a site inspection.
Before setting up, inspect the campsite for the location and condition of the hookups. Look for hazards such as low-hanging branches or uneven ground that could affect your RV’s clearance or stability.
Properly Plugging in the Power Cord
Ensure your RV is turned off before connecting the power cord. Plug the cord into the campground’s electrical pedestal, then connect the other end to your RV. Double-check that the connection is secure and that you use the correct amperage for your RV’s electrical system.
Connecting to Water Supply
Connect your drinking water-safe hose to the campground’s water supply, ensuring it’s tightly secured. Open the water valve gradually to avoid sudden water pressure surges that could damage your RV’s plumbing.
Hooking up the Sewer Hose
Attach the sewer hose to your RV’s waste outlet, ensuring a tight connection. Then, connect the other end to the campground’s sewer hookup. Make sure both ends are properly sealed to prevent any leaks or odors.
Don’ts and Common Mistakes to Avoid
Overloading electrical connections.
Don’t overload the electrical system of your RV or the campground ‘ s supply. Be mindful of the appliances you’re using simultaneously, and switch off unnecessary electrical items to avoid tripping circuits or causing damage.
Mixing Up Water Sources
Avoid connecting your drinking water hose to non-potable water sources like the sewer hookup. This can lead to contamination and health hazards. Always use separate hoses for different purposes and clearly label them.
Incorrectly Handling Sewage Disposal
Never dump your waste tanks anywhere other than the designated sewage hookup. Improper disposal can harm the environment and create unsanitary conditions. Follow the campground’s rules and regulations regarding waste disposal.
Ignoring Weight and Balance Guidelines
Don’t overlook weight and balance guidelines for your RV. Properly distribute weight inside and when towing to maintain stability on the road. Overloading your RV can lead to poor handling and potential accidents.
Safety Precautions for RV Hookups
Understanding electrical safety.
Regarding RV hookups, electrical safety should be at the top of your priority list. Before plugging in your RV, ensure you understand your vehicle’s power source and electrical requirements. Using the right adapters and surge protectors is crucial to prevent any damage to your RV’s electrical system. Remember, a burnt-out electrical system is not the souvenir you want to bring back from your camping trip.
Water Safety and Filtration
Water is an essential part of any RV adventure, but ensuring it’s safe for your use is important. Before connecting to a water source, consider investing in a water filtration system to remove impurities. This will give you peace of mind and keep your RV’s plumbing tip-top shape. Don’t forget to pack a water pressure regulator to prevent unexpected water pressure surprises. Nobody wants a shower that feels like standing under a waterfall!
Handling Sewage Properly
I’ll spare you the details, but let’s say that dealing with sewage isn’t the most glamorous part of RV life. However, it’s a necessary evil if you want to enjoy all the comforts of home on the road. The golden rule here is always to use designated RV dump stations or hookups to dispose of your waste properly. Nobody wants a neighborhood scandal involving your RV and a rogue sewage hose. Trust me on this one.
Maintenance and Troubleshooting Tips
Regular inspection and cleaning.
Like any other vehicle, your RV needs regular TLC to keep running smoothly. Take some time to inspect and clean your RV’s hookups regularly. Look for wear and tear, loose connections, or leaks. A little maintenance now can save you from major headaches down the road. Plus, it gives you an excuse to wear a cool-looking tool belt and pretend you’re a fancy RV inspector.
Troubleshooting Common Issues
Despite your best efforts, your RV hookups can sometimes go wrong. It’s like they have a mind of their own. But fear not; troubleshooting common issues doesn’t have to be a nightmare. Check your circuit breakers, fuses, and GFCI outlets if you’re experiencing electrical problems. For water issues, check for air bubbles in the water lines or clogs in the filters. And if you’re dealing with sewage woes, double-check your valves and connections. Just be prepared to get a little dirty, metaphorically and possibly literally.
Understanding Different Types of RV Hookups
Full hookups vs. partial hookups.
When it comes to RV hookups, not all campsites are created equal. Some offer full hookups, which include electricity, water, and sewage connections, while others only provide partial hookups. Understanding the difference between the two can save you from disappointment on arrival. Remember, nothing ruins a camping trip like dreaming of a long, hot shower and realizing you’ve got nothing but a bucket and a prayer.
Differences in Amp Service
Amps might sound like something out of a sci-fi movie, but they’re an important part of your RV hookup experience. Different campsites offer varying amp services, usually 30 amps or 50 amps. Make sure you know which one your RV requires and what the campground offers. Trust me, you don’t want to be left in the dark, quite literally, because your RV is thirsty for a higher amp service.
Dry Camping and Boondocking
If you’re feeling adventurous and want to venture off the beaten path, dry camping, and boondocking might be right up your alley. Dry camping refers to camping without hookups, while boondocking involves camping in remote or undeveloped areas. While these options offer freedom and solitude, they require careful planning and self-sufficiency. Just be prepared to embrace your inner survivalist and live off the grid for a while. Don’t worry; your favorite reality TV show won’t be filming your adventures (unless you count your own GoPro footage).
Final Tips for a Successful RV Hookup Experience
So, you’re almost ready to embark on your RV hookup adventure? Fantastic! Here are some final tips to ensure a successful experience:
- Always carry extra hoses, adapters, and extension cords. You never know when you’ll need that extra length or a different connection.
- Don’t be shy about asking your fellow campers for advice or help. RV enthusiasts are a friendly bunch and love to share their wisdom.
- Be mindful of campground rules and etiquette. Nobody wants to be the noisy neighbor or the person who leaves their empty potato chip bag floating around the campsite.
- Finally, embrace the unexpected and have a sense of humor. RV life is full of surprises and unplanned adventures. Embrace the quirks, the mishaps, and the unexpected detours. After all, that’s what makes the journey memorable.
About the author

BookOutdoors Staff
Camping options near me.
RV Parks Near Me
Discover and book the best RV campsites near you
Tent Camping Near Me
Find the best campgrounds to pitch a tent
Glamping Resorts Near Me
Luxury camping options near you
Related Posts
RMS North America Unveils Powerful Integration with BookOutdoors, Boosting Revenue for Outdoor Hospitality Managers
SAN DIEGO, Calif.–In a strategic move to expand revenue opportunities for outdoor hospitality managers, RMS North America announces its partnership
Camping Tips For First-Timers: An Easy Guide
So, you’re looking online for camping tips because you’ve never done it before. You’re educating yourself so you can enjoy
Camping Etiquette: The Unwritten Rules We Follow
Camping etiquette, let’s talk about it. Camping is a cherished activity across our planet, and for good reason. This particular
Camping In Zion National Park: A Fellow Traveler’s Guide
Interested in camping in Zion National Park? Good for you! While there are tons of great options to explore Utah’s
Join our newsletter to get the latest!
© 2023 Outdoor Ventures, Inc. All rights reserved.

Home » Guides » How To Set Up A Travel Trailer
How To Set Up A Travel Trailer

- Last Updated: Oct 14, 2024
Are you thinking about hitting the open road in a travel trailer? If so, you’re in for a fun and rewarding experience! Travel trailers are a great way to see America, and they provide all of the comforts of home. But before you can start enjoying your travels, you need to set up your trailer properly.
In this blog post, we will walk you through the process of how to set up a travel trailer. By following our simple steps, you’ll be ready to hit the road in no time!

What Is A Travel Trailer And What Are The Benefits Of Owning One:
It is a type of RV that is towed behind a car or truck . It is typically much smaller than a motorhome and offers a more flexible and budget-friendly option for experiencing the joys of camping and road tripping . While travel trailers come in many different shapes and sizes, they all offer several advantages over traditional RVs. For one, travel trailers are typically much easier to maneuver and park than larger RVs. Additionally, they can be backed into tight spaces and parked without the need for a spacious RV lot.
Travel trailers also tend to be more affordable than motorhomes, making them a great option for budget-minded campers and road trippers. Lastly, travel trailers offer more flexibility when it comes to where you can camp; unlike motorhomes, which must be parked at an RV park or campground with hookups, travel trailers can be towed to nearly any location. Whether you’re looking to save money or have more freedom on your camping trips, owning a travel trailer may be the right choice for you.
Tips For Setting Up A Travel Trailer For the First Time:
If you are new to traveling in a travel trailer, there are a few things you should know before hitting the road. Here are a few tips to help you get started:
Choose Your Spot:
If you want to make sure you have a level spot to set up your trailer. You may also want to make sure that the surrounding area is clear of any large rocks or roots that could damage your trailer. If possible, find a spot that is already graveled or paved. This will make the setup and take it down much easier.
Jacks And Leveling Blocks:
Once you have found your spot, it’s time to get your jacks and leveling blocks out. You will want to place the leveling blocks under the trailer’s tires. This will help keep your trailer level and prevent it from shifting during setup. Once the leveling blocks are in place, you can begin to jack up the trailer. If you have a large trailer, you may need to use multiple jacks.
Hook Up Utilities:
Now that your trailer is level, it’s time to hook up the utilities. If you are hooked up to city water, simply connect your house to the water hookup on your trailer. If you are using a holding tank, fill the tank with water before connecting it to the trailer. Next, connect your power cord to the power hookup on your trailer. If you are using an RV generator, make sure it is full of fuel before starting it up.
Set Up Awnings and Slide-Outs:
Most RVs come equipped with awnings and slide-outs. These can be great features, but they also add a lot of extra work when setting up your RV. To set up your awnings, simply extend them out until they are fully open. For setting your slide-outs, first extend them out fully, then use a manual crank to lower them down into place.
Hook Up TV and Internet:
If you plan on spending any type of significant amount of time on your RV, you will probably want to hook up a TV and Internet connection. To do this, simply connect an HDMI cable from your TV to the HDMI port on your RV’s control panel. If you don’t have an HDMI port, you can use an adapter to connect to another type of cable. For the internet, there are a couple of different options available. You can either use a mobile hotspot or connect directly to the campground’s WiFi network (if available).
Stock The Fridge :
One of the last things you’ll want to do before heading out on your trip is stock the fridge with food and drinks. This way, you’ll have everything you need once you arrive at your destination.
Load The Beds :
Another thing you’ll want to do before hitting the road is to load the beds with sheets, pillows, and blankets. This way, you’ll be able to relax as soon as you arrive at your campsite.
Check All The Lights:
Before driving off, take a walk around your RV and make sure all the lights are working properly. This includes both the interior and exterior lights.
Test The Brakes :
Before pulling out of your driveway, test the brakes by depressing the pedal firmly several times. This will ensure that they are working properly and help prevent any accidents while on the road.
Enjoy The Ride :
Now that everything is all set, it’s time to sit back, relax, and enjoy the ride! These tips should help make setting up your RV for the first time a breeze. So get out there and explore all that nature has to offer!
Some Essential Steps Before Driving Off:
Check all the systems in your travel trailer before setting off on your trip. This includes plumbing, electrical, and propane systems. Make sure everything is in working order and that you understand how to operate each system.
Practice setting up and breaking down your travel trailer in your driveway. This will help you get familiar with the process and give you a chance to work out any kinks. When you do set up camp, take your time and be patient. Read all the instructions carefully and double-check all your connections before turning on any switches or opening any valves.
By following these simple tips, you can ensure that your first experience traveling in a travel trailer is a positive one.
How To Store And Maintain Your Travel Trailer:
If you’re planning to take your travel trailer on the road, you’ll need to know how to properly store and maintain it. Make sure to clean the trailer before storing it. This will help prevent mold and mildew from developing. If possible, store the trailer in a covered area. This will protect it from the elements and keep it clean.
Level the trailer before storing it. This will help prevent structural damage and tire wear. Finally, check the trailer’s tires and brakes before each trip. By following these simple tips, you can ensure that your travel trailer is safe and ready for adventure.
Wrapping Up:
So, there you have it! Everything you need to know to set up your travel trailer. By following these simple steps, you’ll be on your way to enjoying the great outdoors in no time. Now that you are an expert on setting up a travel trailer, what are you waiting for? Get out there and explore!
Other Related Posts:
- How Tall is a Travel Trailer? (And Why You Need to Know)
- Best Bike Rack For Travel Trailer
- What Size Generator For A Travel Trailer
Leave a Comment Cancel reply
Recently published guides.
Buying a Generator for RV Life
RV Refrigerators: How Do They Work?

How to Repair Norcold Fridge Flap

IMAGES
VIDEO
COMMENTS
It all starts with learning how to hitch up a travel trailer correctly so you guarantee a secure connection between your towable camper and your tow vehicle. Let’s cover everything you need to know to hitch up your trailer properly.
Before picking up your trailer, you will need to have a tow hitch that’s appropriate and safe to connect your trailer to your tow vehicle, so you’ll need to know certain information about your trailer (like its gross trailer weight and coupler height) to purchase the correct parts.
This video has been updated with a new video, see the new video here: https://youtu.be/ermDoIB-y7s💥UPDATE: Before completing step 1 below - check the powe...
In this blog post, I'll guide you through the process of hooking up, setting up, and taking down the Winnebago Micro Minnie travel trailer, providing tips on how to do it safely, and managing to do it solo with kids.
These steps and tips are the same whether you drive a motorhome, travel trailer, fifth wheel, or any camper. Hookups are essentially the same wherever you camp, whether it's an RV park, state parks, national parks, or any other place that offers hookups.
Join us as we show you how to hook up your travel trailer. To see more how to videos visit http://cmpngwrld.com/2hbIAQm
Check to Make Sure You Can Reach Hookups: Verify that your RV’s cords and hoses can comfortably reach the site’s water, electrical, and, if applicable, sewer hookups. Level RV: Use leveling blocks or your RV’s built-in leveling system to ensure a stable and even living area.
When setting up your RV travel trailer as a beginner, it's essential to take your time and do it correctly. You don't want to rush and wind up with an RV that isn't prepared for an enjoyable camping experience. Here, you'll learn how to unhitch your trailer and all the details of RV hookups.
Explore the essential RV hookup dos and don'ts with our beginner's checklist! Learn how to make the most of your RV site connections while avoiding common pitfalls for a worry-free camping experience.
Hook Up Utilities: Now that your trailer is level, it’s time to hook up the utilities. If you are hooked up to city water, simply connect your house to the water hookup on your trailer. If you are using a holding tank, fill the tank with water before connecting it to the trailer. Next, connect your power cord to the power hookup on your trailer.