
This post may contain affiliate links or mention our own products, please check out our disclosure policy

It’s So Easy To Seal RV Seams With Dicor
- Rene Agredano
- July 18, 2017
- 12 Comments
Table of Contents

Use self-leveling Dicor to avoid this look.
Two words in the English language will keep your RV in the best condition possible: preventive maintenance. A host of annual RV tasks are sometimes a chore but they’re usually not too difficult or time-consuming. One of the easiest jobs is taking time to seal RV seams with Dicor RV Lap Sealant.
Sealing RV seams is important because water damage often happens at the corners where RV walls are joined together. Although RV walls leave the factory with sealant already applied to the seams, over time UV light and weather breaks the sealant down.
This creates gaps in the corners which allow moisture to get inside. If that happens, the RV becomes a victim of fiberglass RV delamination , an unattractive defect that is impossible to fix and takes every ounce of resale value out of the unit.
The good news is that you can protect your RV from this problem if you take annual measures to re-seal the exterior seams on your walls and roof seams with Dicor Lap Sealant . But don’t head to your nearest RV repair shop to get the job done. This task is so simple, anyone can do it.
Why use Dicor instead of caulk?
Don’t reach for silicone caulk to seal your exterior seams. Although this material is waterproof, over time it dries to a hard finish and cracks. Removing it is difficult and messy.
Dicor Lap Sealant , on the other hand, never hardens even after years of ultraviolet light exposure. This seam sealing product remains flexible and water-tight over time.
The only disadvantage with Dicor is that it can get ugly and dirty. Also, after many years it has a tendency to shrink and separate. That’s OK though, nothing’s perfect.
Frequently inspecting all exterior seams at roof, walls, trim, vents, and light fixtures will prevent any problems resulting from Dicor’s weaknesses.
Many RVs leave the lot with messy Dicor already applied to the fiberglass wall seams. Don’t worry if yours is one of them.
Sealing RV wall seams the right way
Once you are fed up with the droopy looking brown goop on your rig, all you need is some extra time to remove the old sealant and replace it with the right stuff.
Caulking tools or some sort of dull plastic blade make it easy to remove the bulk of old Dicor. Use a rag or sponge and some alcohol to get rid of the remaining residue.
Don’t start the job without purchasing the right type of lap sealant. Dicor is the most popular brand name.
You’ll find it in a few different shades, but there are just two types of Dicor you want to pay attention to when stocking up:
- Self Leveling Dicor is more fluid. It’s best used on the roof or flat surfaces where even spreading of the sealant is desired.
- Non-Leveling Dicor doesn’t sag as much. It’s best for applying to trim on vertical surfaces.
Make sure you have an adequate supply ready for your job. For our 27-foot RV, we used four tubes to complete the chore. Larger RVs require more Dicor. You may also want to keep some handy for emergency repairs.
Use a steady hand with a 3/8″± bead of sealant then apply long, smooth strips one at a time. Do not try to smooth out the sealant with your finger, as you might when applying caulk. Dicor is very sticky before it dries and will make a mess on your hand.
Resealing the trim on your RV is a time-consuming job, but the reward is a clean looking rig with far less potential for expensive water damage and delamination.
Track your RV maintenance
Keep track of all your RV maintenance with an online tool such as RV LIFE Maintenance . Not only can you keep all your maintenance records and documents in one place, you’ll receive timely reminders via email when maintenance is due and potentially avoid a costly repair or serious accident.
You May Also Like:
Tech tips: avoiding sticky valves.

A sticky holding tank valve is a pain in the neck. A stuck (or broken) holding tank valve is a really big issue if it happens, but can easily be prevented. An understanding of how dump valves work helps us take better care of them. All that “goop” in your black water and gray water waste tanks is held in place by the tanks’ dump valves. A little plastic gate rides between two rubber seals (one on the outside of the gate and one on the inside), preventing the stuff from rolling out. The gate is pulled aside, or open, by an attached stainless steel rod. A small T-shaped handle allows you to grab the rod and pull back the gate, permitting the contents to flush forth.
How to Stabilize Your RV
On walking through your RV, you may find yourself singing a refrain from “Rock Around the Clock.” It’s true, RVs, being built

How To Get Tree Sap Off Your RV Awning
Did you get tree sap on your RV awning? Here’s how to get clean it off and keep your RV awning from getting stained in the future.
12 thoughts on “ It’s So Easy To Seal RV Seams With Dicor ”
Puttingblue paint tape on the edge ot the area to apply the Dicor makes it look like a seal from the factory after you remove the tape. Do not wait too long to remove it as the tape will not be come off in a whole.
Good advice. thanks!
I learned long ago that the best way to get an even seal is to use fineline tape from your local NAPA. you can smooth the seam out using rubber gloves dipped in the solvent for the sealant you are using.
Thanks good advice.
Quad caulking works great. Never hardens. Many colors. Uerathane. Home Depot has it. Use rubber gloves and smear it smooth after applying. ☮️
How long does it last Jeff and would you choose it over dicor now, or whats your reason for using quad caulk?
Wldnt u be able to tell if roof was leaking inside? I think it’s my seams
I never would have thought of the tape trick. Great idea!
I’m a former RV engineer…..Your picture appears to be a buytl eruption. Butyl tape is the big ‘dirt magnet’, It is used under the lip of the fixture creating the lap joint. The Dircor sealant is the ‘cap’ to the lap joint. The butyl NEVER dries NOR ‘SKIMS-OVER’ so if it is exposed, every bit of dirt clings. The butyl also ‘creeps’ meaning it slowly oozes out as long as there is pressure. If you are one who checks and tightens the screws on your windows, you will find the butly ooze out as a result of the increased pressure. The key to a clean joint is to clean off all of the butyl that squeezes out before you apply your lap sealant.
Great tip with the butyl!
As a seasoned camper, I would say that RV caulks are essential to have during any trip. You should use this Dicor 501LSW-1 Lap Sealant. It can prevent leaks and stay sturdy even when rain pours down on it. It also has very strong adhesion, which makes it very sticky and able to hold still on pretty much any material. Dicor is much better than silicone, which will crack, leak, peel, and doesn’t self-level. Also, it doesn’t have any discoloration over time. You’ll also be glad to know that this sealant is UV resistant. That’s another reason why it doesn’t deteriorate no matter how much you use your RV.
You’ll also be glad to know that this sealant is UV resistant. That’s another reason why it doesn’t deteriorate no matter how much you use your RV.
Leave a Reply Cancel reply
Your email address will not be published. Required fields are marked *
Save my name, email, and website in this browser for the next time I comment.
Welcome! Please follow these guidelines:
- Be kind and respectful.
- Keep comments relevant to the article.
- Avoid insults, threats, profanity, and offensive remarks.
- Refrain from discussing gun rights, politics, or religion.
- Do not post misleading information, personal details, or spam.
We may hide or remove comments at our discretion.
I have read and accepted the Comment Guidelines and Privacy Policy *
Recent Posts

Browse By Category
- Find a Location
What Is the Best RV Roof Sealant?

These are the most popular roof material types, along with some advantages of each:
Technician Tip: Consult your manufacturer or owner’s manual to confirm which RV roof type your unit has.
What Is the Difference Between RV Roof Coating and Sealant?

Though the terms are sometimes used interchangeably, a coating is used to seal (or reseal) an entire RV roof, while an RV roof sealant is used to reseal roof edges or patch smaller damaged or worn areas of your RV’s roof membrane.
We provide recommendations for RV roof coatings and sealants below to give you the most comprehensive selection.
Picks for the Best Sealant for RV Roofs
Our list of the best RV roof sealant products includes at least one option for each RV roof type. It also includes an RV roof coating option for the common RV roof types, giving you a solution for a DIY roof re-sealing project. If you don’t already have one, pick up a caulking gun for easy roof sealant application.
Best RV Rubber Roof Sealant: Dicor Self Leveling Lap Sealant

The Dicor family of self leveling lap sealants is our top choice for RVs with EPDM, TPO, and PVC rubber roofs. With various colors available, you can find your desired choice for resealing around roof vents, air conditioners, vent pipes, and aftermarket roof-mounted accessories.
These RV roof sealants are UV-stabilized to reduce deterioration and discoloration with prolonged sun exposure. They also use a HAPS-free (HAPS = hazardous air pollutants) formula, making them cleaner and safer to use on your RV.
Technician Tip: Whether self-leveling or non-sag, Dicor sealants are extremely consistent and last long when applied according to the instructions.
Best RV Rubber Roof Coating: Dicor Rubber Roof Coating System

If you need a solution for resealing an entire RV roof, Dicor’s rubber roof coating system works on EPDM, TPO, and PVC roof membranes. On average, an 8’ x 30’ RV roof would require four gallons for a complete reseal, as Dicor recommends applying a minimum of two coats at a coverage rate of one gallon per 125 square feet of roof surface.
Technician T ip: This multi-stage system must be applied properly, but it provides an affordable option for many roofs needing major repairs.
Best Sealant for Fiberglass RV Roof: Geocel ProFlex RV™ Sealant, Clear

We recommend this clear Geocel sealant for patching or resealing smaller areas on a fiberglass RV roof. It’s a CARB-compliant (CARB = California Air Resources Board) formula that offers better adhesion, even when damp, and improved elasticity compared to silicone sealants.
This clear formula can be painted over, making it easy to match your RV’s exterior color after completing the repair. The formula also displaces water in RV seams or joints as it’s applied, further aiding a watertight seal.
Technician Tip: Geocel goes on accurately and finishes clean. It lasts and lasts on properly prepared surfaces. It sets up quickly as well, so work in small sections.
Best Fiberglass RV Roof Coating: Dicor Fiberglass RV Roof Coating

Reseal an entire fiberglass RV roof with this one-gallon roof coating. The bright white finish is designed to improve your roof’s reflectivity, keeping the interior temperature cooler. Once dry, the flexible roof coating resists mold and mildew.
One gallon is designed to cover approximately 350 square feet of RV roof area. Dicor recommends a minimum of two coats to optimize the performance of this roof coating. The first coat must be dry before applying the second coat, and the roof will need at least 24 hours for a complete cure.
Technician Tip: Unlike rubber membranes, fiberglass must be carefully prepped and only products engineered specifically for it should be used to ensure lasting results like you get from this coating.
Best Aluminum RV Roof Sealant: AP Product Sikasil

Airstream is one of the most iconic aluminum RVs, so we went to them for an aluminum RV roof sealant recommendation. Sikasil was the answer, and I won’t argue.
This quick-curing silicone sealant comes in multiple colors and bonds to aluminum substrates without a primer. It’s used in RV production because of its long service life, enhanced adhesion, fast curing, and high early green strength.
Here are the different color options:
Technician Tip: Color alone is not Sika’s only choice. They have a broad selection of products formulated for specific applications, so be sure you have received the correct type, not just the correct color. Sealing aluminum rooftops is challenging, and inferior products may fail in as few as 30 days.
Best Aluminum RV Roof Coating: Dicor Metal Roof RV Coating

We recommend Dicor’s metal roof RV coating for resealing the entire roof of an aluminum RV. It’s an elastomeric coating that forms a rubber barrier on any metal, aluminum, steel, or previously coated RV roof. Note that you must apply Coating-Ready Cover Tape to the roof’s surface before using this metal RV roof coating.
Best Self Leveling RV Roof Sealant: Dicor Self Leveling Lap Sealant

As mentioned above, the Dicor family of products takes the top spot for best self leveling RV roof sealants. Their effectiveness, easy application, and range of available colors make them hard to beat. Here are the different color options to match your RV’s roof:
- Dove Bright White
Technician Tip: Dicor sealants will work on all roofing materials. Not all sealants are formulated to bond to the harder and less porous surfaces as Dicor is, and they may require additional steps or primers to work as intended on those challenging membranes. The broader range of colors and consistencies from Dicor set them apart.
Runner Up: Alpha Systems Self Leveling Lap Sealant

Alpha Systems also makes a useful collection of self leveling lap sealants. Like the Dicor products, they’re made for horizontal applications and are designed to block air and moisture intrusion while offering excellent weather resistance.
Here are your color options:
Best Sealant for RV Roof Seams: Heng’s LiquidRoofTape

For an easy brush application, we recommend Heng’s LiquidRoofTape for resealing RV roof seams. This liquid silicone solution is strengthened by microfibers and designed for use around roof vents, skylights, air conditioners, antennas, vent caps, and other factory-equipped or aftermarket roof-mounted accessories.
Best RV Roof Sealant Tape: Quick Roof Extreme Repair Tape

Use Quick Roof Extreme Repair Tape as a non-liquid RV roof sealant. Their tape products are compatible with EPDM, TPO, PVC, metal, fiberglass, vinyl, and even wood RV roof finishes. Plus, they withstand hardening, cracking, and shrinking over time.
Here are your size and color options:
- White, 4” x 25’
- White, 6” x 25’
- White, 4” x 6’
- White, 8” x 8” Patch
- Clear, 4” x 20’
- Clear, 4” x 6’
Technician Tip: When using, follow all surface prep instructions closely. Avoid feeding from the roll. Lay it out along the seam first and cut it to length. Position it atop the seam, carefully peel away the backer in short sections, and press it into place over the seam. After working to the end of the seam, work the tape tightly into the seam using a clean, dry cloth. Never allow the sticky side of the tape to fold back on itself. If this happens, do not attempt to pull it apart and reuse it, as it will fail prematurely. Simply cut out the bad section, overlap where you left off, and continue. If gaps or puckers appear, rub them down as much as possible and apply a self leveling lap sealant along that edge.
Runner Up: Dicor Seal-Tite Sealing Tape

The Seal-Tite Sealing Tape from Dicor only comes in as runner-up for the best RV roof sealant tape because Quick Roof offers a few more size and color options. This product creates a permanent seal over damaged RV roof sections but can also be used to repair sidewalls, holding tanks, and other afflicted areas.
- White, 4” x 50’
- White, 6” x 6” Patch
- Gray, 6” x 25’
- Gray, 2” x 50’ Corner Seal
Technician Tip: These offer a quick and reliable repair for seams, tears, and pin holes. With proper surface prep, all of the products can offer a permanent repair that is affordable. The handy sizes and colors offered by Quick Roof and Dicor set them apart from the others for roof and awning repairs in the field.
FAQs About RV Roof Sealants

Finding the right sealant for your RV’s roof is just the start. These commonly asked roof sealant questions will help you learn more about maintaining your RV’s roof.
How many tubes of sealant do I need for an RV roof?
On average, one 10.3-ounce tube of RV roof sealant will cover just under 25 feet of RV roof edge, calculated for a bead with a quarter-inch width and depth.
Let’s say you have a 30-foot RV roof that’s 8 feet wide, giving you a total of 76 feet of roof edge to seal. Using that same quarter-inch wide and deep bead, you’d need a minimum of four 10.3-ounce tubes of sealant to complete the job.
Technician Tip: This calculation accounts for 5% wastage, which may be conservative.
Is it OK to use Flex Seal on an RV roof?
Only use Flex Seal on an RV roof in an emergency. It can work well in areas that aren’t exposed to the sun, but the product’s lack of UV stabilization can cause it to crack and fail when used in areas that get prolonged sun exposure. Additionally, FlexSeal’s silicone products can leave behind a residue that inhibits adhesion for other products, compromising your ability to complete future repairs.
How long does RV roof sealant last?
Your RV’s roof should be inspected annually (at minimum), but the original roof sealant from the manufacturer is rated to last 10 to 20 years. Of course, that rating is dependent on proper maintenance, such as using an RV cover to minimize exposure to UV, moisture, and dirt. Realistically, the need to apply roof sealant will vary. We encourage RV owners to be diligent about inspecting their roofs. You can learn to inspect your RV here . Furthermore, you may schedule a free courtesy inspection at your nearest Camping World, which includes a roof inspection.
Use these additional resources to bolster your knowledge about RV roof maintenance, when it’s required, and what to look for:
- How To Do an RV Roof Inspection
- Everything You Need to Know About RV Seams & Sealants
Do you have a favorite RV roof sealant? Tell us your choice and why it’s your preference in the comments below.
Leave Your Comment Cancel Reply
Save my name, email, and website in this browser for the next time I comment.
Shop By RV Type

Your Adventure Awaits
Copyright © 2023 cwi, llc all rights reserved.
- RV Glossary |
- Privacy Policy |
- California Privacy Rights |
- Do Not Sell or Share My Personal Information |
- Targeted Advertising Opt Out |
- Terms of Use
RV 101® / RV Education 101®
How do i reseal my rv roof seams & sealants.

Question: I am taking my RV out of storage and plan to inspect the seams and sealants on the RV roof for any damage. Can you tell me what products and methods work best for re-caulking your RV roof and how often the maintenance should be done?
Answer: That’s a great question and quite often I see advice on this topic that is completely wrong. Let me begin by saying that it is important that you use sealants compatible with the material your RV roof and other products you are sealing are constructed out of.
If you have the RV owner’s manual it will usually specify intervals that you should inspect and perform routine roof maintenance on your RV. This is extremely important because in many cases the RV warranty can be voided if these inspection and maintenance intervals aren’t followed.
I personally use Dicor Lap sealants to reseal and maintain RV roofs. These are the same sealants used in the RV industry by many Original Equipment Manufacturers (OEMs), and they are a popular choice for aftermarket use. But it’s important that you use the right sealant for your type of RV roof. Dicor EPDM lap sealant is specially formulated for EPDM roofing and it works on galvanized metal, aluminum and fiberglass roofs. The Dicor Ultra Sealant System is specially formulated for RV TPO roofing.
Caution: Whenever you are working on your RV roof exercise caution. A fall could result in serious injury or death.

When you inspect the seams and sealants on your RV roof look for cracked or dried out sealants that might be separating and allowing water to get penetrate the surface of the roof. If during your inspections you identify any potential leaks in the old sealant it will need to be resealed. It’s not that difficult to do. One important step is to see if the water has already damaged the roof’s surface around the area where it has penetrated the sealant. You can go inside the RV and feel around the area for soft spots or look for signs of water staining. If the roof structure is damaged it will require repairs much more extensive than we are discussing here.
Our goal is to identify potential leaks and seal the area before there is any damage to the roof. If I identify any cracked or separated sealant during an inspection I remove any old sealant that is loose around the area I am resealing. To do this I use a plastic squeegee similar to what is used when you do body work on a vehicle. They can be purchased at any auto parts store. Be extremely careful not to tear the rubber roofing material as you remove old sealant. When the loose cracked or dried out sealant is removed from the suspect area I clean it with denatured alcohol on a rag and use the correct Dicor sealant or other compatible sealant with a caulking gun to reseal the area. Note: If the old sealant is cracked, but not loose or separating from the surface it is not necessary to remove the old sealant. Clean the area using denatured alcohol and add new sealant over the area that is cracked.
That’s all there is to it.
If you read an article about resealing your RV roof and it says to get up on the roof with some silicone sealant to reseal a rubber roof the author does not know what they are talking about. Follow the inspection and maintenance intervals in your RV owner’s manual and reseal any potential damage with a sealant compatible with yor RV roofing material and your RV roof will last for many trouble-free years.
If you aren’t comfortable working on the RV roof take it to an authorized repair facility to have the work performed. You should also inspect and reseal all of the other seams and sealants on the exterior of your RV at regular intervals. Consult the RV owner’s manual or your RV dealer for sealants compatible with the surface you are attempting to repair.
For more information on RV roof care and maintenance watch the videos posted below.
Subscribe to our New RV 101® Youtube Channel

Happy RV Learning, Mark Polk
RV Education 101
Follow us on FACEBOOK
Subscribe to our Free Digital RV Consumer Magazine:
Copyright by Mark Polk owner of RV Education 101 – All Rights Reserved
Share this:
Posted in Beginning RVer , General , RV Maintenance , RV products , RV Tips & Hints | Tags: how to maintain your RV roof , how to recaulk RV roof , how to reseal RV roof , repair RV roof , RV roof inspections , RV roof maintenance , RV roof sealant
[…] How do I Reseal my RV Roof Seams & Sealants? Share this:TwitterFacebookEmailDiggPrintStumbleUponLike this:LikeBe the first to like this […]
By: RV Maintenance « RV Education 101® on 9:31 am at 9:31 am
- Beginning RVer
- Detroit NAIAS GM
- Free RV Consumer E-Magazine
- Mark's RV Garage Series
- RV Batteries
- RV Campgrounds
- RV Destinations
- RV Electrical System
- RV Maintenance
- RV products
- RV Tips & Hints
- RV Training
- Trailer Towing Topics
- Uncategorized

RV Education 101® —and— RV Online Training
Subscribe to our RV 101® Youtube Channel

Search Site
Join in the conversation:.

We hope you'll join the conversation with us!
Follow Blog via email
Enter your email address to follow this blog and receive notifications of new posts by email.
Email Address:
RV Videos on Demand

Helpful products:
Tired of dead batteries? Stop the problem for good with the charger, maintainer & conditioner that Mark uses on all his batteries: The Battery Minder
Need a sway control hitch? Learn More about the Equal-i-zer® The Original Equal-i-zer Sway control hitch has been enjoyed by thousands of trailer owners for over 50 years. Learn more about the Equal-i-zer hitch, and find which hitch will work best for you
© Copyright RV Education 101 ALL RIGHTS RESERVED
We welcome you to LINK to this blog or any post within this blog. Full attribution must be given by using UNALTERED CLICKABLE links in addition to giving FULL credit in plain view to Mark Polk and RV Education 101 with a SPECIFIC CLICKABLE link to the ORIGINAL content. This content may not be used for any commercial use or by making money in any way shape or form. You may not claim any of this content as your idea. Other unauthorized duplication and/or use of this material without the express written consent of Mark Polk is strictly prohibited. © Copyright RV Education 101 ALL RIGHTS RESERVED
Recent Posts
- Van Conversion Project Video Series
- RV University Online Training- RV 101® How To Video Tips
- Trailer Towing Basics
- RV Safety, by Mark Polk, a trusted resource for RV Education
Blog at WordPress.com.

- Already have a WordPress.com account? Log in now.
- Subscribe Subscribed
- Copy shortlink
- Report this content
- View post in Reader
- Manage subscriptions
- Collapse this bar
You must be logged in to post a comment.
This post may contain affiliate links or mention our own products, please check out our disclosure policy .
Tips for RV Seal and Seam Maintenance
Published on April 10th, 2024 by Chelsea Gonzales This post was updated on May 1st, 2024
RV seal and seam maintenance is one of the most important maintenance tasks for any RV owner, and it’s one I always, always make sure to stay on top of. Your RV’s seals are what keep water out of the camper, preventing mold and wood rot —both major issues that nobody wants to deal with.
Unfortunately, many people don’t have any idea how to go about resealing their RV. That’s why I’m here today. Below is everything I’ve learned over the years about RV seal and seam maintenance. In this article I share how to inspect, repair, or replace RV seals in the roof, walls, and slide outs.
How to Inspect Three Common RV Seals: Exterior Wall Seams, Roof and Slide Out Seals.
In order to ensure you catch leaks as soon as possible, it is important that you check your RV seals and seams regularly. Some recommend doing a thorough inspection every six months, but we think every four months is probably an even safer bet.
DON’T MISS OUT ON RV LIVING UPDATES
Sign up for the newsletter today.
Please enter a valid email address.
An error occurred. Please try again later.
Thank you for subscribing to the RV Living newsletter, keep your eye on your inbox for updates.
Exterior wall seams.
When checking your seals, go over each seam carefully, looking for holes, cracks,or places where the sealant is lifting. All of these are potential entry points for water and should be resealed immediately.
You’ll also want to check out your RV roof. If the roof is discolored in places, it might be time to recoat the entire thing. Look for tears or holes in the rubber roof. These will need to be fixed while you’re up there.
Slide Out Seals
Lastly, be sure to inspect your slide seals. These tend to become melted, cracked, and misshapen over time. Look for anything that looks out of the ordinary and replace damaged slide seals right away.
Not sure you can remember to do this every 4–6 months? RV Life Maintenance can help you keep track of your RV maintenance and will even send you reminders when it’s time to tackle the next job.
Tips to Reseal, Patch, Recoat, or Replace Bad RV Seals
Inspecting for bad seals and seams on your recreational vehicle is only half of the job. The real work begins when you tackle this regular maintenance chore. Let’s look at what you need to do if your RV has bad seals or seams that need attention.
Resealing Your RV Roof
Your RV roof seams should be resealed at least once a year, and any tears or damage to the roof should be covered right away. Meanwhile, the RV roof itself will likely only need to be recoated once every few years.
Before doing any of these things, you will want to make sure your roof is walkable . If it isn’t, it will be necessary to have a good ladder you can move easily. You’ll also want to give the roof a good cleaning to remove debris, dust, and ensure whatever sealant you use sticks properly.
Once your roof is clean, you can dive right in, making sure to stick to high quality, RV-specific seal products and coating solutions in order to avoid damage.
Resealing RV Roof Seams
To reseal roof seams:
- Clean dirt from the area well, making sure not to allow moisture under the sealant.
- Remove any loose pieces of sealant.
- Cover the old sealant and the seam completely using a caulking gun and Dicor RV lap sealant .
- Allow the new sealant to cure before being exposed to rain.
Patching Roof Tears and Holes
To patch tears of holes in the roof:
- Clean the area well, making sure not to allow moisture under the rubber.
- Cover the hole or tear with a piece of pressure-sensitive EternaBond tape .
- Press the EternaBond into place, ensuring all sides are stuck down.
Recoating Your RV Roof
To redcoat your RV roof:
- Clean the entire roof well.
- Cover the front, back, and sides of the RV with painters plastic and painters tape to avoid excess drips.
- Roll an RV-specific coating product made by manufacturers such as Dicor. Roll onto the roof using a paint roller with a long handle. Be sure to follow product instructions precisely.
- Allow to dry completely.
Resealing Wall Seams
With your RV roof resealed, the next step is to repair the other seams on your RV. For a quick job, simply use a caulk gun to apply Dicor non-sag sealant to the offending seams.
Sometimes it is better to remove windows, vents, storage bay doors, and other bits and pieces from the sides of the RV and reseal from under the edges. To do this:
- Unscrew the part from the RV wall (when it comes to your RV’s window seals, you may need to look for window screws inside the RV) and remove the parts that need to be resealed.
- Remove the old butyl tape from the backside of the piece and replace it with new butyl tape , making sure to get good coverage.
- Screw the piece back into the RV wall.
- Reseal around the edges with Dicor non-sag sealant.
- Allow to cure.
Notes for using non-sag sealant: Using a wet finger to spread the sealant can be helpful. Mineral spirits can remove sealant if you happen to drip, but may damage paint, so be careful.
Tips to Replace RV Slide Seals
Let’s say you’re having trouble with RV slide-out seals. The process for replacing RV slide out seals is different from one RV to the next, and from one type of seal to the next (many RVs employ two types of slide seals). Typically, you’ll either be dealing with seals that slide into place along a track, seals that can be pushed or clicked into place, or seals that are stuck in place with an adhesive.
Those seals that are run into place along a track or click into place are pretty straightforward to replace. Just use some patience, as it can get tedious, especially when reaching above your head.
In the case of adhesive seals however, you’ll need to use a putty knife to gently pry the seal off of the RV. From there, clean the old adhesive from the RV using a product that doesn’t damage the RV paint (we tend to have good luck with careful application of mineral spirits ). You can then replace the seals using an adhesive such as Loctite Super Glue , or you can invest in push-on seals that click into place instead.
Finally got a chance today to do some work on replacing the seals today as there was little chance of rain. It took about 2 hours yesterday just to get the seal off the front side of the slide as I had to figure out a good process along the way. A couple of important notes. @newRVer, Replacement Slide Seals , ForestRiverForums.com
This video might help you better understand slide out seal replacement:
By staying on top of this relatively easy RV maintenance task, we have been able to keep our RV in good condition and enjoy several years of RVing with very few leaks or costly repairs. I highly recommend you do the same!
If you enjoyed this post Please Share:
Related posts:.

Four Ways to Clean Bugs Off Your RV During This Year’s Cicada Double Brood Boom

Remove RV Rust Before It Gets Out of Control

Get Rid of Scary Cooking Odors in Your RV, Forever!
About the author:.

Chelsea Gonzales is a full-time RVer, freelance writer, and roadschooling mama who loves sharing her expertise about RVing with kids, roadschooling, and full-time RVing. The entrepreneurial and free-spirited author is also artistic director of the Aistear Mobile Irish Dance Academy, and currently travels with her family in a 27-foot travel trailer. Chelsea’s informational articles about full-time RVing, raising children on the road, camping, and destination features appear on her blog, Wonder Wherever We Wander . throughout the RV LIFE network , and in RV industry media outlets such as Outdoorsy , Coach-Net , and RV Share .
Leave a Comment Cancel reply
Welcome please follow these guidelines:.
- Be kind and respectful.
- Keep comments relevant to the article.
- Avoid insults, threats, profanity, and offensive remarks.
- Refrain from discussing gun rights, politics, or religion.
- Do not post misleading information, personal details, or spam.
We may hide or remove comments at our discretion.
I have read and accepted the Comment Guidelines and Privacy Policy *
This site uses Akismet to reduce spam. Learn how your comment data is processed .

- Types Of RVs
- Tow Vehicles
- Maintenance & Repairs
- RV Power & Electrical Supplies
- RV Appliances
- Living In An RV
- Travel & Destinations
- RV Gear Buyer’s Guides

8 Best RV Roof Sealants for 2024: Choosing the Ideal Roof Coat and Caulk
- Last Updated: May 24, 2024
- 46 minutes read
Finding the best RV roof sealants is paramount for ensuring your RV remains in top condition.
With an extensive range of products on the market, it can be daunting to select the one that truly suits your needs.
Throughout my journey, I’ve personally tested over 30 sealants and coatings designed for RV roofs, evaluating them on criteria such as durability, ease of application, compatibility with various materials like metal and fiberglass , and their effectiveness in repair and leak prevention .
The goal was clear: find the most reliable products that not only protect your RV roof but also extend its lifespan.
This quest led me to discover the Dicor 95D40-35 Epdm RV Rubber Roof coating , standing out as the best overall due to its exceptional durability, ease of application, and versatility across different RV roof materials.
Whether you’re dealing with minor seam sealing or major leak repair, this guide ensures you have the most efficient solutions at your fingertips.
Based on my experience, the top sealants are:
- Dicor 95D40-35 Epdm RV Rubber Roof coating : Best overall for durability and versatility.
- Dicor RP-MRC-1 Elastomeric Coating : Excellent for UV stability and flexibility.
- Heng’s Rubber Roof coating for RV : Great choice for large scale applications, offering a solar reflective finish.
- EternaBond RSW white RoofSeal Sealant Tape : Top option for quick repairs, with a microsealant UV stable formula.
- Geocel GC24201 Pro Flex RV coating : Good for spot sealing with strong adherence to silicone surfaces.
- Dicor 501LSW-1 Self-Leveling Lap Sealant : Ideal for seam sealing and leak repair on fiberglass roofs.
- Flex Seal rubber coating for RV : Suitable for a variety of surfaces, including metal, with leak repair capabilities.
- Liquid Rubber Waterproof RV Roof Coating : Top pick for a completely waterproof, durable seal on camper roofs.
IN THIS ARTICLE
What kind of sealant do you use on an RV?
When sealing an RV, it’s crucial to select the appropriate sealant based on the material of your vehicle. For metal surfaces, a silicone-based sealant is the perfect choice, providing a robust waterproof barrier designed to endure for years. Alternatively, for fiberglass or other non-metal surfaces, an acrylic sealant is your best bet, boasting excellent adhesion and flexibility while also resisting cracks and peeling that may occur with some silicone-based sealants.
Regardless of the sealant you opt for, always make a point to thoroughly read the product instructions and adhere to all safety measures during application. Additionally, ensuring the surface is clean and dry before applying any sealant is imperative, as this significantly contributes to a successful application. Lastly, don’t forget to allocate sufficient drying time for the sealant before exposing it to water or other environmental elements.
What is the difference between RV roof coating and sealant?
RV owner, it’s essential to understand the differences between roof coatings and sealants to ensure the longevity and protection of your vehicle’s roof. Let’s dive into these two primary products used to safeguard the roof of recreational vehicles.
Roof coatings are typically liquid-applied products designed to create a protective layer over your RV’s existing surface. Acting as a waterproof barrier, these coatings shield the roof from detrimental factors such as UV damage, water pooling, and other weather-related issues.
On the other hand, sealants are generally thicker and more adhesive than roof coatings. This essential feature allows them to create an airtight seal around potential leak-prone areas, such as vents and seams. By focusing on preventing damage and providing a longer-lasting roof, sealants offer that extra layer of protection against water intrusion.
Both roof coatings and sealants are crucial in protecting your RV’s roof from the elements. It’s vital to utilize and maintain both of these products properly for an extended lifespan and peak performance of your recreational vehicle’s roof.
1. Best Overall: Dicor 95D40-35 Epdm Rubber Roof coating

If you need to apply a new coating layer to an EPDM rubber RV roof, the Dicor Corporation EPDM rubber roof is an excellent choice.
It’s also suitable for rubber TPO roofing and it does require the pre-application of Dicor’s Cleaner/Activator for EPDM rubber roofing in order to ensure a strong bond with your roof material.
This coating comes in a one-gallon size that can cover up to 125 square feet of RV roof surface.
It’s compatible with all rubber RV roofs and helps eliminate irritating roof rumble that can cause extra noise (and annoyance!) while driving.
This is an acrylic coating with excellent water and UV resistant properties. It also contains fire retardant characteristics for a greater degree of protection.
You’ll need to apply two coats in order to achieve maximum effectiveness, so be sure to double the measurements of your RV’s roof surface to make sure you have enough coating solution for proper application.
When you’re applying this coating, don’t be surprised if your nose picks up a faint ammonia-like odor.
If you think this might bother you, be sure to wear a mask or other face-covering that protects you from the smell.
But it doesn’t have a high freezing point, which means you can apply this solution at lower temperatures, as long as it doesn’t dip below freezing.
A couple of other things I like about this coating include its flexibility and lifespan.
It flexes very well so that it won’t crack or flake when exposed to the movement of your RV.
And it also requires less lifetime maintenance than other coatings, which means more time adventuring between applications.
Things We Like
- Fire Resistance: This coating contains fire-retardant properties.
- Flexibility: This solution has excellent elasticity.
- Eliminates Roof Rumble: This makes for a smoother ride with less noise while driving.
- Less Lifetime Maintenance: This coating requires reapplication less frequently than other solutions.
Things We Don’t Like
- Not a Standalone Coating Solution: Requires pre-application of Dicor’s Cleaner/Activator for EPDM rubber roofing.
- Smell: You might notice a faint ammonia-like odor when applying this coating.
2. Best For Metal or Fiberglass Roof: Dicor RP-MRC-1 Elastomeric Coating

If your RV has a metal or fiberglass roof, the Dicor Corporation Elastomeric Coating is an excellent way to add another layer of protection against the elements.
This acrylic coating contains 100% acrylic elastomeric resins and comes in a one-gallon container with a super bright white color.
Once applied, it forms a rubber-like coating that will expand and contract along with the movement of your RV roof.
The natural expansion and contraction of this coating help to reduce the likelihood of cracks or tears forming over the life of the product.
The coating is also resistant to both mildew and algae formation.
Because this coating will be bright white when you’re finished with the application, it may appear dirtier than others.
But it easily cleans up with water and a mild detergent when you need to clean it to improve that appearance. To achieve maximum effectiveness, you’ll need to apply two coats.
One gallon of this coating is enough to cover up to 200 square feet of roof space.
And because you’ll need to apply two coats, you’ll need to make sure you purchase enough quantity to cover your entire roof twice.
The application process for this coating also requires a clean surface and the removal of any rust if you’re working with a metal roof.
For metal roofs, the application of a primer might be required to achieve a stronger bond.
This coating should also be applied when temperatures are above 50 degrees Fahrenheit (10 degrees Celsius).
- Mildew Resistance: It’s resistant to the formation of mildew and algae.
- Easy Clean-Up: Once dry, the coating can easily be cleaned with soap and water.
- High Reflectivity: Reflects sunlight and helps to lower temperatures inside your RV.
- Long-Term Benefits: Essentially converts a fiberglass or metal roof into a rubber roof, which can reduce the buildup of rust over time.
- Roof Coverage: One gallon of this coating is suited for roofs up to 200 square feet in size.
- Only For Metal or Fiberglass Roofs: And these roof types tend to be less common than others.
- Application: Requires two coats for maximum effectiveness.
3. Best For Spot Sealing: Heng’s Rubber Roof coating for rV

Heng’s RV Rubber Roof Coating is best used for sealing around vents and air conditioner units on top of your RV.
It’s also great for re-sealing seams and tears in your existing RV rubber roof. It’s compatible with both EPDM rubber roof and rubber TPO for more versatile applications.
Although it’s not made to be a solution for resealing an entire RV roof, this is a great option if you just need a more affordable way to seal small tears or seams in your RV roof.
It’s super easy to apply and simply rolls or brushes on like thick paint. You won’t need to apply any sort of activator beforehand, although you should make sure the area you need to seal is thoroughly clean and completely dry before applying.
As a nature lover myself, I appreciate the fact that this coating is made with non-toxic and non-polluting chemicals.
This makes me feel less guilty if I get a little heavy-handed and accidentally spill a little on the ground while applying it.
I also like that it offers excellent impact resistance if you park your RV in a spot where pine cones or other projectiles are likely to fall on the roof occasionally.
Although it’s only rated to cover about 100 square feet of surface area, Heng’s is more suited to spot applications.
So if your RV roof doesn’t necessarily need to be completely resealed, this is a great choice to help you address those few problem spots before they grow into a larger issue.
- Environmentally Friendly: This coating is made with non-toxic, non-polluting chemicals.
- Spot Sealing: Designed for addressing seams and tears in rubber roof, as well as sealing around vents and A/C units.
- Impact Resistance: It’s a good solution for RVs parked in areas where objects may fall on the roof regularly.
- UV-Resistance: Slows down roof wear and tear from UV exposure.
- Easy Application: It rolls or brushes on like thick paint. No activator needed.
- Not a Whole Roof Solution: This coating isn’t designed to seal or coat an entire RV roof.
- Coverage: It’s rated to cover about 100 square feet of roof surface.
4. Best For Leak Repair and Seam Sealing: EternaBond RSW white RoofSeal Sealant Tape

If you’ve found yourself in the unfortunate position of noticing a leak and needing a repair solution, check out the EternaBond RoofSeal Sealant Tape.
This tape isn’t necessarily designed for preventative roof maintenance, but it will help you stem the tide if you already have minor leaks in your RV roof.
This sealant tape is a regular choice of many roof repair specialists because it can bond to almost any RV roof type.
This includes EPDM, TPO, all metals, most PVC, and a variety of other roofing materials.
It’s even rated to be especially stable when exposed to UV radiation, with products being tested and rated to last up to 19 years in full sunlight.
This tape comes in strips that are four inches wide and 50 feet long. Each strip contains a built-in primer that allows for a stronger bond with whatever surface it is applied upon, although it’s still recommended to thoroughly clean and dry the surface around the leak before applying the tape.
The strip design of this tape actually makes it a great solution for sealing all of the seams along the edges of your entire RV roof.
These seams are notorious for leaking in older RVs and extra sealing is often required in these areas.
This tape will give you a permanent watertight seal along those seams and can be installed at temperatures down to -20 degrees Fahrenheit (-28.89 degrees Celsius).
- Made for Roof Repair: It’s a great option if you need to repair an RV roof leak.
- Versatility: It can be used on virtually any RV roof type.
- Durability: It’s rated to withstand up to 19 years in full sunlight.
- Built-in Primer: This makes for easier application and ensures a stronger bond with your roof material.
- Not For Preventative Maintenance: This tape isn’t the most economical solution for preventatively assuring the health of your RV roof.
- Not A Whole Roof Coating Solution: This product is designed for sealing leaks or the seams along the edges of your RV roof.
5. Best Budget-Friendly: Geocel GC24201 Pro Flex rV coating

The Geocel Corporation Pro Flex RV Instant Repair coating is the best option I could find if you’re needing to stop leaks in your RV roof but you’re on a tight budget.
It’s the most affordable option I could find but it’s also specifically designed for metal roofing systems.
It’ll work, however, on steel, wood, vinyl, sheet metal, and other common substrates.
As its name suggests, it’s made for stopping leaks fast and it’s also useful for sealing breaks, seams, splits, or holes in metal roofing.
When a leak crops up unexpectedly (and maybe at an inopportune moment), this solution will seal it fast and prevent your RV roof from sustaining further damage that will be more expensive to repair.
After applying this Instant Repair, your RV will be road-ready in under one hour. So you can keep rolling or continue your RV living worry-free.
It only requires a single coat for effective application and can be applied in adverse weather conditions, including low and high temperatures and icy or wet conditions.
This sealant comes in a one-gallon size and it can be painted directed onto metal RV roofs.
Once cured, it has mildew and UV-resistant properties and it’s durable enough to hold up under intermittent foot traffic when you need to walk on your roof every now and then to re-inspect its integrity.
I also really like that this sealant doesn’t require any primer to achieve a strong bond with your metal roofing material.
This will save you time in the application process, even if you need to clean the area you’ll be applying it to thoroughly and ensure that any rust is removed if you want to achieve a strong bond and an effective seal.
- Price: It’s the best roof sealant solution for RV owners on a budget.
- Quick Setup: It’s made for stopping leaks fast and sets up in under one hour.
- Application: It only requires a single coat and can be applied in adverse weather conditions.
- Durability: This coating has mildew and UV-resistant properties.
- Not A Whole Roof Solution: This instant repair is better suited for sealing holes, cracks, splits, or seams on your roof.
- Compatibility: It only works with metal RV roofing systems.
6. Best For Roof Edges: Dicor 501LSW-1 Self-Leveling Lap Sealant

If you only need to seal small areas along the edges of your RV roof, the Dicor Corporation Self-Leveling Lap Sealant is much more affordable than a paint-can style sealant.
And it’ll also work well to seal around vents, air conditioners, roof antennas, and anywhere else that water may leak into the substructure of your RV roof.
This sealant is best suited for EPDM rubber roofs or rubber TPO, but it will also adhere strongly to aluminum, mortar, wood, vinyl, galvanized metal, fiberglass, and concrete.
It is compatible with other Dicor Products and may be used after their Cleaner/Activator and EPDM Rubber Roof Coating system, respectively, for a full roof sealant solution.
You’ll need a caulking gun to apply this sealant and it has self-leveling properties to help with a smoother, more complete seal where applied.
Each tube contains 10.3 ounces of sealant and that small quantity will mean you might need a good number of tubes to seal the edges or seam around your entire RV.
For example, one user used a total of five tubes to seal the edges around a 13-foot trailer.
So, extrapolating that number out, you’d need 10 tubes for a 26-foot RV and a minimum of 14 tubes for a 33-foot rig.
Furthermore, this sealant is rated to be reapplied every three months or so for maximum effectiveness.
This means that you might need to spend more time applying this sealant than you’d need with other solutions.
If you do go with it, however, make sure you apply the sealant when outside air temperatures are between 50 and 70 degrees Fahrenheit (10 to 20 degrees Celsius). Doing so will help you maximize the lifetime of the sealant.
- Affordable: It’s a very cheap option for sealing seams and edges on your roof.
- Easy Application: Requires the use of a caulking or silicone gun for a squeeze application.
- Versatility: This sealant can adhere to a wide variety of roofing materials.
- Compatible with Other Dicor Products: This can be used as Part 3 of Dicor’s EPDM Rubber Roof Coating System.
- Only For Edges: This isn’t a realistic option for resealing your entire RV roof surface.
- Quantity: You may need to purchase multiple tubes to seal all edges and seams on your RV roof.
- Lifespan: This product is recommended to be reapplied about every three months.
7. Best Pour-On Application: Flex Seal rubber coating for RV

Many of us know Flex Seal products ‘As Seen on TV’, but the Flex Seal Liquid Rubber in a Can really does offer one of the easiest pour-on applications of any RV roof sealant and coating.
It comes in a one-gallon size with a white color that provides great reflectivity to keep the temperatures down inside your RV once applied.
Just like you might’ve seen in one of their infomercials, this stuff sets up quickly to stop leaks fast.
One gallon of this solution is enough to cover about 150 square feet of RV roof area, so you might need two gallons for a complete application, depending on the total roof square footage of your particular rig.
Once it sets up, it forms a watertight, flexible rubber coating that effectively seals your roof from moisture and also protects it from damaging UV radiation.
It’s also super-safe to apply as the solution itself is non-hazardous, non-toxic, and non-flammable.
It also protects your roof from mildew growth and damage that can occur from exposure to other chemicals.
Additionally, it prevents rust and corrosion from occurring on metal roofing systems, which maximizes the lifespan of that roofing type.
While it’s rated to work well with a variety of roof substrates, it hasn’t been tested on top of an elastomeric roof coating, so you might want to apply a small amount to a test area before utilizing this solution if you’ve previously applied this type of coating.
And finally, another thing that impressed me about Flex Seal is how it works to minimize noise and vibrations while you’re driving to provide a smoother, quieter ride.
As someone who’s had to repair a roof leak with Flex Seal at midnight in the middle of a Texas deluge, I can also personally vouch for the reliability of the Flex Seal brand.
- Pour-On Application: Simple requires a paintbrush roller to spread evenly over your roof surface.
- Reflectivity: Reflects UV radiation to keep temperatures cooler inside your RV.
- UV Protection: Reduces wear and tear on roof substrate from UV exposure.
- Safe: Flex Seal is non-toxic, non-flammable, and non-hazardous.
- Smoother Rides: This sealant will help to minimize noise and vibrations while driving.
- Resistance: Prevents buildup of rust and corrosion.
- Can’t Paint Over It: Paints won’t adhere to this liquid rubber, although I wouldn’t even recommend trying.
8. Best To Prevent Adhesion Failure: Liquid Rubber Waterproof RV Roof Coating

For those that have previously used an RV roof sealant and coating that didn’t quite hold up the way you expected, the Liquid Rubber RV Roof Coating is our choice for a solution that will form a strong bond with your RV’s roofing material.
This hopefully prevents the need to reseal your roof before you’re ready to get up there again.
This sealant is available in one-gallon and five-gallon sizes so that you can be sure you have enough to cover the total square footage of your RV roof.
A single gallon of this coating is designed to cover only 50 square feet of RV roof surface.
Additionally, it’s recommended to applies two to three heavy coats of this sealant to achieve maximum effectiveness.
To do a little math, you’ll need a five-gallon container to cover a maximum of 250 square feet with those 2-3 heavy coats.
This is typically enough to cover a 30-foot RV, but if you have a larger rig you’ll need even more quantity.
So be sure to factor this in when considering this as a viable solution to seal your RV roof.
On the plus side, this is a truly preventative RV roof sealant and coating.
It’s UV-stable to prevent the sun from damaging your roof substrate and it reflects solar rays to keep the inside of your RV cooler during the summer months.
The solution itself boasts 1000% elongation, which serves to prevent adhesion failure and create a strong bond with your roofing material.
You’ll also enjoy an easy application process with this sealant. Simply pour it on your roof and spread it evenly using a paint roller.
You may need a smaller paintbrush for edging work, which is actually recommended to do before covering the main flat surface of your roof.
It’s also recommended to apply this coating at temperatures above 50 degrees Fahrenheit (10 degrees Celsius).
- Longevity: When applied properly, this sealant has one of the longest lifespans of any product on the market.
- 1000% Elongation: Guarantees a strong bond and prevents adhesion failure.
- Solar Reflectivity: Reflects UV rays and keeps temperatures down inside your RV.
- Easy Application: Use a paintbrush or roller to spread this coating evenly on your RV roof.
- Environmentally Friendly: This is a water-based solution that contains no VOCs, solvents, or harmful odors.
- Coverage Area: One gallon is rated to cover about 50 square feet.
- Application: It’s recommended to apply 2-3 heavy coats of this sealant.
- Price: This solution could get a little pricey once you buy enough to cover your entire RV.
Features To Look For In RV Roof Sealants
Now it’s time to get into the nitty-gritty of RV roof sealant and coating. You should be careful to consider each of the factors outlined below when comparing and contrasting your sealant and coating options.
Types of RV Roof Sealant & Coating
Let’s begin our Buying Guide by providing some brief definitions of the various types of roof sealants and coatings that you’ll find out there.
RV Rubber Coating
RV rubber roof coatings are the most common type on the market today. They’re actually available in two distinct classifications.
One is primarily constructed from thermal poly Olefin and the other is made of ethylene propylene monomer.
The differences in the construction of these two types of rubber coating require different application and maintenance procedures.
Just make sure you understand the specific procedures recommended by the manufacturer before finalizing your purchase decision.
Acrylic Coating
This is one of the more affordable types of roof coatings out there that will still do a decent job at sealing your RV roof.
The application of most acrylic coatings requires two coats. The first is the primer and the second is called a ‘fabric reinforce’. These two coats help with reflectivity, leak protection, and UV resistance.
The downside of the acrylic coating is that it doesn’t do very well in super wet climates. If your RV roof is frequently wet or develops pools of water, an acrylic coating is more likely to degrade and begin to peel off.
Silicone Coating
Silicone coatings are typically sold by the gallon and they can be one of the more pricey coating options out there.
The added cost comes with benefits, however, as this type of RV sealant only requires a single coat to be effective.
This means less application time and it eliminates the need for a primer, which can also bump up the overall cost of resealing your RV roof.
Silicone coatings have high reflectivity and resistance to both wind and weather degradation.
They also stay elastic for quite some time after application, which means it won’t become too hard or brittle and begin to peel off within a few months.
Liquid Coating
Liquid RV roof coatings tend to offer natural water repellency, which serves to prevent corrosion from occurring on your RV roof.
This type of coating is also very easy to apply and can often be poured directly onto your roof before being spread out evenly.
The application method for a liquid coating is very similar to applying a fresh coat of paint to a wall in your home.
You can use a rolling brush to apply it to a large surface area like your RV roof. Liquid coatings are also UV-resistant and can improve the visual appearance of your RV roof.
Fiberglass Coating
Fiberglass coatings offer financial advantages because they generally require less maintenance over time than other types of RV coatings.
But this type of coating does tend to require more initial effort to apply and can be more expensive at the outset than other coating types.
Finally, fiberglass coatings also add significantly more weight to your RV roof, which can sometimes cause issues if the structural integrity of your roof is even slightly compromised before you apply this type of coating.
Urethane Coating
Urethane coatings are more durable than both acrylic and silicone options. They also provide excellent impact resistance if you frequently store your RV in an area with some potential for pine cones or other projectiles to fall onto the roof (which I don’t recommend!).
This type of coating also offers good UV resistance and reflectivity while being able to remain intact if exposed to excess moisture for long periods of time.
But the downside of urethane coatings is the strong and often unpleasant odor they can produce during the application process. Urethane coatings also tend to be more expensive than other coating types.
Your Roof Material
The four main materials used in RV roofs are EPDM rubber roof, rubber TPO, aluminum, and fiberglass.
The composition of your RV roof determines which sealant/coating products can be used on it.
If you’re not sure which type of material was used in the construction of your RV roof, it’s time to climb up there and have a closer look!
Aluminum roofs are hard to the touch and, while it’s the rarest type, they are very obvious due to their metallic sheen (think Airstream!).
An aluminum roof rarely requires a new coating because of its natural durability and weatherproof qualities.
Fiberglass roofs are also hard to the touch and slightly more common than aluminum roofs, but not by much.
Clearly, fiberglass roofs don’t have the metallic appearance that you’ll see with an aluminum roof, but they’ll also be noticeably harder than a rubber roof and they tend to require less overall maintenance than rubber roofs.
Rubber EPDM (ethylene propylene diene monomer) and Rubber TPO (thermal poly Olefin) are the most common RV roof materials.
The differences between these two types, however, are difficult to discern from the look or feel alone.
So be sure to consult the owner’s manual for your RV to determine exactly which material was used in your roof’s construction.
The answer you find will dictate the exact type of RV roof sealant and coating product you’ll need to ensure a strong bond.
The durability of an RV roof sealant or coating product is determined by how often you’ll need to reapply it.
For example, you can be safe in assuming that a product that recommends re-application every six months is going to be less durable than an alternative that only needs to be reapplied every two years.
Depending on the application process of the specific product you choose, it might require a full weekend for a proper application of a sealant/coating.
So it’s obvious that you probably don’t want to repeat that process very often because, if you’re like me, you’d rather be off enjoying new campgrounds and scenic byways in your RV.
The durability of liquid sealants and tapes also depends on their elasticity and tear resistance.
Because your RV will naturally twist, turn, and bounce around while you’re driving, the sealant/coating your apply to your roof must be able to twist and turn without becoming compromised.
UV Resistance
Your RV’s roof is constantly exposed to the sun unless you put a cover on it for part of the year or you live in Washington (Sorry Washingtonians!).
Over time, UV exposure can lead to significant wear and tear that can be difficult to reverse if you haven’t regularly maintained your RV roof.
Because of this, you need a roof sealant/coating that offers UV protection. But fortunately, most of the best RV roof sealant and coating solutions are designed specifically for this purpose.
If a specific product doesn’t mention UV resistance, however, it’s a good bet to steer clear of it.
Ability to Repel Water
Water-resistance is one of the primary functions of an RV roof sealant and coating.
Water pooling on the roof of your RV or leaking into the substructure can cause damage that will require a much more expensive fix than what you’d spend on a quality roof sealant or coating.
Most of the best RV roof sealant and coating solutions offer a high-degree of water resistance because this is exactly what they’re designed to do!
But because there’s not really a universal metric by which you can compare the water-resistance of one coating versus another, the best way to analyze a coating’s effectiveness on this metric is to read through consumer reviews.
Ease of Application
Consider the application process required before choosing a roof sealant or coating.
The easiest applications involve a single coat and the use of a squeegee or paint roller to spread the solution evenly over your roof’s surface.
More complication applications require multiple coats and the additional purchase of a primer or other solution in order to ensure a secure bond.
If the RV roof sealant and coating you’re interested in requires additional products for proper application, just make sure you’re aware of that and factor the cost of those additional products into your total budget for the project.
Chemical Composition
The chemical composition of an RV roof sealant or coating plays a large role in the safety precautions you’ll need to take when using it.
Many of the best options utilize non-toxic chemicals so that they’re safer and easier to use.
However, this isn’t the case for all sealants and I simply want to make sure you consider each sealant’s chemical composition so that you can ensure your own safety and the safety of anyone else helping you apply it to your RV roof.
Choosing a sealant/coating that uses non-polluting chemicals also ensures less likelihood of negative environmental impact when/if the coating degrades and begins to crack or flake off.
As always, we RVers who love to visit beautiful places in our rigs should always be considered about the environmental impacts of our travels.
So, Which is the best sealant for RV roofs?
There are a few good reasons why we chose the Dicor Corporation EPDM Rubber Roof as our pick for the best overall RV roof sealant and coating.
For one, EPDM rubber roof and rubber TPO are the most common roofing materials used in modern RV construction.
And Dicor’s complete rubber roofing sealant system is specifically designed for resealing these types of roofs correctly the first time around.
This sealant is also great for reducing UV damage and minimizing roof rumble so that you enjoy a smoother, quieter ride once it cures and you’re back on the road.
Furthermore, we chose it because it helps to ensure the safety of your RV (and everyone inside it!) with its fire-retardant characteristics.
But if you’re looking for a solution with a super-easy pour-on application, you also won’t go wrong with the Flex Seal Liquid Rubber In A Can .
This RV roof sealant and coating offers one of the simpler application processes of any solution.
Simply pour it directly onto your roof and spread it evenly using a standard paint roller.
You may need to use a smaller paintbrush to complete the edging work, but you should still be able to apply this coating in an hour or two on a warm day.
Frequently Asked Questions
These RV roof sealant and coating solutions aren’t complicated. But I can assure you that the fun is only just beginning once you’ve identified the right product for your needs.
So let’s cover some frequently asked questions about the roof sealing and maintenance processes.
What is an EPDM rubber roof?
EPDM stands for ethylene propylene monomer. It is a synthetic membrane that often comes in strips ranging from 7.5 to 50 feet long and 45 to 60 millimeters thick.
The material’s primary ingredients (ethylene and propylene) are derived from oil and natural gas.
EPDM rubber roof strips typically need to be secured at the edges using a liquid adhesive or specially formulated tape.
This material has been a trusted choice for low-slope roofs in the construction industry for over 40 years.
How to apply an RV roof coating?
The simple answer is that the application process will depend on the product you choose. Different types of coatings have very different application requirements if you’re going to obtain a quality bond between the sealant and your roof material.
That being said, the realistic first step you need to take before applying any type of roof coating is to measure your roof and understand just how much square footage you need to cover.
If the coating you’re buying requires the application of two coats, you’ll need to double the square footage of your roof in order to make sure you buy enough sealant for two coats.
You’ll also need to prep your roof before applying any type of sealant or coating.
Most products will bond better to a clean surface, so it’s recommended to power wash or thoroughly scrub your RV roof with soap and water and allow it to dry completely before applying a sealant.
If there are any pieces of your old sealant that are loose or flaking, you should carefully remove them before applying a fresh coating.
Additionally, many RV roof sealant and coating solutions contain flammable properties. So make sure to remove any potential source of ignition before beginning the application process.
And finally, many new RV owners make the mistake of wearing shoes up onto their roof when going to apply a fresh coat of sealant or coating.
What can happen if you do is that you actually end up tracking up more dirt or debris that you then seal into your roof and this can compromise the effectiveness of your sealant.
It’s always a good idea to pop your shoes off and just wear socks while applying roof sealant or coating to your RV.
Otherwise, you can invest in shoe covers that easily pull over your shoes before you step onto your roof.
What are the best RV roof sealant brands?
For starters, there’s a good reason you’ll find three different sealants and coatings made by Dicor Corporation in our reviews.
Many Dicor products include a roof cleaner/activator that preps your roof for the application of the sealant.
This ensures a more lasting bond between the coating and your roof material.
Other brands you can trust include Flex Seal, Liquid Rubber, EternaBond, Geocel Corporation, and Heng’s.
Can I use Flex Seal on my RV roof?
Unequivocally yes! Flex Seal is widely considered one of the more versatile products out there and can adhere to various roof materials, although it’s best for use on metal or fiberglass roofs. This includes vent pipes, skylights, and RV roof gutters.
One reason Flex Seal is so effective is its ability to naturally seep into (and seal) cracks and holes.
It also retains its elasticity very well, even once fully dried, which helps to promote better flexibility, water resistance, and durability.
However, if your RV has an EPDM rubber roof, you’ll be better suited with a product like Dicor Corporation’s EPDM rubber roof coating.
How does roof sealant/coating work?
An effective RV roof sealant/coating seals your roof from the elements, including ice, rain, wind, snow, and other forces of Nature.
It has waterproof properties and many add impact resistance to your roof to protect it against falling leaves, branches, pine cones, and other projectiles.
Furthermore, an RV roof sealant and coating prevents damage to your roof from prolonged UV exposure.
And it can also prevent water from leaking into the inside of your rig and reduce heating and cooling loss to keep the interior of your RV at a more comfortable temperature year-round.
Camper roof sealant: What is the best camper roof sealant?
The best camper roof sealant depends on your budget, preference, and the condition of your roof. Some factors to consider when choosing a sealant are:
- Durability: How long will the sealant last and resist weathering, cracking, or peeling?
- Compatibility: Will the sealant adhere well to the material of your roof, such as rubber, fiberglass, or metal?
- Ease of application: How easy is it to apply the sealant and how much time and effort does it require?
- Coverage: How much area can the sealant cover with one application and how thick is the layer?
- Cost: How much does the sealant cost per unit and how often do you need to reapply it?
RV sealant: What is the best RV sealant?
The best RV sealant depends on the material of the RV surface, the climate, and the budget. Some factors to consider when choosing an RV sealant are durability, flexibility, UV resistance, ease of application, and cost.
Rubber roof sealant: What is the best rubber roof sealant?
The best rubber roof sealant depends on the type and condition of the rubber roof, as well as the budget and preferences of the user. EPDM, TPO, and silicone-based products are some of the most popular rubber roof sealants.
RV rubber roof coating: What is the best RV rubber roof coating?
The best RV rubber roof coating depends on the type of roof material, the climate, and the budget of the RV owner. Some of the most popular RV rubber roof coatings are acrylic, silicone, and polyurethane.
Best RV roof sealant: What is the best RV roof sealant for my needs?
The best RV roof sealant for your needs depends on several factors, such as the material of your roof, the climate you travel in, the size of the area you need to cover, and your budget.
Here are some tips to help you choose the best RV roof sealant for your needs:
- Liquid RV roof sealant is a thick coating you apply with a brush or roller. It can fill small gaps and cracks, and create a waterproof barrier. Liquid RV roof sealant is suitable for most types of RV roofs, such as rubber, fiberglass, metal, or wood.
- Tape RV roof sealant is a self-adhesive strip that you stick over the damaged area. It can seal large holes and tears, and provide a flexible and durable repair. Tape RV roof sealant is easy to use and requires no tools or drying time.
- Spray RV roof sealant is a aerosol can that you spray over the affected area. It can cover small to medium-sized leaks and cracks, and form a rubber-like layer. Spray RV roof sealant is convenient, fast to apply, and can reach hard-to-access areas.
What is the best camper roof sealant?
I think the best is:
- Dicor Self-Leveling Lap Sealant
- Eternabond Roofseal Sealant Tape
- Geocel ProFlex RV Sealant
- Sashco Through The Roof Sealant
- 3M Marine Adhesive Sealant 5200
What is the best RV roof sealant?
The best RV roof sealant for you depends on your needs and budget. But here is a small list:
What is the best RV roof coating?
Here are some of the best RV roof coatings:
- Dicor RPCRC1 White EPDM Rubber Roof Coating
- Heng’s Rubber Roof Coating
- Dicor RP-MRC-1 Elastomeric Coating for Metal RV Roofs
- Dicor Fiberglass RV Roof Coating
- LLD RC5000RV Liquid RV Roof Coating & RV Roof Repair
These coatings are highly rated by customers and provide a long-lasting, weather-resistant barrier for your RV roof.
What is RV sealant?
RV sealant is a critical part of keeping your RV in good condition. It helps prevent leaks and water damage, which can be costly and time-consuming. There are two main types of RV sealants: liquid sealants and tape-based sealants. Liquid sealants are easier to apply, but getting a good seal can be more difficult. Tape-based sealants are more difficult to apply but provide a stronger seal.
I recommend using a liquid sealant for most RV roofs. It is easy to apply with a caulking gun, and it can be used to seal small cracks and gaps. You may want to use a tape-based sealant if you have a metal roof. It is more difficult to apply but will provide a stronger seal against leaks.
What is Dicor RV roof sealant?
Dicor RV roof sealant is a liquid sealant designed to seal roofs on recreational vehicles (RVs). It is a versatile sealant that can seal various materials, including EPDM, TPO, and PVC roofing membranes. Dicor RV roof sealant is also UV-resistant and can withstand extreme weather conditions.
What is RV rubber roof coating?
An RV rubber roof coating is a liquid or semi-solid material applied to an RV’s roof to protect it from the elements. It is typically made of a rubber or acrylic base and is designed to be flexible, water-resistant, and UV-resistant.
RV rubber roof coatings can help extend your RV roof’s life by protecting it from weathering, cracking, and leaks. They can also help to improve the insulation of your roof, making your RV cooler in the summer and warmer in the winter.
Take it from someone who has experienced the downfall of an RV roof.
Once you notice sagging in your roof, you’re already looking at a much more expensive fix than you’ll need to spend on a quality RV roof sealant and coating solution.
At that point, there’s little you can do to salvage the integrity of your roof.
Also, follow the manufacturer’s recommended air temperature for effective application.
I’ve applied sealants when the air was far too cold in the past, which effectively turned out to be a complete product waste.
So even if you have to wait a few weeks, you’ll still be able to make the most of your investment.

About Author / Aaron Richardson
Aaron Richardson is an expert RVer and the co-founder of RVing Know How. Aaron, along with his wife Evelyn, has been living and traveling in their Keystone Fuzion RV since 2017. Their adventures span across the country and beyond, including memorable RVing experiences in Mexico. Aaron's passion for the outdoors and RVing shines through in his writings, where he shares a blend of travel stories, practical tips, and insights to enhance the RV lifestyle.
 26")
9 Best Cars to Live In: Find the Perfect Vehicle to Live In (2024 Pros and Cons)
10 best camper vans with fully equipped bathroom, shower and toilet for 2024.

You Might Also Like

Experience The Ultimate RV Adventure At Indian River RV Resort: A Hidden Gem On The Indian River

Experience Ultimate Relaxation at Anchor Down RV Resort

How to Manually Extend or Retract an RV’s Electric Slide-Out System
Start typing and press Enter to search
RV Flex Repair USA
Understanding rv roof repair tape: a diyer's guide.
Nov 06, 2023
RVing is a lifestyle that brings unparalleled freedom and adventure, but it also comes with its own set of maintenance issues . Among the most common and crucial is the need for frequent roof repairs. This is where RV roof repair tape comes into play. But remember, not all tapes are created equal.
The Importance of RV Roof Maintenance
As an RV owner, you're aware that your vehicle's roof is constantly exposed to the elements. This exposure, coupled with the constant movement and flexing of the RV during travel, can lead to deterioration, leaks, and other damage. Water leaks , in particular, can cause significant damage to your RV's interior, leading to costly repairs. That's why regular roof maintenance is crucial.
The Role of RV Roof Repair Tape
In your arsenal of RV maintenance tools, one item should always be present: RV roof repair tape. This adhesive product is specifically designed to repair and prevent leaks in your RV's roof. It's a handy, cost-effective solution for patching up minor damages, saving you from costly professional repairs.
However, it's important to note that not all repair tapes offer the same level of performance. The effectiveness of your RV roof repair depends significantly on the quality of the tape you choose.
The Different Types of RV Roof Repair Tape
There's a wide array of repair tape for RV roofs that are available in the market, but they're not all suitable for your RV roof. The most common types include duct tape, masking tape, and electrical tape. However, these aren't designed to handle the rigors of outdoor use and constant weather exposure.
For your RV, you need a specialized product, like the RV roof seam tape. This type of tape is specifically designed to resist weathering, adhere strongly to your RV's roof material, and provide a waterproof seal.
Not All RV Roof Repair Tape is Equal
While there are several tapes labeled as "RV roof repair tape", their quality and effectiveness can vary dramatically. Factors such as the tape's adhesive strength, weather resistance, flexibility, and durability can all impact its performance.
Substandard tapes may not adhere properly, may be susceptible to weather damage, or may not provide a lasting repair. In contrast, high-quality tapes like the Roof Seam Tape by RV Flex Repair offer superior adhesion, weather resistance, and durability, ensuring a long-lasting repair.
The Superiority of RV Flex Repair's Roof Seam Tape
When it comes to high-quality RV roof repair tape, one product stands out: the Roof Seam Tape by RV Flex Repair . This tape is designed to provide a strong, durable, and weather-resistant seal, making it an ideal choice for RV roof repairs.
Here's what sets it apart:
Incredible Adhesion
The RV Flex Repair's RV Roof Seam Tape boasts remarkable adhesive strength. It's designed to adhere securely to a variety of surfaces, ensuring a firm, reliable seal.
Superior Weather Resistance
This tape is engineered to withstand all types of weather conditions. It resists UV rays, extreme temperatures, and moisture, ensuring your repair holds up regardless of the weather.
Enhanced Durability
With its robust construction, this tape is built to last. It offers excellent resistance to wear and tear, ensuring your repair lasts for years to come.
Easy Application
Applying the RV Flex Repair's Roof Seam Tape is a breeze. It's pliable, so it easily conforms to irregular surfaces. Plus, it's easy to cut and position, making your repair job quicker and more efficient.
The One Weekend Restoration Kit by RV Flex Repair
If you're a DIY enthusiast looking to tackle more extensive RV roof repairs, the One Weekend Restoration Kit by RV Flex Repair is a game-changer. This comprehensive kit comes with everything you need to restore your RV's roof in just one weekend.
The kit includes the superior Roof Seam Tape by RV Flex Repair as well as other necessary materials, allowing you to hit the open road sooner.
Wrapping Up
In conclusion, not all RV roof repair tapes are created equal. When it comes to maintaining the integrity of your RV's roof, choosing a high-quality product like the RV Roof Seam Tape by RV Flex Repair is essential. With its superior adhesion, weather resistance, durability, and ease of application, this tape is a cut above the rest.
So, don't compromise on your RV's maintenance. Invest in the right tools, like the Roof Seam Tape by RV Flex Repair and the One Weekend Restoration Kit , and enjoy the open road with peace of mind
Leave a comment:
Choosing the Right RV Sealants for Your Vehicle
- Description
- Discussions
RV sealants are essential for keeping out moisture and maintaining a firm bond between the components of your RV. It’s very important for the lifespan of your RV that you complete regular inspections to ensure your RV sealants don’t have any cracks or gaps that might lead to leaks in your unit.
Depending on the type of roof material such as rubber membrane or fiberglass, and the component it is sealed to such as a roof cap or antenna base, it’s extremely important to select the right sealant for each part of your unit. Certain types of RV sealants are best suited for specific jobs, and you should take care to choose the right type. So in this lesson, we introduce a variety of RV sealants, and teach you what products are ideal for which jobs.
Picking the proper sealant for your RV
Some RV manuals come with a chart that lays out which RV sealants satisfy the needs of each part of your unit. However, if you’re still unsure which sealant you should use on a certain component, we recommend avoiding a generic silicone sealant that can cause cracking and leaks in your unit. Instead, Dave Solberg introduces a range of RV sealants that you can utilize on your vehicle to properly adhere to that material for a long time to best keep moisture away.
Dave walks you through each of the most common sealants that are readily available at hardware stores, and explains what they’re best used for. He talks about a handful of RV sealants, including butyl tape for windows and roof and side vents, and discusses the proper way to use this handy, pliable sealant.
Typically, RV owners opt for silicone RV sealants for their ease of application. There are several options from which you can choose, including self-leveling joint sealant for vents, exterior siding and trim sealant that expands and shrinks to accommodate temperature changes, as well as thermoplastic sealant. Remember, it’s important that you don’t just settle for any generic sealant, but rather find the right sealant for the job required. Do your homework and, as always, consult the manual if you get stuck!
Share tips, start a discussion or ask one of our experts or other students a question.
Already a member? Sign in
10 Responses to “Choosing the Right RV Sealants for Your Vehicle”
iii have a 1968 Winnebago - I’ve been trying try I refurbish . My roof leaks so I used a silicone base roof paint ( don’t remember which manufacturer) but it still leaks . So I’ve decided to do a rubber roof this year. Do I have to strip all the silicone roof paint off so the rubber adhesive sticks , if so , what can I use to make this easier? And, what type of roof would u recommend?
Need to replace water damaged interior walls in 2001 Shasta Camper. What wood do I need?
How do you determine what products are required using the Winnebago call out sheet that only provides Winnebago part numbers, without going to a dealership?
Keeping the faith by sealing out water
Great vid.. thank U✌🏽🇺🇸.
suggesting silicone to be used on a rubber or TPO roof is just wrong . silicone is one of the worst things you could use , dicor or super flex . is what should be used along with eternabond tape
The screws have fallen out of the latch that holds the door open. There was no sealant installed with the screws from the previous owner. What can I use to ensure a tight fit for the screws to go back in? I am assuming some kind of a sealant. Right?
Hi I had a leak in my truck camper and I have staining on my carpet , and the wood has damage what can I use to clean the carpet and fix the wood ?
It would be nice to have footnotes listing the type of sealant. The tubes were facing the speaker and not the camera.An audio presentation would have been the same.
My unit leaks and I don't know where.
Explore videos by Dave Solberg
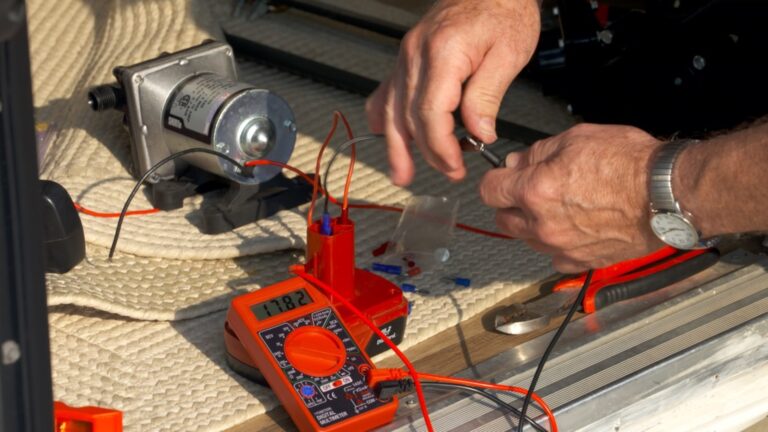
You may be interested in
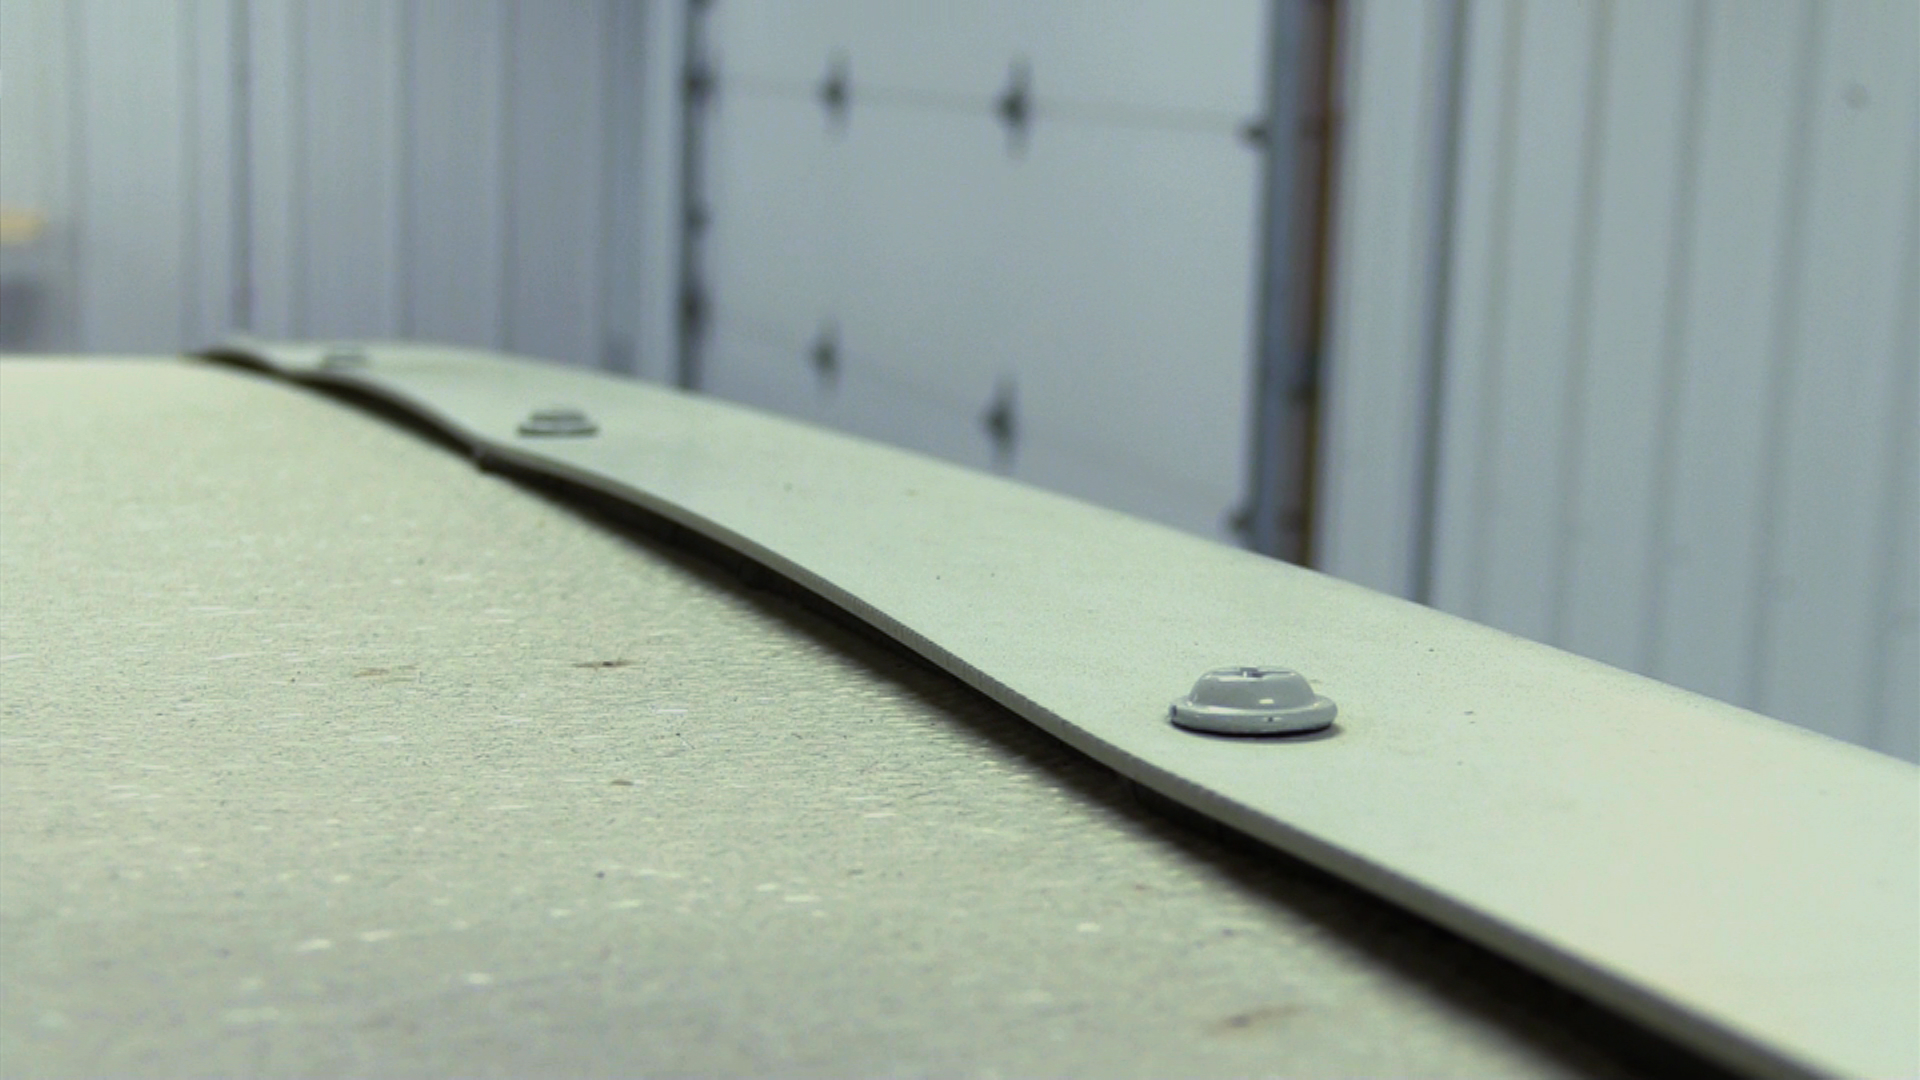
Premium Membership
Unlock exclusive member content from our industry experts.
- 24/7 Access to Premium RV Maintenance Videos, Travel Inspiration, and Lifestyle Tips
- Step-by-Step Instructional Demos, Projects, and Guides
- 50% Off Video Downloads Purchased in the RV Lifestyle & Repair Shop
- Access to Ask the Expert Program
- 2 Full-Length Video Downloads to Watch Offline
Gold Membership
Get everything included in Premium plus exclusive Gold Membership benefits.
- 9 Full-Length Video Downloads to Watch Offline
- 2 Full-Length RV Repair Classes to Keep for Life
- Discounts on Purchase-to-Own Content in the RV Lifestyle & Repair Shop
- Exclusive GOLD LIVE Streaming Events
Enter your sign in info below
For your convenience, we will keep you logged in for the next 90 days unless you uncheck the box.
IMAGES
VIDEO
COMMENTS
Make sure you have an adequate supply ready for your job. For our 27-foot RV, we used four tubes to complete the chore. Larger RVs require more Dicor. You may also want to keep some handy for emergency repairs. Use a steady hand with a 3/8″± bead of sealant then apply long, smooth strips one at a time.
How to Seal RV Roof Seams with Dicor Lap Sealant - This is an easy job you can do yourself and have great results. I show you how to seal rv roof seams yours...
When resealing around roof-mounted accessories, use a self-leveling lap sealant designed for horizontal surfaces. Depending on your RV's design, you may need the same sealant along transition molding or a lap sealant designed for vertical surfaces. Dicor and Alpha Systems are two leading brands for the best sealants for RV roof seams.
Step 2: Choosing the Right Sealant. Picking the right sealant is crucial for repairing your RV roof seam effectively. Remember, the sealant must be compatible with your RV's roofing material. For rubber roofs, sealants like RV Flex Repair is the top choices. This sealant is specially formulated for EPDM and TPO roofing respectively, and are ...
In this RV DIY video host Mark Polk, with RV Education 101, demonstrates how to reseal RV corner molding using Seal-Tite™ Corner Seal. Since filming this vid...
Here are 4 of the better options to look at and consider: 1. Dicor EPDM Self-leveling sealant - comes in a tube and it can be applied directly to the problem spot. You should not have to remove the old caulking or sealant first as this product is said to stick to most compounds and roofing materials.
Over time seams can crack and dry out, allowing water into your vehicle. Water damage in the form of mold and mildew is often a costly expense you want to avoid! In this quick video lesson, veteran RVers Mary and Josh Sherer walk you through the process of replacing old silicone sealant and properly sealing RV exterior components such as door ...
Use Quick Roof Extreme Repair Tape as a non-liquid RV roof sealant. Their tape products are compatible with EPDM, TPO, PVC, metal, fiberglass, vinyl, and even wood RV roof finishes. Plus, they withstand hardening, cracking, and shrinking over time. Here are your size and color options: White, 4" x 25'. White, 6" x 25'.
When you inspect the seams and sealants on your RV roof look for cracked or dried out sealants that might be separating and allowing water to get penetrate the surface of the roof. ... Consult the RV owner's manual or your RV dealer for sealants compatible with the surface you are attempting to repair. For more information on RV roof care and ...
In this RV how to video host Mark Polk, with RV Education 101, demonstrates the Seal-Tite Corner Seal Kit used to repair and reseal RV corner molding. The C...
With your RV roof resealed, the next step is to repair the other seams on your RV. For a quick job, simply use a caulk gun to apply Dicor non-sag sealant to the offending seams. Sometimes it is better to remove windows, vents, storage bay doors, and other bits and pieces from the sides of the RV and reseal from under the edges. ...
Dustin shares his expert tips on how to reseal RV roof seams. Friday, June 28, 2024. RVtravel.com Newsletter News, information and advice for RVers. MENU. SUBSCRIBE TO RVTravel FREE ... His repair facility has been servicing customers at the same location since 2003. What sets us apart from the dealerships is we are here to fix and maintain ...
Rubber RV Roof Repair and Maintenance. In order to keep your RV roof in tip top shape, you will need to clean and inspect it at least four times a year, repair any holes or tears immediately, and reseal all seams at least once a year. After about ten years, it will also be necessary to reseal the entire roof. Safely Working on Your Rubber Roof
Unlike products that leave an unsightly film, Seam Sealer is completely transparent. This makes it ideal for boat and RV covers, awnings, tents, backpacks and other outdoor items. It's very easy to use. The bottle has a built-in sponge applicator that's simply run along both sides of the seam. Once the threads are completely saturated, it ...
Geocel GC24201 Pro Flex RV coating: Good for spot sealing with strong adherence to silicone surfaces. Dicor 501LSW-1 Self-Leveling Lap Sealant: Ideal for seam sealing and leak repair on fiberglass roofs. Flex Seal rubber coating for RV: Suitable for a variety of surfaces, including metal, with leak repair capabilities.
Pre-treatment: Primers & Activators. Sika offers a complete line of RV & travel trailer repair sealants, adhesives, and bonding products, used by repair technicians and RV owners alike. We have recreational vehicle repair products to meet your demanding maintenance requirements, which makes us the perfect choice for any vehicle owner.
In conclusion, not all RV roof repair tapes are created equal. When it comes to maintaining the integrity of your RV's roof, choosing a high-quality product like the RV Roof Seam Tape by RV Flex Repair is essential. With its superior adhesion, weather resistance, durability, and ease of application, this tape is a cut above the rest.
Posts: 180. Help Repairing Edge of Roof Seam. Hello Everyone, As we all prepare to start the spring camping season I am trying to take care of some issues that I didn't finish before I put my camper up at the end of last season. Long story short while on a six week trip two summers ago we had to have our roof repaired as it had come unglued.
He talks about a handful of RV sealants, including butyl tape for windows and roof and side vents, and discusses the proper way to use this handy, pliable sealant. Typically, RV owners opt for silicone RV sealants for their ease of application. There are several options from which you can choose, including self-leveling joint sealant for vents ...
Medvedkovo is a Moscow Metro station in Severnoye Medvedkovo District, North-Eastern Administrative Okrug, Moscow. Mapcarta, the open map.
Elektrostal is a city in Moscow Oblast, Russia, located 58 kilometers east of Moscow. Elektrostal has about 158,000 residents. Mapcarta, the open map.
596K subscribers in the vexillology community. A subreddit for those who enjoy learning about flags, their place in society past and present, and…
Heat-ex is located in Elektrostal. Heat-ex is working in General contractors, Heating installation and repair activities. You can contact the company at 8 (495) 505-21-45.You can find more information about Heat-ex at heat-ex.ru.