Olympus Trip 35
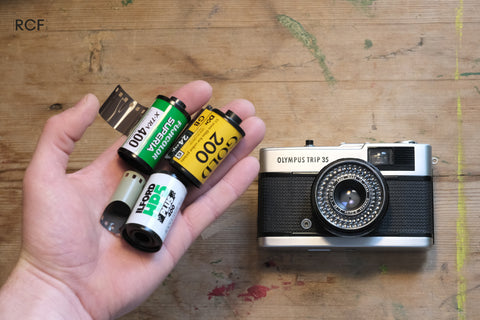
The Olympus Trip 35 is a fully-automatic 35mm compact camera , manufactured by Olympus from 1967 [1] to 1984, during which time over ten million units were sold, [1] though this oft-quoted figure is likely to have included later plastic-bodied Olympus cameras with Trip branding, as the original Trip 35 had serial numbers going up to around 5,400,000. [2] The auto-exposure mechanism is effectively solar-powered by a selenium cell surrounding the lens, and consequently the camera runs without batteries. Until June 1978, the shutter button was silver-coloured metal. After that date, all Trips had a black plastic button.
- 1 Auto-exposure mechanism
- 3 Viewfinder

Auto-exposure mechanism
With the aperture ring set to "A", the camera operates as a program automatic with a working EV range of 8.32-17.4 at ASA 100. [3] Half-pressing the shutter-release button locks the exposure with both the aperture and shutter speed (of which there are only two, 1/40 and 1/200s) fixed by a delicate but accurate mechanism. As explained by one repair page ,
The combination of aperture and shutter speed that the exposure mechanism chooses depends on the amount of light available. The precise amount of light that triggers a change of the shutter speed is not documented in the user manual, but it is believed to be around EV 13. When brightness of EV 13 or more is detected, the Trip 35 will increase the shutter speed to 1/200 sec in preference to using a smaller aperture, and use a narrower aperture as light levels increase from there, presumably to avoid the diffraction effects that affect all 35mm cameras below f/11. [4] Below EV 13, it will use the 1/40 sec speed and widen the aperture for lower light levels. The camera will refuse to fire if there is not enough light, with a red plastic flag appearing simultaneously in the viewfinder. This mechanism makes it impossible to make the error of shooting with the lens cap in place.
When the aperture is set manually (primarily for flash photography), the shutter speed is set to 1/40th of a second. However, the meter is still active even in this "manual" mode. Setting the aperture manually merely sets the widest permissible aperture, and the auto-exposure mechanism may still choose to set a smaller aperture than this if it sees fit. [4]
Other than this, the camera offers no controls for setting exposure manually, though one can easily set exposure compensation by changing the film ASA dial to a higher or lower value.
The Trip 35 has a 40mm f/2.8 Zuiko non-interchangeable lens, with four elements in three groups. Ken Rockwell suspects this to be a front-element focusing Tessar . [5] This lens has a reputation for being extremely sharp, even in the corners; in Rockwell's tests, Costco-scanned Fuji ISO 400 print film loaded into this camera out-performed a Canon 17-40 f/4 L lens in the corners. [5]
The lens provides simple zone-focusing with 4 cute distance symbols marked on the top-left of the lens. These correspond to the real distance markings on the underside of the lens: 1 meter, 1.5 meters, 3 meters, and infinity. Filter ring is 43.5mm.
The viewfinder is an albada-type, with parallax markings for closer focusing. There is a second, very small window under this, nicknamed the "Judas window", which shows the current aperture setting and distance symbol which are on the lens barrel.
A small red flag will appear in the viewfinder if the auto-exposure mechanism decides there is not enough light and refuses to fire.
This camera's aperture blades (there are two blades) tend to be become sticky over time. Before purchasing an old Olympus Trip 35, ask the seller if the aperture is properly opening and closing at all values (f/2.8-f/22). This can be done by manually selecting each aperture value and half-pressing the shutter button. Otherwise, the lens unit would have to be disassembled and cleaned.
- ↑ 1.0 1.1 Olympus' history of EE-equipped cameras (archived)
- ↑ Serial numbers collected by the Olympus Trip Flickr group
- ↑ Specifications in the user-manual.
- ↑ 4.0 4.1 See the Trip 35 program graph , and the explanation in this thread .
- ↑ 5.0 5.1 http://www.kenrockwell.com/olympus/trip-35.htm
- Manual available from UCL
- Olympus Trip 35 group on Flickr
- A modification that allows a 1/200 shutter speed with manual aperture control
- Illustrated instructions for repairing a Trip 35
- Trip 35 in the Olympus Global History (archived)
- This is a trip at Classic Cameras by RaúlM.
- Lionel's Olympus Trip 35 page in French at 35mm-compact.com
- Olympus Trip 35 on www.collection-appareils.fr by Sylvain Halgand (in French)
- Flickr image
- Image by rick soloway
- Japanese 35mm viewfinder
- Image by Michele M. F.
- Image by Hans Jan Dürr
- Image by vincentnip
- Image by Ênio Resende
Navigation menu
Personal tools.
- View source
- View history
- List of Companies
- Community portal
- Recent changes
- Random page
- What links here
- Related changes
- Special pages
- Printable version
- Permanent link
- Page information
- This page was last edited on 7 November 2021, at 07:11.
- Text is available under GNU Free Documentation License 1.3 ; other licenses apply to photos.
- Privacy policy
- About Camera-wiki.org
- Disclaimers

How To Use The Olympus Trip
April 28, 2023 By Cameras By Max
The Olympus Trip is a super popular camera among beginners to film, so here is our guide on how to use this awesome little camera, and some tips on how to get the most out of your Olympus Trip.

What is the Olympus Trip?
The Olympus Trip 35 was introduced in 1967, and discontinued in 1984, which is considered a long production run for a 35mm film camera. Over ten million Olympus Trip cameras were sold in this time.
Many people wrongly call the Olympus Trip a rangefinder camera, however we would classify it more as a point and shoot with zone focusing.
What features does the Olympus Trip have?
The Olympus Trip is really easy to use, and has some cool features that set it apart from other point and shoot 35mm film cameras.
- Zuiko coated 40mm f/2.8 lens : this lens is sharp, and the wide aperture makes it versatile in a lot of situations.
- Automatic settings : the Olympus Trip has two shutter speeds and aperture from f/2.8 to f/22.
- No batteries needed : the Olympus Trip is powered by the selenium meter around the lens. This is also what receives light and tells the camera which aperture is needed.
- Red flag feature : when the camera does not have enough light to take a photograph, a red flag appears in the viewfinder.
- Zone focusing : the Olympus Trip has four focus settings depending on how far away your subject is from the camera.
What are the different parts of the Olympus Trip?
The top plate.
The Olympus Trip top plate is very simple. The camera features are easy to find, making it an ideal camera for beginners. Below is a labelled diagram of the camera.

On the left of the top plate is the rewind knob (more on that later). In the middle is the flash hotshoe, used for mounting hotshoe flashes to the camera. The shutter button is the small black button on the top. On some models of Olympus Trip, this button can be silver. The small panel on the right is the shot counter that displays the number of shots you have taken.
The Olympus Trip lens holds most of the key settings for the camera , such as the ASA, focus, and aperture.

The ASA dial is set to match the roll of film that you put in the camera. For example, if you are using Portra 400, the ASA setting is set to 400.
The focus settings are simple, and known as zone focusing. There are four zones to choose from. We go through them in more depth later on in this article.
The aperture settings are only used if you are using flash. Otherwise, the camera is set to "A", which allows the camera to choose the aperture and shutter speed automatically.
The Bottom Plate
There is only one function on the bottom plate of the Olympus Trip 35: the rewind button. (And the tripod mount, technically.)

The rewind button is pressed when you are ready to start rewinding your film.
How To Load Film In The Olympus Trip
Loading film takes some practice, but it is really easy when you get to grips with it.
To load a roll of film in the Olympus Trip, first you have to open the back of the camera. To open the back of the camera, pull down this small silver tab, shown below.

Once you have the back of the camera open, you can load your roll of film. To load the roll of film, pull the rewind knob up. The roll of film goes in with the top of the canister (the part that sticks out) at the bottom of the camera. See the image below.

When the canister is in, as shown above, you can pull the film leader across the camera to reach the other side.

The rewind knob being put back down will lock the canister in place as you pull the film across. In order to lock the film onto the film spool in the camera, it has to go partly into one of the slots, and the notches at the bottom of the spool have to go through the sprockets on the film (the holes).

In order to be able to advance the film across the camera, you have to fire the shutter . You can do this by pointing it at a bright light or by setting the aperture setting to one of the numbers.
I recommend firing the shutter, and advancing the film (with the advance thumb wheel) twice before closing the back, so that you can make sure the film is definitely loaded correctly. As you get more confident, you can fire the shutter less times and therefore get more photos on your roll of film.
How To Take Photos With The Olympus Trip
Now you have loaded your roll of film, and closed the back of the camera, you are ready to start taking photos!
The first thing to check is that your ASA is set to the same speed as your roll of film. For example, Portra 400 is ASA 400. Or Kodak Gold is ASA 200.

When looking through the viewfinder, you will be able to see your frame lines, and the focus setting that the camera is set to. The viewfinder of the Olympus Trip does not show you where the focus is set, just which symbol you have the lens set to.

When the lens is set to "A", the camera will choose the shutter speed and aperture for you manually. If the image you are trying to take is too dark, the red flag will come up.
You can override this by setting it to one of the numbers instead, but be aware that these are intended for a flash to be used with it. By setting the Olympus Trip to a number on the lens, it reduces the shutter speed to 1/30 - that's one thirtieth of a second. So you will need to have a steady hand when doing so.
How does the film counter on the Olympus Trip work?
When you first load your roll of film, it may look as though the film counter is not moving. It takes two or three shots for the shot counter to move to the number one.
The back of the camera needs to be closed in order for the shot counter to start working.
The counter shows the amount of images you have taken, not how many you have left.

How do I focus the Olympus Trip 35?
The Olympus Trip focus settings are simple, but take some getting used to. There are four settings on the camera. The symbols for these are found on the black part of the lens, as shown earlier in the article.
The symbols are as follows:

The Olympus Trip has four focus settings . The viewfinder view does not change as you change the focus settings, so you need to know which setting is correct for how far away your subject is. Luckily, this is not hard.
The first setting has the symbol of one person. The first setting is used for close-up photographs , where the subject is less than 1 metre away.
The second setting is of two people, which is to be used for subjects from 1.5 to 3 metres away.
The third setting is a symbol of three people. This setting is used for subjects that are between 3 and 6 metres away.
The final setting is a symbol of a mountain, which is used for anything beyond 6 metres away.
If you ever forget these numbers, they are engraved on the underside of the lens (opposite to the symbols on the top).
How does the Olympus Trip 35 red flag feature work?
The purpose of this Olympus Trip feature is to stop you from taking a photograph that is not exposed enough and therefore will not be visible when developed.
When there is not enough light in your image, the red flag will pop up in the viewfinder. You will clearly be able to see it if you are looking through the viewfinder. It also blocks the shutter button from being pressed.

Can I use the Olympus Trip at night?
Yes, you can.
The easiest way to do this is to attach a flash to the top of the camera.
Attaching a flash to the top of the camera is easy and most flashes can be used on the Olympus Trip. It has a standard flash hotshoe on the top of the camera.
Here is an example of a flash that can be used on the Olympus Trip:
When using a flash on the Olympus Trip, there are different settings to use. These are the aperture numbers on the silver barrel of the lens closest to the camera.
The aperture you use needs to be read off of the meter table, which is usually displayed on the back of the flash unit.

You can read more about using the Olympus Trip at night here .
How To Rewind Your Film
Congratulations, you've finished your roll of film.
How can I tell if the roll of film is finished?
You will start to feel some resistance when trying to advance the camera. Do not force it, as you will snap part of the mechanism.
If you are using a 24 exposure roll of film, you will have reached the 24th shot. The shot counter should show the number 24, or near to that number. The same applies for a 36 exposure roll of film, as this will show the number 36. Sometimes you are lucky and get 37 or 38 shots out of a roll of film.
When the film will not advance any more, the film is finished.
How do I take the roll of film out?
On the bottom of the camera is your rewind button. Push this button in. It should stay in after you have pressed it once.
You can now use the rewind knob to rewind the film into the canister. Turn the knob clockwise.

Rewinding the film usually takes around thirty seconds of rewinding. You will feel when the film comes off of the spool at the end, because the rewind knob will have less resistance. Keep rewinding it until you feel certain that the film is back inside the canister.
You can now open the back and take the film out.

That's just about everything you need to know about the Olympus Trip 35 35mm film camera! We really recommend this camera for beginners, so we hope you have a great time using it and create some lovely images.
I think my Olympus Trip is broken; what should I do?
A lot of Olympus Trip 35mm film cameras have never been serviced in their lifetime. Because they are holiday cameras, a lot of them have sand in the mechanisms.
We highly recommend getting your Olympus Trip serviced if it hasn't been used in a while.
Maintained, these cameras can last many years, however when they have been left for decades, they can develop a few issues, such as stuck aperture blades, stuck shutter, non-functioning light meter, etc.
All of our Olympus Trip services and repairs are very affordable, so definitely consider sending it to us before deciding that it doesn't work, or putting it back in a drawer.
Shop our full range of Olympus Trips and accessories here:
Find out more about the olympus trip here:.

Featured Camera: The Olympus Trip 35

Can You Use the Olympus Trip At Night?
If you like what we do, but can't buy a camera from us, please consider buying us a cup of coffee! It helps us to keep these resources free, consistent, and accessible.
Still stuck on which film camera to buy?
Try our film camera quiz. All you have to do is answer a few questions, and then you will get a list of personalised camera recommendations.
Or send us a message on Instagram , send us an email , chat to us on our live website chat, or read some more of our blog posts!

Article written by: Max
Max is the owner of Cameras By Max. They work full-time repairing and refurbishing all the 35mm film cameras you see on the website. Their favourite camera (at the moment) is the Olympus XA, and their favourite city in the world is Edinburgh.
Take our quiz to find your perfect film camera.
Not sure which camera is best for you?
No more products available for purchase
Your cart is currently empty.
Item added to your cart

If you're the proud new owner of a vintage Olympus Trip 35 film camera, you're in for a treat! This classic piece of photographic history is perfect for capturing memories with a unique analog touch with ease. In this guide, I'll walk you through the step-by-step process of using your Olympus Trip 35, complete with images and important precautions to ensure you get it right every time.
Expand the relevant guide:
Collapsible content
Loading film into the olympus trip 35:.
Step 1: Choose your film
Select your preferred 35mm film roll, keeping in mind that the Olympus Trip 35 is compatible with ASA/ISO speeds ranging from 25 to 400.
Popular film brands include Kodak, Fujifilm, and Ilford. This post I wrote might be useful: Buying 35mm Film - A Complete Guide
Step 2: Set the film speed and set the camera to manual for film loading
Set the appropriate ASA/ISO speed for your film using the dial located on the front of the camera, near the lens.

Also turn the aperture ring to any manual f number against the red line so that it isn't set to 'A'. The shutter can now be released regardless of light conditions.
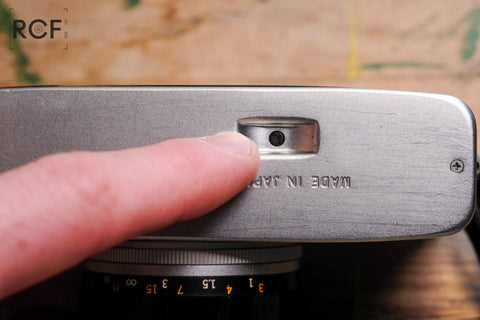
Step 3: Open the camera back
![[Image 2: The Olympus Trip 35's back lock tab]](https://cdn.shopify.com/s/files/1/0571/3212/2301/files/DSCF2797_480x480.jpg?v=1684491064 "olympus trip 35 diagram")
Locate the back cover lock tab on the bottom of your Olympus Trip 35. Pull it down and the camera back should pop open.
Step 4: Insert the film cartridge
![[Image 3: Film cartridge being inserted into the camera]](https://cdn.shopify.com/s/files/1/0571/3212/2301/files/DSCF2798_480x480.jpg?v=1684491072 "olympus trip 35 diagram")
Lift up the rewind knob and insert the film cartridge into the film chamber on the left side of the camera, making sure the tip of the film is pointing toward the take-up spool on the right side. Then push the rewind knob back down into the roll of film (sometimes needs a wiggle or slight rotation to go all the way back down).
Step 5: Engage the film leader into the take-up spool
![[Image 4: Film leader inserted into the take-up spool]](https://cdn.shopify.com/s/files/1/0571/3212/2301/files/DSCF2800_480x480.jpg?v=1684491080 "olympus trip 35 diagram")
Pull the film across the camera and insert the tip securely through and into a slot on the take-up spool. Advance the film using the wind-on wheel.
Step 6: Align the film perforations
Ensure that the film perforations are aligned with the sprocket teeth on both sides of the film.
![[Image 4: Film leader inserted into the take-up spool]](https://cdn.shopify.com/s/files/1/0571/3212/2301/files/DSCF2801_480x480.jpg?v=1684491091 "olympus trip 35 diagram")
This ensures the film will advance smoothly when winding.
Step 7: Close the camera back
Close the camera back tightly. The camera back should click shut, indicating it is securely closed.
![[Image 6: Closing the camera back]](https://cdn.shopify.com/s/files/1/0571/3212/2301/files/DSCF2803_480x480.jpg?v=1684491101 "olympus trip 35 diagram")
IMPORTANT: Never open the camera back before fully rewinding the film, as this can expose your film to light and ruin your photos. Make sure to rewind the film completely after taking all 24 or 36 frames before unloading it.
Step 8: Advance film to '1'
Keep winding film and releasing the shutter until the film counter points to "1". This ensures the unexposed part of the film is ready for your first photo.

IMPORTANT: Watch the rewind knob when you wind the camera on ; it should start to rotate at the same time as you wind, indicating that the film has been taken up correctly - this is key, if this is not happening after a few shots then it probably means that the film has not been securely engaged by the take-up spool and the loading process will need to be repeated.

Step 9: Set the camera back to "Automatic" and get ready to shoot!
Turn the aperture ring until the 'A' mark is aligned with the red line in front of the viewfinder (click stop).

Your Olympus Trip 35 is now loaded with film and ready to capture amazing photos.

Taking Photos with the Olympus Trip 35:
How to take photos with the olympus trip 35:.
Step 1: Ensure the camera is wound on
This gets the shutter ready and primed to take a photo.
Step 2: Set subject zone focus distance on the lens
The Olympus Trip 35 has 4 settings which equate to focusing zone distances away from the camera (shown on the underside of the lens barrel):

- 🧍♀️Close focus ≈ 1 meter. This setting is used for focusing on anything ~1 meter away from the camera, be it close headshots or other close up details.
- 👥 Portrait ≈ 1.5 meters. Used for focusing on anything ~1.5 meters away from the camera, for example portraits or capturing wider details in the photo.
- 👯 Group ≈ 3 meters. Focusing on anything ~3 meters away from the camera, eg. full length body shots/group photos.
- 🌄 Scenery ≈ 5+ meters. Focusing on everything 5+ meters away from the camera, great for landscapes or subjects far away from the camera!

Step 3: Ensure aperture ring is set to 'A'
For 99% of situations in good light without a flash, it's best to leave the camera set to the red 'A'.

This lets the camera's solar powered meter set the exposure settings automatically and ensures a good exposure.
Step 4: Compose the photo using the viewfinder

Use the projected frame lines to see the area that will be captured in your photograph. There are hash marks to indicate the change in frame at close focus.
Step 5: Take photo by pressing shutter button

There should be a small click as the shutter fires - indicating a photo has been taken! 🙌 If instead a red flag appears in the viewfinder, this is a warning that there is not enough light in the scene for a proper exposure.

You can manually disable the red flag low light warning and take a photo anyway in low light by setting the aperture to '2.8'.
Towards the end of the roll it is important to not try to wind on the camera hard when you start feeling quite a lot of resistance or cannot wind on further - this signifies that the roll is finished, but if pushed too hard at this stage can result in the film snapping in the back of the camera.
Unloading Film from the Olympus Trip 35:
Step 1: Check the film counter
Once you've taken all the photos on your film roll (either 24 or 36 frames), check the film counter to ensure you've reached the end.
![[Image 10: Film counter indicating the last frame]](https://cdn.shopify.com/s/files/1/0571/3212/2301/files/DSCF2809_480x480.jpg?v=1684491137 "olympus trip 35 diagram")
Towards the end of the roll it is important to not try to wind on the camera hard when you start feeling quite a lot of resistance - this signifies that the roll is finished and if pushed too hard can sometimes result in the film snapping in the back of the camera.
Step 2: Press rewind button in
Find the small black button on the base of the camera and push it in to disengage the film from the winding mechanism and allow the film to wind back into the film canister inside the camera.
Step 3: Rewind the film
Press the rewind button located on the bottom of your Olympus Trip 35. Then, turn the rewind knob clockwise to rewind the film back into the cartridge. Keep rewinding until you feel the tension release, indicating that the film has been fully rewound.
Step 4: Open the camera back
Following the same steps as when loading the film, locate the camera back lock tab on the bottom of your Olympus Trip 35. Pull it outwards to open the camera back.
Step 5: Remove the film cartridge
![[Image 13: Film cartridge being removed from the camera]](https://cdn.shopify.com/s/files/1/0571/3212/2301/files/DSCF2813_480x480.jpg?v=1684491173 "olympus trip 35 diagram")
Pull up the rewind lever and lift the film cartridge out of the film chamber.
Step 6: Store and develop your film
![[Image 14: Film cartridge ready for storage or development]](https://cdn.shopify.com/s/files/1/0571/3212/2301/files/DSCF2814_480x480.jpg?v=1684491181 "olympus trip 35 diagram")
Place the film cartridge in a light-tight container to protect it from light exposure. Take or send your film to a lab for development or develop it yourself using the appropriate chemicals and techniques.
Shop The Olympus Trip 35
Olympus trip 35 vintage 35mm film camera | tested & fully refurbished | 100 day guarantee, olympus trip 35 vintage 35mm film camera - forest slate green | tested & fully refurbished | 100 day guarantee, olympus trip 35 vintage 35mm film camera - burnt orange | tested & fully refurbished | 100 day guarantee, olympus trip 35 vintage 35mm film camera - golden yellow | tested & fully refurbished | 100 day guarantee, olympus trip 35 vintage 35mm film camera - teal green | tested & fully refurbished | 100 day guarantee, olympus trip 35 vintage 35mm film camera - royal blue | tested & fully refurbished | 100 day guarantee, olympus trip 35 vintage 35mm film camera - lipstick pink | tested & fully refurbished | 100 day guarantee, olympus trip 35 vintage 35mm film camera - sand beige | tested & fully refurbished | 100 day guarantee.
- Choosing a selection results in a full page refresh.
- Opens in a new window.
How to Shoot Night Photography with the Olympus Trip 35 by Tom Box
- Learn to Shoot Film: Tips & Tutorials
- January 25, 2019

Written by Tom Box

I would imagine most, if not all, of the people reading this have heard of the Olympus Trip 35
Over 10,000,000 units of the camera were sold during it’s lifetime, and the solid build, simple operation, and wide availability have made the Trip a hugely popular option for the modern film crowd.
I’m not going to review the camera, as this has been done dozens of times across the internet, but instead explain how to use the Trip outside of its limits, specifically with low light and night photography.
Find the Olympus Trip 35 at KEH Camera or on eBay .

Hacking the Olympus Trip 35 to Work in Low Light
The Olympus Trip 35 uses a selenium light meter to adjust aperture and shutter speed automatically, locking the shutter release if there is insufficient light which would result in underexposure.
However, the Trip also has a flash sync mode, whereby the aperture is manually selected and the shutter is set to it’s slower speed of 1/40th of a second.
This is, of course, designed to be used with a flash, but the manual aperture settings coupled with modern high speed films means you can also use the flash setting to successfully shoot the Trip at night. Don’t let that little red flag stop you…
Load a roll of 400 or 800 speed film, set the ASA to 400 and the aperture to it’s widest setting of 2.8, and you’re ready to go. That’s all there is to it.
If the scene is too bright for the set aperture of 2.8, don’t worry, the Trip’s meter is still active in flash mode and will stop down the aperture to prevent overexposure.
Related: Five Tips for Shooting Film at Night

Working With the Shutter Speed and Aperture Limitations
Now, 1/40th at f/2.8 really doesn’t seem slow or wide enough to shoot at night, even with 800 speed film. But I’ve found that I get excellent results if there are enough bright lights in the scene.
I used to shoot SLRs at night on aperture priority, lens wide open to f/1.4, and, even pointing at a shop window, I’d be struggling to hand hold the camera’s chosen 1/15th or 1/8th shutter speed.
The thing is, most auto-exposure cameras will be metering for the whole scene, taking into account the vast expanse of black just as much as any light sources.
More often than not, auto-exposure for a scene like a shop window at night would result in a blown out light source and mucky shadows, and not look at all how you remember seeing the scene with your own eyes.
Have you ever tried to take a photo of a sunset with your phone camera and it’s blown out the colors and tried to expose for the foreground? Every time.

What to Expect While Shooting the Olympus Trip 35 at Night
I won’t lie and tell you that using the Olympus Trip ( find on eBay ) at night will always produce perfect results. (It works best in an urban area with lots of artificial light.) But I do believe that shooting film at night can be as simple as setting the exposure once and getting on with taking photos.
An underexposed photo is better than a 2 second long exposure of motion blur!
Any grainy shadows can be clipped in using Photoshop or another image editing program to bring true black back into the shot and increase contrast.
That and slightly boosting the mid tones is pretty much the only editing I need to do to my Night Trip photos.

Related: Olympus Stylus Epic Point & Shoot Film Camera Review
The Olympus Trip 35 is a quintessential point-and-shoot camera, and that doesn’t have to stop when the sun goes down.
Try it yourself with some 400 or 800 speed film and see if you agree that night photography doesn’t always require tripods and fast lenses…
All of the photos in this post were taken on a trip to Japan, using Fuji Superia Premium 400 speed film and my Trip 35 set up as I’ve described. Developed and scanned at home.
I also double exposed a roll of CineStill 800T in the Trip. Photos below.

On a tangent…
It’s always worth checking over a ‘dead’ Olympus Trip 35 because it’s quite likely the meter is fine, and the problem is with gummed up aperture blades or other internal gubbins.
On two occasions, I’ve acquired a Trip which refuses to raise the red flag, suggesting the meter is dead, only to remove the top plate (held on by 3 easily accessible screws) and see that the meter needle is moving fine.
The problem both times lay in the sliding plates that determine aperture and shutter speed. A quick clean with naptha and it was working perfectly.
I’ve had a similar experience with an Olympus Pen EES-2 (basically the half frame Trip 35) which merely had sticky aperture blades. Half an hour of disassembly and cleaning and it’s working beautifully.
Thank you so much, Tom! Tom is a regular contributor here at Shoot It With Film, and you can check out his other articles here , like an intro to pinhole film photography and how to use prisms for creative effect . You can also check out Tom’s work on his website and Instagram .
Leave your questions about shooting the Olympus Trip 35 at night below in the comments, and you can pick one up for yourself at KEH Camera or on eBay !

Related Posts:

Blog Comments
Noor Hashem
January 1, 2020 at 7:38 pm
Can i use a 200 speed film or does it have to be 400 or 800?
July 27, 2020 at 5:54 am
Hi Tom, Can you use the Fuji Superia Premium 400 speed film also during the day or you would recommend it only for night shots?
Many thanks! Px
shootitwithfilm
July 27, 2020 at 2:48 pm
Thanks for your comment, Pilar! Fuji Superia 400 is a great film to use during the day. You can check out this post for examples of what it looks like during the day: https://shootitwithfilm.com/how-to-shoot-fujifilm-superia-400/
January 22, 2021 at 8:21 am
How did you do the double exposure on the Cinestill 800T’s pics ?
January 25, 2021 at 2:22 pm
The double exposures were totally random, done by shooting a full roll, rewinding it almost to the end and then shooting over it again. – Tom
April 12, 2022 at 7:59 pm
Hi, I´m planning to use a Fuji 500T for night concert shots in my Olympus trip. Do I have to detail this to the photography laboratory? Any recomendation?
April 12, 2022 at 11:14 pm
Hi Morena! If you want it developed and scanned normally, you don’t need to let the lab know any special information. You’ll only want to let the lab know if you want the film pushed in development or if you want the film scanned a specific way (such as having it scanned for highlights to bring out the nighttime atmosphere of the images). And while you don’t have to let the lab know any special info, if you feel like it was a tricky shooting situation, you can always reach out to the lab and ask their advice for developing and scanning.
September 10, 2022 at 4:07 pm
I just purchased this camera and the red shutter flag appears over my view finder whenever it is set to automatic. I have not yet tested with film yet but my run through seems to work okay when the apture is set to any other setting (2.8-end). What does this mean? That my internal light source is dead? And if so what does this mean when shooting? Shall I just set it to sunny 16 (as a rule of thumb) but how will this look in low light?
Leave a Comment Cancel Comment
Shoot it with film on instagram.


- Olympus Manuals
- Digital Camera
Olympus TRIP 35 Manuals

Olympus TRIP 35 Instructions Manual (13 pages)
Table of contents.
- Setting the Camera to Manual System 2
- Loading the Film 3
- Engaging the Film End with the Take-Up Spool 3
- Before Closing the Rear Cover 4
- Checking the Film Counter 4
- ASA Film Speed Setting 5
- Setting the Camera to Auto System 5
- Composing the Picture and Releasing the Shutter 7
- Rewinding the Film 8
- Flash Photography 9
- The Olympus Pen Flash CL 10
- When Using Ordinary Flash Gun or Electronic Flash 10
- Technical Data 12
Advertisement

Olympus TRIP 35 Repair Instructions (17 pages)

Related Products
- Olympus Trip 500
- Olympus TRIP 505
- Olympus TRIP 600
- Olympus Tough TG-810
- Olympus Stylus Tough 8010
- Olympus Tough TG-820 iHS
- Olympus STYLUS U TOUGH-3000D
- Olympus u TOUGH-6000
- Olympus TG 850
- Olympus STYLUS TG-870
Olympus Categories
Upload manual
Olympus Trip 35: Perfect for Trips
A classic camera with legendary status, makes taking SLR quality photos a breeze and is the perfect camera for taking out, a real grab and go camera.

After sorting out my box of negatives, I found some from when I first started film photography and back then I shot with colour film, whereas now I’m purely black and white.
I picked this camera up on ebay after hearing many many good things on flickr and reading reviews here. I can’t remember how much I paid, but it wasnt much, around £7 I believe. My sister has recently bought one for a trip (that word is going to be used a lot in this review). She’s going on and cost her £18, I think this increase in price is due to the fact more people are realising just how good this camera is.
When my camera arrived, I did all the rudimentary checks you should do with a Trip 35 and that’s half depress the shutter to make sure the aperture blades are moving freely and make sure that the famous red flag rises in the viewfinder. When not enough light is available in “A” mode, simply do this by looking through the finder and cover the lens and press the shutter. The camera passed all the best and was ready to go.
Here are the specs for the Olympus Trip 35 you probably know them already:
Focus: Manual by scale, visible through viewfinder. Lens: 40mm f/2.8 Olympus D. Zuiko, 4 elements, three groups. Close Focus: 2.9’ (0.9m). Diaphragm: two bladed, diamond-shaped, stopping down to about f/22. Shutter: 1/40 or 1/200, automatically selected. No bulb setting. Meter: Selenium cell around lens. (automatically incorporates any filter factors.) Exposure: Program automatic (A) and fixed-aperture for flash. Note: if you chose a large aperture for flash and work in bright light, it stops down accordingly but keeps the shutter speed at 1/40. Film Speed: Third stops from ASA 25 – 400, except ASA 32. Filter Size: 43.5mm screw in. Flash: Hot shoe and PC terminal. Size: 4.912" W x 2.861" H x 2.269" D (124.77mm W x 72.67mm H x 57.62mm D). Weight: 13.77 oz. (390.5g).
Anyway, the following weekend me and my girlfriend and her friend went to Leeds, England. I took the Trip 35 with me, it fit nicely into one of my larger pockets due to the lens, and was easy to carry. I found the camera great to use on the street and hardly anyone notices it and if they do, they look intrigued. Here are some of the results from Leeds.

For my next roll, I decided to experiment a little. I used a roll of self redscaled film. It was iso 200 so I rated it at 50. Here are some results.

Overall, this camera is great and one everyone should own. Over 5 million were made so you will be able to pick one up, put any film init and it will perform fantastically. My two favourite things about it are the fact it doesn’t use batteries and well, it’s amazing zuiko lens. I believe the meter is accurate enough to use slide film and it is very consistent. Thanks for reading, keep shooting.
written by brandkow93 on 2012-05-17 #gear #street #review #colours #colour #olympus #olympus-trip-35 #david-bailey #sharp #redscaled
zorki , lizkoppert , spookydirt , joshuadleach , thepolaroid , foodeanz , alex34 , cloudishballon , chib3h , gengorou , concrete-monstaz , tomkiddo , wuxiong & neanderthalis .

Really wanted one of these for a while but told myself I couldn't buy any more cameras :/

I'm quite fond of this camera, i have never seen one with a lens cap!

@street_smile , I've got one with cap, recently brought from the auction: ic.pics.livejournal.com/romson/2316906/74569/original.jpg The logo has changed slightly since 1970, so possibly it's original cap.
More Interesting Articles
Tipster: film photo inspirations for summer.

The sun's out and so should our film cameras be! In this article we've listed a few fun, classic and experimental photo styles to give you inspiration for your summer shenanigans with the help of our creative community members.
Marce's Summer Adventures with the Sprocket Rocket

Busan-based film photographer Marce takes us back to summer and a trip filled with beautiful scenery and memorable moments, all captured using the Sprocket Rocket 35 mm Panoramic Camera.
A Visual Trip with the LomoApparat by Angela Izzo

Both known for their world-distorting and experimental styles, LomoAmigo Angela Izzo and the LomoApparat make the perfect pair to take us to another reality. Check out Angela's latest shots!
Film Photography Day Deals are On!

In celebration of Film Photography Day there are tons of exclusive discounts and fab freebies available so shop now and enjoy sweet savings before it’s too late!
Available in our Shop
Mahnoosh Niakan's Timeless Portraits with the LomoGraflok

Large format is often slow and clunky. It takes a lot of time and effort to get the perfect image. But with our LomoGraflok, the first instant back for 4x5 cameras, we have broken these barriers. Photographer Mahnoosh Niakan shares her incredible portraits taken with the LomoGraflok.
Tipster: Night-time Adventures With the Fisheye No.2

With its 170° lens mixed with features such as multiple exposure, bulb mode, and flash, the Fisheye No.2 is perfect for nights out. Here we share some tips on how to get the best low light photos with your Fisheye No.2.
Enjoy Summer on Film with the LomoApparat Fluffy Omelet Special Edition

Thai artist Proei-Natchariya Laosrisin, also known as Fluffy Omelet, has designed a beach-themed new edition of our LomoApparat camera, perfect for capturing summer holidays on film. Check out the colorful camera and some photos taken by the artist!
Bundle Up and Save!

On the look for a great deal? In need for the perfect gift? Not sure what film to get with your camera? Worry not and discover our budget friendly bundles including sweet discounts and freebies for many different products! Don´t miss a great deal and check them out now!
Isabelle Baldwin's Large Format Experimentation with the LomoGraflok 4×5 Instant Back

Arizona-based photographer Isabelle Baldwin has a love for environmentalism and analogue photography, so when we found out that she takes her large format camera on her adventures, we knew she'd be the perfect match for our LomoGraflok 4×5 Instant Back.
The Fisheye No.2 and Double Exposure – A Multilayer Adventure

Make a bold statement and break from the straight lines of a classic lens. And if that is not enough, switch the multiple exposure feature on for an extraordinary circular adventure.
Jonathan Mok on His First Impressions of the Diana F+ and Love of 120 Film

Jonathan Mok is a California-based photographer and creator with a knack for medium format photography. We knew the Diana F+ camera would be a perfect photographic companion for him!
Three Lenses in One – Nour Triplet v 2.0/64 Bokeh Control Art Lens

Ignite the legacy of a fascinating but forgotten scientist, Ibn al-Haytham, and become a master of light with this unique lens designed for spherical aberration control on full-frame mirrorless cameras. Shipping Live Now!
Charm Within Everyday Life – Anna Starr Shoots With the Diana F+

Anna Starr has a passion for medium format experimental cameras, so we knew she’d be a perfect match for our endlessly creative Diana F+. In these photos she brings attention to the little things we might miss when going about our daily lives.
Your Lomography Holiday Gift Guide 2023

Let's take a look back at Lomography's 10 Golden Rules and find out which gifts are perfect for you and your loved ones! Film, instant cameras, art lenses, scanning kits, cute gadgets. . . you're sure to find something that suits you!
Muhammad Jocky's First Impressions of Our LomoChrome Color '92 ISO 400 Film

Jakarta-based photographer Jocky recently tried out our LomoChrome Color ’92 35 mm ISO 400 film paired with the LomoApparat 21 mm Wide-angle Camera. Check out his photos and read his thoughts on the newest film stock!
Find Out More About


Olympus Trip 35 (1967)
This is an Olympus Trip 35, a 35mm scale focus camera made by Olympus Optical Co., Ltd. between the years 1967 and 1984. The Trip was an extremely popular compact camera and is credited as one of the first truly successful point and shoot cameras, ushering in a new age of simple cameras to those who otherwise would never have bought a rangefinder or SLR camera. The Trip requires no batteries and uses a selenium cell exposure meter for programmed auto exposure, but also allows for the option of manually selected f/stops. The Trip came with an accurate metering system, a reliable shutter, and a quality lens which meant that it was both dependable and delivered excellent results for the millions of people using them. Many can still be found in good working condition today, making them an ideal point and shoot for film shooters looking for an easy to use, but high quality, vintage shooting experience.

When you look at the progression of 20th century camera development, you can see some themes surrounding the style and features of cameras that were released in a particular period. Folding and box cameras dominated the earliest parts of the 20th century, Leica and other 35mm “miniature” cameras were all the rage in the 30s and 40s. By the 50s, the Single Lens Reflex began to be the preferred style of camera over the rangefinder, and at the start of the 60s, “electric eye” cameras opened up doors with auto exposure to people who otherwise wouldn’t have been able to (or didn’t want to) shoot high quality and properly exposed images.
It seems that by the end of the 1960s and going into the 70s, the industry was getting the idea that people wanted more compact and easy to use cameras, but without too many sacrifices in quality. Auto Exposure not only eliminated a lot of the guesswork that would have stumped novice photographers, but also meant that the manual controls that are needed to set things like shutter speed and f/stops could be eliminated from the design, making them simpler to produce and cheaper to sell. The prevalence of electronics, both in shutters, metering systems, and viewfinder displays also helped decrease the size of cameras compared to fully mechanical ones a decade earlier.

Of all the major players at the time, Olympus seemed to be the one company who did the most to differentiate themselves in the compact camera market. The half frame Olympus Pen model made it’s debut in 1959 before anyone else was making a serious effort in the compact camera segment. Each of Olympus’s subsequent full frame cameras were smaller than those released by their competitors, and although it wasn’t out yet, the upcoming OM-series SLR would offer a fully featured semi-professional level camera system in the smallest package possible.

In 1968, a new model called the Olympus Trip 35 would make it’s debut to relatively little fanfare. This new camera broke very little new ground, it didn’t have the credentials of the Pen’s designer Yoshihisa Maitani , and none of it’s specifications would have excited semi or professional photographers. The name “Trip” was chosen to suggest the camera’s intended purpose as a vacation camera for people who wanted a capable, yet compact and simple camera.
Originally retailing in 1968 for $59.95, when adjusted for inflation this compares to about $450 today which is right in the realm of what a capable, yet not out of reach camera would sell for today. The Trip had a quality 4-element D.Zuiko lens, fully automatic programmed auto exposure via a selenium meter, and an easy to use focusing system with click stops for Portrait, Group, and Scenery. The camera was only slightly larger than the very popular Pen series yet exposed full sized 24mm x 36mm shots on regular 35mm film.
Throughout it’s decade and a half of production, the camera only saw very minor changes. The two most obvious were the switch from a chrome to a black plastic shutter release button and an expansion of the ASA film speeds from 200 to 400.
In my research for this article, I found very little information about the Trip around the time of it’s release and into the early 1970s. The most prevalent form of advertising was a series of commercials that aired in the UK featuring famous photographer David Bailey and his Trip.
Check out the following commercial featuring Bailey and Monty Python alum, Eric Idle .
It doesn’t seem as though the camera caught on until a few years after it’s release, but once it did, it remained a very popular model being sold until the early to mid 1980s. Many sites on the Internet today suggest that up to 10 million Trip 35s were sold , but based on serial number research, the actual number is probably closer to half that. But even with 5 million units sold, the Olympus Trip 35 remains one of the most successful single models of any camera ever made.

By the time the Trip 35 went out of production in 1984, there were already a huge number of more advanced cameras with more features, yet the appeal of a mechanical camera that worked without a battery and could still deliver quality results is why it stayed around for so long.
Olympus recognized the success of the Trip name and would reuse it in a series of simple auto focus cameras that were in production from 1984 to 2000, but none with the long lived popularity as the original Trip 35.
Today, the Olympus Trip 35 remains a very popular model for collectors and film enthusiasts alike. A combination of a plentiful supply of them that can be found cheaply, good reliability, and an easy to use design that produces excellent results means that almost everyone who uses one, still has favorable things to say about them. This is a model that is highly recommended by many, including me, and one that definitely deserves a place in your collection.
Year of Production
The Olympus Trip 35 was in production for about a decade and a half, and a common question among collectors is when was my camera made? There are a few articles online suggesting that the earliest models have 6 digit serial numbers and the first 7 digit serial numbers appeared in 1971 – 72, but the Olympus Trip 35 Flickr group has a post that suggests the month and year of manufacture can be revealed by a date code stamped on the underside of the film pressure plate.

The pressure plate is easy to remove as it simply needs to be pulled off on one side. Do it slowly so as not to bend the clips, but I was able to get mine off without any damage to it. Sure enough, on the back of mine, I saw the number 26 which suggests mine was made in June 1972. I’ve copied the relevant information from that Flickr group here, and take no credit for this information.
- 1st Japanese character or letter (in later models) signifying the assembly plant.
- 2nd number representing the last digit of the year of assembly (e.g. 5 = 1975, 0 = 1980).
- 3rd number or letter representing the month of assembly, 1-9 for Jan-Sep, X, Y, Z for Oct-Dec.
The Trip 35 was manufactured between 1967 and 1984, so if you are unsure if you have a 1968 or 1978 model, the chrome shutter button is the earlier and the black the later.
Further reading through the discussion in this thread, it appears that later Trips either don’t have this number stamped anywhere, or the numbers that are there don’t make any sense so it’s possible that the later cameras either used a different system, or none at all, but this should at least allow a good number of Trips to be dated.
My Thoughts

How good could it be? This is a simple compact camera from the “electric eye” era with a large selenium meter and a limited number of shutter speeds, after all. There were tons of cameras like this made over the years, so despite the overwhelming evidence that the Trip 35 was something special I had to find out for myself.
For starters, the Trip is small, but not too small. This was a camera that was designed to be packed into luggage and taken on vacation, so portability was factored into it’s size. Of course Olympus already had their well known half-frame Pen series, and the Trip 35 in someways looks like a full size Pen. At a weight of 390 grams, the camera is light enough to not be noticeable when hanging from a wrist strap, but isn’t so lightweight as to feel cheap.

The overall design of the camera has a very minimalist Japanese look to it. By that I mean, no unnecessary bumps, curves, or protrusions. The top plate is very straightforward featuring a rewind knob with fold out handle, the flash hot shoe, cable threaded shutter release, and automatic resetting exposure counter window. The shutter release on this one is chrome as were all the earlier Trips. At some point in the late 70s or early 80s, the shutter release was changed to a black plastic type, but otherwise looked the same.

Flip the camera over and the bottom has the rewind release button and a centrally located 1/4″ tripod socket. While I always appreciate the inclusion of a well thought out tripod socket, the lack of a Bulb or any shutter speed slower than 1/40 likely suggests that not too many Trips ever saw use on a tripod.

The back of the camera continues with the same squared pattern vinyl body covering from the front and features a rectangular viewfinder window and to the right, the film advance wheel.
This style of rear film advance wheel was a hallmark of most of Olympus’s compact cameras. It first appeared on the original Olympus Pen in 1959 as a way to make the camera as inexpensive as possible and continued with the Trip and the later XA-series of cameras.

Although a cost cutting measure, in reality it works quite well, as two quick left to right swipes of your right thumb across the wheel is enough to advance the film one full exposure while simultaneously cocking the shutter. I can’t honestly say that a film advance lever would have been much faster.

Loading film into the Trip is an uneventful affair. There is a small release on the bottom of the camera’s left side which unlocks the door. Film loads from left to right onto a multi-slotted fixed take up spool.
Despite it’s economy pricing, the film compartment is as good as cameras costing quite a bit more with it’s over sized and dimpled film pressure plate which helps maintain film flatness while decreasing resistance, and even featuring a metal spring on the door to help keep the cassette stable while shooting. In the previous image to the left, you can see this camera’s degraded light seals which like many cameras of the era, needed to be replaced before I could shoot it.

Although lacking a rangefinder or any other kind of optical focus aide, the Trip 35 has a simplified focusing system that uses 4 click stops for various types of photography. At each click stop is an icon which can be seen through a small window from within the viewfinder. The four stops represent the following distances:
- Closeup – 1m (3.2 feet)
- Portrait – 1.5m (5 feet)
- Group – 3m (10 feet)
- Scenery – Infinity
Although not visible from this angle, a focus distance scale with marks in meters and feet is on the opposite side of the lens, visible for the bottom in case you don’t like the icons.
Combined with the wide depth of field offered by the 40mm D.Zuiko lens, guessing focus in most brightly lit scenes is very easy and quite a bit faster than had the camera come with a rangefinder.

Also visible from this angle is the aperture scale ring which enables full and partial auto exposure modes. Turning the inner ring to the A position allows the camera’s meter to select one of the two shutter speeds (1/40 or 1/200) and any range of f/stops from f/2.8 to f/22 to get the exposure right. If there is insufficient light to make a properly lit exposure, a red flag will appear in the viewfinder window and the shutter release will be locked.
For flash photography, or those who want a little more control, you can choose partial auto exposure mode by turning the aperture ring to any position from 2.8 to 22. In each of these positions, the auto exposure system is not fully deactivated, it will still measure light output and select an appropriate f/stop up to that point. So for example, if you manually select f/16, and the exposure meter thinks that f/8 is the right choice, that’s what it will use. In this partial mode, the shutter speed is fixed at 1/40 and cannot be changed. If you require a 1/200 shutter speed in manual mode, there are articles online showing you how to open the camera and modify it to do so . Without this modification however, the camera should not be used for fast action shots in manual mode.
Lastly, at the very front of the lens, is a ring for setting the ASA film speed for the meter. Earlier Trips were limited from 25-200, but were later increased to allow ASA 400 film to be used.

The viewfinder is large and bright, showing projected frame lines for the 40mm frame. The frame lines do not automatically correct for parallax, so there are hash marks to indicate the frame at close focus.
In an effort to make the camera as small as possible, the viewfinder is a bit too close to the lens which causes it to protrude into the viewfinder in the bottom right corner.
Below the viewfinder is a peep hole that allows you to read both the selected focus distance and shutter mode at the same time. In the previous two images, the camera is set to Portrait and Auto.
Lastly, when there is insufficient light to properly expose an image, a red flag will appear in the viewfinder window and the shutter release will be locked, preventing you from making an exposure. This could be a problem for people wanting to use faster film as the fastest speed supported is 400 but for most general shots it should be fine.
The Trip is very easy to use and I’ve found it’s best with cameras like these to not overthinking these, and to use them to their strengths, which is exactly how I intended to use it.
For my first roll through the Trip, I loaded in a fresh roll of Fuji 200 and took it with me to the Chicago Bears training camp prior to the 2019 season, and like the Bears season turned out to be, that first roll was a disaster as I foolishly used the camera without replacing the light seals and the entire roll had major light leaks in every single image. Whoops!
Into the repair queue went the camera, and after having a free weekend to replace the degraded light seals with some new ones, I loaded in another roll of Fuji 200 and took some fall pictures with it.

There is a reason the Olympus Trip 35 almost universally receives constant praise and was in production for over a decade and a half. This is an immensely fun and easy to use camera that delivers excellent results, and perhaps shocking to no one, my results were excellent too.

I left the camera in Auto mode for the entirely of it’s first two rolls and tried to use it as closely as possible to how it’s target audience would have. Looking at the images I got, they are all properly exposed, sharp across the frame, and show no signs of optical flaws common in lesser cameras. A tiny amount of vignetting was evident in a few images, but nothing that should bother anyone. As is the case with any lens marked Nikkor or Rokkor. Olympus’s lineup of Zuiko lenses make spectacular images.
The Olympus Trip wasn’t the first at anything except possibly being the first truly capable point and shoot camera and for that, has quickly become one of my favorite cameras in all of my collection. As much as I’d love to tell you that a folding plate camera from the 1920s or some quirky 1950s SLR is going to be my “go to” camera when I want to shoot film, the reality is cameras like the Olympus Trip will get the call far more often than 95% of what’s in my collection.

I could probably come up with a few nitpicks about the camera like for example the cramped viewfinder that is blocked by the lens in the bottom right corner, or being limited to only 2 shutter speeds and not having a true manual mode, but frankly, if Olympus had changed any of those things, it likely would have negatively affected the success of the camera. Having such a simple shutter meant that it was more reliable and cheaper to produce. Had the camera cost even as little as $10 more, less people would have bought it and it likely wouldn’t have been in production for as long. If there were more features it might have not appealed to the entry level consumer like it did.
The Olympus Trip 35 is a perfect example of “less is more” and in this case, it is WAY more. As this article tops 3400 words, I regret to say that I have nothing new to add to the countless number of positive articles about this camera that already exist.
They’re all right. This is a wonderful camera and one I strongly recommend you check out!
Related Posts You Might Enjoy
Olympus Pen EE-S (1962)
Minolta Hi-Matic E (1971)
External Links
http://camera-wiki.org/wiki/Olympus_Trip_35
https://www.casualphotophile.com/2016/10/03/olympus-trip-35-camera-review/
https://kosmofoto.com/2017/03/olympus-trip-35-review/
https://www.35mmc.com/05/05/2018/olympus-trip-35-taught-little-bit-spontaneous-photographically-andrew-morang/
https://emulsive.org/reviews/camera-reviews/olympus-camera-reviews/the-olympus-trip-35-vs-the-olympus-xa2-in-the-field
https://www.kenrockwell.com/olympus/trip-35.htm
http://photo-utopia.blogspot.com/2008/03/olympus-trip-35.html
https://lewiscollard.com/cameras/olympus-trip-35/
https://schneidan.com/2016/07/01/olympus-trip-35/
https://wycameras.com/blogs/news/review-olympus-trip-35
http://mattsclassiccameras.com/rangefinders-compacts/olympus-trip-35/
https://www.kpraslowicz.com/2004/07/08/olympus-trip-35-1200th-modification
https://www.flickr.com/groups/olympustrip35/
Like this article? Share it!
- Click to share on Facebook (Opens in new window)
- Click to share on Reddit (Opens in new window)
- Click to share on LinkedIn (Opens in new window)
- Click to share on Twitter (Opens in new window)
- Click to share on Tumblr (Opens in new window)
- Click to print (Opens in new window)
- Click to share on Pinterest (Opens in new window)
Now I understand why this camera is a consistent good seller on That Auction Site. For your readers who may not know, the letter preceding the name “Zuiko” on Olympus manual focus lenses indicates the number of elements, with A = 1, B = 2, etc etc through H = 8 (found on the H. Zuiko 35mm f2.0 in the OM series, which I think is the most complex prime lens Olympus made). . Early manual focus Nikkors of the pre-AI variety use a similar scheme, but the letters are based on Latin or mathematicians’ designations for the number of elements: T = tri, Q = quadra, P = penta, H = hexa, S = septa, on up thru D = deca.
Thanks for the feedback Roger, perhaps this would make for an article of it’s own as Minolta did it with their lenses too.
First Letter (no. of groups): T=3; Q=4; P=5; H=6; S=7; O=8; N=9. Second Letter (no. of elements): C=3; D=4; E=5; F=6; G=7; H=8; I=9; J=10; K=11; L=12.
For example, the 58mm f/1.2 MC Rokkor – PG contained 7 elements in 5 group
I have 3 Trips and really must rationalise and sell a couple of them
String pull Kodak first successful point and shoot?
Thanks Mike and Roger for the Groups/Elements codes here. I knew Nikon, but not theothers
Great article! There was one change/variant you didn’t mention – the all black model produced for two years between 1968-1969. I have three Trips, one early Chrome button, one later black button and, of course, the Trip Noir, which is my faithful travel companion. I’ve even run some infrared film through it (successfully) – it truly is an exceptionally capable camera.
Mike I’ve had a few trips in my time and found them so easy and fun to use. There is a one thing to look out for when buying one, check the red flag pops up when you cover the meter with your hand indicating insufficient light – if it doesn’t show and the shutter still fires then you may have a problem. Also i thought the apature settings were mainly there for when a manual flash was attached and the user then sets the appropriate f stop for the subject to distance coverage needed.
Am I alone in thinking that the Trip 35 is the full frame version of the Pen EES2? I have both.
Olympus’s design theory back then shared a similar family resemblance across many models. I am certain that was intentional! 🙂
Like this Post? Let me hear your thoughts! Cancel reply

Olympus Global Homepage
- History of Olympus Products
Olympus TRIP 35

The Olympus TRIP 35 is a full-sized compact EE camera based on the Pen EES. It first went on sale in 1968. The name reflects its suitability as a convenient camera to take on trips. The TRIP 35 became very popular as a camera that combined ease of use, reliability and a low price with superb photographic performance. It remained a best-seller for over the next 20 years since its launch.
- Olympus Trip 35
- Edit source
- View history
The Trip 35 is a fully-automatic 35mm compact camera , manufactured by Olympus from 1967 [1] to 1984, during which time over ten million units were sold. [1] (This oft-quoted figure is likely to have included later plastic-bodied Olympus cameras with Trip branding, as the original Trip 35 had serial numbers going up to around 5,400,000.) [2] The auto-exposure mechanism is effectively solar-powered by a selenium cell surrounding the lens, and consequently the camera runs entirely without batteries. Until June 1978, the shutter button was silver-coloured metal. After that date, all Trips had a black plastic button.
- 1 Auto-exposure mechanism
- 3 Viewfinder
- 4 Common failure and fix
- 5 References
Auto-exposure mechanism [ ]
With the aperture ring set to "A", the camera operates as a program automatic with a working EV range of 8.32-17.4 at ASA 100. [3] Half-pressing the shutter-release button locks the exposure with both the aperture and shutter speed (of which there are only two, 1/40 and 1/200s) fixed by a delicate but accurate mechanism. As explained by one repair page ,
The combination of aperture and shutter speed that the exposure mechanism chooses depends on the amount of light available. The precise amount of light that triggers a change of the shutter speed is not documented in the user manual, but it is believed to be around EV 13. When brightness of EV 13 or more is detected, the Trip 35 will increase the shutter speed to 1/200 sec in preference to using a smaller aperture, and use a narrower aperture as light levels increase from there, presumably to avoid the diffraction effects that affect all 35mm cameras below f/11. [4] Below EV 13, it will use the 1/40 sec speed and widen the aperture for lower light levels. The camera will refuse to fire if there is not enough light, with a red plastic flag appearing simultaneously in the viewfinder. This mechanism makes it impossible to make the error of shooting with the lens cap in place.
When the aperture is set manually (primarily for flash photography), the shutter speed is set to 1/40th of a second. However, the meter is still active even in this "manual" mode. Setting the aperture manually merely sets the widest permissible aperture, and the auto-exposure mechanism may still choose to set a smaller aperture than this if it sees fit. [4]
Other than this, the camera offers no controls for setting exposure manually, though one can easily set exposure compensation by changing the film ASA dial to a higher or lower value.
The Trip 35 has a 40mm f/2.8 Zuiko non-interchangeable lens, with four elements in three groups. This lens has a reputation for being extremely sharp, even in the corners. The lens provides simple zone-focusing with 4 cute distance symbols marked on the top-left of the lens. These correspond to the real distance markings on the underside of the lens: 1 meter, 1.5 meters, 3 meters, and infinity.
Viewfinder [ ]
The viewfinder is an albada-type, with parallax markings for closer focusing. The windows are made of plastic. There is a second, very small window under this, nicknamed the "Judas window", which shows the current aperture setting and distance symbol which are on the lens barrel.
A small red flag will appear in the viewfinder if the auto-exposure mechanism decides there is not enough light and refuses to fire.
Common failure and fix [ ]
Although Trip 35 units are considered to be well-built and mechanically reliable, many vintage units are experiencing a similar symptom: stuck or sticky aperture.
Identification of misbehavior: On a normal Trip 35, the aperture hole must automatically retract to minimum f/22 whenever shutter button is not pressed. Set the lens to different manual aperture setting and press the shutter, the aperture bore should open to different size accordingly and retract to minimum as soon as the shutter button is depressed. If the aperture does not respond, get stuck somewhere in the middle, then the aperture assembly has a lubrication problem.
The following webpage described the remedy in detail: http://www.thermojetstove.com/Trip35/ . However, there are a few steps that can be improved.
1. It's not necessary at all to open the upper cover to take out the aperture assembly. Keeping the top cover in place has 2 advantages: improved handling and what's more important, top cover is the best position to draw reliable referencing dots which is explained later.
2. When disassembling upper cover, it's not necessarily at all to have the rewind crank removed. simply lift the handle and rotate, and screws will expose.
3. Since focus in this model is done by rotation of screw type front lens element, positioning is absolutely crucial and messing up will be very painful. The online article documented this step however is confusing. The detailed steps should be as follows:
1. Remove the outer ring while having the focus ring set to infinity ('Mountain') 2. Use a marker pen to mark the position of 12 o'clock on plastic edge of front lens. This dot is temporary and shall be removed in step 4. For accurate matching, it's best to use a ruler to mark another spot on metal top cover in a line along the diameter. (Call it 1ST DOT for reference) 3. Rotate the front lens fully clockwise till the bottom(in the article, the term 'the whole way' is really confusing and caused big trouble for me). Then, again using a ruler, draw another dot on metal top cover (2nd dot) along the center and the marked spot on front lens, . 4. Remove the mark on the front lens. 5. When reassembling front lens, first double check the focus ring is in position of infinity, then screw the lens in fully clockwise to the bottom. Draw another dot on the lens edge along 2nd dot and lens center. Let's call it 3rd dot. 6. Rotate the lens counter-clockwise until 3rd dot is aligned with 1st dot. 7. Reinstall front ring, be sure to insert the extend directly into the pit in focus ring, tighten 3 screws and make sure outer ring (With Olympus Zuiko Made in Japan mark) rotate symmetrically with focus ring.
Follow this procedure, factory-level focus accuracy should be retained after a lubrication maintenance.
References [ ]
- ↑ 1.0 1.1 Olympus' history of EE-equipped cameras
- ↑ Serial numbers collected by Flickr group
- ↑ Specifications in the user-manual.
- ↑ 4.0 4.1 See the Trip 35 program graph , and the explanation in this thread .
- Olympus Trip 35 - Sample Images
- Olympus Trip 35 Users - Facebook Group
- Salerno's Olympus Trip 35 age identification page.
- Jim Simon's Trip 35 page
- Lionel's Olympus Trip 35 page in French at 35mm-compact.com
- Olympus Trip 35 page at Retrography.com by Simon Simonsen, Denmark
- Manual for Olympus Trip 35
- Olympus Trip 35 group on Flickr
- A modification that allows a 1/200 shutter speed with manual aperture control
- Illustrated instructions for repairing a Trip 35
- Olympus Trip 35 short intro and use with Kentmere 100 film
- Trip 35 in the Olympus Global History
- This is a trip at Classic Cameras by RaúlM.
- Video Manual by Shawnee Union
- Olympus Trip 35 Instruction Manual in English.
- 1 Radioactive lenses
- 2 Helios-44
- 3 Soviet Factory Logos
- 35mm Lenses
- Camera Reviews
- Point and Shoot
Olympus Trip 35 – Camera Review
Josh solomon.
- October 3, 2016

As enthralling as photography can be, long days, months, and years spent shooting can wear you out. In the worst case, it can lead to a photographic malaise that can dismantle even the most well-built minds from the inside out. It can render the best shooters incapable of even the simple task of pressing a shutter button. It’s shooter’s block, our equivalent to writer’s block, and it hit me hard over the summer.
I jumped out of bed one morning full of energy, ready to take on the world with my trusty Nikon F and Leica M2. But instead of plunging into a world filled with beauty, intrigue, and possibility, I found my surroundings cold, ugly, and indifferent. The images I tried to form seemed trite and overplayed, and I soon lost confidence in my ability to make a decent picture. Even the storied reputations of my F and M2 failed to inspire me. Every time I peered through their viewfinders I saw nothing but dust in the pentaprism and emptiness between the framelines.
Sufficiently depressed, I decided to stay home and put my cameras on the shelf. And it was while I was lying face down on a pillow listening to the opening lines of Chicago’s “Hard To Say I’m Sorry” that I realized I did, in fact, need a little time away. But I didn’t need a full-on vacation from the hobby itself – no, that would be too drastic. I just needed a change from the manual cameras that sat on my shelf. I needed an easier camera, and I had a feeling one camera in particular could fit the bill – the Olympus Trip 35.

The Olympus Trip 35 is a camera I’d heard a lot about but had never tried myself. Its reputation for ease of use and high quality seemed the perfect cure for my shooter’s block. And if the Trip 35 was the prescription, the Pasadena Camera Show was the pharmacy. There I found a beautiful Trip 35 for an absurdly low price, bought it, and quickly threw it in my bag.
One would think the Olympus Trip 35 would seem out of place next to legendary cameras like the aforementioned Nikon and Leica, but it actually fits right in. This camera, although not as capable as the other two, holds an equally lofty place in photographic history. Just as the F and the M defined the SLR and rangefinder genres respectively, the Trip 35 defined the point-and-shoot game. More impressive still, the Trip 35 actually outsold the Nikon F and the Leica M2 by millions. Take that, fanboys.
Olympus achieved these massive numbers by appealing to the casual shooter rather than pro photographers, specifically focusing on the new generation of moneyed vacationers. Racing from landmark to landmark and airport to airport, these sightseers simply lacked the time and interest needed to learn the boring particulars of photography required to operate a camera. Instead, they required a camera that was simple to use, but sophisticated enough to beautifully capture their memories.
Good design marries aesthetics to functionality, and the the camera gods couldn’t have picked a better company to bring the Trip 35 to life. Olympus’ design house, fresh off the ingenious half-frame Pen F, struck gold again with the Trip. The design is classic Olympus; clean-cut lines and an impossibly small form factor, the Trip wastes no time and gets straight to the point. It’s as well designed as any machine of its day, more impactful when we recall that the Trip came of age in an era where cameras were still fully mechanical, save for the occasional battery powered light meter. Automation seemed a distant (and expensive) fantasy, so when Olympus created a genuine auto-exposure camera out of primitive nuts and bolts, the world took notice. This was in no uncertain terms an engineering miracle.
The Trip 35 accomplishes this sorcery by determining the amount of light that enters a Selenium photo cell surrounding the lens, and choosing a correct aperture based on this reading. The camera then chooses a shutter speed of either a 1/200th or 1/40th of a second and we get a perfect exposure. When the camera’s incapable of making an acceptable exposure, a little red flag shows up in the viewfinder and the shutter locks out. The magic of this system is that it takes all exposure-related worry out of our minds. We don’t have to agonize about aperture, shutter speed, or even battery life, a godsend for vacationers and anxious photo geeks.
But before we experience it, it’s quite easy to question the Trip 35’s simplicity. After all, how accurate could a camera this old and primitive be? And could the lens be good enough for our 21st century eyes? As I drove home from the camera show, my new Trip in the passenger seat next to me, these questions rolled through my mind. I really needed this camera to be decent, if I was to pull out of my photographic death spiral.
Just then, I received a text message from my sister. Can you pick up some pork buns in chinatown? thx. With this, I had my mission; buy some pork buns, shoot the Trip, and see if this ancient camera could walk the walk.
The first thing I noticed was its build quality. Comprised of metal and plastic, the Trip 35 is solid, but never heavy; lightweight, but never flimsy. The only disappointing aspect of the camera’s feel is its film advance wheel. A dinky plastic affair reminiscent of disposable cameras, this lackluster cog is forgivable when we remember that the Trip was built to be a consumer-level camera.
Peering through the viewfinder showed bright frame-lines with tick marks both for up-close shots and for landscape shots. These are helpful in view of the Trip’s lack of automatic parallax correction. Having used fancy Leica , Nikon , and Contax rangefinders renowned for brightness and clarity, the Trip’s viewfinder beats most of them. Its relative simplicity is a nice change from the cluttered and overly complex viewfinders of other machines. The Trip 35 also features a small window in the bottom right of the VF (affectionately dubbed the “Judas Window” by Trip 35 disciples) which shows both the chosen aperture and exposure setting on the camera.

So far, so good. But how was I to determine focus? I quickly realized that the Trip’s a scale-focus camera, which is not ideal for accuracy. But before I started feeling like Olympus left me all alone and helpless, I realized that they were kind enough to provide some handy distance-measuring tools. Settings along the lens barrel show a picture of one person for portraits, two people for pictures of two people, three people for group pictures, and a mountain symbol for everything in the distance, including mountains. I stopped hyperventilating, and realized that, for a point-and-shoot camera, this is more than enough. And for all you nitpickers, Olympus also included precise distance measurements in both meters and feet on the underside of the lens. Phew.
Once shooting the Trip started to shine, and I was easily able to focus on exactly what matters most in photography – composition. From the first frame I found myself joyfully snapping away at whatever tickled my fancy, even though I didn’t know what aperture values and shutter speeds the Trip 35 was choosing. Frankly, I didn’t give a damn. All that mattered to me was finding different angles, new ways to play with light, and how to capture Chinatown’s unique charm. It felt like with each and every frame, the Trip was dissolving my shooter’s block more and more, and I wanted to just keep shooting.
So the little Olympus and I danced through Chinatown’s colorful landscape, happily snapping away. In no uncertain terms, it was the most fun I’d ever had with a camera. Even though the heat of the afternoon beat on my shoulders and the sweat sizzled on my brow, the Trip 35 and I ran through the city without a care in the world. The streets led us to the door of a steamy Chinese restaurant, then a pile of steaming pork buns, then back to the equally steamy interior of my car. I didn’t care how long the journey took or how much fluid I lost in that heatwave. It seemed like I sweated out my shooter’s block, and I eagerly raced home to deliver the buns, and develop the film.
But something was nagging me about the camera the entire way home; the focus issue. Had I gotten the focus correct for every shot? How was I to trust those markings? How could I possibly live without a focusing aid? Anxiety began to rear its head again and I had to stop myself from speeding over to a one-hour photo lab to assuage my fears. I gripped the steering wheel tight and told myself to trust the Trip. Besides, I still had a job to do. These pork buns weren’t going to deliver themselves.
After delivering and munching on said pork buns with my contented sibling, I decided to get the roll developed and scanned. My fears were partially founded. Some of the shots, especially photos of close subjects or darker scenes, came back fuzzy due to a combination of my poor distance estimation and the nature of the Trip’s exposure and focus systems. While the Trip automatically helps achieve sharp focus by selecting a smaller aperture for greater depth-of-field, this is only possible in bright light. As things get dark, the ability to shoot at a smaller aperture quickly disappears. In these situations it can be really difficult to nail correct focus. One minor consequence of this is that shooters with an affinity for portraiture and those sweet bokeh balls will probably be disappointed by this camera.

But expecting creamy bokeh and close range performance from the Trip 35 (or most point-and-shoots for that matter) is like expecting a ‘93 Honda Civic to outpace a Tesla Model S. It just won’t happen, and trying will lead to frustration. But just like that Honda, if you regard the Trip 35 as a reliable machine good for an occasional joyride, it will never disappoint. The Trip 35 is capable of a great many things , but we must be careful to recognize and respect its own limits.
When we get the focus right, the Trip’s fantastic 40mm F/2.8 Zuiko lens delivers in spades. The lens is a front-focusing Tessar type lens, which means that it’s very simple and very sharp, and it retains this sharpness edge to edge without chromatic aberration, spherical aberration, or any kind of distortion due to its simple optical formula and Olympus’s masterful execution. The lens’ quality even overcame the limitations of expired film, and ended up giving me some great results.
For whom is this camera best suited? First and foremost, the Trip 35 might just be the perfect camera for the casual photophile. Olympus built this camera to document the daily adventures of the everyman, and the Trip does this beautifully. And for experienced shooters, the Trip 35 can be a great way to break free of shooter’s block, or inject our shooting with something fun and carefree. It emphasizes the art of composition rather than the cold calculations of exposure, but even more importantly, it reminds us to relax, have a pork bun, and not take ourselves too seriously.
Want to try the Trip 35 for yourself?
Buy it on ebay, buy it on amazon, shop b&h photo’s vintage gear, follow casual photophile on facebook and instagram.
[ Some of the links in this article will direct users to our affiliates at B&H Photo , Amazon , and eBay . By purchasing anything using these links, Casual Photophile may receive a small commission at no additional charge to you. This helps Casual Photophile produce the content we produce. Many thanks for your support. ]
Share this post!
- Click to share on Facebook (Opens in new window)
- Click to share on Twitter (Opens in new window)
- Click to share on Reddit (Opens in new window)
- Click to share on Pinterest (Opens in new window)
- Click to share on Tumblr (Opens in new window)
- Click to email a link to a friend (Opens in new window)
- Camera Review
- film camera
- olympus Trip

Josh Solomon is a freelance writer and touring bassist living in Los Angeles. He has an affinity for all things analog. When not onstage, you can find him roaming around Southern California shooting film and humming a tune.
29 comments

Very nicely done.

Great review of the Trip! This is the camera that lured me away from Lomography and the whole low-fi aesthetic. While the metering system is somewhat primitive and the zone focusing can be imprecise, especially in low light, it’s obvious that all the money and work went into the lens. In the right circumstances it’s absolutely tack sharp. Once I started getting sharp images from my Trip, the Lomo LC-A+ and the Holga started looking a lot less appealing.
The Trip definitely has some big limitations but on its own terms it’s a great camera.
Here’s my Trip album on Flickr to get an idea.
https://www.flickr.com/photos/21156896@N07/sets/72157645739914959

Thanks for adding your Flickr album. It’s great for people to be able to see what these cameras can do in varied situations.
Thanks so much! Those images are fantastic; they really showcase what that lens can do. Funny you mention the LC-A+… ?
Thanks! The LC-A+ was the camera that got me back into using film after an extended dalliance with digital photography. I used it really heavily for about 2 years before becoming curious about other cameras. The fact that the Lomo is also a zone focuser made it very easy for me to switch to the Trip and the XA2.

Great write up Josh, and really nice album Neilson! I had to do a double take on some of those shots, especially the close up portraits, realizing that you had used a Trip.

I agree, what a great review and some fine shots on that flickr gallery. I’ve just bought my 50th Olympus Trip 35 and am steadily rebuilding them from head to toe. I’ve posted some reviews and other helpful reviews on my site https://trip35.co/

Great pictures from the Trip. You got to love these little cameras!

The Trip 35 was *made* for landscapes and group photos in good light outside. It’s really dang good for those things. For everything else, not so much! But like you, on a day when I’m just out and about shooting stuff, I find the Trip 35 to be big fun.
My last outing with my Trip 35: https://blog.jimgrey.net/2015/04/20/olympus-trip-35-revisited/
If I ever get on an airplane again I think I’ll be bringing this camera… We’ll see. Josh and your post have helped convince me. Thanks for sharing.

Great review of one of my favourite cameras and one of the best free cameras I’ve ever been given. The quality you can get from this little package has always astounded me, this is an example taken with just bog standard Poundland special film (Agfa Vista 200) https://the6millionpman.wordpress.com/2016/09/30/cardiff-bay-sunset-3/
And yet again I confess to being an Olympus fanboy.
Beautiful colors and range on that.

Great article Josh, and thanks for publishing it James. There wasn’t a link, but I started the Olympus Trip 35 users group on Facebook, here is the link. P.S. A few famous photogrpaphers in the group.
http://www.facebook.com/groups/OlympusTrip35
Hey my friend! Thanks for commenting. We did include a link there, it’s in the third to last paragraph where it says the Trip is “capable…” etc.
And for anyone down here in the comments, do check out the FB group. Amazing talent there shooting with all kinds of Trips.
The Trip Flickr group is worth checking out too. Lots of good stuff there.
https://flic.kr/g/5jsssh

Great write-up! I have three of these and, while I’m by no means a great photographer, I do love the pick-up-and-go nature of the Trip 35. For those who are interested, I spent an entire day refocusing the lens on one of mine;
https://teeritz.blogspot.com.au/2014/04/re-focusing-lens-on-olympus-trip.html
Almost drove me nuts!
That post is scary. You’re a brave man.
Bought a Trip after reading a recommendation by Ken Rockwell. At the time I thought I only ever needed one camera – an FE – and I had one. However, the Trip is great for other things. As you say, the pictures are so sharp. And its so easy to use.

I love my Trip 35. Fantastically sharp lens and incredibly easy to use! The zone focusing took a bit getting used to and I do still occasionally misfocus, but when that happens I embrace my inner William Klein. Also, my copy came with a lens cap and zipped up in a bag so the selenium is not at all worn out and the AE is spot-on. I actually trust shooting slide film in this camera more than any of my all-manual cameras!

Hi! Thank you so much. I am seriously considering to buy a Trip. I want to go traveling and bring a good camera. Do you think this one will do? And some people say it’s not really for taking photo’s in the dark/on parties. Are they right?
Thanks again 🙂
Hey Nikki! The Trip is the perfect camera for travel and casual outdoor shooting IMO, but it does suffer in low light without a flash. A little compact flash will help, and it does have a manual aperture override for accurate flash exposures.
If you’re going to be spending lots of time indoors I would suggest either picking up a cheap P&S with a built in flash, or upgrading entirely to a compact SLR/fixed-lens rangefinder with a fast (f/2 and under) lens for low-light shooting without a flash. Hope this helps!
Hello Nikki, I am the Admin of the Olympus Trips 35 Users Group, I recommend you join to get advice, and there are trustworthy sellers in the group.
See the website link below my comment
I’ve recently picked up aTrip 35 and have been very pleasantly surprised by the ease of use and picture quality. I even tried some low light close shots and had better results than I expected. Tip #1: use 400 speed film to increase versatility. You get more depth of field in any situation and therefore more focussing accuracy. You will also hold off the “red flag” for a stop or two. Tip #2: learn how to guesstimate the zone distances as accurately as possible. If you’re shooting close-up in lower light try to nail the actual distance e.g. set the lens on 1 meter and try to be 1 meter away. Use a tape measure at first so you can see what the distances look like. As the light falls or distances get closer then more accuracy is required from the photographer. Tip #3: remember that you can press the shutter button half way down to lock the exposure. Meter off a mid-tone then recompose and shoot. This will help with back lighting and other tricky light. Tip #4: try to shoot within the limits of the design and you will get good results. The Trip 35 was meant for family holidays and a whimsical approach to photography. If you require critical focussing or metering the Trip was never really designed for that. Enjoy!

Hi, Josh. Great writing. I enjoyed reading your review and laughed so much at the pork bun adventure! Thanks!

Thirty-seven years of shooting film and the Trip 35 was a camera I’d always ignored for being ‘too simple’. I spotted one in a local charity shop last week that was cased, boxed and in lovely condition and I got it for next to nothing. I ran half a roll of FT-12 ASA50 cinema film through and the results were far better than I expected. I started out on Olympus all those years ago (still use them) but I’m a bit ashamed of myself for ignoring this little gem. My 8 year old is just starting to take an interest in photography and this is going to be ideal for her.
Thanks for a great review and for pointing out a couple of little features I hadn’t spotted.

Quick pedantic note: In virtually everything I’ve seen online about the Trip 35, there’s one thing that nobody ever seems to say:
The Trip 35 is essentially the full-frame version of the earlier half-frame Pen EES and EES-2.
I had an EES-2 and it was a great shooter for an inexpensive camera. It worked exactly the same way as the Trip: the selenium meter around the lens chose one of two shutter speeds or raised a red flag if there wasn’t sufficient light; it had a four-icon zone focus lens; there was one manual speed for flash along with adjustable f-stops when not in Auto. Of course, the Trip had a different focal length lens to produce a full-frame image, but I suspect it’s of a very similar design to the EES-2’s. And note that the Trip 35’s top plate includes the EES-2’s hot shoe, along with the back cover/rewind knob from the Pen series (and frame counter from the Pen F series), and the viewfinder is essentially the same as the EES-2’s.
My point is: the Trip 35’s super-successful design wasn’t actually new, the camera was scaled up from the already successful Pen EES series.

Thank you… Now I’m on my way for fun an Mindfulness 🙂 A very brilliant text who give me interests and energy. Thank you 🙂

Just bought one, trying it out tomorrow. I would suggest to buy a tripod and a self-release cord, set it to A and just set for the distance. I used to carry a 110 film camera back in 1977 and was taught photography back in 1981 from a WW2 vet. Warhol used a Pentax 35afm because he could set a high iso without flash.
Leave a Reply Cancel reply
Five cheap (but very good) film cameras you can buy today, new york city and the half-frame 35mm olympus pen d, the cinematic point and shoot – minolta p’s (freedom vista) review.

- Destinations
- Outdoor Adventures
- Travel Photography
- Trip Planning
- Bucket List
- Terms/Privacy
- Travel Resource Library

The Olympus Trip 35 – a perfect travel film camera

The Olympus Trip 35 is a compact, battery-free point-and-shoot 35mm film camera known for its ease of use and quality. When it was released in 1968, it was marketed as the perfect film camera to take on your travels.
NOTE: Travel is not recommended at this time. These posts are here to serve as inspiration when we can explore again. Hey there – this post likely contains affiliate links, which means I earn a commission (at no extra cost to you) if you purchase from them. This helps me earn a few dollars to run this website.

Imagine yourself as a traveller in the 1970s . Airlines were becoming more popular than ever, with more and more destinations opening up to international exploration. The Grand Tour of the 19th century had felt a resurgence for the everyday person. You only connected with those back at home by postcard and you took photos on film, waiting to share them once you returned.
With over 10 million units sold during its 16-year run, it would be likely that as a traveller in the 1970s, you would have had (or would have wanted) the Olympus Trip 35. How about today? With film photography becoming more popular again, is the Olympus Trip 35 a worthwhile film camera to take on your travels?
What is the Olympus Trip 35?
The Olympus Trip 35 is what is known as a point-and-shoot camera – one that does most of the work for you. The camera has a fixed 40mm f/2.8 lens. The camera uses just two shutter speeds and a selenium photocell as a light metre.
The Olympus Trip 35 was marketed as an easy-to-use, compact camera to take with you on your travels. They are super lightweight, take regular 35mm film and work with a click of a button.

How does the Olympus Trip 35 work
The Olympus Trip 35 doesn’t need a battery to operate, which is pretty darn cool if you ask me. It uses a solar-powered selenium photocell light metre to automatically set the aperture and select a shutter speed.
First up, the Olympus Trip 35 has an ISO range of 25 to 400, which makes it perfect for a film stock like Kodak Gold 200. You can use (the crème de la crème) Kodak Portra 400, but because that film stock is so expensive, I’d use the cheaper Kodak Gold 200 or Kodak Ultramax 400 in this point-and-shoot camera. You could even try a nice black and white film stock, although I haven’t done that yet myself.
The Olympus Trip 35 just has two shutter speeds – 1/40s or 1/200s, which the camera chooses automatically based on the available light. The camera’s aperture ranges from f/2.8 to f/22, which it also chooses automatically when in “A” mode. You can take the camera into Aperture-priority mode by twisting the aperture ring on the lens, but there’s really no need to.
The camera has a hot shoe where you could sync with a flash, although I’ve not tried that yet.
Lastly, the only thing you really need to think about when using the Olympus Trip 35 is the focus setting. The camera has four focus zones marked by four symbols: portrait, two people, a group of people and landscape. It’s relatively easy to figure out what focus range you need, but if you need more specifications, the focus zones are 1 metre, 1.5 metres, 3 metres and infinity. For most travel photos, you’re going to stick to the landscape focus zone.

Is the Olympus Trip 35 easy to use?
Once you get the hang of it, yes, the Olympus Trip 35 is so easy to use! The first step is to choose your film stock. The ISO ranges from 25 to 400 so you’ll want to choose a film stock in that speed. (Kodak Gold 200 and Ultramax 400 are some of my favourites).
Next, you need to load the film. There’s a small release button on the left-hand side to pop open the back cover. The 35mm film loads in like most other 35mm film cameras. You need to pop the rewinder knob up, fit in the film and push the rewinder knob back in. Then thread the leader part of the film into the take-up spool making sure that the teeth are grabbing onto the perforated part of the film. Tighten the film by using the film advance wheel, making sure the rewinder knob is turning as you crank the film advance. Close the back of the camera and advance the film three times until the counter is at 0.
Make sure you’ve set your ISO to match your film stock. You can do so by twisting the outer ring of the lens.
Make sure the aperture is set on “A” so that the camera can decide what aperture to use. Once you do that, the camera will decide on either 1/40s or 1/200s for the shutter speed based on the available light.

Next, choose your focus zone. If you’re taking a portrait, use the portrait focus zone, if you’re taking a landscape, use the landscape focus zone. It’s pretty simple.
Then you look through the viewfinder you’ll notice that you can see the lens in the viewfinder. That’s because it’s a parallax viewfinder, rather than a mirror system like you see in most DSLR cameras. The viewfinder in the Olympus Trip 35 has parallax markings, which help you frame up an image when your subject is close to correct for this viewing error.
The second, very small window you see under this (which is called the Judas window – don’t ask me why) shows the aperture session and distance symbol that you’re using.
Once you look through the viewfinder, click the small shutter button on the top right to take the picture.
If a small red flag appears in the viewfinder, it just means that the camera has decided there’s not enough light and won’t take the photo.

Finding an Olympus Trip 35
I think what sold me on the Olympus Trip 35 was how easy it was to use. I had just started my journey back into film photography and I already had the 100% manual Canon AE-1. I wanted something light, enjoyable and fun to use, while still being vintage.
I think I stumbled across the camera while perusing YouTube and thought I’d look it up. I was surprised at the range of cost. Some were selling for over $300 CAD, while others were listed for only $60 CAD.
I learned that people were buying these cameras cheap, replacing the exterior with new leather and reselling them for a lot more, which is why you see Olympus Trip 35s in fun colours. I ended up looking at three Olympus Trip 35s that were for sale but weren’t functional before buying the one I found. There are two major things you need to look out for when searching for an Olympus Trip 35.
First, make sure the aperture blades aren’t stuck. Sticky aperture blades is pretty common in these vintage cameras. You can test to make sure the aperture works correctly by looking through the front of the lens as you change the apertures and pressing the shutter. The aperture blades should change accordingly, opening and closing with ease. If it doesn’t it’s not the end of the world. There are a couple of tutorials on how to fix this online.

Second, make sure the selenium photocell functions. This is key because if doesn’t work properly, the camera won’t metre light properly and your images won’t come out. To test this, you can place your hand in front of the photocell, covering it completely. Try to take a photo, if the red flag appears, it means that it works. If it takes a photo, then it means the selenium photocell isn’t working.
I looked at three different Olympus Trip 35s where the sellers didn’t know if it worked properly or not. I ended up passing on all three before finding one at a camera store in Collingwood that actually worked.
Then I put just one roll of (relatively) cheap film through it and found it worked perfectly.
The tip is to keep a lens cap on it or in a case while not using the camera. Use this handy guide for more tips when buying an Olympus Trip 35.
Why the Olympus Trip 35 is a great travel film camera?
The Trip name is a reference to its intended market—people who wanted a compact, functional camera for holidays.
For me, I think the joy of it is wrapped up in one image I took while on a camping trip in the summer. I was headed out on a kayak on Stormy Lake near Restoule Provincial Park. I wanted to bring my camera, but because I use my camera for my wedding photography business, there was no way in hell I was putting it in a kayak, even if it was protected by a dry bag. I just didn’t want to take that chance. So I put my phone and my Olympus Trip 35 in a dry bag and set off.
I had just brought my film camera out to take a photo when suddenly, a loon popped out of the lake in front of my kayak. I love the sounds of a loon and had heard them often, but I had never seen one so close. I snapped a quick photo of it with my Olympus Trip 35. I didn’t have to worry about aperture, shutter speed and I knew I already had it on landscape focus, so I just pointed the camera at the loon and snapped the photo.
By the time I put down my film camera and picked up my phone to take another photo, the loon had dove back into the depths and when it resurfaced again a few minutes later, it was too far away.
I had to wait another 3 weeks before I saw that photo, and it was even more magical once I saw the image developed.
So why is the Olympus Trip 35 such a great travel film camera?
Hopefully, by now I’ve convinced you that it is easy to use. The camera is lightweight and compact, plus it won’t accidentally take a photo if you’ve got it stashed in your bag. Plus, since it doesn’t need batteries, all you really need to worry about is making sure you have enough film!

Olympus Trip 35 sample photos
So far, I’ve put four rolls of film through this camera and I’ve loved how it turns out every single time. The camera is so light, it fits in my waist bag, and makes shooting a breeze. I can’t wait to take this on my next photography adventure! Here are some sample photos from the Olympus Trip 35.

Love film photography? Join Grainery.
I’m pretty new to film, but I’ve absolutely LOVED this new app called Grainery . It’s Instagram-inspired but focuses solely on analog photography. It’s really new, the actual app for iPhone and Android is still in development, but the website works perfectly. And it’s free! Plus, the guy who is developing it is super grassroots and is planning to keep it ad- and algorithm-free.
If you are looking to upgrade to Grainery+, it’s only $3/month, which helps support the developer. (Not sponsored, just something I genuinely LOVE.)

If you love film photography, then what are you waiting for! Join Grainery and follow me @mywanderingvoyage . It’ll be fun!
Love beautiful photos?
I’ve launched a print shop!! After a couple of years of imposter syndrome, I finally launched my own print shop and I am stoked to share it with you!
You can hang up your favourite prints in your home, get a canvas print or even print on metal! Check out the Print Shop now!
Want to know when a new print collection drops and get exclusive discount codes? Sign up for the Print Shop list and you’ll be the first to know!

Olivia Rutt
Olivia Rutt is the travel writer and photographer behind My Wandering Voyage, a travel website helping working millennials find time to travel. She shares insight in trip planning, travel inspiration and photography tips. Olivia hails from southern Ontario, Canada where she works in the media industry between travels. Follow Olivia on Instagram where she shares her travel photos, or catch up with her on Facebook or Twitter.
Further Reading...

Gift guide for travel photographers

The ultimate guide to improving your travel photography with a smartphone

Best way to organize your travel photos
Mywanderingvoyage.

Privacy Overview
The Olympus Trip 35 Review: Everything You Need To Know
I’ve worked with many Olympus Trip 35s over the years and I’ve discovered the pros and cons of this brilliant little rangefinder camera!
The Olympus Trip 35 is so popular because it’s very easy to use, it has a great lens and it’s ideal for the novice photographer. Also, the Olympus Trip 35 is one of the only 35mm cameras powered by the sun, making it really handy to take on holiday with you. Since 1967 10 million units have been sold, which is a tremendous amount even today.
If you want to know how this camera compares to others, how much you should be paying, some of its common issues and much, much more then read on!
I’ve worked with a hell of a lot of Trip 35s over the last few years and I like them because they’re really simple. If there’s something wrong with a Trip 35 I usually know it pretty much instantly because they aren’t especially complicated.
I’ve sussed out all the common issues, what can be fixed easily and what spells the end for an individual Trip 35. Usually, it’s lens fungus or an unreactive aperture that means doom for this little camera.
After years of working with them, I took one to the south coast of England to do a full review and I was actually pleasantly surprised by it. As you’ll see throughout the article, there are actually some good pictures that came from this ancient camera.
Some shots were let down by the very real limitations of this camera but on the flipside, due to the brilliant 40mm Zuiko lens, when the exposure is correct, its shots are great.
There are a lot of pros and cons to this camera so it’s well worth reading up on it to figure out if it’s the right fit for you. I enjoyed shooting it more than I expected but it wouldn’t be a camera that I’d rely on regularly.
Olympus Trip 35 Specs
Format – 35mm
ISO – 25 – 400
Battery – Solar Powered Selenium Battery
Exposure – Automatic
Shutter Speeds – 40 – 200
Flash – Hot Shoe
A Brief History Of The Olympus Trip 35
Introduced in 1967 and rolling on until 1984, the Olympus Trip 35 was completely ahead of its time. Sporting a solar-powered light meter in the late 60’s was pretty special.
Of course, Olympus’ market audience was pretty obvious, being named ‘Trip’, it’s kind of spelt out for you. Strong, reliable, doesn’t need any batteries, anyone could use it, that pretty much ticks all the boxes when it comes to a holiday camera.
Incredibly, over 10 million Trips were sold (Up for debate) and of course, they’re still being bought and sold to this day.
How Does The Olympus Trip 35 Battery Work?
The Olympus Trip 35 is powered by the sun using a selenium light meter which is the ring around the lens. This powers the light meter and allows the camera to choose the shutter speed and aperture (depending on which settings you have on). This would have been very unusual in its time but the fact that it’s still reliable today is brilliant.
Is The Trip 35 Lens Good?
Yeah, the Olympus Trip 35 has a pretty good lens but I’ve got to say, there are quite a few drawbacks. The lens itself is a beautiful 40mm 2.8 Zuiko lens, it’s pretty high quality for a camera that feels like a point-and-shoot.
I’d say the main drawback is that the focus is zonal and you only have 4 options. You should be able to see above, there’s a picture of one person, then two, then a group and then a landscape symbol. These are your focus options and it’s basically, 1.5m, 2m 3m and 6m and beyond.
This does limit the camera quite a lot but you’ve got to forgive a 50-odd-year-old camera sometimes.
The focal length is interesting, 40mm is pretty unusual but it’s still just wide enough to take the kind of pictures you’d usually take when you go on your holidays. It’d probably be preferable to have a 35mm lens but beggars can’t be choosers.
The Olympus Trip 35 Compared To The Olympus OM10
It’s worth comparing the Olympus Trip 35 with the Olympus OM10 as they’re currently at similar prices.
The Olympus Trip 35 isn’t that similar to the Olympus OM10, the Olympus Trip 35 is a small point-and-shoot rangefinder and the OM10 is an SLR however, it’s good to see what the Olympus Trip 35 is like in comparison to another well-known camera.
The Olympus OM10 would provide much better shots as it has better quality lenses and more control however, the Olympus Trip is more convenient, more compact and easier to use.
How Much Is The Olympus Trip 35 Worth?
Currently, the Olympus Trip 35 is worth around $100-125 or £70-100. You can of course get the Trip 35 for less if you try bidding for it on eBay or search thrift stores and flea markets but it’s worth trying to make sure that your Trip 35 is all working correctly.
What Kind Of Photography Is The Olympus Trip 35 Best For?
The Olympus Trip 35 is unsurprisingly best for travel-type photography. This camera was made with travel in mind as it’s small, compact, strong, easy to use and doesn’t require any batteries. Otherwise, this is also a good camera for day-to-day use. Photographers like David Bailey championed the Olympus Trip 35 believing that it was an incredibly high-quality camera.
Although the Olympus trip 35 has a great lens it’s not necessarily overly accurate and it’s not easy to focus correctly so despite the fact that it has a 2.8 lens it doesn’t mean it’s very likely that you’ll be able to focus correctly close range and get the most out of that lens.
This is not necessarily ideal for more professional types of photography and is definitely better to be used in day-to-day life and travel photography.
Is The Olympus Trip 35 Fully Manual?
The Olympus Trip 35 has two settings, one is an automatic setting that chooses your aperture and shutter speed for you, it decides between a shutter speed of 40 and 200 and between apertures of 2.8 and 22.
Alternatively, you can decide the aperture and the shutter speed will be decided by the camera. All focusing is manual and all ISO needs to be changed manually.
How To Use The Olympus Trip 35
Olympus Trip 35 is a very simple camera to use once you get the hang of it, until then understanding its limitations can be slightly hard.
If your camera seems not to be working properly try to leave it in the sun for some time to effectively charge its battery.
To open the back of the camera there is a small lever on the bottom of the side of the camera which just needs to be pulled down until the back pops open.
To change the aperture just rotate the ring at the base of the lens, this ring will show numbers from 2.8 two 22. If you want to shoot in automatically then turn it all the way around until the red ‘A’.
To change the ISO you just need to rotate the ring on the outer edge of the lens until you are to the correct ISO.
In order to focus you need to rotate the black ring on the lens. The closest focus mode is portrait mode, then there is middle-range portrait row mode, next, there are people standing further away from you and finally, there is a full landscape mode.
To attach a flash you simply have to slide it into the hot shoe located on the top middle of the prism.
To shoot and wind on you just have to press the shooting button on the top of the camera and then wind the black winder on the back of the camera until you can’t wind it any further.
To rewind the film you must first press the black button on the bottom of the camera to release the film and then wind the silver winder on the top left of the camera all the way back until it feels loose.
Common Faults Of The Olympus Trip 35
As the Olympus Trip 35 is a very old camera it has a number of common faults, hopefully, I can shed some light on these and help you avoid them or potentially fix them.
Commonly the red flag of the Olympus trip 35 will stop working, the red flag usually shows you when the scene would be too under-exposed. The red flag would appear at the bottom of the viewfinder when you are looking through it and would usually stop you from taking a picture if it’s too dark.
Sometimes the lens won’t react correctly to light, this is a great thing to check because if this is happening then it’s not really something that you can stop and it will ruin your photos. If this is happening the only advice I can give is to put it in the sun for a bit to see if this charges your selenium battery.
It’s likely that the light seals have worn away unless you bought your camera from a reputable dealer. You will probably have to replace a small number of light seals just to ensure that you do not get light leaks, this is fairly easy and if you want to find out how to do it then go to this link .
Lastly, the lens may have fungus and if the fungus is internal and it’s not something that would be easy to fix it would be much simpler just to get another one.
Final Word On The Olympus Trip 35
This is a great camera for travel and is certainly a camera to consider using. Personally, it’s not my kind of camera, I prefer more control and this just doesn’t cut it for me!
For a camera of its age, it truly is fantastic, a solar-powered vintage wonder that can still produce some beautiful shots!
Leave a Reply Cancel reply
Your email address will not be published. Required fields are marked *
Save my name, email, and website in this browser for the next time I comment.
Hey! I've been shooting film for a very long time and throughout all of my 20's it's been my main format. In 2019 I started to buy and sell film cameras and I became a top rated seller on Etsy and eBay. I've built up a wealth of knowledge about different kinds of film cameras and their common issues.
Since I started photography I've produced a number of zines/prints and more recently made a book called 'So Far So Good'.
I started this website in late 2021 with hopes of helping out people who had been looking for similar information to me and so far, I'm really enjoying it.
Similar Posts
Is the olympus mju ii zoom 80 any good full review.
I’ve shot with a lot of Olympus Stylus Epic Zoom 80’s over the years and now I’ve got a lot of experience with this cult classic point-and-shoot camera. The Olympus Stylus Epic (MJU II) Zoom 80 is a great 35mm point-and-shoot camera that is extremely versatile with a good lens. Following the amazingly popular Olympus…
The Pentax K1000: Everything You Need To Know
I’ve shot with several Pentax K1000’s over the last few years and now I know the pros and cons of this tank-like camera. The Pentax K1000 is a robust classic SLR camera, simple and reliable, the K1000 is a joy. For a forty-year-old camera, this can still produce some beautiful shots. The K1000 is fully…
The Yashica T4 Review: Everything You Need To Know
I’ve been lucky enough to work with quite a few Yashica T3, T4 and T5s over the last few years and I’ve discovered the positives and the pitfalls of this unbelievably sharp point-and-shoot. I understand everything you want to know, how to use it, what film to use with it and the common issues that…
Is The Olympus MJU I That Good? Full Review & Guide
Over the past few years, I’ve shot with, tested and cleaned up hundreds of Olympus MJU I cameras and over that time I’ve really got to know this compact little camera. The Olympus MJU I (Or Infinity Stylus in the US) is a brilliant point-and-shoot camera with a 35mm 3.5 lens. With a weatherproof body,…
The Canon A-1 Review: Everything You Need To Know
Written – 03/08/2023 I’ve been shooting film for over 7 years and over that time I’ve used a bunch of Canon A-1s and discovered the ins and outs of this little SLR. The Canon A-1 is a classic SLR camera produced from 1978 to 1985 with shutter speeds ranging from 30 seconds to 1/1000th of…
Is the Olympus MJU II Really That good? Ultimate Guide
Over the last few years, I’ve tested a hell of a lot of Olympus MJU II’s and I’ve really got to grips with the real-life pros and cons of this cult classic camera. Along the way, I’ve discovered all of the reasons people love this camera and I’ve also got to grips with all of…

Olympus Trip 35 Review – Learning to be More Spontaneous – by Andrew Morang
5 May, 2018
Post Categories:
Share this post:
In the past, I always used manual cameras. I measured the light, set the exposure, and focussed myself. Even in a car, I like to be in control and only drive manual transmission, which is almost unheard of in the United States. The point-and-shoot craze of the 1990s completely passed by me. But now I have this funny little Olympus Trip 35, a “point-and-shoot.”
Why I bought it is a bit of a story. In preparation for a 2017 trip to Nepal, I sent my Leica IIIC off for repair. But in case it would not be ready in time, I bought three inexpensive compact 35s from the ‘Bay. A Minolta was dead on arrival, but a Yashica Electro 35CC and an Olympus Trip 35 were fully functional. However, the Leica was overhauled in time for Asia, so the Trip stayed home. But I was curious to see if the Trip 35 was as good as so many reviewers claim.

As you can see, the Olympus Trip 35 is a simple device. Film winding is via a wheel on the back. Exposure is automatic, controlled by a selenium meter that is coupled to the aperture and shutter. If the light is too low, a red flag pops up in the finder to tell you that the shutter button is locked. (If you buy one from the auction site, make sure the red flag feature works; that means the selenium cell is functioning.)

Limitations
This little Olympus Trip 35 has limitations:
- There are only two shutter speeds: 1/40 sec and 1/200 sec. The camera sets them for you based on the amount of light, but if you turn the aperture dial off “A” to one of the f-stops, the shutter is 1/40.
- The light meter, being a selenium cell, does not have low-light capacity. The selenium cell (behind the bubbly plastic) surrounds the lens. If you want a low-light camera, you need one with a battery-powered CDS or SBC cell.
- The viewfinder does not have a focus aide, so you need to estimate the distance. The lens has some symbols to help you, such as a mountain or a person. Really, it is not difficult, especially with the semi-wide 40mm lens.
- The filter size is a unique 43.5mm fine pitch. Why did Olympus do this, to sell their own unique size? Color filters are very hard to find, and they do not screw in easily. Maybe the assumption was that most casual users took color negative film and did not care about filters.
- For some unknown reason, hoods are unobtanium in the USA. I had to order one from a UK vendor, and it cost as much as the camera did.

The Trip 35 In Use
Regardless of these limitations, this Olympus Trip 35 is fun. With this little Trip 35, you can leave the focus at infinity (the mountain symbol), raise the camera to frame, and snap away. It is so simple, so liberating. I can take it with me on the bicycle, stop where I see something interesting, and snap a photograph. But I noticed I still support it in the same way as my bigger cameras: left hand cradling the lens and right hand holding the right side and index finger on the shutter button. Solid grip, no breathing, and careful press. So maybe I am really not spontaneous, but it is less of an effort than one of my “serious” cameras.

At low light, you can see the limitations of the Olympus Trip 35. Contrast is a bit low, and you should use a hood. And once the red flag pops up and locks the camera, your only option is to move the aperture control off “A” to 2.8 and hope the exposure will be adequate. Because I often take pictures in low-light conditions or in old buildings and factories, this little Trip 35 is rather restricting. Also, although there is no indication of when the selenium meter has set the lens wide open, the edges of the frame in dusk are a bit soft. I assume the lens is close to 2.8. It is certainly not as well corrected as a 35mm Summicron or 35mm Super-Takumar, but, of course, those are more sophisticated and expensive designs.

Despite some limitations, do not let me dissuade you from trying the little Olympus Trip 35. They are fun, inexpensive, and take good photographs. Thank you for reading, and thanks Hamish for letting me post these ramblings.
For more urban decay photography, please see: https://worldofdecay.blogspot.com
Find more similar content on 35mmc
Use the tags below to search for more posts on related topics:
Contribute to 35mmc for an ad-free experience.
There are two ways to contribute to 35mmc and experience it without the adverts:
Paid Subscription – £2.99 per month and you’ll never see an advert again! (Free 3-day trial).
Subscribe here.
Content contributor – become a part of the world’s biggest film and alternative photography community blog. All our Contributors have an ad-free experience for life.
Sign up here.
About The Author

Paul Graham on Olympus Trip 35 Review – Learning to be More Spontaneous – by Andrew Morang
Comment posted: 06/05/2018
Leave a Reply Cancel reply
Your email address will not be published. Required fields are marked *
Save my name, email, and website in this browser for the next time I comment.
Notify me of new posts by email.
Kodachromeguy replied:
Yes indeed, a step-up adapter is a possibility. I considered that, but there are two problems with the Trip 35. First, The genuine Olympus hood will not fit over the adapter ring, so then you need a screw-in hood that fits the filter that you finally adapt. Second: the viewfinder is partly obscured. Olympus used this size for several of their cameras, so once upon a time, there may have been more 43.5 filters available.

Philip Brooke on Olympus Trip 35 Review – Learning to be More Spontaneous – by Andrew Morang
Comment posted: 09/05/2018

Nigel Cliff on Olympus Trip 35 Review – Learning to be More Spontaneous – by Andrew Morang
Comment posted: 22/05/2018

Recommended reading : Down the Road on Olympus Trip 35 Review – Learning to be More Spontaneous – by Andrew Morang
Comment posted: 05/03/2020
Time to Meet Some of the Most Gorgeous Olympus Trip 35 Cameras Ever! – Photography on Olympus Trip 35 Review – Learning to be More Spontaneous – by Andrew Morang
Comment posted: 30/10/2020
Leave a Comment
Related Posts

17 May, 2024
By Molly Kate

15 May, 2024

By Ron Duda

13 April, 2024

Photography & Projects
Looking for some inspiration, or just want to flick through the project work and photos?

Reviews & Experiences
If you're looking for photography equipment and peripheral reviews, this is the place to start!

Theory & Reflections

Tutorials & Knowhow
If you want to learn or discover a new technique, build on your skills, or be inspired to have a go at a bit of DIY or camera modification, then you’re in the right place.
Contribute to 35mmc
Paid Subscription
£2.99 per month and you’ll never see an advert again! (Free 3-day trial).
Subscribe here
Content contributor
Become a part of the world’s biggest film and alternative photography community blog. All our Contributors have an ad-free experience for life.

Browse Over 250+ Film Cameras Shop Now
Trusted By Over 40,000 Customers On Their Photography Journey Early Access
Free Worldwide Shipping on Orders Over £200 Learn more
- Russia (GBP £)
Returns & Exchanges
Hassle Free Returns Policy
Free Tracked UK Delivery
Tracked & Next Day Delivery
30 Days Guarantee
Market Leading Assurance
Free Worldwide Shipping
On All Camera Orders
How To Load Film Into An Olympus Trip 35
Ella Palmer | May 23, 2022
The Olympus trip 35 has made a resurgence in film photography in 2022. It's easy to use and gives great results and here is why.

The Olympus Trip 35 has a lightweight body (approx.400g) but the metal body gives a professional finish to the compact camera. It's easily understandable why the Trip is one of our most popular cameras, the pocket-size camera is tough, easy to use and has a great lens on it to produce some fantastic photos, for this reason, it's important to know a few things about the camera such as how to load film to get you started.
Olympus started producing the Trip 35 model in 1968 and produced around 10 million cameras between then and 1983. The Trip 35's iconic lens started to draw attention because of its obvious and somewhat iconic feature. A selenium panel powers an automatic light meter within the camera body, this metering is done through a solar charge around the lens. Making the Trip automatic when it comes to shutter speed and exposure. Making a perfectly exposed photo on film a breeze. A Trip 35 is reliable for taking those photos you desire no matter if you want a simple point and shoot for those holiday pics or a new experiment for your professional photography.

No batteries are needed!?
It's true! What the Olympus Trip 35 does best is adapt to its consumer, no batteries make the Trip easy to use, quick, and accessible. The Olympus Trip 35 has a single contact hot-shoe for a flash to be added, flash units for Trips are available on our website. It also takes 35mm film which is readily available from our website and is the most popular size of film for those starting in film photography.

So you want to learn how to take those aesthetically pleasing, authentic photos?
Loading film is not as difficult as it sounds and should not stop you from dipping your toes into the world of film. Here's how it's done.
Check out our YouTube channel for more tips and tricks!
Click the link bellow
- Open the back of your Trip 35. the back of the camera is facing you, on the left side at the bottom is a little button to pull down. This opens the back.
- This diagram will show you all the parts of the back that you need to know.

- Push the spindle up to make sure the film can sit in there properly.
- Open your film canister and you should see a bottom and a top with a little tail/ leader piece of film sticking out.

- Flip the film so the bottom is at the top. the bottom has a hole that will connect to the spindle.
- Push the spindle down and pull a small amount of the film out of the canister. Don't worry this will not ruin your film!
- hold the leader and put it into the slot on the take-up spool .

- To make sure the film is in the spool properly press the shutter button and wind the wheel and you should see the film move around the spool . Another good sign that it's working is the spindle will rotate as you spin the wheel .
- Wind the wheel until the display dial goes from s to 1. This 1 is your first exposure ready to be shot.
- Line up your subject and you're ready to take those amazing photos!
Some examples of photos taken with an Olympus Trip 35

View our Olympus Trip 35 Collection Here
Previous Next
Your cart is empty
Subtotal: £0.00 GBP
Free Delivery Service
UK & Worldwide Delivery
Reliable Delivery
Hassle Free Returns
Choose options
- Tel +31-6-19667523 | [email protected]
- Camera museum
- Rental (NL)
- Digitize (NL)
- Search for:
No products in the cart.
Return to shop
Uncategorized
How to determine the age of an olympus trip35.

The serial number on an Olympus Trip 35 camera does *not* give you a precise date of manufacture. The only way to tell is to open the film compartment and carefully remove the pressure plate on the back of the door (this is quite easy. It simply slides free from its locating pins) and look for a code on the back of the pressure plate. The code consists of 3 characters: 1st Japanese character or letter (in later models) signifying the assembly plant.
2nd number representing the last digit of the year of assembly (e.g. 5 = 1975, 0 = 1980). 3rd number or letter representing the month of assembly, 1-9 for Jan-Sep, X, Y, Z for Oct-Dec. for example; N1Y = November 1971 Of course the TRIP 35 was manufactured between 1967 and 1984, so if you are unsure if you have a 1968 or 1978 model, the chrome shutter button is the earlier and the black the later.
Username or email address *
Password *
Remember me Log in
Lost your password?
IMAGES
VIDEO
COMMENTS
1 Setting the Camera to Manual System. 2 Loading the Film. 3 Engaging the Film End with the Take-Up Spool. 4 Before Closing the Rear Cover. 5 Checking the Film Counter. 6 ASA Film Speed Setting. 7 Setting the Camera to Auto System. 8 Focusing. 9 Composing the Picture and Releasing the Shutter.
Also See for TRIP 35: Instructions manual (13 pages) , Repair instructions (17 pages) 1. 2.
The Olympus Trip 35 has a simple circuit diagram consisting of a selenium solar cell powering a moving coil meter. In this diagram, the colouring of the wires is the same as that found on the camera. Due to the circuit being so small and simple, the selenium cell solders directly to the wires from the moving coil meter, through a series resistor.
This video is a complete walkthrough of the Olympus Trip 35 Camera. It covers everything you need to know about the camera including everything listed below:...
The Olympus Trip 35 is a fully-automatic 35mm compact camera, manufactured by Olympus from 1967 to 1984, during which time over ten million units were sold, though this oft-quoted figure is likely to have included later plastic-bodied Olympus cameras with Trip branding, as the original Trip 35 had serial numbers going up to around 5,400,000. The auto-exposure mechanism is effectively solar ...
The Olympus Trip 35 was introduced in 1967, and discontinued in 1984, which is considered a long production run for a 35mm film camera. Over ten million Olympus Trip cameras were sold in this time. ... Below is a labelled diagram of the camera. On the left of the top plate is the rewind knob (more on that later). In the middle is the flash ...
The Olympus Trip 35 has 4 settings which equate to focusing zone distances away from the camera (shown on the underside of the lens barrel): 🧍♀️Close focus ≈ 1 meter. This setting is used for focusing on anything ~1 meter away from the camera, be it close headshots or other close up details.
Load a roll of 400 or 800 speed film, set the ASA to 400 and the aperture to it's widest setting of 2.8, and you're ready to go. That's all there is to it. If the scene is too bright for the set aperture of 2.8, don't worry, the Trip's meter is still active in flash mode and will stop down the aperture to prevent overexposure.
We have 3 Olympus TRIP 35 manuals available for free PDF download: Repair Instructions, Instructions Manual . Olympus TRIP 35 Instructions Manual (13 pages) Brand: Olympus ...
The Trip 35 is a 35 mm film camera manufactured by the Olympus Corporation of Japan. It is a fully automatic compact camera with dimensions 116 mm × 70 mm × 57 mm, and mass 410 g. The body construction is metal, and this one has a black front cover skin, however there are also others with orange skin. It is a simple camera to operate and has ...
Dimensions. 124×72×57 mm (4.9×2.8×2.2 in) Weight. 390 g (390 g) Made in. Japan. The Olympus Trip 35 is a 35mm compact camera, manufactured by Olympus. It was introduced in 1967 and discontinued, after a lengthy production run, in 1984. The Trip name is a reference to its intended market—people who wanted a compact, functional camera for ...
Here are the specs for the Olympus Trip 35 you probably know them already: Focus: Manual by scale, visible through viewfinder. Lens: 40mm f/2.8 Olympus D. Zuiko, 4 elements, three groups. Close Focus: 2.9' (0.9m). Diaphragm: two bladed, diamond-shaped, stopping down to about f/22. Shutter: 1/40 or 1/200, automatically selected. No bulb setting.
Olympus Trip 35 (1967) This is an Olympus Trip 35, a 35mm scale focus camera made by Olympus Optical Co., Ltd. between the years 1967 and 1984. The Trip was an extremely popular compact camera and is credited as one of the first truly successful point and shoot cameras, ushering in a new age of simple cameras to those who otherwise would never ...
The Olympus TRIP 35 is a full-sized compact EE camera based on the Pen EES. It first went on sale in 1968. The name reflects its suitability as a convenient camera to take on trips. The TRIP 35 became very popular as a camera that combined ease of use, reliability and a low price with superb photographic performance. It remained a best-seller ...
The Trip 35 is a fully-automatic 35mm compact camera, manufactured by Olympus from 1967[1] to 1984, during which time over ten million units were sold.[1] (This oft-quoted figure is likely to have included later plastic-bodied Olympus cameras with Trip branding, as the original Trip 35 had serial numbers going up to around 5,400,000.)[2] The auto-exposure mechanism is effectively solar-powered ...
First and foremost, the Trip 35 might just be the perfect camera for the casual photophile. Olympus built this camera to document the daily adventures of the everyman, and the Trip does this beautifully. And for experienced shooters, the Trip 35 can be a great way to break free of shooter's block, or inject our shooting with something fun and ...
The Olympus Trip 35 sometimes requires cleaning and overhauling, and they are tricky to open if you do not know how. If your camera was jammed or the light meter was not working then you will need to open it to fix it. The following pages with illustrations might help with disassembly. Camera Repair Preparation.
What is the Olympus Trip 35? The Olympus Trip 35 is what is known as a point-and-shoot camera - one that does most of the work for you. The camera has a fixed 40mm f/2.8 lens. The camera uses just two shutter speeds and a selenium photocell as a light metre. The Olympus Trip 35 was marketed as an easy-to-use, compact camera to take with you ...
The Olympus Trip 35 is so popular because it's very easy to use, it has a great lens and it's ideal for the novice photographer. Also, the Olympus Trip 35 is one of the only 35mm cameras powered by the sun, making it really handy to take on holiday with you. Since 1967 10 million units have been sold, which is a tremendous amount even today.
This little Olympus Trip 35 has limitations: There are only two shutter speeds: 1/40 sec and 1/200 sec. The camera sets them for you based on the amount of light, but if you turn the aperture dial off "A" to one of the f-stops, the shutter is 1/40. The light meter, being a selenium cell, does not have low-light capacity.
Click the link bellow. How To: Load 35mm Film into an Olympus Trip 35. Watch on. Open the back of your Trip 35. the back of the camera is facing you, on the left side at the bottom is a little button to pull down. This opens the back. This diagram will show you all the parts of the back that you need to know.
The Olympus Trip 35 uses four easy "Zone" settings for focusing a frame. This design feature saves much time having to focus the frame for sharpness. It means anyone from partially sighted to the blind could take sharply focused photographs. Head - 1 m.
2nd number representing the last digit of the year of assembly. (e.g. 5 = 1975, 0 = 1980). 3rd number or letter representing the month of assembly, 1-9 for Jan-Sep, X, Y, Z for Oct-Dec. for example; N1Y = November 1971. Of course the TRIP 35 was manufactured between 1967 and 1984, so if you are unsure if.