

Extended Hours: Modern Off-Road Lighting
Adam blattenberg.
- best off road suspension ,
- best off-road suspension ,
- double wishbone suspension ,
- four-link ,
- leaf spring suspension ,
- long travel ,
- off road suspension ,
- off road suspension design ,
- off road suspension setup ,
- offroad suspension ,
- rims and tires ,
- solid axle suspension ,
- suspension lift ,
- truck leaf springs ,
- types of off road suspension ,
Share article
Suspension 101: pick the right setup for your ride.
Tires help get power to the ground, and without the right set, it’s possible to sit in an infinite burnout and not go anywhere. But what many don’t understand is that the proper suspension setup is much more important than the right set of shoes.
If the best tires for cars can’t make effective contact with the terrain then they won’t get you anywhere. Getting the power down (traction on the terrain) is one important thing, ride comfort and safety are others altogether. When picking your suspension setup, to get the best off-road suspension all three need to be taken into consideration. Most off-road capable vehicles nowadays see much more time on the street than they do on the dirt, so you’ll need to consider how much comfort and performance you’re willing to sacrifice on either terrain in the interest of building a vehicle that best meets all of your specific needs. There is not a perfect suspension design that does all things perfectly: It’s a give-and-take situation. But you can still find the best suspension for off road that is also a great riding and performing rig both on and off the highway.
Multiple suspension designs exist, and they all offer certain qualities that make them better for one situation versus another. So to properly set up your rig, you’ll first need to know what’s out there, how they work, what they do well, and what they don’t do well. From there you can decide what suspension setup is best for you and how to modify it to better suit your exact needs.
Solid Axles

Henry Ford used solid axles for his Model T as far back as the early 1920s. They were done differently than today with a transversely mounted leaf spring (simply put, a single sideways mounted leaf spring). Obviously, it’s no longer a new design as it’s been around for almost a century, having gone through multiple rounds of upgrades and tweaks since inception, but they work great off-road, and even with the decent amount of bumpsteer they come with, they do fairly well on-road as well. A long travel leaf spring setup can handle substantially more weight with fewer problems than other designs. This is why we see solid axles under most SUVs and every sized truck. However, suspension systems for solid axles are many, and they all have their own strengths and weaknesses, as well as their individual ways of modifying them for the dirt.
Leaf Spring Suspension

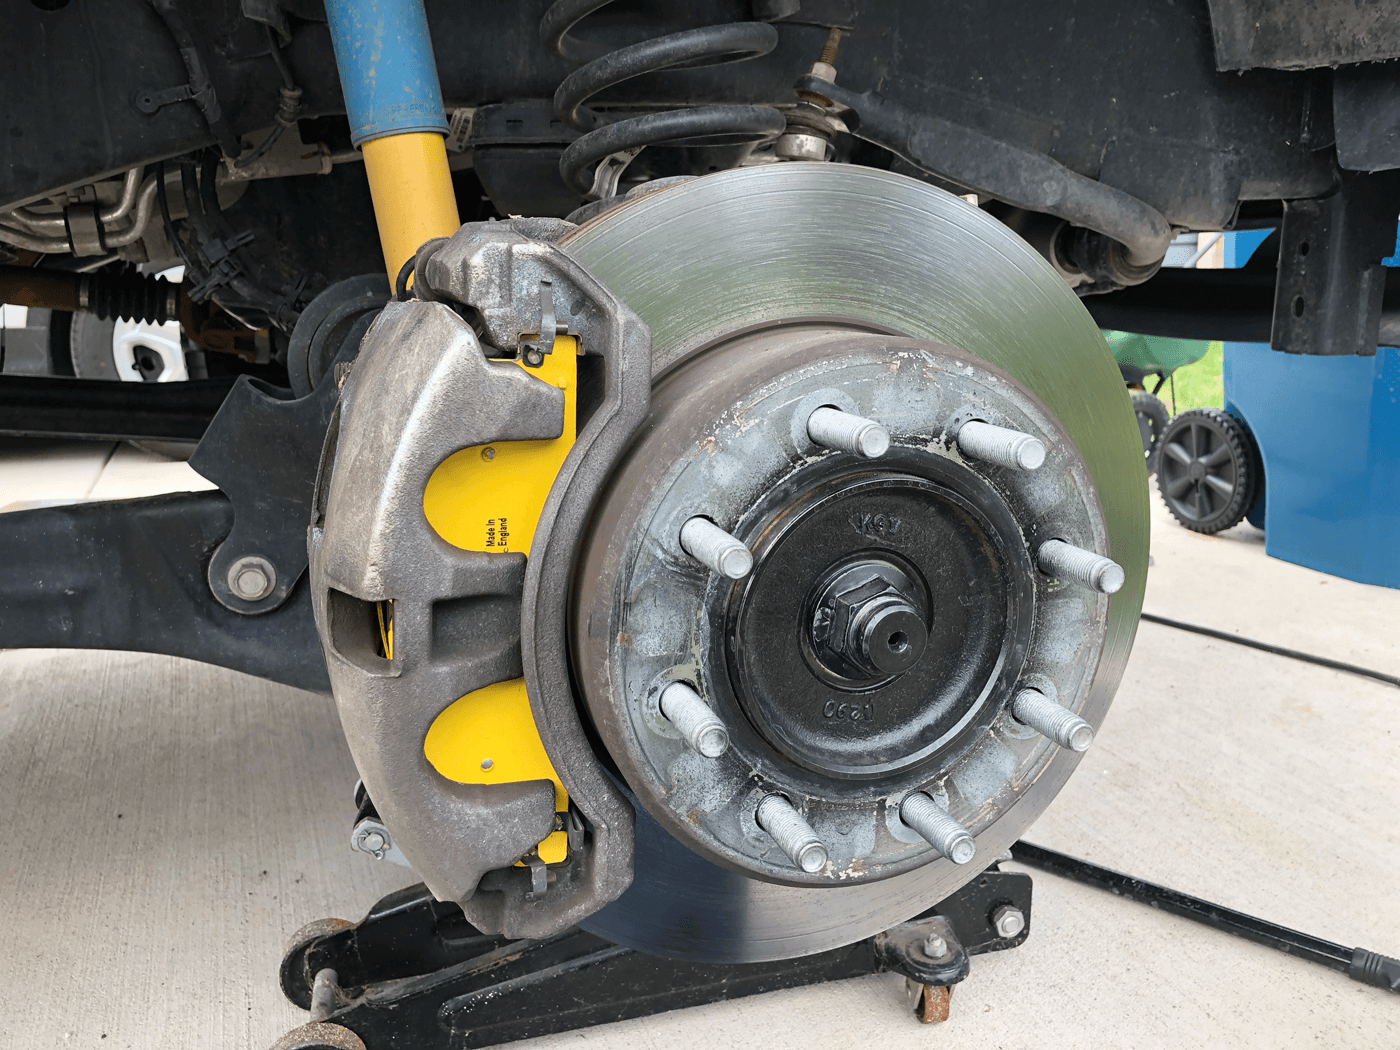
With a factory truck leaf spring rearend on a 2014 Ford Super Duty, the main two leaves locate the axle and handle basic operation spring duties. The upper and lower springs are overloads and only come into play when the vehicle is carrying a heavy load.

By far the simplest design and cheapest to modify, a long travel leaf spring setup is just multiple pieces of spring steel (a steel with memory that returns to its original shape after being deformed) stacked in varying widths (rates) or amounts of leaves depending on the need. The axle is mounted to the center of the leaf (in most situations) and the frame secures both eyelets of the spring, one solid mounted and the other with a shackle to allow for suspension travel. Stock leaves generally have a main pack, which allows for a pleasant ride during normal, unloaded daily driving. Below that spring (and sometimes above it) is an overload spring that takes over when the vehicle is loaded. It’s a much more robust spring designed to only come into play when the rig has a large load on/in it.
Suspension lift with a truck leaf spring setup is simple; in the rear, blocks can be used, which simply put a spacer in the suspension, raising the vehicle by whatever thickness the spacer is, although these blocks will create added axle wrap under acceleration, wearing out driveshaft components or worse. So, the use of blocks should be kept to just a few inches in lift, anything higher and you should consider getting new leaves made, adding a leaf to your existing pack, or having your existing leaves reached by a qualified shop. Adding blocks will give you a stock-like ride with stock-like performance with the benefit of larger tires; adding a leaf will make the ride stiffer, and for the most part will just add more room for tires; re-arching the leaves will generally make the ride stiffer, and again, only add room for more tires. Getting new leaves made will make the ride just about whatever you want it to be.
Lifting or modifying a front leaf spring rig should only be done with new leaves or with parts designed specifically for the front of a leaf spring vehicle. Blocks are not a good idea up front. There’s just too much of a rotational load on the front end to make them safe at all.
Drawbacks to truck leaf spring solid axles are mainly a lack of “tuneability” when compared to four-link setups (see 4-Link section below). Axle wrap is also a concern, but can be taken care of with a set of traction bars fairly easily.
Four-Link Suspension

Pure Performance’s 4-Link design for later model Ford Super Dutys uses a bracket mounted to the factory radius arm mount, which gives the new four-links a place to mount to the truck. Spring duties are then taken care of by coils in this instance, with a large reservoir shock controlling it all.

Ram trucks use this radius arm suspension design. It’s very similar to four-link designs except caster will change as the suspension cycles. Carli Suspension’s radius arm setup for the Ford Super Duty includes new arm mounts, coil springs, reservoir shocks, radius arms, a steering stabilizer, and more. This is one of the higher-end suspension systems out there. This is where it gets interesting. Four links, three links, radius arm, and triangulated link setups are the ultimate way to tune your rig’s suspension. A link suspension, similar to those found under late-model Jeep Wranglers, Rams, and Ford Super Dutys, consist of multiple solid arms, which connect the axle to the vehicle with some sort of pivoting joint. The axle then can move freely with little restriction within the limits that the links set. The solid links will also keep the axle aligned exactly how you want it to be, at any point in the suspensions travel, no matter the engine load. Springs (air, coils, coilovers, hydraulic arms, and so on) of any type are then used to keep the vehicle at ride height.
Due to the solid links and free choice of shock and spring combos, this type of suspension is the most tuneable for any terrain or situation. With the right knowledge, it can literally be set up to do just about anything, which is why it’s one of the best suspensions for off-road. Adjusting things like the angle and/or the length of each link will affect how the vehicle reacts to acceleration, braking, turning, size of terrain, high-speed performance, and low-speed performance. If you’ve ever seen an off-road racing Trophy Truck take off from a stop and hit a turn at high speed, you would have noticed the excessive lifting and rolling of the vehicle during both situations. They were not designed to take corners well at all. But, this is an aspect designed and tuned into the suspension. Those trucks are made to travel at very high speeds through desert terrain that often includes sections of “whoops” (large repetitive bumps in the road) that are commonly over a few feet tall. The suspension is designed to move quickly to keep the tires on the ground as much as possible, maximizing driver control. And the rear link setup is usually designed more to load the rear tires allowing for maximum rearend traction. A rock buggy would have a totally different set of link geometry to help it claw its way over large boulders. These are the two extremes. Most link setups are designed to be somewhere in between.
For most of us, we’re just fine with a small lift kit to gain clearance for both larger truck rims and tires, as well as whatever objects the terrain has to throw at us. Those lifts range from simple coil spring spacers adding a couple of inches to more involved kits that come with slightly longer links and new coil springs, possibly coilovers. From there, you’ll start getting into long arm suspensions that relocate the factory link mounting points and use much longer links to achieve extra travel while keeping wheel alignment angles correct throughout the range of travel. A coilover would then be the most common type of shock/spring to be used.
Beam Suspension

Ford designed the beam suspension. It was a revolutionary design when it was released. Modifying involves drop-down brackets and springs for light to medium off-road use. All out race systems use new, longer I-beams and radius arms as well as coilover shocks.
Ford’s Twin Beam (I-Beam for 2WD, Twin Traction Beam for 4WD) suspension is a true HD truck suspension and was available in Rangers, Broncos, E-Vans, and F-Series trucks. It was originally designed to reduce bumpsteer in vehicles that had previously used a solid axle, 2WD, or 4WD. It’s a sort of happy medium between a full solid axle (which handles heavy loads extremely well and works well on the dirt) and A-arm suspension (which handles great on the road, but not as well with heavy loads or in off-road situations). Currently, no late-model vehicles sold after 2014 use this suspension design; the 2WD E-Vans were the last ones in production.
The Twin Beam can be best thought of as a single “L” frame: The bend in the “L” is where the wheel mounts and the other two sides which are pivot points that are mounted with bushings to different parts of the frame. One pivot basically is secured under the motor mount on either side, and the other under the passenger and driver doors, respectively. By making either of the two sides longer, the amount of usable wheel travel can be increased upwards of 30 inches of travel or more. Coil springs are the most common way of suspending the vehicle here. The most common way of achieving a midrange suspension that can perform well on either terrain is with a set of drop brackets and matching coil springs to gain lift and a bit of wheel travel. Any more than that, you’re looking at coilovers with custom mounts as well as longer I-beams and the adjoining radius arm.
Twin Beam suspensions are a favorite of high-speed desert racers due to the ease of getting huge amounts of wheel travel out of them at lesser cost than with A-arm designs. Plus, since they were originally designed to handle very heavy loads, the steering and other parts are built robustly enough from the factory to handle harsh desert terrain at very high speeds. Drawbacks from this type of suspension design include uneven tire wear and unstable camber throughout the suspension’s range of travel.
Double Wishbone Suspension

Double wishbone systems, also known as A-arm suspension, are the best of all designs on the street, but lack slightly in the dirt (in stock form).

The Double Wishbone Suspension (aka A-arm) design was and is a total departure from straight axle thought and is actually a bit closer to a link setup in theory. While the Twin Beam style looked to reduce bumpsteer from the solid axle design, A-arm suspension takes it a step further by completely isolating the wheel and tire while keeping its travel perfectly (when designed correctly) aligned to the road, maximizing driver comfort and control.
Utilizing a dual set of wishbones (often called A-arms or control arms) and a steering knuckle in which the wheel is secured, this suspension type keeps the wheel aligned almost perfectly throughout its range of travel. Therefore, it allows for extremely good on-road manners, but not as much off road in stock trim. The dual A-arms are generally parallel, so when the wheel moves over the bumps, the angle of the wheel and tire stays the same and therefore steers straight, whether at full droop or full compression. Spring types are all over the board here. Torsion springs are the late-model favorite although coil springs and struts are also in the mix from the OEMs.
The aftermarket offers steering knuckles that will allow a small 1- to 3-inch lift while keeping stock ride. There’s also a whole slew of coil and strut spacers, as well as torsion bar keys that will also allow for just a few inches of lift with minimal effect on ride quality. For even more ground clearance, kits generally end up relying on drop-down brackets, which take the mounting points for the control arms and move them down to achieve the lift. The sky is the limit there; 16-inches of lift or even more is entirely possible.
For high-performance, long-travel suspension setups, new longer control arms and custom spindles are the norm. Stock springs will be ditched and replaced with coilovers in most cases; 12 inches of travel and 6 inches of lift is a common occurrence here. Just know that these types of kits are closer to “race only” designs and on-road performance will be hindered.
Editor’s Note: A version of this article first appeared in the Winter 2015 print issue of Tread Magazine.
You May Also Like
- Accessories
Must-Have Jeep Wrangler Accessories for Off-Road Adventures
- Tread Staff
- January 26, 2024
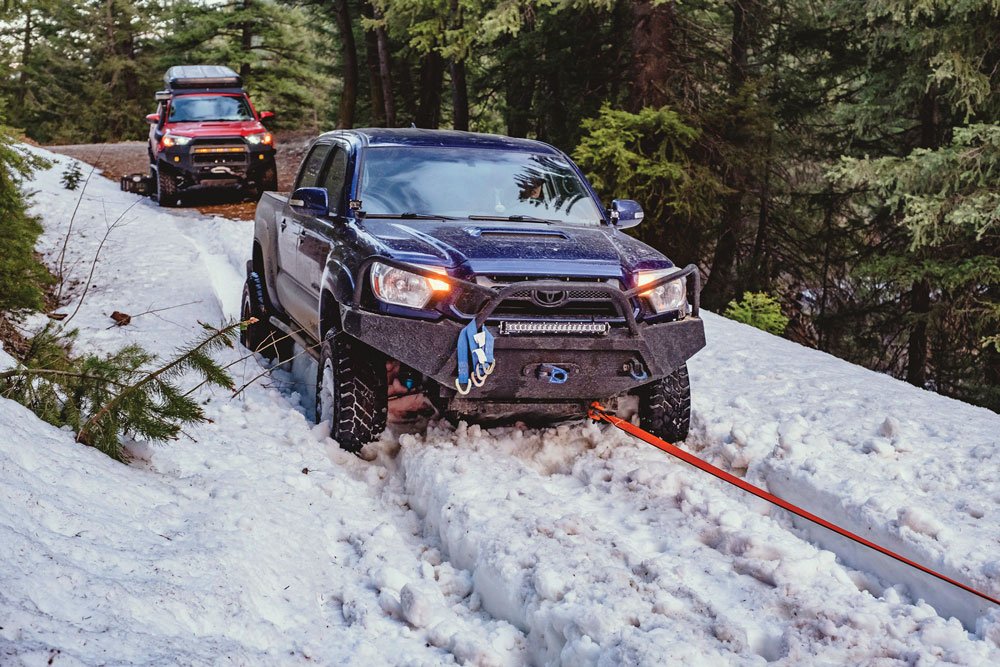
Recovery Gear Essentials
- Ryan Gibbons
- June 16, 2020
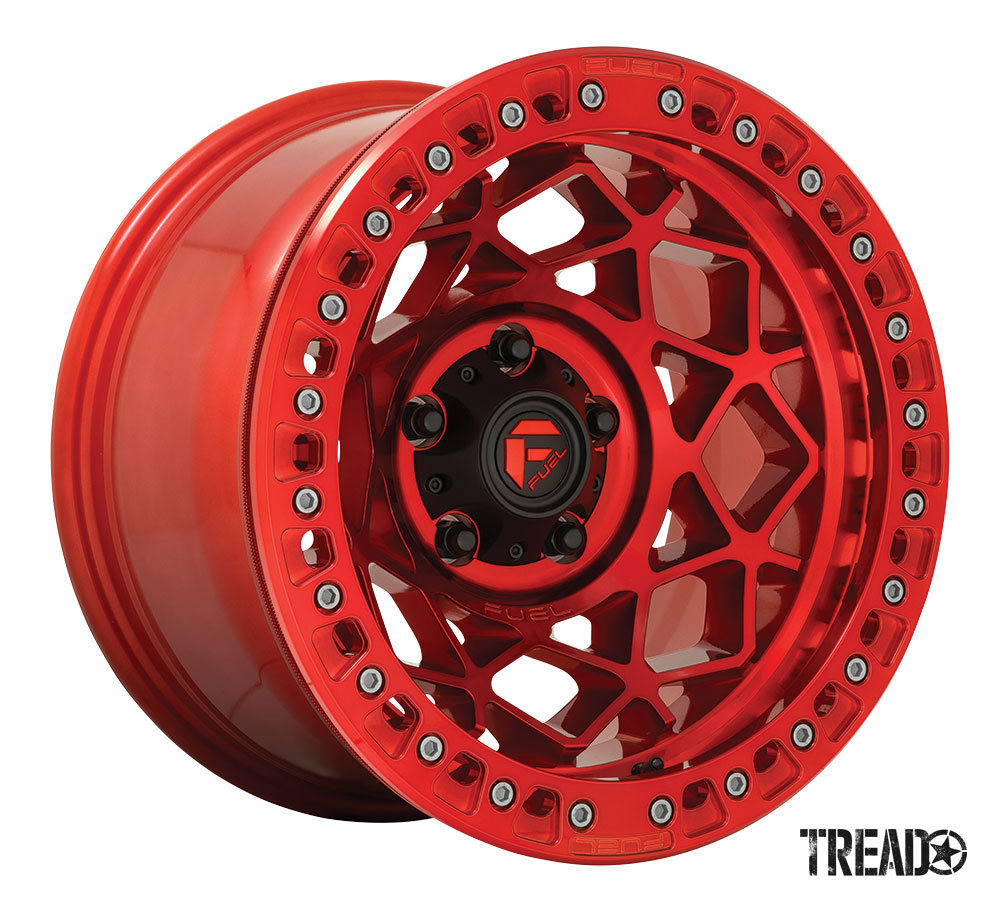
Rock ‘n’ Roll: Off-Road Wheels
- December 30, 2021
- New Products
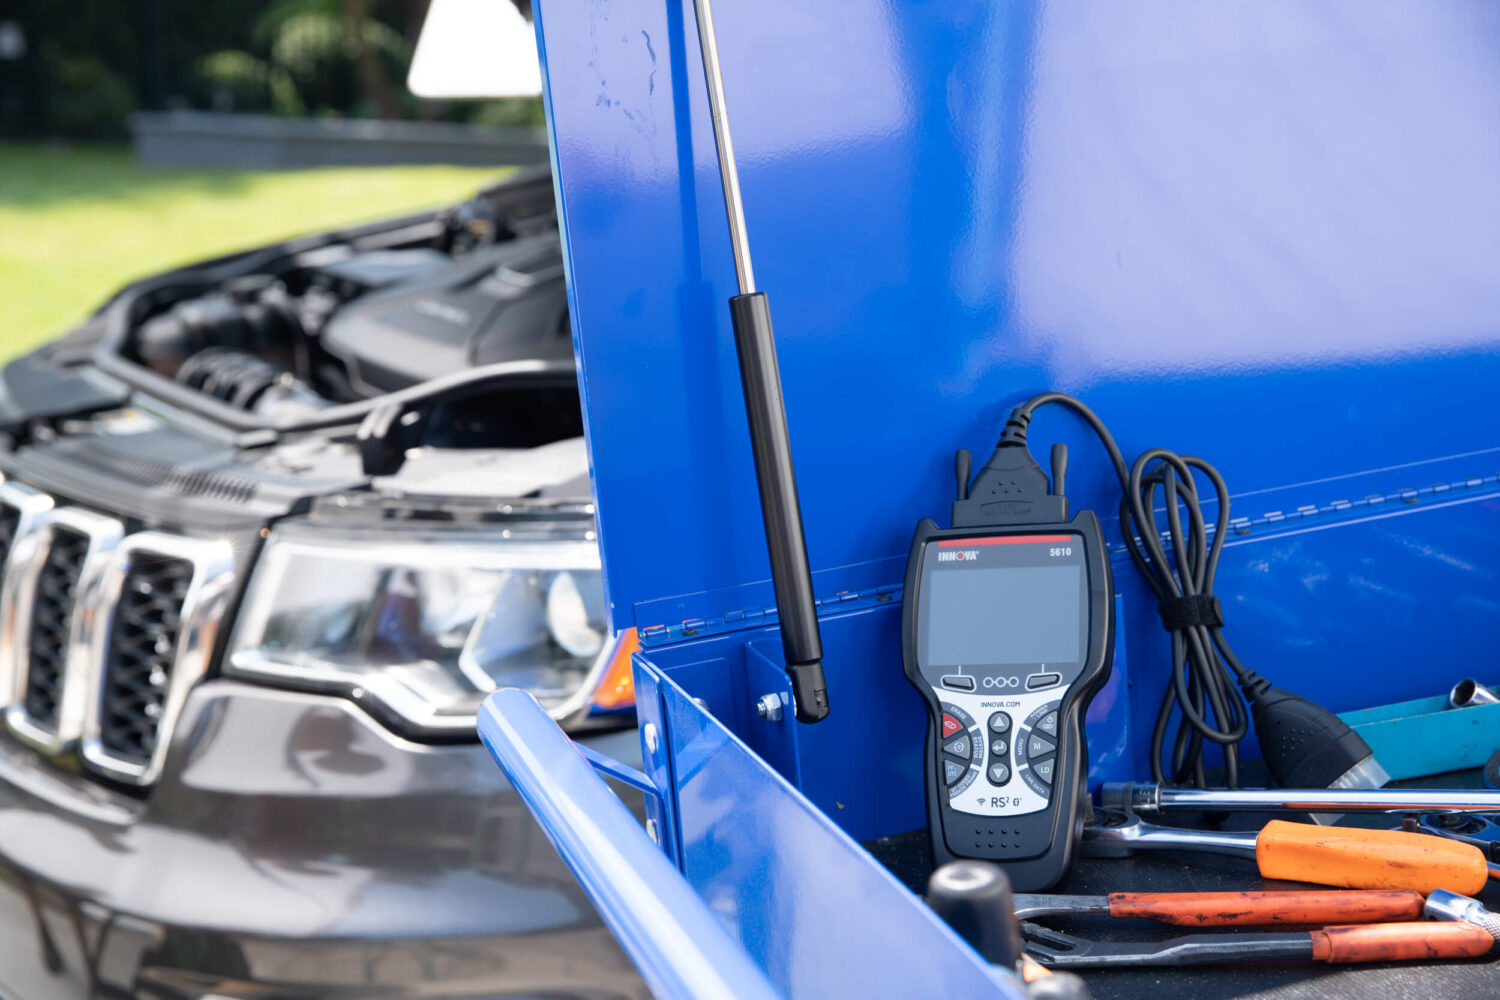
Diagnostic Tool for DIY: Innova Electronics 5610 CarScan Pro
- March 16, 2021
- Modifications
How To Tell If Your Brake Pads Are Glazed
- March 09, 2023
- 4 minutes read
- Buyer's Guide
High-Quality Aftermarket Wheels
- June 08, 2021
- 3 minutes read

Southern Xpeditions Founder’s 2012 Toyota Tacoma
- February 18, 2021
- 10 minutes read
No-Pressure Pumping with InDeflate
- February 04, 2019
- 2 minutes read

- Mods 1 – Getting Started
- Mods 2 – Tire Size Guide
- Mods 3 – Tire Buying Guide
- Mods 4 – Performance
- Mods 5 – Lift & Level Kits
- Mods 6 – Grille Kits
- Mods 7 – Headlights
- Mods 8 – Fog Lights
- Mods 9 – Rock Sliders
- Mods 10 – Roof Racks
- Mods 11 – Front Bumpers
- Mods 12 – Rear Bumpers
- Mods 13 – Skid Plates
- Mods 14 – Wheels
- Switch Systems
- Rooftop Tents
- Acc Lighting
- Tail Lights
- Rock Sliders
- Skid Plates
- Front Bumpers
- Rear Bumpers
- Accessories
- Recovery Gear
- Refrigerators
- Trail Tested
- Maintenance
5th Gen Mods , Feature Friday , Off-Road , Overland , Suspension , Trail Tested
Feature friday: 10 must-see 5th gen 4runner long travel suspension setups.

Looking for a Wide Stance & Tons of Suspension Travel? Check Out These 10 Unique 5th Gen Toyota 4Runner Long Travel Off-Road & Overland Builds
This Week’s Topic: Long Travel 4Runners
Holy smokes do we have some awesome rigs for you for this Feature Friday! This week we are cranking up the suspension dial WAY past 11 with these 10 killer long traveled 5th Gen 4Runner builds.
So real fast, what is long-travel suspension?
The whole point of long travel is to gain better performance off-road, and more specifically for high-speed off-road applications.
In terms of parts, a typical lift kit allows you to gain more ground clearance by increasing your overall ride height. In simple terms, most common lift kits only require upgraded coilovers, extended rear springs, and maybe some upper control arms if needed/recommended for the lift height. Some of the options might just increase overall performance and some might actually give you more travel. That’s usually where 95% of us would stop and call it a day. Not these dudes…
Long travel kits use that same suspension upgrade concept and then take it to the next level with extended length coilovers, and in some cases, secondary shocks with remote reservoirs for increased damping for compression/rebound.
A long travel kit, due to changes in suspension geometry, will allow for increased wheel travel over factory suspension and assist you with running larger tires. To achieve additional “longer” wheel travel, these kits start with extended lower control arms (LCAs), upper control arms (UCAs) and build from there.
In addition to extended-length upper and lower control arms, most long travel kits will have upgraded wider/stronger axles with stronger joints, extended tie rods, limit straps, extended-length bump stops, and other strength enhancements like gusseted spindles, and gusseted control arm mounts.
For the rear of the 4Runner, a long travel kit will require extended brake lines, upgraded trailing arms, extended height springs, increased travel shocks, and of course, extended length bump stops. When it comes to shocks for long travel kits, they typically feature adjustable remote reservoirs to allow the internal shock body oil to stay within peak operating temperature while the suspension is aggressively cycling, as well as the ability to tune the ride.
Now enough talking, let’s see these rigs in action!!
10 Epic 4Runners with Long Travel
1. adam wolfe ( @builtbysquirrels ) – 2018 trd or.

Long Travel Suspension Details
- LSK 4.5” Prototype Kit
- Boxed LCAs with Recessed Shock Mounts & 1.5” Horizontal Uniball
- Built-in Air Bump Pads & Delrin Bushings
- Boxed UCAs With Heims & Vertical Uniball
- Fully Boxed Spindle Replacement with Dual Shear Steering
- ADS 8” Shocks with Reservoirs & 600lb 18” Springs
- ADS 2.125X2 Air Bumps
- Sway Bar Delete
- 12” Radflo Shocks
- Dobinsons 59-677V Springs
- DuroBumps Bump Stops
- 22” Brake Lines
What Do You Like About Your Setup?
I loved working with LSK Suspension to R&D a 4.5+ LT kit for the 5th Gen 4Runner. From start to finish, they were fantastic with a quick turnaround on sending new parts to swap out ones that weren’t working for this build. This finalized kit is incredible! Everything from the build quality to their customer support, I’m very happy with the choice of going with LSK.
But we’re not here to talk about the company, you’re here to know what it rides like. The answer is simple, it’s like a cloud off-road. The suspension articulates flawlessly while the wheels feel solid and planted. I just point and go, and the 4Runner takes me. Just a friendly reminder though, you’re 9” wider than stock. Having 17×9 wheels with a -12 offset and 35×12.5 tires, puts the outside tire to the outside tire to 89” wide. I believe the kids would call it THICCC . That being said, it’s unlike any other kit on the market and the only one with the upper and lower uniballs on the spindle for the 4runner.
2. Jonathan Armada ( @NC.4Runner ) – 2013 SR5 Premium

- Radflo Shocks/Coilovers
- Radflo Hydraulic Bump Stops
- Total Chaos +2 UCAs
- Total Chaos +2 LCAs
- Dobinsons Rear Arms
- Dobinsons Rear PHB
- Dobinsons Springs
I love how well the 4Runner rides with this suspension set up from Radflo.
The hydro bumps on all 4 corners keep the vehicle handling as if it still had sway bars. The 4Runner crawls really well since I’m able to keep all the tires on the grounds while the rig is articulating. The wider track also gives the 4Runner a better stance and stability off-road as well. And lastly, you can’t forget about that look!
3. AB Castro ( @Dj_ayybeats ) – 2005 SR5 2WD

- Dirt King 3.5+ Long Travel Kit
- Dirt King Upper Arm Sheer Kit
- Dirt King Bypass Shock Hoop Kit
- King Shocks Long Travel Spec 2.5 x 8” Coilovers
- King Shocks Long Travel Spec 2.5 x 8” 3 Tube Bypasses
- Camburg 4” Performance Spindle
- King Shocks 12” Triple Bypasses
- Califabrication Rear Shock Relocation
- Califabrication Adjustable Upper, Lower Links and Panhard Bar
- Dobinsons 3” Dual Rate Coils
- Locked Off-Road 2.0 x 2” Threaded Bump Stops
- Yukon 4:88 Gears
I like that I can daily my vehicle while still being able to take it off-road whenever I want.
This 4Runner is able to withstand the punishment I put it through whenever I take it out on the trail without any hiccups. The setup is simple yet so unique in its own way. This rig is definitely a neck breaker whenever I take it out on the streets or off-road.
Jon’s Note: Yes I know this is 4th Gen 4R, but it’s SO SICK!!
4. Tim Curley ( @milk.wagon ) – 2018 SR5

- Dobinsons MRR Rear Long Travel Setup
- Dobinsons MRA59-A575 3-Way Adjustable Shocks
- DuroBumps Extended 5.5″ Bump Stops
- Toytec 1″ Body Lift
- Dobinsons Adjustable Rear Upper Control Arms
- Dobinsons Adjustable Rear Lower Control Arms
- MetalTech 4×4 Extended Stainless Steel Brake Lines
- Dobinsons Adjustable Rear Panhard Bar
- Dobinsons C59-701V Variable Rate Rear Springs
Watching the Dobinsons rear long travel go to work on some rock shelves is almost as fun as actually driving up to them yourself. The amount of articulation the 4Runner gets from these bolt-on parts is truly impressive.
Since my 4R is part of the SR5 gang (open diffs), keeping both rear wheels planted goes a long way in terms of crawling. By no means does this modification replace the need for lockers, but it sure does bring the capability of a SR5 4Runner to a whole new level.
5. Richard Yan ( @ryr_t4r ) – 2019 TRD OR

- Total Chaos +3.5 Race Kit with King Coilovers & Triple Bypass Shocks
- Dirt King Double Shear Upper Gussets
- Custom Gussets For Main Hoop & Engine Crossbar
- Boxed In Lower Control Arms
- DRT Body Mount Relocation Kit
- The rear is custom by AZWillis Fabrication. It’s a cantilever rear end achieving 18″ of wheel travel. It’s also a custom 4 Link with no pan hard bar.
This setup rides nice and smooth. Long travel kits are all about the tuning of the shocks and having the proper setup. You can pay however much you want for a suspension setup, but if it’s not properly tuned, then it’s a waste of money.
I had a lot of trial and error trusting the wrong people when it came to getting this setup dialed in. However, after I had to redo a few things, the stars started to align and I was able to finalize this long travel kit for my 4Runner.
6. Johnny Shin ( @ramensavedmylife ) – 2016 SR5

- BTF 4.5+ Coilover LT Kit
- 2.5 / 8” King Shock Coilovers w/ Triple Tube Secondary Shocks
- 2.0 x 2” Hydro Bump Stops
- 2.5 Stock Replacements w/ OME 899s
- Timbren Rubber Bump Stops
The truck definitely still needs a lot of work, but I do still enjoy how it handles thus far. The limited travel and cushion in the rear still bugs me honestly. But that should all get sorted out in a couple of months when some new suspension bits come in.
I’m just glad I went LT before all the mid travel jazz. Might as well just pay once and enjoy than pay twice and regret it. This truck’s platform has so much potential and I’m still putting all the pieces together.
7. Nathan Krig ( @trdlun4r ) – 2021 TRD Pro

- Total Chaos 3.5” Race Long Travel Kit
- King 2.5” Long Travel Coilovers w/ 700lb springs
- Total Chaos Secondary Shock Hoop w/ King 2.5” Triple Tube Bypass Long Travel Shocks
- Total Chaos UCAs
- OME 700lb 3” Lift Springs
- Total Chaos Rear Control Arm Kit
- 3” King Rear 2 Tube Bypass Shocks
- King Shocks 2” Stubby Air Bumps
I chose components that work well together and that would provide a wide range of tuning for different terrains. Adding the secondary triple bypass front shocks allows the rig to run with no front sway bar and still allows the 4Runner to handle great both on and off-road.
Knowing I can drive how I want, take a turn when I want, and cruise at the same speed off-road as I can on-road is what I wanted out of this build, and it delivers on that with ease.
8. Jacob Cutting ( @mag4rnr ) – 2019 SR5

- BTF Fabrication +4.5” LT Kit
- 8” Coilovers w/ 700lb Springs
- 8” Three Tube Bypass
- 2” 2.0 Bump Stops
- 8” Two Tube Bypass
- Dobinsons 701V Springs
This LT setup allows me to get where I need to go fast and as smoothly as possible. The 4Runner floats over everything I put it through both on and off-road.
With all the extra wheel travel I can keep my tires on the ground while articulating through obstacles. This helps out huge for better traction while off-road since the SR5 doesn’t come with a rear locker like the TRD Off-Road models. Overall this setup is has been great and as an added bonus, the 4R also looks awesome!
9. Chris Alexander ( @shepherdrunna ) – 2018 TRD OR

- Total Chaos +2 Standard Kit
- Total Chaos LCAs
- King Coilovers
- CVJ Extended Axles
- Gusseted Spindles & Cam Tabs
- 12″ Stroke King Coilovers w/ Remote Reservoirs
- Metaltech Upper and Lower Links
- Dobinsons 677V Variable Rate Springs
- Icon Track Bar w/ Eimkeith PCK
- Extended Break Lines
What I enjoy most is the performance this setup delivers both on and off-road. The front long travel works excellent off-road on a variety of terrain while still providing a comfortable driving experience on the highway.
The price point is was pretty reasonable and the customer service by Total Chaos was excellent. All of the products I put on my 4Runner are tried and true. You can’t go wrong with Total Chaos combined with King Shocks.
10. Clinton Saephan ( @amg_t4r ) – 2016 Trail

- Total Chaos +2 Long Travel
- Kings Shocks 2.5 w/ Remote Reservoirs & Adjusters
- 600lb Springs
- Califabrication 3 Link Kit
- Fox 2.0 14” Coilovers w/ Reservoir
- 14”- 250 + 16” – 250 Top-Bottom Spring Rate
What I like about this long travel kit is just how comfortable it rides on and off-road compared to stock/mid travel. The Total Chaos LT kit performs extremely well while rock crawling even though it was originally built for racing, which is what I first liked about it. I definitely love the added stance it also gives to the 4Runner. It just makes your rig look tough and aggressive.
The up travel and down travel performs amazingly as well. I’m able to keep my rigs tires planted on the ground most times while traversing over sketchy terrain. With the LT kit being wider than the stock track width, the rig feels a bit safer while going through sketch sections or tipsy areas out on the trail. You will not be disappointed with this kit from Total Chaos.
Final Thoughts

These next-level long travel 4Runners were absolutely amazing! I enjoy how each owner picked a long travel suspension kit for their own reasons as well. The SR5 group chose LT to help compensate for the lack of rear locker in their 4Runners. Several owners mentioned this, and to be honest, that never even crossed my mind as a reason to justify a better suspension system. See, even I learned something with this Feature Friday.
Other builds on this list were built to go fast through any terrain. You can see that in the @builtbysquirrels , @magrnr , and @trdlun4r builds. These rigs are next level and have been built to literally conquer any terrain, and fast. All the builds this week were absolutely KILLER! I can’t wait to see next week’s submissions.
If you would like to be considered for next week’s Feature Friday, we will be showcasing AFTERMARKET HEADLIGHTS.
We want readers to get inspired by a variety of rigs/products. Submit your build for Feature Friday and you might get featured. If you would like to submit your build for next week, include your setup details and an awesome photo that shows it off.
Have a great weekend everyone!

Jon Gangloff
@TRDJON - I love Toyota news, reviews, and how-tos! There are big things on the horizon for Toyota and I can't wait to share them with you all!

CHRIS ALEXANDER ( @SHEPHERDRUNNA ) – 2018 TRD ORWhy the extended axles and gusseted spindles? For suspension or wider wheel tires

What size tires are on NATHAN KRIG (@TRDLUN4R) – 2021 TRD PRO? I really like the set-up.

It would be interesting if someone highlighted the changes needed for LT in the rear. I’ve purchased the TC kit for the rear of my 5th gen (not installed yet), and was wondering if the sway bar needs extensions, or just run it like it is.
Also, Ben at Filthy Motorsports posted a vid on youtube on 5th gen 4runner rear shocks and considerations thereof, when running LT.
It kinda makes your head spin!
Thanks for the article, Mike

You can buy extended adjustable links, from Dobinson’s for example, I run MT rear LT shocks and your lower trailing arms will bottom out on the axle housing before the swaybar becomes a limiting factor. I run a combination of offset trailing arms and extended sway bar links and get full ~12″ of travel out of the rear shocks.

Honestly, I’d delete the rear swaybar. Try it before the lift goes on to test it out. You won’t even notice it’s gone.
Delete? That is a possibility. When I’m done I want to try it out with and without to see how it goes. I’m adding a bunch of weight in the build so I’m curious to see if the adjustable shocks and stiffer springs are enough by themselves, or do I still need the sway bar.

There was some very sweet builds in this line up as to be expected once someone gets to the point of true LT. Keep up the great articles.
- Get Free Parts & Get Paid! Apply to Write
GET 20% OFF
Take up to 20% off at the trail 4runner store.

CarParts.com will be back soon!
We apologize for the inconvenience. The CP Team is working on some upgrades to improve our service. Thank you for using CarParts.com!
You can call us at
1-866-529-0412
Reference ID: 18.6fc733e.1716424267.bbf223d

Long Travel Suspension 101: Enhance Your Off-Road Adventure!
Long travel suspension enhances a vehicle’s off-road capability by allowing for greater wheel travel. This system improves traction and comfort over rough terrain.
Off-roading enthusiasts often seek out long travel suspension systems to upgrade their vehicles’ performance. With the increased wheel travel, the suspension can absorb more shocks from uneven surfaces, leading to a smoother ride in challenging conditions. This kind of suspension is crucial for drivers aiming to tackle steep hills, large rocks, and other obstacles that require a high level of articulation and responsiveness.
Investing in a quality long travel suspension system can significantly transform the off-roading experience, providing both durability and improved handling. It is an essential modification for serious off-road vehicles and contributes to the safety and capability of the adventure-seeking driver’s arsenal.
Long Travel Suspension
Imagine your off-road vehicle gliding over rough terrain with ease. That is the magic of long travel suspension. It’s key for ultimate off-road performance . Let’s dive into what this suspension system is all about.
Defining Long Travel Suspension
Think of long travel suspension as the ultimate upgrade for your vehicle’s legs. It allows for more wheel movement. This means your tires stay on the ground over bumps and dips.
The Role Of Suspension In Off-roading
- Comfort: It smooths out bumpy rides.
- Control: Better tire contact equals more grip.
- Safety: It helps prevent rollovers.
Advantages Of Upgrading To Long Travel Suspension
- Improved handling: More responsive steering.
- Greater clearance: Tackle taller obstacles.
- Better shock absorption: Softer landings from jumps.
Components Of Long Travel Suspension Systems
Long travel suspension systems transform your vehicle’s performance off-road. Below are key components that let these systems smooth out rough terrain, giving you a more comfortable ride.
Shocks And Their Impact On Performance
The role of shocks is crucial in a long travel system. They absorb bumps and provide the right damping. Better shocks mean a smoother ride. Here are standout features:
- Adjustable damping: Tailor your ride to the terrain.
- Oversized design: More oil and air capacity to handle more abuse.
- Heat dissipation: Keeps performance consistent.
Understanding Control Arms And Linkages
Control arms connect your wheels to the frame and let them move. Linkages maintain wheel alignment. Both are crucial for stability and handling.
The Significance Of Springs And Coilovers
Springs and coilovers store energy when pressed down. They help your vehicle bounce back smoothly after hitting a bump. Let’s outline their importance:
- Weight support: They carry your vehicle’s load.
- Ride height adjustment: Raise or lower your vehicle.
- Progressive rates: Provide softer or firmer rides as needed.
Additional Components: Cv Joints, Tie Rods, And Axles
Alongside the main parts, other elements like CV joints , tie rods , and axles are vital. They join wheels to the drivetrain, steering to the suspension, and transfer power to the wheels.
- CV Joints: Allow wheels to turn and move up and down.
- Tie Rods: Connect steering rack to the wheels.
- Axles: Transmit torque from the engine to the wheels.
Selecting The Right Long Travel Suspension For Your Vehicle
Long travel suspension systems are crucial for off-road enthusiasts. These systems offer improved traction , increased wheel travel , and better absorption of bumps and obstacles. Choosing the right system can be a major upgrade for your vehicle.
Assessing Your Off-road Requirements
Understanding your off-road activities helps identify the right suspension . Do you need endurance for desert racing, precision for rock crawling, or something versatile for varied terrain? Outline your off-road goals to determine suspension needs that match your adventure intensity.
Compatibility With Different Vehicle Models
Ensuring compatibility is essential when selecting a long travel suspension. Not all systems fit every vehicle. Manufacturers offer kits designed for specific makes and models. Consult with manufacturers or use their online tools to find matching kits for your vehicle.
Pros And Cons Of Popular Long Travel Suspension Brands
- Brand A: Known for durability, might be costly.
- Brand B: Offers comfort, may lack in extreme performance.
- Brand C: Affordable, could have a shorter lifespan.
Budget Considerations And Investment Expectations
Long travel suspensions are an investment in your vehicle’s performance. Set a realistic budget that reflects your off-road demands. Premium kits often mean longevity and better support, while more affordable options might require sooner replacements.
Installation And Maintenance Of Long Travel Suspension
Ready for a smoother ride and better off-road performance? Installing a long travel suspension system might be your next big project. This setup isn’t just about slapping on bigger shocks; it’s a detailed process. It requires careful planning and maintenance. Here’s everything you need to get started and ensure lasting performance.
Diy Vs. Professional Installation: What To Choose?
Cost-effectiveness and personal satisfaction are big wins for DIY. Yet, risks include potential mistakes and longer installation time . Professionals bring expertise and precision. This ensures a quick and correct fit .
Step-by-step Guide To Installing Long Travel Suspension
- Gather tools and components : Make sure you have everything on hand.
- Remove old suspension : Take off current shocks, springs, and related parts.
- Install new components : Follow the manufacturer’s guide to fit new parts.
- Alignment and testing : Check angles and take a test drive to ensure proper function.
Routine Maintenance Tips For Peak Performance
- Inspection : Regularly check for wear and tear.
- Greasing : Keep parts lubricated to avoid friction and damage.
- Tighten bolts : Ensure all connections are secure after each off-road trip.
- Shock checks : Monitor for leaks or damage and address immediately.
Troubleshooting Common Issues In Long Travel Suspensions
Real-world applications and user experiences.
Long Travel Suspension systems are a game-changer for vehicle performance, especially in demanding environments.
They transform the ride, providing unmatched comfort and handling.
Off-road enthusiasts and professional racers alike reap the benefits of these robust upgrades.
Let’s dive into real-life examples and consumer insights.
Case Studies: Transformations With Long Travel Suspension
Remarkable improvements are seen when vehicles get equipped with Long Travel Suspension.
- Jeeps overcoming rocky terrains with ease
- Trucks maintaining stability on harsh trails
- SUVs achieving greater wheel travel for safer rides
User Reviews And Feedback On Performance Enhancements
Owners share their success stories after upgrading.
“A total transformation” and “next-level handling” are common praises.
Long Travel Kits enable vehicles to handle tough conditions with unprecedented grace.
Off-roading Trips Enhanced By Long Travel Suspension
Rugged adventures are now more exhilarating thanks to Long Travel Suspension setups.
Adventurers share experiences of smoother rides on mountain paths , desert sands , and muddy tracks .
Expert Advice: Maximizing Your Vehicle’s Off-road Capability
Professionals offer tips to optimize performance:
- Choose the right suspension kit for your vehicle type
- Regular maintenance for lasting durability
- Proper installation is key to reliability
Future Outlook Of Long Travel Suspensions
The journey through the exhilarating realm of long travel suspensions now reaches an informative end. We stand at a juncture where reflection on benefits meets the anticipation of future advances. Join us as we glance back, project forward, and determine the value of long travel suspensions in the automotive landscape.
Recap Of Long Travel Suspension Benefits
Long travel suspensions serve as the backbone of off-road mastery. These robust systems:
- Absorb shocks from rough terrain, ensuring a smoother ride.
- Enhance wheel articulation , crucial for maintaining contact with the ground.
- Improve overall vehicle stability and control during high-speed adventures.
Emerging Trends In Suspension Technology
Innovations are unfolding within suspension technology. Here’s what’s gaining momentum:
- Advanced materials are being utilized to reduce weight and increase durability .
- Electronic control systems are enhancing adjustability and responsiveness.
- Adaptive suspensions are being developed that can automatically calibrate to diverse terrains.
Is Long Travel Suspension Worth It?
Assessing the merits of long travel suspensions, it’s clear they are invaluable for off-road enthusiasts . The capacity to tackle diverse landscapes with ease positions long travel suspensions as a worthwhile investment. Performance gains , coupled with the promise of emerging technologies, ensure these systems remain relevant and revolutionary.
Frequently Asked Questions
What is long travel suspension.
Long travel suspension systems provide increased wheel travel for off-road vehicles. They enhance handling and performance on rough terrains. By allowing more suspension movement, vehicles can better absorb impacts and maintain traction.
Benefits Of Long Travel Suspension?
Long travel suspension offers improved off-road handling, increased ground clearance, and a smoother ride over obstacles. It enhances vehicle stability and tire contact with the ground, leading to safer and more enjoyable off-road adventures.
How To Install Long Travel Suspension?
Installing a long travel suspension typically involves replacing stock components with longer, aftermarket parts. It requires mechanical skills and tools, and it’s often recommended to consult a professional for proper installation to ensure safety and performance.
Long Travel Vs. Short Travel Suspension?
Long travel suspension is geared towards off-road performance, providing greater wheel travel. Short travel focuses on on-road comfort and handling. Choose long travel for rugged terrains and short travel for daily driving and efficiency.
Embarking on off-road adventures demands reliable equipment. A long travel suspension kit stands as a true game-changer for enthusiasts. It not only enhances control but also improves vehicle resilience. Remember, choosing the right setup ensures an unmatched riding experience. Explore, equip, and enjoy the transformative impact on your journey.
Leave a Comment Cancel reply
Save my name, email, and website in this browser for the next time I comment.
- Coil Over Shocks & Bypass Shocks for Trucks
No products in the cart.
Return to shop
- 2.0″ Coil Over Shocks
- 2.0″ Coil Over Shocks w/ Reservoir
- 2.0″ Reservoir Shocks
- 2.0″ Emulsion Shocks
- 2.0 Coil Over Kit
- 2.5″ Coil Over Shocks
- 2.5″ Coil Over Shocks w/ Remote Reservoir
- 2.5″ Bypass Shocks
- 2.5″ Emulsion Shocks
- 2.5″ Reservoir Shocks
- 2.5″ Reservoir Pin Top Shocks
- 2.5 Coil Over Shock & Spring, 2-Corner Kits
- 2.5 Coil Over Shock & Spring, 4-Corner Kits
- 2.5 Coil Over w/ Remote Reservoir Shock & Spring, 2-Corner Kits
- 2.5 Coil Over w/ Remote Reservoir Shock & Spring, 4-Corner Kits
- 3.5″ Reservoir Shocks
- 3.5″ Piggyback Bypass Shocks
- 2.5″ Springs
- 3.0″ Springs
- 3.75″ Springs
- OEM Springs
- Viper LS Valve Spring Kit
- Steering Stabilizer
- 2.0″ Bumpstops
- 2.5″ Bumpstops
- Bumpstop Kits
- Bumpstop Parts
- 2.0″ Parts
- 2.5″ Parts
- Shock Rebuild Kits
- Shock Tools
- Rod End Kits
- F-O-A 3.0 Inch Axle Mount Shock Tabs, 2-pack
- F-O-A Angled Shock Tab, 2-pack
- F-O-A Flat Bottom Shock Tabs, 2-pack
- F-O-A Shock Reservoir Mounting Kit
- Ford F250 & F350 Billet Coilover Conversion Mounts
- Billet Coil-Over Adapter
- Anodized Billet Shock Reservoir Clamp
- Coil Over Towers
- Accessories
Uncategorized
Mid-travel vs long-travel suspension.

Get more out of your off-road rig with a mid-travel or long-travel suspension kit. There are many different off-road disciplines, from a few bumpy roads, a deep mud bog, a demanding rock crawling experience, a Midwest rock bouncing event, a short course challenge, or a full out off road desert race. Compare the benefits of a mid-travel and a long-travel suspension systems to find the best option for your rig and budget. Explore quality suspension options at F-O-A before hitting the trail and making dirt-covered memories in your off-road vehicle.
Understanding Your Suspension
First, it’s important to realize there are few hard-and-fast distinctions between mid- and long-travel suspensions. You can swap out your OEM suspension with a wide range of travel options, and every kit can be adjusted to fine-tune your ride. Learn more about mid-level options that balance an OEM look with dependable off-road protection.
Kit Components
If you want to put a small lift kit on your vehicle for an off-road look, you won’t need a new suspension kit. However, for a true off-road ride, you’ll want to upgrade to a mid-travel or long-travel suspension. Here are the areas of your suspension system that you’ll need to alter to create a professional off-road ride:
- Upper and lower control arms
- Brake lines
- Limit straps
Carefully read the type of kit you pick up. Some kits come with all of these components, while others miss the coil over shocks or other features. Keep in mind that a long-travel kit and serious off-roading may require additional reinforcements, as you enjoy your new found ability to go faster on your favorite trails.
Why You Need an Upgraded Suspension
A new suspension system is all about soft landings, articulation, and higher ride height. If you’re cruising over rutted roads or sand dunes, then your stock suspension won’t be enough to protect you from the jarring ride. The addition of good Coil-over shocks are the single key difference between a comfortable ride and a bone-jarring experience. Second is the amount of suspension your rig enjoys, long travel or mid travel.
A new kit, particularly a long-travel one, gives you more articulation from full jounce to full droop. This is an essential feature in making your rig drivable in all situations in your off-road adventure. You may need to lift the body of your vehicle or use aftermarket fiberglass fenders if you wish to run larger, wider tires that give you the traction and clearance you can now use when the road takes a turn for the worst.
Installing Mid-Travel vs. Long-Travel Kits
Upgrading your suspension system can be a DIY project or a fabrication shop in your area can always do the job for you. Compare full kit fab shop installs vs. DIY installation and find out how to select mid-travel or long-travel kits from F-O-A . . . and get the information you need to settle the debate for you and your ride.
Full Kit vs. Piece by Piece
A full-suspension kit gives you the all-in-one convenience you need. Prepare for any adventure with most or all of the parts and hardware you need. Consider purchasing a full kit for your first time for convenient setup and quick installation.
Some off-roaders pick and choose shock absorbers, springs, arms and other components from various manufacturers. Use caution when mixing brands of parts, as some may not be compatible with others or have the exact specifications you need.
Mid-Travel vs. Long-Travel
A mid-travel kit is going to be more affordable than a long-travel alternative. You won’t have the same articulation, but you’ll have an affordable easy modification to improve your on and off road experience.
Long-travel suspension systems offer unbeatable articulation, surprisingly soft landings, and excellent ride ability. Compared to a mid-travel kit, these kits are a larger investment into your rig and people will notice your investment. Choose a long-travel option if you’re a serious off-roader who wants the best suspension option on the market.
Benefits of an F-O-A Kit
At F-O-A, we believe in affordable suspension kits that don’t sacrifice on quality. Compare our kits for various makes and models of vehicles for a hassle-free upgrade to your ride. Our kits use powder-coated control arms, precision-machined tie-rod extensions, and DOT-approved brake line extensions. When you need a reliable off-road package, turn to F-O-A.
The Verdict
In the end, it’s all about your personal preferences. Does an off-road trip to you mean a few rutted dirt roads and OHV trails, or are you a diehard bouldering expert looking for an industry-leading suspension system? Your driving experience will help you determine whether you need the more extended travel out there or if a mid-travel option will work well for your situation.
Shop for suspension kits at First Over All Off-Road Shock Technology. Find the long-travel and mid-travel suspension kits that fits your vehicle and your budget, if you don’t see it reach out to sales for your application. You don’t need to wait for your next paycheck . . . start your off-road adventures quickly with competitive financing options @ f-o-a.com

- Search for:
Username or email address *
Password *
Remember me Log in
Lost your password?
Username *
Email address *
Shock Treatment: Testing Performance Distributors’ S.O.S. Ignition Coils
- streettrucks
- 4 link set up ,
- 4 link suspension setup ,
- best truck suspension for smooth ride ,
- how to build a 4 link airbag suspension ,
- how to choose leaf springs ,
- how to improve suspension on a truck ,
- long travel leaf spring setup ,
- off road suspension setup ,
- race truck suspension ,
- types of truck suspension ,
Share article
Suspension basics: picking the right setup for your ride, tires help get power to the ground, and without the right set, it’s possible to sit in an infinite burnout without going anywhere..
What many don’t understand is that the proper suspension setup is much more important than the right set of shoes. if the tires can’t make effective contact with the road, then they won’t get you anywhere. Getting the power down to the ground is one important characteristic, ride comfort, clearance, style and safety are others. when picking your suspension setup, all five aspects need to be taken into consideration.
For those who want to go low, there are several options available these days to achieve the look you desire. If you are going for a mild drop, a set of spindles or springs can help out, and they can also be combined for a deeper drop. Springs are more inexpensive, and while spindles can be pricey, they offer better ride quality if you keep the factory springs. Another alternative is to set up your truck with adjustable coil-overs for the ultimate in ride control. If you want to go to extremes with how low your truck sits, airbags will definitely get you there. The added benefit of airbags is an ultra-smooth ride, however, most of these systems are not optimized for handling or high-powered drivetrains.
On the off-road side of things, there are even more solutions because space and clearance issues aren’t as important. Most off-road capable vehicles see much more time on the street than they do in the dirt, so you’ll need to consider how much comfort and performance you’re willing to sacrifice on either terrain in the interest of building a vehicle that best meets all of your specific needs. There isn’t one suspension design that does everything perfectly—it’s a give-and-take situation—but that doesn’t mean you can’t have a rig that rides and performs great both on and off the highway.
Multiple suspension designs exist, and they all offer certain qualities that make them better for one situation versus another. To properly set up your rig, you’ll first need to know what’s available, how each system works, what they do well, and what they don’t do well. From there you can decide which suspension setup is best for you and how to modify it to better suit your exact needs.
DOUBLE WISHBONE SUSPENSION

Drop-down brackets are commonly used to gain some ground clearance with double wishbone systems. the one pictured above is an extreme drop-down bracket example; most are only a few inches tall.
The double wishbone suspension design was and is a total departure from straight axle and is actually a bit closer to a link setup in theory. while the twin beam style was designed to reduce the bump steer of the solid axle design, double wishbone suspension takes it a step further by completely isolating the wheel and tire while keeping its travel perfectly (when designed correctly) aligned to the road, maximizing driver comfort and control.
Utilizing a dual set of wishbones (often called “a-arms” or “control arms”) and a steering knuckle (spindle) in which the wheel is secured, this suspension type keeps the wheel aligned almost perfectly throughout its range of travel. It allows for extremely good on-road manners, but not as much off road in stock trim. The dual a-arms are generally parallel, so when the wheel moves over bumps, the angle of the wheel and tire stays the same and steers straight whether at full droop or full compression. spring types are all over the board here. Torsion springs are the late-model favorite, although coil springs and struts are also in the mix from the oems.
For high-performance long-travel suspension setups, new, longer control arms and custom spindles are the norm. Stock springs are ditched and replaced with coil-overs in most cases. Twelve inches of travel and 6 inches of lift is a common ratio here. Just know that these types of kits are closer to “race-only” designs–on-road performance will be hindered.
BEAM SUSPENSION

Ford created the beam suspension design, and it was revolutionary when it was released. Modifying involves dropdown brackets and springs for light to medium off-road use. All-out race systems use new, longer I-beams and radius arms as well as coil-over shocks.
Ford’s twin beam (I-beam for 2wD, twin traction beam for 4wD) suspension is a true HD truck suspension and was available in rangers, Broncos, e-Vans and F series trucks. It was originally designed to reduce bump steer in vehicles that had previously used a solid axle, 2wD or 4wD. It’s a sort of happy medium between a full solid axle, which handles heavy loads extremely well and works well in the dirt, and a-arm suspension, which handles great on the road, but not as well with heavy loads or in off-road situations. Currently, no late-model vehicles sold after 2014 use this suspension design; the 2wD e-Vans were the last ones in production.
The twin beam can be best thought of as a single “L” frame: the bend in the “L” is where the wheel mounts, and the other two sides are pivot points that are mounted with bushings to different parts of the frame. One pivot is secured under the motor mount on either side, and the others are mounted under the passenger and driver doors, respectively. By making either of the two sides longer, the amount of usable wheel travel can be increased upwards of 30 inches of travel.
Twin beam suspensions are a favorite of high-speed desert racers due to the ease of getting huge amounts of wheel travel at lesser cost than with a-arm designs. Plus, since they were originally designed to handle very heavy loads, the steering and other parts are built robustly enough from the factory to handle harsh desert terrain at very high speeds. Drawbacks for this type of suspension design include uneven tire wear and unstable camber throughout the suspension’s range of travel.
SOLID AXLES
Solid axle, leaf-sprung suspension is the cheapest and easiest way to get decent results. Henry Ford used solid axles for his model t as far back as the early ’20s. They were done differently than they are today. The leaf spring was mounted transversely; in other words, it was a single sideways-mounted leaf spring. Obviously, it’s no longer a new design since it’s been around for almost a century and has undergone multiple rounds of upgrades and tweaks since its inception. Nevertheless, they work great off road, and even with the fair amount of bump steer they have, they do pretty well on road, too. Plus, they can handle substantially more weight with fewer problems than other designs. This is why we see solid axles under most suVs and every size truck. However, suspension systems for solid axles are many, and they all have their own strengths and weaknesses. there are individual ways to modify them, as well.

“THEY CAN HANDLE SUBSTANTIALLY MORE WEIGHT WITH FEWER PROBLEMS THAN OTHER DESIGNS. THIS IS WHY WE SEE SOLID AXLES UNDER MOST SUVS AND EVERY SIZE TRUCK. ”
LEAF-SPRUNG SUSPENSION

“IN THE REAR, BLOCKS CAN BE USED THAT SIMPLY PUT A SPACER IN THE SUSPENSION, RAISING OR LOWERING THE VEHICLE BY WHATEVER THICKNESS THE SPACER IS . . . ”
By far the simplest design and cheapest to modify, leaf springs are just multiple pieces of spring steel (a steel with memory that returns to its original shape after being deformed) stacked in varying widths (rates) or amounts of leafs depending on the need. the axle is usually mounted to the center of the leaf, and the frame secures both eyelets of the spring: one solid mounted and the other with a shackle to allow for suspension travel. stock leafs generally have a main pack that allows for a pleasant ride during normal, unloaded daily driving. Below that spring (and sometimes above it) is an overload spring that takes over when the vehicle is loaded. It’s a much more robust spring designed to come into play only when the rig has a large load on or in it.
Altering height with a leafsprung suspension is simple: In the rear, blocks can be used that simply put a spacer in the suspension, raising or lowering the vehicle by whatever thickness the spacer is; although, these blocks will create added axle wrap under acceleration, wearing out driveshaft components or worse. the use of blocks should be kept to just a few inches in lift, anything higher and you should consider getting new leafs made, adding a leaf to your existing pack, or having your existing leafs rearched by a qualified shop.
Drawbacks to leaf-sprung solid axles are mainly a lack of tuneability when compared to 4-link setups (see “multi-Link suspension” below). Axle wrap is also a concern but can be rectified with a set of traction bars fairly easily.

MULTI-LINK SUSPENSION

This is where it gets interesting. Four-links, 3-links, radius-arm and triangulated-link setups are the ultimate way to tune your rig’s suspension. a link suspension consists of multiple solid arms, which connect the axle to the vehicle with some sort of pivoting joint. the axle can then move freely with little restriction within the limits that the links set. the solid links will also keep the axle aligned exactly how you want it to be, at any point in the suspension’s travel, no matter the engine load. springs (air, coils, coil-overs, hydraulic arms, etc.) of any type are used to keep the vehicle at ride height.
Due to the solid links and free choice of shock-and-spring combos, this type of suspension is the most tunable for any terrain or situation. with a little know-how, it can literally be set up to do just about anything. adjusting things like the angle and/or the length of each link will affect how the vehicle reacts to acceleration, braking, turning, size of terrain, high-speed performance, low-speed performance, etc.

KEEPING IT SQUARE
With multi-link suspensions, you’ll need some sort of lateral stabilization.

Without reinforcement, the suspension could slide right out from under your truck. a good way to combat this is with link bars that are mounted at an angle known as a “triangulated system.” If the bars are straight back and forth, you can use a simple pan hard bar.

Spindles are one of the better ways of altering your truck’s height because they don’t mess with ride quality. Factory systems are set by highly skilled engineers to have the most comfortable ride while keeping good traction. Lowered or lifted spindles change the location of the wheel-mounting point and alter the height. though they are more expensive, they will give the best ride. the only drawback is that you are limited by how much they will change the height. If you want to go lower or higher than the spindles allow, you must combine them with other parts like springs and shocks.
For the ultimate in side-to-side control, a watts link will do the trick. Unlike pan hard bars, watts links won’t pull the rearend from side to side when the suspension travels up and down.

This is a combination of tuned shocks with specific springs working together for the perfect combination of ride control and handling. these are also adjustable in length and will allow you to get the exact height you want. there are also plenty of them that allow you to adjust the shock valving for the best firmness. Installing a set of coil-overs is always the simplest choice since most are universal and must be adapted for use. If you can make them fit or have it done for you, they are a great option.
If you want the ultimate in adjustability and smooth ride, airbags will get you there. the best way to use airbags is to combine them with a decent set of shocks to prevent a balloon-like ride. Airbags also need to be adapted and can be very reliable if set up correctly. These are not the best option for performance vehicles because they’re too soft and can lead to traction loss. there are some that integrate shocks for better control, but they are a compromise.

There are many different types of shocks that can get the job done. the most common are twintube and mono-tubes. twin-tubes are most common and use an outer reservoir to store hydraulic fluid and low-pressure gas. these can offer great passenger comfort, but under heavy use churning and foaming will occur, reducing their effectiveness.
A mono-tube uses a single valve on a larger moving piston and has a second independent piston that separates the fluid from high-pressure nitrogen gas. thus, the gas and fluid never mix, making for improved handling and continuous effectiveness.
The previously mentioned shocks might work great on street applications, but when the majority of your driving is over rougher areas or off-road, they may not be the best choice. the problem occurs when the shock piston is overworked, causing the fluid to heat up, sacrificing performance. reservoir shocks can help because they have an external chamber that increases fluid capacity, keeping temperatures down. there are two types: one is a piggyback reservoir shock with attached chamber, and the other is a remote reservoir shock with a loose chamber, which affords more mounting position options.

The ultimate in off-road performance, dampers are bypass shocks that force fluid through external tubes and meter it via check valve. the benefit of this is multi-staging dampening that coincides with multiple spring rates. also, if you are off-roading, you will have larger diameter tires that can cause excess vibration in your steering system. this movement can also be controlled with shocks called “steering stabilizers.”

This part is simple yet very effective in minimizing the body of your truck. sway bars are u-shaped tubes of steel that bolt both sides of the suspension to the frame. these use stiffness to deflect torsion between the two sides of the suspension system. though these are great for on-road vehicles, some off-roaders choose not to use them for the sake of having more independent travel at each corner their truck.
Editor’s Note: A version of this article first appeared in the August 2016 print issue of Street Trucks Magazine.
You May Also Like

- October 25, 2016
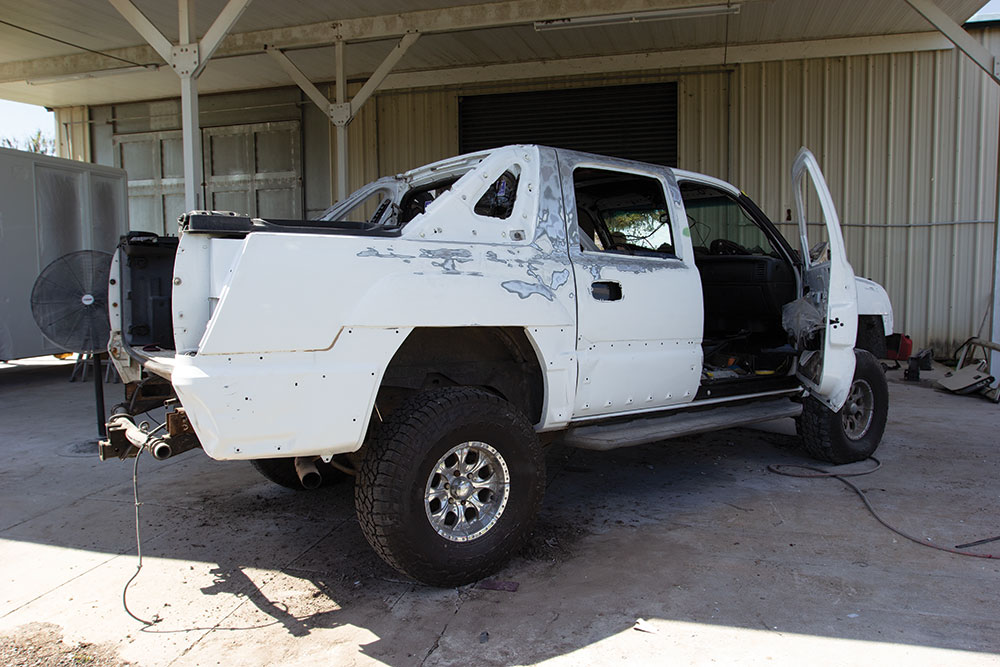
Avalanche Overhaul
- Chris Hamilton
- October 01, 2019
- Industry News
- Truck Reviews
Installing CVF Hood Hinges on No Association! Product Review and Install Tutorial.
- Adam Johnson
- March 15, 2022
- Press Release
- Product Reviews
- Uncategorized
How To Build Custom Seats with Cato's Custom Upholstery
- April 28, 2022

- C10 Builders Guide
Top 10 Trucks From Lone Star Throwdown 2021!!! Yes Already!
- March 01, 2021
- 1 minute read

Truck News for the week! | Word on The Street
- March 17, 2020
- 4 minutes read
Getting some old hydraulics running. Can we make it jump around again? The S10 lives!
- November 25, 2021
- Blood Sweat and Gears
Phat Phabz - Project NAVIH8R - Ep. 01
- October 14, 2021

Tom Pro Design
The Baddest Mini Buggies on the Planet
Why Choose Tom?
Here is where we will explain why Tom Pro Design Buggies are superior to the competition but before we point out the differences let’s go over a brief summary on the science of long-travel suspension and the ins-and-outs (pun intended) of shock technology…
The purpose of a dune buggy is obviously not just for accelerating straight down a drag strip but they require the ability to stop, turn, handle bumps and holes, and climb and descend hills at the same time. Most people desire a comfortable ride while tackling these kinds of conditions but without the teeth jarring effects. In order to satisfy that need while providing a safe and enjoyable experience, proper design and fabrication is crucial.
Wheel travel, whether 12 to 36 inches, is where the wheels don’t just go up from ride height but go up and down following the terrain. The compression-to-rebound ratio is similar for most dune buggies but some have even more droop than upward travel; droop is a major factor in keeping the wheels on the ground for improved traction and control. Therefore, proper engineering of a correct suspension system requires proper strength, geometry, shock valving and spring rates.
Geometry design dictates how well the suspension system will perform; however, without proper A-Arm and Trailing Arm connecting/pivots points, shock mounting points, valving and spring rates the results will be far from desirable.
Wheel alignment is another key factor in the way a buggy will handle; the following is a brief explanation on three common factors that determine proper alignment. First is Camber: this is the vertical angle of the wheel in relation to the chassis; in other words, how much the top of the wheel tilts towards (negative Camber) or away from (positive Camber) the chassis. For a buggy application zero or slightly negative Camber is ideal since positive Camber would result in poor handling and stability. Second is Caster: this is the pivot point angle in relation to vertical; in other words, the top of the spindle leans towards the rear of the chassis resulting in positive Caster. Positive Caster will provide that steering feel due to the centering effect and straight line stability; most buggies have positive Caster ranging from 7 to 10 degrees. Third is Toe: this is measured by how much the front of the wheels point towards or away from each other. Toe-In is when the front of the wheels are closer together than the rear and Toe-Out is just the opposite; most buggies have 1/8 to 1/4 inch of Toe-In.
There are two other factors that affect handling that should be mentioned here. First is Kingpin: this is the axis around which steered wheels pivot; in other words, the spindle assembly is designed where the top of steering knuckle leans toward the chassis but the spindle shaft remains horizontal. This is so that when an imaginary line is drawn through the upper and lower spindle pivot points it will intersect the ground where the center of the tire makes contact. This results in the wheel pivoting at the center of the wheels contact point rather than scrubbing or pushing though an arc. Second is Ackermann Steering Geometry: this is named after Rudolph Ackermann, who designed a solution to the turning problem in London in 1817. The idea is to angle the steering arms of the steering linkage towards the center of the vehicle so that the tie rods change the wheel angles by different amounts resulting in the inside wheel taking a shorter path than the outside wheel following the correct radius without scrubbing or pushing through the turn. Calculating of the exact angle of each steering arm is complicated but angling the steering arms so that a line drawn from the centre of each arm meets at the centre of the rear axle provides the desired result.
Now that you have a better understanding of the complex engineering that goes into the proper design of a dune buggy, here is what sets Tom Pro Design Buggies above the rest by revealing the oversights we have observed on our competitor’s buggies…
- Incorrect Suspension Geometry: Over 90% of today’s long-travel buggies have, what we call, old-school travel. To understand that, look at the pivot points on the front A-Arms; at the frame draw a straight line threw that, this is the pivot point. Now you will notice that the wheel at the bottom of the travel goes forward first, then backwards as it runs through its cycle. The best example of modern front geometry is to visualize the motion of a dirt bike; as the front wheel compresses or goes up, it moves backwards resulting in a much smoother ride over its old-school counterpart. Our models incorporate this concept by mounting the A-Arms on an 11 degree angle for proper wheel motion. Another advantage of the 11 degree mounting is there is less chance of Suspension Stall in the event the buggy is stuffed in a Witch Eye. Suspension Stall occurs when impacting the buggy at an extreme angle and the wheel is unable to travel upwards in order to absorb that impact resulting in major failure/damage.
- Bump Steer: This is when the wheels Toe-In and Toe-Out as the suspension cycles up and down resulting in the vehicle steering off the intended track without driver input when hitting a bump. To minimize this effect, the Steering Rack should be properly mounted so the Tie-Rods are parallel to the A-Arms. Also, the Tie-Rods need to be the exact length of the top A-Arm plus the bottom A-Arm divided by two.
- Rear Trailing Arms Are Too Long: Our buggies have shorter Trailing Arms allowing more manipulation which provides a better forward bite and optimal acceleration; by adding more air pressure to the rear tires you can decrease this effect allowing you to slide. Shorter Tailing Arms pivot at a shorter radius resulting in improved backwards motion away from the bump. Also, our Trailing Arms on all of our models are the same length and are mounted on an 8 degree angle providing the correct geometry. With 8 degree mounting points, the Trailing Arms will create positive and negative Camber through its cycle. This is important because as the vehicle goes around a corner, it will lean into that corner yet the wheels will stay square to the ground for maximum traction and minimal sliding. When the Trailing Arms are mounted square to the frame (zero degrees) or a 5 (equal length) link system is used, like some of our competitors, the wheels will cycle straight up and down leaning with the chassis resulting in poor traction and sliding.
- Small Driver’s Compartment: Our driver’s compartment is the largest in the Mini Buggy industry and has more leg and head room than most full-size buggies.
- Mild Steel Tubing: Our buggies are built using 100% Chromoly tubing providing superior strength and lighter weight. We have heard too many horror stories from owners of our competitor’s buggies who regretted not getting a Chromoly based product since the Mild Steel was, in most cases, the point of failure.
- Mild Steel Heim Joints: Our buggies are assembled with 100% Chromoly Heim Joints providing better strength and durability. Once again, the Mild Steel was, in most cases, the point of failure on our competitor’s buggies.
- No ‘B’ Pillars: All of our models have ‘B’ Pillars which help minimize cage collapse in the event of a roll-over.
- No Center Chassis Vertical Posts: Our buggies have vertical posts from the seats to the mid-rail providing support for the driver and passenger weight.
- No Front Hubs: Spindle mounted wheels are offset which creates improper steering geometry and require shorter A-Arms; our buggies come standard with billet aluminum hubs which allow us to use longer A-Arms due to the 3 inch backspace on the wheel providing increased travel with correct geometry. Also, our buggies have the longest A-Arms providing less scrub and angle at the pivot points.
- Single Shear Spindle Mounts: If that fails the buggy will flip over; our buggies are fabricated using dual-shear mounts in order to reinforce the front-end from those unexpected hard impacts.
- Single Core Radiator: Our buggies come standard with a Ron Davis dual-core aluminum radiator with a shroud and thermo-controlled electric fan for extremely efficient cooling.
- Radiator Fill Cap Not Above The Engine: This can trap air in the cylinder head resulting in critical overheating; our buggies come standard with a custom fabricated aluminum reservoir that is mounted above the engine eliminating this problem.
- No Oil Cooler: Our buggies come standard with an Oil Cooler and connected to the engine via custom fabricated billet aluminum adapters and stainless steel braided lines, providing more efficient cooling.
- Exhaust Wrapped Around The Cylinder Head: This can cause overheating since that extreme heat needs to exit away from and not around the engine; properly routed exhaust can increase horsepower and improve performance.
- Large Rear Sprocket Exposed Below The Frame: This can cause the chain to break and damage to the sprocket in the event you go over a rock or some other hard surface; our buggies have the Sprocket positioned above the frame protecting it from those hazards and with our custom Reverse Box, it is positioned even higher.
- Aluminum Rear Sprocket: These are not very durable for a dune buggy application resulting in premature failure; our buggies come standard with an AR400 Sprocket made of hardened tool steel and .050” thicker to provide better support for the chain pins/rollers resulting in longer chain life.
- Stub Axles: Stub Axles are an older design that are not only used as a carrier for the spinning rear wheels but also carry the weight of those wheels directly on the shaft. Our buggies use Micro-Stubs which only carry the spinning rear wheels and the weight is carried by the bearings, minimizing the stress on the shaft and potential failure. Other advantages with using Micro-Stubs, because they have shorter shafts, we are able to use longer drive axles with less angle providing more real wheel travel.
- Electrical System Wired With Butt Connectors And No Relays: Our buggies’ electrical system is completely soldered and shrink tubed with relays for all components for a proper transfer of electrical currents and loads.
- Incorrect Turbo: Most of our competitors use a Street Bike Turbo which are Bushing type and too large. For a dune buggy application, a smaller Ball Bearing type Turbo is ideal, especially due to the additional weight of a dune buggy chassis; this will provide less lag with increased boost response and the Ball Bearings provide longer life in the sand.
- No Bypass Shocks: It is a common misconception that Bypass Shocks are not necessary on such a lightweight vehicle when, in fact, that is quite the opposite. The obvious goal of a long-travel vehicle is to minimize the up and down motion of the chassis by forcing the wheels to take on that role. A heavier vehicle makes more force in order to counteract the gravitational force keeping it down; where as a lighter vehicle is much more susceptible to bumps; this is where Bypass Shocks allow for running softer springs reducing the resistance in the wheel motion, allowing them to move before the chassis but without sacrificing adequate absorption of varying terrain. Building a vehicle just for jumping is easy since that is a single impact at a time; the real science goes into creating a vehicle that can also handle multiple consecutive bumps with minimal up and down motion to the chassis; Tom Pro Design has achieved this in our buggies; take a look at the ‘Suspension Action’ video in our Gallery.
We realize this is a lot of information to absorb but we feel it is important to educate our potential customers who are about to make a major investment in a product and that should be done armed with all the facts and no regrets. So what are you waiting for? Give us a call today to place your order for a Tom Pro Design Buggy, The Baddest Mini Buggies on the Planet.
2018 Primetime Emmy & James Beard Award Winner
In Transit: Notes from the Underground
Jun 06 2018.
Spend some time in one of Moscow’s finest museums.
Subterranean commuting might not be anyone’s idea of a good time, but even in a city packing the war-games treasures and priceless bejeweled eggs of the Kremlin Armoury and the colossal Soviet pavilions of the VDNKh , the Metro holds up as one of Moscow’s finest museums. Just avoid rush hour.
The Metro is stunning and provides an unrivaled insight into the city’s psyche, past and present, but it also happens to be the best way to get around. Moscow has Uber, and the Russian version called Yandex Taxi , but also some nasty traffic. Metro trains come around every 90 seconds or so, at a more than 99 percent on-time rate. It’s also reasonably priced, with a single ride at 55 cents (and cheaper in bulk). From history to tickets to rules — official and not — here’s what you need to know to get started.
A Brief Introduction Buying Tickets Know Before You Go (Down) Rules An Easy Tour
A Brief Introduction
Moscow’s Metro was a long time coming. Plans for rapid transit to relieve the city’s beleaguered tram system date back to the Imperial era, but a couple of wars and a revolution held up its development. Stalin revived it as part of his grand plan to modernize the Soviet Union in the 1920s and 30s. The first lines and tunnels were constructed with help from engineers from the London Underground, although Stalin’s secret police decided that they had learned too much about Moscow’s layout and had them arrested on espionage charges and deported.
The beauty of its stations (if not its trains) is well-documented, and certainly no accident. In its illustrious first phases and particularly after the Second World War, the greatest architects of Soviet era were recruited to create gleaming temples celebrating the Revolution, the USSR, and the war triumph. No two stations are exactly alike, and each of the classic showpieces has a theme. There are world-famous shrines to Futurist architecture, a celebration of electricity, tributes to individuals and regions of the former Soviet Union. Each marble slab, mosaic tile, or light fixture was placed with intent, all in service to a station’s aesthetic; each element, f rom the smallest brass ear of corn to a large blood-spattered sword on a World War II mural, is an essential part of the whole.

The Metro is a monument to the Soviet propaganda project it was intended to be when it opened in 1935 with the slogan “Building a Palace for the People”. It brought the grand interiors of Imperial Russia to ordinary Muscovites, celebrated the Soviet Union’s past achievements while promising its citizens a bright Soviet future, and of course, it was a show-piece for the world to witness the might and sophistication of life in the Soviet Union.
It may be a museum, but it’s no relic. U p to nine million people use it daily, more than the London Underground and New York Subway combined. (Along with, at one time, about 20 stray dogs that learned to commute on the Metro.)
In its 80+ year history, the Metro has expanded in phases and fits and starts, in step with the fortunes of Moscow and Russia. Now, partly in preparation for the World Cup 2018, it’s also modernizing. New trains allow passengers to walk the entire length of the train without having to change carriages. The system is becoming more visitor-friendly. (There are helpful stickers on the floor marking out the best selfie spots .) But there’s a price to modernity: it’s phasing out one of its beloved institutions, the escalator attendants. Often they are middle-aged or elderly women—“ escalator grandmas ” in news accounts—who have held the post for decades, sitting in their tiny kiosks, scolding commuters for bad escalator etiquette or even bad posture, or telling jokes . They are slated to be replaced, when at all, by members of the escalator maintenance staff.
For all its achievements, the Metro lags behind Moscow’s above-ground growth, as Russia’s capital sprawls ever outwards, generating some of the world’s worst traffic jams . But since 2011, the Metro has been in the middle of an ambitious and long-overdue enlargement; 60 new stations are opening by 2020. If all goes to plan, the 2011-2020 period will have brought 125 miles of new tracks and over 100 new stations — a 40 percent increase — the fastest and largest expansion phase in any period in the Metro’s history.
Facts: 14 lines Opening hours: 5 a.m-1 a.m. Rush hour(s): 8-10 a.m, 4-8 p.m. Single ride: 55₽ (about 85 cents) Wi-Fi network-wide

Buying Tickets
- Ticket machines have a button to switch to English.
- You can buy specific numbers of rides: 1, 2, 5, 11, 20, or 60. Hold up fingers to show how many rides you want to buy.
- There is also a 90-minute ticket , which gets you 1 trip on the metro plus an unlimited number of transfers on other transport (bus, tram, etc) within 90 minutes.
- Or, you can buy day tickets with unlimited rides: one day (218₽/ US$4), three days (415₽/US$7) or seven days (830₽/US$15). Check the rates here to stay up-to-date.
- If you’re going to be using the Metro regularly over a few days, it’s worth getting a Troika card , a contactless, refillable card you can use on all public transport. Using the Metro is cheaper with one of these: a single ride is 36₽, not 55₽. Buy them and refill them in the Metro stations, and they’re valid for 5 years, so you can keep it for next time. Or, if you have a lot of cash left on it when you leave, you can get it refunded at the Metro Service Centers at Ulitsa 1905 Goda, 25 or at Staraya Basmannaya 20, Building 1.
- You can also buy silicone bracelets and keychains with built-in transport chips that you can use as a Troika card. (A Moscow Metro Fitbit!) So far, you can only get these at the Pushkinskaya metro station Live Helpdesk and souvenir shops in the Mayakovskaya and Trubnaya metro stations. The fare is the same as for the Troika card.
- You can also use Apple Pay and Samsung Pay.
Rules, spoken and unspoken
No smoking, no drinking, no filming, no littering. Photography is allowed, although it used to be banned.
Stand to the right on the escalator. Break this rule and you risk the wrath of the legendary escalator attendants. (No shenanigans on the escalators in general.)
Get out of the way. Find an empty corner to hide in when you get off a train and need to stare at your phone. Watch out getting out of the train in general; when your train doors open, people tend to appear from nowhere or from behind ornate marble columns, walking full-speed.
Always offer your seat to elderly ladies (what are you, a monster?).
An Easy Tour
This is no Metro Marathon ( 199 stations in 20 hours ). It’s an easy tour, taking in most—though not all—of the notable stations, the bulk of it going clockwise along the Circle line, with a couple of short detours. These stations are within minutes of one another, and the whole tour should take about 1-2 hours.
Start at Mayakovskaya Metro station , at the corner of Tverskaya and Garden Ring, Triumfalnaya Square, Moskva, Russia, 125047.
1. Mayakovskaya. Named for Russian Futurist Movement poet Vladimir Mayakovsky and an attempt to bring to life the future he imagined in his poems. (The Futurist Movement, natch, was all about a rejecting the past and celebrating all things speed, industry, modern machines, youth, modernity.) The result: an Art Deco masterpiece that won the National Grand Prix for architecture at the New York World’s Fair in 1939. It’s all smooth, rounded shine and light, and gentle arches supported by columns of dark pink marble and stainless aircraft steel. Each of its 34 ceiling niches has a mosaic. During World War II, the station was used as an air-raid shelter and, at one point, a bunker for Stalin. He gave a subdued but rousing speech here in Nov. 6, 1941 as the Nazis bombed the city above.

Take the 3/Green line one station to:
2. Belorusskaya. Opened in 1952, named after the connected Belarussky Rail Terminal, which runs trains between Moscow and Belarus. This is a light marble affair with a white, cake-like ceiling, lined with Belorussian patterns and 12 Florentine ceiling mosaics depicting life in Belarussia when it was built.

Transfer onto the 1/Brown line. Then, one stop (clockwise) t o:
3. Novoslobodskaya. This station was designed around the stained-glass panels, which were made in Latvia, because Alexey Dushkin, the Soviet starchitect who dreamed it up (and also designed Mayakovskaya station) couldn’t find the glass and craft locally. The stained glass is the same used for Riga’s Cathedral, and the panels feature plants, flowers, members of the Soviet intelligentsia (musician, artist, architect) and geometric shapes.

Go two stops east on the 1/Circle line to:
4. Komsomolskaya. Named after the Komsomol, or the Young Communist League, this might just be peak Stalin Metro style. Underneath the hub for three regional railways, it was intended to be a grand gateway to Moscow and is today its busiest station. It has chandeliers; a yellow ceiling with Baroque embellishments; and in the main hall, a colossal red star overlaid on golden, shimmering tiles. Designer Alexey Shchusev designed it as an homage to the speech Stalin gave at Red Square on Nov. 7, 1941, in which he invoked Russia’s illustrious military leaders as a pep talk to Soviet soldiers through the first catastrophic year of the war. The station’s eight large mosaics are of the leaders referenced in the speech, such as Alexander Nevsky, a 13th-century prince and military commander who bested German and Swedish invading armies.

One more stop clockwise to Kurskaya station, and change onto the 3/Blue line, and go one stop to:
5. Baumanskaya. Opened in 1944. Named for the Bolshevik Revolutionary Nikolai Bauman , whose monument and namesake district are aboveground here. Though he seemed like a nasty piece of work (he apparently once publicly mocked a woman he had impregnated, who later hung herself), he became a Revolutionary martyr when he was killed in 1905 in a skirmish with a monarchist, who hit him on the head with part of a steel pipe. The station is in Art Deco style with atmospherically dim lighting, and a series of bronze sculptures of soldiers and homefront heroes during the War. At one end, there is a large mosaic portrait of Lenin.

Stay on that train direction one more east to:
6. Elektrozavodskaya. As you may have guessed from the name, this station is the Metro’s tribute to all thing electrical, built in 1944 and named after a nearby lightbulb factory. It has marble bas-relief sculptures of important figures in electrical engineering, and others illustrating the Soviet Union’s war-time struggles at home. The ceiling’s recurring rows of circular lamps give the station’s main tunnel a comforting glow, and a pleasing visual effect.

Double back two stops to Kurskaya station , and change back to the 1/Circle line. Sit tight for six stations to:
7. Kiyevskaya. This was the last station on the Circle line to be built, in 1954, completed under Nikita Khrushchev’ s guidance, as a tribute to his homeland, Ukraine. Its three large station halls feature images celebrating Ukraine’s contributions to the Soviet Union and Russo-Ukrainian unity, depicting musicians, textile-working, soldiers, farmers. (One hall has frescoes, one mosaics, and the third murals.) Shortly after it was completed, Khrushchev condemned the architectural excesses and unnecessary luxury of the Stalin era, which ushered in an epoch of more austere Metro stations. According to the legend at least, he timed the policy in part to ensure no Metro station built after could outshine Kiyevskaya.

Change to the 3/Blue line and go one stop west.
8. Park Pobedy. This is the deepest station on the Metro, with one of the world’s longest escalators, at 413 feet. If you stand still, the escalator ride to the surface takes about three minutes .) Opened in 2003 at Victory Park, the station celebrates two of Russia’s great military victories. Each end has a mural by Georgian artist Zurab Tsereteli, who also designed the “ Good Defeats Evil ” statue at the UN headquarters in New York. One mural depicts the Russian generals’ victory over the French in 1812 and the other, the German surrender of 1945. The latter is particularly striking; equal parts dramatic, triumphant, and gruesome. To the side, Red Army soldiers trample Nazi flags, and if you look closely there’s some blood spatter among the detail. Still, the biggest impressions here are the marble shine of the chessboard floor pattern and the pleasingly geometric effect if you view from one end to the other.

Keep going one more stop west to:
9. Slavyansky Bulvar. One of the Metro’s youngest stations, it opened in 2008. With far higher ceilings than many other stations—which tend to have covered central tunnels on the platforms—it has an “open-air” feel (or as close to it as you can get, one hundred feet under). It’s an homage to French architect Hector Guimard, he of the Art Nouveau entrances for the Paris M é tro, and that’s precisely what this looks like: A Moscow homage to the Paris M é tro, with an additional forest theme. A Cyrillic twist on Guimard’s Metro-style lettering over the benches, furnished with t rees and branch motifs, including creeping vines as towering lamp-posts.

Stay on the 3/Blue line and double back four stations to:
10. Arbatskaya. Its first iteration, Arbatskaya-Smolenskaya station, was damaged by German bombs in 1941. It was rebuilt in 1953, and designed to double as a bomb shelter in the event of nuclear war, although unusually for stations built in the post-war phase, this one doesn’t have a war theme. It may also be one of the system’s most elegant: Baroque, but toned down a little, with red marble floors and white ceilings with gilded bronze c handeliers.

Jump back on the 3/Blue line in the same direction and take it one more stop:
11. Ploshchad Revolyutsii (Revolution Square). Opened in 1938, and serving Red Square and the Kremlin . Its renowned central hall has marble columns flanked by 76 bronze statues of Soviet heroes: soldiers, students, farmers, athletes, writers, parents. Some of these statues’ appendages have a yellow sheen from decades of Moscow’s commuters rubbing them for good luck. Among the most popular for a superstitious walk-by rub: the snout of a frontier guard’s dog, a soldier’s gun (where the touch of millions of human hands have tapered the gun barrel into a fine, pointy blade), a baby’s foot, and a woman’s knee. (A brass rooster also sports the telltale gold sheen, though I am told that rubbing the rooster is thought to bring bad luck. )
Now take the escalator up, and get some fresh air.

R&K Insider
Join our newsletter to get exclusives on where our correspondents travel, what they eat, where they stay. Free to sign up.
21 Things to Know Before You Go to Moscow
Featured city guides.
IMAGES
VIDEO
COMMENTS
Long-travel shocks can give you up to 20 inches of shock travel. Choose shocks with or without a remote reservoir for the off-road performance you've been expecting. Be sure to measure the physical length of travel that your shocks will need. These shocks are designed for professional tuning, whether in a pre-runner or your dedicated race ...
Most mid travel systems for this platform will net around 10 inches of suspension travel with just an aftermarket UCA and coilover. Most long travel systems for this platform will net 13 inches or more of suspension travel. And depending on the components, some can attain as much as 18 inches of travel, all while retaining four wheel drive.
The most common independent suspension design up front is unequal length A-arms. Two arms mounted perpendicular to the frame attach to an upright that holds the hub assembly. ... This prompted several niche manufacturers to build custom long travel suspension systems that use technology developed in off-road racing. Longer and stronger arms ...
Fabrication: Creating A Custom Long Travel Suspension. By Steven Olsewski September 15, 2016. ... "The rod ends you selected were the JMX12T, which use a three-piece design along with a 3/4-16 thread, they have a 3/4-inch bore, and have the PTFE liner." He continued, "The ball is made out of 52100 steel with a hard chrome plate. The body ...
Let's talk Long Travel Suspension. Suspension is the separation and connection to the ground below us, and (like most things overlanding) can be upgraded. These upgrades provide more lift and more ground clearance, and give us more adjustability and comfortability on the road and trail. Suspension upgrades run the gamut of simple spacer lifts ...
There is not a perfect suspension design that does all things perfectly: It's a give-and-take situation. ... For high-performance, long-travel suspension setups, new longer control arms and custom spindles are the norm. Stock springs will be ditched and replaced with coilovers in most cases; 12 inches of travel and 6 inches of lift is a ...
The wider track also gives the 4Runner a better stance and stability off-road as well. And lastly, you can't forget about that look! 3. AB Castro ( @Dj_ayybeats) - 2005 SR5 2WD. Long Travel Suspension Details. Front: Dirt King 3.5+ Long Travel Kit. Dirt King Upper Arm Sheer Kit. Dirt King Bypass Shock Hoop Kit.
Brake linescarry hydraulic pressure from the master cylinder to the wheel cylinders until it reaches the brake calipers. In a long travel suspension system, the brake calipersare farther from the frame, which can affect the vehicle's stopping power during sudden stops. Extended brake lines can help prevent the loss of braking power.
Long travel suspension enhances a vehicle's off-road capability by allowing for greater wheel travel. This system improves traction and comfort over rough terrain. Off-roading enthusiasts often seek out long travel suspension systems to upgrade their vehicles' performance. With the increased wheel travel, the suspension can absorb more ...
Long Travel Suspension Fundamentals. A basic kit should include several critical components: Longer upper and lower control arms that push the wheels farther away from the vehicle's center line, up to 6 inches per side, allowing the wheels to vertically move farther. Longer coilover front shock absorbers with remote reservoirs that have ...
Long-travel suspension systems offer unbeatable articulation, surprisingly soft landings, and excellent ride ability. Compared to a mid-travel kit, these kits are a larger investment into your rig and people will notice your investment. Choose a long-travel option if you're a serious off-roader who wants the best suspension option on the market.
The '80-'96 Ford Twin-Traction Beam (TTB) front suspension uses a swing arm design that's become the foundation for thousands of long-travel four-wheel-drive suspensions over the years. Ford's TTB ...
KORE Off-Road Dodge Ram 1500. KORE Off-Road's long-travel suspension system for '09-13 Dodge Ram 1500 4x4 trucks delivers 14 inches of wheel travel. The Baja racing inspired suspension system ...
A long travel kit is a complete suspension replacement for your side-by-side. It comes with longer A-arms, axles, tie rods, and radius arms (if your UTV uses them). It's designed to make your suspension wider by some amount. The actual increase in width varies from kit to kit, but at SuperATV, we offer everything from 3" per side increase ...
An off-road-racing twin I-beam design cycles a massive 26 inches of travel. Ford created the beam suspension design, and it was revolutionary when it was released. Modifying involves dropdown brackets and springs for light to medium off-road use. All-out race systems use new, longer I-beams and radius arms as well as coil-over shocks.
A long travel kit is a complete suspension replacement. It comes with everything you need to make your off-road vehicle wider, stronger, and more stable than stock. Long travel kits are designed to dampen the effects of rough riding. The extra width provides stability and makes your machine harder to tip, so you can approach turns at higher speeds.
Here is where we will explain why Tom Pro Design Buggies are superior to the competition but before we point out the differences let's go over a brief summary on the science of long-travel suspension and the ins-and-outs (pun intended) of shock technology…. The purpose of a dune buggy is obviously not just for accelerating straight down a ...
Leveling Kits, Lift Kits, Mid Travel Kits, and Long Travel Suspension Kits, Baja Kits offers the latest in off road suspension products for todays trucks. Toggle navigation. Search. Welcome Guest Log In ... Suspension. Wheels. Bajakits " Lightning " T-Shirt. Price: $19.00. More Info. Brenthel Industries " TT " T-Shirt . Price: $19.00.
Long travel suspensions. Mark Plecnik has applied his research on the design of six-bar linkage function generators to the challenge of a long travel independent suspension for an off-road vehicle. UCI race car engineering students built a 1/5 scale model of his latest design and compared its performance to his calculated design.
In this article the design of the suspension of a sports car with the class "FORMULA SAE" is considered. A suspension double wishbone is taken as the basis. ... On the basis of the rules and conditions of the layout, the authors established the following limits: x Suspension travel is 60 mm (30 rebound, compression 30) 1285 S. Chepkasov et ...
impact by the vehicle suspension. For this reason length is a critical geo-metric-design parameter. Experiments have shown that as lengths increase peak acceler-ations tend to occur at higher speeds, and more linear dynamic effects are created. In general, longer humps exhibit better char-acteristics for speed reduction.3,4
The Ford Expedition is a full-size three-row SUV, manufactured by Ford.Introduced for the 1997 model year as the successor of the Ford Bronco, the Expedition was the first full-size Ford SUV sold with a four-door body.For its entire production life, the Ford Expedition has been derived from the corresponding generation of the Ford F-150 in production, sharing some body and mechanical components.
But since 2011, the Metro has been in the middle of an ambitious and long-overdue enlargement; 60 new stations are opening by 2020. If all goes to plan, the 2011-2020 period will have brought 125 miles of new tracks and over 100 new stations — a 40 percent increase — the fastest and largest expansion phase in any period in the Metro's ...