How to download videos from Safari on iPhone and iPad
Contrary to popular belief, it’s easy to download videos on iPhone and iPad using Safari. In this tutorial, we will show you how to save video files locally to your iPhone Camera Roll and the Files app for offline viewing.


What videos can you download on iPhone?
In almost all chat apps like Messages, WhatsApp, Telegram, Signal, etc., you can download the videos people send you and view them inside that messaging app or export them to your iPhone’s Photos app.
Social apps
Most social media apps like Twitter, Instagram, and Facebook don’t allow easy saving of video clips to the Camera Roll. However, some free video downloader apps from the App Store, iOS shortcuts, and third-party websites let you save videos from these social platforms to your iPhone. Have a look:
- 6 ways to download Twitter videos on your iPhone
- How to download Instagram Reels without watermark for free
- How to download Facebook videos and photos
The YouTube app has a video downloader option, and the only legal way to download YouTube videos is by tapping the download button inside the official app. The saved video stays sandboxed in the YouTube app from where you can watch it without an internet connection, but you can’t transfer it to the iPhone Camera Roll.
In about 125 countries and regions like India, Israel, Egypt, Malaysia, Pakistan, Philippines, Saudi Arabia, South Africa, Thailand, Turkey, UAE, and Vietnam, you can download most YouTube videos in the app for offline viewing – no YouTube Premium is required.
However, in countries like the USA, the UK, Australia, France, Italy, and more, you must have a Premium subscription to download YouTube videos .
You can browse websites using Apple’s Safari and search for the video you want to download. Some sites may offer an easy way to download the video, while others may have no such option, and when you tap the video, it starts playing in Safari with no visible button to save the video file. But worry not, as we will show you how to address this. These tips won’t work for all websites but should cover most of them.
How to download videos on iPhone and iPad
1) Open Safari and find the video on the concerned website. For this tutorial, I’m using Pixabay , which is a library of royalty-free stock footage.
2) Once you’re on the video page, tap the download button or link . If you don’t see a download button, jump to the next section .
3) After you tap the video download icon on a website in Safari, you should see an iOS pop-up menu with two options – View and Download . Tap Download , and it will save the file. You’ll notice that the Safari address bar now has a tiny arrow icon with a circular blue progress bar signifying the download status.

4) Tap Safari’s arrow icon and pick Downloads to get to the download manager, which lists the downloaded files. These files are saved in a folder inside the Files app .

But you can easily add them to your iPhone’s Camera Roll using one of these two ways:
Save video: Tap the video file > share button > Save Video.

Drag & drop: Tap and hold the video file, and its tile will slightly lift. Drag it a bit from its original position to detach it, but don’t lift your finger yet. Now, swipe up (or press the Home button) using your other hand to get to your iPhone Home Screen. From here, open the Photos app and make sure you’re inside Recents or an album. Finally, drop the video file by lifting your finger. You’ll see that the video is now added to the Photos app.

Another method to save a video file using Safari on iOS
As mentioned earlier, not all websites offer a download button. But for a video, you will see a play button, and tapping it starts playing the video inside Safari. So, if you find yourself on such a website, play the video and then follow these steps:
1) On the Safari video player, tap the Picture in Picture button , which will detach the video and put it inside a small floating window. It won’t work if you tap the Picture in Picture button directly on the web page video player, like that on Vimeo.
2) Tap the share button from the video player screen.
3) Pick Save to Files > select iCloud or On My iPhone > Save .

Don’t see the share button in step 2?
In the left screenshot, you see a video playing/streaming on a web page. And in the right image, you see a video file starting to play inside the default Safari media player.

If a video is embedded on the website, it generally plays on that same web page (left image above) and doesn’t launch the video player inside Safari. If this is the case, you won’t be able to download the video unless you look for third-party sites that can save such videos. For example, tapping a video on Twitter starts playing it in the browser and you can’t download it directly from Safari, but you can use a site like Twitter Video Downloader in Safari , which will grab the Twitter video, play it in Safari video player (right image above) and let you save the file.
On some sites, tapping the triangle play button over the video may start playing it on the webpage, making it impossible to download. Hopefully, you can address this by looking for a View , Download , or Play button, which loads the actual video file and starts playing it inside the Safari video player. Once the file is in the Safari video player, enter Picture in Picture, and tap the share button > Save to Files.
Find downloaded files on an iPhone or iPad
You will find the downloaded video in the following places:
Inside Safari: Tap the downloads button in the URL bar, hit Downloads , and you’ll see the video file.
In the Camera Roll: Open the Photos app and tap Recents from the Albums tab.
In the Files app: Open the Files app and tap Recents to see the video. You can also tap Browse and look for the video in the downloads folder. From the Files app, tap & hold a video thumbnail and then choose Share > Save Video to add it to the Photos app.

This is how you can download video files on your iOS or iPadOS device. Not all websites allow video downloads. But in many situations, you can use the above methods to save it locally and watch it offline without a Wi-Fi or cellular connection.
Related tips:
- How to download files and documents to iPhone or iPad
- 3 ways to download music from SoundCloud to iPhone
- 2 ways to add files from a computer to VLC on iPhone and iPad
How To Download Video On Safari

- How To Download Videos
- How-To Guides
- Software Tutorials

Introduction
Are you looking for a way to download videos while browsing Safari? Whether it’s a captivating documentary, a hilarious comedy sketch, or a mesmerizing music video, having the ability to download videos can be incredibly convenient. Unfortunately, Safari doesn’t come with a built-in video download feature. However, fear not! There is a way to download videos on Safari, and in this article, we’ll guide you through the step-by-step process.
Downloading videos can be useful for various reasons. You may want to watch a video offline, save it for future reference, or share it with others who might not have internet access. Whatever your reason may be, we’ve got you covered. So, grab your Mac or iOS device, and let’s dive into the world of video downloading on Safari!
In this article, we’ll walk you through the steps to download videos on Safari, whether you’re using a Mac or an iOS device. We’ll cover how to enable the necessary menu, locate the video file, and save it to your desired location. By following these steps, you’ll have a video downloaded and ready to enjoy in no time.
Note that downloading videos from certain websites may infringe upon copyright laws and the terms of service of these sites. It’s essential to respect intellectual property rights and use this knowledge responsibly. Make sure you have permission or the right to download the video before proceeding.
Now that we have the legalities out of the way, let’s get started with the step-by-step instructions to download videos on Safari!
Step 1: Open Safari and navigate to the video
The first step in downloading a video on Safari is to open the browser and navigate to the webpage where the video is located. You can do this by simply launching Safari from your Mac or iOS device and typing the URL of the website into the address bar. Alternatively, you can search for the website or video using a search engine like Google.
Once you’ve arrived at the webpage containing the video you want to download, take a moment to ensure that the video is playing correctly. Play the video and make sure it’s fully loaded without any buffering issues. This step is important because we want to make sure we’re downloading the video in its best quality.
Ensure that the webpage you’re on allows video downloads and that you’re not violating any terms of service or copyright laws by downloading the video. It’s always a good idea to check the website’s terms and conditions or contact the website owner if you’re unsure about whether downloading the video is permitted.
Now that you have successfully opened Safari and navigated to the webpage containing the video, you’re ready to move on to the next step of the process. Let’s continue and enable the necessary menu that will help us download the video.
Step 2: Enable the Develop menu
Before we can move forward with the video downloading process, we need to enable the Develop menu in Safari. By default, this menu is hidden, so we’ll need to enable it through Safari’s preferences.
To enable the Develop menu, follow these steps:
- Open Safari and go to the menu bar at the top of the screen.
- Click on “Safari” and select “Preferences” from the drop-down menu.
- In the Preferences window, click on the “Advanced” tab.
- Check the box next to “Show Develop menu in menu bar”.
Once you’ve enabled the Develop menu, you’ll see it appear in the menu bar at the top of the screen. This menu contains a variety of developer tools that can be useful for various purposes, including video downloading.
Enabling the Develop menu gives you access to additional features and options that can enhance your browsing experience. In particular, it unlocks the ability to view and access page resources, which is integral to the video downloading process.
With the Develop menu now enabled, you’re ready to proceed to the next step of the video downloading process: opening the Develop menu and selecting “Show Page Resources”. Let’s move on to that step!
Step 3: Open the Develop menu and select “Show Page Resources”
Now that you have enabled the Develop menu in Safari, it’s time to open it and select the “Show Page Resources” option. This step will allow you to access the webpage’s resources, including the video file you want to download.
Here’s how you can open the Develop menu and select “Show Page Resources”:
- Launch Safari and go to the webpage with the video you want to download.
- Go to the menu bar at the top of the screen and click on “Develop”.
- In the drop-down menu, select “Show Page Resources”.
When you select “Show Page Resources”, a new window or sidebar will appear, displaying a list of all the resources associated with the webpage. These resources include HTML files, CSS stylesheets, images, and, most importantly, video files.
Scroll through the list of resources and look for the video file you want to download. The video file may be in various formats such as .mp4, .mov, or .avi, depending on how the website has encoded it.
It’s worth mentioning that not all videos on a webpage may be easily identifiable in the resource list. Some websites may use different techniques to protect their videos or make them harder to download. In such cases, you may need to explore further or employ additional methods to locate the video file.
Once you have located the video file in the resource list, you’re ready to move on to the next step, which involves downloading the video file itself. Let’s proceed to step 4 and learn how to download the video!
Step 4: Locate the video file in the resource list
Now that you have opened the Develop menu and selected “Show Page Resources” in Safari, it’s time to locate the video file in the resource list. This step is crucial because it allows you to identify the specific video file you want to download.
Follow these steps to locate the video file in the resource list:
- In the resource list, carefully scan through the files and look for entries that have video formats such as .mp4, .mov, .avi, or any other common video format.
- Pay attention to the file sizes as well, as the video file is likely to have a larger size compared to other resources.
- If the website has multiple videos, you can usually identify them based on their filenames or by looking for keywords related to the video content.
- Once you have located the video file, take note of its location in the resource list, as you will need it in the next step to download the video.
Keep in mind that some websites may use obfuscated or coded filenames for the video files to make it more difficult to identify them. In such cases, you may need to rely on file sizes or additional information to determine the correct video file.
It’s also worth noting that not all videos on a webpage may be easily downloadable, as some websites may employ additional measures to prevent or restrict video downloads. In such cases, you may need to explore alternative methods or utilize specialized tools to download the video.
Once you have successfully located the video file in the resource list, you’re now ready for the next step, which involves downloading the video file onto your device. Let’s move on to step 5 and learn how to download the video!
Step 5: Download the video file
Now that you have located the video file in the resource list, it’s time to download the video onto your device. This step will allow you to save the video file locally, making it accessible for offline viewing or further use.
Follow these steps to download the video file:
- Right-click (or Control-click) on the video file in the resource list. A context menu will appear.
- In the context menu, select “Download” or “Download Linked File”. This action will initiate the download process.
- A download progress bar or indicator may appear, showing the status of the video download. Wait for the download to complete.
- Depending on your Safari settings, the downloaded video file may be saved automatically to your default downloads folder or prompt you to choose a location to save the file. If prompted, select the desired location to save the video file.
Once the video file has finished downloading, you will have successfully saved it onto your device. The time it takes to download the video will depend on various factors, such as the file size, your internet connection speed, and the server’s responsiveness.
It’s important to note that the downloaded video file will be in the same format and quality as it was on the website. If the video was in high definition or 4K resolution, the downloaded file will retain the same quality. However, keep in mind that the video’s quality is dependent on how it was encoded and uploaded to the website.
Now that you have successfully downloaded the video file, you can proceed to the final step, which involves saving the video file to your desired location. Let’s move on to step 6 and learn how to save the video file!
Step 6: Save the video file to your desired location
After successfully downloading the video file on Safari, you can now save it to your desired location. This step allows you to choose where you want the video file to be stored on your device for easy access and organization.
Follow these steps to save the video file to your desired location:
- Locate the downloaded video file on your device. Depending on your settings, it may be saved automatically to your default downloads folder or the location you specified during the download process.
- Right-click (or Control-click) on the video file to reveal a context menu.
- In the context menu, select “Move” or “Copy”.
- Navigate to the desired location or folder where you want to save the video file.
- Click on “Move” or “Copy” to transfer the video file to the selected location.
By following these steps, you have now successfully saved the downloaded video file to your preferred location. This allows you to easily locate and access the video whenever you want to watch or share it.
It’s worth mentioning that you can also rename the video file if you want to give it a more descriptive or memorable name. This can help you identify the video easily in your file system.
Remember to choose a location that makes sense for your organizational preferences and ensures that the video file is easily accessible. You can save it to a specific folder, your desktop, or any other location that suits your needs.
Congratulations! You’ve completed the final step of the video downloading process on Safari. Now, you can enjoy your downloaded video at your convenience, whether it’s for entertainment, educational purposes, or any other personal use.
Congratulations! You have successfully learned how to download videos on Safari. By following the step-by-step guide provided in this article, you can now download your favorite videos and save them for offline viewing or sharing with others.
Remember to always respect the terms of service and copyright laws of the websites you visit. Make sure you have the legal right to download the videos and use them responsibly.
Enabling the Develop menu in Safari and accessing the page resources allows you to locate and download the video files directly from the website. By following the instructions, you can easily navigate through Safari’s menus and options to accomplish this.
Once you locate the video file in the resource list, downloading it is a straightforward process. Right-clicking on the video file and selecting “Download” initiates the download, and you can monitor the progress until the file is completely saved on your device.
Finally, saving the video file to your desired location ensures easy access and organization. You can choose the destination folder and even rename the file if necessary, making it easier to identify and locate in the future.
Now that you know how to download videos on Safari, you can enjoy your favorite content offline, share videos with friends, or keep them for reference. Whether you’re using a Mac or an iOS device, you can use these steps to download videos hassle-free.
Remember to always download videos responsibly and within the legal boundaries. Respect content creators’ rights, and make sure you have the necessary permission or license to download and use the videos you are interested in.
Now that you have mastered the art of video downloading on Safari, go forth and explore the vast world of online videos. Enjoy the freedom of watching your favorite content even when you’re offline!
Leave a Reply Cancel reply
Your email address will not be published. Required fields are marked *
Save my name, email, and website in this browser for the next time I comment.
- Crowdfunding
- Cryptocurrency
- Digital Banking
- Digital Payments
- Investments
- Console Gaming
- Mobile Gaming
- VR/AR Gaming
- Gadget Usage
- Gaming Tips
- Online Safety
- Tech Setup & Troubleshooting
- Buyer’s Guides
- Comparative Analysis
- Gadget Reviews
- Service Reviews
- Software Reviews
- Mobile Devices
- PCs & Laptops
- Smart Home Gadgets
- Content Creation Tools
- Digital Photography
- Video & Music Streaming
- Online Security
- Online Services
- Web Hosting
- WiFi & Ethernet
- Browsers & Extensions
- Communication Platforms
- Operating Systems
- Productivity Tools
- AI & Machine Learning
- Cybersecurity
- Emerging Tech
- IoT & Smart Devices
- Virtual & Augmented Reality
- Latest News
- AI Developments
- Fintech Updates
- Gaming News
- New Product Launches
- 12 Best Free AI Image Sharpeners in 2024 WebPCMobile
Sanjuksha Nirgude Soaring High with Robotics
Related post, unveiling the secrets of sls printing and its role in robotics, unleashing efficiency: the role of robotic process automation in industry 4.0, advancing cybersecurity: the integration of robotics with emerging sms phishing alert tools – innovations, challenges, and future perspectives, robotics redefining long-term investment horizons, bridging software development and robotics for enhanced automation, the role of robotics in cnc machining for large part production, related posts.

How To Save Videos From Safari

How To Download Videos To IPad

How To Download From Safari

How To Download Video From Safari On IPhone

How To Download Any Video From Safari

How To Download Videos From Safari On iPhone

How To Install Safari On Apple TV 4

How To Download Videos On Browser
Recent stories.

12 Best Free AI Image Sharpeners in 2024 (Web/PC/Mobile)

OpenStack Backup and Recovery Software

Apple Wallet Availability in the PocketGuard App: Sync your Apple Card, Apple Cash, and Savings from Apple Card Accounts

5 Ways to Improve IT Automation

What is Building Information Modelling?

How to Use Email Blasts Marketing To Take Control of Your Market

Learn To Convert Scanned Documents Into Editable Text With OCR
- Privacy Overview
- Strictly Necessary Cookies
This website uses cookies so that we can provide you with the best user experience possible. Cookie information is stored in your browser and performs functions such as recognising you when you return to our website and helping our team to understand which sections of the website you find most interesting and useful.
Strictly Necessary Cookie should be enabled at all times so that we can save your preferences for cookie settings.
If you disable this cookie, we will not be able to save your preferences. This means that every time you visit this website you will need to enable or disable cookies again.
How to Download Videos From Safari on iPhone and iPad

While on the internet, we often come across videos that we would like to save for offline viewing or sharing. However, downloading videos from the Safari browser is challenging. Also, most social media websites (where many users come across these videos) lack a built-in option to download videos nor allow users to download videos.
We’ve compiled a guide to help you learn how to download videos from Safari on your iPhone or iPad. Also remember that while you can download videos from the internet, make sure it is for personal use and refrain from sharing elsewhere. We’ll talk more about this, later in the article.
Steps to Download Videos From Safari on iPhone and iPad
Please ensure that you only download videos from websites that allow users to download videos. Planning to repurpose the content? Before doing that check whether the videos are royalty free. All I’m trying to convey is that avoid trouble by following the legalities.
To demonstrate the process, we’ll be using the Pixabay website which has thousands of free stock videos shared by the community members.
Time needed: 3 minutes
Steps to download videos from Safari on your iPhone and iPad.

Alternatively, you can tap and hold on to the video, drag it to the Photos app, and directly save it to your iPhone or iPad.
Where are the Downloaded Videos Stored on iPhone and iPad?
The videos you download are saved to the Photos and the Files app. Navigating to download videos in the Photos app is quite easy. You can find it in the Albums > Recents . However, if you want to locate it in the Files app, follow the steps mentioned below.
1. Open the Files app on your iPhone or iPad.
2. Head to the Browse tab and tap the iCloud Drive option.
3. Now tap on the Downloads folder and you’ll find the downloaded videos in this tab.

Download Videos from Social Media Apps and Websites
Downloading videos from social media sites like Twitter, Instagram, etc., might not be ethical or even legal. Especially, if you want to download and share these videos or use the content in your videos, etc.
Coming to YouTube, it allows users to download videos for offline viewing within the app. These videos will not appear in the Photos or Files app and can only be accessed on YouTube. You might need a YouTube Premium subscription for some videos and resolutions (This is region specific). We have a guide that will help you download YouTube videos on your iPhone or iPad .
Now, if you upload your videos to YouTube (to store them privately as backup), then downloading these videos shouldn’t be a problem. You can look up websites that allow you to download videos from YouTube. However, please refrain from downloading videos from other creators and using them as it will come under copyright infringement laws.
On the other hand, Twitter, Instagram, and other social media websites do not allow users to download videos even within their apps. So, if you’re looking to download a video from Twitter you can check out our detailed guide to download Twitter videos on your iPhone .
If you want to download Instagram reels or videos, you can use websites like Snapinsta , Save Insta , etc. Again, please ensure that you do not circulate these videos or repurpose the content as it can land you in trouble.
Download Videos From Safari With Ease
We hope you’ve learned how to download videos from Safari on your iPhone or iPad. Now that you’re aware of the steps, ensure that you do not download and use the content. And, if you intend to do so, please pay the royalties or take the necessary permissions from the original creators.
If you have any doubts regarding downloading videos from Safari on iPhone or iPad, let us know in the comments below.
Open the video in Safari > tap Download > tap the Download Icon in the address bar > select Downloads > play the video > tap Share > Tap Save Video.
Leave a Reply Cancel reply
You must be logged in to post a comment.
This site uses Akismet to reduce spam. Learn how your comment data is processed .
- Darryl Dsouza
- Video Tools Video Downloader for Windows Download online video/audio Video Downloader for Mac Download YouTube video on Mac Video Downloader Online Download any video for free Video Editor Easy video editing software VideoKit All-in-one video toolkit EaseUS RecExperts Screen recorder for PC and Mac Download YouTube videos Mac Download Instagram videos Download YouTube videos in laptop Convert YouTube to MP3
- Audio Tools EaseUS VoiceWave Change voice in real-time Vocal Remover (Online) Remove vocals online for free MakeMyAudio Record and convert audio EaseUS VoiceOver Free online AI voice generator WhatsApp voice changer Female to male voice changer High quality vocal remover Online vocal remover from YouTube
- Support Support Center Download Download installer Chat Support Pre-Sales Inquiry Chat with a Sales Rep
How to Download Videos on iPhone from Safari in All Possible Ways
In this tutorial, we will tell you how to download videos from Safari to your iPhone and iPad. This should be a simple tutorial, and everyone can quickly start with these methods. Click to learn more.
Secure Download
Don’t forget to share this post!
Page Table of Contents
Updated on Jul 25, 2024
▶️Open Safari and navigate to the video you want to download. On your iPhone (iOS 13 and later), long press on the video, then select " Download " from the options that appear to begin the download.
We don't know if you have this experience when watching a funny video clip in your Safari but find it constantly buffering due to a slow/unstable internet connection or insufficient internet bandwidth or outdated browser, or whatever reason. Whatever the reason, the best option to solve the buffering problem is to have your wanted videos downloaded to your iPhone or iPad. Thus, you can watch them without interruption.
If this is what you want, just apply any of these methods to grab the videos you want from Safari on your iPhone.
Method 1. Directly Download Videos from Safari to iPhone or iPad
Starting from iOS 13 , iPhones let you save files from Safari as long as the video comes with the download option.
🎯If the videos you want to download are from YouTube, Facebook, Instagram, or other platforms that have strict download restrictions , then this method doesn't work .
Step 1 . Open Safari and navigate to the video site from which you wish to download videos.
Step 2 . Find the video you wish to download.
Step 3 . Tap on the " Download " icon to save the video.
Step 4 . Once it's done, you can see a small download icon in your URL bar, tap it and select "Downloads," from where you can preview the video you downloaded or tap " Share " to save it to your video library or your iCloud.
Quick Tips : If there is no download icon, you can tap and hold the link to the video and tap " Download Linked File " from the pop-up menu.

Method 2. Download Videos from the Internet to iPhone or iPad
We don't deny that using Safari is convenient for downloading videos, but not all videos are available for downloading from Safari. Such types are mainly from YouTube, Facebook, Instagram, and other sites with strict download restrictions. If you want to download videos from these sites, you will need a simple video downloader like EaseUS Video Downloader to help.
As a simple and easy-to-use URL video downloader for Mac and Windows, this software has helped millions of users grab their wanted videos or music from sites like YouTube, Vimeo, Facebook, Instagram, and more.
Though it may require you to push the downloaded videos to your iPhone or iPad with some extra steps, EaseUS Video Downloaders' rich functionality will make the time worth devoting.
🔎 You can free download this software and save videos from the internet with EaseUS Video Downloader : (Here we take YouTube, for example)
Step 1. Launch EaseUS Video Downloader and choose your desired format and quality.

Step 2. Then copy the YouTube link and click "Paste Link." You'll see the video displayed below.

Step 3. Wait for the download to complete, then click "Open File Location" to locate and check the video.

Disclaimer : Bear in mind that it's illegal to download copyrighted content and use them for commercial intensions without authorization. Before you download videos, you'd better check whether the sources are copyrighted.
🔥 More features of EaseUS Video Downloader:
- Download Kpop MV , movies, TV shows or any videos/audio from 1000+ sites
- Personalize the download option: resolution, output format, and storage path
- Download all videos from a YouTube channel
- Extract audio from YouTube, TikTok, Facebook, and more sites
Method 3. Download Videos from Safari with Online Video Downloaders
If you can't download videos using the above-introduced method, you can try using some online downloading services. You can find such services by entering some keywords like " YouTube video downloader ," "Instagram video downloader," "Facebook video downloader," or more in your Safari. Then, select the top one from the results. If you don't want to waste time finding such services, you can try the following one we picked for you.
Step 1 . Open the YouTube app on your iPhone or iPad.
Step 2 . Find the video you wish to download and click the " Share " icon.
Step 3 . From the pop-up window, click " Copy Link ."
Step 4 . Open Safari and go to savefrom.net.
Step 5 . Paste the URL you copy and press " Go ."
Step 6 . Then, choose the video resolution you want and download the video to your iPhone or iPad.

Method 4. Download Videos from Safari Extension and Send to iPhone
After setting up the Safari extension, seamlessly download videos to your iPhone with just a few taps. This method enhances convenience by integrating directly with Safari, allowing for quick access and management of downloaded content. By leveraging this extension, users can effortlessly save videos for offline viewing on their iPhones, streamlining the process of accessing favorite media content on the go.
VideoDuke is a robust Safari video downloader exclusively designed for macOS users. With its intuitive interface and advanced features, VideoDuke simplifies the process of downloading movies, music, and videos.
It offers two modes: Simple for straightforward downloading and Advanced for more customizable options. Compatible with Safari and other browsers, VideoDuke supports popular platforms like YouTube and TikTok, allowing seamless video extraction and conversion to MP3 files. Ideal for batch downloading, it supports various formats and resolutions, making it versatile for different needs.
To download videos using VideoDuke's Safari extension:
Step 1. Download and install VideoDuke from the official website on your macOS device.
Step 2. Integrate VideoDuke into your Safari browser by dragging the quick link to the bookmarks bar.

Step 3. Navigate to the website containing the video you wish to download.
Step 4. Click on the VideoDuke download button in the bookmarks bar to initiate and save your desired video file to your Mac.
In Conclusion
All possible ways you can use to download videos on your iPhone from Safari have been detailed in this guide. As you can see, you can achieve your goal in many different ways. Which way to choose depends on whether the video has a download button and the video site you wish to download from. If you want an all-in-one approach to downloading videos, EaseUS Video Downloader is an excellent option.
Under normal conditions, you can download videos from Safari to your iPhone, but problems may arise when you do that. If you have doubts about downloading videos from Safari, here are some answers to the popular questions.
1. How do I save a video from Safari to my Camera Roll?
To download a video to your Camera Roll from Safari, you can open the video you want and tap the video to show the three dots. Then, select "Save to Camera Roll."
2. Why can't I download videos from Safari?
There are many different reasons why you can't download videos from Safari. If you have this problem, you can try some solutions and suggestions Apple promotes.
3. Where do Safari downloads go on iPhone?
The files downloaded in Safari are default saved in the "Download" section of the File app.
Melissa Lee
Related Posts

How to Download All Videos from a YouTube Channel in 3 Ways

How to Use YouTube Music to Download Songs [Detailed Tutorials]

How to Download Music from YouTube to iPhone

YouTube to MP4: Convert YouTube to MP4 in HD Quality
Success, thanks for submitting!
- Refund Policy
- Terms & Conditions
- Do Not Sell
Copyright © 2004 - 2023 EaseUS. All rights reserved.

{[ bar_title ]}
Free & easy: download videos from safari on iphone & mac.

Safari has long been the default browser on your iPhone and Mac. Unlike Chrome, it’s not easy for users to find a good free video downloader for Safari. Your favorite video downloadhelper also not available on Safari. But, there still are a few good video downloader that you can use with Safari, though.
In the simplest case, the video is embedded on a website and is downloadable by default, you can directly use the downloading functionality in Safari. If you need downloading videos from YouTube, Instagram, Facebook, TikTok, etc. Then, you’ll need to either use a Safari extension, online site, shortcut, or video downloader app to download the video.
Note: Before we show you how to download any video from Safari, it’s worth noting that these methods tend to break every once in a while. Video sharing sites like YouTube, Facebook, etc. frequently changes things on its end and stops these downloaders from working. which means that the method for downloading videos need to adapting accordingly. If any method stops working, please let us know in the comments, we’ll test and update with a working method.
Downloading Embedded Video with Safari Itself
If the video you want to download is made available by the website, you can download the videos directly on Safari, just in the same way you download any other file. Please note, this method is only applicable to download embedded videos on web pages and not for videos provided by streaming services such as YouTube, Facebook, TikTok, Dailymotion, etc.

Download Any Video with Video Downloader App for Safari
There are many third-party apps that let you download videos, The most reliable of these apps that I’ve come across is iFunia YouTube Downloader. It can download videos from YouTube, Bilibili, Instagram, Facebook, Pinterest, Reddit, Soundcloud, TikTok, Tumblr, Twitch, Vimeo, VK, etc. 1000+ websites. In our test, it can really download video at their highest resolution possible—including 4K and 8K.
The free version of the app allows 3 downloads for a test, which is good enough for most people. It features no ads, trackers, or analytics. You can download videos in MP4, MP3, M4a, etc.
If you want to download videos in bulks or you want to download a whole playlist or channel, this app supports it too. and It also couldn't be simpler to use: just copy the URL of the video and paste it to this app.

Steps on how to download any video from Safari on Mac:

- Click the Download icon in the bottom right and it will start downloading all videos instantly. Once completed, tick out “checkmark” icon to find the just downloaded videos on your device.
1. Using Apple Shortcuts
On your iPhone, the best way to download videos from Safari is via Apple’s Shortcuts app . It’s where you’ll find all kinds of extensions and automations for iOS. and one of them is called Lucky Download Shortcut which enables you download videos from social media sites like YouTube, Facebook, Twitter, Pinterest, Daily Motion, TikTok, Instagram, etc.
This shortcut is ad free, and supports downloading videos as MP4, MKV, AVI, and MOV formats. Besides video, it can download photos, audios and subtitles too.
Here’s what you need to do:
- Download the Lucky Download Shortcut from RANKSAPK (a third-party gallery for shortcuts for your iPhone and iPad).
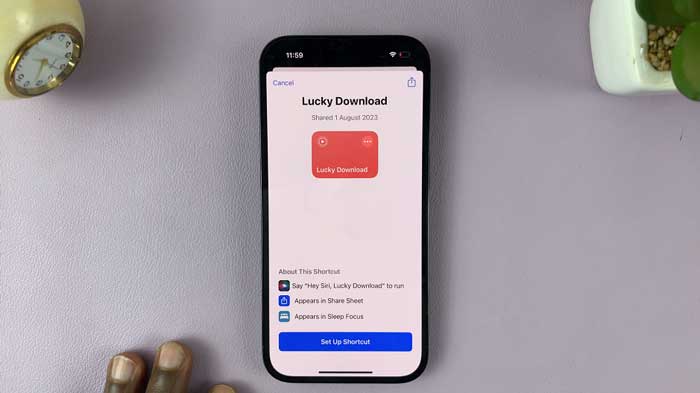
- Scroll down and select Lucky Download. The shortcut will guide you through the process and ask for a bunch of permissions in the process. In this process you can set the downloaded format and location.
- After giving all the permissions, the downloaded file will be saved on your iPhone. You can repeat this process for pretty much any video on any sites or app.
2. Use a video downloader site (but be cautious)
Now, Mobile browsing on iPhone is just the same as browsing on a Mac or PC. So, just like on Mac you can open an online video downloader in Safari and download the video.
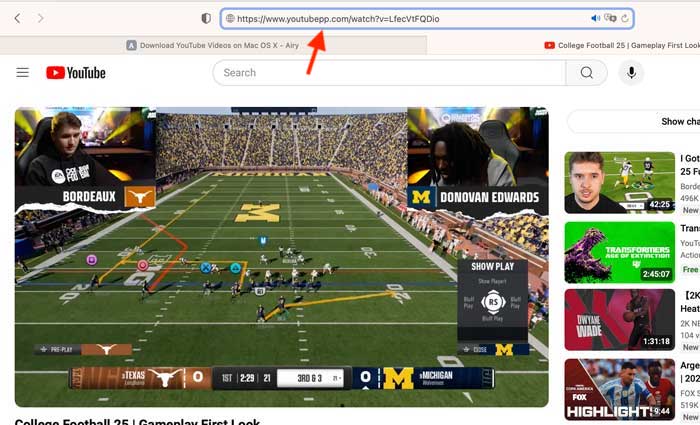
Y2mate is the site I recommend most for mobile users, as you can download videos in MP4 or MP3 format up to 1080p. And, with this app you don’t need the copy&paste step. You just open the video in safari and then insert "pp" after "youtube" in any YouTube URL for faster downloading.
With this method you need to be cautious on which website to use, as online video downloader websites can be spammy, blasting you with sketchy ads and may have malicious. Still, as the Y2mate we introduce above, it does work, so it’s also a notable option.
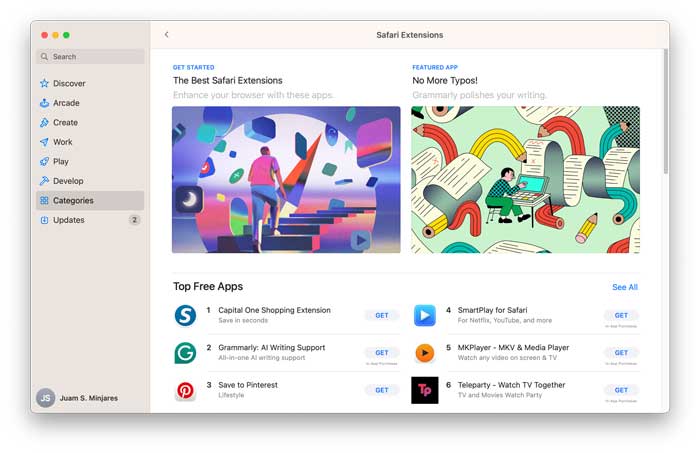
Safari Video Downloader Extension
Yes, Safari has browser extensions too. You can use the Safari Extensions category on the App Store for iPhone, iPad, and Mac to navigate and find Safari extensions. But, unlike Firefox and Google Chrome, there are not many extensions that supports downloading video from Safari. you don’t have choices like video downloadhelper, JDownloader. and many of them have not been updated for a long time. Not even to mention downloading YouTube videos from Safari.
VideoDuke Integrate into Safari
After testing all available methods, we found VideoDuke. VideoDuke is both a video download app and extension. It supports integrate into Safari and you can use it to download videos from YouTube, Vimeo, Dailymotion, TikTok, Reddit, Bandcamp, SoundCloud, Twitch, Tumblr, and Twitter. It supports batch video downloading, can download videos in different quality and fast speed.
Here’s how you can use VideoDuke in Safari to download videos:
- Download and install VideoDuke on Mac.
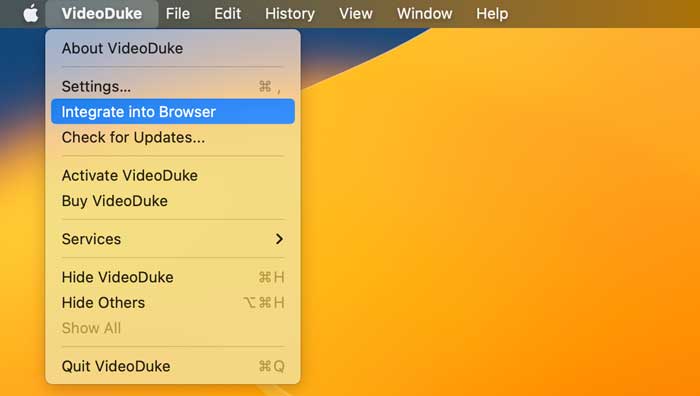
- Now open YouTube or any video sharing sites, and play the video you want to download, then click on the bookmark you just saved.
- Click open in VideoDuke on that page, and allow it to open the video in VideoDuke app. The app will then start analyzing the video. Just click Download to get the video.
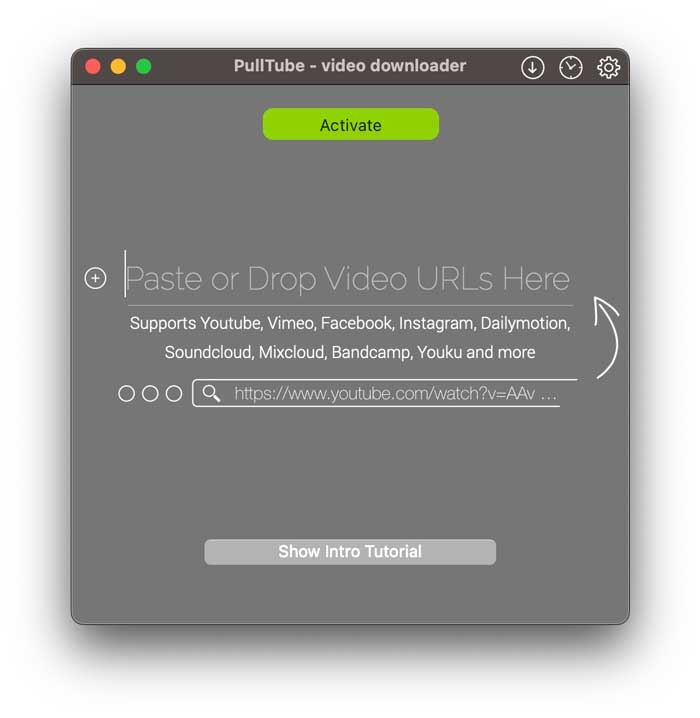
PullTube Extension for Safari
Just like VideoDuke, PullTube is both an app and extension, it can download videos, audios and playlist from 1,000+ websites and offer some editing functions like video trimming, you can download its extension for Safari, Chrome, and Firefox.
Here’s how you can use PullTube Extension for Safari to download videos:
- Download and install PullTube on Mac .
Safari Video Downloader Online
If you don’t want to download any apps or extension, there are also several online options that can download videos from Safari without software. although it is full of ads and the download speed is slow.
As for online video downloaders, there are plenty of sites you can try to use to download videos. A number of them seem pretty scammy, though. So, if you decide to use online video downloader, do pay attention to fake ads and make sure not to click it.
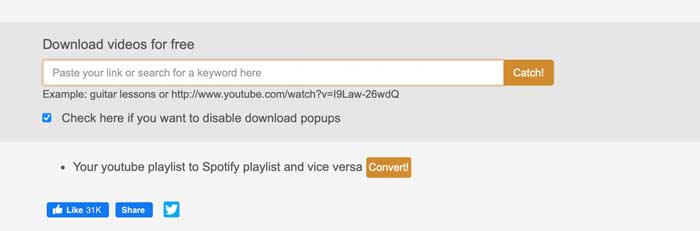
y2mate.com is the online video downloader that supports downloading videos from YouTube, Facebook, Dailymotion, Youku, etc. to Mp3, Mp4 in HD quality. Compared with other website, Y2mate makes the video downloading process a bit easier, you don’t need to copy&paste to download the video.
How to use:
- Click on convert and it will start downloading the video.
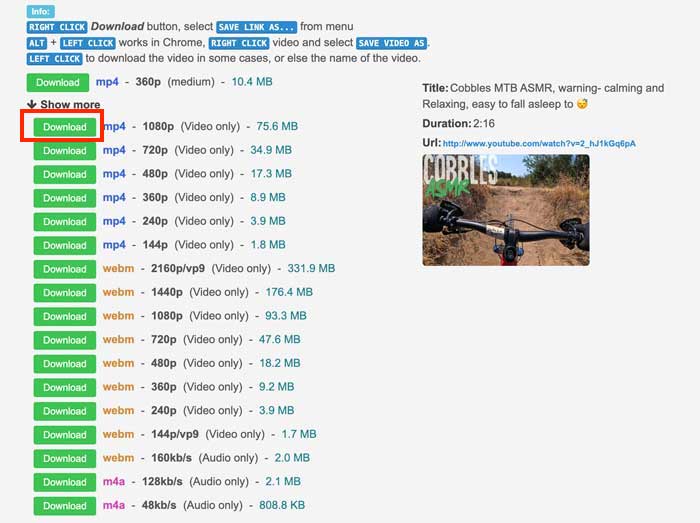
catchvideo.net works on YouTube and a half-dozen other video sharing websites including Facebook, DailyMotion, Vimeo, Metacafe, Flickr, etc. It will give a list of formats based on the source video. Just choose a format and click to download it. Where Catchvideo really shines is grabbing the highest quality video from a given site, you can choose to download videos up to 1080p or 4K and the speed is fast. but in our test, it will failed to download some videos for copyright issue.
- Open the video you need to download and copy the URL of the video. Then paste the URL to Catchvideo, and click Catch!
That's all about how you can download videos from Safari on iPhone or Mac. Pretty easy, right? However, do note that there is no official way to download videos from Safari, If you do decide to do it, you’ll need a video downloader, Shortcut, a browser extension, or use an online website.
iFunia Free YouTube Downloader is the option we recommend, though it requires to be installed, it is more reliable than online sites and extensions, it get constantly updated to adapting the changes on video sites, so it is always workable. It supports downloading videos from 1000+ websites and can download videos with subtitles in original quality and fast speed. Interested in testing? Click on the download button and start with 3 totally free video download now!
Chloe LEE is good at explaining and solving complex technology problems to her readers. Since joining iFunia Studio, she has focused on writing articles about video and DVD software, and how-to tutorials.
Hot Articles

How to Easily Download Videos from Safari on Mac
Safari for Mac is a powerful, secure, and fast web browser that helps you get the most out of your Mac. With its native version for Mac, Safari offers a great experience for browsing the web, including features like Reader Mode, Private Browsing, and iCloud integration. It’s also the only browser with support for AirPlay video streaming.
But what if you want to download videos from Safari on your Mac? Fortunately, Safari makes it easy to do so. In this blog post, we’ll show you how to download videos from Safari on your Mac.
First of all, open the video you want to download in Safari on your Mac. Once the page loads completely, click the three-dot icon at the top right corner of the page and select “Save Video.” This will open a new window with options for saving the video in different formats and resolutions. Select one format and resolution and click “Save.” The video will be downloaded to your Downloads folder (or wherever you’ve set it as default).
If you want more control over your downloads or need more advanced features than what Safari offers by default, there are several third-party apps available that can help you out. For example, iTube HD Video Downloader is an excellent app that allows you to download videos from various websites such as YouTube and Dailymotion directly on your Mac. It also has an intuitive user interface that makes downloading videos easy and fast.
downloading videos from Safari on your Mac doesn’t have to be complicated or time-consuming thanks to some helpful third-party apps like iTube HD Video Downloader or 4K Video Downloader or even online video converters like OnlineVideoConverter whih make it easy to get the job done quickly and easily – no matter what type of video file format or resolution you’re looking for!

Downloading Videos Directly From Safari
To download a video directly from Safari, open the video you want to download and tap the three dots that appear on the screen. Select “Save to Camera Roll” from the menu that appears. The video will be saved to your Camera Roll for you to access anytime.
Downloading Videos on Mac
Downloading video on a Mac is easy and straightforward. First, find the video you would like to download. Copy the URL of the video into your clipboard. Then, go to a reliable online video downloader for Mac such as KeepVid or Video Grabber. Paste the URL into the address bar and click “Download”. You will be prompted to select the format and quality of the video that you want to download. Once you have made your selection, click “Download” agan and the download should begin. When it has finished, check your “Downloads” folder on your Mac for the video file. That’s it! You now have successfully downloaded a video on your Mac!
Does Mac Have a Video Downloader?
Yes, Mac does have a video downloader. iFunia YouTube Downloader is one of the most popular free video downloaders available on Mac. It allows users to download 1080p FHD, 4K UHD videos from YouTube, Dailymotion, Vimeo, Blip TV, Liveleak, Lynda, Break, Vube, Ustream, Ted and other websites in batch. It is easy to use and it can help you save your favorite online videos for offline watching anytime you want. With its fast download speed and high-quality output files, iFunia YouTube Downloader is definitely a great choice for Mac users who need a reliable video downloading tool.
The Best Video Downloader for Safari
The best video downloader for Safari is Airy. It is an easy-to-use program that lets users download videos from YouTube, Vimeo, Dailymotion, and other popular video-sharing sites. Airy supports both audio and video downloads and offers a variety of quality settings to choose from. The app also has a built-in browser for easy navigation, allowing users to search for videos and click on the download button directly from within the app. Airy is also compatible with the latest version of Safari, so users don’t need to worry about compatibility issues.
Downloading Embedded Videos from Websites on Mac
To download an embedded video from a website on a Mac, you will need to use an app like VideoProc Converter. First, download and install the app on your Mac computer. Launch the program and click the Downloader icon from the main screen. Click the Add Video button, and paste the link of the website page that contains the video you want to download. Then, select your desired output format, such as MP4 or MOV. Once you have finished setting up your preferences, simply click the Download button and wait for your file to be saed on your computer. You can then access it through your local folder or from within VideoProc Converter itself.
Downloading Videos From the Internet on Apple Devices
To download videos from the Internet on Apple devices, you’ll need to fist find the video you want to download. Once you’ve located the video, copy its URL and open a downloading website such as SaveFrom.net. Paste the URL into the search field and tap the arrow to proceed. From there, tap and hold on Download and select Download Linked File from the quick action menu that appears. Finally, tap on the Downloads icon in the top-right corner of your screen to access your downloaded video.
Downloading Videos on IOS Browsers
Safari is the default web browser on iOS devices and it allows you to download videos. To download a video, open Safari and navigate to the video you’d like to download. Tap the ‘share’ icon at the bottom of the page and select ‘Save Video’. The video will be saved in your device’s Photos app, whee you can watch it anytime. Additionally, there are several third-party browsers available in the App Store that allow you to download videos from any website, such as Puffin Web Browser, Dolphin Browser and iCab Mobile.
In conclusion, Safari for Mac is an incredibly ueful and powerful browser for Mac users. It is fast and secure, providing a great user experience. With its intuitive navigation bar and user-friendly interface, it makes browsing the web easy and efficient. Additionally, it has built-in features such as video downloader support, private browsing mode, and customizable settings to make your browsing experience even more tailored to your needs. Whether you’re looking for a simple way to browse the web or are looking for more advanced features that make life easier, Safari on Mac is definitely worth considering.
Our Tech Essentials:

Garmin Forerunner 55, GPS Running Watch with Daily Suggested Workouts, Up to 2 weeks of Battery Life, Black - 010-02562-00

Amazon Fire 10 Kids tablet- 2023, ages 3-7 | Bright 10.1" HD screen with ad-free content and parental controls included, 13-hr battery, 32 GB, Blue

Amazon Fire TV 40" 2-Series HD smart TV with Fire TV Alexa Voice Remote, stream live TV without cable

PowerA Joy Con Comfort Grips for Nintendo Switch - Black

SUPVAN T50M Pro Bluetooth Label Maker Machine with Tape, Wide Waterproof Label, Versatile App with 40 Fonts and 450+ Icons, Inkless Labeler for Home, Kitchen, School, Office Organization, Black
Related posts:.

Sanjeev Singh
AI Tools AI Logo Generator
Screen Recorder Free & Online Online Free Screen Recorder Screen Recorder for Win & Mac
Video Downloader
3 Ways to Download YouTube Videos from Safari on Mac
3 ways to download YouTube videos on Mac Safari by using YouTube4KDownloader, Safari extension VideoDuke, and YouTube Premium.
Popular Video Download Tips
- How to Downloade Music Videos from YouTube in 4 Ways
- Download YouTube Videos Online: All Proven Tips
- 4 Ways to Download YouTube Live Streams to MP4
- 5 Ways to Download Part of YouTube Video
- How to Download YouTube Videos in Laptop | 5 Tested Ways
Quick Answer: The blog covers 3 easy ways to download YouTube videos from Safari on Mac. 1. YouTube4KDownloader 2. Safari extension: VideoDuke 3. YouTube Premium 4. SurFast Video Downloader
Want to get some videos from YouTube to your Mac? There are multiple approaches for you to get this job done. In this blog, we will walk you through 3 methods to download YouTube videos using Mac’s Safari as well as a bonus tip to download YouTube videos on Mac . Check out the guide below to catch each method fast.
Table of contents
- Download YouTube videos from Safari using YouTube4KDownloader
- Download YouTube videos with a Safari extension
- Download YouTube videos from Safari with YouTube Premium
- Download YouTube Videos on Mac with SurFast Video Downloader
How to Download YouTube Videos on Mac from Safari
Here we will cover three ways to download YouTube videos on Mac with Safari, both free and paid. These methods are straightforward to go and easy to catch up with. With them, you can download YouTube videos on your Mac for offline watching or editing purposes (only for your own videos or non-copyrighted videos).
Method 1. Download YouTube videos from Safari using YouTube4KDownloader
To save videos from YouTube using Safari, you can rely on a universal method that can easily be performed via any browser, including Safari. That is to use an online YouTube video downloader. You can access an online YouTube downloader from Safari and then use it to download YouTube videos on Mac free .
You can search keywords like “YouTube video downloader” to find an online downloader like YouTube4KDownloader. The downloader allows you to download high-quality videos from YouTube from Safari, Chrome, Firefox, Opera, Edge, and more on Mac, Windows, Android, and iOS devices. Now check the steps for how to download YouTube on Mac Safari.
Step 1. Open the online YouTube video downloader from Safari on Mac.
Go to YouTube4KDownloader by clicking here – https://youtube4kdownloader.com/en73/
Step 2. Get the video URL
Find the YouTube video via Safari. Hover the mouse on the URL and right-click on the link. Select Copy to get the URL.
Step 3. Paste the URL to save the video
Right-click to paste the URL into the online downloader and click the button Start . Select a download option and click Download beside to save the YouTube videos from Safari to your Mac.

Method 2. Download YouTube videos with a Safari extension
The next method to download YouTube videos in Safari is to use a Safari extension. Unlike Chrome, which has forbidden uploads of any YouTube video downloader extension, You can find a YouTube downloader Safari extension like VideoDuke. With it, you can easily download YouTube when you are browsing Safari.
VideoDuke is a Mac YouTube video downloader that provides a Safari extension version. With it, you can directly click the download button in the bookmarks bar to download a YouTube video without getting its URL.
Step 1. Install VideoDuke on your Mac.
Step 2. Click Integrate into Browser and drag the link into your bookmarks bar on Safari.
Step 3. Find and open the YouTube video you would like to download in Safari. Then click the VideDuke link you add to Safari.
Step 4. Select the preferred format and download quality. Click the Download button to start downloading your video.

Method 3. Download YouTube videos from Safari with a YouTube Premium account
By using a YouTube Premium account, you can download unlimited YouTube videos from Safari on Mac as well, no need of using any third-party tool. The process is quite easy. You just need to visit YouTube.com from Safari and then sign in with your YouTube Premium account. Later, you will see a download icon for all downloadable videos on YouTube. Just click the download button to save your favorite YouTube videos.
It is worth mentioning that you can’t find the downloaded video files on your Mac. You can access the downloaded ones by logging in to your YouTube Premium account from Safari. To enjoy the downloaded videos for more than 30 days, you need to make sure you log in to the account every 30 days during the subscription period.
Learn more about YouTube Premium .
Bonus Tip: Download YouTube Videos on Mac with SurFast Video Downloader
By using Safari, you get the above three ways to download YouTube videos on Mac. Here you can still use a downloaded YouTube downloader to save YouTube videos on Mac without Safari, which is stable and fast.
SurFast Video Downloader can be installed on Mac to help you download YouTube videos without limitation. You can save any YouTube videos to your Mac if you have the URL. The tool downloads YouTube videos to MP4 or WebM on Mac. Here is how to do this.
Step 1. Copy the YouTube video link, paste it to SurFast Video Downloader, and then wait for the app to parse the link.

Step 2. Select the video output format and resolution and then click Download .

Step 3. After the YouTube video download completes, click Finished to view the video.

Then you just need to wait for the downloading to finish. Then you can view the downloaded file on your Mac.
Now you have learned three ways to download YouTube videos in Safari on Mac and an extra way to download YouTube videos to your Mac.
FAQs on Download YouTube Videos from Safari on Mac
It depends on the methods you select to use. Most online YouTube video downloaders for Safari are free to use, with a poor user experience sometimes. If you try a Safari video downloader extension or download with a YouTube Premium account, you need to pay to get the full service
Yes, you can. By using an online YouTube to MP3 converter, you can convert YouTube to MP3 from Safari using tools like BigConv YouTube to MP3 Converter. The process is similar to the first method we introduced in the article. You just need to set MP3 as the output format,
If you would like to download YouTube videos to your Mac without installing any application, you can try YouTube Premium or an online YouTube downloader. The two ways are both convenient and easy to use. While you may have a faster video downloading speed with the paid service YouTube Premium. If you are to get the video file on your Mac, the only solution left to you is online YouTube video downloaders.
About the Author
Related Articles
If you are wondering how to download 3D video from YouTube, check this guide and you will know easy tips for YouTube 3D download.
Check this guide to learn how to download YouTube videos on Mac without software using three different ways.
VLC is also a choice to download YouTube videos. Read this guide to learn how to download YouTube videos with VLC on Mac, PC, and Android.
📢 Newsroom Update
Apple Intelligence comes to iPhone, iPad, and Mac starting next month. Learn more >
Looks like no one’s replied in a while. To start the conversation again, simply ask a new question.
How can I download videos straight from safari ??
Hello, I am using ipad with the latest ios version i.e., ios 10.0.2.
Please help me out how to download videos(any files mainly documents) straight from safari to view offline .
Many web sites are offering their videos to download videos or may be the other files even thogh the device have space we are not able to utilize that space as a media storage while all the other mobile platforms are providing.
Many users need to show some documents to the other people where the internet may not be available.
This thing mostly happens with the iphones even though they have the outstanding performance and 256 GB of data and if we need those documents offline we have to download some other applications such that we can transfer the documents from a mac or pc(through itunes). We know the devices support these type of documents but we need a way to access the files, documents,videos, etc., we need to depend on a mac or pc(through itunes) we need the devices independent of any other devices.
Is there a way to do so please help me out. So that it is easily accessible.
iPad mini 2 Wi-Fi, iOS 10.2
Posted on Jan 5, 2017 6:39 AM
Loading page content
Page content loaded

Jan 5, 2017 7:08 AM in response to Developer Vijay
Hi. For documents, you can add them to the Safari reading list, or transfer them to another app, like GoodReader, for offline use. GoodReader can handle pdf, html, Microsoft word, excel, powerpoint, etc. I don't know about video.
Jan 5, 2017 9:44 AM in response to Developer Vijay
For videos, if the website allows downloading, the VLC app can download a video to the iOS device for later playback. If capturing the video requires a computer, VLC publishes itself as a website on the LAN and you can drag and drop videos onto it using a browser. That's simpler than using iTunes.
Jan 18, 2017 3:04 AM in response to Diana.McCall
Yeah, I agree with you
But the thing is we have to copy the URL to download to VLC
Safari should be independent like the other apps it should be able to download all the files and sharing should be easy.
Jan 18, 2017 3:17 AM in response to King_Penguin
Yeah, its good but its of 300₹ in the Indian store
every one needs that easy access and sharing but not every one buys that application
Not only that no one needs to get the another application for just downloads and also we can't make the other applications as default we need on safari as by default

Jan 5, 2017 7:10 AM in response to Developer Vijay
You can't into the Videos app (not sure about the TV app in the US, but I doubt it). Some apps have built-in browsers that allow you to download items directly into them e.g. GoodReader

Jan 8, 2017 3:24 AM in response to Developer Vijay
The short answer is, you don't.
Record Video
Best Recorders
- Mac Screen Recorder With Audio
- Mac Voice Recorder
- Windows 10 Video Recorder
- Game Screen Recorder
- Webcam Recorder
- Minecraft Screen Recorder
- GIF Recorder
- MP4 Recorder
- MP3 Recorder
- Web Recorder
5 Ways to Record Safari Browser on iOS/Mac [Quick & Easy]
Have you encountered a video on a Safari browser that you cannot download? Or are there some contents you cannot record in Safari by default tools? You probably encountered these problems and are searching for a way to solve them. Thankfully, you found this page! Continue reading this post, for it features the 5 most straightforward yet efficient ways to record Safari browsers on Mac and iOS. Discover them now!
Part 1: How to Record Safari on macOS and iOS in One Software
If you wish to record Safari quickly on your Mac or iOS device, the AnyRec Screen Recorder tool would be the best tool for you! This tool can easily record any on-screen content on your Safari browser. Thanks to its easy-to-use and understand Video Recorder and Phone Recorder features, which are well composed for easy and quick Safari recordings. Moreover, it is much more powerful because it supports various screen capture modes to achieve your desired Safari recording needs.

Support recording all Safari content with high quality and without any watermarks.
Equipped with Real-Time Drawings that enable you to embed on your recordings.
Offer various video formats to export your recordings, such as MP4, MOV, WMV, etc.
Infused with a Scrolling Screenshot feature that lets you capture lengthy Safari pages.
100% Secure
How to Record Safari Browser on Mac using AnyRec Screen Recorder tool:
Step 1. Download and install the AnyRec Screen Recorder on your computer. After that, launch the tool and click the "Video Recorder" button. Then, access the content to record on Safari.

Step 2. Next, click the "Full" button to record your screen with the Safari browser. Otherwise, you can click the "Select region/window" button and drag the "border lines" to the area located.

Step 3. After that, if you are going to record a video on a website, you need to enable the "System sound" option to record with sound. Then, click the "REC" button to start the recording process.

Step 4. You can add shapes, lines, arrows, texts, callouts, etc., to your recording during the recording process. If you are finished recording, click the "Stop" button.

Step 5. Then, in the "Preview" window, you can trim the recorded video to remove unwanted parts. Once you are done, click the "Save" button.

How to use the AnyRec Screen Recorder tool to Record Safari on iPhone:
Step 1. Launch the AnyRec Screen Recorder tool on your computer. Then, click the "Phone Recorder" button and select the "iOS Recorder".

Step 2. After that, on your iOS device, slide up or down your Control Center, look for your "Screen Mirroring" icon, and tap it.
Step 3. Then, under the "Screen Mirroring" screen, click the "AnyRec Screen Recorder" button to cast out your iOS screen to the tool’s interface.

Step 4. Once your iOS screen is successfully cast, go to your Safari browser and access the site you wish to record. Then, click the "Record" button.

Part 2: 2 Built-in Ways to Record Safari Browser on Mac
Now that you have discovered the best way to record video from the browser (Safari), it’s time to explore the Mac default ways to record videos on the Safari browser.
1. Utilize Mac’s Screenshot Toolbar Feature
The first way that you can use to record Safari is through the use of Mac’s built-in Screenshot Toolbar . You can record any on-screen videos on Safari browsers by pressing key combinations and a few option clicks. However, only use this feature if your Mac runs macOS Mojave or newer. In case it does run the said macOS, perform the following steps below showing you how to record video from the browser:
Step 1. Access the content you wish to record on your Mac’s "Safari" browser. After that, on your keyboard, press "Shift + Command + 5" keys to bring up the "Screenshot Toolbar".

Step 2. Next, choose whether to record the "entire screen" of your browser or a "specific portion". Then, highlight the area you want to record and click the "Record" button.

Step 3. Then, the recording process will start immediately. Once you are done recording the content, click the "Stop" button on the menu bar at the upper left corner of your screen.

Step 4. To preview the recorded file, click the "Thumbnail" button on the lower left corner of your screen. Click the "Play" and "Done" buttons once you are satisfied with it.

2. Use QuickTime to Record videos on Safari
If the above recommendation to record Safari doesn’t apply because of having an older macOS version, then QuickTime could work for you. QuickTime is infused with the ability to record any on-screen activities. If you use QuickTime to record a video on the Mac Safari browser for the first time, you might need to permit it before using it to record your browser. If you can permit it, follow the steps below on how to record video from the browser:
Step 1. Look for your "QuickTime Payer" on your Mac and launch it. Afterward, head to the "Menu Bar", and click the "File" and "New Screen Recording" buttons. Then access Safari to record.

Step 2. After that, wait for the recording window to appear on your screen. Then, click the "Start Recording" button with the "Red Circle" icon, and a pop-up will appear on your screen.

Step 3. Next, if you want to record the whole screen, click anywhere on the screen. Otherwise, if you only want to record a specific area, drag the borderlines to highlight the area to record.

Step 4. Once you are done recording, click the "Stop" button to finish the recording process. After previewing, you can click the "Save" button if you are satisfied with it.

Part 3: How to Use Built-in Recorder to Record Safari on iOS
If you want to record Safari using iOS, you can use its built-in screen recording and capture feature. You can follow the steps to screen record on iPhone 12/13/14 and all other iOS devices.
Step 1. On your iPhone, iPad, or iPod, head to your Safari browser, access the "Control Center", and tap the "Record" button with the "Circle Grey icon".
Step 2. After that, wait for the three-second countdown. Slide down or up the Control Center, go to your Safari browser, and then you can access the content you wish to record on your browser.
Step 3. Once you are done recording, slide up or down your screen to access the Control Center and tap the "Red Record" icon to stop recording.

Part 4: FAQs about Safari Recording
Why I couldn’t find my Recording feature on my iOS device’s Control Center?
If you can’t find your Screen Recording feature on your iOS device, it might be unenabled yet, head to your Settings app, tap Control Center and Customize Controls . After that, tap More Controls and enable the Screen Recording option by tapping Add.
How to grant QuickTime Player permission to record Safari screen?
If you encounter a scenario in which QuickTime asks to grant permission before you can record the Safari browser screen, go after these steps: Click the Open System Preferences button and tick the checkbox right before the QuickTime Player. After that, restart the QuickTime.
How can I record Safari with audio on Mac using QuickTime?
If you wish to record a video on Safari, open the QuickTime Player, choose the File on your Menu bar, and click the New Screen Recording button. After that, on the screen recording window, click the Down Arrow button and select the Internal Microphone option. Then, click the Red button to start recording your Safari browser with audio.
That’s it! Those are the 5 most straightforward yet efficient ways to record Safari browsers on Mac and iOS. Pick the one that you think that suitable for your needs. If you wish to capture Safari browser more conveniently on your Mac and iOS devices, then the professional AnyRec Screen Recorder tool would be the best for you! Feel free to visit this tool’s official website to try its Video and Phone Recorder features with your hands! Take your first step today!
Related Articles
- [Check Here] How Record A Phone Call on All iPhone Models
- 5 Effective Methods to Screenshot on iPhone 14/Plus/Pro/Pro Max
- 2023 Best Pick for Browser Audio Recorders on Chrome and Firefox
- Firefox Screenshots: Capture Every Detail in Any Screen Size
Copyright © 2024 AnyRec Studio. All Rights Reserved.
Terms & Conditions | Privacy Policy | License Agreement
Advisory boards aren’t only for executives. Join the LogRocket Content Advisory Board today →
- Product Management
- Solve User-Reported Issues
- Find Issues Faster
- Optimize Conversion and Adoption
- Start Monitoring for Free
Streaming video in Safari: Why is it so difficult?

The problem
I recently implemented support for AI tagging of videos in my product Sortal . A part of the feature is that you can then play back the videos you uploaded. I thought, no problem — video streaming seems pretty simple.

In fact, it is so simple (just a few lines of code) that I chose video streaming as the theme for examples in my book Bootstrapping Microservices .
But when we came to testing in Safari, I learned the ugly truth. So let me rephrase the previous assertion: video streaming is simple for Chrome , but not so much for Safari .
Why is it so difficult for Safari? What does it take to make it work for Safari? The answers to these questions are revealed in this blog post.
Try it for yourself
Before we start looking at the code together, please try it for yourself! The code that accompanies this blog post is available on GitHub . You can download the code or use Git to clone the repository. You’ll need Node.js installed to try it out.
Start the server as instructed in the readme and navigate your browser to http://localhost:3000 . You’ll see either Figure 1 or Figure 2, depending on whether you are viewing the page in Chrome or Safari.
Notice that in Figure 2, when the webpage is viewed in Safari, the video on the left side doesn’t work. However, the example on the right does work, and this post explains how I achieved a working version of the video streaming code for Safari.

Basic video streaming
The basic form of video streaming that works in Chrome is trivial to implement in your HTTP server. We are simply streaming the entire video file from the backend to the frontend, as illustrated in Figure 3.

In the frontend
To render a video in the frontend, we use the HTML5 video element. There’s not much to it; Listing 1 shows how it works. This is the version that works only in Chrome. You can see that the src of the video is handled in the backend by the /works-in-chrome route.
Listing 1: A simple webpage to render streaming video that works in Chrome
In the backend.
The backend for this example is a very simple HTTP server built on the Express framework running on Node.js. You can see the code in Listing 2. This is where the /works-in-chrome route is implemented.
In response to the HTTP GET request, we stream the whole file to the browser. Along the way, we set various HTTP response headers.
The content-type header is set to video/mp4 so the browser knows it’s receiving a video.
Then we stat the file to get its length and set that as the content-length header so the browser knows how much data it’s receiving.
Listing 2: Node.js Express web server with simple video streaming that works for Chrome
But it doesn’t work in safari.
Unfortunately, we can’t just send the entire video file to Safari and expect it to work. Chrome can deal with it, but Safari refuses to play the game.
What’s missing?
Safari doesn’t want the entire file delivered in one go. That’s why the brute-force tactic of streaming the whole file doesn’t work.
Safari would like to stream portions of the file so that it can be incrementally buffered in a piecemeal fashion. It also wants random, ad hoc access to any portion of the file that it requires.

Over 200k developers use LogRocket to create better digital experiences
This actually makes sense. Imagine that a user wants to rewind the video a bit — you wouldn’t want to start the whole file streaming again, would you?
Instead, Safari wants to just go back a bit and request that portion of the file again. In fact, this works in Chrome as well. Even though the basic streaming video works in Chrome, Chrome can indeed issue HTTP range requests for more efficient handling of streaming videos.
Figure 4 gives you an idea of how this works. We need to modify our HTTP server so that rather than streaming the entire video file to the frontend, we can instead serve random access portions of the file depending on what the browser is requesting.

Supporting HTTP range requests
Specifically, we have to support HTTP range requests. But how do we implement it?
There’s surprisingly little readable documentation for it. Of course, we could read the HTTP specifications, but who has the time and motivation for that? (I’ll give you links to resources at the end of this post.)
Instead, allow me to guide you through an overview of my implementation. The key to it is the HTTP request range header that starts with the prefix "bytes=" .
This header is how the frontend asks for a particular range of bytes to be retrieved from the video file. You can see in Listing 3 how we can parse the value for this header to obtain starting and ending values for the range of bytes.
More great articles from LogRocket:
- Don't miss a moment with The Replay , a curated newsletter from LogRocket
- Learn how LogRocket's Galileo cuts through the noise to proactively resolve issues in your app
- Use React's useEffect to optimize your application's performance
- Switch between multiple versions of Node
- Discover how to use the React children prop with TypeScript
- Explore creating a custom mouse cursor with CSS
- Advisory boards aren’t just for executives. Join LogRocket’s Content Advisory Board. You’ll help inform the type of content we create and get access to exclusive meetups, social accreditation, and swag.
Listing 3: Parsing the HTTP range header
Responding to the http head request.
An HTTP HEAD request is how the frontend probes the backend for information on a particular resource. We should take some care with how we handle this.
The Express framework also sends HEAD requests to our HTTP GET handler, so we can check the req.method and return early from the request handler before we do more work than is necessary for the HEAD request.
Listing 4 shows how we respond to the HEAD request. We don’t have to return any data from the file, but we do have to configure the response headers to tell the frontend that we are supporting the HTTP range request and to let it know the full size of the video file.
The accept-ranges response header used here indicates that this request handler can respond to an HTTP range request.
Listing 4: Responding to the HTTP HEAD request
Full file vs. partial file.
Now for the tricky part. Are we sending the full file or are we sending a portion of the file?
With some care, we can make our request handler support both methods. You can see in Listing 5 how we compute retrievedLength from the start and end variables when it is a range request and those variables are defined; otherwise, we just use contentLength (the complete file’s size) when it’s not a range request.
Listing 5: Determining the content length based on the portion of the file requested
Send status code and response headers.
We’ve dealt with the HEAD request. All that’s left to handle is the HTTP GET request.
Listing 6 shows how we send an appropriate success status code and response headers.
The status code varies depending on whether this is a request for the full file or a range request for a portion of the file. If it’s a range request, the status code will be 206 (for partial content); otherwise, we use the regular old success status code of 200.
Listing 6: Sending response headers
Streaming a portion of the file.
Now the easiest part: streaming a portion of the file. The code in Listing 7 is almost identical to the code in the basic video streaming example way back in Listing 2.
The difference now is that we are passing in the options object. Conveniently, the createReadStream function from Node.js’ file system module takes start and end values in the options object, which enable reading a portion of the file from the hard drive.
In the case of an HTTP range request, the earlier code in Listing 3 will have parsed the start and end values from the header, and we inserted them into the options object.
In the case of a normal HTTP GET request (not a range request), the start and end won’t have been parsed and won’t be in the options object, in that case, we are simply reading the entire file.
Listing 7: Streaming a portion of the file
Putting it all together.
Now let’s put all the code together into a complete request handler for streaming video that works in both Chrome and Safari.
Listing 8 is the combined code from Listing 3 through to Listing 7, so you can see it all in context. This request handler can work either way. It can retrieve a portion of the video file if requested to do so by the browser. Otherwise, it retrieves the entire file.
Listing 8: Full HTTP request handler
Updated frontend code.
Nothing needs to change in the frontend code besides making sure the video element is pointing to an HTTP route that can handle HTTP range requests.
Listing 9 shows that we have simply rerouted the video element to a route called /works-in-chrome-and-safari . This frontend will work both in Chrome and in Safari.
Listing 9: Updated frontend code
Even though video streaming is simple to get working for Chrome, it’s quite a bit more difficult to figure out for Safari — at least if you are trying to figure it out by yourself from the HTTP specification.
Lucky for you, I’ve already trodden that path, and this blog post has laid the groundwork that you can build on for your own streaming video implementation.
- Example code for this blog post
- A Stack Overflow post that helped me understand what I was missing
- HTTP specification
- Range requests
- 206 Partial Content success status
Get set up with LogRocket's modern error tracking in minutes:
- Visit https://logrocket.com/signup/ to get an app ID
Install LogRocket via npm or script tag. LogRocket.init() must be called client-side, not server-side
Share this:
- Click to share on Twitter (Opens in new window)
- Click to share on Reddit (Opens in new window)
- Click to share on LinkedIn (Opens in new window)
- Click to share on Facebook (Opens in new window)
Would you be interested in joining LogRocket's developer community?
Join LogRocket’s Content Advisory Board. You’ll help inform the type of content we create and get access to exclusive meetups, social accreditation, and swag.

Stop guessing about your digital experience with LogRocket
Recent posts:.

How to display notification badges on PWAs using the Badging API
Ding! You got a notification, but does it cause a little bump of dopamine or a slow drag of cortisol? […]

JWT authentication: Best practices and when to use it
A guide for using JWT authentication to prevent basic security issues while understanding the shortcomings of JWTs.

Auth.js adoption guide: Overview, examples, and alternatives
Auth.js makes adding authentication to web apps easier and more secure. Let’s discuss why you should use it in your projects.

Lucia Auth: An Auth.js alternative for Next.js authentication
Compare Auth.js and Lucia Auth for Next.js authentication, exploring their features, session management differences, and design paradigms.

10 Replies to "Streaming video in Safari: Why is it so difficult?"
Hi, thank you for this blog, it is very helpful. It works perfectly with Safari (Mac), but not in Mobile Safari on ios (downloading the full video before starting to play…). Do you know why?
Thanks for your feedback!
That’s strange… the production version I’m using works although I never tested the code for the blog post. It might have been broken when I simplified it.
Could you please log an issue against the code in GitHub, that will be an easier way to work through the problem, thanks.
Ashley Davis
I’ve encountered this problem with a web page I’m writing that shows videos. I’m doing the range queries correctly, but they still malfunction because the user shows first one video, then another. Your code assumes there’s only one video path, so it won’t work in this case. Range requests don’t include the file path. So how does the server code know which file to retrieve the bytes of data from? I tried using a session variable, but this fails because the session variable can change asynchronously with respect to what the video player is actually doing. The user can reposition and switch between a number of different videos! On Mac/Safari, this abnormally halts the video player.
Range requests can have a route, they can have query parameters or they can have a body… so that’s at least three ways to statelessly include the file path or id of a video to play. Use which ever one best satisfies your needs.
The problem doesn’t happen because of accept range requests (using the Accept-Ranges header), or for requests to open and play a video file. You are correct, all information from the server is available there.
The problem happens for range requests from the client, which are made by the client application, such as a video player. These requests ARE ONLY MARKED by the HTTP_RANGE header. There is no other information that the server can use to locate the file whose bytes are to be returned to the client. This is one of the rare cases where a client calls a server to obtain information. Usually, it’s the other way around.
This appears to be a very poor design, since multiple overlapping video displaying can be done by one server on behalf of one user. The bytes returned by the server may go to the wrong client player, which causes a crash of the player.
You must be misunderstanding something, If what you were saying were true then YouTube wouldn’t work.
You might be able to learn more here: https://developer.mozilla.org/en-US/docs/Web/HTTP/Range_requests
YouTube works fine because it serves one video at a time. So its byte requests don’t need to specify which file is the context. When a client of mine tried to access a second video right after a first, the log showed that the byte requests were interleaved, probably due to lack of sync in setting the path in the Session variables. Anyway, when I look at the $_SERVER information for byte requests from the video player, the video path is NOT there, just the range of bytes.
Ok maybe I’m misunderstanding something.
But I just opened two browser windows and started two YouTube videos simultaneously. It was serving two videos simultaneously and seemed to have no problem. In fact I imagine that YouTube is serving millions of videos at once because that’s how many people are probably watching YouTube at the same time.
If you want I can look at your code and see if I can spot a problem with it, just email me on [email protected]
It is possible that my explanation is incorrect. The fact is that my code works for Firefox, Chrome, and Safari on a mobile device. It only fails for Safari on MacOS. It is a known bug with apparently no solution published as yet.
Do you have links to information on the bug? I might be able to help if I learn more about it.
Leave a Reply Cancel reply
Safari Screen Recorder
Capture your screen directly into Safari with 1 click
Uploading...
Please wait while we upload your recording

- Screen Record Safari Easily
- Export In High Resolution
- Edit and Share Instantly
Trusted and Supported by businesses across the world
How to Use Safari Screen Recorder
Record your safari browsing sessions effortlessly.
Capture everything you see and do within the Safari browser, effortlessly preserving web pages, videos, and more.
With ScreenApp's Safari Screen Recorder, you can:
- Record entire Safari browsing sessions or specific tabs
- Capture screen, audio, and webcam simultaneously
- Edit and annotate recordings with ease
- Share and collaborate on recorded content seamlessly
Benefits of Safari Screen Recorder
Unleash the power of safari screen recording.
Capture your screen and create stunning videos with ScreenApp's Safari Screen Recorder. Our powerful yet user-friendly tool empowers you to:
- Record high-quality web pages, tutorials, and presentations
- Easily edit and trim your recordings
- Share your videos on social media or embed them on websites
- Boost engagement with stunning visuals
- Simplify online learning and remote work
.webp)
Record anything Instantly
Capture your screen and camera in a click without a watermark, including any Teams, Meet, Zoom, or Webex Call.
.webp)
Transcribe in a Flash
Transcribe any video or audio with AI and without lifting a finger with 99% accuracy and lightning speed.
.webp)
Summarize Recordings with AI
Save time and effort. Get an AI-generated summary automatically and focus on what matters.
.webp)
Automatic Notes with AI
Turn your videos and audio into skimmable notes. Click to the part you want to watch.
.webp)
Chat to Your Recordings
Instantly extract action items, decisions, and insights from your recordings. It's like talking to somebody who has watched the videos for you.
.webp)
Instantly Record Audio and Video
Record your audio and Video with 1 click directly from your browser.
.webp)
Translate Videos with AI
Translate Understand any video or audio in over 50 languages.
.webp)
Upload any Video or Audio
Upload any video or audio file for transcription, summaries and notes.
Who is Safari Screen Recorder for?
Anyone who needs to record their safari browser screen.
Whether you're a student creating a tutorial, a business professional giving a presentation, or a gamer sharing your latest victory, ScreenApp's Safari Screen Recorder is the perfect tool for you.
With its easy-to-use interface and powerful features, ScreenApp makes it simple to capture your Safari screen, including audio and webcam footage. You can then edit your recordings and share them with others with just a few clicks.
So if you need to record your Safari browser screen, look no further than ScreenApp. It's the easiest and most powerful screen recorder available.
Full ScreenApp Demo
ScreenApp's Safari Screen Recorder FAQ
How do i start recording safari screens.
Click the "ScreenApp" extension on the Safari toolbar, select "Start Recording" and begin your recording.
Can I record both my screen and webcam?
Yes, use the "Camera" option in the ScreenApp extension to include your webcam in your recording.
How do I share my recordings?
After recording, click "Save" or "Copy Link" to share your video with others.
Can I record audio?
Yes, ScreenApp allows you to record both system and microphone audio.
How do I change the recording settings?
Click the "Settings" button in the ScreenApp extension to adjust resolution, audio & video input, and more.
What browsers does ScreenApp support?
ScreenApp is currently compatible with Safari on macOS.
Can I use ScreenApp to record gameplay?
Yes, ScreenApp can capture high-quality gameplay recordings.
How do I trim or edit my recordings?
ScreenApp does not currently offer editing capabilities.
Can I record my entire desktop?
Yes, ScreenApp allows you to select the entire screen or specific windows to record.
What video formats does ScreenApp support?
ScreenApp saves recordings in MP4 format, which is supported by most devices and platforms.
Still have questions?
Try it for yourself
More Recorders
Bildschirmvideos von Mac, iPhone und iPad aufzeichnen - so geht's!
Bilder sagen mehr als Worte – aber Filme sind bisweilen noch aussagekräftiger als Bilder. Daher lässt sich der Bildschirm deines Mac, iPhone und iPad auch filmen und nicht nur „fotografieren“. Wir zeigen dir, wie das geht und stellen dir außerdem einige Apps vor, mit denen du am Mac noch komfortabler zum Ziel kommen als mit der Systembeigabe Quick Time.

Wer auch nur halbwegs mit dem Mac, dem iPad oder dem iPhone vertraut ist, kennt das Problem: Familienmitglieder, Freunde oder Bekannte suchen oft um Rat nach. In vielen Fällen genügt aber eine Unterweisung per Telefon oder E-Mail, Whatsapp oder iMessage nicht und auch Screenshots sind nicht immer aussagekräftig genug – sei es, dass Sie mehrere Arbeitsschritte hintereinander verdeutlichen wollen oder ein kleines Tutorial erstellen, um jemanden über neue Funktionen des Betriebssystems oder einer App zu unterrichten. Ähnliches gilt für Fehlermeldungen, die Sie dem Hardwarehersteller oder Softwareentwickler zukommen lassen müssen. Und nicht zuletzt können Sie mittels eines kleinen Films Spiele vorstellen oder Tipps geben, wie man in einem Spiel einen Level weiter kommt.
Sowohl auf dem Mac als auch auf dem iPhone und dem iPad reichen, um kleine Screencasts zu erstellen, Apples Bordmittel aus. Unter macOS können Sie mit dem QuickTime Player den Bildschirm filmen, unter iOS mittels der Bildschirmaufnahme. Haben Sie höhere Ansprüchen, dann gibt es für den Mac zahlreiche Apps, welche nicht nur die Aufnahme, sondern auch die Weiterbearbeitung der Filme bequemer und professioneller gestalten.
- Mehrere Arbeitsschritte zeigen
- Prozesse verdeutlichen
- Fehlermeldungen und Fehler visualisieren
- Neue Funktionen zeigen
- Spiele vorstellen
- Spieletipps geben
Bildschirmaufnahme am Mac
Am schnellsten „filmen“ Sie den Bildschirm Ihres Mac mit dem QuickTime Player. Sie finden die wohlbekannte App im Ordner „Programme“. Öffnen Sie diesen und wählen Sie im Menü „Ablage“ den Befehl „Neue Bildschirmaufnahme“. Starten Sie mit dem roten Aufnahmeknopf die Aufnahme. Falls Sie das Video mit Ton erstellen wollen, klicken Sie auf die weiße Pfeilspitze und dann auf den Eintrag „Internes Mikrofon“. Möchten Sie den gesamten Bildschirm filmen, genügt ein Mausklick.
Um nur einen Bildschirmausschnitt auszuwählen, ziehen Sie mit der Maus einen Rahmen über dem gewünschten Ausschnitt auf und klicken dann auf „Aufnahme starten“. Führen Sie Ihre Arbeitsschritte aus. Zum Beenden der Aufnahme klicken Sie dann auf den Aufnahmeknopf rechts oben in der Menüleiste. Spielen Sie anschließend das Video kurz ab und speichern Sie es unter dem von Ihnen gewünschten Namen. Zudem können Sie mit dem Befehl „Exportieren als“ das Video in einem anderen Format als „Quicktime-Film“ – kodiert mit dem H.264-Codec – speichern.
Bitte beachten Sie, dass Sie das Video mit dem QuickTime Player nicht bearbeiten oder gar schneiden können. Dazu verwenden Sie Apples iMovie-App oder nutzen eine Drittanbieter-Software für Screencasts, von denen wir Ihnen auf den folgenden Seiten eine kleine Auswahl vorstellen.

Bildschirmaufnahmen unter iOS
Mit dem QuickTime Player können Sie nicht nur Bildschirmaufnahmen vom Mac, sondern auch von einem iOS-Gerät erstellen. Besitzen Sie ein iPhone oder iPad, das unter einer früheren Version von iOS bis einschließlich Version 10 läuft, ist das auch der einzige Weg, der mit den „Bordmitteln“ Ihres Mac funktioniert. Dazu schließen Sie das iOS-Gerät mit einem Lightning-auf-USB-Kabel an den Mac an.
Starten Sie den QuickTime Player und wählen Sie im Menü „Ablage“ den Befehl „Neue Bildschirmaufnahme“. Um statt des Bildschirms Ihres Mac den Bildschirm des iOS-Geräts aufzunehmen, klicken Sie auf die weiße Pfeilspitze und dort auf den Eintrag „iPhone“ oder „iPad“. Mit einem Mausklick auf den Aufnahmeknopf starten Sie die Aufnahme. Bitte entsperren Sie zuvor das iPhone oder iPad und führen Sie die entsprechenden Arbeitsschritte aus. Zum Beenden der Aufnahme verfahren Sie wie bei der Aufnahme des Bildschirms Ihres Mac.
iOS 11 und neuer macht’s leichter
Falls auf Ihrem iPhone und/oder iPad iOS 11 oder neuer als Betriebssystem installiert ist, gestaltet sich die Bildschirmaufnahme noch einfacher und ist direkt mit Bordmitteln möglich. Die entsprechende Funktion müssen Sie aber erst dem Kontrollzentrum hinzufügen. Öffnen Sie dazu die „Einstellungen“ und wählen Sie dort ein Eintrag „Kontrollzentrum“. Hier tippen Sie auf „Steuerelemente anpassen“. Mithilfe des grünen Plus-Schalters neben dem Steuerelement „Bildschirmaufnahme“ nehmen Sie dieses in das Kontrollzentrum auf.
Die Bildschirmaufnahme Ihres iPhone oder iPad führen Sie auf die folgende Weise durch: Wischen Sie vom unteren Bildschirmrand nach oben, um das Kontrollzentrum anzuzeigen. Dort finden Sie rechts unten den weißen Aufnahmeschalter. Starten Sie die Aufnahme, indem Sie auf diesen tippen. Die Aufnahme beginnt nach drei Sekunden und der Aufnahmeschalter wird rot eingefärbt. Führen Sie jetzt alle Apps und Arbeitsschritte aus, die Sie zeigen möchten. Um die Aufnahme zu beenden, tippen Sie erneut auf den Aufnahmeschalter.
Das Video wird automatisch im Album „Videos“ der Fotos-App gesichert. Hier können Sie es zur Bearbeitung an iMovie weiterleiten oder versenden. Möchten Sie nur den Anfang und das Ende kürzen, dann können Sie dies auch mit der Foto-App erledigen. Wählen Sie dazu das Video aus und tippen Sie auf die weißen Pfeilspitzen links oder rechts. Es taucht ein gelber Rahmen auf, den Sie entsprechend nach rechts oder links verschieben, um das Video am Anfang oder Ende zu schneiden. Mit einem Fingertipp auf „Fertig“ können Sie es „Als neuen Clip sichern“.

Bildschirmaufnahmen am Mac: Profi-Tools

Capto: Capto – ehemals Voila – ist nicht nur eine Screencast-Software, sondern dient auch zum Erstellen, Bearbeiten und Präsentieren von Bildschirmfotos und -videos. Neben den umfangreichen Funktionen für Screencasts besitzt die App zahlreiche Funktionen zum Verwalten und Veröffentlichen.
Wenn die Bordmittel nicht reichen: ausgewählte Screencast-Apps

Monosnap: Monosnap ist eine kostenlose und einfache Screencast-Software, die dennoch mehr Einstellungen und Möglichkeiten besitzt als das Bordmittel des Mac – der QuickTime Player. Sogar das Kürzen der Bildschirmvideos ist möglich.

Screenrekorder: Beim Mac-Screenrekorder handelt es sich um eine weitere kostenfreie und einfache Screencast-Software, die etwas mehr bietet als der QuickTime Player. Unter anderem können Sie Mausklicks animieren und die Aufnahmequalität und die Auflösung der Videos anpassen.

Camtasia: Wer professionell Screencasts und Tutorials erstellt, kommt um Camtasia nicht herum. Es bietet eine Fülle von Bearbeitungsfunktionen und Präsentationsmöglichkeiten, die keine der anderen erwähnten Programme auch nur ansatzweise zur Verfügung stellt.
Workshop: So erstellen Sie einen Screencasts am Mac mit Monosnap

Laden Sie Monosnap im Mac App Store herunter und starten Sie das Programm. Es klinkt sich in die Menüleiste ein. Soll es künftig automatisch geladen werden, klicken Sie auf „Preferences“ und dann auf „Launch at login“.
Mehr zu diesen Themen:
- Bildschirmaufnahme
Diskutiere mit!
Hier kannst du den Artikel "Bildschirmvideos von Mac, iPhone und iPad aufzeichnen - so geht's!" kommentieren. Melde dich einfach mit deinem maclife.de-Account an oder fülle die unten stehenden Felder aus.
Mit welchen von den Programmen kann man Spielevideos aufzeichnen?
Was genau willst du denn aufzeichnen? Oder willst du live streamen?
- nächste Seite ›
- letzte Seite »
Mehr Apple-Wissen für dich
- Zugriff auf alle Inhalte von Mac Life+
- Alle Magazine vor dem Erscheinen lesen.
- Über 300 Ausgaben und Bücher als E-Paper
- Maclife.de ohne Werbebanner
- 31 Tage gratis, danach monatlich ab 4,99 €
How to Record Audio From Websites on Your Mac

Your changes have been saved
Email is sent
Email has already been sent
Please verify your email address.
You’ve reached your account maximum for followed topics.
I Stopped Posting Photos to Instagram for a Year: Here's Why
6 safari settings i changed to improve the browsing experience on my mac, one of the best mobile games of all time is back to give you nightmares.
Recording audio from a website on a Mac is tricky because there is usually no download option available. You can use your Mac's internal microphone and speakers, but they're prone to capturing the noise around you as well.
Instead, we suggest you use a virtual audio driver along with a native audio recording app, like QuickTime Player. We'll show you how to record the audio from any browser on your Mac below.
Set Up the BlackHole Audio Driver for Your Mac First
Before we get into using the native apps to record audio from websites, you first need to install a virtual audio driver.
Using a virtual audio driver, like BlackHole, allows you to capture the sound from internet browsers and other apps on your Mac. It creates a virtual link between the audio output heading to your speakers and your Mac's audio input. This allows you to route the audio from a browser directly into a recording app on your Mac.
Related: How to Record System Audio on Any Platform
Once you register on the BlackHole site, you'll get an email with a download link giving your two app option: a two-channel or a 16-channel version. Choose to install the two-channel package, since it'll be enough.
Once you install it, you might have to restart your Mac.
After rebooting your Mac, you'll be able to select the BlackHole audio driver as the sound input and output whenever you want to record audio from a website site.
Here's how to go about it:
- Click the Apple icon in the top-left corner of the menu bar and select System Preferences .
- Click Sound .
- Click on the Output tab and select BlackHole from the list that appears.
- Lastly, click on the Input tab and choose BlackHole .
Since this is a virtual audio driver, you don't have to worry about any external sound getting recorded. While the BlackHole audio driver usually works flawlessly, you should take note of these quirks:
- Every time you want to record audio, you have to select the BlackHole audio driver as the sound input and output.
- You won't get to hear any audio while recording it.
Switching to the BlackHole audio driver is a hassle. To make it easier, create an Automator workflow or write an AppleScript and automate the process with a keyboard shortcut.
After installing BlackHole, use either of these two apps to record audio from web browsers on your Mac
1. QuickTime Player
As well as playing media files on your Mac, QuickTime Player can record audio, video, and even your Mac's screen. For recording audio, you get the basic options: a record button, a volume control, and a file size counter.
To use QuickTime Player to record audio from websites, you need to select the BlackHole audio driver to route audio from input to your output first.
Then follow these steps to use the QuickTime Player to capture audio from a website in any browser:
- Open QuickTime Player .
- Click File in the menu bar and select New Audio Recording .
- Press the Record button when you're ready to capture audio from a browser.
- Hit the Stop button when you're done.
You can see a timer and file size counter for the recording in QuickTime Player.
After you finish recording, you can preview it in QuickTime Player as well. If you want to trim the recording, go to Edit > Trim or press Cmd + T . Then drag the yellow handles on the trimming bar to highlight the portion you want to keep.
QuickTime Player lets you record audio for as long as you want. And you can save the final clip on your Mac or on an external drive.
2. Voice Memos
Voice Memos is the best native Mac app to record, play, and manage audio files in a single place. It's available for all Macs running macOS Mojave and later.
Before you begin, select the Blackhole audio driver as your sound input and output, as shown above. Then follow these steps to use the Voice Memo app to record audio:
- Open Voice Memos .
- Press the Record button when you want the app to start recording the browser's audio.
- Hit the Done button when you want to stop recording.
Once you record an audio clip, click on the recording to give it any name you want.
Voice Memos app also lets you pause and resume the recording whenever you like. To edit the audio file, click on the Edit button in the top-right corner of the app's window to launch the editing options. This allows you to trim the beginning or end of the recording.
You can also use the Enhance button in the top-right corner to suppress any background noise captured in the recording.
The Voice Memos app puts no limit on the recording time and saves the recorded audio in the app. After that, you can share those recordings with any other apps.
If you want to access and move the recorded files on your Mac, you need to launch Finder and press Shift + Cmd + G to open the Go to Folder window. Then type the following folder path:
Once the Finder opens the Recordings folder, you'll find your recordings arranged in date order.
Easily Record Audio From Browsers on Your Mac
Now you know how to record audio from websites using the QuickTime Player or the Voice Memos app on your Mac. You can test out both apps before recording any audio for real.
Both apps let you record audio from browsers and edit them. The Enhance option in the Voice Memos app is useful for cleaning up background noise. Meanwhile, QuickTime Player gives you the flexibility to save your clips directly to an external drive.
Since the edit feature in both the apps is pretty basic, you may want to check out the best audio editors for macOS to get more options.
- Record Audio
iPhone 16 Pro Technische Daten
Titan Schwarz, Titan Weiß, Titan Natur, Titan Wüstensand
Design aus Titan Ceramic Shield der neuesten Generation auf der Vorderseite Texturiertes mattes Glas auf der Rückseite
Design aus Titan Ceramic Shield der neuesten Generation auf der Vorderseite Texturiertes mattes Glas auf der Rückseite

- Super Retina XDR Display
- 6,3" All‑Screen OLED Display (15,9 cm Diagonale)
- 2622 x 1206 Pixel bei 460 ppi
Das iPhone 16 Pro Display hat gerundete Ecken, die den Kurven des Designs folgen und sich innerhalb eines normalen Rechtecks befinden. Als Standard-Rechteck gemessen hat das Display eine Diagonale von 6,27" (15,93 cm). Der tatsächlich sichtbare Displaybereich ist kleiner.
- 6,9" All‑Screen OLED Display (17,4 cm Diagonale)
- 2868 x 1320 Pixel bei 460 ppi
Das iPhone 16 Pro Max Display hat gerundete Ecken, die den Kurven des Designs folgen und sich innerhalb eines normalen Rechtecks befinden. Als Standard-Rechteck gemessen hat das Display eine Diagonale von 6,86" (17,43 cm). Der tatsächlich sichtbare Displaybereich ist kleiner.
- Dynamic Island
- Always‑On Display
- ProMotion Technologie mit adaptiven Bildwiederholraten bis 120 Hz
- HDR Display
- Großer Farbraum (P3)
- Haptic Touch
- Typisches Kontrastverhältnis: 2.000.000:1
- 1.000 Nits maximale typische Helligkeit, 1.600 Nits Spitzenhelligkeit (HDR), 2.000 Nits Spitzenhelligkeit (im Freien), 1 Nit minimale Helligkeit
- Fettabweisende Beschichtung
- Unterstützung für die Anzeige mehrerer Sprachen und Zeichen gleichzeitig
Nach IEC Norm 60529 unter IP68 klassifiziert (bis zu 6 Meter für bis zu 30 Minuten)
- A18 Pro Chip
- Neue 6‑Core CPU mit 2 Performance-Kernen und 4 Effizienz-Kernen
- Neue 6‑Core GPU
- Neue 16‑Core Neural Engine
- Pro Kamera-System
- 48 MP Fusion: 24 mm, ƒ/1.78 Blende, optische Bildstabilisierung mit Sensorverschiebung der 2. Generation, 100 % Focus Pixel, Unterstützung für superhochauflösende Fotos (24 MP und 48 MP)
- Ermöglicht außerdem 12 MP 2x Tele: 52 mm, ƒ/1.6 Blende, optische Bildstabilisierung mit Sensorverschiebung, 100 % Focus Pixel
- 48 MP Ultraweitwinkel: 13 mm, ƒ/2.2 Blende und 120° Sichtfeld, Hybrid Focus Pixel, superhochauflösende Fotos (48 MP)
- 12 MP 5x Tele: 120 mm, ƒ/2.8 Blende und 20° Sichtfeld, 100 % Focus Pixel, Objektiv mit 7 Elementen, optische Bildstabilisierung mit 3D Sensorverschiebung und Autofokus, Tetraprisma Design
- 5x optisches Einzoomen, 2x optisches Auszoomen, 10x optischer Zoombereich
- Bis zu 25x digitaler Zoom
- Kamerasteuerung
- Anpassbares Standardobjektiv (Fusion)
- Objektiv-Abdeckung aus Saphirkristall
- Adaptiver True Tone Blitz
- Photonic Engine
- Deep Fusion
- Smart HDR 5
- Porträts der nächsten Generation mit Fokus‑ und Tiefen‑Kontrolle
- Porträtlicht mit sechs Effekten
- Nachtmodus Porträts durch den LiDAR Scanner
- Panoramabild (bis zu 63 MP)
- Fotografische Stile der neuesten Generation
- Räumliche Fotos
- 48 MP Makrofotos
- Apple ProRAW
- Fotos und Live Photos mit großem Farbraum
- Objektiv-Korrektur (Ultraweitwinkel)
- Fortschrittliche Rote‑Augen-Korrektur
- Automatische Bildstabilisierung
- Serienbildmodus
- Geotagging für Fotos
- Aufgenommene Bildformate: HEIF, JPEG und DNG
- 4K Dolby Vision Videoaufnahme mit 24 fps, 25 fps, 30 fps, 60 fps, 100 fps (Fusion) oder 120 fps (Fusion)
- 1080p Dolby Vision Videoaufnahme mit 25 fps, 30 fps, 60 fps oder 120 fps (Fusion)
- 720p Dolby Vision Videoaufnahme mit 30 fps
- Kinomodus bis zu 4K HDR mit 30 fps
- Actionmodus bis zu 2,8K mit 60 fps
- Räumliche Videoaufnahme bei 1080p mit 30 fps
- ProRes Videoaufnahme bis zu 4K mit 120 fps mit externer Aufnahme
- Log Videoaufnahmen
- Academy Color Encoding System
- Makrovideoaufnahme mit Zeitlupe und Zeitraffer
- Unterstützung für Zeitlupenvideo bis zu 4K mit 120 fps (Fusion) und bis zu 1080p mit 240 fps (Ultraweitwinkel und Tele)
- Zeitraffervideo mit Bildstabilisierung
- Nachtmodus Zeitraffer
- QuickTake Video bis zu 4K mit 60 fps in Dolby Vision
- Optische Bildstabilisierung mit Sensorverschiebung der 2. Generation für Video (Fusion)
- Optische Bildstabilisierung mit 3D Sensorverschiebung und Autofokus für Video (Tele)
- True Tone Blitz
- Cinematic Videostabilisierung (4K, 1080p und 720p)
- Kontinuierlicher Autofokus
- Während der Aufnahme von 4K Video Fotos mit 8 MP machen
- Zoomen bei der Wiedergabe
- Aufgenommene Videoformate: HEVC, H.264 und ProRes
- 3D Audio und Stereoaufnahme
- Vier Mikrofone in Studioqualität
- Windgeräusche reduzieren
- 12 MP Kamera
- ƒ/1.9 Blende
- Autofokus mit Focus Pixeln
- Retina Blitz
- Porträts der nächsten Generation mit Fokus‑ und Tiefen‑Kontrolle
- Porträtlicht mit sechs Effekten
- Animoji und Memoji
- Nachtmodus
- Fotografische Stile der neuesten Generation
- Fotos und Live Photos mit großem Farbraum
- Objektiv-Korrektur
- Automatische Bildstabilisierung
- 4K Dolby Vision Videoaufnahme mit 24 fps, 25 fps, 30 fps oder 60 fps
- 1080p Dolby Vision Videoaufnahme mit 25 fps, 30 fps oder 60 fps
- Kinomodus bis zu 4K Dolby Vision mit 30 fps
- ProRes Videoaufnahme bis zu 4K mit 60 fps mit externer Aufnahme
- Unterstützung für Zeitlupenvideo in 1080p mit 120 fps
- 3D Audio und Stereoaufnahme
- Ermöglicht durch die TrueDepth Kamera für Gesichtserkennung
- Mit deinem iPhone und Face ID in Geschäften, Apps und im Internet bezahlen
- Auf dem Mac getätigte Apple Pay Käufe abschließen
Weitere Infos zu Apple Pay
- Notruf SOS über Satellit 4
- Unfallerkennung 5
Modell A3293 * Modell A3296 *
- FDD-5G NR (Bänder n1, n2, n3, n5, n7, n8, n12, n20, n25, n26, n28, n30, n66, n70, n75, n76)
- TDD-5G NR (Bänder n38, n40, n41, n48, n53, n77, n78, n79)
- FDD‑LTE (Bänder 1, 2, 3, 4, 5, 7, 8, 12, 13, 17, 18, 19, 20, 25, 26, 28, 30, 32, 66)
- TDD-LTE (Bänder 34, 38, 39, 40, 41, 42, 48, 53)
- UMTS/HSPA+/DC‑HSDPA (850, 900, 1.700/2.100, 1.900, 2.100 MHz)
- GSM/EDGE (850, 900, 1.800, 1.900 MHz)
Alle Modelle
- 5G (sub‑6 GHz) mit 4x4 MIMO 6
- Gigabit LTE mit 4x4 MIMO und LAA 6
- WLAN 7 (802.11be) mit 2x2 MIMO 7
- Bluetooth 5.3
- Ultrabreitband-Chip der zweiten Generation 8
- Thread Netzwerk-Technologie
- NFC mit Lesemodus
- Express Cards mit Energiereserve
- Präzises Dual-Frequenz GPS (GPS, GLONASS, Galileo, QZSS, BeiDou und NavIC)
- Digitaler Kompass
- iBeacon Mikro-Ortung
- FaceTime Videoanrufe über Mobilfunk oder WLAN
- FaceTime HD (1080p) Videoanrufe über 5G oder WLAN
- Teile Erlebnisse wie Filme, Fernsehserien, Musik und andere Apps in einem FaceTime Anruf mit SharePlay
- Bildschirmfreigabe
- Porträtmodus in FaceTime Video
- Mikrofonmodi: Stimmisolation und Breites Spektrum
- Optischer Zoom mit der Rückkamera
- FaceTime Audioanrufe
- Voice over LTE (VoLTE) 6
- Anrufe über WLAN 6
- Zu den unterstützten Formaten gehören AAC, APAC, MP3, Apple Lossless, FLAC, Dolby Digital, Dolby Digital Plus und Dolby Atmos
- 3D Audiowiedergabe
- Von Benutzer:innen festlegbare maximale Lautstärke
- Zu den unterstützten Formaten gehören HEVC, H.264, AV1 und ProRes
- HDR mit Dolby Vision, HDR10+/HDR10 und HLG
- Bis zu 4K HDR AirPlay für Mirroring, Fotos und Videoausgabe an Apple TV (2. Generation oder neuer) oder AirPlay fähiges Smart TV
- Video Mirroring und Videoausgabe: Bis zu 4K HDR für native DisplayPort Ausgabe über USB‑C oder USB‑C Digital AV Adapter (Modell A2119, Adapter separat erhältlich) 10
- Lass dir bei alltäglichen Aufgaben helfen, wie Nachrichten senden, Erinnerungen erstellen und mehr
- Einfach mit deiner Stimme und „Hey Siri“ aktivieren
- Mit dem stärksten Datenschutz bei einem intelligenten Assistenten

Lautstärke
Actiontaste
Kamerasteuerung
Seitentaste
Integrierter Stereo‑Lautsprecher Integriertes Mikrofon
USB‑C Anschluss
Integrierte Mikrofone
Integrierter Stereo‑Lautsprecher
Stummmodus, Fokus, Kamera, Taschenlampe, Sprachmemo, Musik erkennen, Übersetzen, Lupe, Steuerelemente, Kurzbefehl oder Bedienungshilfen
Belichtung, Tiefe, Zoom, Kameras, Stile, Ton
- USB‑C Anschluss mit Unterstützung für:
- DisplayPort
- USB 3 (bis zu 10 Gbit/s) 12
Videowiedergabe Bis zu 27 Std.
Videowiedergabe (gestreamt) Bis zu 22 Std.
Audiowiedergabe Bis zu 85 Std.
Videowiedergabe Bis zu 33 Std.
Videowiedergabe (gestreamt) Bis zu 29 Std.
Audiowiedergabe Bis zu 105 Std.
- Integrierte wiederaufladbare Lithium-Ionen-Batterie
- Kabelloses Laden bis zu 25 W mit MagSafe mit 30W Netzteil oder höher 14
- Kabelloses Laden bis zu 7,5 W mit Qi 14
- Schnelles Aufladen: Bis zu 50 % in etwa 30 Minuten(none) mit 20W Netzteil oder höher und USB‑C Ladekabel oder 30W Netzteil oder höher und MagSafe Ladegerät (alle separat erhältlich)
- Kabelloses Laden bis zu 25 W mit 30W Netzteil oder höher 14
- Magnetanordnung
- Ausrichtungsmagnet
- Zubehörerkennung NFC
- Magnetometer
- LiDAR Scanner
- Gyrosensor mit großem Dynamikbereich
- High‑g Beschleunigungssensor
- Näherungssensor
- Zwei Umgebungslichtsensoren
- iOS 18 iOS ist das persönlichste und sicherste mobile Betriebssystem der Welt. Es ist voll mit leistungsstarken Features und dafür gemacht, deine persönlichen Daten zu schützen.
Neu in iOS 18
Integrierte Bedienungshilfen mit Unterstützung für Sehvermögen, Mobilität, Hörvermögen, Sprache und kognitive Einschränkungen helfen dir, dein iPhone optimal zu nützen – so wie es für dich am besten funktioniert.
- Schaltersteuerung
- AssistiveTouch
- Blickerfassung
- RTT und TTY Unterstützung
- Erweiterte Untertitel
- Live Sprachausgabe
- Siri Anfragen tippen
- Stimmkurzbefehle
- Gesprochene Inhalte
- Dual SIM (Nano‑SIM und eSIM) 15
- Dual eSIM Unterstützung 15
Weitere Infos zur eSIM
Weitere Infos zum Reisen mit eSIM
Kompatibel mit Hörhilfen
.jpg, .tiff und .gif (Bilder), .doc und .docx (Microsoft Word), .htm und .html (Webseiten), .key (Keynote), .numbers (Numbers), .pages (Pages), .pdf (Vorschau und Adobe Acrobat), .ppt und .pptx (Microsoft PowerPoint), .txt (Text), .rtf (Rich Text Format), .vcf (Kontaktdaten), .xls und .xlsx (Microsoft Excel), .zip, .ics, .usdz (USDZ Universal)
- Apple ID (für einige Funktionen erforderlich)
- Internetzugang 16
- macOS Catalina 10.15 oder neuer mit Finder
- macOS High Sierra 10.13 bis macOS Mojave 10.14.6 mit iTunes 12.8 oder neuer
- Windows 10 oder neuer mit iTunes 12.12.10 oder neuer (kostenloser Download unter apple.com/at/itunes/download )
0 °C bis 35 °C
–20 °C bis 45 °C
5 % bis 95 %, nicht kondensierend
getestet bis 3.000 m über NN, ohne Druckausgleich
Englisch (Australien, Großbritannien, USA), Chinesisch (Vereinfacht, Traditionell, Traditionell – Hongkong), Französisch (Kanada, Frankreich), Deutsch, Italienisch, Japanisch, Koreanisch, Spanisch (Lateinamerika, Spanien), Arabisch, Bulgarisch, Katalanisch, Kroatisch, Tschechisch, Dänisch, Niederländisch, Finnisch, Griechisch, Hebräisch, Hindi, Ungarisch, Indonesisch, Kasachisch, Malaysisch, Norwegisch, Polnisch, Portugiesisch (Brasilien, Portugal), Rumänisch, Russisch, Slowakisch, Schwedisch, Thai, Türkisch, Ukrainisch, Vietnamesisch
Englisch (Australien, Kanada, Indien, Japan, Neuseeland, Singapur, Südafrika, Großbritannien, USA), Chinesisch – Vereinfacht (Handschrift, Pinyin QWERTY, Pinyin 10‑Key, Shuangpin, Wubihua), Chinesisch – Traditionell (Cangjie, Handschrift, Pinyin QWERTY, Pinyin 10‑Key, Shuangpin, Wubihua, Sucheng, Zhuyin), Französisch (Belgien, Kanada, Frankreich, Schweiz), Deutsch (Österreich, Deutschland, Schweiz), Italienisch, Japanisch (Kana, Romaji), Koreanisch (2‑Set, 10‑Key), Spanisch (Lateinamerika, Mexiko, Spanien), Ainu, Albanisch, Amharisch, Apache (Westlich), Arabisch, Arabisch (Najdi), Armenisch, Assamesisch, Assyrisch, Aserbaidschanisch, Bengali, Belarusisch, Bodo, Bulgarisch, Birmanisch, Kantonesisch – Traditionell (Cangjie, Handschrift, Phonetisch, Wubihua, Sucheng), Katalanisch, Cherokee, Kroatisch, Tschechisch, Dänisch, Dhivehi, Dogri, Niederländisch, Dzongkha, Emoji, Estnisch, Färöisch, Filipino, Finnisch, Flämisch, Fula (Adlam), Georgisch, Griechisch, Gujarati, Hawaiisch, Hebräisch, Hindi (Devanagari, Lateinisch, Transliteration), Ungarisch, Isländisch, Igbo, Indonesisch, Irisches Gälisch, Kannada, Kashmiri (Arabisch, Devanagari), Kasachisch, Khmer, Konkani (Devanagari), Kurdisch (Arabisch, Lateinisch), Kirgisisch, Lao, Lettisch, Litauisch, Mazedonisch, Maithili, Malaysisch (Arabisch, Lateinisch), Malayalam, Maltesisch, Manipuri (Bengali, Meitei‑Mayek), Māori, Marathi, Mongolisch, Navajo, Nepali, Norwegisch (Bokmål, Nynorsk), Oriya, Paschtunisch, Persisch, Persisch (Afghanistan), Polnisch, Portugiesisch (Brasilien, Portugal), Punjabi, Rohingya, Rumänisch, Russisch, Samoisch, Sanskrit, Santali (Devanagari, Ol Chiki), Serbisch (Kyrillisch, Lateinisch), Sindhi (Arabisch, Devanagari), Singhalesisch, Slowakisch, Slowenisch, Swahili, Schwedisch, Tadschikisch, Tamil (Anjal, Tamil 99), Telugu, Thai, Tibetisch, Tongaisch, Türkisch, Turkmenisch, Ukrainisch, Urdu, Uigurisch, Usbekisch (Arabisch, Kyrillisch, Lateinisch), Vietnamesisch (Telex, VIQR, VNI), Walisisch, Jiddisch, Akan, Bengali (Transliteration), Chickasaw, Choctaw, Tschuwaschisch, Gujarati (Transliteration), Hausa, Hmong (Pahawh), Inguschisch, Japanisch (Handschrift), Kabylisch, Kannada (Transliteration), Liangshan Yi, Malayalam (Transliteration), Mandäisch, Marathi (Transliteration), Mi’kmaq, N’Ko, Osage, Punjabi (Transliteration), Rejang, Tamazight (Standard Marokkanisch), Tamil (Transliteration), Telugu (Transliteration), Urdu (Transliteration), Wancho, Wolastoqey, Yoruba
Arabisch, Arabisch (Najdi), Bengali, Bulgarisch, Katalanisch, Cherokee, Chinesisch – Vereinfacht (Pinyin QWERTY), Chinesisch – Traditionell (Pinyin QWERTY), Chinesisch – Traditionell (Zhuyin), Kroatisch, Tschechisch, Dänisch, Niederländisch, Englisch (Australien, Kanada, Indien, Japan, Neuseeland, Singapur, Südafrika, Großbritannien, USA), Estnisch, Filipino, Finnisch, Niederländisch (Belgien), Französisch (Belgien), Französisch (Kanada), Französisch (Frankreich), Französisch (Schweiz), Deutsch (Österreich), Deutsch (Deutschland), Deutsch (Schweiz), Griechisch, Gujarati, Hawaiisch, Hebräisch, Hindi (Devanagari, Lateinisch, Transliteration), Ungarisch, Isländisch, Indonesisch, Irisches Gälisch, Italienisch, Japanisch (Kana), Japanisch (Romaji), Koreanisch (2‑Set, 10‑Key), Lettisch, Litauisch, Mazedonisch, Malaysisch, Marathi, Norwegisch (Bokmål), Norwegisch (Nynorsk), Persisch, Persisch (Afghanistan), Polnisch, Portugiesisch (Brasilien), Portugiesisch (Portugal), Punjabi, Rumänisch, Russisch, Serbisch (Kyrillisch), Serbisch (Lateinisch), Slowakisch, Slowenisch, Spanisch (Lateinamerika), Spanisch (Mexiko), Spanisch (Spanien), Schwedisch, Tamil (Anjal), Tamil (Tamil 99), Telugu, Thai, Türkisch, Ukrainisch, Urdu, Vietnamesisch (Telex)
Englisch (Australien, Kanada, Indien, Japan, Singapur, Südafrika, Großbritannien, USA), Chinesisch (Vereinfacht, Traditionell), Französisch (Belgien, Kanada, Frankreich, Schweiz), Deutsch (Österreich, Deutschland, Schweiz), Italienisch, Japanisch, Koreanisch, Spanisch (Lateinamerika, Mexiko, Spanien), Arabisch, Arabisch (Najdi), Kantonesisch (Traditionell), Niederländisch, Hindi (Devanagari, Lateinisch), Portugiesisch (Brasilien, Portugal), Russisch, Schwedisch, Thai, Türkisch, Vietnamesisch, Hebräisch, Polnisch, Rumänisch
Englisch (Australien, Kanada, Indien, Japan, Neuseeland, Singapur, Südafrika, Großbritannien, USA), Chinesisch – Vereinfacht (Pinyin), Chinesisch – Traditionell (Pinyin), Französisch (Frankreich), Französisch (Belgien), Französisch (Kanada), Französisch (Schweiz), Deutsch (Deutschland), Deutsch (Österreich), Deutsch (Schweiz), Italienisch, Japanisch (Romaji), Portugiesisch (Brasilien), Portugiesisch (Portugal), Spanisch (Spanien), Spanisch (Lateinamerika), Spanisch (Mexiko), Niederländisch (Belgien), Niederländisch (Niederlande), Hindi (Lateinisch), Vietnamesisch, Polnisch, Rumänisch, Türkisch
Englisch (Australien, Kanada, Indien, Japan, Neuseeland, Singapur, Südafrika, Großbritannien, USA), Chinesisch (Vereinfacht), Französisch (Belgien), Französisch (Kanada), Französisch (Frankreich), Französisch (Schweiz), Deutsch (Österreich), Deutsch (Deutschland), Deutsch (Schweiz), Italienisch, Spanisch (Lateinamerika), Spanisch (Mexiko), Spanisch (Spanien), Arabisch, Arabisch (Najdi), Niederländisch (Belgien), Niederländisch (Niederlande), Hindi (Devanagari), Hindi (Lateinisch), Russisch, Schwedisch, Portugiesisch (Brasilien), Türkisch, Vietnamesisch
Englisch (Australien, Kanada, Indien, Japan, Neuseeland, Singapur, Südafrika, Großbritannien, USA), Chinesisch (Vereinfacht Pinyin QWERTY), Chinesisch (Traditionell Pinyin QWERTY), Französisch (Kanada), Französisch (Frankreich), Französisch (Schweiz), Deutsch (Österreich), Deutsch (Deutschland), Deutsch (Schweiz), Italienisch, Spanisch (Lateinamerika), Spanisch (Mexiko), Spanisch (Spanien), Portugiesisch (Brasilien), Portugiesisch (Portugal), Niederländisch (Belgien), Niederländisch (Niederlande), Schwedisch, Vietnamesisch, Arabisch, Hebräisch, Koreanisch, Polnisch, Rumänisch
Englisch (Australien, Kanada, Indien, Irland, Neuseeland, Singapur, Südafrika, Großbritannien, USA), Spanisch (Chile, Mexiko, Spanien, USA), Französisch (Belgien, Kanada, Frankreich, Schweiz), Deutsch (Österreich, Deutschland, Schweiz), Italienisch (Italien, Schweiz), Japanisch (Japan), Koreanisch (Republik Korea), Mandarin (Festlandchina, Taiwan), Kantonesisch (Festlandchina, Hongkong), Arabisch (Saudi‑Arabien, Vereinigte Arabische Emirate), Dänisch (Dänemark), Niederländisch (Belgien, Niederlande), Finnisch (Finnland), Hebräisch (Israel), Malaysisch (Malaysia), Norwegisch (Norwegen), Portugiesisch (Brasilien), Russisch (Russland), Schwedisch (Schweden), Thai (Thailand), Türkisch (Türkei)
Englisch (Australien, Kanada, Indien, Irland, Malaysia, Neuseeland, Philippinen, Saudi‑Arabien, Singapur, Südafrika, Vereinigte Arabische Emirate, Großbritannien, USA), Kantonesisch (Festlandchina, Hongkong), Mandarin (Festlandchina, Taiwan), Französisch (Belgien, Kanada, Frankreich, Luxemburg, Schweiz), Deutsch (Österreich, Deutschland, Schweiz), Italienisch (Italien, Schweiz), Japanisch, Koreanisch, Spanisch (Chile, Kolumbien, Mexiko, Spanien, USA), Portugiesisch (Brasilien, Portugal), Arabisch (Kuwait, Katar, Saudi‑Arabien, Vereinigte Arabische Emirate), Katalanisch, Kroatisch, Tschechisch, Dänisch, Niederländisch (Belgien, Niederlande), Finnisch, Griechisch, Hebräisch, Hindi, Ungarisch, Indonesisch, Malaysisch, Norwegisch (Bokmål), Polnisch, Rumänisch, Russisch, Shanghai-Dialekt (Festlandchina), Slowakisch, Schwedisch, Thai, Türkisch, Ukrainisch, Vietnamesisch
Englisch (Großbritannien, USA), Chinesisch (Vereinfacht, Traditionell, Traditionell – Hongkong), Dänisch, Niederländisch, Französisch, Deutsch, Hebräisch, Hindi, Italienisch, Japanisch, Koreanisch, Norwegisch, Portugiesisch, Russisch, Spanisch, Schwedisch, Thai, Türkisch, Bulgarisch, Katalanisch, Griechisch, Malaysisch, Polnisch, Punjabi, Rumänisch
Vereinfachtes Chinesisch, Traditionelles Chinesisch – Englisch, Kantonesisch – Englisch
Arabisch – Englisch, Bengali – Englisch, Chinesisch (Vereinfacht) – Englisch, Chinesisch (Traditionell) – Englisch, Tschechisch – Englisch, Niederländisch – Englisch, Finnisch – Englisch, Französisch – Englisch, Französisch – Deutsch, Deutsch – Englisch, Gujarati – Englisch, Hindi – Englisch, Ungarisch – Englisch, Indonesisch – Englisch, Italienisch – Englisch, Japanisch – Englisch, Japanisch – Chinesisch (Vereinfacht), Koreanisch – Englisch, Polnisch – Englisch, Portugiesisch – Englisch, Russisch – Englisch, Spanisch – Englisch, Tamil – Englisch, Telugu – Englisch, Thai – Englisch, Urdu – Englisch, Vietnamesisch – Englisch, Englisch – Griechisch, Englisch – Malaysisch, Englisch – Schwedisch
Englisch (Großbritannien, USA), Chinesisch (Vereinfacht)
Englisch (Australien, Kanada, Indien, Japan, Neuseeland, Singapur, Südafrika, Großbritannien, USA), Französisch (Belgien, Kanada, Frankreich, Schweiz), Deutsch (Österreich, Deutschland, Schweiz), Italienisch, Spanisch (Lateinamerika, Mexiko, Spanien), Arabisch, Arabisch (Najdi), Bulgarisch, Tschechisch, Dänisch, Niederländisch (Niederlande, Belgien), Finnisch, Griechisch, Hindi (Devanagari), Ungarisch, Irisches Gälisch, Norwegisch (Bokmål, Nynorsk), Polnisch, Portugiesisch (Brasilien, Portugal), Punjabi, Rumänisch, Russisch, Schwedisch, Telugu, Türkisch, Vietnamesisch
Argentinien, Armenien, Australien, Österreich, Aserbaidschan, Bahrain, Belarus, Belgien, Brasilien, Bulgarien, Kanada, Chile, Festlandchina 17 , Kolumbien, Costa Rica, Kroatien, Zypern, Tschechien, Dänemark, El Salvador, Estland, Färöer, Finnland, Frankreich, Georgien, Deutschland, Griechenland, Grönland, Guatemala, Guernsey, Honduras, Hongkong, Ungarn, Island, Irland, Isle of Man, Israel, Italien, Japan, Jersey, Jordanien, Kasachstan, Kuwait, Lettland, Liechtenstein, Litauen, Luxemburg, Macau, Malaysia, Malta, Mexiko, Moldawien, Monaco, Montenegro, Marokko, Niederlande, Neuseeland, Norwegen, Palästina, Panama, Peru, Polen, Portugal, Katar, Rumänien, San Marino, Saudi‑Arabien, Serbien, Singapur, Slowakei, Slowenien, Südafrika, Südkorea, Spanien, Schweden, Schweiz, Taiwan, Großbritannien, Ukraine, Vereinigte Arabische Emirate, USA, Vatikanstadt, Vietnam
- iPhone mit iOS 18
- USB‑C Ladekabel (1 m)
- Dokumentation
Tausch dein Smartphone gegen eine Gutschrift ein.
Mit Apple Trade In kannst du eine Gutschrift für ein neues iPhone erhalten, wenn du dein qualifiziertes Smartphone in Zahlung gibst. 18 Gut für dich. Und den Planeten.
Weitere Infos
Hast du noch Fragen? Frag einfach.
Es gibt keinen besseren Ort, um ein iPhone zu kaufen. Wir kennen die Mobilfunkanbieter, Zahlungsoptionen und mehr. Und wir erklären es so, dass es einfach zu verstehen ist.
IMAGES
VIDEO
COMMENTS
How to download videos on iPhone and iPad. 1) Open Safari and find the video on the concerned website. For this tutorial, I'm using Pixabay, which is a library of royalty-free stock footage. 2) Once you're on the video page, tap the download button or link. If you don't see a download button, jump to the next section.
Step 2: Copy the video URL. Once you've located the video you want to download in Safari, the next crucial step is to copy the video's URL. The URL, or Uniform Resource Locator, serves as the unique web address that points to the specific location of the video on the internet. By copying this URL, you'll be able to provide the necessary ...
This video introduces multiple ways to share with people on how to download videos from Safari on Mac and iPhone, allowing people to enjoy videos/movies with...
Install the chosen app on your iPhone and open it. Launch Safari and navigate to the webpage containing the video you want to download. Once you have found the video, tap on it to open it in Safari's built-in video player. Look for the share button, which typically appears as a square with an arrow pointing upwards.
Right-click (or Control-click) on the video file in the resource list. A context menu will appear. In the context menu, select "Download" or "Download Linked File". This action will initiate the download process. A download progress bar or indicator may appear, showing the status of the video download.
Steps to download videos from Safari on your iPhone and iPad. Open Safari and head to the website from which you want to download the video. Tap on the Download Button. If applicable select the ...
Step 5. Paste the URL you copy and press " Go." Step 6. Then, choose the video resolution you want and download the video to your iPhone or iPad. Method 4. Download Videos from Safari Extension and Send to iPhone. After setting up the Safari extension, seamlessly download videos to your iPhone with just a few taps.
Here's how you can use PullTube Extension for Safari to download videos: Download and install PullTube on Mac. Open PullTube and click the settings button in the top right. Click Extension >> Safari. Safari will pop up the extension window. Click the checkbox before PullTube Extension and agree to turn on it.
Why download video in Safari? The main reason is that the video you want to watch isn't available to stream, and the only way you can watch it is to download it. Another reason is that someone has sent you the video via a file-sharing service, and the only way you can access it is Safari. Even if the video is available for streaming, you may ...
First of all, open the video you want to download in Safari on your Mac. Once the page loads completely, click the three-dot icon at the top right corner of the page and select "Save Video ...
Here's how to save video from Safari via Video Saver: Step 1: First, install the Video Saver app from the App Store. Step 2: Open it and select the "Direct URL" option. Paste the video link in the corresponding box. Step 3: Click the "Download" icon to save the video in the iPhone's gallery.
I have macOS 10.15.7 and Safari 14.0. I would like to download some webinars that I would like to access offline. ... (Alt+Cmd+I) and search for the tab Networks. If the video has been played, it will appear a URL from which you can download it. Thanks! - dpalo. Commented Oct 23, 2020 at 9:29. Add a comment | Sorted by: Reset to default
Hover the mouse on the URL and right-click on the link. Select Copy to get the URL. Step 3. Paste the URL to save the video. Right-click to paste the URL into the online downloader and click the button Start. Select a download option and click Download beside to save the YouTube videos from Safari to your Mac.
Hi. For documents, you can add them to the Safari reading list, or transfer them to another app, like GoodReader, for offline use. GoodReader can handle pdf, html, Microsoft word, excel, powerpoint, etc. I don't know about video.
Teil 2: 2 integrierte Möglichkeiten zum Aufzeichnen des Safari-Browsers auf dem Mac. Nachdem Sie nun herausgefunden haben, wie Sie Videos am besten über den Browser (Safari) aufnehmen können, ist es an der Zeit, die Standardmethoden des Mac zum Aufzeichnen von Videos im Safari-Browser zu erkunden. 1.
Step 1. Download and install the AnyRec Screen Recorder on your computer. After that, launch the tool and click the "Video Recorder" button. Then, access the content to record on Safari. Step 2. Next, click the "Full" button to record your screen with the Safari browser.
The content-type header is set to video/mp4 so the browser knows it's receiving a video. Then we stat the file to get its length and set that as the content-length header so the browser knows how much data it's receiving. Listing 2: Node.js Express web server with simple video streaming that works for Chrome.
The way to record video from safari is to use peer to peer connection and capture video at the other end. There are few open-source application and third-party services which offer this and they are quite stable. If you are only going to support recording from mobile, you can use HTML5 file API, which will pop up the camera in a single click ...
Unleash the Power of Safari Screen Recording! Capture your screen and create stunning videos with ScreenApp's Safari Screen Recorder. Our powerful yet user-friendly tool empowers you to: Record high-quality web pages, tutorials, and presentations. Easily edit and trim your recordings. Share your videos on social media or embed them on websites.
Do you know any alternative to MediaRecorder for recording videos from the browser camera with safari? It can be using the video tag of html, or some html 5, if you have an example of implementation would be much better. Thank you very much. javascript; html; safari; Share. Improve this question.
Zum Beenden der Aufnahme klicken Sie dann auf den Aufnahmeknopf rechts oben in der Menüleiste. Spielen Sie anschließend das Video kurz ab und speichern Sie es unter dem von Ihnen gewünschten Namen.
Then follow these steps to use the QuickTime Player to capture audio from a website in any browser: Open QuickTime Player. Click File in the menu bar and select New Audio Recording. Press the Record button when you're ready to capture audio from a browser. Hit the Stop button when you're done.
4K Dolby Vision Videoaufnahme mit 24 fps, 25 fps, 30 fps, 60 fps, 100 fps (Fusion) oder 120 fps (Fusion) 1080p Dolby Vision Videoaufnahme mit 25 fps, 30 fps, 60 fps oder 120 fps (Fusion) ... In Festlandchina kannst du Apple Pay mit Safari im Internet nur auf kompatiblen iPhone und iPad Modellen mit iOS 11.2 oder neuer nützen.