Winter is here! Check out the winter wonderlands at these 5 amazing winter destinations in Montana
- Travel Guide

How To Start A Sightseeing Tour In Google Earth
Published: October 29, 2023
Modified: December 28, 2023
by Bianka Fisk
- Plan Your Trip
- Travel Tips
Introduction
Google Earth is a powerful tool that allows you to explore destinations from the comfort of your own home. While it’s great for virtual exploration, did you know that you can also use Google Earth to create your own sightseeing tours? Whether you’re a travel guide looking to showcase the best spots in a city or simply a traveler wanting to share your favorite destinations, creating a sightseeing tour in Google Earth can be a fun and engaging way to present your experiences.
In this guide, we will take you through a step-by-step process of how to start a sightseeing tour in Google Earth. We will cover everything from accessing the application to customizing tour paths and adding descriptions and media to tour stops. By the end of this guide, you’ll be equipped with the knowledge to create an impressive sightseeing tour that you can share with others.
But why use Google Earth for your sightseeing tours? The answer lies in its immersive experience. With Google Earth, you can take your audience on a virtual journey, allowing them to explore famous landmarks, scenic views, and hidden gems without leaving their homes. It’s a unique way to showcase the beauty and charm of a destination.
Furthermore, Google Earth offers a range of tools and features that make creating sightseeing tours a breeze. From the ability to add custom placemarks to creating interactive paths, Google Earth provides a user-friendly platform that caters to both novice users and seasoned professionals.
So, whether you’re a travel enthusiast, a tour guide, or someone looking to share your travel experiences, join us as we delve into the world of sightseeing tours in Google Earth. Let’s get started on creating an unforgettable journey!
Step 1: Accessing Google Earth
Before you can start creating your sightseeing tour, the first step is to access Google Earth. Thankfully, Google makes it easy for users to access this powerful tool in a variety of ways.
One option is to download and install the Google Earth application on your computer. Simply visit the Google Earth website, click on the “Download” button, and follow the installation instructions for your operating system. Once installed, you can launch the Google Earth application from your desktop or Start menu.
Alternatively, if you don’t want to install any software, you can access Google Earth directly through your web browser. Google offers a web-based version of Google Earth, which can be accessed by visiting the Google Earth website and clicking on the “Launch Earth” button. This option allows you to explore Google Earth without the need for installation.
Once you have accessed Google Earth, you will be greeted with a stunning 3D interactive globe. Take a moment to familiarize yourself with the interface, as we will be exploring its various features and functionalities in the following steps.
If you’re using the Google Earth application, you will see a toolbar at the top of the window that provides quick access to the main features of the program. This includes options for navigation, search, and customization.
If you’re using the web version of Google Earth, you will find similar features, but they may be located in different areas of the interface. Take some time to explore the web version and get acquainted with its layout.
Now that you have successfully accessed Google Earth, you’re ready to start creating your sightseeing tour. In the next steps, we will guide you through the process of navigating through the interface, adding sightseeing points of interest, customizing tour paths, and more. Get ready to embark on an exciting journey of creating your own virtual sightseeing tour!
Step 2: Navigating through the Interface
Once you have accessed Google Earth, the next step is to familiarize yourself with the interface and learn how to navigate through the virtual globe. Here are some key navigation controls and features that will help you explore and create your sightseeing tour:
1. Zooming In and Out: To zoom in on a specific location, use the zoom controls located on the toolbar. You can also use the mouse scroll wheel or two-finger gestures on a trackpad to zoom in and out. Zooming in allows you to see more detailed imagery of a particular area.
2. Panning: To move the view in any direction, simply click and drag the map. You can also use the arrow keys on your keyboard to pan across the map. Panning allows you to explore different areas within the virtual globe.
3. Rotation: To rotate the view, click and drag the compass rose located in the top right corner of the screen. You can also use the “Look Around” feature, which allows you to tilt and pan the view as if you were physically turning your head.
4. Search: Use the search bar located on the toolbar to find specific locations, landmarks, or addresses. Simply type in the name of the place you’re looking for, and Google Earth will take you there. You can also search for general categories, such as “restaurants” or “parks,” to discover points of interest in a particular area.
5. Layers: The Layers panel, which is usually located on the left side of the interface, allows you to toggle different layers and overlays on and off. Layers can include information such as roads, borders, parks, and more. Adjusting the layers can provide additional context and information for your sightseeing tour.
6. Street View: For a more immersive experience, you can switch to Street View to explore destinations at ground level. Simply drag and drop the yellow pegman icon onto the map in the desired location, and Google Earth will display a street-level view for that area.
Take some time to experiment with these navigation controls and features to become comfortable with maneuvering through the interface. By mastering the navigation, you’ll be able to create a more fluid and engaging sightseeing tour for your audience.
Now that you have a good understanding of navigating through the Google Earth interface, it’s time to move on to the next step: understanding layers and overlays. This will involve adding relevant information to enhance your sightseeing tour. Let’s proceed to the next step and take your tour to the next level!
Step 3: Understanding Layers and Overlays
In Google Earth, layers and overlays are essential tools for adding context and information to your sightseeing tour. Layers are pre-designed collections of data, such as roads, borders, and landmarks, which can be toggled on and off. Overlays, on the other hand, are user-generated content that can be added to the map, such as images, text, and videos. Understanding how to use layers and overlays effectively will enhance the depth and richness of your tour.
To access the Layers panel, look for it on the left side of the Google Earth interface. The Layers panel contains a list of available layers and overlays that you can utilize in your sightseeing tour. Here are a few key concepts to keep in mind:
1. Base Layers: Base layers provide the foundational map data, such as satellite imagery or street maps. These layers form the backdrop for your tour and help orient your audience. Toggle different base layers depending on the level of detail and visual style you want to present.
2. Data Layers: Data layers provide additional information about specific themes or categories. For example, you can choose to display layers that show historic sites, natural landmarks, or cultural points of interest. These data layers can be used to highlight important locations and enrich your tour with relevant information.
3. 3D Buildings: Enabling the 3D Buildings layer will add realistic three-dimensional representations of buildings in major cities. This layer can greatly enhance the visual appeal of your sightseeing tour, giving your audience a sense of immersion and realism.
4. Weather Layers: Weather overlays allow you to display current weather conditions and forecasts, adding a dynamic element to your sightseeing tour. These layers can be especially useful for showcasing weather-dependent destinations or planning outdoor activities.
When selecting layers and overlays for your sightseeing tour, consider the specific theme or focus of your tour. For instance, if you’re creating a tour of famous landmarks in a city, you might want to enable layers that display notable buildings, historical sites, and popular tourist attractions. By choosing the appropriate layers and overlays, you can tailor your tour to appeal to a particular audience or highlight specific aspects of a destination.
Additionally, you can customize the display of each layer or overlay to suit your preferences. For example, you can adjust the transparency of overlays to overlay them onto the base map without obscuring important details. Experiment with different layer combinations and configurations to find the best visual representation for your sightseeing tour.
Understanding layers and overlays is crucial for creating an engaging and informative sightseeing tour in Google Earth. By utilizing these tools effectively, you can provide your audience with a deeper understanding and appreciation of the places you’re showcasing. Now that you have a good grasp of layers and overlays, let’s move on to the next step: adding sightseeing points of interest to your tour!
Step 4: Adding Sightseeing Points of Interest
Now that you have a good grasp of navigating the interface and understanding layers, it’s time to start adding sightseeing points of interest to your tour. These points of interest can include famous landmarks, scenic viewpoints, historical sites, and other notable locations that you want to highlight in your sightseeing tour.
To add a point of interest, also known as a placemark, follow these steps:
1. Select the Placemark Tool: Look for the “Add Placemark” icon in the toolbar or menu. It is usually represented by a pin or flag symbol. Click on it to activate the placemark tool.
2. Position the Placemark: Move your cursor over the desired location on the map and click to place the placemark. You can drag and drop it to fine-tune its position if needed.
3. Customize the Placemark: Once you’ve placed the placemark, a pop-up window will appear where you can enter the name, description, and other details for the point of interest. Take this opportunity to provide informative and engaging descriptions that capture the essence of the location.
4. Add Media: You can enhance your placemark by adding media such as images, videos, or even audio recordings. Simply click on the corresponding options in the placemark window and follow the prompts to upload or embed media files.
5. Repeat for Additional Points of Interest: Continue adding placemarks for all the sightseeing points of interest you want to include in your tour. You can add as many placemarks as needed to cover all the locations you wish to showcase.
As you add placemarks, remember to be selective and choose locations that are truly unique and interesting. This will ensure that your sightseeing tour stands out and offers something special for your audience. You can also use layers and overlays to provide additional context and information about the placemarks you add.
Once you have added all your sightseeing points of interest, take the time to review and fine-tune each placemark. Double-check the names, descriptions, and media associated with each location to ensure accuracy and coherence. This attention to detail will contribute to a more polished and professional sightseeing tour.
With your sightseeing points of interest added and customized, you’re ready to move on to the next step: customizing tour paths. In the next section, we’ll explore how to create paths that connect your placemarks, providing a guided and seamless experience for your audience. Let’s continue building the tour of a lifetime!
Step 5: Customizing Sightseeing Tour Paths
In order to create a seamless and engaging sightseeing tour, it is important to connect the sightseeing points of interest you have added. This can be accomplished by customizing tour paths within Google Earth. These paths provide a guided route for your audience to follow, enhancing the flow and narrative of the tour.
Here’s how you can customize tour paths in Google Earth:
1. Select the Path Tool: Look for the “Add Path” icon in the toolbar or menu. It is typically represented by a curved line or path symbol. Click on it to activate the path tool.
2. Create the Initial Path: Start by clicking on the map to create the starting point of your tour path. Each subsequent click will create a connected segment of the path. Continue adding points until you have connected all the sightseeing points of interest you want to include in your tour.
3. Customize the Path: Once you’ve created the initial path, you can further customize it by editing the shape, thickness, and color. You can also adjust the elevation of the path to give it a 3D effect. Experiment with different styles to find the one that complements your sightseeing tour the best.
4. Add Descriptions and Media: Just like with individual placemarks, you can add descriptions and media to specific segments of the tour path. This allows you to provide additional information or highlight specific aspects of the route.
5. Adjust the Path Timing: If you want to create a timed tour, you can adjust the duration of each segment in the path. This will control the speed at which your audience moves along the route, providing a more guided and immersive experience.
By customizing your sightseeing tour paths, you can create a more cohesive and engaging experience for your audience. The paths serve as a visual guide, connecting the sightseeing points of interest and providing a logical progression throughout the tour.
While creating your tour paths, keep in mind the geography and layout of the destinations you are showcasing. Opt for paths that optimize the viewing experience, taking into consideration viewpoints, natural walking routes, or historic streets that add to the overall narrative of the tour.
With customized sightseeing tour paths in place, your audience will be able to follow a seamless journey through the locations you have highlighted. Next, we’ll explore how to add descriptions and media to tour stops, further enriching the immersive experience of your sightseeing tour. Let’s continue building an unforgettable virtual journey!
Step 6: Adding Descriptions and Media to Tour Stops
Adding descriptions and media to your tour stops is a crucial step in creating an engaging and informative sightseeing tour. It allows you to provide valuable context, details, and visual elements that enhance the overall experience for your audience. Here’s how you can add descriptions and media to your tour stops within Google Earth:
1. Select the Tour Stop: Click on a placemark or segment of the tour path that represents a specific tour stop in your sightseeing tour. This will bring up the information window for that location.
2. Add Descriptions: Within the information window, you can add text descriptions that provide interesting and relevant information about the tour stop. This can include historical facts, geographical details, interesting anecdotes, or any other engaging content that adds value to the tour.
3. Include Media: To further enhance your tour stops, you can add various types of media. This can include images, videos, audio recordings, or even links to external websites. Simply click on the corresponding media option within the information window and follow the prompts to upload or embed media files.
4. Arrange and Customize Content: After adding descriptions and media to a tour stop, you can arrange and format the content within the information window. This allows you to present the information in a visually appealing and easy-to-read manner. Experiment with different layouts to find the one that best suits your content and tour style.
5. Repeat for Each Tour Stop: Continue adding descriptions and media to each tour stop you have created. Take the time to draft compelling and informative descriptions that captivate your audience and add value to their virtual exploration. Be selective and choose high-quality media that showcases the beauty and uniqueness of each location.
By adding descriptions and media to your tour stops, you will provide your audience with a deeper understanding and appreciation of the places you are showcasing. This additional content will enhance the immersive experience of your sightseeing tour and make it a memorable virtual journey.
Remember to keep your descriptions concise and engaging, without overwhelming the reader with too much information. Use media strategically to complement and enhance the descriptions, providing visual elements that immerse your audience into the tour stops.
Now that your tour stops are filled with engaging content, it’s time to share and publish your sightseeing tour. In the next step, we’ll explore how to share your creation with others and make it accessible for a wider audience. Let’s get ready to showcase your virtual tour to the world!
Step 7: Sharing and Publishing Your Sightseeing Tour
Once you have created and customized your sightseeing tour in Google Earth, it’s time to share it with others and make it accessible to a wider audience. Fortunately, there are several options available for sharing and publishing your tour. Here’s how you can do it:
1. Save Your Tour: Before sharing your tour, ensure that you save all your progress. Click on the “Save” button within the Google Earth interface or use the keyboard shortcut (Ctrl+S or Command+S) to save your tour to your device’s storage.
2. Share with Friends and Family: If you want to share your tour with a select group of people, you can simply send them the saved file or invite them to view it using Google Earth. They can then open the file in Google Earth and experience your sightseeing tour firsthand.
3. Upload to Google Earth: Another way to share your tour is by uploading it to Google Earth. This allows your tour to be discovered and enjoyed by a wider audience. Visit the Google Earth website and follow the instructions to upload your tour. This will make it available for others to explore and enjoy using Google Earth.
4. Embed on Websites or Blogs: If you have a website or blog, you can embed your sightseeing tour directly on your platform. Simply generate the embed code using Google Earth, and then paste it into the HTML of your webpage. This way, visitors to your site can experience your tour without leaving your website.
5. Share on Social Media: Utilize social media platforms to share your sightseeing tour with a wider audience. Create posts or stories on platforms like Facebook, Twitter, Instagram, or YouTube, and include snippets or highlights from your tour to entice your followers to explore it further.
6. Collaborate with Travel Websites: Reach out to travel websites or online travel communities that may be interested in featuring your sightseeing tour. Collaborating with these platforms can provide exposure to a larger audience and attract more people to experience your virtual tour.
Remember to provide clear instructions or links to help others access and view your sightseeing tour. Consider using captivating visuals or teasers to entice potential viewers and make them excited about exploring your creation.
Sharing and publishing your sightseeing tour allows you to showcase your virtual journey to a global audience. Whether you’re sharing with friends and family or making it accessible to the public, your tour has the potential to inspire and transport others to the beautiful destinations you have carefully curated.
With your sightseeing tour shared and published, you have successfully completed all the necessary steps. Congratulations on creating an immersive and captivating virtual experience! Your tour is now ready to be enjoyed by others, providing them with a unique and informative exploration of the locations you have highlighted.
Remember to update and refine your tour periodically to keep it fresh and engaging. As you discover new sights or learn more about the locations, consider adding them to your existing tour or creating new ones. Continually enhancing and sharing your sightseeing tours will keep your audience coming back for more.
So go ahead, share your tour with the world and let them embark on an unforgettable virtual journey!
Congratulations! You have successfully learned how to create a captivating and informative sightseeing tour in Google Earth. By following the steps outlined in this guide, you have gained the knowledge and skills to showcase your favorite destinations, share travel experiences, or even create virtual tours for others to enjoy.
From accessing Google Earth and navigating through the interface to adding sightseeing points of interest and customizing tour paths, you have mastered the art of creating a seamless virtual journey. By incorporating descriptions and media to your tour stops, you have enhanced the immersive experience for your audience, bringing the destinations to life.
Remember, effective utilization of layers and overlays has allowed you to provide additional context and information, making your sightseeing tour both informative and visually appealing. Sharing and publishing your tour has allowed you to reach a wider audience, inspiring others to explore and appreciate the beauty of the places you have showcased.
With your newfound expertise, you can continue to refine and expand your sightseeing tours. Keep exploring new destinations, seeking out unique points of interest, and incorporating engaging descriptions and media to create even more captivating experiences.
Whether you’re a travel guide showcasing the best spots in a city or a traveler sharing your favorite destinations, creating a sightseeing tour in Google Earth is an exciting and powerful way to immerse others in your experiences. Through the combination of technology and creativity, you have the opportunity to transport and inspire others, providing a virtual exploration that is as informative as it is enjoyable.
So, what are you waiting for? Start creating your own sightseeing tour in Google Earth and share your virtual journey with the world. Let your creativity and passion for travel shine through, and watch as your tour engages and captivates audiences around the globe.
Happy sightseeing and happy exploring!

- Privacy Overview
- Strictly Necessary Cookies
This website uses cookies so that we can provide you with the best user experience possible. Cookie information is stored in your browser and performs functions such as recognising you when you return to our website and helping our team to understand which sections of the website you find most interesting and useful.
Strictly Necessary Cookie should be enabled at all times so that we can save your preferences for cookie settings.
If you disable this cookie, we will not be able to save your preferences. This means that every time you visit this website you will need to enable or disable cookies again.
Google Earth Tour Guide: 14 Virtual Tours You'll Want to Check Out

Your changes have been saved
Email is sent
Email has already been sent
Please verify your email address.
You’ve reached your account maximum for followed topics.
Buy With Prime Gives You Amazon Shipping Benefits Elsewhere—Now With PayPal
You'll see automatic dubs, more robust communities, and powerful creator tools in youtube soon, yes, you can connect nintendo switch to a tv without the dock: here's how.
For ages, Google Earth has remained the go-to service for browsing our globe. You can use this app to visit all corners of the planet from the comfort of your living room. In 2017, Google Earth was also completely overhauled to add more features. This overhaul included additional Google virtual tours to the world's most remote and amazing places.
Here are the best Google Maps tours that are available on Google Earth.
1. Life in the Ocean Deep
With Life in the Ocean Deep, you can discover mysterious sea creatures with the help of renowned naturalist Sir David Attenborough. This Google tour takes you on a journey through the many quirky yet breathtaking creatures that inhabit our oceans, like glow-in-the-dark jellyfish and giant crabs.
Assisting this Google Earth tour are a series of videos and underwater maps.
2. UNESCO World Heritage Sites
Looking to dive into the past? Follow this Google Maps virtual tour as it briefs you on thirty historic landmarks that were declared World Heritage Sites by UNESCO. The tour includes but is not limited to, India's Taj Mahal, Cambodia's Towers of Angkor Wat, and Spain's Catedral de Sevilla.
If you're dreaming of traveling, don't forget to plan your itineraries with these smart travel planning apps .
3. This is Home
Sometimes home is where the heart is, even if that home is very far away. With This is Home, Google lets you visit traditional homes from around the world. You'll even get to know about the history behind each of these places and get a glimpse inside the unique structures with Google Street View.
For instance, Jordan's House of Hair is a string of tents constructed from the hair of camels and other animals. It's located in the middle of the desert, but some of the other houses on this tour are located in even more far-flung regions than that.
4. Stop and Smell the Flowers
Stop and Smell the Flowers is a Google virtual tour that takes you on a journey through some of the most breathtaking botanical gardens and arboretums around the world. This tour highlights a total of eleven places, ranging from countries like Russia, Sweden, and Canada, to the Netherlands.
If you're into gardening, then this one is for you.
5. Pilgrimage to Mecca
Every year, many thousands of Muslims embark on a pilgrimage to Mecca, a holy city for practitioners of the Islamic faith. Google's virtual tour lets you learn about this practice, from landing at the Hajj Terminal Jeddah Airport to the final destination of Masjid al-Haram.
6. Global Flea Markets
Have you ever had an interest in bustling flea markets? Experience them yourself with this Google Maps virtual tour. This tour walks you through nine of the most iconic markets worldwide, such as France's Les Puces de Saint-Ouen, India's Anjuna Flea Market, and London's Portobello Market.
While we're still on the subject: If you want to plan a dream vacation, here are some easy ways that you can travel more cheaply .
7. Colorful Street Fests & Carnivals
Being a land of diverse cultures and societies, the world is laden with numerous festivals. The most vibrant of them are covered in a Google Maps tour.
This tour features eight of the biggest celebrations from around the globe. These celebrations include the large-scale food fight La Tomatina in Spain, Holi in India, and Mardi Gras in New Orleans.
8. Comic Geek Destinations
Unleash your inner geek with this virtual tour that takes you on a trip through a bunch of iconic comic book spots. Comic Geek Destinations curates a total of ten locations known for appearing in various fictional universes. One of these locations is the Parkwood Estate. It was a mansion used by X-Men's Professor Xavier for his school of "Gifted Youngsters."
If you feel like doing some light reading after this tour, here are the best ways to read comics online for free .
9. Iconic Film Locations in the Mediterranean
Are you more of a movie buff than a comic book aficionado? Try out this tour featuring iconic film locations in the Mediterranean.
In this tour, you can travel to each selected landmark where a movie scene has been shot. If you don't want to use Google Earth to find these spots, however, here's how to track down your favorite film locations using websites.
10. International Year of the Reef
Coral reefs have been in peril for many decades now due to the threat of global warming. To raise awareness on this issue, a Google Maps virtual tour was set up to help familiarize the public with the basics.
With the International Year of the Reef, you can see how these marvelous underwater colonies are formed over millions of years. Each chapter in the tour also discusses fundamental topics like coral reef diversity. Additionally, it includes video highlights and subaqueous street view images.
11. In Mandela's Footsteps
Sometimes you can take a virtual walk through history. In Mandela's Footsteps lets you follow the journey of the legendary political leader and former president of South Africa, Nelson Mandela.
This tour highlights the places that played a critical role in Mandela's life. For example, there's a page devoted to the University of Fort Hare. It was one of the first institutions in the region that allowed non-white people to study for a post-secondary degree.
12. Reading the ABCs from Space
Perhaps one of the most intriguing virtual tours available on Google Earth is Reading the ABCs from Space. Developed by NASA, this tour consists of twenty-six chapters that reveal locations on the planet that form an alphabet from space.
Our personal favorite is the letter "J" off the coast of Australia, which is made up of a coral reef.
If space is your jam, here are great resources to learn all about Mars .
13. The Beautiful Game
If you're in a World Cup spirit, you might want to check out The Beautiful Game. This Google Earth tour takes you on a trip through some of the planet's most unforgettable soccer destinations. The destinations include the Allianz Arena in Munich, Barcelona's Camp Nou, and Old Trafford in England.
14. National Parks of the United States
Looking for natural wonders closer to home? Especially ones that will help you appreciate the great outdoors?
If so, then you need to check out the National Parks of the United States. It's a virtual tour that will take you on a journey through the most pristine areas of wilderness from coast to coast, ranging from Acadia National Park to Denali.
Use a Google Tour to Visit the World
While all of these virtual tours are absolutely amazing, we've barely scratched the surface in just how many there are. If you go deep-diving through the archives, you'll also find that the tours are divided into subcategories like nature, culture, education, and street view. The best thing about the tours is that they're entirely free. A reliable, high-bandwidth connection to view them is a must, however.
For those that want to dig deeper into this app, it might surprise you to learn that Google Earth is an offshoot of Google Maps. With that in mind, take some time to understand how Google Maps works .
Stuck at home and long to go outside? Here are a few more virtual outdoors tours you can do from home and live sightseeing webcams you can stream .
- Google Earth
- Google Maps
Google Earth
Tourbuilder Tutorials
Creating a tour and adding locations.
- Create and name your tour by visiting tourbuilder.withgoogle.com .
- Add different locations by searching by city name, street address, or lat/long coordinates.
- The field of view for each location can be tilted.
- You can also go into Street View for different locations, too.
Adding and Deleting Photos
- Once you have a location added to map, add imagery and videos to each location by clicking "Add Photos or Videos".
- They can be uploaded, imported from Youtube, added via Google image search, or inserted from Google Drive.
- Each image can have a title and description to help your students understand its importance.
Viewing Tourbuilder Files on the new Google Earth
- Create a Tour telling a story at tourbuilder.withgoogle.com .
- Make your tour publically viewable, then click the three lines in the top right.
- Click "Open in Earth" to view your tour in the new Google Earth.
Stack Exchange Network
Stack Exchange network consists of 183 Q&A communities including Stack Overflow , the largest, most trusted online community for developers to learn, share their knowledge, and build their careers.
Q&A for work
Connect and share knowledge within a single location that is structured and easy to search.
How to "Play Tour" directions in Google Earth?
How do a play directions as a tour in Google Earth?
Bonus Chatter
From Google Earth help:
Touring and saving directions Once you have a route displayed in the 3D viewer, you can use the tour feature to "fly" the route in the 3D viewer, and you can save the directions to your 'My Places' folder for later reference. Touring the Route Select the 'Route' item at the end of the directions listing. Click the Play Tour button: The 3D viewer automatically starts the tour from the departure point, oriented in the correct direction as if you were flying over the route you have marked. The tour follows the route, stops at the end, and zooms out to encompass the entire route in the 3D viewer. See Using Tours for more information.

Important Notes
The important points in the instructions are:
- select the Route item at the end of the directions listing

So we have to note the important points in the documentation:
there is no Route item at the end of the directions listing:

Given that there's no way to play directions as a tour in Google Earth, how do i play directions as a tour in Google Earth?
There are no updates available at this time:

Bonus Reading
- Google Lat Long Blog: Helicopter view of your driving directions on Google Maps
- google-earth
The answer is on Google Earth Help Forum .
As that article explains, the key is to click the "Copy the current search results to My Places" button:

You must log in to answer this question.
Not the answer you're looking for browse other questions tagged google-earth ..
- The Overflow Blog
- Looking under the hood at the tech stack that powers multimodal AI
- Featured on Meta
- User activation: Learnings and opportunities
- Preventing unauthorized automated access to the network
Hot Network Questions
- General solution that have the rectangular function as amplitude of the Fourier transform?
- Sent money to rent an apartment, landlord delaying refund with excuses. Is this a scam?
- Can a 20A circuit mix 15A and 20A receptacles, when a 20A is intended for occassional space heater use?
- string quartet + chamber orchestra + symphonic orchestra. Why?
- On the Connection Between Holy Mass and the Book of Revelation---Looking for Ancient References
- Is there a "hard problem of aesthetics?"
- Email from Deutsche Bahn about a timetable change - what do I need to do?
- Establishing Chirality For a 4D Person?
- Is it possible to monitor the current drawn by a computer from an outlet on the computer?
- Beta hat conditional variance - Hansen Econometrics
- Calculate transition probabilities
- What happens when I declare multiple register variables in C on older compilers?
- Will running a dehumidifier in a basement impact room temperature?
- Can there be a proper class of Dedekind-finite cardinals?
- Consequences of registering a PhD at german university?
- What is the meaning of a sentence from Agatha Christie (*Murder of Roger Ackroyd*)?
- What happened to the periodic scripts on macOS Sequoia?
- How can I add cache information to InboundPathProcessor?
- use of "instead"
- Does "Speak with animals" allow you to improve the attitude of an animal like "wild empathy"?
- If morality is real and has causal power, could science detect the moment the "moral ontology" causes a measurable effect on the physical world?
- Why is the #16 always left open?
- Baskervald Package Produces Slightly Different Italicized Textgreek
- Writing in first person for fiction novel, how to portray her inner dialogue and drag it out to make a chapter long enough?
Google's Tour Builder Is a Great Way to Make Your Friends Hate You
Now you can create virtual tours of your annoying vacations.

Google has an improved way for you to show your friends exactly where you've been or where you want to go. On Tuesday, the company made new Google Earth tools public so that users can create custom guided tours, superimposed over a map. The web-based tool is called Earth Tour Builder and it may be the best way to dole out travel advice. Eat it, maps.
Google technically released the Earth Tour Builder in 2013, but the company has released new tools that basically put it on steroids. Earth Tour Builder lets users drill down to the street view to mark specific spots they've been or want to go. Google Earth previously made guided tours available through its Voyager tab, but these were all professionally made. The big difference here is that anyone can make a project.
Interestingly, the project first began as a way for veterans to record their globetrotting as a result of their service, but has morphed into a storytelling tool that allows users to show their friends and family some of their favorite places and how to replicate the same journey. The improved tool is currently in beta and billed as "a Google Earth experiment" on the build page, but anyone can access it.
We'll walk you through the basics of how to create your first Google Earth Tour, with a focus on the bridges in Pittsburgh, Pennsylvania. Google also has additional instructions here. To check out our final tour creation, click here.
Navigate to Google Earth Tour Builder
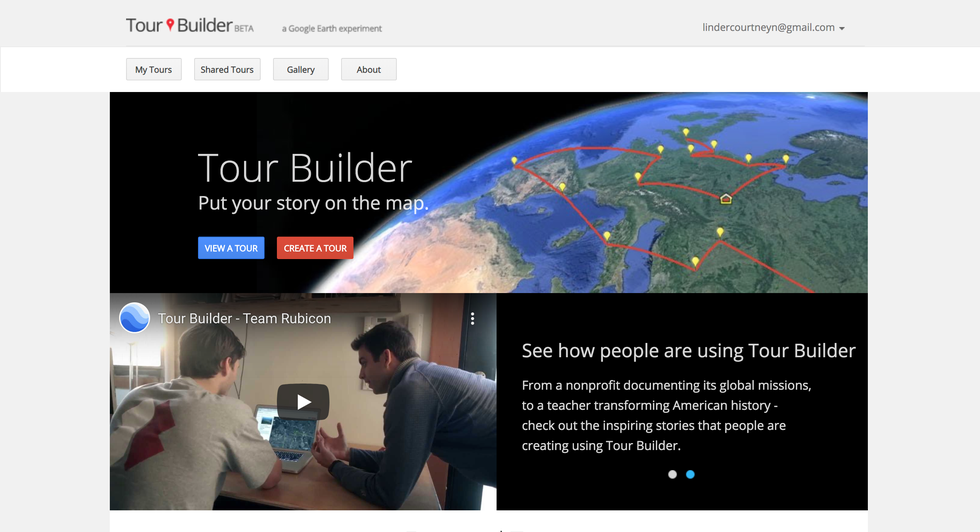
To start, visit tourbuilder.withgoogle.com , where you'll see a blue button to "View a Tour" and a red button to "Create a Tour." Click the red button and make sure you're signed into your Google account.
Slap a Title On
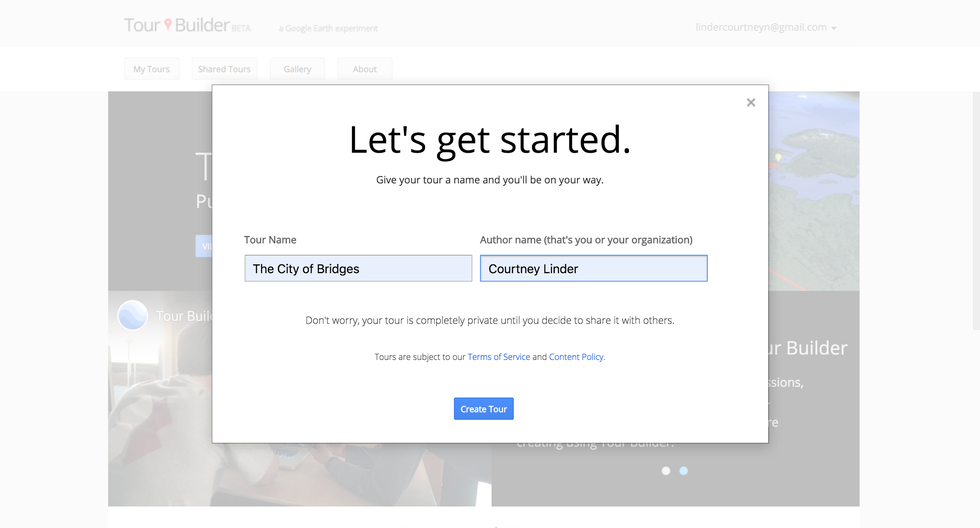
Next, come up with a good name for your tour that illustrates exactly what your viewers will be getting. We named ours "City of Bridges" since the tour will cover a few of Pittsburgh's many bridges.
Decide Where You're Heading and Build an Intro

Given the ridiculous amount of data that Google has collected for its Google Earth platform, you can create your tour pretty much anywhere. And it doesn't have to be a glimpse into your latest travels, necessarily—it could be an educational tour that hops around in a way that you simply couldn't on a single trip.
Once you've decided, select an introduction photo, either from your own photo collection (Google will automatically pull up anything you've uploaded to your Google Photos account) or elsewhere on the internet. To ensure you aren't encroaching on any copyright laws, use Flickr Creative Commons photos.
To wrap up your introduction, type up a description of your starting location.
Add Your First Location

Here's where it gets fun: Google Earth Tour Builder not only lets you select locations, but it also allows you to drill down further into the metadata, zooming in on the location through Street View. You can lock the angle you're currently viewing by dragging Pegman (the little yellow guy) and clicking the blue "Lock this view" button that pops up in the top right-hand corner.
Spice It Up with Multimedia

Once you've dropped a pin at the perfect spot, it's time to customize your location. Click the blue plus sign beneath "Enhance the Story" on the left-hand side of the screen near the left rail. There, you can upload your own photos and videos or even search and add videos from YouTube, right in the native web application. Then, draft up a description that will help your friends understand why this spot matters.
Customize Your Pin

This step isn't necessary, but it's a fun touch: You can add one of Google's other custom pins to ditch the old red one or even upload a link to your own icon.
Continue to Add Locations

Just as before, type in a location and drop a pin at the best spot, customizing with pictures, videos, text and links. Add as many as you like to wrap up your tour. Note in this example that if users have uploaded geotagged panorama shots and made them public, you'll see those on the map while dragging around Pegman. After you've added as many stops on your tour as you'd like, click "Done Editing" in the top right-hand corner to publish.
Tip: While dragging Pegman, you can find user-uploaded images by looking for small, gray circles that pop up near the blue Google Street View lines on roads. A small, grayed-out preview window will pop up and you can plop him down on the circle.
Share, Share, Share

When you've finished, click the blue "Share" button at the top right-hand corner of your screen. There, you can access a shareable link to your tour or you can add friends' email addresses to share your project with them, just as you would a Google Doc. You can also change the editing settings to allow others to collaborate on the tour.
Before joining Pop Mech , Courtney was the technology reporter at her hometown newspaper, the Pittsburgh Post-Gazette . She is a graduate of the University of Pittsburgh, where she studied English and economics. Her favorite topics include, but are not limited to: the giant squid, punk rock, and robotics. She lives in Philadelphia with her husband, her black cat, and towers upon towers of books.

We Put Photoshop’s Generative AI to the Test

Twitter’s New 𝕏 Logo Is Meant for Typing Math

Why AI May Be at the Heart of the Reddit Protest

9 Ways to Instantly Free Up Space on Your Phone

Which Celebrities Still Have Twitter Checkmarks?

Who Is TikTok CEO Shou Zi Chew?
The Best Weather Apps for iPhone and Android

18 Best Stargazing Apps to Download Now

How to Delete Your Twitter—And What to Use Instead

iOS 16 Lets You Say ‘Duck Off’ to Typos for Good

How to Delete All of Your Old Tweets At Once

The Fight Between RCS and SMS Messaging
Visit the U.S. National Parks in Google Earth
Apr 19, 2019
[[read-time]] min read
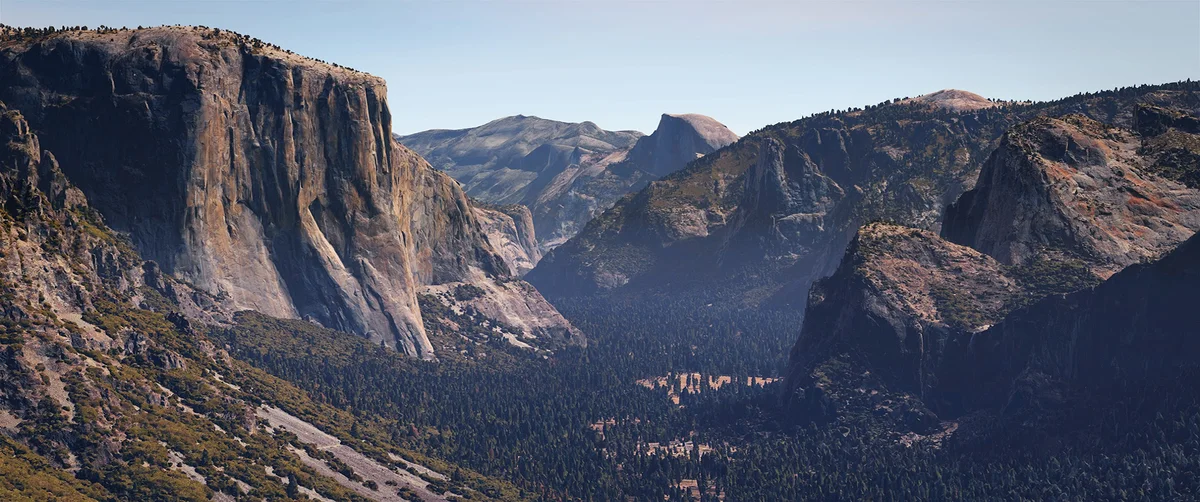
Each spring, the National Park Service and the National Park Foundation dedicate a week to celebrating the protected spaces in our communities. Today, we’re bringing the national parks to you in a Google Earth guided tour through 31 different parks around the country.
From the breathtaking vistas of the Shenandoah Valley to the awe-inspiring hoodoos of Bryce Canyon, the National Parks allow us to truly experience the natural wonders of our country. Start with the pink granite formations of Otter Cliff in Maine’s Acadia National Park , then head west to explore the ancient Pueblo dwellings of Mesa Verde National Park in Colorado. Finally, complete your journey with a peek through the North Window arch in Utah’s Arches National Park .
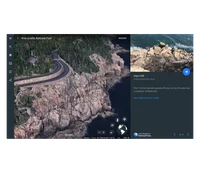
Acadia National Park
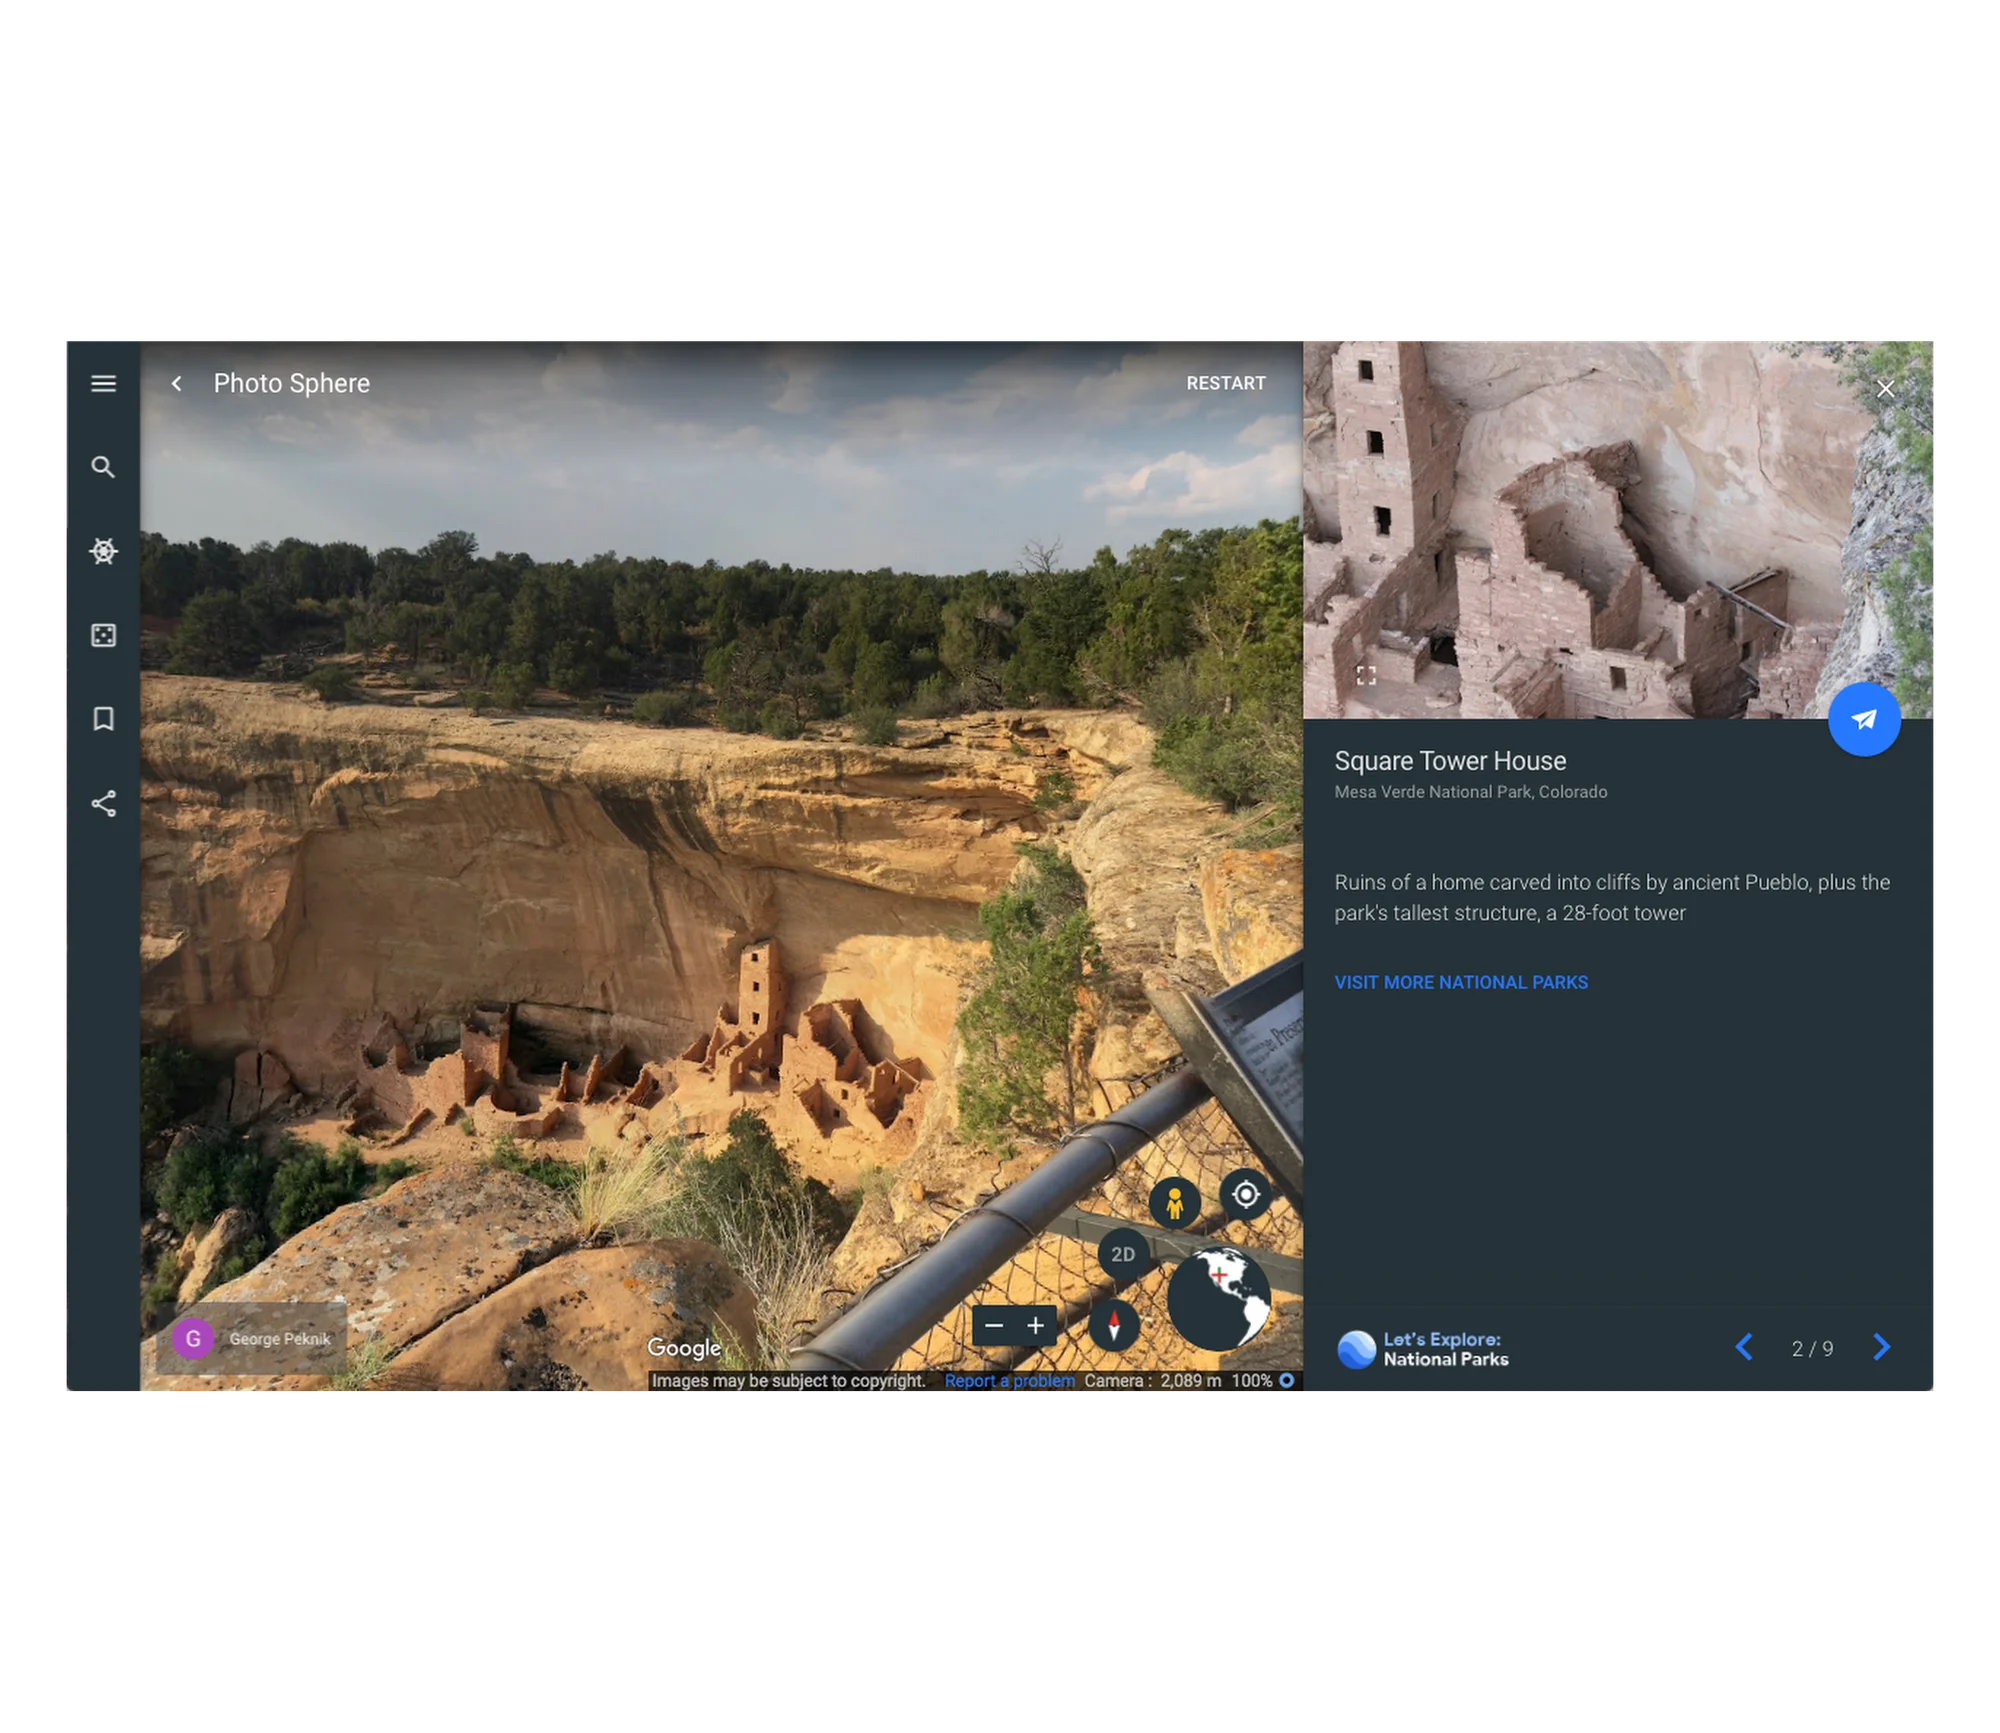
Mesa Verde National Park
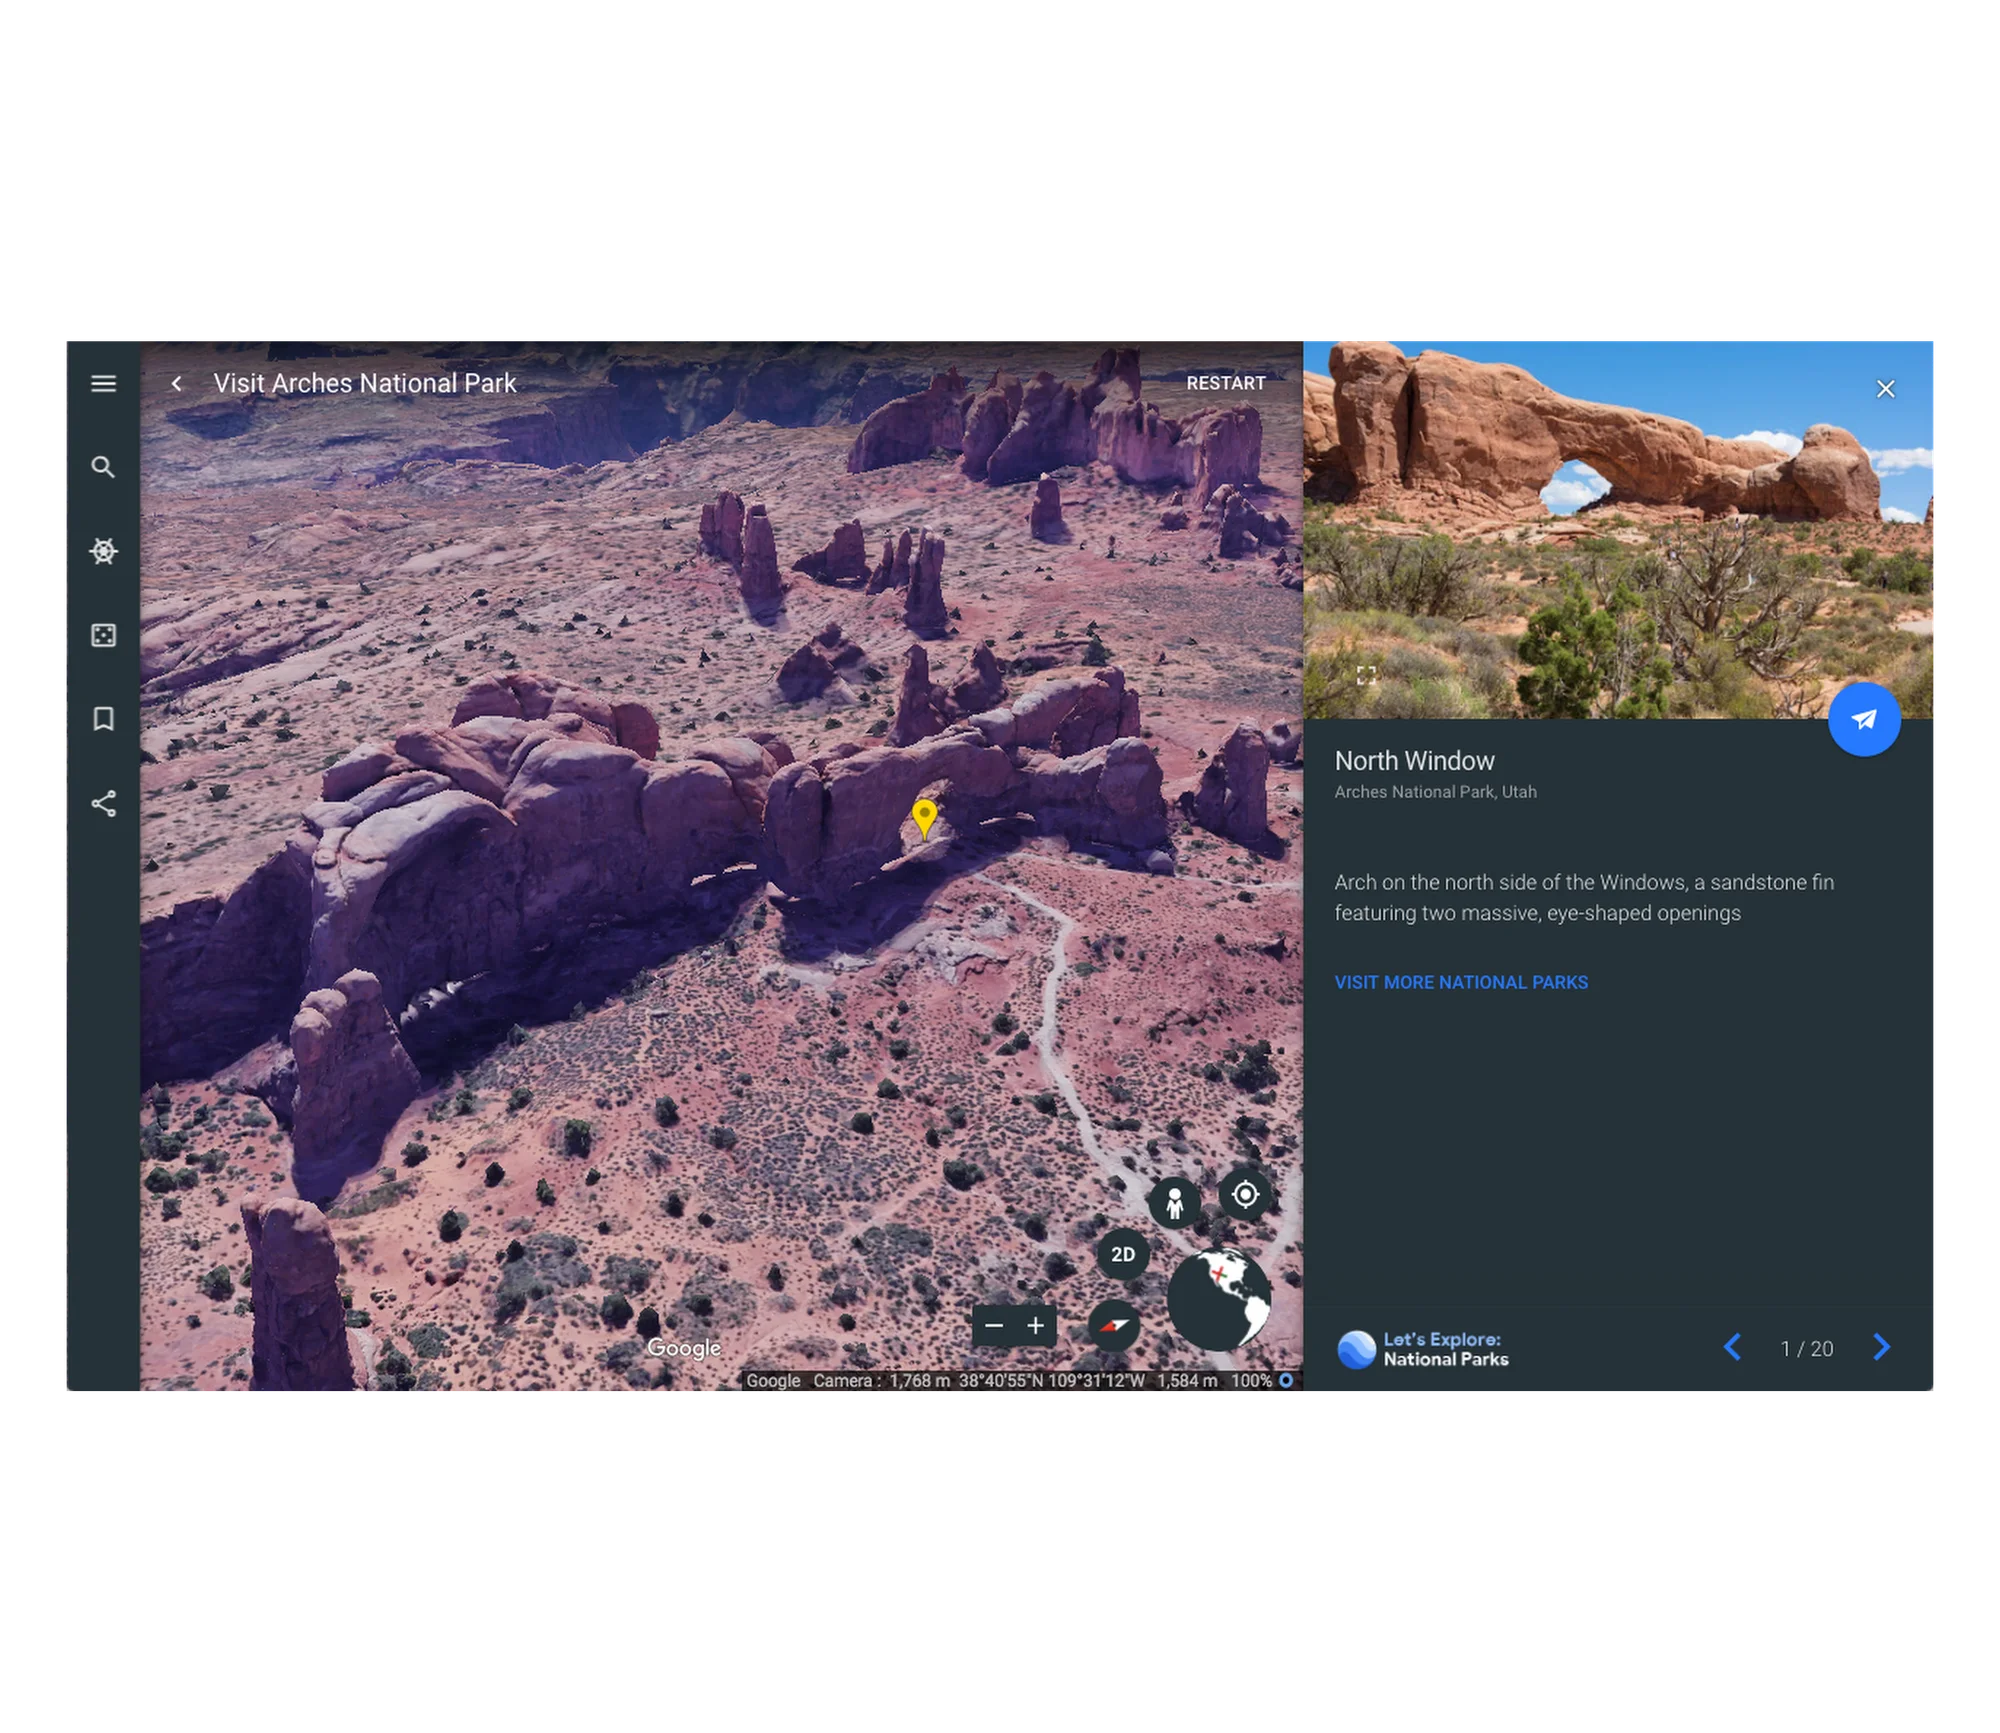
Arches National Park
Once you’ve virtually explored the national parks in Google Earth, we encourage you to put down your phone, put on some sunscreen and get outside to explore the wonders that our parks system has to offer. Start by finding the park closest to you.
Related stories

Our work to build a more sustainable future in Nebraska
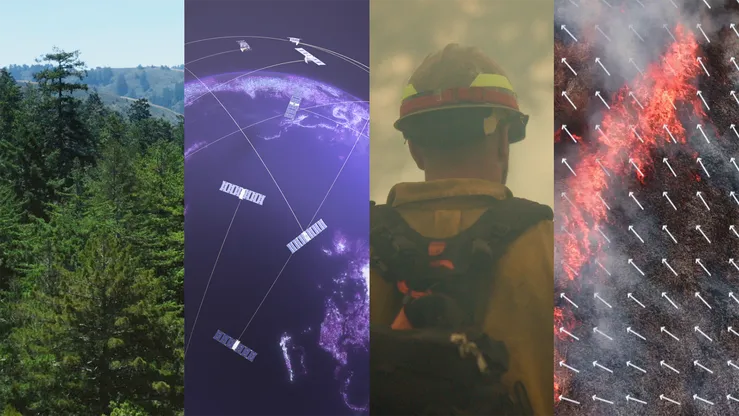
A breakthrough in wildfire detection: How a new constellation of satellites can detect smaller wildfires earlier
Our first-of-its-kind direct air capture deal forges a path to lower costs
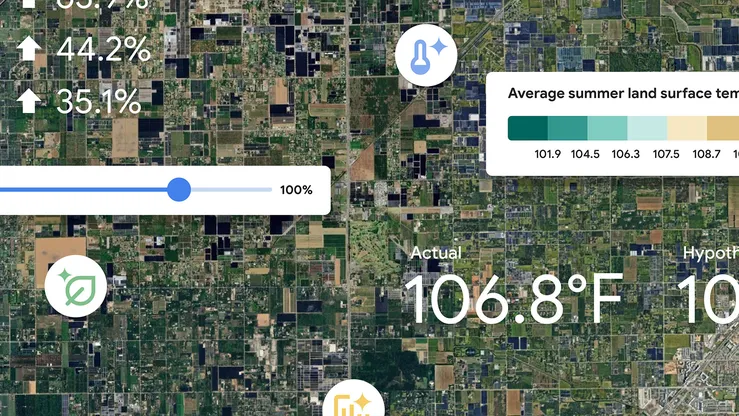
How we’re using AI to help cities tackle extreme heat

How we made our hardware packaging 100% plastic-free

New ways we're advancing our clean energy commitments in the U.S.
Let’s stay in touch. Get the latest news from Google in your inbox.
You can now make tours in Google Earth to show your friends your favorite travel spots
It’s like a homemade guided tour.
By Jay Peters , a news editor who writes about technology, video games, and virtual worlds. He’s submitted several accepted emoji proposals to the Unicode Consortium.
Share this story
:format(webp)/cdn.vox-cdn.com/uploads/chorus_asset/file/10745895/acastro_180427_1777_0001.jpg)
Today, Google is adding new tools to Google Earth on the web that let you build your own tour of a place right on top of the Google Earth map. It could help solve the problem of not being able to communicate just how awesome that walk around Tokyo was by letting you show your friends your journey. The tools let you set landmarks, draw lines from place to place, add text, images, and videos to every point along the way, and present the whole thing, step by step.
Google gave me early access to the tools, and they were pretty simple to use. In just a few minutes, I was able to build a short tour of some of my favorite places in Tokyo’s Harajuku district. One of my favorite features was being able to capture a specific camera angle for a landmark, which let me zoom in on a delicious ramen spot that would be really hard to see from a birds-eye view. Here are a couple screenshots:
:format(webp)/cdn.vox-cdn.com/uploads/chorus_asset/file/19390445/Screen_Shot_2019_11_19_at_10.28.58_AM.png)
Google also gave me access to a few premade tours (which they are calling “stories”), including an Antarctic expedition, a look at Renaissance architecture in Italy, and even a tour of landmarks that are important in the book Walk Two Moons , and these were much more robust. Here’s what some of that Antarctic expedition looks like:
:format(webp)/cdn.vox-cdn.com/uploads/chorus_asset/file/19390429/Screen_Shot_2019_11_19_at_10.25.54_AM.png)
Google Earth did already have guided tours in its “Voyager” tab , but those are professionally made. The tools launching today allow anyone to make and share a tour — and Google says that you can even invite others to collaborate on them. However, you’ll only be able to use the creation tools on the web, though Google says you can still view tours with the latest versions of the iOS and Android app.
- Redesigned Google Earth brings guided tours and 3D view to Chrome browsers and Android devices
Nintendo and Pokémon are suing Palworld maker Pocketpair
Microsoft launches a windows app for iphones, macs, and android devices, playstation’s 30th anniversary ps5 and ps5 pro are delightfully retro, apple iphone 16 pro review: small camera update, big difference, behold, the black apple watch ultra 2.
More from Tech
:format(webp)/cdn.vox-cdn.com/uploads/chorus_asset/file/24049860/226292_Apple_Watch_SE_PHO_akrales_0047.jpg)
Here are the best Apple Watch deals right now
:format(webp)/cdn.vox-cdn.com/uploads/chorus_asset/file/24247717/lp_logo_3.0.jpg)
OpenAI can’t register ‘GPT’ as a trademark — yet
:format(webp)/cdn.vox-cdn.com/uploads/chorus_asset/file/25184511/111323_PlayStation_Portal_ADiBenedetto_0013.jpg)
Sony’s portable PlayStation Portal is back in stock
:format(webp)/cdn.vox-cdn.com/uploads/chorus_asset/file/23925998/acastro_STK054_03.jpg)
The Nintendo Switch 2 will now reportedly arrive in 2025 instead of 2024
- Help Center
- Google Earth
- Privacy Policy
- Terms of Service
- Submit feedback
- Create and share maps
Create travel routes or areas of interest
These instructions are for Google Earth Pro. Get help with Google Earth for Web and Mobile.
Mark up your map with lines and polygons to plan or document travel routes or notable areas.
Draw a path or polygon
- Open Google Earth.
- Go to a place on the map .
- To draw the line or shape you want, click a start point on the map and drag.
- Click an endpoint.
- Click Done .
After you’ve drawn a path or polygon, you can measure distances and areas .
Need more help?
Try these next steps:.
Google Earth
- Google Earth on web
- Google Earth on mobile
- Google Earth Pro on desktop

IMAGES
VIDEO
COMMENTS
Explore Tours in Google Earth.
Make use of Google Earth's detailed globe by tilting the map to save a perfect 3D view or diving into Street View for a 360 experience. ... Take a guided tour around the globe with some of the ...
These can now be found in the Layers panel in Google Earth. Take a tour in Google Earth Take a guided tour around the globe with some of the world's leading storytellers, scientists and nonprofits.
Step 1: Accessing Google Earth. Before you can start creating your sightseeing tour, the first step is to access Google Earth. Thankfully, Google makes it easy for users to access this powerful tool in a variety of ways. One option is to download and install the Google Earth application on your computer.
Create a KML Tour. Click the Add Tour button in the toolbar, or go to the Add menu, and select Tour. The tour recording tools appear in the lower-left corner of the 3D viewer: Click the Record ...
Record a tour. Open Google Earth. Click AddTour, or, in the bar above the globe, click Record . To start recording, go to the lower left corner in the media player and click Record/Stop . To record audio, click Microphone . Navigate to each place you want to visit or go to the left-hand panel under "Places" and click a placemark to fly to that ...
Explore Google Earth. Grab the helm and go on an adventure in Google Earth.
Tutorial on creating a tour in Google Earth, controlling altitude and angle for each visited placemark, and saving and sharing the tour
This tutorial demonstrates two ways to create virtual tours using Google Earth. The first method allows you to include written descriptions, links, and pict...
Learn how to Create Virtual Tours in Google Earth Pro.This video explains the Ways to Create a Tour, Fine Tune the Touring Parameters, Record a Tour and Crea...
4. Stop and Smell the Flowers. Stop and Smell the Flowers is a Google virtual tour that takes you on a journey through some of the most breathtaking botanical gardens and arboretums around the world. This tour highlights a total of eleven places, ranging from countries like Russia, Sweden, and Canada, to the Netherlands.
With Google Earth for Chrome, fly anywhere in seconds and explore hundreds of 3D cities right in your browser. Roll the dice to discover someplace new, take a guided tour with Voyager, and create your own maps and stories. Coming soon to more browsers. Launch Earth. The whole world, in your hands
Tourbuilder Tutorials. Creating a Tour and Adding Locations. Create and name your tour by visiting tourbuilder.withgoogle.com. Add different locations by searching by city name, street address, or lat/long coordinates. The field of view for each location can be tilted. You can also go into Street View for different locations, too.
Earth has a new look. Use your phone to add places, images, and videos to your maps. Then, pick it up from your browser later. Examine the world without leaving your desk. Available on Chrome and ...
Touring the Route. Select the 'Route' item at the end of the directions listing. Click the Play Tour button: The 3D viewer automatically starts the tour from the departure point, oriented in the correct direction as if you were flying over the route you have marked. The tour follows the route, stops at the end, and zooms out to encompass the ...
Google technically released the Earth Tour Builder in 2013, but the company has released new tools that basically put it on steroids. Earth Tour Builder lets users drill down to the street view to ...
Each spring, the National Park Service and the National Park Foundation dedicate a week to celebrating the protected spaces in our communities. Today, we're bringing the national parks to you in a Google Earth guided tour through 31 different parks around the country.. From the breathtaking vistas of the Shenandoah Valley to the awe-inspiring hoodoos of Bryce Canyon, the National Parks allow ...
Customize your GPS track. In the "Places" panel, right-click the GPS data source and choose: Windows: Properties. Mac: Get Info. To choose an icon for your track, click the button next to "Name." Then, pick an icon. To change the color of labels, lines, or icons, click Style, Color, and choose colors for items in your GPS track.
Google Earth's Voyager is a showcase of interactive guided tours, quizzes, and layers that aim to help educate everyone about the world, locations near and far. By clicking the ship's wheel icon ...
1 / 4. Google Earth did already have guided tours in its "Voyager" tab, but those are professionally made. The tools launching today allow anyone to make and share a tour — and Google says ...
Draw a path or polygon. Open Google Earth. Go to a place on the map. Above the map, click Add Path or polygon . To draw the line or shape you want, click a start point on the map and drag. Click an endpoint. Click Done. After you've drawn a path or polygon, you can measure distances and areas.
Google Earth Pro on desktop is available for users with advanced feature needs. Import and export GIS data, and go back in time with historical imagery. Available on PC, Mac, or Linux.