- Trip Reports
- Areas & Ranges
- Huts & Campgrounds
- Logistical Centers
- Fact Sheets
- Custom Objects
- Plans & Partners
- Compass Basics: An Introduction to Orientation and Navigation

- Images (15)
- Comments (30)
- Introduction
The basics of compass usage are surprisingly simple and can be mastered quickly; and once learned they will certainly become an invaluable skill for any hiker, mountaineer, back country skier or suchlike outdoor enthusiast. However, if you are anything like most of us, chances are you have been packing a compass around for years, on your outdoor adventures, without fully utilizing it. It’s probably time to change that, isn’t it? Essentially a compass is nothing more than a magnetized needle, floating in a liquid, and responding to the Earth’s magnetic field consequently revealing directions. Over time compass markers have added features which make compasses work more harmoniously with maps and also more beneficially as stand alone tools. Today, compasses can be classified as one of four types, namely: fixed-dial (the type that you find on a key chain, or that come out of a gum ball machine) , floating dial (the needle is an integrated part of the degree dial) , cruiser (professional grade instrument used by foresters) , and orienteering. For hiking, mountaineering, back country skiing, canoeing, hunting or the like, the orienteering type is the most sensible being accurate to within 2 degrees, not requiring a separate protractor nor map orientation, and being highly affordable. Hence forth, this article focuses solely on the orienteering compass .
- Orienteering Compass Parts
Let’s begin our introduction to compasses by taking a look at a standard, modern day, orienteering compass, and identifying its parts. As figure 1 shows an orienteering compass typically consists of three main parts: a magnetic needle, a revolving compass housing, and a transparent base plate. The magnetic needles north end is painted red and its south end white. The housing is marked with the four cardinal points of north, east, south, and west and further divided into 2 degree graduations indicating the full 360 degrees of a circle. The bottom of the rotating housing is marked with an orienting arrow, and meridian lines. The base plate is marked with a ruler (and/or USGS map scales), an index line (bearing reading line), as well as a direction of travel arrow.

- Directions and Degrees

Before beginning to use a compass one should familiarize himself with basic directions and their degree readings. The four cardinal points are all 90 degrees apart, with East being at 90 degrees, South at 180 degrees, West at 270 degrees, and North at 360 degrees (or zero degrees). Identifying the degrees by 45 degree increments gives us the eight principal points of direction namely North (O or 360 degrees), North East (45 degrees), East (90 degrees), South East (135 degrees), South (180 degrees), South West (225 degrees), West (270 degrees), and North West (315 degrees). Memorizing the eight principal points can help one to instinctively associate directions and bearings, and help eliminate errors when taking bears (bearings are explained in the next section) . For example if you are told that a landmark is SE of your location, you know that is 135 degrees, or conversely if you know you need to go West but you calculate the bears as 90 degrees you will instinctively realize the bearing is wrong, as West is at 270 degrees (turn your compass around, you have committed the classic 180 degree error) . You may have heard directions given in terms like NNW or ESE, those types of directions are a result of distinguishing degrees in 22.5 degree increments resulting in the 16 traditional compass directions. Typically the eight principal points are sufficient to know. See figure 2.
One of the most important uses of a compass is taking, and following a bearing. A bearing is the direction from one spot to another, measured in degrees, from the reference line of north; in other words it’s one of the 360 degrees of the compass rose. To take a bearing hold the compass in front of you with the direction of travel arrow pointing at the object of interest. Hold the compass level and steady, and rotate the housing dial, until the orienting arrow lines up with the red end (north end) of the magnetic needle, all the while keeping the direction of travel arrow pointed at the object. Read the number indicated at the index line, and that is your bearing. Now to follow that bearing to the object, let’s consider an example. Say you want to travel to a large rock outcropping on the horizon, which is currently visible to you, but which may leave your field of vision when you walk into a dip, or when pending clouds come in or the sun sets. Let’s say your bearing on the outcropping measured 315 degrees (or NW). Assuming you still have the direction of travel arrow pointing at the rock outcropping, and have not changed the 315 degree bearing setting on the dial, walk forward keeping the magnetic needle over the orienting arrow (by rotating your body, and not the dial), and the straight line course (as pointed out by the direction of travel arrow), will lead you to the rock outcropping. En route, when the rock outcropping leaves you line of sight pick out an intermediate landmark along the bearing, so you don’t have to constantly look down at your compass. Walk to the intermediate landmark, and repeat with another landmark until you reach your destination. Once you arrive at the rock outcropping, what bearing do you use to return to where you came from? Actually you don’t need any other bearing besides the 315 degrees already set on your compass. To return, just point the direction of travel arrow at you, instead of forward, and then rotate your body until the orienting arrow lines up with the red end (north end) of the magnetic needle, and then walk straight ahead while keeping the magnetic needle over the orienteering arrow (just as you did in going to the rock outcropping). That is the easy way to backtrack, of course you could also calculate your back bearing by subtracting 180 from your forward bearing of 315, and set the 135 degree (SE) difference at the compasses index line and then use the same body rotating method mention earlier, only this time you’d have the direction of travel arrow pointing your way. Try this. Take your compass to an empty parking lot or field and mark a spot. While standing at the spot set your compass to any bearing between 0 and 120 degrees, pick a landmark along the direction of travel and take 15 steps toward it. Stop, add 120 degrees to your initial bearing, pick out a landmark along that bearing and walk another 15 steps toward it, stop and once again increase your bearing by 120, pick out a third landmark and again walk 15 steps. Notice you have arrived back at your original starting location. Let’s return to the example above where we took a 315 degree (or NW) bearing on a rock outcropping, and lets suppose that enroute to the outcropping we encounter an obstacle which we must go around thus forcing us to deviate from our straight line course. If you are lucky enough to be able to pick out a landmark that’s along the bearing, and also on the other side of the obstacle, you have nothing to worry about, just go around the obstacle and get back on course by reaching the landmark and aligning the red end of the magnetic needle over the orienteering arrow, and continue walking.

If you can’t see a landmark along your course, there are a couple of other methods you can use to get around the obstacle and get back on your original course. One method is to have a member of your party navigate the obstacle, and then treat him like a landmark. One he has cleared the obstacle talk him into position along your original bearing. Also have him take a back bearing on you to confirm he is in indeed back on course. He can do this by pointing the direction of travel arrow of his compass at himself and then turning his body so as to align the red end of the magnetic needle over the orienteering arrow, and he should notice that you are along the bearing, if not he needs to move left or right. If the obstacle is too large for the previously described method, or you are on a solo trip, you can use right-angles to maneuver the obstacle. To do this turn 90 degrees and walk across the front of the obstacle while counting your steps. To make a 90 degree turn without changing the bearing setting on your compass, simply turn your body until the red end (north end) of the magnetic needle points at the West marking (to turn right) or East (to turn left), as opposed to the normal North marking. Once you’re past the front of the obstacle turn 90 degrees again, by rotating your body until the red end of the magnetic needle is over the orienting arrow, and walk past the obstacle. Once past the obstacle, turn 90 degrees for a third time (by pointing the red end of the magnetic need at the opposite marking or your first 90 degree turn), and walk the same number of steps you counted to get past the front of the obstacle. Once the steps are up, turn your body to align the magnetic needle back over the orienteering arrow (thus turning 90 degrees for a fourth and final time), and you will be back on course. See figure 3.
Bearings can also be calculated from a topographic map, and then used in the field. Assume you know you are at landmark A in the field, and you want to travel to landmark B, but you can’t see it. If you have a topographic map and you can identify both landmarks on the map, you can use you compass with the map to get a bearing thus enabling you to travel accurately to landmark B. On the map align either the left or the right edge of the base plate through landmarks A and B with the direction of travel arrow pointing toward B. If the base plate edge isn’t long enough to reach both landmarks simply extend it with any straight edge (for example a piece of paper), or draw a straight line between the points and align the compass edge with the line. Without moving the base plate turn the compass housing until the orienteering arrow points to the top of the map (remember that north is at the top of the map). If you are lucky enough to have one of the maps north/south grid lines visible under the compass housing you can align the meridian lines on you compass with the maps north/south grid line as you turn the housing until the orienteering arrow points to the top of the map. Now, read the bearing at the compasses index line, and follow the bearing in the field! See Figure 4A-C. A word of caution, map bearings and field bearings can differ in the USA by as much as 30 degrees east and 20 degrees west. This difference and how to deal with it is explained in the next section below on declination. Figure 4A-C, has a map with magnetic north lines, rather than true meridian lines, and so declination is not a factor.
- Declination
A compass needle is influenced by the earth’s magnetic field which causes it to line up with magnetic north. Maps, on the other hand, are typically oriented to the North Pole (which is truth north). The difference between these two norths is called declination, and must be accounted for when using your compass in conjunction with a map. There are places where the two norths are the same, these places fall on the so-called agonic line, see figure 5 . In areas to the left of the agonic line the magnetic compass needle points a certain number of degrees to the east of true north, and on the other side of the line the magnetic needle points a certain number of degrees to the west of true north (in other words the magnetic needle points toward the agonic line). We say areas to the left of the line have east declination and those to the right have west declination. Figure 5 shows the 2005 declinations in the USA. Note, declination numbers change over time as magnetic poles shift. Thus said it’s important to know how old the declination information on your map is before heading out into the field. Current declinations can be had at the NGDC website . The website also tells you by how much declination is changing per year. Note that easterly declinations are changing by a west amount (minutes), and westerly declinations are changing by an east amount, thus over time magnetic north is approaching true north. If you know by how many minutes on average the declination of your area is changing per year you can use that to update an out of date map figure. For example if you have a map from 1960, and you learn that the declination is changing by 0° 7' W/year, multiple that number by the elapsed years, and divide the result by 60 to get the degree change in declination. For example, (2007-1960) * 7 = 329; since there are 60 minutes in a degree 329/60 = 5.48 degrees or about 5.5 degrees. So if declination on the 1960 map is 15 degrees east, the 2007 value is 15-5.5 or 9.5 degrees east.

If you are simply taking and following bearings in the field, you can completely ignore declination. Likewise if you are only calculating and working with bearings on a map declination is unimportant. However, when you calculate map bearings from a map drawn to true north and then use the bearings in the field, you may be thrown completely off course if you don’t adjusting them for the declination of the area. Consider this, say you are in Rhode Island where the declination is 15 degrees west, and lets say your map bearing is 0 degrees (or directly north). You set your compass dial to zero, turn your body to align the magnetic needle over the orienteering arrow, and take off in the direction of the direction of travel arrow walking toward an intermediate landmark, without doing any bearing adjusts for declination . In doing so, for each 60 feet you travel, you will be 15 feet to the west of your course, thus after traveling one mile you will be one-quarter mile off course! Fortunately, it a simple matter of adding to or subtracting from a map bearing to compensate for declination. Also, modern compass are available which can be set to automatically adjust for declination if you don’t want to bother with the math, if so equipped consult your compass booklet to learn how to set it. Here is all you need to remember when converting a map bearing to a magnetic bearing for use in the field: If your declination is west (you are on the right side of the agonic line, see figure 5) , ADD the number of degrees of declination to your map bearings, and if your declination is east (you are on the left side of the agonic line, see figure 5) SUBTRACT the number of degrees of declination from your map bearing. Of course if you are plotting a field bearing on to a map do the opposite: that is ADD east declination to a magnetic (field) bearing and SUBTRACT west declination from a magnetic (field) bearing. Let’s say you are hiking in Utah where the declination is 13 degrees east. You take a bearing from you map and learn that your destination lays SE at 135 degrees. To use the bearing in the field you would subtract 13 (the declination) from 135 resulting in 122 and simply set your compass dial at 122 degrees and then follow that bearing to your destination. To get this clear in your mind, try this. Pretend your declination is 20 degrees east (your in Alaska). That means the needle on your compass is pointing 20 degrees east of true north. You need to travel due north (0 or 360 degrees), so set your compass to 360, hold it in front of you and turn your body until the magnetic needle aligns with the orienteering arrow. Think to yourself "my compass is pointing off by 20 degrees to the east, my right, so to go true north I really need to point my direction of travel arrow 20 degrees to my left" . So rotate you body counterclockwise until the magnetic needle lines up with the 20 degree marking on the compass housing dial. Now the direction of travel arrow is pointing to true north. Knowing where true north lies, now follow the declination adjustment rule by subtracting 20 east declination degrees from your 360 degree bearing and set your compass dial to 340 degrees. Again, turn your body until the magnetic needle aligns with the orienteering arrow, and notice the direction of travel arrow is now pointing to true north! So that is why you subtract east declination. To further cement this concept into your mind repeat this exercise, but use a pretend west declination instead. In field orienteering it’s all about getting the direction of travel arrow pointing in the correct direction. Some compasses have a declination scale marked within the housing. If you compass is so marked, you don’t need to adjust a map bearing before using it in the field, instead you just need to remember to align the magnetic needle with the declination marking rather than the orienteering arrow, and then follow the direction of travel arrow as usual. When you take a field bearing and want to plot it on a map, take it with the magnetic needle pointing to the declination figure rather than the orienting arrow, and then you can use the bearing on the map without adjustment. A map trick used to avoid converting a map bearing to a field bearing is to draw magnetic north lines on the map based off the diagram at the bottom center of all USGS maps. With magnetic north/south lines drawn you can then align the meridian lines of your compass dial with the hand draw lines and the bearings indicated at the index line are field ready bearings. Figure 4A-c above has magnetic north lines drawn on it, and thus no adjustment were needed to use the map bearing in the field. A compass trick used to avoid declination adjustments is to place a piece of scotch tape over the compass dial starting at the east declination and ending at the value of declination plus 180. Map bearings can then be set on the compass dial as read from the map, but the magnetic needle now needs to be aligned with the tape line, rather than the orienteering arrow. Note if the declination is west, place the tape strip at 360 minus declination to 360 minus declination minus 180. The mechanical declination adjustment on so-enabled compasses uses this very procedure.
- Compass Dip
As learned in the declination section, magnetic needles are affected by the horizontal direction of the Earth’s magnetic field. Bearing that in mind you might not find it surprising to learn that they are also affected by the vertical pull as well. You see, the closer you get to the magnetic north pole (located near Bathurst Island in Northern Canada in 2007), the more the north-seeking end of the needle is pulled downward. Whereas, at the south magnetic pole (located just off the coast of Wilkes Land, Antarctica in 2007) the north-seeking end of the needle is deflected upward. Only at the equator is the needle unaffected by vertical magnetic forces. To overcome magnetic dip manufacturers must design compasses that have the needle balanced for the geographic area in which they will be used. Thus, a compass built for use in North America, will not work in South America. The North American compass will have the pivot point the needle rests on slightly into the north half of the needle thus offsetting the downward pull. When the compass is taken to South America, the imbalance will work in the same direction as the vertical pull and the needle could very well rub against the roof of the housing making the compass unusable. In other words you will need a compasses manufactured for use in the part of the world you intend to use it. As a result of these magnetic variances, the compass industry has divided the earth into 5 "zones", which you can learn more about at thecompassstore.com . Compasses with so-called global needles are available, and they can be used accurately in any part of the world. Global needles are also useful if you tend to take bearings while moving making it difficult to hold the compass level. Global needle compasses can handle tilts up to 20 degrees.
- Triangulation

It was mentioned early that one of the most important uses of a compass is for taking and following bearings. Equally important is using a compass to pinpoint your exact location on a topographic map. If you can look at a map and determine a line you are on, such as a road, hiking trail, or mountain ridge, you can pinpoint your location with only one other piece of information. Say you are on a hiking trail, and to the west you can identify a mountain peak. You take a bearing on the peak and learn that is at 280 degrees. Next you adjust it for, say, the 10 degree easterly declination of the area arriving at a map bearing of 290 degrees - remember to convert a field bearing to a map bearing do the opposite conversion of a map bearing to a field bearing by adding east declination and subtracting west declination . Next, with the adjusted bearing set on the compass dial, find the landmark on the map, and point the direction of travel arrow in the direction of the landmark with the edge of the base plate on the landmark. Keeping the edge of the base plate on the landmark, rotate the base plate (not the dial) until the meridian lines of the compass align with the north/south lines of the map. Now plot this line back to the position line (in this case the hiking trail) you are known to be on, and where the line crosses the position line is your exact location. This method is known as free triangulation. If you are not on a position line, you will need to identify two landmarks in both the field and on the map to pinpoint your location. This method is known as triangulation. First take a bearing on landmark A, and adjust it to a map bearing and set that on the compass dial. Follow the above described process to orient the compass on the map by passing the base plate edge over the landmark and rotating the base plate (not the dial) until the meridian lines of the compass parallel the north/south lines on the map, and draw a line on the map along the base plate edge. Repeat the process with the second landmark and the intersection of the two lines is your exact location. See Figure 6. Another use for triangulation is in being able to return to an exact location. Say you are hiking and decide to stash a water bottle part way along the trail so you can drink it on your return trip and avoid carrying it for the whole hike. You take a look around, and stash the water bottle behind a rock. Next you pick out two permanent landmarks which are preferably about 90 degrees apart, and take a bearing on each. Make a note of each landmark and it’s bearing, then when you return to the general area all you need to do is position yourself where the two bearings match and you will find you hidden water bottle.
- Navigation Tips and Tricks
Understanding Maps : To be truly strong at orienteering and navigation, one must become very familiar with maps, and the abundance of information they contain. Unfortunately, it would require a separate article to fairly explain maps, but it’s still worth looking at some map basics here. Know the scale of your map. All maps list their scales in the margin. A scale of 1:250,000 means that 1 unit (be it inches, feet, meters, or whatever) on the map is the equivalent of 250,000 units in the real world. Most USGS maps are 1:24,000, (also known as 7.5 minute maps) where 1 inch equals 2,000 feet (3/8 mile) in other words 2.64 inches equals one mile, thus a 7.5 minute USGS map has a north-south extent of about 9 miles. Clearly, the smaller the scale, the more detail is revealed. Maps are drawn based on latitude and longitude lines. Latitude lines run east and west (that is, parallel to the equator) and measure the distance in degrees north or south from the equator (0° latitude), and are often called parallels. Longitude lines run north and south intersecting at the north and south poles. Longitude lines measure the distance in degrees east or west from the prime meridian that runs through Greenwich, England, and are often called meridians. Latitude and longitude are measured in degrees, minutes and seconds. One degree equals sixty minutes, and one minute equals sixty seconds. The latitude and longitude grid allows us to calculate an exact point using these lines as X axis and Y axis coordinates. Another way to identify a point on a map is with the Universal Transverse Mercator (UTM) coordinate system, which similar to latitude and longitude also uses a north/south and east/west grid. On the USGS maps you will see markings for both grids. The UTM grid is more precise than latitude/longitude because USGS maps identify UTM scales every thousand meters compared to only every 2.5 minutes (about 3500 to 5000 meters) for latitude and longitude. Working with one meter number, can be less confusing than working with three degrees, minutes, and seconds values.
Trip Planning and Pseudo Maps : Before setting out on a back country trip into unfamiliar territory, it is wise to carefully study a map of the area, and make some notes. Note such things as landmarks, bearings between landmarks, distances and elevations. Notes of this type can save valuable time in the field, and will help you both stay orientated as well as assist in measuring your progress. I refer to such notes as a pseudo map. There is a tool on the Internet that I like to use to make my pseudo maps called ACME Mapper 2.0 . This tool allows you to enter a latitude/longitude and it returns a topographic map, which can be zoomed to various scales. It also allows you to mark spots on the map, and then it gives you the distance between marks as well as bearings to them. I find it faster than measuring distances with a ruler on the map, and a very precise way to calculate map bearings. Even with a pseudo map at hand sometimes it can be useful to track distances as you are hiking. A trick to do so is to count your double steps. Typically one double step (that is just counting the steps of one of your feet, while ignoring the other) is about five feet. So, a thousand double steps is about one mile. Also, if you keep an eye on your watch, and time yourself over known distances, you soon get an idea of how long it takes you to cover distances over various terrains.
Altimeter : An altimeter can be a useful companion to your topographic map and compass, assuming one knows how to calibrate it. As you hike the altimeter approximates your current altitude (based on atmospheric pressure), and you can use that information as a "Z" coordinate, if you will, to determine your location on a map. Knowing your general location on the map, if you find the contour line of your current elevation you know your position.
Aiming Off : When navigating to a target, if you realize that it could be easily missed if you get slightly off course one way, whereas missing the target the opposite way wouldn’t be a problem, you should use a trick known as aiming off. Consider this example; you leave your car at the north most end of a road that runs south to north. Leaving your car you walk SW at 240 degrees, making your literal return bearing 60 degrees. Returning you worry you will miss your car, if you get off course a bit and end up to far north, where there is no road. On the other hand, if you were to miss your car by being to the south you would cross the road, and you could just follow it back to the car. To avoid going to far north, you intentionally aim off so you will end up south of your car, thus guaranteeing you encounter the road. To do so, in this case, you might follow a return bearing of 70 degrees.
Awareness : When hiking, or mountain climbing, in an area unfamiliar to you, make use of a topographic map and compass to learn the area. As you spot a landmark, such as a mountain peak, take a field bearing on it, and convert it to a map bearing. Starting at your current location pinpointed on the map (see the section on triangulation), plot the converted bearing on the map, and see which mountain it passes through, and then read the name of the unfamiliar mountain from the map. That quickly and that easily, you will learn the area, and that knowledge will help you stay oriented and lessens chances of becoming lost.
Reverse Bearing : When hiking in and back out from somewhere one should know how to calculate a reverse (or opposite) bearing. For example, if you walked south following a 177 degree bearing, and turned around to return to your starting point what bearing would lead you back? Simply look at your compass and the straight line across the dial (the number on the opposite side) is the return bearing. The easiest way to calculate the opposite bearing is to add 180 degrees to the original bearing when it was less than or equal to 180 degrees, and to subtract 180 when the orginal bear was greater than 180. So for our example, the return bearing for the orginal bearing of 177 is 177 + 180 = 357 degrees (or almost due north). One can also leave his compass set to the orginal bearing and turn the compass 180 degrees by lining up the white end of the magnetic needle with the orienting arrow, as opposed to the normal red end of the magnetic needle. Another orientation trick, which I learned as a child from reading Louis L'Amour books, is to occasionally turn around and have a good look at the back trail, because a trail looks difference in the reverse direction. It’s also beneficial to pay attention to wind directions. For example some areas are known to have winds that blow from the west. If you are hiking in such an area, even if the wind isn’t blowing, you can often observe the results such as pine trees being leaner on their west side. We have all heard the saying that moss grows on the north side of trees. Why not verify if that is true in your area? If your trail crosses, or parallels a stream or river, pay attention to the direction it flows. Does it flow east, or northwest? Being aware, will reduce lost time, and disorientation, and make your outdoor experiences more rewarding.
Wristwatch as Compass : A watch with an hour hand can be used as a makeshift compass. If is set to the correct time, simply point the hour hand at the sun, and in that position, the point halfway between the current hour and the 12, is south. In a vice versa way a compass can act as a watch. For example knowing the sun is in the east at 6:00 am, southeast at 9:00 am, south at noon, southwest at 3pm, and west at 6pm, you can take a bearing on the sun, and get a good idea of the current time.

The North Star : In the Northern Hemisphere, Polaris (the North Star) is visible all year round. To find it, locate the Big Dipper and follow the two pointer stars at the end of the cup to the tail of the Little Dipper, Polaris is the last star on its tail, see Figure 7. Roughly the distance to the North Star from the Big Dipper is 5.5 times the distance between the two pointer stars forming the non-handle side of the cup. The Big Dipper rotates around Polaris. The North Star can be used to measure declination. At night, place two sticks in the ground lined up with the North Star, with the taller one to the north of the shorter. Set your compass dial at 360, and point the direction of travel arrow north at the longer stick. Look at the compass needle, and note the difference between its bearing and true north, the difference is declination. In the Northern Hemisphere, latitude is obtained by measuring the altitude of Polaris. At the Equator (0° of latitude) the North Star is on the horizon, making an angle or "altitude" of 0 degrees. Whereas at the North Pole (90° of latitude), Polaris is directly overhead making an angle or "altitude" of 90 degrees. Likewise, at 30°N the star is 30 degrees above the horizon, and so on. In other words, in the Northern Hemisphere, if you know your latitude, you can use that as an angle from the horizon to locate the North Star. To measure your latitude, point a stick at the North Star, then measure the angle the stick makes from a level horizon. Note, some compasses, include an inclination gauge (not covered in this article) by which you can easily measure the angle.
Determine East and West Via a Shadow : To determine east and west, place a stick in the ground so you can see its shadow (alternatively, you can use the shadow of any fixed object). Ensure the shadow is cast on a level, brush-free spot. Mark the tip of the shadow with a pebble or scratch in the dirt; try to make the mark as small as possible so as to pinpoint the shadow's tip. Wait 10-15 minutes, as the shadow moves from west to east (the opposite side the sun moves on, ie the sun moves from the east to the west -- but both the shadow and the sun move in a clockwise direction). Mark the new position of the shadow's tip with another small object or scratch. Connect the two shadow tip markings with a straight line and you have an east-to-west line approximation. Midday readings give more accurate approximations. To get an exact east-to-west line join the marks from two shadows of equal length. In either the approximate or the exact case stand with the first mark on your left, and the second on your right, and you will be facing toward true north. Pay attention to your own shadow during the course of the day while on a long walk - if you are moving north your shadow will be over your left shoulder at sunrise and over your right shoulder at sunset. You might be the only object to throw a shadow when walking in barren terrain like a desert.
Global Positioning System : The U.S. Department of Defense has 24 satellites orbiting the earth, which give off signals that handheld GPS devices can pick up and translate into a user’s position and altitude to within roughly 50 feet. These devices are useful, but are not a replacement for knowledge of the basics of orientation and navigation with a compass and map. Also always remember that a GPS unit is a delicate, battery powered device that can fail or be easily damaged. Never rely solely on, nor allow yourself to become dependent on such a piece of equipment. The tops of pine trees tend to dip to the north.
If you do lose your way , keep a cool head - a cool head can accomplish much, a rattle one nothing. Note that lost people tend to wander in circles; as such above all don’t run around aimlessly. First stop, relax, and think, then look around for a familiar landmark, or climb a tree or a hill to try to find one. Estimate the time you have been traveling, and the remaining about of daylight - this will help you figure out how far you have traveled. If possible consult your compass, if not possible pay attention to sunset or sunrise which will indicate east and west, or use a wristwatch as a compass. Consider blazing your way by leaving small marks indicating the direction you have taken such as arrows in the dirt or snow, peeled bark on a tree, toilet paper on a tree branch, and/or rock cairns. If it gets dark it may be best to stay put, as such build a rousing fire, making it easier for others to find you and allowing you to stay warm. At night find the North Star and mark that direction on the ground to guide you come daylight.
- Other Outdoor Tips and Tricks

Estimating Remaining Daylight : If you can see the sun and the horizon you can estimate the remaining daylight time. To do so, hold your hand up so it appears that your pointer finger is just touch the bottom of the sun. Then count the number of finger widths to the horizon. Each finger is worth about 15 minutes of time. For example, if you can fit eight fingers (two hands without thumbs) between the bottom of the sun and the top of the horizon there is about two hours of daylight remaining. Note that this trick doesn't really work when one is near either of the poles, as the sun hovers over the horizon longer at those locations. If thirsty and can’t find water, suck on a pebble or a button, it will relieve the dryness. Make a sundial from a piece of stick stuck in the ground where the sun’s rays can cast a shadow from the stick onto the ground. Refer to a watch to mark the hours, then when the watch goes missing or the owners leaves camp, or the batteries die, you can use the sundial to tell time. To prevent sickness, keep your feet and inner cloths dry, your bowels open, and your head cool. A warm head makes you sweat causing you to remove your hat, and then leaving you open to a cold.
The surest way to stay both fit and healthy is to simple make a point of walking each and every day. Consider this statement by Soren Kierkegaard a 19th-century Danish philosopher, "Above all, do not lose your desire to walk. Every day I walk myself into a state of well-being and walk away from every illness." To dry the inside of wet boots, heat peddles in a frying pan or kettle, or in the fire and place them in the boots, shaking the boots now and then. Reliable Weather Indicators "Red at night, campers delight; red in morning campers warning." A red sunset indicates clear weather, whereas a red sunrise indicates rain and wind. Pale Yellow sky at sunset indicates wet weather. "Rain before seven quits before eleven." In other words morning rain often makes clear afternoons. Slow rain tends to last, but sudden rain is typically short in duration. Heavy dew indicates dry weather to follow. Daytime temperatures drop about five degrees Fahrenheit per 1,000 feet of elevation gain.
Seasons

In the Northern Sky the Big Dipper is one of the most familiar asterisms of the constellation Ursa Major (the Great Bear). As the Earth moves around the sun the angle of our view of the Big Dipper changes and thus is different for each season.
In summary, a compass is an invaluable tool that every outdoors enthusiast should understand how to use. Two of its main uses are to measure bearings, and to pinpoint locations. When working with bearings one needs to be aware of declination and how that causes map bearings and magnetic (field) bearings to differ. Remember it’s simply a matter of subtracting an east declination from a map bearing to convert it to a magnetic (field) bearing, and a matter of adding a west declination. Of course, when converting a magnetic bearing to a map bearing apply the opposite of the rule. Remember, the magnetic needle of a compass is for use in the field, and is never used on a map. Also recall that the top of a map is always north, so when taking map bearings always turn the compass housing to point the orienting arrow at the top of the map. Of course a compass isn’t the only thing that will help you stay oriented in the back country. Always study a map before entering unfamiliar territory. In the field always carry a map and pay attention to the surroundings, as well as make use of natural direction indicators, like shadows, stars, wind, and landmarks.
- About the Author

I considered myself to be an outdoors enthusiast. Very few activities provide me with as much joy as hiking, camping, skiing, mountain biking, rock climbing, ice climbing and exploring.
This passion began in my childhood. At the young age of 10 years, I climbed Chief Mountain in Glacier Park, MT, and not long after I back-packed the 26 mile from the USA/Canada border over Stoney Indian Pass to Goat Haunt.
Over the years, I have crossed paths with cougars, been charged by moose, and spooked by grizzly bears. I have stood on the Great Wall of China, strolled beaches in Australia, enjoyed winters in Canada, and lived in Asia. I have cycled the Golden Triangle from Banff, Alberta and the full C&O Canal Trail from Washington, DC. I have rock climbed at Stone Hill Montana, ice climbed in Ouray Colorado, scaled Denali in Alaska, explored the Copper Canyons of Mexico, skied the Trinity Chutes of Mt. Shasta California, and white-water rafted on the Gauley River of West Virginia. I have climbed to the highest point of all 50 states.
I don't like GPS and never use any type of electronic navigator.
- Also By This Author
• All Fifty: My Journey to the Highest Point of Every U.S. State • Fifty Pinnacles • The Effort Scale of Highpointing the Fifty U.S. States • Seven Peaks (aka Wasatch Seven)
View Compass Basics: An Introduction to Orientation and Navigation Image Gallery - 15 Images


Alpinist - Nov 19, 2007 3:56 pm - Voted 10/10
Nice addition to SP. Thanks for posting it.

vanman798 - Nov 19, 2007 4:14 pm - Hasn't voted
Your welcome! I enjoyed brushing up on my compass skills in order to write it.

Dmitry Pruss - Nov 19, 2007 4:22 pm - Voted 10/10
Nowadays most watches are dial-less, and therefore the rule should be made from analog into digital. The Sun is at 15 degrees true * military time (or one hour less if daylight savings time is in effect). A bit more complex formulas apply to sun shadow (add 180 deg), and to the Moon (subtact 13 degrees times number of days since New Mooon). Yeah, and as to retracing your steps ... most of the time I can 100% trust my dog. It is a fun and useful means of navigation :)
vanman798 - Nov 19, 2007 4:39 pm - Hasn't voted
Thanks for the digital rule. If you flesh it out a bit more I will gladly use it in the article. The Wristwatch compass rule is useful to know whether one uses an analog or a digital watch. From this rule one understands how to approximate directions based on the time of the day. If I know the time of day, but I don't have a watch, I can always scratch a drawing of one into the dirt and approximate directions based on the rule.

Mark Doiron - Nov 21, 2007 3:04 pm - Voted 10/10
Great article--thanks for this! FYI, you can use a compass with an inclination gauge to determine your latitude. Point a stick at the North Star, then measure the angle of that stick with a level horizon (a compass with an inclination gauge makes this easy). One may not think this is especially useful, but the inverse can be: The North Star is always located at an angle from your horizon approximately equal (within one degree) to your latitude. Don't bother looking anywhere else for it, and if you think you've found it, but it isn't at that angle, you haven't found it! --mark d.
vanman798 - Nov 22, 2007 12:08 pm - Hasn't voted
Great tip! I have included it in the article. Thanks a lot.

Corax - Nov 21, 2007 4:41 pm - Voted 10/10
Great addition.

tommi - Nov 22, 2007 6:19 am - Voted 10/10
A very good idea to post that article about something important like this, you did a good job.

zenalpinist - Nov 22, 2007 10:26 am - Hasn't voted
Great article! We need more people to work on their compass skills rather than their GPS skills. One way I help people remember to deal with declination in areas to the west of the line (or with East Declination) is the following: Field to Map: add the declination (and the way to remember is you are going forwards in the alphabet from F to M) Map to Field: subtract (and the way to remember is you are going backwards in the alphabet from M to F) Of course it would have to be reversed for those on the east half of the line. Good tips for aiming off too, blindly following the compass or GPS is not always the best way to go.

donhaller3 - Nov 22, 2007 12:18 pm - Voted 10/10
1) Two other tricks for remembering how declination works help in most of North America. "East is least and West is best." Visualizing the general shape of North America and remembering where the big hole at the top is(Hudson's Bay)--Shezam! roughly where mag North is-- helps this idiot. 2)If the map legend lists a "third north", grid north, the degree or so correction can be added or subtracted from from your declination correction. Not to worry if it's not there, but eliminating cumulative systemic error if it's there. It would be seen as a little set of arrows showing true, magnetic and grid north. Makes setting off the compass very easy by the way. 3)Finally, one may run across a bearing listed like "N67W." This is an alternate convention that is useful where you're doing engineering, surveying or air and sea navigation because it makes trig easier. Unless your curious, ignore it. http://en.wikipedia.org/wiki/Bearing_%28navigation%29 4)Anything somebody else says is an azimuth is a bearing in our author's sense.

singularity - Nov 26, 2007 3:32 pm - Voted 10/10
thx for adding it!

MakeItHappen - Nov 26, 2007 7:47 pm - Hasn't voted
Yet another reason why SP is such a useful and helpful website.

Moni - Nov 28, 2007 1:28 pm - Voted 10/10
Nicely done. I take issue with two terms, however. A bearing is a direction gotten from a compass with the quadrant scale (like N37W) while a direction from a compass with 0 - 360 is an azimuth. The term triangulation is incorrect: this technique is called resectioning and involves the intersection of any two linear features, which can be 2 compass directions but also a road and an elevation, etc. See here
vanman798 - Nov 28, 2007 3:03 pm - Hasn't voted
Synonyms. :) It seems there was a time when "bearing" was restricted to referring to the direction of a terrestrial object or point. And back then an "azimuth" referred to the direction of a celestial body. That distinction seems to no longer apply. I'm not sure, but prehaps the military uses the word azimuth instead of bearing.
Moni - Nov 28, 2007 8:10 pm - Voted 10/10
It is not an opinion. Look here - one of many sites which use the terms correctly. In fact, when you use 2 compass directions, it is called determining position by intersection, but it comes under resection Resection Azimuth

dpk - Nov 30, 2007 11:01 pm - Voted 10/10
great detail and links - an excellent reference tool thank you

idahomtnhigh - Nov 30, 2007 11:38 pm - Voted 10/10
I teach a land navigation class and I think or article was well done, Thanks for the post.
vanman798 - Dec 13, 2007 12:16 pm - Hasn't voted
That is a great compliment coming from a land navigation teacher. Thank you very much.

cp0915 - Dec 7, 2007 1:18 pm - Voted 10/10
You did a terrific job on this page! Excellent, truly.

chel3178 - May 31, 2008 10:39 pm - Voted 10/10
This looks really great. I bought a compass but haven't really used it yet, though I haven't needed it yet either. But, at some point I will and I'd like to practice where I can't get lost. I'm wondering how I can save articles also without commenting for future reference...
You need to login in order to vote!
Don't have an account.
- Rating available
- Suggested routes for you
- People who climb the same things as you
- Comments Available
- Create Albums
How To Use A Compass | The Complete Beginners Guide
It’s hard to imagine life without the handiest orientation tool of them all, the humble compass. If you are a true hiker, camper, hunter or even just general outdoors enthusiast then you would definitely have a basic understanding of how to use a compass. You would swear by one of these bad boys as you would never know when you could become lost or stranded for whatever reason.
The humble compass has been used and improved over the years and has surprisingly been around for centuries! In fact, it is well documented that the first compass can be dated back to the ancient Han dynasty of China between 202 BC – 220 AD. They were created from a naturally magnetised ore of iron called ‘Iodstone’. As time progressed and improvements were made, they were then conveniently upgraded using iron needles. These iron needles were magnetised by striking them with a lodestone. That is where they get their form that we know of today. They were more than likely created as navigational backups for when the sun, stars, or other landmarks could not be seen. But enough of the history lesson as this article is designed for you who want to learn how to use a compass. Not only that, we’ll try to make it as simple as possible for you to do so!
Why would you need to learn how to use a compass?
Learning to use a compass is a basic outdoor skill that you should learn and master if you are serious about making sure that you never get yourself lost for whatever reason. The skill itself is pretty much like learning to ride a bike, once you do it a few times and succeed and you gain confidence within it, you’ll find that it’s very hard to forget. Sure, there’s a ton of gizmos and gadgets out there today that can do it all for you but in a way, they kind of dumb you down a bit. Not only that, what happens if you run out of battery or the power grid goes down? If it ain’t broke, don’t fix it. This rings true with the ancient skill of compass reading. So when all else fails, it’s just a heck of a lot more reassuring to be able to get out the old map and compass and just put your sure fire skills to the test!
Things you should understand before you begin
There are a few things to think about before even attempting to take your chances in the lost art of orienteering. Any expert would tell you that it’s super important to make sure that you get your head round these small issues before you begin. So let’s go through some of the basics first and then with extra confidence, take those skills out onto the field.
Getting to know your compass
If you have never even laid your eyes upon a compass before then you’ve come to the right place. Here we have some of the most common components of a compass, what they look like and their function.
Take note that a lot of compass designs may vary but they all share one common factor. That is that they include some sort of magnetized needle which orients itself to the magnetic fields of the earth. The most simple and common design is the baseplate compass, A.K.A. ‘The field compass’. We have chosen to base our learnings on this design due to it’s common nature. It features the following simple components which you should familiarize yourself with to enable you to continue forward.
Baseplate: The clear plastic, rectangular shaped plate which the compass housing is mounted on. It’s transparent to enable the user to hover it over a map and see the map underneath without any restrictions. It has a ruled edge to help with triangulation and contains directional lines/rulers and scaled numbers to help the user to navigate.
Scales & Rulers: The lines and numbers marked out along the edges of the baseplate. These numbers help the user to convert distances on a map to real life distances on a scaled level (Ratios). Eg: 1cm on the map equals 1km on the ground. Scales will vary from map to map. Depending on the maps scale, you may need to convert your compass scale to match that of your map before you begin. Meaning, if your compass is in inches and your map is in cms, you will have to convert your map to inches to suit your compass. The good thing is that when you do it once, you don’t have to keep doing it for the duration of the map usage.
Compass housing: The clear plastic, liquid filled, raised circular container part which houses the magnetic needle. It’s the main part of the compass in terms of function. The needle spins inside of the container as the user either rotates its body or the dial itself.
Direction of travel arrow: Marked on the baseplate, the arrow that begins at the compass housing and points away from it towards the top/front side of the compass. Shows the user which direction to point the compass to obtain a bearing in the direction that they wish to travel in. The user would hold the compass flat and the direction of travel arrow would face outwards, away from the user.
Magnifier: Small, circular magnifying glass used to help the user see smaller details on the map.
Index Pointer/Index Line: The base end of the direction of travel arrow. Begins at the edge of the dial and is where the user takes degree readings to navigate their path.
Degree dial: Rotating circular dial which surrounds the compass housing and displays all 360 degrees of the circle.
Declination Scale/Marks: This part is used to orient the compass in an area with known declination (When magnetic north and true north don’t align) Declination is a term used to show the difference between the 2 ‘norths’ There are many variables that can occur to change the state of declination. Knowing how to adjust your compass for it is vital.
Orienting Arrow: The non-magnetic arrow marked on the base/floor of the housing. Commonly marked in a colour such as red. It rotates with the housing when the dial is turned. When lined up with the magnetic needle, it ensures its user is properly following its bearing.
Orienting Lines: The lines inside the compass housing that run parallel to the orienting arrow. They rotate with the orienting arrow.
Needle: The needle is a magnetised piece of metal that spins within the compass housing. It’s the key component of a compass. One of the ends of the needle is commonly coloured red and and will always point to magnetic north (Not true north as they can be up to hundreds of miles apart depending on your location).
Understanding the difference between True North/Flat North or Magnetic North
Just because there are 2 Norths to think about, it doesn’t mean that it has to be confusing so let’s look at how to easily distinguish between the 2 to save you from any further headaches!
True North or Flat North: This is a fixed point on our earth realm. The two ends of the earth realms axis are documented as the geographic poles, North and South – known as True North and True South.
Magnetic North: On the other hand, magnetic north isn’t fixed and can vary depending on where you are located at the time. The term Magnetic North refers to the tilt of the magnetic field. Magnetic north is estimated to be about 11 degrees from the tilt of the earth’s axis. Meaning that the difference between true north and magnetic north can differentiate up to 20 degrees in some places. If you want the most accurate reading possible then it is important to account for the magnetic shift. Even the tiniest of miscalculations could throw you off kms from where you want to be.
Adjusting your compass for declination
First of all, what even is declination? Declination is the angle between true north and magnetic north. This angle can vary depending on the user’s location and it will gradually change over time due to the shifting of the earth’s tectonic plates.
Most maps will have declination diagrams as well as that date that it was last revised so you can use those figures to more accurately locate your starting position. Of course, the newer the map, the more accurate the figures will be as the declination will change over time. You would usually find an angle and a direction. For example, your map may show something like ‘11 degrees West’
Any time you venture out, it is advised that you check your maps to see what state they are in and how old they are. Some of the older maps may be a little tricky so you might want to check online for any updated maps of the area. You may even be able to find the declination somewhere on the internet which you can write down and use as a reference for your expedition.
Once you have obtained your declination figure, you should either add the figure from your compass bearing for west or subtract the figure to your compass bearing for east. An easy way to remember whether to add or subtract is “ West is best and East is least .” So for West declination, add to the true reading (West is best, and therefore a larger number) and for East declination subtract from the true reading (East is least, and therefore a smaller number).
How to hold your compass
One thing that you should always remember is to hold the compass flat. Whether that be on the palm of your hand or resting on a map. Keep the compass flat at all times.
You should also establish the direction that you are actually facing to get a feel of how the compass functions. You can do this by orienting yourself. Have a look at the magnetic needle, as you hold the compass flat in the palm of your hand and rotate your body. The needle should swing from side to side depending on which way you rotate.
Now turn the degree dial so that the orienting arrow lines up with the magnetic arrow. You should make sure that both of them are pointing North. To find the general direction you’re facing, have a look at the direction of travel arrow. If the direction of travel arrow sits between the S and the W, you can safely assume that you are facing Southwest.
To get an even more accurate reading, check out the number of degrees on the compass. If the direction of travel arrow intersects with the degree dial and shows a degree reading of 52 then you’re facing 52 degrees Southwest.
Using your compass
When it comes to actually using your compass, unless you know exactly where you are in relation to your map then you will need to first locate yourself and mark that point out on your map. This is so you have a reference point to begin. This is a crucial step because if you get this wrong, you could easily become lost.
Locating Yourself – Even If You’re Lost
The best way to begin with compass usage is to understand where exactly you are in relation to your map. You may already know and that’s fine, you can skip this step but if you’re unsure of your location due to being lost or disorientated then this method will help give your approximate location. It’s a triangulation method that has been used with minimal failure for as long as has been documented.
The easiest way to locate yourself is to try to find 2-3 landmarks. Both on your map and by physically locating them in your line of sight. Things such as mountains or lakes are great landmarks to use as they are usually quite easy to spot from a distance. Use these simple steps to give you your approximate location.
1. Using your compass, aim the direction of travel arrow at the first landmark. Orient your map so that north is pointing to true north. You can do this by twisting the degree dial so that the orienting arrow lines up with the northern tip of the magnetic needle. Once they are both lined up, this will enable you to see where your direction of travel arrow is pointing. Don’t forget to correct any declination depending on where you are located.
2. The next step is to get a bearing on the first landmark that you are using. So, line the direction of travel arrow up with your chosen landmark, then slowly rotate the dial until the needle is aligned with the markings for north. The bearing to note down is the degree number that is shown next to the index line.
3. Now, by placing one corner of your compass’ straightedge on your chosen landmark, slowly rotate the entire compass until the needle lines up with north on the dial. Use a pencil to draw a line across the straight edge.
4. Go through this same process for each of your landmarks. Once complete, you will have 3 lines that form a triangle on your map. Your position is inside that triangle. The size of this triangle will all depend on how accurate you were with working out the bearings. With a bit of practice, you will become more accurate and the triangle will become smaller which of course will give you a more accurate position.
Finding your bearings to enable you to move to your desired destination
After working out your location in relation to your map, you can then focus on moving towards your destination. It’s a good idea to break your journey down into manageable steps as it may not be possible to map it out just by standing in one position. You may need to head toward landmarks to use them as a guide and as you reach them, you can relocate yourself and start the process again.
To begin mapping out a route, you will want to:
- Adjust your compass for declination as we went over just before.
- Then orient your map to true north. (Put your compass on your map. Look at which way the red needle is pointing. Turn your map so that north on the map, points in the same direction as the needle).
Once you have completed these 2 foundational steps you are ready to begin with the fun stuff.
- Start by carefully placing the corner of your compass’ baseplate on your location. Next, rotate the compass itself so that the straight edge of the compass forms a straight line between your location and your desired destination.
- Then rotate the dial of the compass until the grid lines on the compass’ baseplate match the grid lines of your map. This can be a little tricky so try to be as accurate as possible.
- You will then be able to discover your degree bearing. This can be found by reading the degree number next to the index line.
- Next, hold your compass flat in the palm of your hand and rotate your body until the north arrow on the degree dial matches up with the needle of the compass. With some practice and luck, your direction of travel arrow will now be pointing towards your desired destination.
As mentioned before, once you have the direction of travel arrow pointing to your destination and you head there. To accurately follow the direction of travel arrow, try to focus on a distant object like a tree, telephone pole, or other smaller landmark, and use this as a guideline. It’s advised that you don’t focus on anything too distant or broad, such as a mountain. Bigger landmarks aren’t precise enough to navigate by accurately and throw you off by a fair bit. Stop, regroup and focus on your next line. It gets a lot easier with patience and practice.
These are some great basic tips to begin with. There are more advanced ways to use a compass which we will save for another post. There are also a range of different compass types that you can use these days. Some are easier to use than others. There are bare bones compasses like the baseplate and you can also use smartphones. Smartphones are a little unreliable in the way that they need to be updated and require power for batteries. Not only that, they just don’t allow the user to think for themselves.
We hope that we have been able to help you find your way around a compass and its usage. Any feedback or questions will be welcomed with open arms so we can further educate all of outdoor enthusiasts who enjoy our content! Happy trekking!
Related posts:
- Interceptor body armor vs dragon skin body armor – Who reigns supreme?
- Top 10 Best Camping Fans
- Best Hiking Backpack Under $100 2023: Reviews and Buying Guide
- How To Wash A Sleeping Bag (Step by Step Guide)
About The Author

Glenn Gissing
Related posts, top 10 best dutch ovens for camping.

How Much Weight Can an Air Mattress Hold: Best Answer!

Leave a Comment Cancel Reply
Your email address will not be published. Required fields are marked *
Save my name, email, and website in this browser for the next time I comment.
- PRO Courses Guides New Tech Help Pro Expert Videos About wikiHow Pro Upgrade Sign In
- EDIT Edit this Article
- EXPLORE Tech Help Pro About Us Random Article Quizzes Request a New Article Community Dashboard This Or That Game Happiness Hub Popular Categories Arts and Entertainment Artwork Books Movies Computers and Electronics Computers Phone Skills Technology Hacks Health Men's Health Mental Health Women's Health Relationships Dating Love Relationship Issues Hobbies and Crafts Crafts Drawing Games Education & Communication Communication Skills Personal Development Studying Personal Care and Style Fashion Hair Care Personal Hygiene Youth Personal Care School Stuff Dating All Categories Arts and Entertainment Finance and Business Home and Garden Relationship Quizzes Cars & Other Vehicles Food and Entertaining Personal Care and Style Sports and Fitness Computers and Electronics Health Pets and Animals Travel Education & Communication Hobbies and Crafts Philosophy and Religion Work World Family Life Holidays and Traditions Relationships Youth
- Browse Articles
- Learn Something New
- Quizzes Hot
- Happiness Hub
- This Or That Game
- Train Your Brain
- Explore More
- Support wikiHow
- About wikiHow
- Log in / Sign up
- Navigation and Directions
How to Use a Compass
Last Updated: June 5, 2024 Approved
Learning the Basics
Using the compass, finding your bearings when lost.
This article was co-authored by Josh Goldbach . Josh Goldbach is an Outdoor Education Expert and the Executive Director of Bold Earth Adventures. Bold Earth leads adventure travel camps for teenagers all over the world. With almost 15 years of experience, Josh specializes in outdoor adventure trips for teens both in the United States and internationally. Josh earned his B.A. in Psychology from Eckerd College in St. Petersburg, Florida. He’s also trained as a wilderness first responder, a Leave No Trace master educator, and a Level 5 Swiftwater rescue technician. There are 8 references cited in this article, which can be found at the bottom of the page. wikiHow marks an article as reader-approved once it receives enough positive feedback. In this case, several readers have written to tell us that this article was helpful to them, earning it our reader-approved status. This article has been viewed 1,620,042 times.
A compass is an essential tool in wilderness survival. Along with a good quality topographical map of the area you're navigating, knowing how to use a compass will ensure that you're never lost. You can learn to identify the basic components of the compass, take an accurate reading of your bearings, and start developing the necessary skills of navigation with a few simple steps. See Step 1 to start learning to use your compass.
How do you use a compass?
Hold the compass so it's flat on your palm with your palm centered in front of your chest. Use the magnetic needle for guidance—it will spin unless you're headed north. Adjust the direction-of-travel arrow on your compass so it's pointing in the direction that you're traveling.

- The baseplate is the clear, plastic plate on which the compass is embedded.
- The direction of travel arrow is the arrow in the baseplate pointing away from the compass.
- The compass housing is the clear, plastic circle that houses the magnetized compass needle.
- The degree dial is the twistable dial surrounding the compass housing that displays all 360 degrees of the circle.
- The magnetic needle is the needle spinning within the compass housing.
- The orienting arrow is the non-magnetic arrow within the compass housing.
- The orienting lines are the lines within the compass housing that run parallel to the orienting arrow.

- Turn the degree dial until the orienting arrow lines up with the magnetic arrow, pointing them both North, and then find the general direction you're facing by looking at the direction of travel arrow. If the direction of travel arrow is now between the N and the E, say, you're facing Northeast.
- Find where the direction of travel arrow intersects with the degree dial . To take a more accurate reading, look closely at the degree markers on the compass. If it intersects at 23, you're facing 23 degrees Northeast.

- True North or Map North refers to the point at which all longitudinal lines meet on the map, at the North Pole. All maps are laid out the same, with True North at the top of the map. Unfortunately, because of slight variations in the magnetic field, your compass won't point to True North, it'll point to Magnetic North.
- Magnetic North refers to the tilt of the magnetic field, about eleven degrees from the tilt of the Earth's axis, making the difference between True North and Magnetic North different by as many as 20 degrees in some places. Depending where you are on the surface of the Earth, you'll have to account for the Magnetic shift to get an accurate reading.
- While the difference may seem incidental, traveling just one degree off for the distance of a mile will have you about 100 feet (30.5 m) off track. Think of how off you'll be after ten or twenty miles. It's important to compensate by taking the declination into account.
- In the US, the line of zero declination runs up through Alabama, Illinois, and Wisconsin, [5] X Research source at a slight diagonal. East of that line, declination orients toward the West, meaning that Magnetic North is several degrees West of True North. West of that line, the opposite is true. Find out the declination in the area in which you'll be traveling so you can compensate for it.
- Say you take a bearing on your compass in an area with West declination. You'll add the number of degrees necessary to get the correct corresponding bearing on your map. In an area with East declination, you'll subtract.
- Twist the degree dial until the orienting arrow lines up with the north end of the magnetic needle. Once they're aligned, this will tell you where your direction of travel arrow is pointing. [6] X Research source
- Take off local magnetic variation by twisting the degree dial the correct number of degrees to the left or right, depending on the declination. See where the direction of travel arrow lines up with the degree dial.

- If visibility is limited and you cannot see any distant objects, use another member of your walking party (if applicable). Stand still, then ask them to walk away from you in the direction indicated by the direction of travel arrow. Call out to them to correct their direction as they walk. When they approach the edge of visibility, ask them to wait until you catch up. Repeat as necessary.
- Draw a line along the compass edge and through your current position. If you maintain this bearing, your path from your current position will be along the line you just drew on your map.
- Rotate the degree dial until the orienting arrow points to true north on the map. This will also align the compass’s orienting lines with the map’s north-south lines. Once the degree dial is in place, put the map away.
- In this case, you'll correct for declination by adding the appropriate number of degrees in areas with West declination, and subtracting in areas with East declination. This is the opposite of what you'll do when first taking your bearing from the compass, making this an important distinction.
- Repeat this process for the other two landmarks. When you’re done, you will have three lines that form a triangle on your map. Your position is inside this triangle, the size of which depends on the accuracy of your bearings. More accurate bearings reduce the size of the triangle and, with lots of practice, you may get the lines to intersect at one point.
Community Q&A
- You can also hold the compass square to your body by holding the sides of the baseplate between both hands (making L shapes with your thumbs) and keeping your elbows against your sides. Stand facing your objective, look straight ahead, and square yourself with the object by which you are taking your bearing. The imaginary line extending out from your body will travel through your compass along the direction of travel arrow. You can even rest your thumbs (against which the end of the compass is resting) against your stomach to steady your hold. Just be sure you aren't wearing a big steel belt buckle or some other magnetic material close to the compass when doing this. [11] X Research source Thanks Helpful 0 Not Helpful 0
- Trust your compass: 99.9% of the time it is giving you the correct direction. Many landscapes look similar, so again, TRUST YOUR COMPASS. Thanks Helpful 7 Not Helpful 0
- For maximum accuracy, hold the compass up to your eye and look down the direction of travel arrow to find landmarks, guide points, etc. Thanks Helpful 7 Not Helpful 3

You Might Also Like

- ↑ https://americanhiking.org/resources/how-to-use-a-compass/
- ↑ https://www.seattleymca.org/blog/how-use-compass
- ↑ https://irp.fas.org/doddir/army/fm3-25-26.pdf
- ↑ https://www.sco.wisc.edu/learning-center/magnetic-declination/
- ↑ https://www.nationaltrust.org.uk/features/how-to-read-a-compass
- ↑ https://www.usgs.gov/educational-resources/method-1
- ↑ https://www.princeton.edu/~oa/manual/mapcompass3.shtml
- ↑ http://www.princeton.edu/~oa/manual/mapcompass3.shtml#Scenarios
About This Article

To use a compass, hold the compass flat on your outspread hand in front of your chest. Next, turn the degree dial so that the orienting arrow lines up with the magnetic arrow inside the compass. Then, look at the travel arrow on the baseplate of the compass to tell you which direction you’re facing. For example, if you want to find which direction is North, rotate slowly with the compass until the travel arrow is pointing to the N on the dial. If you want to learn how to use a compass to find your bearings on a map, keep reading the article! Did this summary help you? Yes No
- Send fan mail to authors
Reader Success Stories
Mario Manzur
Jun 23, 2020
Did this article help you?

Gabriel McLaughlin
Jun 8, 2021
John Connolly
Mar 30, 2018
Ed Sommerfeld
Jan 21, 2019
Keith Brooks
Aug 18, 2017

Featured Articles

Trending Articles

Watch Articles

- Terms of Use
- Privacy Policy
- Do Not Sell or Share My Info
- Not Selling Info
Don’t miss out! Sign up for
wikiHow’s newsletter
So how do we resolve the issue of these two different Norths? Declination! Declination is simply the difference in degrees between true north and magnetic north for any particular area. But be aware: the amount of difference between true and magnetic north varies by location. (Hang in there – this gets really cool!)
Now if you’re using a topographic map, it probably has a legend that displays the declination as two straight lines, where true north has a star at the top of the line and magnetic north is indicated as MN on the other line. If your map isn’t fairly new, please feel free to ignore this legend, because not only does declination vary by area – it varies over time. Just because the declination was 12 degrees west when the map was published, it doesn’t mean that it still is.
So what’s a person to do? Just type in the zip code or coordinates for the area you’ll be hiking at this NOAA website and you’ll have the exact current declination figured out for you!
Once you know the declination – it will be expressed in degrees west (a negative number) or degrees east (a positive number) – you should be able to adjust your compass appropriately. Sometimes there is a screw to adjust this, but it varies by model. If you no longer have the owner’s manual, you might be able to find directions at the compass manufacturer’s website.
For more information about magnetic declination and how to use your compass, we encourage you to view this page on the National Wildfire Coordinating Group website .
Traveling by Compass
There are two ways you can take a bearing out on the trail – by map or by sight in the field. Here is a very brief explanation of each method.
By map: place your map and compass on the ground. Then mark your current position as well as your intended destination and draw a straight line between them. Line up the edge of your compass on this line so that the travel arrow is in the direction you wish to travel, then twist the azimuth ring (which is simply the ring with the measured units of degrees on a compass) until north on the map and the orienting arrow are aligned. When you remove your compass from the map and turn until the orienting arrow and red magnetic needle are lined up, you will be in the right direction.
By sight, it’s much simpler. If you are heading to a mountain for example, point at it from your current position with the travel arrow on the compass. Then rotate your azimuth ring until the orienting arrow is lined up with the red end of the magnetic needle pointing towards north. Continue on your path so that the needle and its housing remain intact and you should have no problem reaching your destination.
- Odnoklassniki icon Odnoklassniki
- Facebook Messenger
- LiveJournal
How To Use A Compass (& Why You Need To Bring One On Your Next Hike)

A compass is an age-old tool for navigation. It is simplistic in design and function. In today's high-tech world, the humble compass seems to be somewhat forgotten, replaced by modern technology and navigating devices. However, it is still critically important for anyone spending time outdoors to know how to use a compass. In fact, despite all the modern innovations that are available, a compass should still be considered an essential piece of equipment whenever you are adventuring outdoors and most certainly when hiking. This is especially true for anyone embarking on a solo hike .
Like any tool or piece of equipment, in order to get the most out of a compass, it is important to know how it works and how to properly use it. It is also essential to know how to pick the proper compass for your intended activities, as well as being able to utilize it as a crucial piece of emergency equipment .
How a compass works

In reality, a compass is a relatively simple device that relies on magnetism to perform its function. Whether you realize it or not, the earth has a magnetic field that is essentially anchored by two poles — magnetic north and magnetic south. A compass uses a magnetized needle that is constantly drawn to magnetic north. No matter how elaborate the model of compass, it still relies on the same magnetic attraction of needle to pole to determine direction.
This reliance on the earth's magnetic field does raise a couple of issues: deviation and variation. Each of these is a disruption in the magnetic field that can affect a compass' ability to accurately point to true north. Deviation is caused by metal objects or electrical fields that can disrupt the magnetic field in a particular area. This most often happens when aboard a boat, vehicle, or airplane. However, it can be an issue for hikers in some areas. The best way to account for compass deviation is to utilize a deviation chart or card to correct for the error.
Variation, also known as declination, is a bit different. This is something that affects all compasses to varying degrees depending on physical location. However, it is a factor that must be addressed in order to ensure the accuracy of a compass.
Dealing with declination

A compass always points north. Right? Well, not exactly. A compass is designed to point in the general direction of magnetic north, which isn't actually true north. The difference between magnetic north and true north is measured as the variation or declination. If hikers are using a compass to get a general sense of direction, this isn't much of an issue. However, if they are attempting to navigate based on map directions, they must adjust for declination in order to get an accurate heading.
While this may sound like a daunting task, it is simply a matter of addition and subtraction. In North America, you should subtract for an easterly declination and add for a westerly declination. So, what exactly do you add? The amount of declination will vary depending on how far east or west of true north you are located. These numbers will appear on most good charts and maps. However, you can also utilize a declination chart to determine the amount of correction that is necessary.
How to use a compass

All compasses have some basic components that are used to take a bearing to help navigate. These include the direction of the travel arrow, dial or bezel, orienting arrow, bearing line, and magnetic needle. Using these components in conjunction with one another, it is possible to take a bearing either on a map or by sight in the field.
To take a bearing by map:
- Place both the map and compass on a flat surface.
- Mark where you are and where you want to go.
- Draw a line between those two points.
- Place the compass base along the line, making sure the direction of the travel arrow is pointing at the destination.
- Twist the compass dial (bezel) until the orientating arrow is facing north on the map.
- Then, while holding the compass flat, turn your body to where the red magnetic needle is facing the orientating arrow and the direction of the travel arrow will be pointing toward your desired destination.
To take a bearing by sight:
- Holding the compass flat, point the direction of the travel arrow toward the landmark you have chosen.
- Rotate the compass dial until the orientating arrow is lined up with the red magnetic needle.
- As long as the orientating arrow and red magnetic needle remain aligned, the direction of the travel arrow will point toward your destination as you move.
Why you need to bring a compass on your next hike

The most obvious use for a compass is to tell direction. That is, in simplest terms, what a compass does. However, as mentioned above, these directions can be applied in a variety of ways. For example, they can help you orientate a map, locate your position, and find your way to a destination. They can also help you find your way back to your vehicle or base camp if you should become lost while hiking .
Of course, one could argue that electronic navigation devices can do the same thing. However, electronic devices are not invisible nor infallible. A myriad of maladies can cause electronics to become unreliable, such as dead or weak batteries, distorted signals, weak or no signal, broken screens, and various malfunctions.
With that in mind, it is always a good idea to carry a compass — even if it is simply as a backup to check the accuracy of digital devices or in the case of an electronic malfunction.
Choosing the right compass

When it comes to choosing the right compass, there are several questions that need to be considered as to when, how, and how often it will be used. Is it for emergency use only, as backup to digital devices or primary navigation tool? How often will you use it? Will it be used at night? Will it be exposed to water or used in rugged terrain? Will it be worn on a lanyard or stowed in a backpack?
As is the case with all equipment and gear, the size and weight are always factors. A luminescent needle and numbers are handy if navigating at night, while a magnifying lens built into the baseplate is helpful when using a compass in conjunction with a map. According to REI , the primary features serious adventures should look for when choosing a compass (beyond the essential components) include a declination adjustment, sighting mirror, clinometer, and global needle.
Recommended
How to use a compass: improve your navigation and get your bearings
Learning or enhancing your knowledge of how to use a compass is a great idea ahead of the summer hiking season

Like anything worth knowing, learning how to use a compass correctly takes a little practice. However, once you've mastered the skills, it's immensely rewarding. There's something undoubtedly satisfying about navigating successfully through the backcountry in tough conditions or at night using only a topographical map and a baseplate compass.
Knowing how to use a compass also enhances your survival skills, giving you the toolkit to find your way out of potentially dangerous situations. In this digital age of navigation apps and GPS devices, it's hugely useful to be able to revert to traditional methods when you're in a bind. This is particularly so as technology is fallible, especially when exposed to extreme temperatures.

That's not to say that compasses aren't fallible, which is why we always carry two in our hiking backpack . For a start, the needle can become temporarily or permanently reversed due to interference from other magnetic materials and equipment. To counter this, keep it away from electronic devices and always check your compass before setting out.
Another reason for taking along a spare is that compasses are just as easy to misplace as any other piece of kit. It's why we carry spare gloves, spare hats and spare headlamps. The best compass options can be worn around the neck, so get into the habit of securing them in this way when using them.
Right, we've established you need a couple of compasses in your pack, let's get into how to use them.
How to use a compass: what makes up a compass?
A traditional, base plate compass has one key component: a magnetised needle, which spins freely within a housing, with one end constantly drawn towards Earth’s magnetic north pole. The north-facing half of the needle is typically red, identified with an ‘N’, and features a luminous strip for navigating in low light.
A classic protractor-style Silva compass is comprised of two elements: the baseplate , which often features various elements useful for map reading and wayfinding (including arrows, measurements and a magnifying lens), and the housing , containing the aforementioned arrow.
Advnture Newsletter
All the latest inspiration, tips and guides to help you plan your next Advnture!
The baseplate is usually made from clear plastic, so you can see the map and gridlines through it, and will have a ‘Direction of Travel Arrow’ at the top, typically featuring a luminous strip on the forward-facing line.

Good baseplates have scale converters on the long sides (showing, for example, that on a 1:50,000 map, 1cm represents 500 metres on the ground) and are inscribed with standard ruler measurements (mm) on the small straight edge. In addition, there’s often a small magnified window for looking at fine detail on maps, and ‘aid lines’ that make it easier to set your map and take a bearing.
Mounted on the base plate, typically close to the rounded end, is the circular housing unit, containing the all-important magnitised needle. On a good quality magnetic compass, the housing will contain a clear fluid, which dampens (slightly slows and steadies) the needle as it spins, allowing it to settle in place once it has a fix.

The housing is topped with a rotating circular bezel, inscribed with the cardinal points of the compass – N (north) S (south) E (east) and W (west) – along with graduation markers indicating degrees (0-360).
On the bottom of the housing is an ‘Orienting Arrow’, which moves when the bezel is rotated but permanently points towards the ‘N’ (north) on the housing. Running parallel to this you’ll see ‘Orienting Lines’, which also rotate with the bezel and are made to align with the vertical North–South grid lines on maps. As with the needle, the top half of both the Orienting Arrow and the Orienting Lines are coloured red, to indicate north.
Lastly, you will see an ‘Index Line’ (or ‘Dash’) marked on the top edge of the compass housing, beneath the degree markings on the housing, which aligns with the direction of travel arrow on the base plate. This doesn’t move, so it indicates the bearing set when the bezel is rotated.
As well as base plate compasses, there are various other types of compass , such as thumb compasses, solid state compasses and non-magnetic varieties, like GPS compasses.
How to use a compass: setting your map
At the outset of any walking adventure it is a good idea to establish which way is north and to ‘set’ your map, so it’s facing the same way as the physical terrain in front of you.
To do this, turn the bezel until the orienting arrow and the red N is directly above the index line (dash), pointing up towards the direction of travel arrow. Hold the compass flat in the palm of your hand and slowly turn on the spot until the needle also aligns with the orienting arrow, N and the direction of travel arrow. You are now facing due north.
If you repeat this process while holding the compass on the map with orienting lines aligning on the compass housing aligned with the map’s North–South grid lines, your map will be correctly ‘set’. If you can see a peak or some other notable feature directly in front of you, you should also be able to identify it on the map. Ideally you should do this at regular intervals during your trek, to make sure you know where you are and which direction you’re travelling in.
How to use a compass: finding your bearings
One of the most common compass-reading techniques used by hikers traversing wild terrain is to take a map-to-land bearing, then following it to reach a desired destination. If you know how to triangulate your exact location, this is an important first step. Once you've pinpointed where you are on the map you can start to take a bearing.

1. Find your current location on the map (call it point A) and identify a feature (for example a peak or campsite) you want to reach (call it point B). Place the long edge of your compass so it points in a straight line from point A towards point B, ensuring the direction of travel arrow is pointing at your intended destination.
2. While keeping the baseplate still, rotate the bezel so the orienting lines on the compass align with the north–south gridlines on your map, and the Orienting Arrow is pointing towards grid north (the top of the map). The number indicated by the index line (dash) is your bearing.
3. Take the compass off the map, hold it longways, flat in the palm of your hand, with the direction of travel arrow pointing away from you. Rotate your body until the red end of the floating needle settles exactly in the red orienting arrow on the base of the housing. You’re now facing in the direction you want to walk in. If you can’t see the feature you’re trying to reach, pick out something distinguishable that lies in same direction and walk towards it – repeat until you get to where you want to go.
Knowing how to take a bearing will help you navigate in the dark or when visibility is compromised.

How to use a compass: magnetic variation/declination
If you’re following a bearing over a short distance, it’s fine to keep it simple. If you want to plot a really accurate course of travel over a lengthy distance, however, you need to take something called ‘Magnetic Variation’ (called ‘Declination’ in the U.S.) into account.
The reason for this is that Earth's Magnetic North Pole (which your compass needle points to) is not quite the same as ‘true north’ (the direction of a meridian of longitude, which all converge at the North Pole), or Grid North (the direction of a grid line which is parallel to the central meridian on the National Grid). Knowing how to adjust for magnetic declination can help you to solve this issue.
Unfortunately, the Magnetic North Pole doesn’t stay still – it fidgets about a lot as the Earth's magnetic field changes. Over the last century, it has shifted over 1,000 kilometers towards Siberia, so the newer your map is, the more accurate the stated Magnetic Variation information will be. Maps usually state the annual change in Magnetic Variation alongside the publication date, so you can figure it out even if the map is old.
How to use a compass: compass zones
Because the pull direction of the planet’s magnetic field changes according to where you are on Earth (it pulls vertically at the poles, but more horizontally towards the equator), most magnetic compasses are balanced according to the part of the world they’ve been designed for use. So, a magnetic compass intended for use in Britain will not work so well in Australia.
There are no industry standard zones, but Silva is the dominant player and many manufacturers use their zones. If you have a Silva magnetic compass – such as the stalwart of the compass world, the Silva Expedition Type 4 – have a look at the bottom of the baseplate, beneath the housing and in line with the Orienting Arrow, and you should see two letters. Compasses designed for use in the UK, North America, Europe and most of Asia will have the letters ‘MN’, meaning ‘Magnetic North’. Compasses for use in Australia and New Zealand will have MS (‘Magnetic South)’, but there is also an ME (‘Magnetic Equator’) zone that takes in much of Africa and most of South America.
Some brands, for example Suunto, produce a universal magnetic compass that should work well anywhere on the planet.
Author of Caving, Canyoning, Coasteering… , a recently released book about all kinds of outdoor adventures around Britain, Pat has spent 20 years pursuing stories involving boots, bikes, boats, beers and bruises. En route he’s canoed Canada’s Yukon River, climbed Mont Blanc and Kilimanjaro, skied and mountain biked through the Norwegian Alps, run an ultra across the roof of Mauritius, and set short-lived records for trail-running Australia’s highest peaks and New Zealand’s Great Walks. He’s authored walking guides to Devon and Dorset , and once wrote a whole book about Toilets for Lonely Planet. Follow Pat’s escapades on Strava here and Instagram here .
I've hiked all over the world – these are the 8 deals in REI's Labor Day hiking sale I'm most excited about
National Park fights back after being labeled ‘disappointing’ tourist attraction
A grandma who was lost in the Alps for five days survived by drinking puddles
Most Popular
- 2 I've hiked all over the world – these are the 8 deals in REI's Labor Day hiking sale I'm most excited about
- 3 National Park fights back after being labeled ‘disappointing’ tourist attraction
- 4 Snow sport specialists Rossignol launch new flagship trail running shoe after three years of research
- 5 New coffin-shaped Yeti cooler is a real chiller

How Does a Compass Work? Follow This Simple Guide
Know where you are, and where you want to go, even when the batteries die.

Using a compass is an essential skill. It’s like having a mental roll of duct tape: You don’t know when you’re going to use it, and it might kick around unused for a long time, but when you’re in a pinch, you’ll be glad you have it.
With a compass, you can navigate a map , shoot bearings to find your location, and even participate in fun activities like geocaching , an orienteering-based scavenger hunt.
Navigating with a compass starts with, well, a compass. While the old army style with a flip-up cover is cool, a rectangular plastic orienteering compass with a spinning dial is your best bet.
We love this affordable option:
Reliable Outdoor Gear Reliable Outdoor Gear Orienteering Compass

What makes up a compass?
Baseplate: The plastic rectangle that makes up the base of your compass. The straight edges on the sides help to shoot bearings.
Direction of travel arrow: The arrow fixed on the middle of the baseplate.
Magnetic needle: This arrow, often red, is what points you north.
Compass housing (Bezel): The spinning marked with N,E,S,W, the cardinal directions, and 360 degrees, all of which help you head in the right direction.
Orienting arrow: The arrow or box, usually about the width of the magnetic needle, drawn on the interior of the compass housing.
Index line: The line that comes down from the direction of travel arrow and points to the bezel.
How does a compass work?

The magnetic needle on a compass points to magnetic north , rather than to the true north pole . While the earth does act like a giant magnet with a north and south pole, the churning molten core makes magnetic north wander away from the pole.
In order to account for the difference between magnetic north and true north, every map will be marked with declination—this is the difference—in the specific area that that map covers, between true and magnetic north. This number varies depending on where you are in the world. If magnetic north lies directly between you and true north, then you’ll have a declination of zero. But in most areas, you’ll have to add or subtract to what your compass reads as north.
Because magnetic north is wandering, it's important to have a modern map. Because even if the declination only changed by one degree, that can make an enormous difference over the course of a few miles.
OK, so where do I find this declination figure?
Check the legend of your map, usually in one of the corners, which should also have the date the map was created so you can be sure you have an up to date map.
What if my map is pretty old?
Worry not, head to the National Oceanic and Atmospheric Administration (NOAA) website to calculate your most up to date declination . If you own the map, go ahead and write the new figure down next to the old one, just make sure you date it.
How do I find true north?
1. Hold your compass flat near your belly button, let the magnetic needle settle. The red end points to magnetic north.
2. Spin the bezel of your compass until N (north) is in the center of the baseplate, with the index line pointing directly at N.
3. Rotate in place until the red arrow of your compass lies within the orienting arrow and points at N. You are now facing magnetic north.
4. Read your declination. If it reads X Degrees WEST, twist your bezel clockwise to subtract that number. If it reads X Degrees EAST, spin your dial counterclockwise to add that number on your bezel. If you have trouble remembering which way it goes, consider learning one, or a few, of these rhymes .
5. Spin in place until the magnetic needle is once again inside of the orienting arrow. Now the direction of travel arrow, and you, are pointing true north.
How do I align my map with true north?

1. Lay your mat on a flat surface, beware of metal bolts on picnic tables which can affect the magnet.
2. With your compass pointing to true north, line the straight edge of the compass up with the north south lines of your map. Your map is now oriented toward true north.
3. Put rocks on the corners, or otherwise secure your map, so that it doesn't move while you navigate .
How do I use my map with my compass?

1. With your map aligned to true north, look around you for two known landmarks. Mountains work well, lakes work well, even water towers or road intersections can work great.
2. Find these landmarks on your map.
3. Take your first landmark. Pick up your compass, adjusted for true north, and point the direction of travel arrow at the landmark .
4. Spin the bezel of your compass until the needle is in the orienting arrow (put red Fred in the shed, as we used to say in Boy Scouts). The number at the index line is your bearing.
5. Put the compass on your map with one corner touching the landmark. With the compass corner touching the landmark, spin the compass until the needle is once again in the orienting arrow. Draw a line with a pencil on your map along the straightedge of your compass, intersecting your landmark.
6. Repeat steps 1-5, with your second landmark. Where the lines intersect, is your location.
7. If you’re on a trail, pay attention to how the land or trail around you corresponds to the map as you travel so you don’t have to continue shooting bearings. If you do get turned around, shoot bearings once again.
How do I pick the right direction?

1. Align your map to true north.
2. With a straight edge, draw a line between where you are and where you want to be.
3. Put your compass straight edge, adjusted for declination, on that line, turn the bezel until the needle is in the orienting arrow.
4. Pick up your compass, and holding it flat, put it against your bellybutton so the direction of travel arrow is pointing away from you. Turn yourself in place until the needle is in the orienting arrow. The direction of travel arrow now points where you want to go.
5. Pick a landmark in the distance that your direction of travel arrow points to, walk to it. This makes it easy to stay true to your course.
Happy adventuring.
James Lynch is Popular Mechanic’s Field Editor looking for stories across the U.S. about those building a better America. He’s passionate about the Erie Canal and the Apollo Space Program.

Essential How-To

8 Ways to Power Your Home With Renewable Energy

7 Ways to Silence Your Squeaky Floor

How to Fix an Ugly Lawn

How to Sharpen Your Chainsaw Like a Pro

Chopping Metal is Fun With a Cold Chisel

8 Super-Effective Ways to Soundproof a Room

How to Kill Those Pesky Mosquitoes in Your Yard

How to Make a Forge and Start Hammering Metal

Safe and Fun Rules for Using an Angle Grinder

15 Secrets to Cleaning Your Home in Half the Time

How to Clean a Cast-Iron Pan

The Amazing Math Inside the Rubik’s Cube
- Skip to primary navigation
- Skip to main content
- Skip to primary sidebar
- Skip to footer
The Modest Man
Complete this reader survey by Feb 29th for a chance to win a prize. 🎉 ×
A Beginner’s Guide to Compasses
Published on June 17, 2024 by Ryan Hallstrom · Everyday Carry (EDC)
A compass is one old-school item you may wish to add to your everyday carry. Here’s why!
Table of Contents

When getting from point A to point B, compasses seem to pale in comparison to modern navigation devices such as GPS. However, the usefulness of a compass will never diminish.
Unless you were a Boy Scout, you may be unfamiliar with how to read and utilize a compass. Heck, even today’s Scouts may look at a compass without the first clue on how to properly use it.
Starting with the history of the compass, I invite you to read and learn about how they work, how they have evolved, and the importance of the compass today and in the future.
The Compass: A History
Most likely, when you think about a compass, you imagine a circular, handheld device that points to true north. This design has been consistent since the magnetic compass’ assumed inception. The Chinese created the first compass for navigation between the 11 th and 12 th centuries.
Before manmade magnetism, had to use the natural environment to find their way.
For example, ants yearn for the sun and often tend to build their anthills on the south side of trees or other structures to increase their colony’s sun exposure. Thus, if you can find south, you can determine the general north direction.
In naval navigation, where moss or anthills are significantly more difficult to find, travelers relied on the stars to guide their way. Famously, the North Star , which you can easily find using the Big Dipper constellation, is always aligned with the Earth’s North Pole (hence the name).
Several other stars and constellations provide valuable information when it comes to navigation. Some organizations, like the U.S. Navy, utilize recognized star charts for a reference to star alignment and positioning.

Compasses provide more reliable navigational information on both land and sea. As I mentioned, historians attribute China to be the compass’ inventor, with artifacts dating back to 220 BC.
At this point, early navigators used naturally occurring magnetic metals in their compasses. It took explorers and scientists hundreds of years to discover how to magnetize metals, like smaller iron needles, to mass-produce and fine-tune compasses.
Skipping ahead over a millennium, Swedish inventor, Bjorn Kjellstrom fathered the modern compass. Until 1932, compass needles moved freely about the compass base, resulting in inconsistent results between compasses and real-time inaccuracies.
Kjellstrom, among others, devised a way to restrain the compass needle with a protractor built into the compass base.
Regarding their contribution to the improvement of the compass, the New York Times reported:
“Their invention made it faster and easier to use and read the compass. The protractor baseplate allowed users to take more accurate bearings from maps. The brittle magnetic needle stopped moving in the compass liquid within four seconds as opposed to up to 30 seconds in older compasses.”
The effect of stabilizing the compass’ base improved overall functionality, and, practicality. Kjellstrom’s enhancements are the foundation of the compasses commonly traded today.
Compasses in Religion and Folklore
For many individuals and groups, the compass represents more than just a navigational device. For example, the “Viking Compass”, Vegvísir (literally, “way shower”), depicts a runic stave, pointing in 8 directions.
First recorded in the Huld Manuscript, this symbol actually comes much after the Vikings, but due to its rune-like appearance, received the moniker of the “Viking Compass”.
Originally used on signposts and other stationary landmarks to indicate direction. Today, the Vegvísir appears in video games, movies, and TV shows. It’s also a symbol used frequently in tattoos, demonstrating a more spiritual connection to finding one’s way.
In Islamic history and culture, members refer to the qibla, or Qiblah , as the direction towards the Kaaba in Mecca.
These days, devout Muslims utilize qibla compasses or online qiblas, like Google’s Qibla Finder in order to identify the proper direction for praying rituals (salaat). This sort of compass is unique because it guides people to a different, fixed location other than north.

“Mihrab” refers to an architectural element of mosques — often a niche — that points towards the qibla (or in other words, the direction to Mecca).
Compasses in Video Games
In 2024, compasses can be accessed anywhere. Almost all modern smartphones have a built-in compass application, right on the device. GPS systems, both standalone and on mobile devices display a compass to aid in directions.
Even tactical video games have adopted an on-screen compass delineating what direction the character model is facing, in order to better identify and explore the in-game surroundings.
View this post on Instagram A post shared by @varsitygamingtv
However, in the physical world, here are a few applications where a well-tuned compass will come in handy.
Using a Compass When Orienteering
In addition to the betterment of compasses, Kjellstrom brought the sport of orienteering to the United States, founding the United States Orienteering Federation in 1971. Orienteering consists of timed, navigational challenges, designated on an orienteering map.

The sport pushes athletes of all backgrounds to challenge both their body and their brains.
For many, orienteering enhances the outdoor experience of something like running. However, many orienteers compete without the foot race element.
The Role of the Compass in Surveying and Mining
Now imagine, orienteering — except you get paid. Ok, maybe it is not quite like orienteering, but surveying presents another perfect example of when you would need a compass.
Famously, George Washington worked as a public land surveyor. Washington was so talented that he obtained the position of county surveyor by age 17.

Surveyors must understand how to read and use a compass to accurately determine the direction of bearings or lines along the Earth’s surface. Even today, compass surveying often provides better data than their GPS counterparts.
In mining, compasses are used to establish the direction of tunnels and exploration paths. Miners can use surveying compasses to determine the angle and distance of mine structures.
Compass Use by Geologists
Geologists use compasses to measure the orientation of rock layers, faults, and geological structures.
In fact, geologists will more than likely opt for geological compasses , which feature a backing scale, an inclination measuring plate, and a level.
Parts of a Compass
In order to read a compass properly, let’s identify the parts of a compass and the terms related to compass navigation.

While there may be some variance from compass to compass, generally, a standard, modern compass consists of these parts.
The most recognizable part of a compass is the magnetic needle (usually red, black, or half and half) that rotates freely. It aligns itself with the Earth’s magnetic field, pointing toward magnetic north.
Magnetic North
The place the compass points to, that varies with the constantly shifting magnetism of the Earth.
A fixed point, often called the geographic north, that maps and directions are based on.
Declination
Magnetic declination refers to the angle between true north and magnetic north.
This is the flat, transparent part of the compass that houses the needle. It often has a ruler or scale for measuring distances on maps.
Direction of Travel Arrow
A marked arrow on the baseplate that you align with your desired direction of travel.
The horizontal angle relative to actual location compared to north.
Degree Dial
A circular dial around the housing of the needle, marked in degrees from 0 to 360 allows you to determine your bearing.
A line on the baseplate that you align with the degree dial to read your bearing accurately.
Orienting Arrow
An arrow on the baseplate is used for orienting the compass with a map by aligning it with the map’s north-south grid lines.
Orienting Lines
Lines on the baseplate parallel to the orienting arrow, aiding in aligning the compass with map features.
Reading the Compass
To read a compass accurately, start by holding it flat in your hand, ensuring it’s level to the ground and the direction of the travel arrow is pointing away from you.

Look for the magnetic needle inside the compass; it’s usually red or has a red end, indicating north. The opposite end of the needle points to the south.
After that, turn the compass housing, which is the outer ring with degree marks, until the magnetic needle’s north end and the orienting arrow line up. By doing this, the compass is appropriately oriented, and the degree indications indicate the way you are facing.
Rotate your body until the magnetic needle’s north end lines up with the orienting arrow once more to read a bearing.
Next, observe that the compass housing’s degree indication is in line with the journey arrow’s direction. You can use this information to determine your target’s bearing or direction.
Adjust for declination, the difference between magnetic and true north, as necessary. While some compasses feature an integrated tool for declination adjustment, others allow manual adjustments.
Now, there are times when a compass does not work, and it may not be your fault. Artificially magnetic material, say, an iron monolith, will interfere with a compass reading.
How to Make a DIY Compass
Now, whether you are a survival enthusiast or just someone who wants to build a compass, here is one fun way you can takeyour bearings with easy-to-find materials.
First, you need some kind of metal object to serve as the needle. Simple, ready options include sewing needles or razor blades .
Next, you will need to magnetize the needle by either tapping it, rubbing it, or using a magnet, if available.
To magnetize via tapping, tap the needle on one end with either a steel or iron object fifty or more times. For the rubbing method, you can use your hair, animal fur, or silk. Rub the point of your needle in one direction one hundred times to magnetize.
Lastly, with an actual magnet at your disposal, you may magnetize your needle by rubbing the needle on the magnet about thirty times, in one direction.
Now, with a properly magnetized needle, suspend it in something like water. Allowing it to float atop a leaf will complete the magnet.
The needle will align itself north and south, and you can determine which is which by judging east and west based on the sun’s position.
Of course, getting this right can be tricky. Try this method out a few times before relying on it out in the wild.
Here are answers to common compass questions:
Are all compasses created equal? Where should I buy a compass?
Earlier this article, we discussed Bjorn Kjellstrom, the man who brought and popularized orienteering in the United States. Kjellstrom also founded Silva Sweden AB, a premier compass manufacturer.
This would be a good place to start for high-quality, commercially available compasses.
However, the best type of compass for you depends on your needs.
Do compasses need to be calibrated?
You may want to manually adjust your compass for declination if you know the proper deviation, either found on the map you are using, prewritten declination charts, or online on sites like NOAA’s magnetic declination calculator.
Knowing How to Use a Compass is an Important Skill to Know
Compasses played a crucial role throughout history, aiding travelers, explorers, and navigators in finding their way across vast distances, both physically and spiritually.
From their humble origins as magnetic needles to their modern incarnations as sophisticated electronic devices (or in video games) compasses have remained an essential tool for orientation and navigation.
Their reliability, portability, and simplicity make them indispensable in various fields, including outdoor adventures , marine navigation, many modern jobs , and even in everyday life.
As technology advances, compasses continue to evolve, ensuring that humanity can always find its true north, both metaphorically and literally.
When was the last time you used a compass? Tell me about it in the comments!
Related Posts
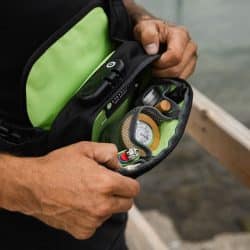
About Ryan Hallstrom
TMM's Senior Editor, Ryan Hallstrom is from Horseheads, NY, the only town in America named in honor of military packhorses. When he’s not writing about menswear, Ryan enjoys reading, whittling, running, and perfecting his penmanship. Background: In 2021, Ryan graduated from Brigham Young University where he majored in American Studies and Russian. Before completing his schooling, he had a wide range of job titles including finish carpenter, usher, elevator operator (yes, that’s a real job), landscaper, tour guide, and more. In January 2022, Ryan began working full-time as The Modest Man’s Senior Editor. In this role, he not only edits all articles prior to publication but also is a frequent contributor to the blog. He enjoys crafting in-depth product reviews (often testing items in extreme environments), helpful self-improvement articles, and detailed clothing guides. His interest in men’s style stems from the examples of men in his family: “Growing up, a lot of the men I looked up to dressed well. My dad is always clean-shaven and makes sure that he looks presentable before heading out the door, and my grandfather, who owned and operated a dairy farm, usually wore work pants with a sharp crease and a button-up work shirt.” However, it wasn’t until the end of high school that Ryan began to care about how he looked. Gradually, over the next few years, he started to dress better and learn about style. “Finding clothes that fit helped me to become more confident. I find that when I try to dress well, I feel better.” Expertise: Ryan has loved writing since an early age, and in college began contributing to and editing for university publications. After college, he began freelance writing and editing. He’s written from blogs and magazines such as Real Men Real Style, Life in the Finger Lakes, and Gentleman Within. An avid traveler who spends plenty of time outdoors, Ryan appreciates clothes, footwear and accessories that can take a beating. His reviews often include long-term, thorough testing in extreme weather conditions. Ryan has also spent more time in a suit and tie than most guys, so he's well qualified to write about classic menswear, business casual and formalwear.
More Articles by This Author

Join the Club
Never miss a post, plus grab this free guide (instant download). No spam. Ever.
Reader Interactions
Ask me anything cancel reply.
Got questions? Want to share your opinion? Comment below!
Home • Blog • Resources • Contact • Advertise
Privacy Policy & Affiliate Disclosure • Terms & Conditions • Sitemap
As an Amazon Associate I earn from qualifying purchases.
Copyright © 2024 The Modest Man (Registered Trademark)
CELL COVERAGE LAYER
See where you can dial 911 and scope out data for (really) remote work with Gaia GPS.
BEST WEEK EVER
Try out unlimited access with 7 days of Outside+ for free.
Start Your Free Trial
Powered by Outside
Learn How to Use a Compass and Never Get Lost Again
Make sure you never get lost again by mastering the underappreciated art of navigating with a compass and map..
- Share on Facebook
- Share on Reddit
Heading out the door? Read this article on the new Outside+ app available now on iOS devices for members! >","name":"in-content-cta","type":"link"}}'>Download the app .
Sure, not all who wander are lost. But when you’ve been walking in circles for hours and your day hike is stretching into an overnight, that saying is cold comfort. The solution? Don’t get lost in the first place. Learning how to use a compass and map is something all hikers and backpackers need to know.
Even experienced backpackers sometimes neglect their navigation skills, but when the trail peters out or is covered by snow, knowing how to blaze your own path is absolutely essential. And even in the age of GPS and smartphones, the most dependable way to make sure that you stay on track is by carrying a map and compass and knowing how to use them. Below, we’ll cover both the basics and finer points of compass navigation.
More: Get unlost with our Backcountry Navigation course on Outside LEARN
Why should i learn how to use a compass.
With the advent of GPS, navigating by compass has become something of a lost art. It’s easy to see why: In clear skies, modern GPS receivers can determine a user’s location accurately and quickly with little to no user skill necessary.
But here’s the thing: GPS units are electronic, and electronics fail at the most inopportune times. Sometimes, they run out of battery; sometimes, after years of use, they fail. Furthermore, they can usually only tell which way you’re facing once you’re on the move.
Compasses, on the other hand, are nigh-indestructible. They don’t take batteries, don’t have screens to break, and don’t need software updates. When protected with either waterproof coatings or careful storage, maps rarely fail. Keeping these two simple items in your pack —and knowing how to use them—is a small step that could save you a lot of trouble.
Tip: Once you’ve got the hang of navigating the old-school way, you can use apps like Gaia GPS to check your work or get more specialized data like slope angle.

Get to Know Your Compass
A compass is the most reliable navigation method—but it’s no good unless you know your way around it. Which parts your compass has depends largely on what kind you carry. Here are some common components.
Parts of a compass
Baseplate : A clear back that lets you see the map underneath. The ruled edge helps with triangulation and taking your bearings.
Direction of travel arrow : This shows you where to point your compass when taking a bearing.
Index line : An extension of the direction of travel arrow that indicates where to read bearings.
Rotating bezel : A circular area marked with number degrees from (clockwise) 0 to 360.
Magnetized needle : Located inside of the bezel, it always points to magnetic north, not true north. (They’re hundreds of miles apart.)
Orienting arrow : It helps line the bezel up with the directions on the map.
Declination scale : Hash marks on the inside of the bezel that are designed to help adjust declination. (Don’t know how to do that? Read on.)
Correcting for Declination
One of the tricky parts of navigating with a compass is that magnetic north isn’t the same as true north. The angle between the two—known as the declination—varies depending on your location. It also gradually changes over time as the Earth’s tectonic plates shift. If you don’t adjust your compass to compensate, you’ll find yourself headed in the wrong direction.
The easiest way to find the angle of declination is to check your map: most have declination diagrams, along with the date it was last revised. Because declination changes over time, newer maps will have more accurate figures. There should be an angle and a direction—for example, 8 degrees east.
Working off an older map? Check online. There are several different services that can use the location you’ll be hiking in to calculate your declination.
Once you have your declination, subtract it from your compass bearing for west and add it for east. If you have trouble remembering that rule, try this mnemonic: Maps Tell Almost Everything. (Translation: Magnetic to True: Add East.)

What Are the Different Types of Compasses?
While there are many different kinds of compasses on the market, the most common for backpackers is the baseplate compass, which consists of a liquid-filled compass face attached to a flat, clear piece of plastic. Besides being cheap and simple, baseplate compasses’ see-through design makes them easy to use with a map.
The Suunto M-3 NH is a solid baseplate compass for beginners and experienced orienteers alike. Buy Now
Also popular are lensatic compasses, which flip open like a locket and use a sighting wire in the cover and a rear lens to take harder learning curve.
Our executive editor, a die-hard fan of lensatic compasses, recommends the Brunton Model 9077, a classic, durable military-style compass that will last for years. Buy Now
Because baseplate compasses are the most widely used, our instructions here will focus on them. If you have a lensatic compass, your steps may vary slightly. Metal interferes with compasses’ magnetic needles, so avoid spreading your map out on a car hood.
Hiking somewhere with well-marked trails where you won’t have to navigate overland? A cheap button compass doesn’t have the features to take or triangulate a bearing, but it can be a handy tool for a lost hiker trying to figure out which way they have to walk to pick up the path again or find a major landmark like a river. Our editor keeps one clipped to his pack.

How to Find Your Location with a Compass
Figuring out your location with a map and compass is easy, but it comes with some caveats. First, you’ll need to be able to find at least two known landmarks. ( Mountains and lakes are both good choices.) If you can find a third, even better. As always, remember to adjust for declination
- Using your compass, orient your map so that north is pointing to true north. (Pro tip: make sure the fixed grid lines on your compass line up with the north-south grid lines on your map.)
- Take a bearing on your first landmark: Line up your direction of travel arrow with your landmark, then rotate the bezel until the needle lines up with the markings for north. (The number next to the index line is your bearing.)
- On the map, place one corner of your compass’s straightedge on the landmark, the rotate the entire compass until the needle lines up with north on the bezel. Using a pencil, draw a line across the edge.
- Repeat steps 2 and 3 for your other landmarks. The point where all the lines intersect is your approximate location.
How to Find Your Bearings With a Compass
If you already know your location, you can use your compass to figure out how to get to any point on your map. After adjusting your compass for declination, start by orienting your map to true north, as in the previous example.
- Place the corner of your compass’s baseplate on your location, then rotate your entire compass until the straightedge forms a line between your location and your destination.
- Rotate the bezel until the grid lines on the base plate match the grid lines on the map.
- Read the number next to the index line—this is your bearing.
- Holding the compass level in front of you, turn your body until the north arrow on the bezel matches up with the compass’s needle. Your direction of travel arrow should now be pointing toward your destination.
Using Your Smartphone as a Compass
Your smartphone can do everything else, so it shouldn’t come as a surprise that it has a compass built into it. With the right app (try Digital Field Compass for Android), you can practice your compass skills with just the device in your pocket. The apps use your phone’s magnetometer. After a simple calibration process, it can not only do whatever a compass can do but can even lock onto a bearing well enough to tell you when you’ve gone astray.
Of course, phone-based compasses come with a few big cautionary notes. The biggest? Just like the GPS on your phone, all of these apps require a charged battery to work. That’s why we recommend that everyone learn how to use a normal, analog compass: You can count on it continuing to work no matter what you put it through. Once you’ve fully developed those skills, you can use your phone’s GPS without fear of running out of juice.
Looking for a high-tech app as a companion to your newfound compass skills? Outside+ members get a premium membership to Gaia GPS .
Popular on Backpacker
The 30-mile thru-hike was the ideal trip for putting our backpacking and hiking candidates through the wringer.
Related content from the Outside Network
Navigation – desert, what’s it like to go on a 200-person hike better than you think., how to pack for backcountry skiing, the original yosemite firefall.

101 Guide to Reading and Using a Compass
This is so simple, does this really need an article.
As the subtitle mentions, you might think that is so simple and fairly common sense, do you really need to read this article? My response to that is that the fact that you were taught this topic in geography during your adolescent years and you still end up reading this article, means yes.
But we will be covering more than North, East, South, and West.
Understanding how to read a compass properly is necessary for any outdoor adventure or activity whether you are going for a hike or plan to hike, this small piece, can really save your life, and determine your location in relation to our surroundings and direction of travel, that is if you know how to use it properly. For that, you need to understand what a compass does and what it cant.
A 101 Guide to Reading and Using a Compass
So, let’s go over the basics.
The two main types of compasses are magnetic compasses and gyro compasses .

A magnetic compass is a type of compass in which the needle aligns itself with magnetic lines of Earth’s magnetic field to point to the magnetic poles of the Earth. (More covered below) .

Gyrocompass is a compass which has a rapidly spinning wheel whose rotation interacts with the rotation of the earth until its axis of rotation is parallel with the Earth’s and points to the Earth’s rotational poles. This compass points to the true poles of the Earth. (More covered below)
Different Types of Magnetic Compasses
Subtypes of a magnetic compass that are relevant to our category are:
Liquid Compass – which has a magnetized needle or card immersed in a fluid and is somewhat accurate and does the job.
Marine compass or a card compass – This type of compass has a needle that is fixed and a compass card that is mounted in fluid and rotates according to orientation. It is used on boats because the moving card absorbs much of the motion of a boat which makes it easier to read than a needle compass.
Base plate compass or Orienteering compass – which is a liquid filled compass placed on the rectangular base made of transparent plastic so a map can be read through it. It often has a magnifying lens for map reading, some sort of light for low light conditions and a ruler. It is often used for plotting.
Thumb compass – is a variant of base plate compass but smaller. It is fixed on the thumb (as its name says) which leaves one hand free to hold the map and is used often while traveling at speed by bike or by canoe.
Solid state compasses – are found in electric devices. They often have two or three magnetic field sensors from which microprocessor reads data about the orientation of the device. They can often be found in clocks, mobile phones, and tablets.
Components of a Compass
Compasses might be small but have so many details and components inside that you might be surprised when you finish reading the article.

Compasses tend to have the following as primary component parts:
Body of Compass: This is the body of the compass which contains the tiny parts.
Compass Needle: A Movable Part that turns according to the magnetic pull of the Earth.
For purposes of this article, we would be focusing on the orienteering compasses as that is the most common one used outdoors while mountaineering, trekking, hiking, and camping. Orienteering Compasses which are used during hiking or mountaineering contain two extra components:
Travel Arrow: This is an arrow painted outside the compass, that the traveler follows, once he hs determined where h needs to go.
Orienting Arrow: A fixed arrow painted on the compass itself, to which the traveler adjusts the compass.
What is Declination?
Declination, in simple terms, is the difference that exists between Magnetic North and True North. The difference is attributed to the fact that the magnetic fields of the Earth (to which an Orienteering Compass Points) do not align exactly with the North Pole and the South Pole (to which a Gyrocompass points) and for this reason, declination varies from place to place.
The Difference between True North and Magnetic North
There are two types of North and understanding this is vital in knowing how to read an orienteering compass. True North is located at the North Pole, which is the point in the Arctic Sea around which the earth rotates.
The Magnetic North, however, is located in a different location, in northern Canada. This location actually changes with time. The earth is covered in magnetic lines that come out of the Magnetic South, cover the planet, and converge again at the Magnetic North.
To understand Magnetic North, you need to understand that those lines are generally not straight, and in some parts of the country they point pretty far from True North.
That variance between the True North and Magnetic North is called magnetic variation or declination .
Cardinal Points
There are four cardinal points on a compass – North, South, East, and West. In compass terminology, the words ‘right’ and ‘left’ are not used as they are relative and can differ based on one’s location, a and depends on how one is facing the relevant landmark, whereas cardinal directions are constant and remain same for everyone.
The direction halfway between each cardinal points are called intercardinal points and for example one of them is SouthEast . The other three intercardinal points are SouthWest, Northeast, and NorthWest.
Finally, there are secondary intercardinal points halfway between each cardinal point and intercardinal point. These are North-NorthEast, East-NorthEast and so on.
Reading a Compass Correctly
Compasses as mentioned above, contain a magnetic needle and therefore you need to make sure that are no metal or magnetic objects closeby that can skew your readings.
Here are a few tips on how to read a compass correctly, as explained by the Compass Dude :
1. When holding the compass, make sure that the baseplate is level and the direction-of-travel arrow points away from you.
2. Hold it at a height between your waist and your face, and close to your stomach. Your elbow should be slightly bent and your arm relaxed.
3. Look down and see which direction the needle points to.
Then, place the compass so that North is at the top of the circle. Now use the numbers of declination and rotate the compass slowly until you are at the correct number of degrees away from the magnetic North to point to True North.
Remember that North on a map is calibrated to True North. So when using your compass along with a map, remember to adjust for the declination or difference.
And that’s it, now you know how to operate and work with a compass and now you cannot get lost, that is if you bring a compass along with or if you don’t want to be sure to read our article, How not to Get Lost.
We hope you’ve enjoyed reading 101 Guide to Reading and Using a Compass and we hope this small masterclass should give you some great tips on how to get you to use this tiny magnificent creation and hopefully find your way through your adventure. Do let us know your thoughts in the comments below, what different brands of compass do you use and which is your favorite one!
Also, do check out our other great articles and guides . Be sure to signup for our newsletter to get future updates on great guides, and other outdoor inspirations and gear from Settle Outdoor.

Settle Outdoor is about embracing the life that starts outside the home. Where every single detail counts and this is where Settle Outdoor helps you in making a informed decision about your next trip or adventure.
Beginners Guide to Hiking
ikiPele – Compact Heater & Burner
A water bottle with an in-built purifier? – The Grayl Ultralight Purifier
The Ultimate Hammock for Your Outdoor Trip – The Kammok Roo
🍴 The Muncher 🍴
This Grill will Make you Love Outdoor Adventures- M1 Grill Kit

After you oriented yourself to the map, you can easily judge the location of a landmark in the field even if you can t see it. Mark both your current location and destination. Lay one side edge of the compass baseplate on the map, aligned with these two points. (The direction of travel arrow should be pointing toward the goal, not away from it.)
Your email address will not be published.
Save my name, email, and website in this browser for the next time I comment.
- Experiences
How to Use a Compass: Orienteering Basics
Share this:.
- Click to share on Facebook (Opens in new window)
- Click to email a link to a friend (Opens in new window)

Anytime you venture out into the wild, there’s a handful of essential items that should be in your backpack. Snacks, water, and extra layers make that list, but something that many people forget or take for granted is a reliable navigation tool.
Perhaps we’ve become too reliant on cellphones or simply lost the art of map and compass navigation. When it comes to wilderness travel and survival, a basic compass can’t be replaced. Reliable and intuitive, a map and compass should always make your wilderness packing list .
But before adding a map and compass to your gear list, learn how to use them properly.

Parts of a Compass
Compasses are relatively simple pieces of technology that have been around in some form for thousands of years. To properly use a modern compass, familiarize yourself with a few common parts.
All compasses are mounted on a baseplate. These should be transparent so you can see your map underneath. Additionally, the baseplate’s straight edge will assist in taking bearings to transfer to your map and navigate onward.
Direction-of-Travel Arrow
This arrow indicates where you need to point the compass when taking or following a bearing.
Rotating Bezel
The rotating bezel is the circular area marked with degrees from 0 to 360 and also known as the “azimuth ring.”
The index line is found above the bezel and shows where to read bearings. It’s an extension of the direction of the travel arrow described above.
Magnetized Needle
Essential for navigation, the magnetized needle can be found inside the bezel and is usually red or white. This needle always points to magnetic north, not true north.
Orienting Arrow
This arrow allows you to orient the bezel with the map and is often designed to match the magnetized needle.
Orienting Lines
These are the parallel lines that move with the bezel and will help set your orienting arrow to north on the map.
Declination Scale
The hash marks inside the bezel are known as the declination scale and are there to use when adjusting declination.
Declination
One of the most common mistakes made when navigating with a map and compass is failing to adjust for declination. True north and magnetic north are not the same, and for accurate navigation, you must correct for this difference.
Depending on where you are in the world, the discrepancy between true and magnetic north could be anywhere from a few degrees to upwards of 20 degrees, which could send you a couple hundred feet — or even miles — off course.
Every region has a different declination, and the respected topographic map of the area you’re traveling in will list this value. Even so, these values vary over time, so check the map’s publication date or cross-reference the NOAA magnetic declination website for the most up-to-date readings.
Once you confirm the declination value (expressed as several degrees), you can translate that to your real-world navigation. Simply subtract that value from your compass bearing if the value is X degrees west, and add that value if the indicated declination is X degrees east.

Maps, Bearings, Navigation: How to Use Your Compass
To navigate correctly with a map and compass, you need to orient your map with the surrounding landscape. Setting declination is step one. From there, you can easily piece the rest together:
- First, put your compass on the map with the direction-of-travel arrow pointing to the top.
- Second, rotate your bezel to match the direction-of-travel arrow with north on the compass. Move the compass so the edge of the baseplate is sitting on the left or right side of your map, with the direction-of-travel arrow still pointing to the top.
- Rotate your body with map and compass in hand, so the magnetic needle lands in the outline of the orienting arrow. These steps should leave you oriented appropriately, and you can cross-check this by comparing the landscape to what you see on the map.
- Bearings entirely depend on a specific location; think of them as a numerical way to describe the direction of travel. That is, due south is equivalent to 180 degrees. It is crucial to remember that following the same numerical bearing from different places will not deliver you to the same location. Setting a bearing using your map and compass is quite simple.
- Place your compass on your map so the straight edge of the baseplate is between your current location and where you would like to travel.
- Double-check that the direction-of-travel arrow is pointing in the direction you would like to travel!
- Rotate the bezel so that the orienting lines within match the north/south running lines on your map.
- Check out the index line on your compass and record the bearing it is indicating to begin traveling onward.
- To move toward your destination, hold your compass and ensure the direction-of-travel arrow is aimed away. Still holding the compass, move your body until the magnetized needle lines up inside the orienting arrow. By doing this, the direction-of-travel arrow will now be facing the bearing you took from your map. Follow its direction to your desired destination.
These are the basics of map and compass navigation. As you get more comfortable and familiar with the process and equipment, you can work this process backward and use a bearing to identify where you are on a map.
After putting all the pieces together and devoting a fair amount of time to familiarization and practice, you will soon be able to travel off trail in the wilderness with ease!

Follow Us On
Subscribe Now
Get adventure news and gear reviews in your inbox!
Join Our GearJunkie Newsletter
Gear Top Stories Deals
How to Use a Compass: The Ultimate Guide to Navigation

Every outdoorsperson should know the nuts-and-bolts of the compass. We live in an age when digital navigational tools abound: GPS receivers, satellite messengers, smartphone maps, and apps.
These are all well and good, wonderful resources to have—but they aren’t foolproof, and overreliance on them without backbone knowledge in tried-and-true map-and-compass wayfinding can leave us in dire straits.
In this article, we’ll introduce the basics of how to use a compass : what the tool does, how it’s put together, and all the invaluable locational and route-finding information it can provide out there in the backcountry.
- Use a compass to navigate by taking bearings and compensating for obstacles.
- Aim off when returning to a starting point in order to maintain course.
- If there's no opposite-side landmark, take a back bearing from the starting point.
- If you hit an obstacle, aim off by veering significantly to one side or the other of your bearing line.
- Practice navigation in different settings to become comfortable using a compass.
Quick Navigation
Why Should I Learn to Use a Compass?
A compass always has your back, keeping you from going in the wrong direction when navigating through remote wilds. Your smartphone might die, your GPS unit may act up , but that compass of yours—as long as you keep the magnetic needle away from interfering metal—points north through thick and thin. You can walk a straight course and stay oriented even when socked in by a cloud (or caught by darkness).
Now, even as we underscore the tremendous power of a compass, it’s worth noting there’s a surprising amount of sturdy wilderness navigation you can do without one. In many landscapes, experienced outdoorspeople can stay oriented just by matching obvious physical landmarks with their mapped locations.
Using such on-the-ground navigational aids as handrails (long linear features such as rivers, roads, or powerline corridors roughly aligned with your desired course of travel) and catchpoints (mapped landmarks along a handrail that peg your location), you can cover a lot of ground without peeking at your compass.
But the point is, you should have a compass to peek at it if you need it—and, in many situations, using a compass and map together is the surest way to stay on track and avoid getting dangerously turned around.
Introducing the Tool: Parts of a Compass
A magnetic compass consists of a freely rotating magnetized needle that lines up with the Earth’s magnetic field, one end of it usually a red arrow pointing north. (We’ll get into just what “north” means in this context shortly.) The needle does its thing within the compass housing, filled with a liquid that dampens the compass needle’s otherwise jittery movement.
Along the rim of the housing or case, the 360 degrees describing a circle come hatched and labeled on a dial (aka azimuth ring or bezel ring ). The four cardinal points (cardinal directions)—North, South, East, and West—are labeled at 360 degrees (or 0 degrees), 180 degrees, 90 degrees, and 270 degrees, respectively.
Some compass models denote not only the cardinal points but also the intercardinal points of North East, South East, North West, and South West, and occasionally even finer-scale divisions (North-Northeast, South-Southwest, and other secondary intercardinal points).
Different Types of Compass
The cheapest compasses are fixed-dial models, but, while better than nothing, these aren’t the go-to choice for a dyed-in-the-wool hiker, backpacker, climber, or hunter.
That would be the baseplate compass , also known as the protractor compass given it serves as that tool in mapwork, or as an orienteering compass due to its original invention for use in that sport.
It goes without saying that the same skills competitive orienteer employs are part of a backcountry traveler’s basic route-finding toolkit.
Baseplate Compasses
Baseplate compasses consist of a rotating bezel-set atop a see-through, square-edged base plate. Within the compass case, below that free-swinging compass needle, parallel lines known as meridian or orienting lines can be used to match with the north-south grid lines of a topo map.
At the center of the case and aligned with those meridian lines, an orienting arrow points to north on the compass housing.
The base plate will also typically include a direction-of-travel line or direction-of-travel arrow pointing toward the front edge of the compass. Its back end meets the rotating bezel at an index line. Two or three of the base-plate edges include multiple ruler measurements and scales for determining distances on a map.
Many orienteering compasses include a hinged cover with a sighting mirror . Run through with a line, this design allows you to hold the compass at eye level when pointing toward a target landmark or along a desired bearing, using the mirror (set at about a 45-degree angle) to confirm the direction where the index line meets the dial.
Other Types of Compasses
Now, keep in mind there are a number of other kinds of compasses: the stripped-down thumb compass, non-magnetic compasses such as the gyrocompass, the military-style lensatic compass or magnetic-card compass, digital compasses, and more.
But, given considerations of accuracy, ease-of-use, affordability, and general wilderness suitability, your average outdoor user is going to want to obtain—and, naturally, eventually master—a baseplate model.
For that reason, the rest of this article focuses specifically on baseplate-compass basics .
Understanding & Accounting For Magnetic Declination
Accurately using a compass and a topo map together in most parts of the world necessitates a bit of translation, you might say. The reason is that the two navigational tools actually have their own, different definitions of “north”: Your compass points to a different reference point than your map.
Declination: True North & Magnetic North
The north marker on your topo map refers to true north , aka “geographic north.” True north indicates the North Pole , the ultimate northern reference point we all tend to envision. But the arrow of your compass’s magnetized needle points to a different north: magnetic north .
Compared with stolid, unchanging true north, magnetic north describes a transient location: the northern tip of the Earth’s magnetic field—the so-called “ magnetic North Pole ”—which actually moves around due to the molten messiness of Earth’s deep innards.
So there are two complications we face when trying to use our compass with our topo map to find our way.
The first is the fact that magnetic north and true north differ . Magnetic declination describes the difference between true north and magnetic north in cardinal degrees. That difference is negligible along what’s called the line of zero declination, where true and magnetic north agree.
But off that line, you need to correct for a west or east declination in order to have your compass needle and map sync with one another. Without proper declination adjustment, your bearings translated between compass and map will be off, which can result in trekking majorly astray.
The other complication is the magnetic north’s roving ways. Many topo maps will indicate their depicted area’s declination via a diagram at the bottom, but this measure changes year by year; that becomes an issue after a while. This speaks to the value of checking your map’s revision date and going with as current an issue as you can.
But thanks to online resources such as the U.S. National Oceanic and Atmospheric Administration’s declination calculator or the Canadian Geomagnetic Reference Field , you can assure yourself of a thoroughly up-to-date declination adjustment.
Correcting for Declination
Many baseplate compasses offer built-in adjustable declination, achieved with the turn of a screw or some other mechanism. You can also use tape to identify your area’s declination correction or simply go through the math (subtracting or adding degrees per the given declination) when making measurements with a map and compass.
You can also correct for declination on the map rather than the compass by drawing in the appropriately offset lines, but that’s more troublesome; just pay the marginal amount more for a compass with adjustable declination.
If you’re planning a hiking trip in a different geographic region than where you usually go backpacking, remember to check the area’s declination and adjust your compass accordingly before hitting the trail.
All of what follows assumes you’ve corrected for declination on your compass.
How to Use a Compass to Take Bearings
A bearing describes the direction between two points as defined by the angle made by a line run through both locations and a given baseline, which in orienteering work is either magnetic or true north.
You can use a compass to take bearings from the landscape—considering your current position against a visible landmark—or from the map, measuring the angle between two mapped points.
Direct Bearings
Take a direct bearing from a landmark you can see—a mountain peak, a lake, a grand old tree—by holding your compass level at your chest or (with a sighting mirror) in front of your eyes and pointing the direction-of-travel arrow at the feature.
Then rotate the compass housing until the compass needle’s contained within the orienting arrow, and read the measurement where the direction-of-travel arrow meets the dial. That measurement identifies the direction between your current position and the landmark.
Back Bearings
You can also take a back bearing from such a landmark—useful if you’re not sure of your position. This can be done by repeating the above process, except “boxing” not the north end but the south end of the compass needle with the orienting arrow, then reading the degrees where the direction-of-travel line hits the dial.
Or you can just measure a direct bearing and then—because the back bearing is simply the very opposite of it—either subtract 180 degrees (if the direct bearing reads 180 or more degrees) or add 180 degrees (if the direct bearing reads less than 180).
Measuring Bearings on a Map
Measuring direct or back bearings from visible landmarks with a compass alone relies on the magnetized needle. But if you want to take bearings from a topo map—in other words, find a course—you actually completely ignore that needle (not to mention declination) and simply use the baseplate compass’s rotating bezel. Here’s where the baseplate compass serves essentially as a protractor.
Place the compass flat on the map with the travel arrow pointed in the general direction of north and one of the base plate’s long edges linking your location and your destination; you may need a straight-edge to make the connection, depending on the map’s scale and the distance to be covered.
Then turn the housing so that its meridian lines run parallel to the north-south grid lines of the map (1). Identify the bearing where the index line meets the dial (2).
How to Use a Compass to Plot Bearings in the Field
If you’ve taken a bearing (or found a course) from a topo map (1), you can steer yourself along with it by holding the compass level, then turning your body (2) so that the needle’s boxed by the orienting arrow (3). When that happens, you’re facing your destination (4) with the direction-of-travel arrow pointing (5) the way to go.
You can, of course, use this method to follow a course from any known bearing, not just a topo-taken one. For example, a guidebook (or experienced buddy) may give you precise directions to a dispersed campsite or a water source somewhere out of sight but reachable by following a bearing from a certain location on the trail.
Turn the azimuth ring to set that bearing at the index line and follow the same procedure to orient yourself and strike off.
Use a Compass to Plot Bearings on a Map
You can also plot a known compass bearing on the map—the reverse process. This may arise when you don’t know your current position but have taken a back bearing from a visible landmark (1) you can identify on the map. Turn the compass dial so that the bearing intersects the index line (2).
Then put the base plate on the map with one of the front corners on the mapped landmark. Turn the whole compass until the meridian lines lie parallel with the map’s north-south lines. This gives you a position line (3) along which you know you are.
If you’re hiking a trail or following a river or ridgetop or otherwise situated along with a mapped linear feature, that position line revealed by your field back bearing will pinpoint your location.
Crisscrossing Position Lines & Contours
If you aren’t along with such a reference feature, you can still fix your position by taking one or more additional back bearings from other mapped landmarks (as far apart from one another as possible) and drawing position lines from them on the map. Your point position is where those position lines cross.
Maybe, though, you can only recognize one landmark you can definitely locate on the map. You can often still get some idea of your rough location by identifying your elevation using an altimeter and seeing where the position line crosses that particular contour.
Obviously, it may cross multiple contour lines of that elevation, but cross-referencing with other topographic or geographic features will hopefully narrow down the possibilities.
How to Use a Compass to Locate Yourself With a “Running Fix”
You can also try to mark your general location from a single mapped landmark by obtaining a “running fix,” as mariners use in nautical navigation .
Here’s the process (nicely laid out in David Seidman’s much-recommended The Essential Wilderness Navigator ):
- Take a back bearing from the landmark and draw your position line, then walk a straight line (aided by your compass), keeping some rough track of the distance you’re covering until you reach a point where another back bearing taken from the landmark is at least 30 degrees different from the first.
- Draw that bearing line on the map.
- Put a straight-edge parallel to your course that intersects both position lines, and slide it along the map until the distance between the two lines, as gauged by the map scale, matches (more or less) the ground you covered between taking the two back bearings. You’re about where the straight edge hits the second position line.
Finding & Identifying Landmarks
The same principles we’ve outlined above can easily be used to find a mapped landmark on the landscape or, conversely, identify visible distant objects on the map. Mountain peaks or major hilltops are obvious examples.
Identifying a mapped summit in a sea of peaks from some known vantage is the same as matching a bearing measured on the map to the field; sight along the set course , and you should be looking at the peak in question.
And all it takes to I.D. an unknown peak—assuming it’s named or at least labeled with elevation on the topo—is to take a bearing off it and then plot that on the map.
Using Your Compass to Orient Your Map
Depending on how your brain visualizes things, you may get along just fine studying your map with the top of the chart always pointing up. But some navigators prefer orienting the map to the landscape, which also may be necessary for the particularly confusing countryside.
Sometimes it’s easy enough—and, from an orientation perspective, good enough—to simply turn the map to conform to the arrangement of obvious, recognizable, mapped landmarks in view. But if you can’t identify surrounding landmarks, or if you want to be as accurate in orienting your map as possible, use your compass.
Turn the dial so that the ring’s north marker (0 or 360 degrees) hits the index line (1). Then place the left or right edge of the base plate along the analogous margin (2) of the topo—placed on a flat surface—with the direction-of-travel line pointing toward map north (3), and turn compass and map together until the orienting arrow boxes the north-pointing needle. The map’s oriented to the landscape as you see it.
Following a Compass Course
The trick to following a compass course long-distance is to use intermediate destinations along the desired bearing to keep you on track toward your intended destination. You may or may not have your destination in view when you begin following your bearing: maybe you can see a particular peak or lake, but maybe you’re trying to navigate to that out-of-sight, possibly fairly far-off campsite from the trail.
But unless you’re trekking across open, fairly level tundra, steppe, or desert, you’re not likely to have, say, a target peak in view the whole way—not when you’re traversing dense forest or dropping into valleys or ravines along the bearing, or entering ranges of foothills before hitting the ultimate slopes you want.
It’s impractical, too, to keep your compass out the whole hike , following the direction-of-travel arrow and keeping the needle boxed. It doesn’t make cross-country travel very easy, for one thing, and you’re just about guaranteed to stray to one side or another of your desired course.
You can drift laterally this way and still find your compass reading the proper bearing, though following it won’t get you to a destination point. And, of course, you’re very likely to hit obstacles along the way that force you to detour.
Using Intermediate Landmarks to Follow a Compass Bearing
To embark on your course by sighting down your desired bearing and locating a near-range landmark, such as a rock formation (1), a lofty tree (2), or a big log, along with it. Then you can simply walk whichever way is easiest to the landmark.
Repeat the process by sighting ahead along your bearing and finding another strategically positioned landmark. By doing this, you’ll stay true to your course and you won’t have to be referencing your compass all the time.
Making use of intermediate landmarks is even more reliable when you take back bearings along the way to previous “waystations” to check that you’re headed in the right direction.
Dealing With Obstacles Along a Compass Bearing
You’ll often need to be negotiating obstacles—lakes, swamps, impassable terrain, nasty stretches of blowdown, and the like—when following your compass course. If you can see across the obstacle and there’s a landmark on the other side along your bearing line, just work your way around and get to that touchstone so you can resume your course.
If there isn’t an opposite-side landmark but you can easily identify your starting point in detouring, get to the other side and take a back bearing from the starting point.
If you can’t see across the obstacle or you don’t have any reference points to use on either side of it, execute your detour by making right-angle turns and counting your steps along with straight-line courses between turns—however many are required to get around.
By compensating for your side-tracking with an equal number of steps in the opposite direction on the other side of the obstacle, you should be able to exactly resume your course.
Another Wayfinding Trick With the Compass: Aiming Off
A very important practice to learn as a backcountry traveler is what’s known as aiming off or international offset . This is a safety-net procedure to allow you to navigate back to a starting point located along a baseline of some kind. For example, you might want to return to a vehicle parked along a road, or to a campsite along a trail.
You’ve followed a bearing on your hike from the starting point, and now want to get back to that car or that campsite. You could follow the back bearing exactly, but you’re invariably going to drift a bit, and then when you hit the road or the trail you won’t know which way to turn to get to your destination.
So instead of following your return bearing exactly, you “aim off”: that is, you intentionally hike significantly to one side or another of the exact course—by more than just a few degrees. Veer off by, say, 10 to 20 degrees, enough to ensure that when you intersect the baseline, you’ll know for sure you’re to the right or the left of the starting point, and thus be confident which direction to go.
Negotiating Obstacles While Aiming Off
Effectively aiming off requires that, should you hit an obstacle on your return hike, you always detour to the offset side you’ve chosen to maintain the correct direction. If you’re heading northeast to reach a campsite roughly due north, for example, and you hit a tangle of deadfall, you should go bypass it by angling around to the east.
Put in the Field Practice to Master Compass Navigation
Reading about the ins-and-outs of using a compass correctly is all well and good, but it won’t get you very far: You need to invest plenty of quality time in practicing out in the field. Start with your neighborhood, maybe your nearest city park; then graduate to more “real-world”-style map-and-compass exercises out in the woods.
Before long, sighting and plotting bearings will become second nature—and, more magically yet, you’ll find yourself striding with genuine confidence out into big, trackless backcountry, feeling firmly centered in—and all the more connected to—the landscape around you.
- Nordic Walking
- Backpacking
Free shipping on all orders!
Using a Compass: How to Find your Way in Nature

Written By Spencer Yeomans
- Updated August 23, 2020
Being able to navigate outdoors is something any nature enthusiast should be able to do. There’s a reason why this is considered one of the 10 essentials , and it’s certainly not something to gloss over just because you think you’ll be okay. I can think of several times when I used to believe my phone was all I needed to show me where to go, but then lost my way in the Rocky Mountains. So let’s check out a foolproof method for staying on track wherever you are in the world: using a compass.
Key Takeaways:
- A compass, relying on magnetism, is reliable, battery-free, and works whether you’re in motion or not.
- Magnetic north constantly moves and needs consideration for accurate navigation.
- Don’t forget to adjust for declination.
- Orient your map and compass for accurate navigation.
- Take a bearing using the map or a visible landmark.
- Be cautious of metal, electrical wires, mirrors, thick metal glasses, and magnetic geological formations affecting compass accuracy.
Why Use a Compass?

You’re probably reading this thinking, “Compasses are so outdated. Why take the time to learn how to use one?” And while it might be true that they could be categorized as “old school,” that doesn’t mean they aren’t useful, if not essential, for your next outdoor trip. GPS devices revolutionized the art of navigation, and for good reason, since almost everyone has a phone and it can tell you where you are at any given moment. They’re incredibly convenient for day to day life when you’re trying to get directions while out on the road, but there are a couple major flaws that should concern you next time you want to use them in the wilderness. First, GPS devices are electronic. The thing about electronic devices is that they require a power source , usually in the form of a battery. What happens when you run out of battery life? You have several hundred dollars of dead weight in your hand, and no idea how to get to where you want to go. The other problem is that the GPS on your phone will only tell you which way you’re going once you’re actually on the move. If you’re at a standstill, the blue dot on your screen might tell you where you are, but not which way you need to start walking. Because of that, you might spend a few minutes walking in the wrong direction until your GPS picks up on where you’re going and can redirect you. A compass, on the other hand, requires nothing but magnetism to work. No matter where you are, or how long it’s been since you dusted off your compass, you can be sure that it will always work. There are no screens or moving parts to break, and you don’t have to be in motion for it to work. When paired with a topographical map, there’s nothing you have that’s more reliable, if you know what you’re doing.
Compass Components
Before we get into the basics of using a compass, it’s important to understand all of the different components . Not all compasses are the same, but for our example, we’ll be using an orienteering compass. This type is specifically designed for use with a map, which is likely what you’ll want when you’re out exploring.
This is the “body” of your compass. The material is transparent and has at least one straight edge, so you’ll be able to see the map beneath it and take a bearing.
Rotating Bezel
Also known as the azimuth ring, which comes from the Arabic word as-sumt , meaning “the direction.” This outer ring rotates, and has 360 degree markings.
Also known as the “read bearing here” mark, it’s located directly above the bezel, and marks the bearing that you want to travel along.
Direction of Travel Arrow
An arrow pointing away from the compass, you’ll line this up with a bearing.
Used along with the map’s key to determine distance.
Magnetized Needle

Arguably the most recognized part of a compass, this needle is red on one end and black or white on the other. The red side points toward magnetic north.
Orienting Arrow
This outline of an arrow allows you to orient the bezel with the map by correctly accounting for declination. We’ll talk more about this later.
Orienting Lines
Parallel lines that move with the bezel, these are handy when trying to find true north in conjunction with a map.
True North vs Magnetic North

It’s frequently believed that all you have to know about a compass is that the red needle points north. Once you figure out where north is, you can check your map and be on your way. However, depending on where you are in the world, this thought process is going to get you lost in a hurry. A distinction needs to be made between true north and magnetic north . True north is where Santa and his little helpers live, up at the north pole. This is the “north” you’ll find on a map, and ultimately the direction you want to locate. The magnetic north pole is where your compass is pointing, and it’s a lot more complicated than it sounds. Mostly because…well…it’s always moving. Discovered 190 years ago, the magnetic north pole was originally in Canada, just north of Hudson Bay. Moving at a pace of about 9 miles each year, the pole recently came within 240 miles of the true north pole in 2017, before continuing its journey toward Siberia. Long story short, the needle on your compass is following a moving target. If that doesn’t spell trouble for your navigation ability, I don’t know what does! Thankfully it’s possible to adjust for this change. Declination, or the distance between true north and magnetic north, is usually laid out on your local topographical map next to the legend. Since magnetic north is always on the move, make sure your map was updated recently, or it might be providing you with faulty information.
Adjusting for Declination
So how do you adjust for declination ? Thankfully it’s a lot more simple than it sounds. First, check the declination diagram on your map to find the degrees and direction of declination. Examples of this would be something like “16.1 ° E” or “3.4 ° W” depending on where you are in the world. Some locations, like Minneapolis and New Orleans are close to the agonic line, which means that true north and magnetic north line up. So if you find yourself close to this line, there’s no extra work to do: your compass is already pointing toward true north. Once you’ve found the degree of declination (we’ll say it’s 10 ° E), all you have to do is move your orienting arrow 10 degrees to the east and line up the magnetic pin inside of it. Once you’ve done that, your direction of travel arrow will be pointing to true north, and you won’t have to touch it again for the rest of your trip.
Orient your Map

Once you’ve set your declination, knowing how to use a compass and map is very simple. Place your compass on one side of the map, so the straight edge of the base plate matches with the edge of the map. Make sure your direction of travel arrow is pointed toward the top of the map, and your bezel is rotated so the N (north) is aligned with the travel arrow. Once you’ve done this, rotate your body (not the compass) until the red needle fits inside the orienting arrow. Congratulations! Your map is now oriented properly and you can take a look at your surroundings to spot any landmarks. Check your map frequently as you hike, so you’re always aware of where you are. It’s much easier to do this than get lost and try to find yourself again.
Take a Bearing
What is a bearing.
The time will inevitably come when you’ll have to take a bearing. If you aren’t very familiar with navigation, a “bearing” is just a way to describe a direction in a more precise way. So instead of being told to travel northeast, which leaves a lot of room for error, you might be told to follow a bearing of 45 degrees.
Taking a Bearing from a Map

Taking a bearing from a map is actually very easy once you’ve adjusted for declination. First, find your current location on the map, as well as the location that you’re trying to reach. Take the straight edge of your baseplate, and line it up between those two points on the map. Make sure the direction of travel arrow is pointing the way that you want to go and not upside down! Once you’ve done that, rotate the bezel until the N (north) marker is pointing north on the map, and your orienting lines are aligned with the north-south grid on your map. Now that you’re all lined up, check to see what number your index line is pointing to, and that’s the bearing that you’ll use. From here, hold the compass with the direction of travel arrow pointing away from you, and rotate your body until the needle falls within the orienting arrow. The direction of travel arrow is now pointing toward your destination, and you can be on your way!
Taking a Bearing from a Landmark

This is really handy if you’re lost or “not quite sure” where you are on the trail. Start off by finding a landmark around you that you can also identify on your map. Once you’ve got your landmark in sight, point the direction of travel arrow at it, and rotate the bezel until your magnetized needle falls inside the orienting arrow. Now, pull your map out and lay your compass on it so that one of the straight edges is touching the landmark. Make sure your direction of travel arrow is always pointed in the general direction of the landmark on the map, and rotate your compass until the magnetized needle falls inside the orienting arrow again. Draw a line down the straight edge of your compass until it intersects with the trail you’re on, and that’s where you are! Knowing how to take a bearing from both a map and a landmark is going to be especially relevant for those of you who enjoy exploring the world in a one person tent or bivy sack . That’s not to say you have poorer directional skill than other campers, but because you’re able to be so mobile, you’re more likely to get lost! Make sure you’re familiar with these techniques before attempting to travel anywhere with a badly marked trail.
Avoid False Readings

Now that you know how to use a compass, there are a couple things to look out for to make sure you’re getting an accurate reading. As you probably know, compasses work by picking up the earth’s magnetism at the north and south poles. However, the earth’s magnetism isn’t the only force that compasses are able to pick up. If your compass is too close to certain types of metal, electrical wires, some mirrors, and even thick, metal glasses, you may get an inaccurate reading. There are even certain geological formations and rocks that are magnetic and will affect the accuracy of your compass. Keep these things in mind next time you’re trying to take a bearing or figuring out where you are on a map.
In Conclusion
Getting lost in the middle of nowhere is not only inconvenient, but potentially dangerous as well. Your phone is adequate up to a point, but there’s nothing more reliable than a map, compass and the know-how needed to use them. Now that you’ve got the tools to read a compass, go out and get one if you’re planning a trip outside. I recommend using one with an adjustable declination, so you can change it depending on where you’re going. They’re a little more expensive, but it’ll save you a lot of headache out in the field.
Discover More on This Topic

Living in a Tent Full Time – Here’s How to Do It

How to Start a Fire Simply and Effectively

Wildfire Prevention and Safety Tips

Top Tips on How to Keep Bears Away from Your Campsite

The Complete Guide on How to Purify Water in the Wild

Bear Safety: Things to Know to Avoid Getting Hurt
Meet the Author!
Spencer Yeomans
By the age of 20, Spencer had already tackled some of the most famed mountain ranges in Europe, Asia, and North America. His mission is to help others accomplish their own outdoor-related goals, even within the time constraints of a 9-5 job and a busy life schedule.
Leave a Comment Cancel Reply
Your email address will not be published. Required fields are marked *
Save my name, email, and website in this browser for the next time I comment.
Our Mission To inspire, equip, and accompany you on the path to a life where work and adventure walk hand in hand.
Our Vision Inspiring the 9-to-5 to embrace nature’s 5-to-9.
Our Mission To inspire, equip, and accompany you on the path to life where work and adventure walk hand in hand.
Want Tips and Tricks to Fly Into Your Inbox?
Signup for news and special offers!
You have successfully joined our subscriber list.
Our Vision Inspiring the 9-to-5s to embrace nature’s 5-to-9.
Amazon Associates Disclaimer
As an amazon associate, i earn from qualifying purchases. this comes at no extra cost to you, and helps me to maintain and grow the site., stop paying top dollar to get your camping fix.
➤ Find free campsites anywhere ➤ Respect and take care of the land ➤ Stay safe when alone in unfamiliar territory
How to Use a Compass
Similar Entries In: Technique , Gear , Hike Safety , Recommended Reads , Bushwhack , True Bushwhack , Tutorials , Winter Gear .

You can master this crucial skill today
Disclosure: This content may contain affiliate links. Read my disclosure policy .
If you’ve found learning how to use a compass intimidating, this guide simplifies the journey and makes each step along the way a confident and enjoyable one.
The first time I navigated by compass was on January 17, 2021 . It was so easy, I couldn’t believe it! On a solo winter bushwhack, I set a bearing beside Biscuit Brook in the Catskills, stepped off the trail, and headed directly up Fir Mountain . I didn’t have to tweak my compass until I got to the summit. Huge success! First time out of the gate! If I can do it, you can do it too.
Like most people, I’d always been too intimidated to learn how to use a map and compass to navigate. Turns out it’s actually super easy; the problem is usually how it’s taught.
This post takes a non-jargon-based approach that will walk you through the whole process, step-by-step.
Table of Contents
Basic Map & Compass Skills Make You Feel Amazing
The sense of freedom, self-reliance, and the thrill of exploring uncharted territory become more than just skills; they become the gateway to unforgettable adventures and the joys of self-discovery.
Knowing your map and compass navigation basics means…
- You’ll never feel lost again — in fact, you’ll become instantly un-get-lost-able ;
- You’ll be able to hike in a straight line through even the densest fogs and forests;
- You’ll feel a much deeper connection to the terrain around you;
- You won’t have to rely on a smartphone for backcountry navigation;
- You’ll feel 100 times more self-reliant. You will not believe the wonderful sense of freedom and accomplishment that comes from navigating with map and compass.
Learning How to Use a Compass is EASY!
You can learn how to use a compass in minutes. You will learn it in minutes. There are only 4 simple steps…
- Orient your map and compass;
- Set a bearing;
- Hang the compass around your neck;
- There’s no fourth step!
LOL. Let’s walk through it, step by step. Afterwards, we’ll get into the gear, the jargon, and the nuances. For now, I just want to show you how easy it is…
Note: This guide is focussed solely on how to set a bearing and navigate with a compass. It does not teach important map reading skills — i.e. interpreting map symbols, contours, etc. — which are, comparatively, much easier to learn.
How to Use a Compass for Hiking
Mastering the art of map and compass navigation opens up a world of possibilities for hikers and outdoor enthusiasts. It’s not just a skill; it’s a key that unlocks the beauty and wonder of the great outdoors. How do you use a compass step by step? Here’s exactly how…
STEP 1: ORIENT YOUR MAP & COMPASS
Your first step is to make sure that your map , your compass and your body are all facing magnetic north .

Turn your compass dial until it shows N at the index mark 1 under the direction-of-travel arrow 2 .
Line up a side edge of your compass with the map’s vertical gridlines 3 .
Next, holding the map and compass, turn your body until the red arrow is inside the red “shed” 4 .
Now that “red is in the shed”, you, your map, and your compass are all facing magnetic north .
Get access to hyper-detailed trail guides, insider tips, and expert advice. Join a vibrant community of like-minded hikers, receive exclusive content, and embark on unforgettable outdoor adventures. Whether you’re a seasoned outdoor enthusiast or just starting out on your hiking journey, this website provides invaluable resources to help you explore the best trails in the Catskills, Adirondacks, Hudson Highlands, Berkshires, and beyond. Get access now to all content on this website instantly and enjoy unique supporter benefits.
STEP 2: TAKE A BEARING
In this example, we’ll set a bearing between the summits of Balsam Cap and Rocky mountains in the Catskills.

Simply place the edge of your compass’ baseplate so it forms a line between your current/starting position 1 and your intended destination 2 .
While keeping the compass tight against the map — so it doesn’t shift — turn your compass dial until the red orientation lines on the dial are facing north and are once again parallel with the vertical gridlines on your map.
In this example, your initial bearing, visible at the index tick , would be 247°.

Adjust your bearing…
If true north and magnetic north were one and the same, you would now be finished and ready to set off.
Usually, they are not, and because they are not we have to make a small adjustment to account for the difference between the two.
This is the part that confuses people the most. But it’s easy…
Every topographic map includes the key you need. Near the edge of your map, look for a small diagram like the one below which will tell you that (in our example area) Magnetic North is 13° west/left of True North.

Elsewhere in the world, this value is very different. This is why you need high-quality topographic maps for any area you plan to navigate with a map and compass. (Thanks to NYNJTC for allowing me to use their amazing maps for this tutorial.)
Okay. 13° West. How do we use this piece of information? Read on…
It’s easy to remember…
If Magnetic North is to the LEFT of True North, turn your dial to the LEFT (counter-clockwise). If Magnetic North is to the RIGHT of True North, turn your dial to the RIGHT (clockwise). The mnemonic for this is: “West is best / East is least.”
In our example, magnetic north is to the west/left of true north, so we will turn our dial 13° to the left. This adds to our initial bearing: 247 + 13 = 260°.
For now, you no longer need your map — and the bearing itself is no longer very important either because…
Your compass is ready to use!
STEP 3: USING YOUR COMPASS
First, hang the compass around your neck. Good job. 50% done.
Second, whenever you want to check which way to walk, hold the compass in your hand and turn your body until red is back in the shed 1 . Then simply follow the direction of travel arrow 2 .

That’s it! 100% done!
You just learned how to use a compass. Remember, practice makes perfect. The more you practice navigating with a map and compass, the more confident you’ll become in your navigation skills.
Get the Step-by-Step Visual Guide
If you’d like an even more thorough walk-through of the whole process — with clearly labeled photos of every single step — grab this step-by-step visual guide from my Ko-fi store…
- Map & Compass Navigation: A Step-by-Step Visual Guide
“As a very active senior citizen Catskill mountain hiker I would highly recommend your map and compass navigation skills guide. It refreshed my memory of a long forgotten skill in 10 minutes. It’s the best 12 bucks I’ve spent in a long time.” — Bob G .
You’ll also learn…
- The best compass to buy
- How to deal with magnetic interference
- How to think about terrain issues
- How to navigate in low visibility (e.g. thick fog and dense forest)
- The individual part names of your compass

The step-by-step visual guide is designed in 9:16 aspect ratio as a PDF, perfect for reading on your phone. This is independently produced content with excellent reviews. Buy it here . I appreciate your support.
Frequently Asked Questions
How do you read a compass for beginners.
There are only three steps. This guide shows you how to read a compass correctly. The Step-by-Step Visual Guide breaks it down even further, with more detail and clear photographs of each step.
How to use a compass for orienteering?
The process is the exact same as shown above. A compass is used in combination with a topographic map to orient yourself and direct your travel.
How do you find north on a compass?
The red needle always points north. Just make sure to hold it away from any other metal.
Does a compass always point north?
In the absence of any magnetic interference, the red needle on every compass always points north.
Which arrow do you follow on a compass?
When used correctly, the red arrow always points north.
You might also enjoy…
- Challenge › Fire Tower Challenge 2024
- New › Say Goodbye to Blisters
- Follow › Sean’s content on Instagram
- Bugs › Black Fly Season Means Black Fly Bites
- Explore › The Hardest Hikes You Can Do
- Hike More › Catskills , Adirondacks , Hudson Highlands , Gunks , Berkshires
Get full access…
Get instant access to the full version of this site and enjoy great supporter benefits: full galleries, full trail notes, early access to the latest content, and more.
Hot on the website right now…
Follow for more….
Follow my @TotalCatskills content on Instagram for regular hiking inspo and safe, inclusive community.
I also stay active on Facebook and Threads .
You might like…
One response to “ how to use a compass ”.
- Pingback: How to Properly Use a Compass: A Clear and Confident Guide - surviving another day
Your comments are welcome here… Cancel reply

Hello, I’m Sean
I write hyper-detailed trail guides and expert hiking content to help hikers like you find and enjoy amazing hikes in the Catskills, Adirondacks, Gunks, Hudson Highlands, Berkshires, and beyond.
Subscribe to My Free Weekly Hiking Newsletter
- Exclusive Trail Guides: Access to detailed, step-by-step trail guides not available anywhere else
- Insider Tips: Expert advice on gear, safety, and hiking techniques
- Hidden Gems: Discover lesser-known trails and secret spots for your next adventure
Sign up today and elevate your hiking experience. You won’t regret it!
Stay healthy
Russia has an international phone code of +7 while the telephone area code of Chelyabinsk is 351.
- Has custom banner
- Has map markers
- Airport listing
- Do listing with no coordinates
- Outline cities
- Outline articles
- City articles
- Has Geo parameter
- Chelyabinsk Oblast
- All destination articles
- Pages using the Kartographer extension
Navigation menu
IMAGES
COMMENTS
That means the needle on your compass is pointing 20 degrees east of true north. You need to travel due north (0 or 360 degrees), so set your compass to 360, hold it in front of you and turn your body until the magnetic needle aligns with the orienteering arrow.
Direction of travel arrow: Marked on the baseplate, the arrow that begins at the compass housing and points away from it towards the top/front side of the compass. Shows the user which direction to point the compass to obtain a bearing in the direction that they wish to travel in.
The basic field compass, also sometimes called a baseplate compass, features the following simple components you should familiarize yourself with as soon as possible: [1] The baseplate is the clear, plastic plate on which the compass is embedded. The direction of travel arrow is the arrow in the baseplate pointing away from the compass.
Line up the edge of your compass on this line so that the travel arrow is in the direction you wish to travel, then twist the azimuth ring (which is simply the ring with the measured units of degrees on a compass) until north on the map and the orienting arrow are aligned. When you remove your compass from the map and turn until the orienting ...
Twist the compass dial (bezel) until the orientating arrow is facing north on the map. Then, while holding the compass flat, turn your body to where the red magnetic needle is facing the orientating arrow and the direction of the travel arrow will be pointing toward your desired destination. To take a bearing by sight:
To do this, turn the bezel until the orienting arrow and the red N is directly above the index line (dash), pointing up towards the direction of travel arrow. Hold the compass flat in the palm of your hand and slowly turn on the spot until the needle also aligns with the orienting arrow, N and the direction of travel arrow.
The direction of travel arrow, a triangle or arrow painted on the baseplate that faces away from the compass housing. This is what you point toward the landmark you want to reach; the arrow helps you determine your orientation and bearing.
The straight edges on the sides help to shoot bearings. Direction of travel arrow: The arrow fixed on the middle of the baseplate. Magnetic needle: This arrow, often red, is what points you north.
Adjust the compass index line pointing to the North or 0 degrees. Rotate your body to align the orienting arrow with a red magnetic needle. "Put red in the shed.". Walk 10 steps, then stop and mark your spot. Adjust the compass index line pointing to the East or 90 degrees.
To read a compass accurately, start by holding it flat in your hand, ensuring it's level to the ground and the direction of the travel arrow is pointing away from you. Photo by Remains / Depositphotos.com. Look for the magnetic needle inside the compass; it's usually red or has a red end, indicating north.
Take a bearing on your first landmark: Line up your direction of travel arrow with your landmark, then rotate the bezel until the needle lines up with the markings for north. (The number next to the index line is your bearing.) On the map, place one corner of your compass's straightedge on the landmark, the rotate the entire compass until the ...
Direction-of-Travel Arrow:This arrow is on the compass's baseplate and points where you want to go. This arrow is an integrated part of the compass and does not move.
Here are a few tips on how to read a compass correctly, as explained by the Compass Dude: 1. When holding the compass, make sure that the baseplate is level and the direction-of-travel arrow points away from you. 2. Hold it at a height between your waist and your face, and close to your stomach.
Direction-of-Travel Arrow This arrow indicates where you need to point the compass when taking or following a bearing.
Direction of travel arrow Marked on the base plate, this arrow tells you which direction to travel or where to point the compass when you're taking or following a bearing.
Then rotate the compass housing until the compass needle's contained within the orienting arrow, and read the measurement where the direction-of-travel arrow meets the dial.
Now, pull your map out and lay your compass on it so that one of the straight edges is touching the landmark. Make sure your direction of travel arrow is always pointed in the general direction of the landmark on the map, and rotate your compass until the magnetized needle falls inside the orienting arrow again.
Orient your map and compass. Turn your compass dial until it shows N at the index mark1 under the direction-of-travel arrow2. Line up a side edge of your compass with the map's vertical gridlines3. Next, holding the map and compass, turn your body until the red arrow is inside the red "shed"4.
Chelyabinsk is the closest city to where a meteor exploded during its fall through the atmosphere on 15 February 2013. It is the largest known meteor to enter Earth's atmosphere since the 1908 "Tunguska Event". The high heat and extreme pressures of entering and traveling through the atmosphere caused the meteor to explode at an altitude of 30 ...
Chelyabinsk [1] ( Russian: Челя́бинск chel-yah-beensk) is a city in Chelyabinsk Oblast, Russia .Chelyabinsk is the administrative center and largest city of Chelyabinsk Oblast, Russia it ranks seventh among all Russian cities, with a population more than 1.2 million people as of 2023. Yekaterinburg is the largest city in the Ural Federal District, while Chelyabinsk is the second ...
The Chelyabinsk Region is a land of endless mountains and forests, 3,000 lakes and ancient legends. This is a region on the border of two major and distinct parts of the world - Europe and Asia. Here you can go downhill skiing, touch a meteorite and taste the most delicious dumplings!
Chebarkul — Chebarkul is a town in Russia, which is located 78 km west of Chelyabinsk. The city is located in the southern Urals, on the Eastern slope of Ilmensky mountains, on the shore of lake Chebarkul. The name of the city and the lake comes from the Turkic language and it means 'a beautiful colorful lake'.