You are using an outdated browser. Please upgrade your browser to improve your experience.

How to change app icons on macOS

There are lots of reasons you may want to change the icon of an app on macOS. Maybe the developer recently changed one of the icons and you don't like it as much as the old one. Perhaps you've got a great idea for a new themed appearance that you'd like to make. Whatever the reason, we can help show you the easiest way to change your icons.
We're not going to teach you how to make your own icons, as that can be an involved process. However, if you want to find ready-made icons, you can check out our favorite resources in our Customize your iOS 14 Home Screen article — they'll work just the same.
Important : You can only change the icon of third-party apps, such as Google Chrome, Slack, Photoshop, etc. You cannot change the app icon for Apple-related apps, such as Messages, Calendar, Music, and Podcasts.
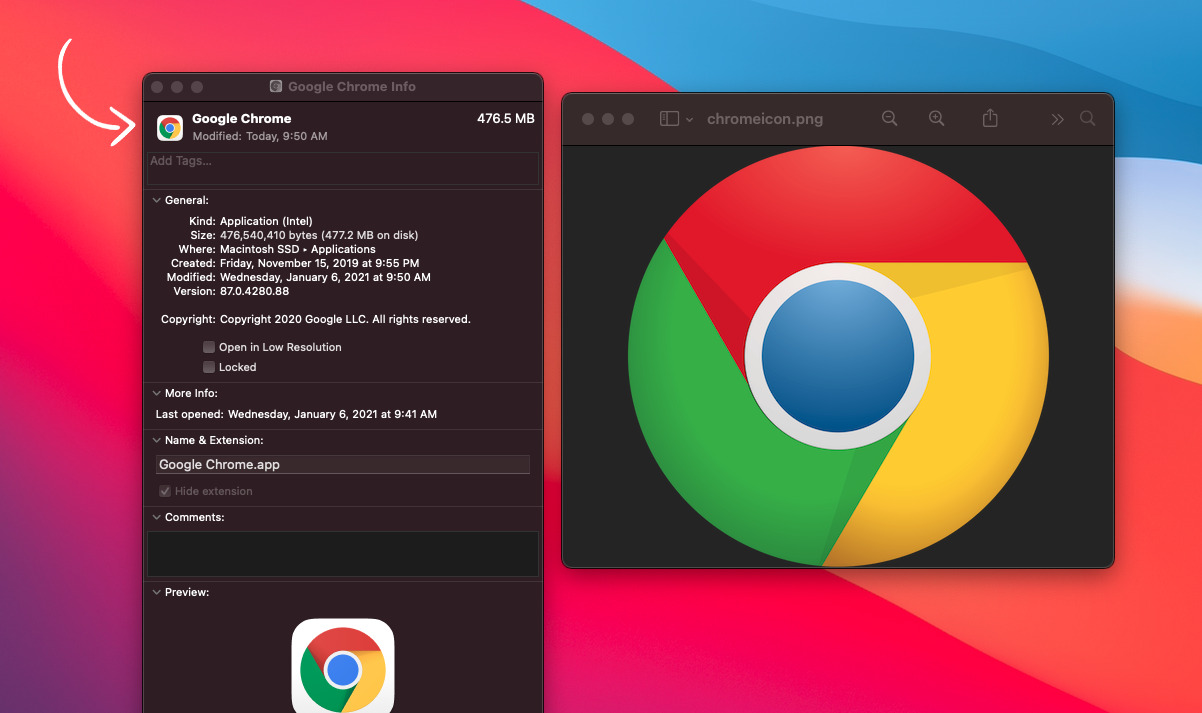
How to change an app icon on macOS
- Find an image you would like to use for your App icon and save it to your desktop. Square PNG and JPG files work the best.
- Open Finder
- Click Applications
- Right click on the app whose icon you'd like to change
- Select Get Info
- Right-click the desired icon image on your desktop
- Select Open With
- Select Preview
- While in Preview navigate to the top navigation bar
- Navigate back to the app's Get Info window
- Click the small icon at the top left of the window (see above image)
- Press Command + V on your keyboard
- Close the Get Info window
- Close the app, and if needed, clear it from your dock
- Reopen your app
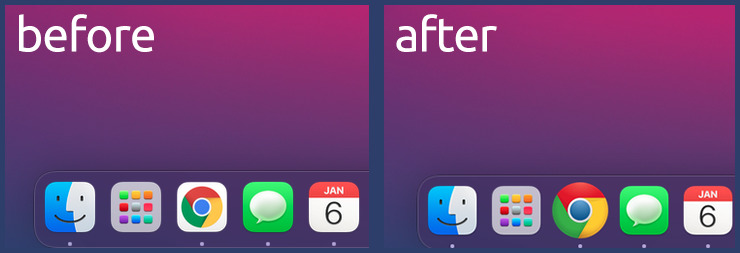
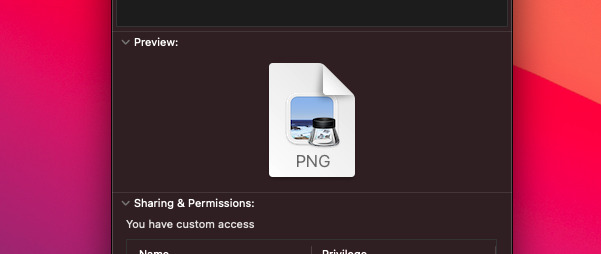
Important: You must copy the image you wish to use from Preview, as merely left-clicking on the icon and copying it from your desktop will insert macOS's default placeholder image file.
Of course, if you change your mind, you can always reset the app icon to the ones the developer intended you to use, as well.
How to reset an app icon on macOS
- Right click on the icon you'd like to change
- Click the small icon at the top of the window
- Tap the Delete key on your keyboard
Of course, these aren't the only icons you can change, either. If you'd like, you can easily change the icons for folders this way, too.
Top Stories

Apple's best-selling 14-inch MacBook Pro M3 with 16GB RAM is back on sale for $1,599
Your next iPhone could be the iPad mini - iPhone 15 vs iPad mini showdown

All-screen foldable MacBook may come in multiple sizes with M5 processor
Siri for iOS 18 to gain massive AI upgrade via Apple's Ajax LLM
iOS resurrected photo bug fixed with iOS 17.5.1 detailed by Apple

iPad Pro hands on: Luxury technology in an impossibly-thin package
Featured deals.

Best Memorial Day 2024 sales: Apple AirPods, MacBooks, new iPads up to $700 off
Latest exclusives.

Apple set to deliver AI assistant for transcribing, summarizing meetings and lectures
Apple to unveil AI-enabled Safari browser alongside new operating systems

System Settings getting shuffled again in macOS 15, among other UI tweaks
Latest comparisons.
13-inch tablet power compared — iPad Pro vs iPad Air

Flagship iPad head-to-head — M4 iPad Pro vs M2 iPad Pro compared

iPad Air shootout — 2024 M2 iPad Air vs M1 iPad Air compared
Latest news.

Today's MacBook Pro price war knocks $300 off Apple's M3 Max 16-inch with 48GB RAM
Apple Authorized Resellers Amazon and B&H Photo are engaged in a price war on the M3 Max MacBook Pro 16-inch, driving the high-end model with a top-of-the-line 40-core GPU and 48GB RAM down to $3,699.

App icon customization, new emoji creation coming to iOS 18
A new report suggests that further enhancements to both the Home Screen and various Apple apps are coming in iOS 18, arriving in fall 2024.

Flash deal: grab a Babbel lifetime subscription for $139.97 ($460 off)
For 48 hours only, pick up a lifetime Babbel subscription with access to all languages for just $139.97.

Apple later this year hopes to make real-time audio transcription and summarization available system-wide on many of its devices, as the iPhone maker looks to harness the power of AI in delivering efficiency boosts to several of its core applications, AppleInsider has learned.

Several of Apple's standard system components are on the verge of receiving significant AI-related enhancements, with Safari, Spotlight Search, and Siri being first in line for the treatment.
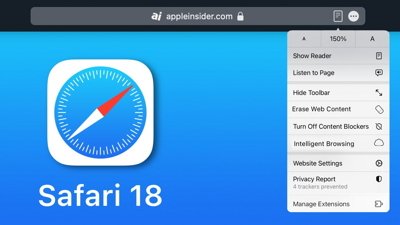
Apple is testing a version of its Safari web browser that includes UI tweaks, advanced content blocking features, and a new AI-powered tool dubbed Intelligent Search, AppleInsider has learned.

The coupon special knocks $200 off Apple's latest 14-inch MacBook Pro with an M3 chip and bump up to 16GB unified memory. Plus, grab a $50 discount on three years of AppleCare.

ICQ 1996-2024: The first universal messenger had a good run, and is leaving us soon
While you probably haven't thought about it in years, the first mainstream universal messenger app for the Mac and just about every other platform will finally be completely retired in June 2024.

How to answer and end phone and FaceTime calls using Siri
In addition to initiating phone calls, you can use Siri to answer incoming phone and FaceTime calls. When the call is over, you can also use Siri to end the call as well — with an important caveat.

How to look up your App Store purchase history
Being able to look up your past purchases on Apple's App Store can help you recover an app you accidentally deleted, or spot a problem with a subscription.

How to repurpose an old iPad and make it useful again
After upgrading an iPad, you may want to find a use for your old one instead of disposing of it. Here are ways you can make your older iPads more useful.
Latest Videos

Retro gold rush: which emulators are on the App Store, and what's coming
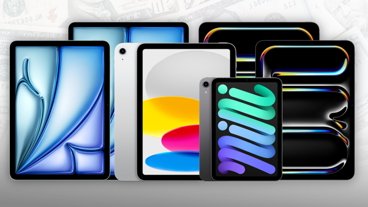
iPad, iPad Air, iPad Pro buyer's guide May 2024: which iPad to buy for any budget

iOS 17.5 is here with Repair State & EU Web Distribution
Latest reviews.

Waterfield Shield Case for Apple Vision Pro review: Way better for travel than Apple's case

Keychron Q1 HE Review - Near-infinitely adjustable keyboard with impressive design

Atoto S8 Pro Wireless CarPlay receiver review: great, but fragile aftermarket solution

{{ title }}
{{ summary }}
- macOS Monterey
Here’s what’s new with the redesigned Safari in macOS Monterey and how it works
9to5Mac is brought to you by CleanMyMac X . Find hidden junk, large old folders, unused apps, and heavy memory consumers. You can also use CleanMyMac X to remove malware, unwanted pop-ups, and virus extensions. Try it for free .
Apple features a redesigned Safari with macOS Monterey but as it happens, the biggest UI change isn’t seen with the default version. Let’s jump into what’s changed, what’s new, and how Safari in macOS Monterey looks and works.
Apple made its way through a lot of Safari iterations during the macOS Monterey beta period and it even changed from the 12.0 build that comes installed on the 2021 MacBook Pro to the official Monterey public 12.0.1 release.
- Apple reverts to more traditional Safari tab design in macOS Monterey RC following controversy
- Apple moves Safari favorites bar back where it’s supposed to be in Monterey beta 10
While the default Safari experience on Monterey 12.0.1 and later looks very much like what came with Big Sur, you can opt for the new modern and minimal new tab design by heading to Safari > Preferences > Tabs > Compact.
- Hands-on: 100+ macOS Monterey changes and features [Video]
Beyond the default classic and optional super modern UI, Safari in Monterey includes new tab groups, a redesigned sidebar, the new Quick Note feature, UI/button changes, and more.
Safari in macOS Monterey: What’s new and how it works
The start page in the new Safari looks about the same with your Favorites up top, followed by Frequently Visited, Privacy Report, and Reading List. Like Safari in Big Sur, you can customize your start page background image with the included options or your own. You can drag to reorder the different sections or turn them on/off.
New in Safari for macOS Monterey/iOS 15 is that background images automatically sync across devices via iCloud. You’ve also got the new “Use Start Page on All Devices” option and a checkbox to turn on/off iCloud Tabs for the start page.
You can head to the bottom right corner 3-line icon to customize your start page, including the background image.

Safari’s new unified tab/search/toolbar
Just like Safari in Big Sur, you can right-click at the top to customize the new unified tab/search/toolbar with more buttons (or in the menu bar, click View > Customize Toolbar).
By default, the toolbar includes five buttons: Sidebar/Tab Groups, back/forward, downloads, share button, and new tab + icon.
Here’s a look at how it comes and what’s available when you customize:
If you choose to stick with the default Safari in Monterey, you’re getting the same tab UI experience you’re used to with macOS Big Sur and earlier.
But for the new modern UI, it’s quite an aesthetic change. Head to Safari > Preferences > Tabs > Compact to use the new design:
This is how the modern, “ Compact ” tab design looks:
And here’s the default/traditional UI, what Apple calls “ Separate ” tabs:
Using tabs and tab groups in the new Safari
You can drag tabs or the URL/search bar to the left to pin a tab/open page. However, the mechanics can feel a little clunky in the modern Compact UI. For example, reordering pinned tabs requires some precision and patience.
With the new Sidebar/Tab Groups button (in either the Separate or Compact UI), click the dropdown arrow to pull up saved Tab Groups or create new ones:
You can create a new empty tab group or quickly make a new Tab Group your existing open tabs.
As you’ve already guessed, you can make multiple tab groups to quickly switch between different sets of saved web pages to work and play more seamlessly.
Just click the Tab Groups drop-down arrow anytime to get back to your saved groups. And alternatively, you can click the Sidebar button to see your Tab Groups.
Finally, you can click the Tab Overview button (four squares icon) to see all open tabs.
Refreshed Sidebar
For the new Sidebar, you’ll see “Start Page” up top with your Tab Groups below.
Under that, you’ll see links that have been shared by others, then Bookmarks and your Reading List at the bottom.
When the Sidebar is enabled, you’ll also have the two-window + icon show up to quickly create a new empty tab group.
Creating Quick Notes
Quick Notes are new for macOS Monterey and iPadOS 15. There are a couple of ways to use the feature with the new Safari.
You can click the three-dot icon in the URL/search bar > Add to Quick Note with the Compact UI.
With the Separate tabs UI, you can click the share button (square with up arrow > Add to Quick Note).
Or, when you highlight text on a webpage and do a right-click, you can choose Add to Quick Note.
Safari in macOS Monterey wrap-up
After a lot of changes for Safari throughout the Monterey beta, Apple seems to have landed on a build that satisfies people who want the classic browsing experience and tab design as well as including an all-new UI for those ready to change things up.
What do you think of the new Safari in macOS Monterey? Are you using the new tab UI or the default? Share your thoughts in the comments below!
9to5Mac is brought to you by CleanMyMac X . Find hidden junk, large old folders, unused apps, and heavy memory consumers. You can also use CleanMyMac X to remove malware, unwanted pop-ups, and virus extensions. Try it for free .
FTC: We use income earning auto affiliate links. More.

Check out 9to5Mac on YouTube for more Apple news:

A collection of tutorials, tips, and tricks from…

Michael is an editor for 9to5Mac. Since joining in 2016 he has written more than 3,000 articles including breaking news, reviews, and detailed comparisons and tutorials.
Michael Potuck's favorite gear

Satechi USB-C Charger (4 ports)
Really useful USB-C + USB-A charger for home/work and travel.

Apple Leather MagSafe Wallet
My slim wallet of choice for iPhone 12

Manage push notifications
Sign up for our daily newsletter
- Privacy Policy
- Advertise with Us
Customize Safari on Mac with this Ultimate Guide
For most Mac owners, Safari is the gateway to the World Wide Web. Given that it’s probably your most used application, knowing tips, tricks and new features is the best way to get the most out of it. While Safari does not have the extension libraries of Chrome, it still has a few tricks up its sleeve for Mac owners. Read on to learn how to customize Safari on your Mac.
1. Pin Tabs

You probably visit a couple of sites on a regular basis, and keeping them close can make it easy to refer back to them. When a tab is pinned in Safari, it stays docked as the farthest-left tab. Pinning a tab is incredibly easy: right-click on any open tab and select “Pin Tab.” Rearranging pinned tabs is as easy as dragging the tabs around one another until you have a setup you prefer.
2. Mute Tabs

We have all been there as you open a new tab expecting to read new content and are instead hit with an auto-play video. In Safari, when a new tab is opened with audio playing, you’ll see a little speaker icon in the tab. Click the speaker icon, and it will automatically mute the tab.
3. Rearrange Tabs
For anyone who has more than a few tabs open at a time, organization can become an issue. To help with this, Safari enables you to get at least some semblance of order.
1. Open the “Window” menu on the Mac bar.

2. Choose “Arrange Tabs By.”

3. You can now choose between “Title” and “Website.”

For many, choosing to sort by website will be the most useful. That way, if you have multiple tabs open, they will all be next to each other.
4. Customize Safari Toolbar
The Safari toolbar is where your most important buttons will go for daily use. That includes your Home button, Sidebar, Tab overview, and so on.
1. Right-click anywhere on the toolbar and select “Customize Toolbar.” You can then drag any item into the toolbar.

2. Once you have dragged all of the icons you want to use, click “Done.” Then, all of your changes will be saved.

5. Change Your Search Engine
Safari, like most browsers, will let you choose between a few different default search engines. Google is the default search engine in Safari, but it’s not your only available option.
1. Go to “Safari -> Preferences” and open the Preferences window.

2. Click the “Search” tab.

3. You will immediately see a drop-down that allows you to choose between Google, Yahoo, Bing, Ecosia, or DuckDuckGo.

At this time, there is no way to add your own search engine. For now, Safari has chosen to add the most popular options.
6. Save Pages as PDFs
If you ever need to export a website as a PDF, Safari makes it super simple. Head to the page you want to save, then click on File and “Export as PDF.”

The last remaining step is to choose where on your hard-drive you want to save the page. You can then refer to the PDF at any time, and it will automatically open in Safari, Preview or your PDF viewer of choice.
7. Handoff Continuity
As Safari is the default browser for iOS and Mac, Apple has long explored how to make it seamless between the two systems. Enter Handoff , Apple’s solution for starting an email on Mac and picking it up on iOS. This also works incredibly well with Safari.
1. Start by signing in to your iCloud account on both devices.
2. On your Mac computer, go to “System Preferences -> General,” and click on the box next to Handoff to allow it.

3. On iOS or iPad OS, go to “Settings -> Handoff” and move the switch so that it’s active.
4. Once activated, you can go about your regular browsing business on your Mac. When you want to pick up wherever you left off on your Mac on your iPhone or iPad, a little icon will appear above your Safari icon. Tap on Safari and it will allow you to select whatever page you want to continue browsing.
Also read: Safari Not Working on Your iPhone? Here’s How to Fix It
8. Reading List
Bookmarks were yesterday’s news. Today, it’s all about Safari’s Reading List. We have all come across interesting articles that we want to read but don’t have time at the moment. Across all Apple devices, Reading List is enabled via the Sidebar icon on Safari on Mac or by using the book icon on Safari on iOS/iPadOS. You can choose the eyeglasses icon to view your entire article list. To add a new article, you have two options on Mac.
1. The first is to hit the “+” sign that appears next to the website URL. The article or site will automatically save itself to your reading list.

2. Alternatively, you can click on the Share Sheet icon, and the first option in the drop-down is “Add to Reading List.” Select that and the article will automatically save itself to your Reading List.
If you want to read these articles offline, say while you are on a plane, go to “Safari -> Preferences -> Advanced” and click on “Save articles for offline reading automatically.”

9. Safari Reader
Safari Reader strips away all of the distractions from any site where it’s available, allowing for an uninterrupted view of your chosen content. Note that it does not work on every website but definitely works on many.
1. To activate Reader, click on the four-line icon that appears next to the “+” button to the left of the URL.

2. A single press of that button will enable Reader view. Clicking on it again will take you out of reader view.
10. Set Custom Safari Icon
If you want to customize your Safari icon, doing so is surprisingly straightforward.
1. While holding down the Ctrl button, click the Safari logo and select “Options -> Show in Finder.”

2. When Finder loads, you’ll find yourself on the Applications page. Click the Safari logo again while holding Ctrl and choose “Get Info.”

to the top-left corner of the Get Info window, you’ll see a tiny Safari icon next to “Safari.app”. Click on it to highlight it, then drag your replacement icon image to replace it.
11. Customize Safari Theme
When you first use Safari on your Mac, you’ll see the standard white and grey interface. This is fine, but it can get a little boring for some users. Fortunately, you can customize your Safari theme in several ways.
Change to Dark Mode
For instance, you can change your browser to show dark mode.
1. Go to the Apple icon in the top left of your toolbar and choose “System Preferences … ” in the drop-down.

2. Select “General.”

At the top of the next window, you’ll see the “Appearance” option. Click on “Dark.”

Change Safari’s Background Image
Another way you can customize Safari’s theme is by tweaking the background image on your homepage.
1. Click on the “+” button in the top right of your Safari browser to open a new page.
2. Select the icon showing three lines with sliders in the bottom-right corner.
3. Make sure the box next to “Background Image” is ticked. Then, choose from one of the custom background images beneath it.

In addition to using the background images included with Safari, you can add your own. Click the “+” icon instead of one of the other images.
Choose the picture you want to have as your background image for Safari.

Once you’ve picked your image, you should see the changes take place immediately.
If you want to clear your background later, you can click on the screen while holding the Ctrl button and choose “Clear Background.”

12. Customize Safari Homepage
Once you’ve customized the theme of Safari, you can fine tune the homepage.
When you see your “Frequently Visited” section, all pages in this area will initially appear as smaller versions of the actual web pages. However, you can make them show up as icons again.
1. Click on one of the pages while holding down the Ctrl button.
2. Select “View as Icons.”
You can also remove some of your Favorites from view. As with changing the “Frequently Visited” pages to icons, click on one of the pages and simultaneously hold the Ctrl button. Select “Delete” from the dropdown menu, and your changes will take effect.

13. Create Custom Bookmark Folders
When customizing Safari on your Mac, you’ll want to think about productivity and not just aesthetics. One of the best ways to organize your most-visited pages is by creating custom bookmark folders to put all of them in.
1. Click on the icon in the top left that sits next to the red, yellow, and green circles.
2. On the bookmark tab, click anywhere while holding Ctrl .
3. Select New Folder and give it a name.

4. Drag to add pages to this folder.
14. Customize Safari Location
Like your iPhone, your Mac can easily track where you are in the world. It uses this for several reasons, such as changing the date and time on your device.
However, websites can also track you – and some users may want them to do so. If you don’t want specific sites knowing where you are in Safari, follow these steps:
1. Click on “Safari” next to the Apple logo and choose “Preferences … ” from the drop-down.

2. Go through your currently open websites and choose whether you want to allow or deny access.

You can also block future visited websites from tracking you. Go to the bottom where it says “When visiting other websites.” If you want to revoke permission, open the drop-down and select “Deny.”
Also read: How to Make Mobile Safari Save Your Passwords on iOS
Frequently Asked Questions
1. can i change the color of the safari browser.
Besides tweaking from light to dark mode, you can’t customize Safari’s color on your Mac without third-party software.
2. Can I change my Mac’s default browser?
Yes. To change your Mac’s default browser, go to “System Preferences -> General -> Default Web Browser.” Open the drop-down and change to the browser of your choice.
3. Why won’t my Safari icon change on my Mac?
In some cases, you may find that the Safari icon on your Mac doesn’t change. You may need to close and reopen the app. If that doesn’t work, try changing the “Read & Write” privileges on your device.
Wrapping Up
Safari is one of the most important native Apple apps, and customizing it will both let you show off your personality and improve productivity. The above tips to customize Safari are only the tip of the iceberg. Don’t forget that you can also add extensions to extend its functionality . Do you use Safari on your Mac or one of the strong alternatives ?
Our latest tutorials delivered straight to your inbox
Danny has written for online audiences for 10+ years. He specializes in Apple products and loves writing on his MacBook, keeping in touch on his iPhone, and measuring his workouts on his Apple Watch. Danny's work has featured in multiple places online, including MUO, AppleToolBox, and Guiding Tech. Away from the keyboard, he's passionate about photography and leading an active lifestyle outdoors.

How-To Geek
How to customize the safari toolbar on your mac.
If you use Safari as the default browser on your Mac, you should take some time to customize the Safari toolbar to improve your productivity.
Quick Links
Why should you customize the safari toolbar, how to customize the safari toolbar.
Safari on the Mac features a minimal interface. Although you don't have a lot of room for customization or theming, you can change the toolbar buttons to suit your productivity style. Here's how to make the Safari toolbar look and work the way you want it to.
By default, the Safari toolbar shows all your enabled extension icons along with the URL bar and navigation buttons.
If you have a lot of extensions, you might want to hide some from the toolbar. You might also want to disable the Sidebar button or the Share button if you're going for a cleaner look.
When you go to customize the Safari toolbar, you'll find a new set of buttons that you can add to the toolbar. Shortcuts such as iCloud Tabs, Top Sites, Home, History, Bookmarks, Zoom, Mail, Print, Web Inspector, and so on.
For a pro user who doesn't like using keyboard shortcuts, fast access to features like Bookmarks and History can be incredibly useful. If you're a web developer, the same goes for the Web Inspector tool.
Related: Mac Users Should Ditch Google Chrome for Safari
Now that we've answered the why, let's get to the how. You can customize the Safari toolbar to your liking by first clicking "View" from the menu bar and then selecting "Customize Toolbar."
This will open a drop-down menu with a visual customization tool for the toolbar. You'll notice that all the icons in the toolbar start to jiggle, signaling that you can now move them around if you like. If you've tried reorganizing your iPhone or iPad home screen , you'll be familiar with this interface.
In the top part of the customization menu, you'll see a list of all available buttons. This is where you'll find new buttons like History or Bookmarks. If you want to add one of these buttons to the toolbar, click on the button, and drag it to the toolbar.
If you want to remove a button, click and drag the icon out of the toolbar area.
You can also customize the look of your Safari toolbar by adding some empty space. Click on the "Flexible space" button---located in the last row---and drag it into the toolbar.
To remove flexible space, click and drag it out of the toolbar.
Now that you understand how every element works, feel free to play around to get the Safari toolbar to look and feel just the way you like it.
Safari, macOS, BigSur Icon
You are free to:
- Use the icon for commercial purposes
- Share the icon
- Edit the icon
- Use the icon on merchandise for sale
You cannot:
- Sell the icon
- MacOs Big Sur
- Social media & Logos
More icons from MacOs Big Sur
Related icons with tags: Safari , macOS or BigSur
How to refresh website favicons in Safari on Mac
Are some website icons missing or showing incorrectly in Safari? Learn how to refresh Safari favicons on your Mac to force the browser to fetch the new icons and display everything correctly.
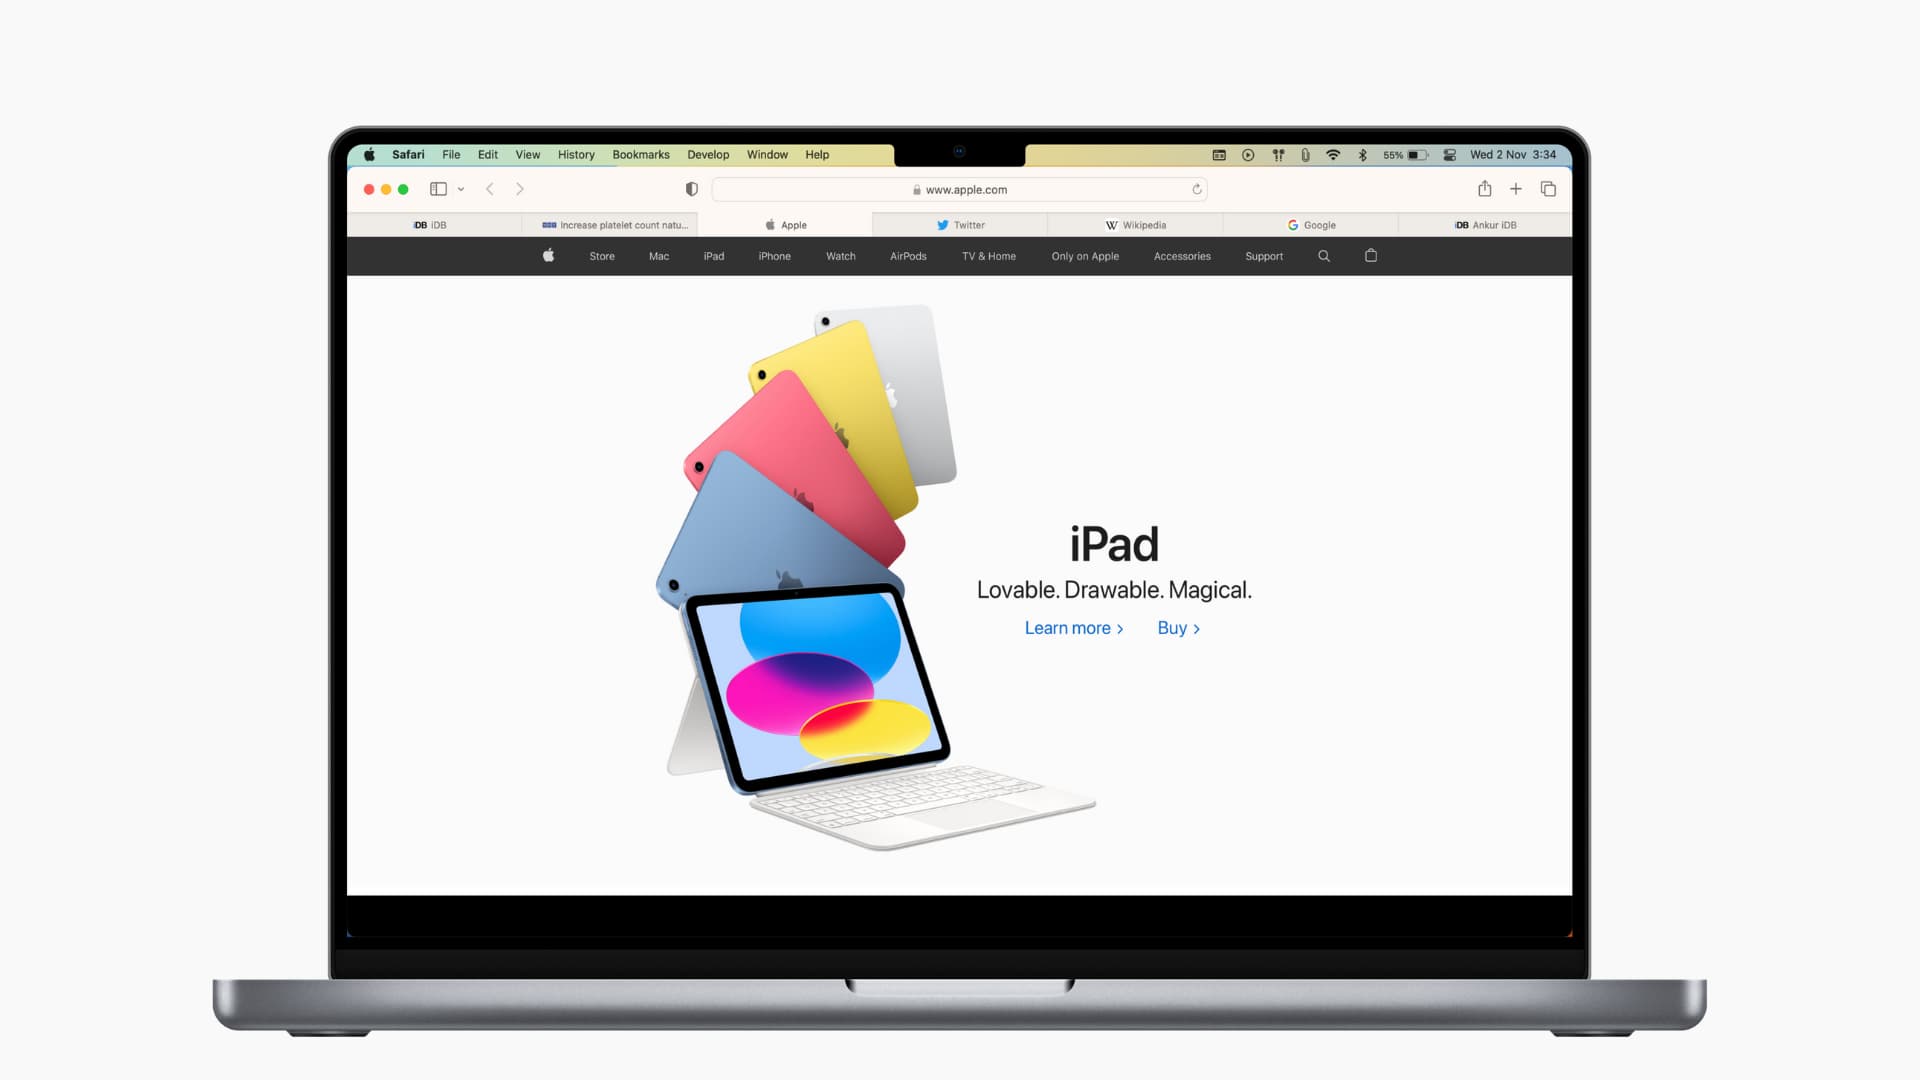
A favicon is the small website logo you see in your browser tab. The ability to see favicons for websites in Safari is convenient. It lets you spot the site you want at a glance by seeing just the icon on your tab, in your bookmark list, and in your history.
But have you ever noticed favicons that go missing or are incorrect, showing the wrong icon? You can “refresh” the website favicons in Safari on Mac in just a few steps, and we’ll show you how.
Also see: How to hide or show website icons in Safari Favorites Bar
Delete Safari’s favicon cache
If you’re experiencing favicons that aren’t right, maybe they have icons for different websites; clearing the cache and starting over is a good option.
1) Close and quit Safari . You can do this by clicking Safari from the top menu bar and choosing Quit Safari .
2) Using Finder, click Go > Go to Folder from the menu bar
3) Enter ~/Library/Safari/Favicon Cache/ in the pop-up window and go to this location.
4) Select all items in the cache folder and move them to the Trash . You can select all with the keyboard shortcut Command + A and then drag them to your Trash or right-click and pick Move to Trash.
5) Empty your Trash or delete those items from it. (For help with both options, check out our tutorial on How to Empty Trash on Mac .)
6) Open Safari .
The Safari favicon cache folder will rebuild itself as you visit websites. And you’ll need to visit the sites you have saved for the favicons to appear. But those that were incorrect or missing should show up correctly.
Related : How to skip the Trash and delete files on Mac immediately
Alternative option
If you’d rather try something else, there is one other option that may or may not work.
Open the website with the incorrect favicon in a private window in Safari. You can do this easily by right-clicking Safari in your Dock and selecting New Private Window or selecting File > New Private Window from the menu bar.
Visit the website in the private window, and when you return to your non-private Safari, the favicon may be correct.
The suggestion comes from the Apple Community Forum . This method did not work for the user with the question, nor did it work for me; however, it’s worth a try if you’d like.
Enabling favicons in Safari
As a reminder, you can enable favicons in Safari on older versions of macOS by following these simple steps.
1) With Safari open, click Safari > Preferences from the menu bar.
2) Select the Tabs tab.
3) Check the box for Show website icons in tabs to enable favicons.
Hopefully, either rebuilding the Safari favicon cache or opening a specific site in a private window works for you. And if you have another method to refresh favicons in Safari that works for you, please share it in the comments below!
Useful Safari tips:
- 11 tips to customize and personalize Safari on iPhone and iPad
- How to pin tabs in Safari on iPhone, iPad, and Mac
- How and why to update Safari, Chrome, and other web browsers on iPhone and Mac
- How to open multiple websites at once on Mac

Looks like no one’s replied in a while. To start the conversation again, simply ask a new question.
Generic icon on Safari in Dock & App folder, how do I fix?
Disappeared Compass in Safari Icon
Catalina on a MacBook Air and both in the Dock and the Applications folder, the Safari icon is the generic pad and tool app icon.
How do I get it back to the compass and does this indicate an underlying problem?
Was going to see if Diskwarrior could fix, but I can’t run it from the SuperDuper clone on the external SSD because Catalina won’t let that SSD be the startup.
Posted on Jan 17, 2021 10:19 AM
Posted on Jan 19, 2021 10:53 AM
Hey Thomas,
It sounds like you're seeing an issue with the Safari icon on your Mac. We can understand wanting to get that resolved. We want to help.
We'd recommend testing to see if the same issue occurs in safe mode. This article explains how: Start up your Mac in safe mode
Similar questions
- Mac OS icon folder problem on dock l change my folder icon on Mac OS Catalina 10.15.7. When I move it to Dock, it shows as a standard one . l have tried .icns, .jpg. png, restarting, shutting down my laptop and other stuff but it is still the same. Is it as it should be? 161 3
- Missing Chrome icon from Finder Ever since updating to Catalina, the icon for Google Chrome is missing. It's missing from the dock as well as Finder. It shows up as a generic application icon. Chrome is up-to-date. I've tried deleting and reinstalling it. No change. I've used the trick to replace the icon within the Get Info window, but the image changes to a generic icon for whatever image type I use. Tried rebooting in Safe Mode and restarting. Tried resetting the SMC and PRAM. Same issue. What can I do? 3960 2
- icon's have changed Mac os catalina 10.15.2 after todays update my finder icon has change to the trash can, the trash can is the finder icon. What can i do to make things normal. 159 2
Loading page content
Page content loaded
Jan 19, 2021 10:53 AM in response to Thomas Miller2
Jan 25, 2021 4:39 AM in response to barberlives123
Safe Mode didn't change a thing. The Safari app in the Applications folder and the Dock version are both still the generic, non-compass version. Safari 14.0.1 and 10.15.7 on a MacBook Air produced in 2019 and purchased in 2020.
Indicative of an under lying problem? Wish it were simpler to start up from a clone on an SSD. Am planning to run Disk Warrior.
Feb 1, 2021 3:55 AM in response to WinsC1
I wondered about running Disk Warrior. I have a SuperDuper clone on an SSD that I could run DW from. However, Catalina won't allow me to start up from that SSD.
Command-R takes me to macOS Utilities, but that does NOT have "Startup Security Utility" as claimed. The closest option would be "Restore From Time Machine Backup." It doesn't look like there is any way to use the SSD as the Startup Disk. Howcum???
Another option in macOS Utilities is to "Reinstall macOS." Your recommendation? Does that destroy any settings or eliminate any files or applications that we have added to this 2019 MacBook Air running Catalina?
Feb 2, 2021 7:46 AM in response to Thomas Miller2
Reinstalling macOS using the previous steps would not affect the data on your Mac as long as you don't erase your hard drive prior to the reinstall. This will reinstall the main macOS system files which includes Safari.
Jan 26, 2021 8:57 AM in response to Thomas Miller2
Thanks for testing that.
Next, we'd recommend running a reinstall of macOS which will reinstall Safari. This article explains how: How to reinstall macOS
Browse Icons
- Newest Packs
- SVG Icon Packs
- Popular Packs
- Random Packs
- License: Commercial free Packs
- Adobe Icons
- Alphabet Icons
- Animal Icons
- Apple Icons
- Application Icons
- Avatar Icons
- Buildings Icons
- Business Icons
- Cartoon Icons
- Christmas Icons
- Computer Icons
- Culture Icons
- Drive Icons
- Easter Icons
- Emoji Icons
- Folder Icons
- Funny Icons
- Halloween Icons
- Hand-Drawn Icons
- Holiday Icons
- Lifestyle Icons
- Media Icons
- Medical Icons
- Microsoft Icons
- Mobile Icons
- Music Icons
- Nature Icons
- Object Icons
- People Icons
- Photographic Icons
- Places Icons
- Sci-Fi Icons
- Social Network Icons
- Sport Icons
- System Icons
- Technology Icons
- Toolkit Icons
- Transport Icons
- TV & Movie Icons
- Vintage Icons
- All Designers (by Alphabet)
- All Packs (by Alphabet)
- "Staff picks" Icon Packs
- High Resolution Packs
- Largest Packs
- Pixelart (Old Style) Icon Packs
Need more? Visit our Sitemap for all options.
Safari Icon
Preview other sizes:
More icons with these tags:
More icons from the " OS X Yosemite Preview Icons " icon pack:
- © 2024 IconArchive.com
- · Privacy Policy
- · Terms of Services
Request your app icon
Need a new app icon for your business? Send me a message to receive a quote.

Safari Favorites Icons Missing? 7 Ways to Get Them Back

If you buy through affiliate links, we may earn a commission at no extra cost to you. Full Disclosure Here…
Safari favorites icons, or favicons, are a celebrated convenience that allows you to quickly see the website you want in history, bookmarks, or tabs. Unfortunately, these favicons tend to appear incorrectly or go missing. This article shows you how to get back missing favorite icons on your Mac.
If you notice that your Safari favorites icons are missing , clearing your cache and restarting Safari is the fastest way to get them back . There is another alternative way of opening the affected website in a private Safari window; I will look at it in detail later in the article.
How to Find Safari Favorites Icons Missing?
- Method 1: Clear Safari favorites icons cache
Method 2: Use Safari Private Window
Method 3: create new user, method 4: verify your preferences, method 5: restore items from time machine, method 6: download updates.
- Method 7: Use the safe mode
In Conclusion
If the favorites icons are missing in Safari on your Mac, try going to “Safari” > “Preferences” > “Tabs” and check the box next to “Show website icons in tabs.” If this doesn’t solve the issue, try resetting the Safari browser by going to “Safari” > “Reset Safari” and selecting the appropriate options. If the issue persists, try restarting your Mac or updating the operating system.
How to bring back Safari Favorites Icons
When Apple first introduced the favicon feature on Safari, most people unsurprisingly jumped on it enthusiastically. The convenience of quickly locating your favorite website on a tab or bookmark list was too good to pass up. Precious seconds are saved by that little image appearing in the history list of the Safari browser, while not seeing it can put some people off whatever they are doing on the internet. Even though the Safari favorites icon appears distorted or missing, we’re here to tell you that you can quickly recover the icon by following a few simple steps on your MacBook.
Method 1: Clear Safari favorites icons cache
Clearing the Safari favorites icons cache and starting over is the universal way of solving the problem of incorrect and missing favicons on your computer. Follow the steps below to get your favorite icons back.
- Shut or quit Safari.
- Go to Finder on your Mac.
- Next, click on Go, then select Go To Folder on the visible menu.
- A pop-up menu will appear, and you will need to type in/Library/Safari/Favicon Cache/
- Once you’ve typed that in, you need to click on Go.
- You must send all the items in the folder on your screen to Trash. Pressing the Command and the A key simultaneously selects all the files in the folder, then you can drag them to the trash. You can also right-click the files and select Move To Trash on the menu that appears on the screen.
- Empty the entire trash or delete the items from the favicon cache folder only. The simplest way to empty your trash is by right-clicking the trash icon on your dock and selecting Empty Trash.
- Open your Safari browser again and visit your saved sites.
The incorrect or distorted images should appear correctly. The favicon cache rebuilds itself as you visit your saved sites. However, in rare cases, some alternatives might help. I’ll now look at some of the methods that you can use. Feel free to try them all, as none take a long time to complete.
Also Read: How to Fix Finder Not Responding on Mac
There is no guarantee that this alternative method will work, but it is worth a try if clearing the favicon cache is not working or if you prefer not to use it. Safari has a private window that does not store browsing history, and you can use this feature to try and refresh your favicons.
- Right-click on Safari in the Dock
- Select New Private Window
- Visit the site with the incorrect or missing favicons
- Close Private Window
The favicons should return to normal working conditions after this. You can try these further steps in the Private Window.
- Select Preferences and click on Privacy on the Safari menu
- Click on Manage Website Data, and a list of sites will appear
- Choose the site that is causing issues and click on Remove
- Click on Done to finish the process
- Go back to the non-private window and open the website again.
Your Mac should be able to rebuild the favicon cache on its own. If you know your way around the device, you can manually make another favicon cache folder, but this is not a recommended route. It is better to contact the Apple Support center.
If you continue having issues with favicons, create a new user on your Mac. This method has worked for others on the Apple Community Forum , where users try to help each other solve various challenges with Mac. One user managed to retrieve all the missing favicons using this method.
- Select System Preferences (System Settings on macOS Ventura and above) on your menu and click Users & Groups
- Click on Add at the bottom of the dialogue box.
- Choose the type of user, preferably the Administrator.
- Enter the name of the new user and a password.
- Click on Add User.
The first time you open Safari under the new user profile, favicons should all work perfectly. \
Also Read: How to Change Admin Name on Mac
The Mac has a preference setting that allows tabs to display icons when you’re on Safari. Check that your preferences are set correctly by following these simple steps.
- Open Safari
- Click on Safari in the menu bar
- Select Preferences
- Click on Tabs, and a list of preferences will show up
- Tick the box allowing website icons to be shown.
The image below shows the box that you should tick. You can try doing this a couple of times while restarting your device. Try this method several times, restarting your device each time.
If you use Time Machine to backup files, then you can use it to retrieve files and items. The good thing about Time Machine is that it works with almost all Mac apps. Here is a reminder of how to open Time Machine and retrieve files and items.
- Click on the Time Machine icon. If the icon is not there, go to System Preferences (System Settings on macOS Ventura and above) and click Time Machine on the Apple menu.
- Click on Show Time Machine in the menu bar to browse backups and local snapshots.
- Use the arrows to look through your missing files and items. When you see the files you need, click Restore.
You can restore all the files at once or one by one. When restored, the files return to the original folder. Remember, you need to have already set your device to back up to the Time Machine for this method to work perfectly.
Also Read: How to Turn off Time Machine on a Mac
Your Safari favorites icons missing challenge can also be solved by updating your device. The macOS Catalina 10.15.7 Combo update fixes issues that prevent files from syncing with iCloud and resolves graphics. You can download this update and see if the problem is solved.
Follow these steps to download software updates on your Mac.
- Open the Apple menu and choose System Preferences (System Settings on macOS Ventura and above).
- Click on Software Update.
- Open the Software Update preferences for the Safari folder.
You can also find a list of available updates in the Apple Store or set your device to check for software updates in the System Preferences (System Settings on macOS Ventura and above) automatically. However, for this particular issue of missing favicons, the Catalina 10.15.7 Combo update should be able to help.
Method 7: Use the safe mode
One way of solving issues on your Mac is to restart it in safe mode. The safe mode allows your device to start and run with limited functionality as you try and solve specific issues. You must determine if your device uses Apple silicon, then follow these steps.
- Shut down your Mac device.
- Turn on your Mac and hold the power tab until the startup options window appears.
- Choose the startup disk.
- Click the Continue in Safe Mode tab while holding down the shift key.
- Log in, and if asked to, do it again.
If your device uses the Intel processor, follow the instructions below.
- Turn on the Mac
- Press and hold the shift key immediately
- Release the shift key when the login window appears
- Login as per instruction
All the methods mentioned here should help retrieve missing or distorted favicons. If you continue having issues after everything I have touched on here, you may need to reinstall your macOS to ensure that all the third-party apps are up to date.
Also Read: Best Mac OS Version
Always keep your Mac device updated, as this helps solve issues before they arise. Clearing your favicon cache is the simplest and fastest way of retrieving your missing favicon. If it does not work, you should get joy from the other methods mentioned above. As a last resort, reinstall the operating system. None of your data is removed by reinstalling macOS. Click on the Reinstall macOS tab in the Utilities window and follow the instructions to complete the process.
Do not close the lid on your Mac until the reinstallation process is finished. Your device will load all the latest software updates and be as good as new. Besides everything I have covered here, you can also contact Apple support and get help.
Favicons provide a convenient way of quickly identifying websites on tabs, bookmark lists, and browser history. For those using the internet for work, favicons save valuable time and energy since you do not have to type the first few letters of sites to get where you want to be.
Ujjwal is a tech enthusiast with a special interest in everything Apple! He manages and writes on MacMyths.com where sharing anything and everything related to Apple devices and services is his daily thing to do.

Recent Posts
How to connect an ethernet cable to a MacBook Air [Solution]
Apple introduced Ethernet ports in MacBook versions 2010 and 2011. After this, the tech giant focused primarily on Wi-Fi connectivity and removed the ports from all its devices. However, if you are...
8 Ways to Fix a MacBook Trackpad Not Working
Are you having trouble with your Macbook trackpad not working? You're not alone. Many Macbook users experience this issue, and it can be incredibly frustrating. So, after testing different methods, I...
How to Use Inspect Element in Chrome, Safari, & Firefox
Published: May 20, 2024
When I started my coding journey, I couldn’t always pinpoint what made a web page great — all of the code underneath that craft a well-designed experience. So, I would use the inspect element on my browser to peel back the curtain. Here, I could see how pages were coded so I could understand how to recreate elements for my own projects.

The inspect element feature lets us view and even modify any website’s front end. This simple trick can help you understand how websites work and even help you build your own.
In this post, I’ll discuss what it means to “inspect” page elements and how to do so on three common web browsers. If you’re in a pinch, jump ahead to what you’re looking for.
Table of Contents
How to Inspect Elements in Chrome
How to inspect elements in safari, how to inspect elements in firefox, get a closer look with inspect, what does “inspect element” mean.
Inspect element is a feature of modern web browsers that enables anyone to view and edit a website’s source code, including its HTML, CSS, JavaScript, and media files. When the source code is modified with the inspect tool, the changes are shown live inside the browser window.
Inspect is a web professional’s scout team. Developers, designers, and marketers frequently use it to peek inside any website (including their own) to preview content and style changes, fix bugs, or learn how a particular website is built. For instance, if I find an intriguing interface on a competing website, the inspect element lets me see the HTML and CSS that make it up.
I also think of my browser’s inspect feature as a “sandbox” of sorts. I can play around with a web page as much as I want by changing content, colors, fonts, layouts, etc. When finished, I just refresh the page to revert everything to normal.
Inspect doesn’t change the website itself — only how it appears in your browser. You can then experiment without worry!
Inspect is also an incredibly valuable tool for those learning web development. Instead of viewing plain source code, I can use the inspect element to interact with the page and see how each line of code maps to an element or style.
By better understanding what constitutes the typical web page, I can communicate effectively with developers in the case of an error or if I want to make a change.
Inspect may be a “developer tool,” but you don’t need to write any code or install any additional software to use it. You can do everything I’ve described right inside your browser. Let’s learn how.
How to Inspect Elements
To inspect elements, you have to right-click any part of a web page and click Inspect > Inspect Element. Alternatively, you can press Command+Option+i on your Mac or F12 on your PC to do the same.
Every modern web browser has a native tool for inspecting elements. It can be accessed in any browser, but some browsers like Chrome and Safari have slight differences. Let’s discuss how to use the inspect tool in three desktop web browsers: Google Chrome, Apple’s Safari, and Mozilla Firefox.
Chrome comes with a handy developer tool that allows you to inspect individual elements. This allows you to see the code behind a web page and even edit it on your own browser. (Note that the changes are only visible to you, not to anyone else across the web.)
Here's how to get started.

Free Guide: 25 HTML & CSS Coding Hacks
Tangible tips and coding templates from experts to help you code better and faster.
- Coding to Convention
- Being Browser-Friendly
- Minimizing Bugs
- Optimizing Performance
You're all set!
Click this link to access this resource at any time.
1. Launch Chrome and navigate to the page you want to inspect.
To use the element inspector in Google Chrome, I first navigate to any web page. In these examples, I’ll be using HubSpot.com .
2. Open up the Inspect panel.
Once I arrive at my desired page, I have several ways to open Chrome's Inspect tool.
- Option 1 : I can right-click any part of the page and choose Inspect . Right-clicking a specific page element will open that element in the inspector view.
- Option 2 : In the top menu bar, I can select View > Developer > Developer Tools .
- Option 3: I can click the three-dot icon in the top right corner of the browser window. From there, I can choose More Tools > Developer Tools . Then, I can click the Inspect tab in the popup.
- Option 4 : I can use the shortcut control-shift-C on Windows or command-option-C on macOS.
3. Change the location of the inspect panel.
To better view the code, I can change the position of the inspector window.
The Chrome Developer Tools panel will open at the bottom of the browser window, but sometimes it opens in a separate window altogether.
If I want to change the location of the panel, I can click the three-dots icon in the top right corner of the panel (next to the X icon), and then choose my preferred dock position.
Pro tip: Choosing Dock to right makes it easier to view the rendered page and its source:

Along the top of the inspect panel, I see tabs for Elements , Console , Sources , etc. These are all tools I can use to assess a page’s contents and performance. However, everything I need to inspect is under the Elements tab.
4. Look at the source HTML code of the page.
The biggest area of the panel will contain the source HTML of the current page. I always spend some time exploring this region. Hovering the cursor over the piece of code highlights the corresponding element on the page.
Blue indicates the contents of an element, green corresponds to padding, and areas in orange are margins.
Pro tip: If you’re a beginner and want to learn more about the different elements you’re inspecting, check out this HTML guide for beginners.
5. Select a specific element to inspect.
Rather than trying to read through the code to find an element, I can also do the opposite. I can locate a piece of code by hovering over the page element itself. To do this, I click the Element select icon in the top left corner of the panel.

8. Edit the page's CSS code.
Moving down the Chrome inspect panel, I see the Styles tab. This shows me what CSS styling has been applied to the selected element. I can click on lines of code to rewrite them, or I can activate/deactivate certain declarations by checking/unchecking the boxes next to them. I’ll do this for my <h1> element’s font-weight property:
9. View the page's mobile version.
Finally, let’s cover one more feature of Chrome’s inspect feature: mobile view. When building a site, designers need to consider how its pages appear on desktop, mobile, and tablet screens alike.
Fortunately, Chrome lets me preview the same web page in multiple screen resolutions. Start by clicking the Toggle device icon in the top left corner of the panel:

Now, when I click a page element, the Web Inspector reveals the corresponding source code.
7. Edit, add, or delete page elements.
Like Chrome’s inspector, Safari lets me modify, add, and remove page elements. To edit the page, I can right-click an HTML element in the inspect panel. I can then choose an option from the Edit menu.
Web Inspector will prompt me for a new text input and then display my changes in real time:

If I want to delete a page element, I just select some code and delete it. Or, I can right-click and choose Toggle Visibility to hide an element without deleting it.
8. Activate or deactivate the page's CSS code.
To the right, I have the Styles column, where I can change or activate/deactivate CSS declarations for any element, like so:
When testing content and style changes, I want to see the effect on mobile screens as well as desktops. I’ll cover that next.
Pro tip: When seeking inspiration from other web pages, I always take advantage of the Styles tab in my browser’s developer tools to tailor the CSS according to how I envision it on my own page. Try it out. This allows you to refine and adapt design elements to suit your specific preference before moving forward with coding it in your own workspace.
Safari’s Responsive Design Mode allows me to preview a website across common devices.
To view the page in a mobile viewport, I choose Develop → Enter Responsive Design Mode . In this mode, I can use the same inspector tools on pages formatted for Apple devices or set the dimensions myself:

What I like: Safari’s responsive design tab not only lets you test your web page’s responsiveness on devices, but you can also test its behavior across different browsers. Serving as a one-stop-shop for testing responsiveness, the Safari dev tools are a huge time saver.
Firefox is another great option for inspecting a web page in either macOS, Windows, or Linux. Here’s how to get started.
1. Open Firefox's inspect element tool.
To open the Firefox Inspector, I have several options:
- Option 1: I can right-click any part of the page and choose Inspect Element . Right-clicking a specific page element will open that element in the inspector view.
- Option 2: I can select Tools → Browser Tools → Web Developer Tools from the top menu bar.
- Option 3: I can use the shortcut control-shift-I or press f12 in Windows or command-option-I in macOS.
Next, I go to the web page I’d like to inspect. I’ll be using HubSpot.com again.
3. Change the location of the inspector panel.
The Firefox inspector appears along the bottom of the window by default. To change its position, I can select the three-dots icon in the top right corner of the inspector, then choose an alternative display option.

4. Look at the HTML code of the page.
Firefox’s inspector panel is comparable in features to Chrome’s and Safari’s. The HTML source code indicates the corresponding page element with color codes — content is blue, padding is purple, and margins are yellow:
I can also find code by selecting elements on the page. To enter selection mode, I click the cursor icon in the top left corner:

I can then click any page element to reveal its source code in the inspect panel.
6. Modify or delete page elements.
To modify or delete a page element, I select its code in the inspector. Then, I can either double-click to change the text, right-click and choose Edit as HTML, or click Plus Button next to the “Search HTML” bar to add code. Or I can simply delete the code and see the resulting changes on the page.

7. Toggle the page's CSS styles.
To toggle the CSS styling of an element, I use the Filter Styles region at the bottom of the inspect panel. There, I can uncheck the box next to a CSS declaration to deactivate it (or write in new code myself):
8. View the page's mobile version.
Finally, Firefox’s tools also come with a mobile preview option. To use it, I can click the Responsive Design Mode icon in the top right corner of the panel:

Responsive Design Mode lets me choose from several preset screen resolutions or set my own. I can also toggle connection speed and device pixel ratio:

What I like: As a software developer, it is very important that I make web pages that can be easily used by anyone. Firefox’s accessibility tab in its inspector tool allows me to check if my nodes accessibility tree is missing any important properties. I can verify color contrasts too.
The quickest way to access this feature is by right clicking on the page → choose Inspect → select the two arrows next to debugger → select Accessibility .
Once you learn the basics of your browser’s inspect tool, you might realize just how much information about your favorite websites is publicly available. With a few clicks, you can explore how exactly web pages are built, what styles they use, how they optimize for search engines, how they format on mobile screens, and a lot more.
Editor's note: This article was originally published in December 2020 and has been updated for comprehensiveness.

Don't forget to share this post!
Related articles.
The Beginner's Guide to Website Development

Are .io Domains Good? Why Tech Startups Love .io Domains

15 Backend Project Ideas for Your Developer Portfolio

37 Backend Interview Questions and Answers: The Ultimate Guide 2022
![safari icon macos How to Build & Run an Effective Website With a Small Team or Budget [Startup Tips]](https://blog.hubspot.com/hubfs/website-on-a-budget.jpg)
How to Build & Run an Effective Website With a Small Team or Budget [Startup Tips]

How to Code a Website for Free in 6 Easy Steps

How Long Does it Take to Build a Website?

Flush DNS: What It Is & How to Easily Clear DNS Cache
![safari icon macos How to Make a Website With User Accounts and Profiles [With WordPress, Wix, and More]](https://blog.hubspot.com/hubfs/how-to-create-user-accounts-and-profiles.jpeg)
How to Make a Website With User Accounts and Profiles [With WordPress, Wix, and More]

Wildcard SSL Certificates: What They Are & How They Work
CMS Hub is flexible for marketers, powerful for developers, and gives customers a personalized, secure experience

macOS 15 said to bring big UI design changes with a spotlight on Siri
W WDC 2024 is just around the corner. While macOS Sonoma was quite a disappointing update, it seems Apple will give macOS 15 a major overhaul. Not only is Cupertino reportedly preparing an AI-first approach to this operating system , but a design change is coming for System Settings in addition to several UI tweaks.
People familiar with the matter told AppleInsider that Apple is once again rearranging the System Settings app. After a major revamp with macOS Ventura, which gave this crucial macOS app a more iOS-themed version, Apple is now considering tweaking a few things here and there.
The publication teases some of the changes, including:
- General settings will be right underneath network settings
- Notifications and Sound settings will be moved lower in the System Settings list
- Wallpaper and display-related settings will be hidden in General Settings, Accessibility Settings, and others
- Privacy & Security will be better highlighted and moved closers with Touch ID, Users & Groups, and Lock Screen
AppleInsider reports that the Menu Bar icon will also get a new monochromatic Siri icon. The personal assistant will be able to use the internet "to gather relevant search results and information." We'll have to see how much of a ChatGPT-like assistant Siri will be.
The publication also corroborates Apple ID will shift to the Apple Account brand. New animations and redesigned UI elements are expected across the system. macOS 15 could also include:
- A "modern" user interface for AirDrop
- Calculator, Notes, Safari, and Voice Memos getting several visual changes
That said, macOS 15 looks like one of the biggest software updates the Mac has ever had. Luckily, Apple will also fix several bugs that macOS Sonoma added. Since significant design changes usually mean many bugs, a report last year said Apple was working to resolve these issues to deliver an improved user experience .
Fortunately, it won't take long until we learn more about macOS 15 and start testing it. BGR will keep reporting on Mac's upcoming operating system update.
The post macOS 15 said to bring big UI design changes with a spotlight on Siri appeared first on BGR .


Tips & Tricks
Troubleshooting, how to install & run windows 11 in vmware fusion pro on mac.

There are numerous options to run Windows 11 simultaneously with MacOS, and one great app option that is newly free is VMware Fusion Pro 13.
VMWare Fusion Pro makes it particularly simple to download, install, and setup Windows 11 in a virtual machine on the Mac, but if you’re new to virtualization and virtual machines, it may sound like a complicated process.
Not to fret, this walkthrough will detail the necessary steps to install Windows 11 into VMware Fusion Pro on a Mac, entirely for free.
How to Install & Run Windows 11 on Mac with VMware Fusion Pro
You can use Windows 11 for free, and download and use VMWare Fusion Pro for free as well, making this a great option for running Windows on a Mac.
- Before anything else, you need to download and install VMWare Fusion Pro by signing up for a free Broadcom account, and agree to use VMWare Fusion Pro for personal use
- Launch VMWare Fusion Pro if you have not done so already
- Choose “Get Windows from Microsoft” to start downloading Windows 11 within VMWare Fusion Pro

- Configure the VM and continue on to begin the installation of Windows 11

- Go through the typical Windows 11 installation process in the VMWare VM

- Let Windows 11 finish installation

- Go through the standard Windows 11 setup screens, sign in with a Microsoft account (you can get around that requirement if you don’t want to login), and proceed as usual
- You’ll soon be booted into a Windows 11 desktop, running alongside MacOS within the VMware Fusion Pro app

This is a full fledged and fully capable installation of Windows 11, and you can install apps into it, install Windows WSL , and use it for many purposes, whether professional or personal.
There are some scenarios where installation may get stuck or halted, whether when requiring the usage of and sign-in with a Microsoft account to login and start using the operating system, or the internet connection requirement , both of which can be bypassed.
Do you run Windows 11 on your Mac? Do you use VMware or another app, like UTM , for this purpose? What do you think of virtualizing Windows 11 on a Mac? Share with us your thoughts in the comments.
Enjoy this tip? Subscribe to our newsletter!
Get more of our great Apple tips, tricks, and important news delivered to your inbox with the OSXDaily newsletter.
You have successfully joined our subscriber list.
Related articles:
- How to Download & Install VMware Fusion Pro for Mac for Free
- How to Use Deep Fusion on iPhone Camera
- Install & Run Windows 8 in a Virtual Machine Using VMWare in Mac OS X
- Install & Run Mac OS X 10.7 Lion in a Virtual Machine with VMWare
» Comments RSS Feed
There is no option in VMWare Fusion pro for downloading windows 11; i.e., there is now option that says “Get Windows From Microsoft.”
there is no get windows from Microsoft:
Have 6 options – drag your own iso from disk install MacOS Import from existing machine install from bootcamp create custom vm create a vm on remote server
there is no option to pull it from Microsoft.
suggestions?
How do I enable shared folders with this? Everything I’m finding online tells me to enable this in the settings under the sharing option. But there is no sharing option.
Managed to download VMWare. The option to download Windows 11 never appeared; so stuck. Help! Thank you.
When you launch VMWare, you select the option in the middle of the screen that says “Get Windows from Microsoft” and it starts the process to download it, where you can choose Home or Professional
I can’t see the first window And I can’t see (Windows 11) window
After STEP 5
How is it that installing Windows with VM is free? Don’t we have to pay for Windows?
VMWare Fusion is free, and Windows is free to download and install as well, just skip the activation part unless you want to pay
Leave a Reply
Name (required)
Mail (will not be published) (required)
Subscribe to OSXDaily
- - How to Change the Voice of ChatGPT on iPhone, Mac, iPad
- - How to Confirm Before Closing Windows with Multiple Tabs in Chrome, Edge, Brave
- - How to Search the Web (Minus AI Junk & Clutter) with Google on Safari for Mac
- - How to Use ChatGPT for Mac Right Now, Bypassing the Waitlist
- - How to Search Google Without AI Rubbish & Clutter
- - iOS 17.5.1 & iPadOS 17.5.1 Update Released to Fix Reappearing Deleted Photos Bug
- - MacOS Ventura 13.6.7 & macOS Monterey 12.7.5 Updates Available
- - iOS 16.7.8 & iPadOS 16.7.8 Updates for Older iPhones & iPads Available
- - iOS 17.5 & iPadOS 17.5 Updates Released with Bug Fixes
- - MacOS Sonoma 14.5 Update Released with Security Fixes
iPhone / iPad
- - 3 Great Photo App Tips for iPhone, iPad, & Mac That You May Have Overlooked
- - Play Apple Music in Retro Mac OS X Fashion with QuickTune
- - How to Factory Reset Mac (MacOS Sonoma & Ventura)
- - How to Fix the Apple Watch Squiggly Line Screen
- - What Does the Number Badge Mean on Microsoft Edge Icon?
- - How to Hide iPhone Keyboard When It’s Covering Buttons & Won’t Go Away
- - What’s a PXM File & How Do You Open It?

About OSXDaily | Contact Us | Privacy Policy | Sitemap
This website is unrelated to Apple Inc
All trademarks and copyrights on this website are property of their respective owners.
© 2024 OS X Daily. All Rights Reserved. Reproduction without explicit permission is prohibited.
- Helldivers 2
- Dragon’s Dogma 2
- Genshin Impact
- Counter Strike 2
- Honkai Star Rail
- Lego Fortnite
- Stardew Valley
- NYT Strands
- NYT Connections
- Apple Watch
- Crunchyroll
- Prime Video
- Jujutsu Kaisen
- Demon Slayer
- Chainsaw Man
- Solo Leveling
- Beebom Gadgets
All macOS Versions in Order Until 2024
- With the launch of Mac OS X Public Beta, Apple launched the first member of the macOS family in 2000.
- In 2024, macOS 14 Sonoma is the latest macOS version available.
- Launched in October 2021, macOS 12 Monterey is the oldest macOS still supported.
All macOS Versions List
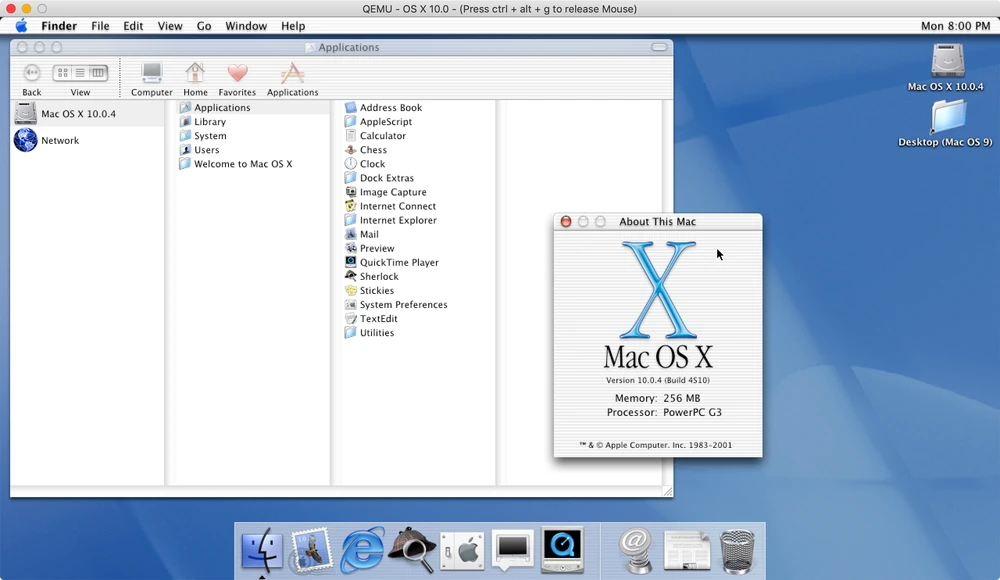
Complete macos version history, 1. mac os x 10.0 (cheetah).
That said, there were some challenges too. One of the major issues was slow performance. As a result, Apple shifted its focus to performance with the next release.
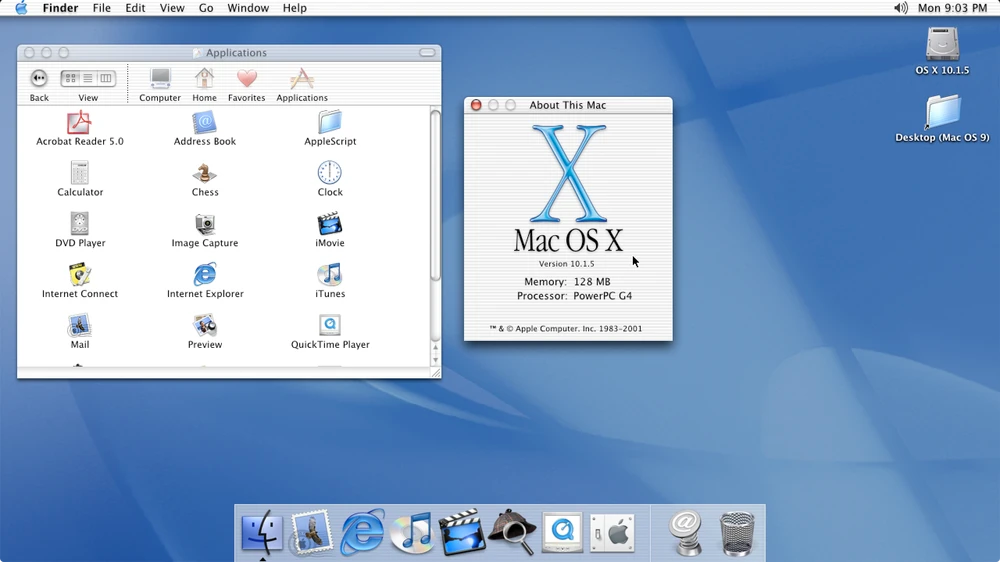
2. Mac OS X 10.1 (Puma)
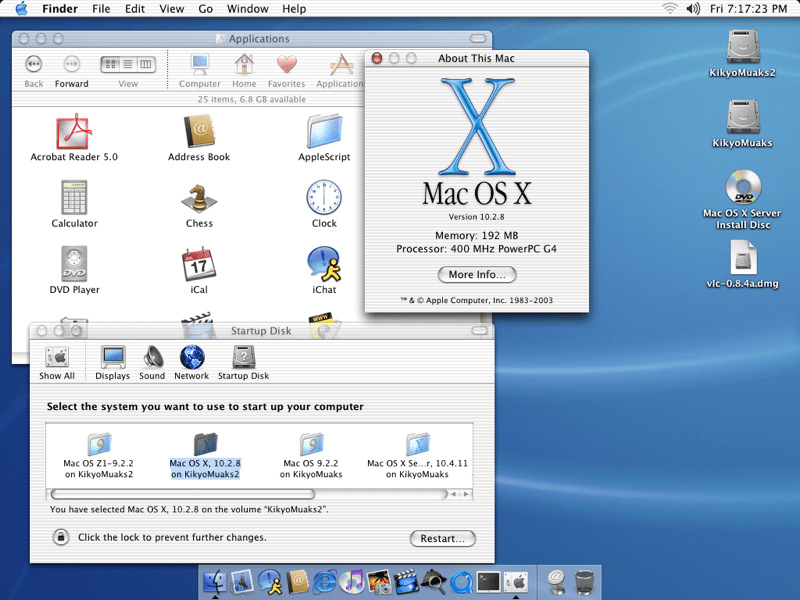
3. Mac OS X 10.2 (Jaguar)
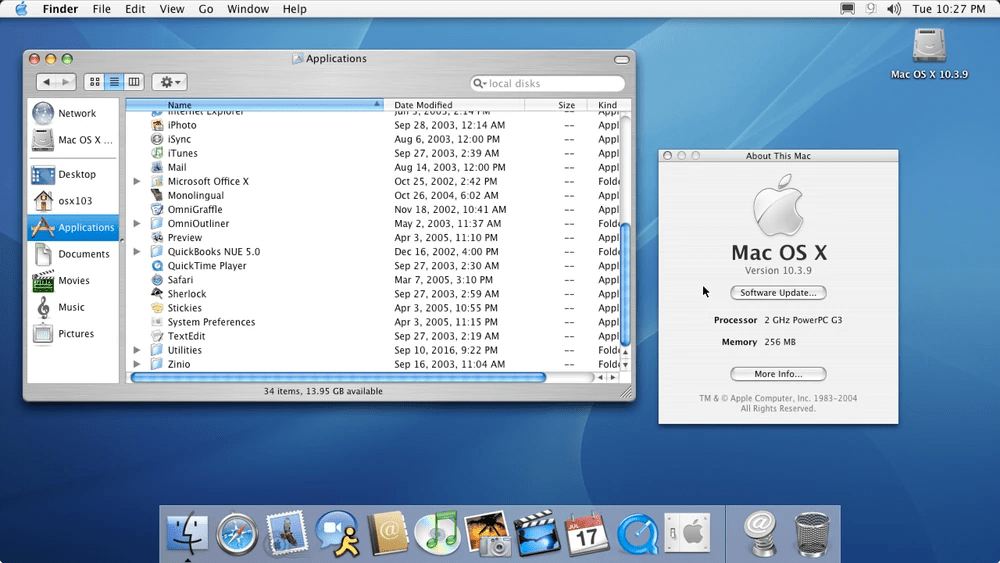
4. Mac OS X 10.3 (Panther)
- Xcode developer tools
- Updated Finder interface
- Fax support
- Faster user switching
- Built-in X11 support
- iChat AV video-conferencing software
5. Mac OS X 10.4 (Tiger)
Rolled out on April 29, 2005, Mac OS X Tiger was a pretty big update that delivered more than 200 features and improvements. During this time, Apple also switched to Intel processors. So, Tiger was the first operating system on Intel-based Macs. Apple described Mac OS X 10.4 as the “world’s most advanced operating system”.
- Dictionary and thesaurus
- Enhanced Japanese fonts
- Improved syncing features

6. Mac OS X 10.5 (Leopard)
- Spotlight enhancements
- Support for 64-bit apps
- Time Machine
- Improved Automator
- Improved 3D dock
- Objective-C 2.0 runtime
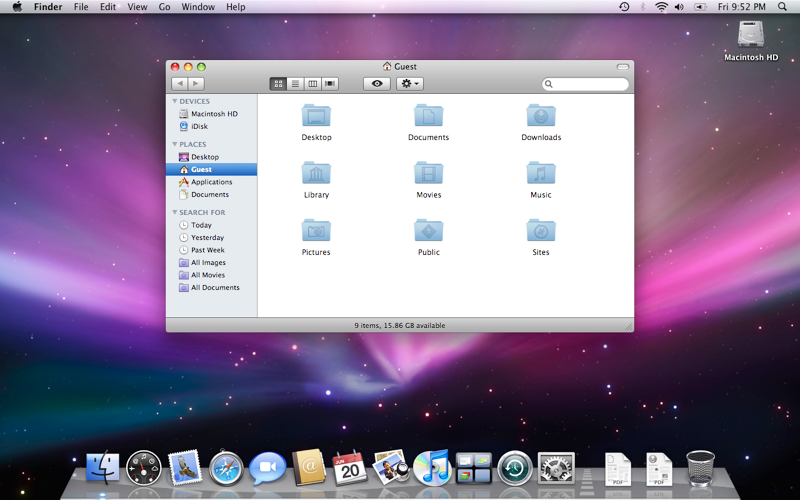
7. Mac OS X 10.6 (Snow Leopard)
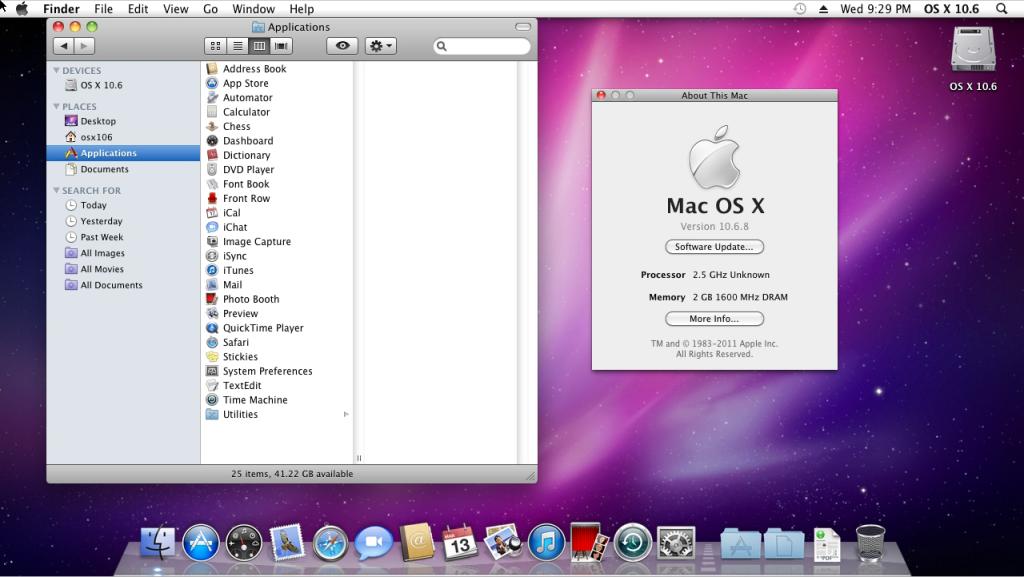
8. Mac OS X 10.7 (Lion)
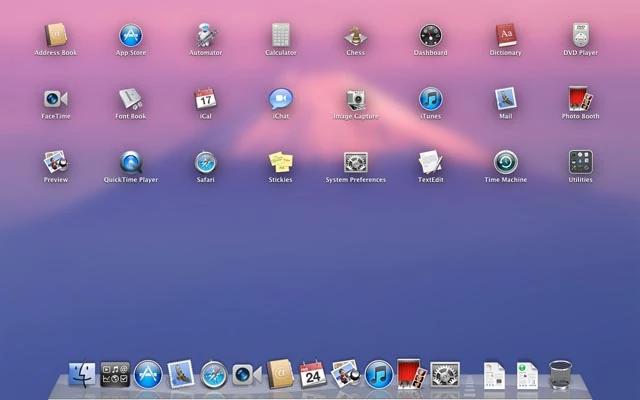
Released on July 20, 2011, Mac OS X Lion brought several useful enhancements from iOS to Mac, including launchpad, multi-touch gestures, and more. Introduced at $19.99, Apple sold $1 million in sales on the first day of the Mac OS X Lion release. Back then, many users criticized Mac OS X 10.7 for “natural scrolling,” which moved the content up when you scroll down. At that time, the users wanted the content to move down when they scroll down. That’s what Windows did.
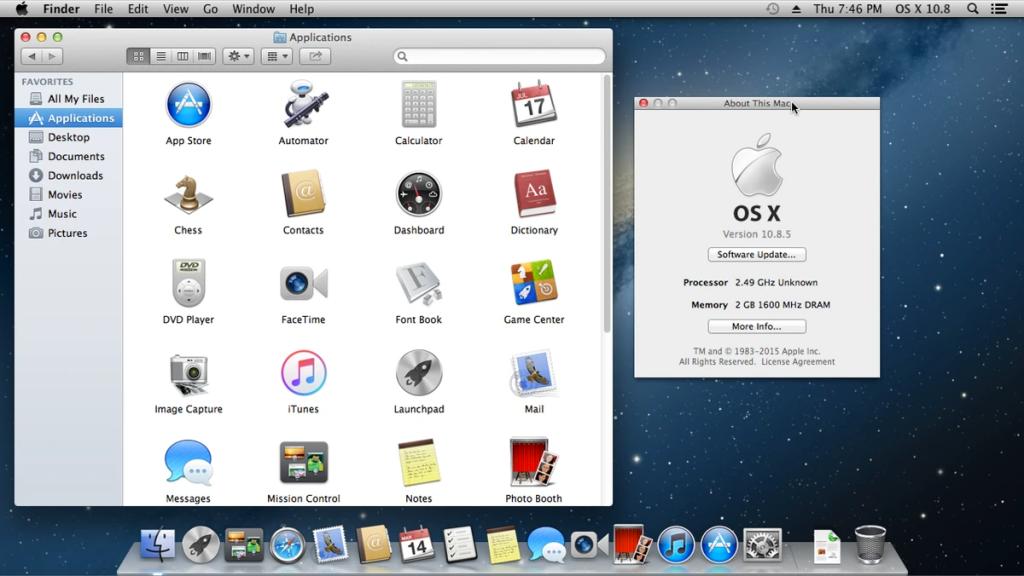
9. OS X 10.8 (Mountain Lion)
10. OS X 10.9 (Mavericks)
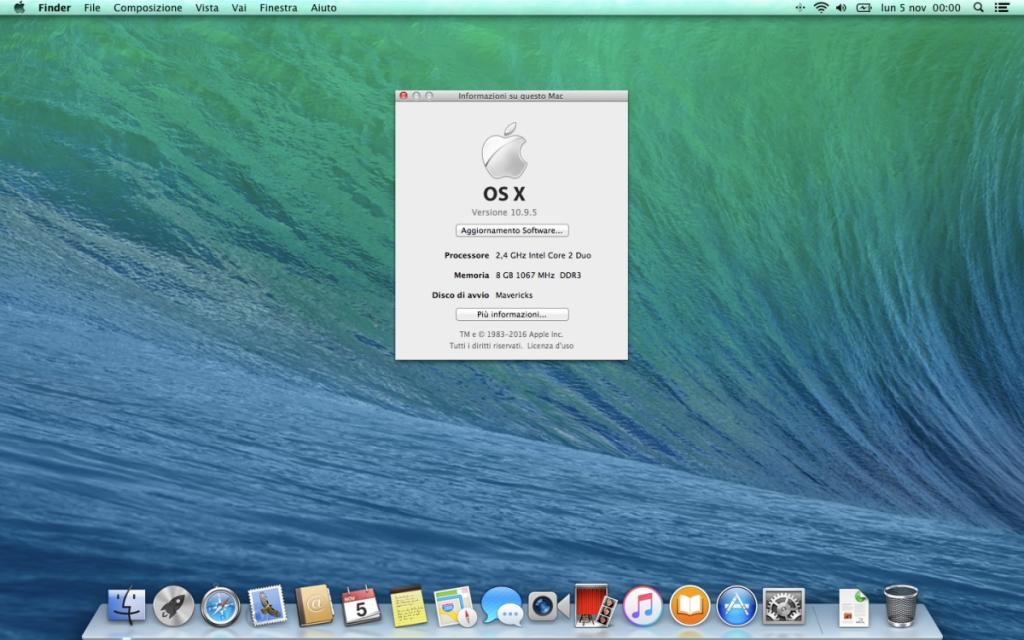
11. OS X 10.10 (Yosemite)
- Ability to take iPhone calls from desktop
- Darker night theme
- Instant hotspot
- “Today view” in Notifications centre
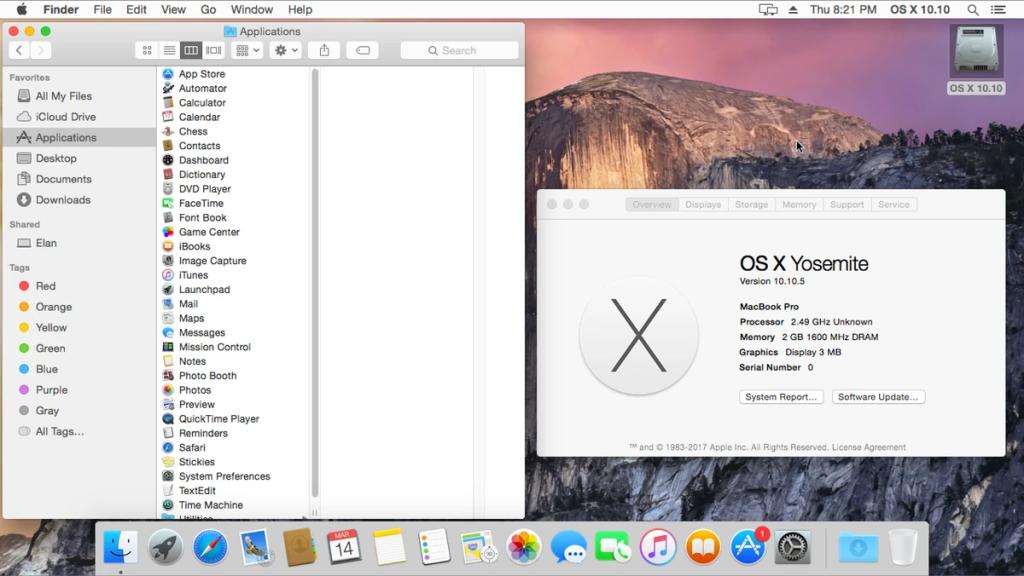
12. OS X 10.11 (El Capitan)
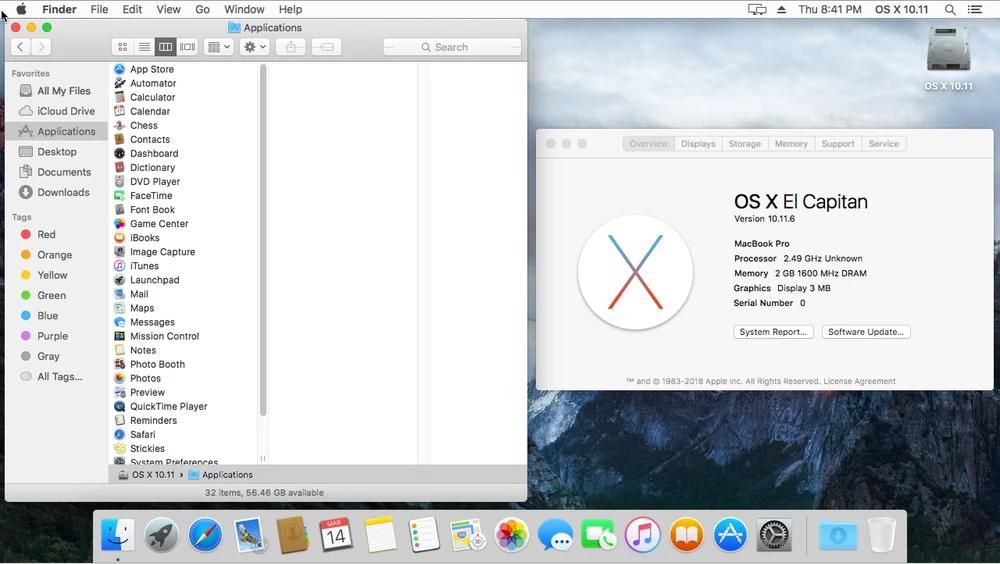
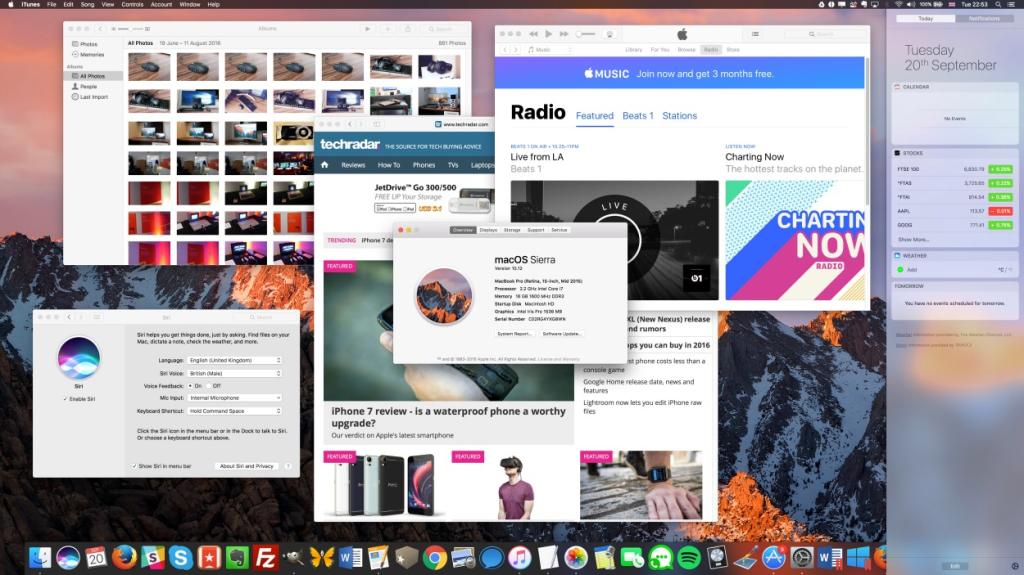
13. macOS 10.12 (Sierra)
Arrived on September 20, 2016, macOS Sierra brought some other iOS perks like unlocking Mac with an Apple Watch. The thirteenth major software release of Apple’s desktop also brought the following notable features on Macs:
- Picture-in-Picture support for Safari and iTunes
- Safari-inspired tags
- Optimized storage feature
- Rich media support in Messages
14. macOS 10.13 (High Sierra)
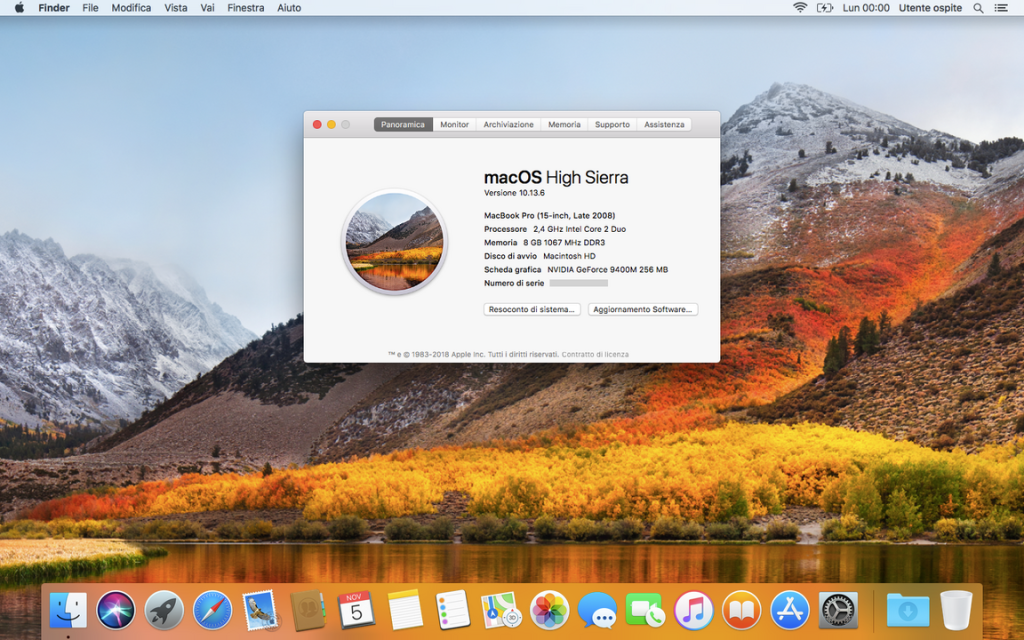
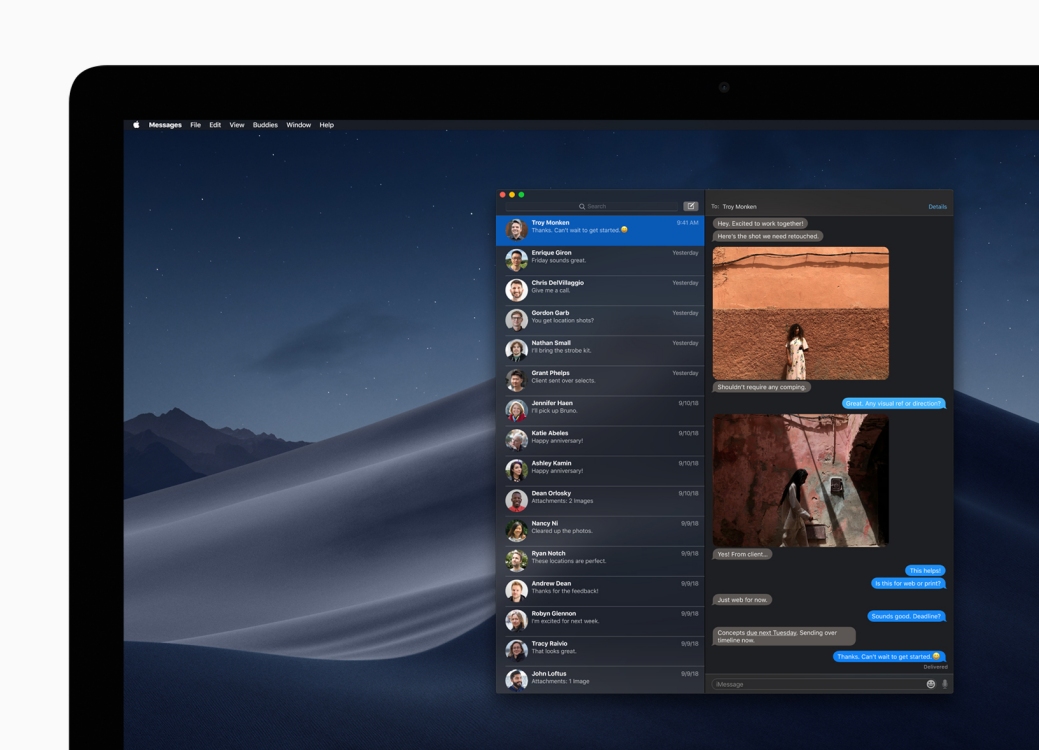
15. macOS 10.14 (Mojave)
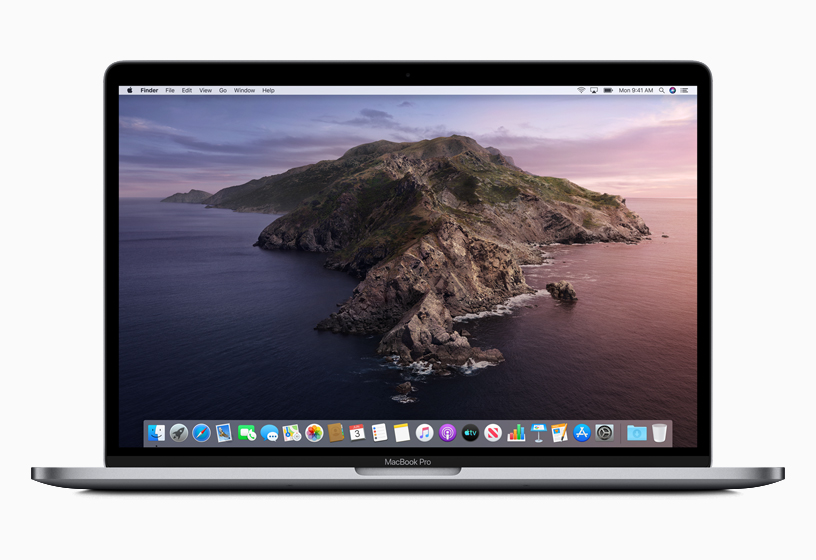
16. macOS 10.15 (Catalina)
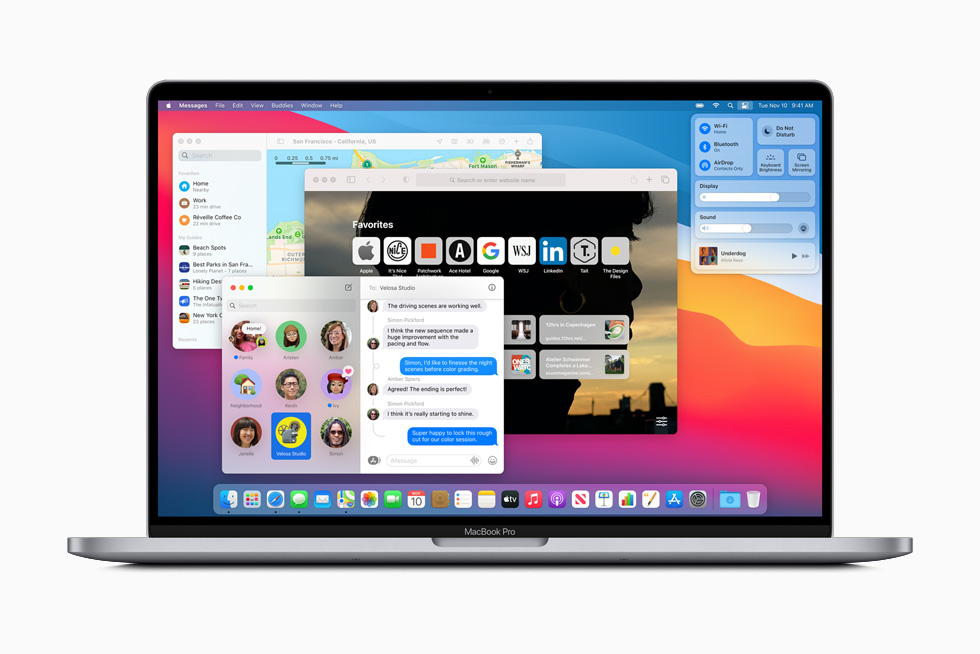
17. macOS 11 (Big Sur)
18. macOS 12 (Monterey)
On October 25, 2021, macOS Monterey replaced Big Sur and brought several significant features like SharePlay, Live Text, redesigned Safari with tab groups, Shortcuts app, Quick note feature, and Focus modes. In addition to this, Monterey added Universal Control that allows a seamless transition between macOS and iOS devices. For instance, you can move the pointer between your Mac and iPad.
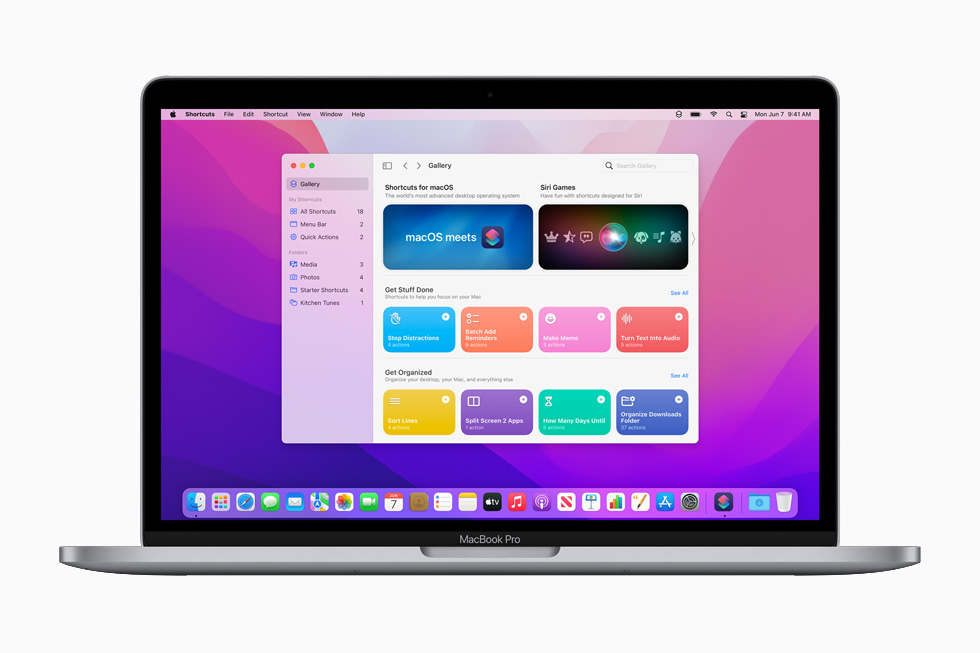
19. macOS 13 (Ventura)
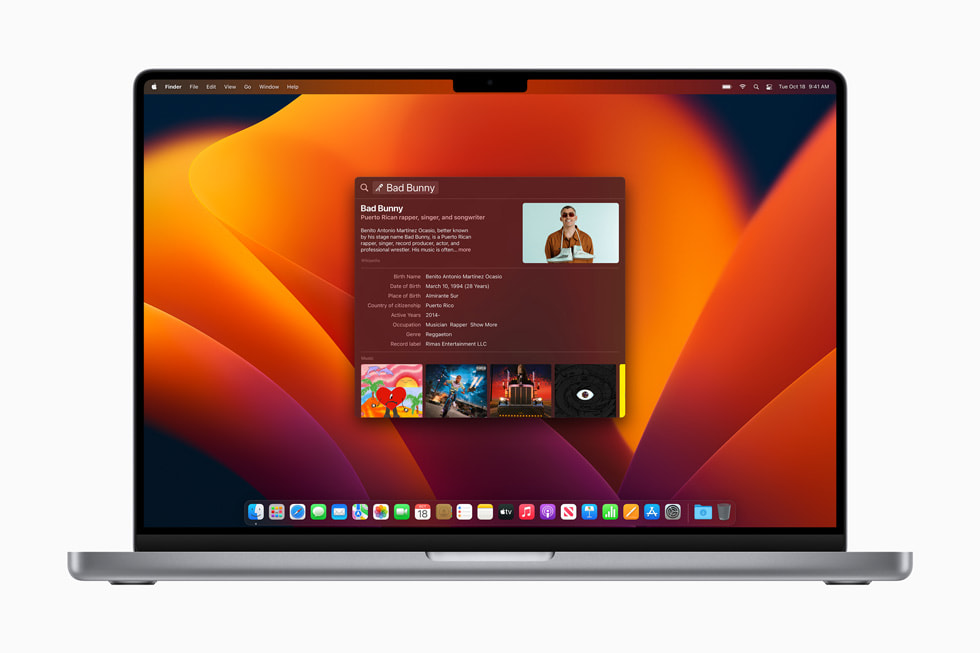
20. macOS 14 (Sonoma)
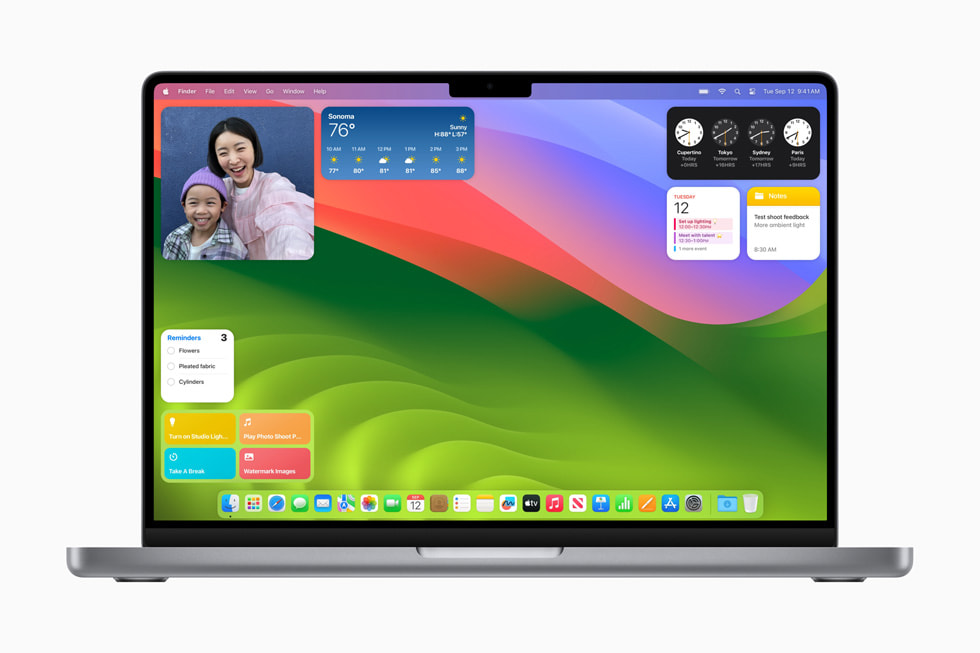
Upcoming macOS Version
How to check macos version on your mac.
You can always check the current macOS version is installed on your Mac. Here’s what you need to do:
- On your Mac, click on the Apple menu icon from the top left corner of the screen,
- Select “About This Mac” .
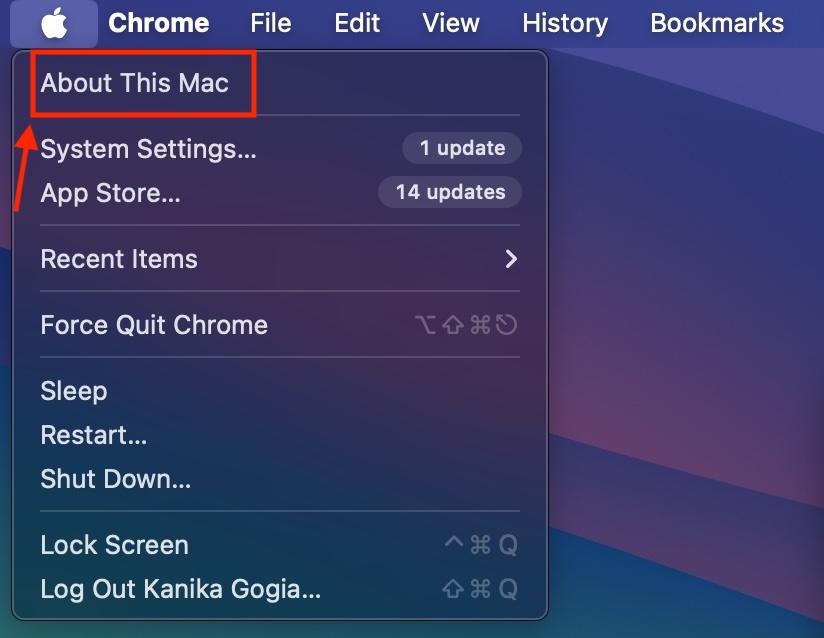
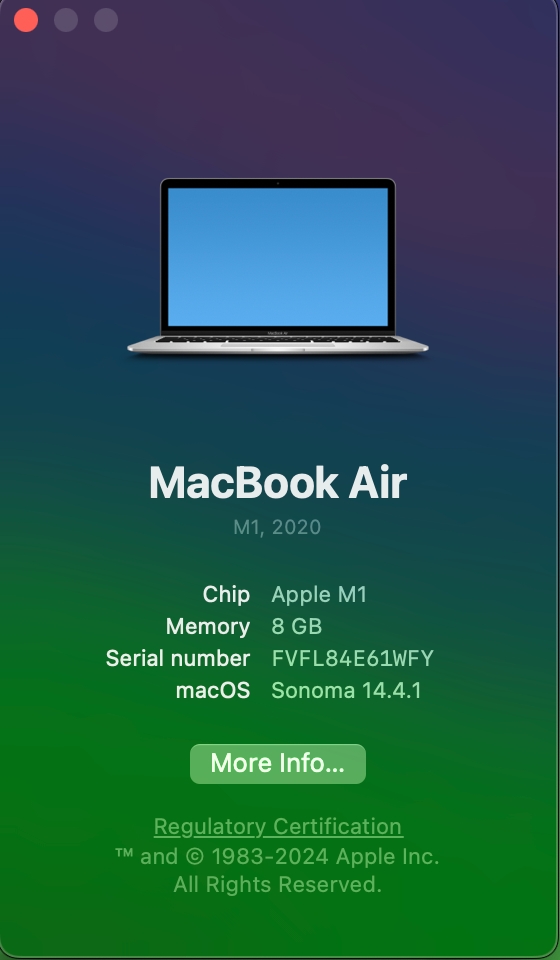
- This should bring up a small window displaying your Mac’s model, Serial number, current macOS version, and other information.
Kanika Gogia
Kanika has been a loyal iPhone user since 2014 and loves everything Apple. With a Master’s in Computer Applications, passion for technology, and over five years of experience in writing, she landed at Beebom as an Apple Ecosystem Writer. She specializes in writing How To’s, troubleshooting guides, App features, and roundups for Apple users to help them make the best use of their gadgets. When not writing, she loves to try out new recipes and enjoy some family time.
Add new comment

- a. Send us an email
- b. Anonymous form
- Buyer's Guide
- Upcoming Products
- Tips / Contact Us
- Podcast Instagram Facebook Twitter Mastodon YouTube Notifications RSS Newsletter
5 Reasons to Use OpenAI's ChatGPT App for Mac
On May 13, OpenAI during its Spring Update announced that it would be releasing a desktop ChatGPT app for the Mac in the "coming weeks," and said that ahead of a wider launch it had started rolling out the app to some ChatGPT Plus subscribers.
Access the ChatGPT Launcher
For a while now, it's been possible to use OpenAI's chatbot on iPhone via the official ChatGPT iOS app , but most desktop users have relied on visiting the website in a browser. Thanks to ChatGPT for Mac, things feel a lot more integrated. Using the keyboard shortcut Option + Space, you can instantly invoke the app's Launcher and ask the conversational AI to help you with some task or project, but you also get fast access to several other key features.

Take a Screenshot
Clicking the paperclip icon also brings up some useful additional options, such as the ability to take a screenshot of any open app window (even if it's off-screen) or your entire desktop, and query it with ChatGPT. For example, we queried a screenshot of a recent MacRumors article covering Apple Music's Top 10 Albums of All Time , and asked ChatGPT to provide a summary of top critics' reviews for each album, which it duly did.

Take a Photo
"Take a Photo" is another option that you can access via the paperclip button. Clicking it automatically brings up the current output of your Mac's FaceTime camera or an attached webcam.

The only problem right now is that the shutter button remains on the camera feed on your Mac's screen, rather than switching to your iPhone. This is probably an oversight that OpenAI will rectify soon.
Customize ChatGPT
In the app's settings (accessed via ChatPGT ➝ Settings… in the menu bar when the app's main window is active) there are several options that let you customize how ChatGPT works. You can control whether or not OpenAI uses your content to train its models, as well as change the desktop launcher keyboard shortcut and enable/disable GPT capabilities including web browsing, DALL·E image generator, and Code Interpreter.

The main app window also lets you access your conversation history and switch between any custom GPTs you have parked in your sidebar. Not only that, you can choose which version of ChatGPT you wish to query. For example, the introduction of the new multimodal GPT-4o model enhances response times, improves reasoning capabilities, and offers a better understanding of images and other content types.
When interacting with ChatGPT in the app's main window, there are buttons to dictate your query or alternatively start a two-way voice chat with the bot. In theory it sounds great, but in practice there's a delay between responses, and you have to wait for ChatGPT to stop speaking before you can give it a follow-up query or command. It's also not possible to access other features like taking a photo via voice. Fortunately, there's more to come on this front.

If you are a regular user of ChatGPT on Mac, using OpenAI's official app should be your go-to method of interacting with the AI chatbot. For a first version, the client is surprisingly polished, and invoking the Launcher via a keyboard shortcut makes using ChatGPT quicker and easier than ever before. It also offers a peek into a possible future where ChatGPT is fully integrated with Apple's operating systems.

- Apple Wrapping Up OpenAI Deal to Bring ChatGPT Features to iOS 18
Note that the ChatGPT Mac app is currently only available to Plus subscribers ($20 per month), and only a limited subset of those users have been offered the download so far. We will say that there are download links to the app floating around on social media, and there is a fairly reliable way for any Plus subscriber to bypass the waitlist and get it to work. But if you have the patience to wait in line, OpenAI says that the ChatGPT Mac app will be available to users "more broadly in the coming weeks."
Get weekly top MacRumors stories in your inbox.
Popular Stories

Best Buy's Memorial Day Sale Has Record Low Prices on iPads, MacBooks, and Much More

macOS 15 System Settings to Get Design Overhaul

5 Biggest Changes Rumored for iPhone 16 Pro Max
Top rated comments.
Am i the only one slightly concerned how everything is now going AI?
I know several people that lost their jobs to AI. They were artists. I’m getting quite concerned there will no longer be a need of any pro applications anymore.
Why exactly?
Next Article

Our comprehensive guide highlighting every major new addition in iOS 17, plus how-tos that walk you through using the new features.

Apple News+ improvements, cross-platform tracker alerts, website app downloads for the EU, and more.

Get the most out your iPhone 15 with our complete guide to all the new features.
A deep dive into new features in macOS Sonoma, big and small.

Apple's annual Worldwide Developers Conference will kick off with a keynote on June 10.

Expected to see new AI-focused features and more. Preview coming at WWDC in June with public release in September.

AI-focused improvements, new features for Calculator and Notes, and more.
Action button expands to all models, new Capture button, camera improvements, and more.
Other Stories
2 days ago by Tim Hardwick

2 days ago by Juli Clover

4 days ago by Tim Hardwick

5 days ago by Tim Hardwick
Mac keyboard shortcuts
By pressing certain key combinations, you can do things that normally need a mouse, trackpad, or other input device.
Using keyboard shortcuts
Common shorcuts like cut, copy, paste
Sleep, log out, and shut down shortcuts
Finder and system shortcuts, document shortcuts, accessibility shortcuts, other shortcuts.
To use a keyboard shortcut, press and hold one or more modifier keys and then press the last key of the shortcut. For example, to use Command-C (copy), press and hold the Command key, then the C key, then release both keys. Mac menus and keyboards often use symbols for certain keys , including modifier keys:
Command (or Cmd) ⌘
Option (or Alt) ⌥
Control (or Ctrl) ⌃
Caps Lock ⇪
On keyboards made for Windows PCs, use the Alt key instead of Option, and the Ctrl key or Windows logo key instead of Command.
Cut, copy, paste, and other common shortcuts
Command-X : Cut the selected item and copy it to the Clipboard.
Command-C : Copy the selected item to the Clipboard. This also works for files in the Finder.
Command-V : Paste the contents of the Clipboard into the current document or app. This also works for files in the Finder.
Command-Z : Undo the previous command. You can then press Shift-Command-Z to Redo, reversing the undo command. In some apps, you can undo and redo multiple commands.
Command-A : Select All items.
Command-F : Find items in a document or open a Find window.
Command-G : Find Again: Find the next occurrence of the item previously found. To find the previous occurrence, press Shift-Command-G.
Command-H : Hide the windows of the front app. To view the front app but hide all other apps, press Option-Command-H.
Command-M : Minimize the front window to the Dock. To minimize all windows of the front app, press Option-Command-M.
Command-O: Open the selected item, or open a dialog to select a file to open.
Command-P : Print the current document.
Command-S : Save the current document.
Command-T : Open a new tab.
Command-W : Close the front window. To close all windows of the app, press Option-Command-W.
Option-Command-Esc : Force quit an app.
Command–Space bar : Show or hide the Spotlight search field. To perform a Spotlight search from a Finder window, press Command–Option–Space bar. (If you use multiple input sources to type in different languages, these shortcuts change input sources instead of showing Spotlight. Learn how to change a conflicting keyboard shortcut .)
Control–Command–Space bar : Show the Character Viewer, from which you can choose emoji and other symbols .
Control-Command-F : Use the app in full screen, if supported by the app.
Space bar : Use Quick Look to preview the selected item.
Command-Tab : Switch to the next most recently used app among your open apps.
Command–Grave accent (`): Switch between the windows of the app you're using. (The character on the second key varies by keyboard. It's generally the key above the Tab key and to the left of the number 1.)
Shift-Command-5 : In macOS Mojave or later , take a screenshot or make a screen recording. Or use Shift-Command-3 or Shift-Command-4 for screenshots. Learn more about screenshots .
Shift-Command-N: Create a new folder in the Finder.
Command-Comma (,) : Open preferences for the front app.
You might need to press and hold some of these shortcuts for slightly longer than other shortcuts. This helps you to avoid using them unintentionally.
Power button : Press to turn on your Mac or wake it from sleep. Press and hold for 1.5 seconds to put your Mac to sleep.* Continue holding to force your Mac to turn off.
Control–Command–Power button :* Force your Mac to restart, without prompting to save any open and unsaved documents.
Control-Command-Q : Immediately lock your screen.
Shift-Command-Q : Log out of your macOS user account. You will be asked to confirm. To log out immediately without confirming, press Option-Shift-Command-Q.
* Does not apply to the Touch ID sensor .
Command-D : Duplicate the selected files.
Command-E : Eject the selected disk or volume.
Command-F : Start a Spotlight search in the Finder window.
Command-I : Show the Get Info window for a selected file.
Command-R : (1) When an alias is selected in the Finder: show the original file for the selected alias. (2) In some apps, such as Calendar or Safari, refresh or reload the page. (3) In Software Update, check for software updates again.
Shift-Command-C : Open the Computer window.
Shift-Command-D : Open the desktop folder.
Shift-Command-F : Open the Recents window, showing all of the files you viewed or changed recently.
Shift-Command-G : Open a Go to Folder window.
Shift-Command-H : Open the Home folder of the current macOS user account.
Shift-Command-I : Open iCloud Drive.
Shift-Command-K : Open the Network window.
Option-Command-L : Open the Downloads folder.
Shift-Command-N: Create a new folder.
Shift-Command-O : Open the Documents folder.
Shift-Command-P : Show or hide the Preview pane in Finder windows.
Shift-Command-R : Open the AirDrop window.
Shift-Command-T : Show or hide the tab bar in Finder windows.
Control-Shift-Command-T : Add selected Finder item to the Dock (OS X Mavericks or later)
Shift-Command-U : Open the Utilities folder.
Option-Command-D : Show or hide the Dock.
Control-Command-T : Add the selected item to the sidebar (OS X Mavericks or later).
Option-Command-P : Hide or show the path bar in Finder windows.
Option-Command-S : Hide or show the Sidebar in Finder windows.
Command–Slash (/) : Hide or show the status bar in Finder windows.
Command-J : Show View Options.
Command-K : Open the Connect to Server window.
Control-Command-A : Make an alias of the selected item.
Command-N : Open a new Finder window.
Option-Command-N : Create a new Smart Folder.
Command-T : Show or hide the tab bar when a single tab is open in the current Finder window.
Option-Command-T : Show or hide the toolbar when a single tab is open in the current Finder window.
Option-Command-V : Move the files in the Clipboard from their original location to the current location.
Command-Y : Use Quick Look to preview the selected files.
Option-Command-Y : View a Quick Look slideshow of the selected files.
Command-1 : View the items in the Finder window as icons.
Command-2 : View the items in a Finder window as a list.
Command-3 : View the items in a Finder window in columns.
Command-4 : View the items in a Finder window in a gallery.
Command–Left Bracket ([) : Go to the previous folder.
Command–Right Bracket (]) : Go to the next folder.
Command–Up Arrow : Open the folder that contains the current folder.
Command–Control–Up Arrow : Open the folder that contains the current folder in a new window.
Command–Down Arrow : Open the selected item.
Right Arrow : Open the selected folder. This works only when in list view.
Left Arrow : Close the selected folder. This works only when in list view.
Command-Delete : Move the selected item to the Trash.
Shift-Command-Delete : Empty the Trash.
Option-Shift-Command-Delete : Empty the Trash without confirmation dialog.
Command–Brightness Down : Turn video mirroring on or off when your Mac is connected to more than one display.
Option–Brightness Up : Open Displays preferences. This works with either Brightness key.
Control–Brightness Up or Control–Brightness Down : Change the brightness of your external display, if supported by your display.
Option–Shift–Brightness Up or Option–Shift–Brightness Down : Adjust the display brightness in smaller steps. Add the Control key to this shortcut to make the adjustment on your external display, if supported by your display.
Option–Mission Control : Open Mission Control preferences.
Command–Mission Control : Show the desktop.
Control–Down Arrow : Show all windows of the front app.
Option–Volume Up : Open Sound preferences. This works with any of the volume keys.
Option–Shift–Volume Up or Option–Shift–Volume Down : Adjust the sound volume in smaller steps.
Option–Keyboard Brightness Up : Open Keyboard preferences. This works with either Keyboard Brightness key.
Option–Shift–Keyboard Brightness Up or Option–Shift–Keyboard Brightness Down : Adjust the keyboard brightness in smaller steps.
Option key while double-clicking : Open the item in a separate window, then close the original window.
Command key while double-clicking : Open a folder in a separate tab or window.
Command key while dragging to another volume : Move the dragged item to the other volume, instead of copying it.
Option key while dragging : Copy the dragged item. The pointer changes while you drag the item.
Option-Command while dragging : Make an alias of the dragged item. The pointer changes while you drag the item.
Option-click a disclosure triangle : Open all folders within the selected folder. This works only when in list view.
Command-click a window title : See the folders that contain the current folder.
Learn how to use Command or Shift to select multiple items in the Finder .
Click the Go menu in the Finder menu bar to see shortcuts for opening many commonly used folders, such as Applications, Documents, Downloads, Utilities, and iCloud Drive.
The behavior of these shortcuts may vary with the app you're using.
Command-B : Boldface the selected text, or turn boldfacing on or off.
Command-I : Italicize the selected text, or turn italics on or off.
Command-K : Add a web link.
Command-U : Underline the selected text, or turn underlining on or off.
Command-T : Show or hide the Fonts window.
Command-D : Select the Desktop folder from within an Open dialog or Save dialog.
Control-Command-D : Show or hide the definition of the selected word.
Shift-Command-Colon (:) : Display the Spelling and Grammar window.
Command-Semicolon (;) : Find misspelled words in the document.
Option-Delete : Delete the word to the left of the insertion point.
Control-H : Delete the character to the left of the insertion point. Or use Delete.
Control-D : Delete the character to the right of the insertion point. Or use Fn-Delete.
Fn-Delete : Forward delete on keyboards that don't have a Forward Delete key. Or use Control-D.
Control-K : Delete the text between the insertion point and the end of the line or paragraph.
Fn–Up Arrow : Page Up: Scroll up one page.
Fn–Down Arrow : Page Down: Scroll down one page.
Fn–Left Arrow: Home: Scroll to the beginning of a document.
Fn–Right Arrow : End: Scroll to the end of a document.
Command–Up Arrow : Move the insertion point to the beginning of the document.
Command–Down Arrow : Move the insertion point to the end of the document.
Command–Left Arrow : Move the insertion point to the beginning of the current line.
Command–Right Arrow : Move the insertion point to the end of the current line.
Option–Left Arrow : Move the insertion point to the beginning of the previous word.
Option–Right Arrow : Move the insertion point to the end of the next word.
Shift–Command–Up Arrow : Select the text between the insertion point and the beginning of the document.
Shift–Command–Down Arrow : Select the text between the insertion point and the end of the document.
Shift–Command–Left Arrow : Select the text between the insertion point and the beginning of the current line.
Shift–Command–Right Arrow : Select the text between the insertion point and the end of the current line.
Shift–Up Arrow : Extend text selection to the nearest character at the same horizontal location on the line above.
Shift–Down Arrow : Extend text selection to the nearest character at the same horizontal location on the line below.
Shift–Left Arrow : Extend text selection one character to the left.
Shift–Right Arrow : Extend text selection one character to the right.
Option–Shift–Up Arrow : Extend text selection to the beginning of the current paragraph, then to the beginning of the following paragraph if pressed again.
Option–Shift–Down Arrow : Extend text selection to the end of the current paragraph, then to the end of the following paragraph if pressed again.
Option–Shift–Left Arrow : Extend text selection to the beginning of the current word, then to the beginning of the following word if pressed again.
Option–Shift–Right Arrow : Extend text selection to the end of the current word, then to the end of the following word if pressed again.
Control-A : Move to the beginning of the line or paragraph.
Control-E : Move to the end of a line or paragraph.
Control-F : Move one character forward.
Control-B : Move one character backward.
Control-L : Center the cursor or selection in the visible area.
Control-P : Move up one line.
Control-N : Move down one line.
Control-O : Insert a new line after the insertion point.
Control-T : Swap the character behind the insertion point with the character in front of the insertion point.
Command–Left Curly Bracket ({) : Left align.
Command–Right Curly Bracket (}) : Right align.
Shift–Command–Vertical bar (|) : Center align.
Option-Command-F : Go to the search field.
Option-Command-T : Show or hide a toolbar in the app.
Option-Command-C : Copy Style: Copy the formatting settings of the selected item to the Clipboard.
Option-Command-V : Paste Style: Apply the copied style to the selected item.
Option-Shift-Command-V : Paste and Match Style: Apply the style of the surrounding content to the item pasted within that content.
Option-Command-I : Show or hide the inspector window.
Shift-Command-P : Page setup: Display a window for selecting document settings.
Shift-Command-S : Display the Save As dialog, or duplicate the current document.
Shift–Command–Minus sign (-) : Decrease the size of the selected item.
Shift–Command–Plus sign (+) : Increase the size of the selected item. Command–Equal sign (=) performs the same function.
Shift–Command–Question mark (?) : Open the Help menu.
To use these vision shortcuts, first choose Apple menu > System Settings (or System Preferences), then click Keyboard. Click Keyboard Shortcuts, select Accessibility on the left, then select “Invert colors” and "Contrast" on the right.
Control-Option-Command-8 : Invert colors.
Control-Option-Command-Comma (,) and Control-Option-Command-Period (.) : Reduce contrast and increase contrast.
Use these shortcuts to change keyboard focus. To use some of these shortcuts, first choose Apple menu > System Settings (or System Preferences), then click Keyboard. Click Keyboard Shortcuts, select Keyboard on the left, then select the shortcut's setting on the right.
Control-F2 or Fn-Control-F2: Move focus to the menu bar. You can then use the arrow keys to navigate the menu, press Return to open a selected menu or choose a selected menu item, or type the menu item's name to jump to that item in the selected menu.
Control-F3 or Fn-Control-F3 : Move focus to the Dock.
Control-F4 or Fn-Control-F4 : Move focus to the active window or next window.
Control-F5 or Fn-Control-F5 : Move focus to the window toolbar.
Control-F6 or Fn-Control-F6: Move focus to the floating window.
Control-Shift-F6 : Move focus to the previous panel.
Control-F7 or Fn-Control-F7 : Change the way Tab moves focus—between navigation of all controls on the screen, or only text boxes and lists.
Control-F8 or Fn-Control-F8 : Move focus to the status menu in the menu bar
Command–Grave accent (`) : Activate the next open window in the front app.
Shift–Command–Grave accent (`) : Activate the previous open window in the front app
Option–Command–Grave accent (`) : Move the focus to the window drawer.
Tab and Shift-Tab : Move to next control, move to previous control.
Control-Tab : Move to the next control when a text field is selected.
Control-Shift-Tab : Move to the previous grouping of controls.
Arrow keys : Move to the adjacent item in a list, tab group, or menu, or move sliders and adjusters (Up Arrow to increase values, Down Arrow to decrease values)
Control–Arrow keys : Move to a control adjacent to the text field.
Other accessibility shortcuts:
Option-Command-F5 or triple-press Touch ID : Show the Accessibility Shortcuts panel .
VoiceOver commands
Zoom in or out
Use Mouse Keys to control the pointer with your keyboard
If you're using VoiceOver, you might need to make VoiceOver ignore the next key press before you can use some of the shortcuts in this article.
Safari shortcuts
Spotlight shortcuts
Mail shortcuts
Photos shortcuts
Disk Utility shortcuts
Preview shortcuts
Apple Music shortcuts
Startup shortcuts
For more shortcuts, check the shortcut abbreviations shown in the menus of your apps. Every app can have its own shortcuts, and shortcuts that work in one app might not work in another.
Use emoji and symbols
Create your own shortcuts and resolve conflicts between shortcuts
Change the behavior of the function keys or modifier keys
Use a spoken command for a keyboard shortcut
Explore Apple Support Community
Find what’s been asked and answered by Apple customers.

IMAGES
VIDEO
COMMENTS
Open Finder. Click Applications. Right click on the icon you'd like to change. Select Get Info. Click the small icon at the top of the window. Tap the Delete key on your keyboard. Close the app ...
Open Finder and navigate to Applications. Click the app you'd like to change the icon for and use the keyboard shortcut command + I (or right-click and choose Get Info) Have an image for the new ...
Quick Notes are new for macOS Monterey and iPadOS 15. There are a couple of ways to use the feature with the new Safari. You can click the three-dot icon in the URL/search bar > Add to Quick Note ...
App icons in all platforms use the PNG format and support the following color spaces: sRGB (color) Gray Gamma 2.2 (grayscale) In addition, app icons in iOS, iPadOS, macOS, tvOS, and watchOS support Display P3 (wide-gamut color). The layers, transparency, and corner radius of an app icon can vary per platform.
Open the "Window" menu on the Mac bar. 2. Choose "Arrange Tabs By.". 3. You can now choose between "Title" and "Website.". For many, choosing to sort by website will be the most useful. That way, if you have multiple tabs open, they will all be next to each other. 4. Customize Safari Toolbar.
You can also customize the look of your Safari toolbar by adding some empty space. Click on the "Flexible space" button---located in the last row---and drag it into the toolbar. To remove flexible space, click and drag it out of the toolbar. Now that you understand how every element works, feel free to play around to get the Safari toolbar to ...
I am using Safari on macOS Sierra. I have added several commonly-used sites to my favorites section, like so: (there are 10 icons, and all but 2 of them are displayed as the proper, correct icon from the site. For example, the Wikipedia icon has the large W icon. However, for Google Drive and Gmail, the icons are just big, ugly, generic G's)
240 Macos Safari Icons. design styles for web or mobile (iOS and Android) design, marketing, or developer projects. These royalty-free high-quality Macos Safari Vector Icons are available in SVG, PNG, EPS, ICO, ICNS, AI, or PDF and are available as individual or icon packs.. You can also customise them to match your brand and color palette!
If you let Siri make suggestions in Safari, and you book an event on a website, such as a dinner reservation, you can quickly add it to Calendar.. Accept a Siri suggestion: Click the notification to review the event, then click Add to Calendar. Stop seeing Siri Suggestions in Safari: Choose Apple menu > System Settings, click Siri & Spotlight in the sidebar (you may need to scroll down), click ...
Safari, macOS, BigSur Icon. PNG; ICO; ICNS; 512px 256px 128px 96px 72px 64px 48px 32px. Download PNG. 512px 256px 128px 96px 72px 64px 48px 32px. Download ICO. Download ICNS. Elias; Free for commercial use; MacOs Big Sur; Social media & Logos; 3D, Badge; 2866 ; More icons from MacOs Big Sur.
Enabling favicons in Safari. As a reminder, you can enable favicons in Safari on older versions of macOS by following these simple steps. 1) With Safari open, click Safari > Preferences from the menu bar. 2) Select the Tabs tab. 3) Check the box for Show website icons in tabs to enable favicons.
Starting with macOS Ventura, iOS 16, and iPadOS 16, you can share extensions across your Mac, iPhone, and iPad: On your Mac, open Safari and choose Safari > Settings, then click Extensions. Select "Share across devices" at the bottom of the window. On your iPhone or iPad, go to Settings > Safari > Extensions, then turn on Share Across Devices.
Original icons from the macOS Big Sur. Download for free. Original PNG icons from the macOS Big Sur. Work on iOS14.
Apple released macOS Big Sur version 11.7.3 in late January with security fixes, but the software update also introduced a new bug that prevents icons from appearing in Safari's Favorites section ...
Finder —> Programs —> right-click on Safari —> "Information" —> a little window pops up. Open an icns file in Preview. Activate the sidebar showing the minitures. Click on the icon miniture and copy it. Go back to the pop-up window from before. Click on the tiny little safari icon top left. It should highlight a little bit.
Catalina on a MacBook Air and both in the Dock and the Applications folder, the Safari icon is the generic pad and tool app icon. ... Mac OS icon folder problem on dock l change my folder icon on Mac OS Catalina 10.15.7. When I move it to Dock, it shows as a standard one . l have tried .icns, .jpg. png, restarting, shutting down my laptop and ...
In this video you will see how the icon for Apple's flagship browser Safari has evolved from 2003 up to the present for both iOS and macOS!Music provided by ...
Now, here are 30 tricks to help you have a better experience when using Safari. 1. Navigate Tab Bar. (Credit: Lance Whitney / Apple) The jump to iOS 15 moved Safari's address bar to the bottom of ...
Select Applications from the sidebar. Locate the application you wish to change the icon for. Click on the app to highlight it. Press Command + I to reveal the Information Panel. Drag the ICNS file from the icon folder to the small icon in the top right-hand corner of the Information Panel.
Click the Smart Search field to show the page's full address and its icon, then drag the icon to the Favourites bar. Open all bookmarks from a folder in the Favourites bar. Command-click the folder in the Favourites bar. Move a bookmark on the Favourites bar. Drag the bookmark left or right. Remove a bookmark from the Favourites bar
Click to download Safari, Browser icon from OS X Yosemite Preview Iconpack by johanchalibert
A showcase that puts all 46 app icons that are included in the macOS icon pack on display. Download them now! A showcase that puts all 46 app icons that are included in the macOS icon pack on display. Download them now! ... Safari. Adobe Photoshop. Discord. Framer. WeTransfer. Github. Signal. VSCode. Linear. Twitch. Adobe PremierPro. Craft ...
How to bring back Safari Favorites Icons. Method 1: Clear Safari favorites icons cache. Method 2: Use Safari Private Window. Method 3: Create New User. Method 4: Verify your preferences. Method 5: Restore items from Time Machine. Method 6: Download updates. Method 7: Use the safe mode.
Option 3: I can click the three-dot icon in the top right corner of the browser window. From there, I can choose More Tools > Developer Tools. Then, I can click the Inspect tab in the popup. Option 4: I can use the shortcut control-shift-C on Windows or command-option-C on macOS. 3. Change the location of the inspect panel.
With the macOS 15 update that is set to debut at WWDC in June, Apple plans to rearrange "menus and app UIs," according to a report from AppleInsider. The System Settings app, which was last ...
New animations and redesigned UI elements are expected across the system. macOS 15 could also include: A "modern" user interface for AirDrop. Calculator, Notes, Safari, and Voice Memos getting ...
There are numerous options to run Windows 11 simultaneously with MacOS, and one great app option that is newly free is VMware Fusion Pro 13.. VMWare Fusion Pro makes it particularly simple to download, install, and setup Windows 11 in a virtual machine on the Mac, but if you're new to virtualization and virtual machines, it may sound like a complicated process.
Let's check out the complete rundown of all macOS versions released until 2024. 1. Mac OS X 10.0 (Cheetah) Released on March 24, 2001, Mac OS X Cheetah was the first major software update for Mac users. Cheetah featured an Aqua interface, a water-based theme with a beautiful, all-new visual experience and 2D & 3D graphics support.
Thanks to ChatGPT for Mac, things feel a lot more integrated. Using the keyboard shortcut Option + Space, you can instantly invoke the app's Launcher and ask the conversational AI to help you with ...
Finder and system shortcuts. Command-D: Duplicate the selected files.. Command-E: Eject the selected disk or volume.. Command-F: Start a Spotlight search in the Finder window.. Command-I: Show the Get Info window for a selected file.. Command-R: (1) When an alias is selected in the Finder: show the original file for the selected alias.(2) In some apps, such as Calendar or Safari, refresh or ...