- Skip to primary navigation
- Skip to main content
- Skip to primary sidebar
Adventure Protocol
Let the adventures begin

Planning a backpacking trip
Planning a backpacking trip can be overwhelming. There are a ton of questions to answer: Where should you go? How far should you hike? What equipment do you need? What kind of food should you bring, and how much? But for many backpackers, planning the trip is almost as fun as the trip itself. This guide, informed by “ The Backpacker’s Field Manual ” and “ Mountaineering: The Freedom of the Hills ” is full of invaluable resources for both beginners and veterans. It’ll make planning a backpacking trip easy–or even fun!

Planning a backpacking trip: Decide where to go
The first step in planning a backpacking trip is you’ll need to figure out where you’re going. Where you can go is limited by a few things: the size and ability of your group, and the difficulty of the backpacking routes you have in mind.
Assessing your group
The first thing you need to do is assess your group to figure out what kind of backpacking you CAN do. Here are the the things to think about:
Some state or national parks limit group sizes. A larger group creates a wider range of experience levels and physical abilities. Larger groups often require someone to take on more of a leadership role. Knowing who this is beforehand can prevent issues later on.
Physical ability
A group moves as quickly as its slowest member. Make sure the trip is appropriate for all members. If you have a specific trip in mind, make sure all members of the group are physically fit enough to be able to participate. If you’re unsure, err on the low side of miles per hour/per day recommendations below.
Experience Level
Does everyone have the necessary experience? Or, do you have at least one person with the necessary skills to effectively lead and manage the group (keep the ratio of leader-to-follower or experienced-to-inexperienced small, ideally no more than 1:3). Unexpected things happen on the trail, so be conservative if hiking with inexperienced people.
Group Dynamics and Logistics
What are the expectations of each member of the group? How will costs be handled? Transportation? Whose gear is being used? Is there a specific trip leader, or are responsibilities being shared? It’s important to figure these things out beforehand, not at the last minute–and certainly not while people are tired, sore, and hungry after miles on the trail.
What skills will each member of the group need to have to do the activities on the trip? Do they already have these skills or will they need to be taught? Plan time for teaching new skills–don’t assume members of the group will be able to do certain things. Placing someone in a situation that is beyond their abilities can be dangerous and will affect the entire group. For more on this see “Route Difficulty” section.
If you’re enjoying this article, you might also like 10 Tips for staying warm while sleeping outside

How to estimate route difficulty and travel time
Now that you have some idea of how capable your group is, the next step in planning a backpacking trip is to sort the possible routes by difficulty and travel time to find a good match. Unfortunately, there’s no commonly used rating system for trail difficulty. Mileage alone can’t tell you how hard a route is or how long it will take. Here are some factors to help you estimate a trail’s difficulty and travel time:
- Daily/total mileage
- Elevation changes and steepness of those changes
- Trail conditions (rocky, smooth, etc.)
- Altitude of the trip (and how different it is than the altitude participants are coming from)
- How much weight each participant will have to carry (see below for advice on how to calculate this)
Here’s a helpful formula for estimating travel times:
- Average hiking speed on generally flat ground is ~2 miles per hour (generally 1-3 mph).
- Add 1 hour of total hiking time for every 1,000 feet of elevation gain
- Plan for about 5-15 minutes of rest for every hour of hiking. With a larger group, expect more breaks.
With all those considerations, use this equation to figure out a rough estimate:
(Miles to travel ÷ 2[mph]) + (Elevation gain ÷ 1,000) + ((miles to travel ⨉ 5 (minutes per hour break)) ÷ 60 [to put the figure back in hours]) = travel time in hours
For example, let’s say we were doing a 60 mile hike with 5,000 feet of elevation gain.
(60 ÷ 2) + (5,000 ÷ 1,000) + ((60 x 5) ÷ 60) = 40 hours
This estimate doesn’t include longer stops for lunch, picture-taking, or especially slow group members. Keep track of how fast you’re moving each day to get a better idea for future days.
Read More: 6 Books every adventurer should have on their shelf

Planning a backpacking trip: How to plan your route
Effectively planning a route takes time and practice and is an important part of planning a backpacking trip. In general, start with popular and well-traveled trails and areas that have lots of available information. Here are some other considerations when planning your route:
Research the location
An integral part of planning a backpacking trip is researching the area(s) where you want to go:
- Find guidebooks and maps, perhaps reach out to rangers or local experts.
- What permits do you need to get before you go?
- What are the trail conditions of the area?
- Are there safety hazards (seasonal or otherwise) might you encounter?
- Where is camping allowed and not allowed?
- Are fires allowed?
- Are there any unique Leave No Trace guidelines for the area?
- Is there water available and does it need to be purified?
- What’s the expected weather? Look for average highs and lows for the area as well as how many hours of daylight you’ll have, as this could limit your hiking hours.
Travel logistics
Look at the logistics of getting to and from your trip. Where are the starting and ending points? How is everyone getting to the trailhead? Is there available parking? Is your route a loop or do you need to shuttle a vehicle or arrange for a pickup? Figuring this out beforehand can save you a lot of headache while you are planning a backpacking trip.
Keep up with the latest articles on Backpacking, Camping, and Hiking .
A good guidebook can do a lot of the work of planning a backpacking trip for you. Many guidebooks even have specific trips pre-planned with all pertinent information listed including mileage, elevation changes, places to camp, things to see, hazards, etc. Be aware that conditions could have changed since your guidebook was published so it’s always good to do research online or ask local experts. Some of our favorite guidebooks come from Wilderness Press , like the Pacific Crest Trail Data Book (5th ed.) and the guide to the Desolation Wilderness .

Choosing Campsites
Most trips should be planned campsite to campsite. It’s important to make sure you have somewhere to sleep each night that’s safe, comfortable, and legal. Here are a few things to look for in a good campsite:
- Water availability : Is there drinkable or treatable water nearby? Is it a reliable water source year round?
- Leave No Trace Camping: Camp on durable surfaces, like dirt and rocks. Look for somewhere that has already been used as a campsite rather than creating a newly impacted area. Respect other visitors campsites.
- Campsite size : Make sure the site is large enough for your group to sleep, cook, and wash. In bear country it’s best to have these areas spread out.
- Campsite location : If you have a pre-planned camping spot, make sure you’ll recognize nearby landmarks as you approach. If you don’t know exactly where you’ll be camping, start looking for a site early on. Err on the side of stopping earlier at a good site rather than continuing on and risking not finding one later in the day.
- Private or restricted land : Don’t camp on private or restricted land unless it’s an emergency. In cases of emergency or injury, most landowners and rangers will be understanding and helpful if you ask. Even then, recognize that you could be breaking the law and be fined or even arrested.
Check out: The gear you DON’T need for your next adventure
Time Control Plan
It’s important when planning a backpacking trip to estimate ahead of time how long you expect all activities to take as well as how much daylight you have. Look at expected travel time, meal times, breaks, breaking down and setting up camp, special scenic stops, etc. Add up all of the times for these activities to calculate what time you should get up in the morning, how much wiggle room you have, and maybe if you need to cut certain activities or decrease mileage. As a general safety precaution, we suggest adding a buffer of 10-20%.
Expect the Unexpected
An important part of planning a backpacking trip is being flexible. Bad weather, unexpected trail conditions, equipment failure, and injury are just a few things that could force you to change your plan. Here are two ways to expect the unexpected.
- Vary the distance you’re hiking each day. By having some shorter days planned you can either catch up on mileage or rest. On longer trips, plan entire days where you aren’t moving.
- Have an emergency contact who is not on the trip who knows your planned route and intended end date. Plan on contacting them when you’re done so they know you’re safe. Give them emergency phone numbers to call if they don’t hear from you.
Looking for more? LNT 101: Don’t be an outdoor asshole
Planning a backpacking trip: How to pack
For many, packing is half the fun of planning a backpacking trip. We broke down how to pack into three categories: water, food, and equipment. For more information on how to put all of this into your backpack effectively, check out How to pack a backpack.

Staying hydrated during a trip cannot be stressed enough. Dehydration causes fatigue, disorientation, headaches, and irritability. Not fun, and likely dangerous. Here are three things to keep in mind:
- Drink more than you usually do. Here are general guidelines:
- How much water you carry at any given time depends on how often you’ll be able to refill. Know possible water sources beforehand and plan your trip accordingly. Pro Tip : have each person bring at least one hard container for water (e.g a Nalgene). A leaking water bladder can quickly ruin a trip.

- There are three main ways to purify water: boiling, chemical treatment (iodine, chlorine, and chlorine dioxide), and filtering. For first time backpackers in most areas, we recommend either using a water filter (we like the MSR Guardian Purifier because its easy to use, super efficient, and has an auto-back flush feature that increases the life of the filter) or chlorine dioxide (we like the Aquamira Water Treatment Drops because its super lightweight, has a long shelf life, and makes the water taste great quickly). While other chemical treatments (iodine and chlorine) are inexpensive and easy, they’re not effective against all known parasites. And boiling, while effective, is time-consuming and requires carrying additional fuel.
Check out: 11 Kid-friendly Outdoor Adventures

Choosing healthy and delicious food is an important part of planning a backpacking trip. Bringing enough, but not too much, food is a difficult balance. Some consider backcountry cooking an art form, while others prefer easy, minimalist meals. Find the balance you prefer to keep yourself and your group happy, healthy, and well-fed. Here are some guidelines and tips, plus some classic backpacking food ideas.

* See the “Active” column in this chart for more information on your specific caloric needs
- Carbohydrates 50-70%
- Fats 20-30%
- Proteins 20-30%
- Plan meals as a group, making sure to cover preferences, dietary restrictions, meal timing, etc. Fresh food like fruit, vegetables, meat, and cheese can keep for many days, especially in cooler weather. Though heavy, these foods are easy to eat, nutritious, and a welcome luxury when out on the trail.
- Dehydrated food is lightweight and easy, but often expensive. Dehydrating your own food (while time consuming) can be fun and save you some money.
- Avoid individually packaged items and instead buy and package items in bulk. This cuts down on trash and allows you to measure and bring exactly the amount you need.
- Don’t forget the spices ! Salt and pepper are great but more variety can really take your cooking to the next level.
- Pro tip: More accidents happen around 11am and 3pm because people often have low blood sugar and are dehydrated. Plan in snack times between meals to keep everyone happy and safe!
Pooping in the woods: The 9 D’s of defecation
Food Suggestions
- Scrambled eggs , dehydrated hash browns, veggies, and bacon bits (add cheese, salsa, and tortillas for a gourmet option)
- Granola (with raisins or other dried fruit) along with powdered milk
- Instant oatmeal (try our favorites from Picky Oats )
- Muffins or other baked goods
- Energy bars and dried fruit leather
- Don’t forget tea, coffee , or hot chocolate!
- Canned chicken or fish
- Summer sausage
- Powdered hummus
- Hard cheeses
- Bagels, pita bread, or crackers
- Cookies, chocolate, or candy bars
- Vegetables (carrots, peppers, etc.)
- Dried fruit
- Trail mix (nuts, dried fruit, sunflower seeds, coconut, chocolate, pretzels, sesame sticks, dried green peas, etc. Make your own!)
- Energy bars
- Emily’s Citrus Cashew Bliss Balls
- Pasta: spaghetti, dehydrated sauce, with meat and veggies
- Burritos: dehydrated beans, veggies, canned chicken, cheese, tortillas, and salsa
- Pita Pizzas: pitas, dehydrated sauce, pepperoni, veggies, and cheese
- Curry: Quinoa or rice, veggies, tofu, with curry powder
- Freeze-dried ice cream
- Instant pudding
- Chocolate cheesecake
- Gummy candies
Looking for cool gift ideas? Check out our Outdoor adventure gift buying guide

Backpacking can require extensive equipment, or very little, depending on your needs. In this section, we’ll first review the questions you need to ask yourself about the equipment you should bring. Second is the ten essentials, items that everyone should bring every time they travel in the wilderness. Third is an extensive checklist you can use to make sure you don’t forget anything.
Considerations
Ask yourself and the group these questions while deciding what to bring:
- How long is the trip and how many people are going?
- Are people bringing their own gear, borrowing gear, or renting?
- What gear can be shared (tents, cooking gear, etc.) and who is bringing it?
- What’s the expected weather, altitude, and temperature?
- What are trip activities and what special equipment is needed?
Personal Equipment
These are items that every group member will need, and will probably want to carry in their own pack.
- Clothing : What and how much you bring will largely depend on the weather, activities, and duration of the trip. Bring layers so you can adjust to different temperatures and activities. Prepare to get stinky and bring much less than you think you need!
- Storage : Bringing the right size backpack is a critical part of a successful trip! For more on this, read How to Choose a Backpacking Pack .
- Sleeping : Sleeping bag , sleeping pad , and possibly a pillow. See How to Choose A Sleeping Bag and How to Choose a Sleeping Pad and to make sure you sleep warm, see our 10 Tips for Sleeping Warm Outside .
- Miscellaneous : Toiletries, water bottles, headlamp , eating utensils, etc.
Group Equipment
These are items that not everyone needs to carry, and can be distributed among group members.
- Shelter : What shelter you bring will depend on the size of the group and the anticipated weather conditions. Read more in How to Choose a Tent .
- Cooking : Stove, pots and pans, plates and/or bowls, cups, utensils, etc.
- Hygiene : Water purification, soap, and bathroom kit.
- First Aid : We like the first aid kits from Adventure Medical Kits
- Repair : Prepare for things to break and bring appropriate tools and backup items
RELATED: Why You Should Repair Your Outdoor Gear Instead of Buying New
Ten Essentials

Regardless of where you’re going or for how long, when you’re planning a backpacking trip make sure to bring at least one of each of these Ten Essentials :
- Navigation (map and compass)
- Sun Protection (hat, sunscreen, sunglasses)
- Insulation (warm layers)
- Illumination (flashlight or headlamp with extra batteries)
- First-Aid supplies
- Fire source (matches, lighter, etc.)
- Repair kit and tools
- Nutrition (emergency food)
- Hydration (water and purification method )
- Emergency shelter
Trip Preparation Checklist
Ok, so there’s a lot that goes into planning a backpacking trip. What if you forget something?! Don’t worry, we summarized everything into a short Pre-Trip and Equipment Checklist, which you can download as a PDF here .
Pre-Trip Checklist
- Route planned (guidebook, map, etc.)
- Necessary permits obtained
- Weather checked and accounted for
- Equipment (personal and group) checklist verified
- Food and water planned and packaged
- Emergency contact designated and informed
- Travel logistics to and from trip established
Check out: Outdoor Nudity: The must-follow Instagram accounts
Equipment Checklist
This is a general equipment checklist designed for a multi-day 3-season backpacking trip (meaning daytime temperatures of ~50°-70° F and nighttime temperatures of ~30°- 50° F). Most people won’t need to bring everything on this list, but some trips might require additional equipment. We’ve included links to our articles, and some directly to our favorite gear.
- Warm hat (beanie)
- Sun hat (baseball cap)
- T-shirt(s) – cotton or synthetic
- Long-sleeve synthetic shirt
- Fleece/wool jacket or sweater
- Down/synthetic filled jacket
- Windproof layer (can be same as rain jacket)
- Waterproof rain jacket
- Warm gloves
- 1 to 2 pairs of shorts
- Synthetic/wool long underwear
- 1 to 2 pairs of long pants (synthetic, not cotton or denim)
- Waterproof rain pants
- Hiking boots
- Camp shoes (lightweight sneakers, sandals, etc.)
- 2 to 3 pair synthetic liner socks
- 2 to 3 pair wool or synthetic socks
Travel Gear
- Pack rain cover (or garbage bag)
- Trekking poles
Personal Sleep System
- Sleeping bag (synthetic or down, rated appropriately to weather)
- Sleeping pad
- Liner for your sleeping bag
- Insect repellent
- Biodegradable soap
- Personal medications
- Contact lenses (and solution)
Eating and Drinking
- 2 – 4 1-liter water bottles (at least one non-bladder style)
- Cup for hot drinks
- Bowl or plate
- Spoon or fork
Miscellaneous
- Flashlight or headlamp (and extra batteries)
- Small Towel
- Knife or multi-tool
- Large garbage bag
- Small notebook
- Shelter (tent, tarp, etc.)
- Stove (1 per 4 to 5 people)
- Waterproof matches or lighters
- Pots and pans
- Pot gripper
- Mixing spoon
- Sponge or brush
- Ziploc bags
- Water purification method ( filtration , boiling, or chemical )
- Chlorine bleach (backup water purification and dish cleaning)
- Toilet paper
- Hand sanitizer
- Plastic bags for toilet paper/tampons/other waste to pack out
- First-aid kit
- Satellite phone or other technology
- Rope for bear hang or bear canister
- Stove repair parts
- Sleeping pad repair kit
- 30 ft. of fishing line
- Assorted safety pins
- 100 ft. of paracord
Backpacking can be an intimidating sport, in part due to the perceived difficulty of planning a backpacking trip. But if you plan ahead with our guide you can make sure to stay safe and have fun. Happy trails!
If you enjoyed this article, check out our other How-To Guides , or you might also like:
- How to choose a backpack
- Best climbing backpacks 2021
- 6 Types of adventure couples we all love to hate
- How to become a trad climber
- Leave no Trace lovemaking: A guide to sex outdoors
- Guide to Joshua Tree National Park
Share this:
- Click to share on Facebook (Opens in new window)
- Click to share on Twitter (Opens in new window)
- Click to share on Reddit (Opens in new window)
- Click to share on Tumblr (Opens in new window)
- Click to share on Pinterest (Opens in new window)
- Click to share on LinkedIn (Opens in new window)

About Grant Smith
Grant is an AMGA-certified Single Pitch Instructor based out of Seattle, WA. A California native, Grant worked as a climbing guide for many years before selling out and getting a "real" job. He was once told by a nun that he looks like Justin Timberlake–the jury's still out on that one. He co-founded Adventure Protocol with his three brothers to share his love of climbing and adventuring. Instagram @grantnsmith
Leave a Reply Cancel reply
Your email address will not be published. Required fields are marked *
Notify me of follow-up comments by email.
Notify me of new posts by email.
CURRENT PRICES END MAY 12
Outside Festival feat. Thundercat and Fleet Foxes.
GET TICKETS
Start Your Free Trial
Powered by Outside
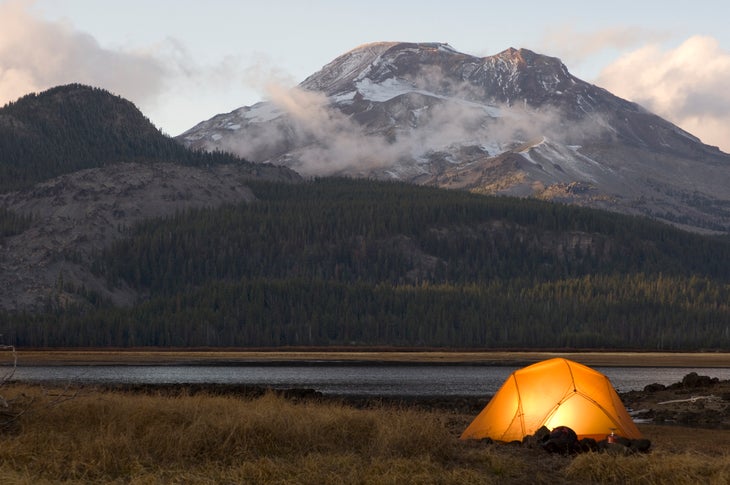
Level Up From Scenic Dayhikes to Awe-Inspiring Overnight Adventures
Ready to spend your first night out but don’t know where to start we've got you covered..
Heading out the door? Read this article on the new Outside+ app available now on iOS devices for members! >","name":"in-content-cta","type":"link"}}'>Download the app .
Backpacker wants to be your guide to the wilderness: Join Outside+ today and get access to all of our skills stories, gear reviews, hike reports, and much more.
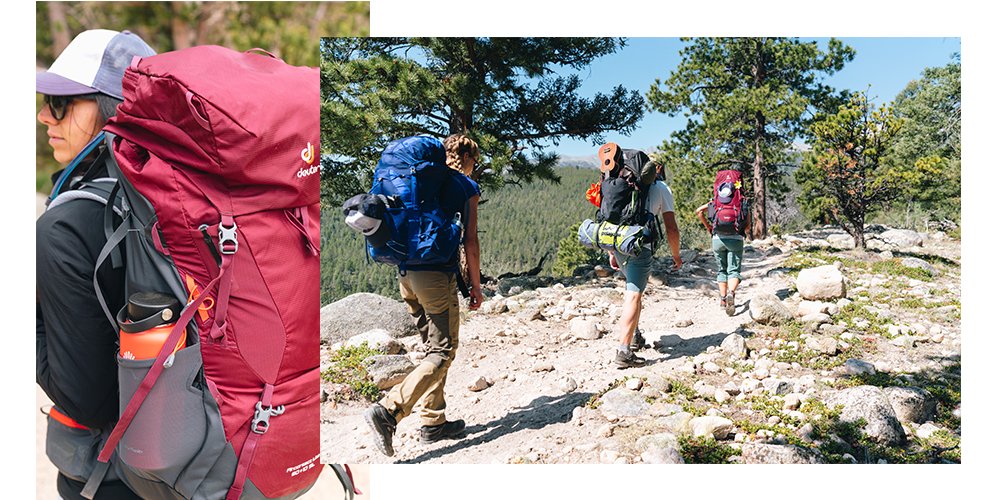
Dayhiking is a marvelous way to experience nature; it’s approachable, a low time commitment, and easy to get into with little gear or experience. If you’re an avid dayhiker, you may be curious about taking the next step into overnight hikes. You should: Backpacking takes all the joys of dayhiking to the next level. You can go further, see more, and test your limits while connecting with yourself and your hiking partners off the grid.
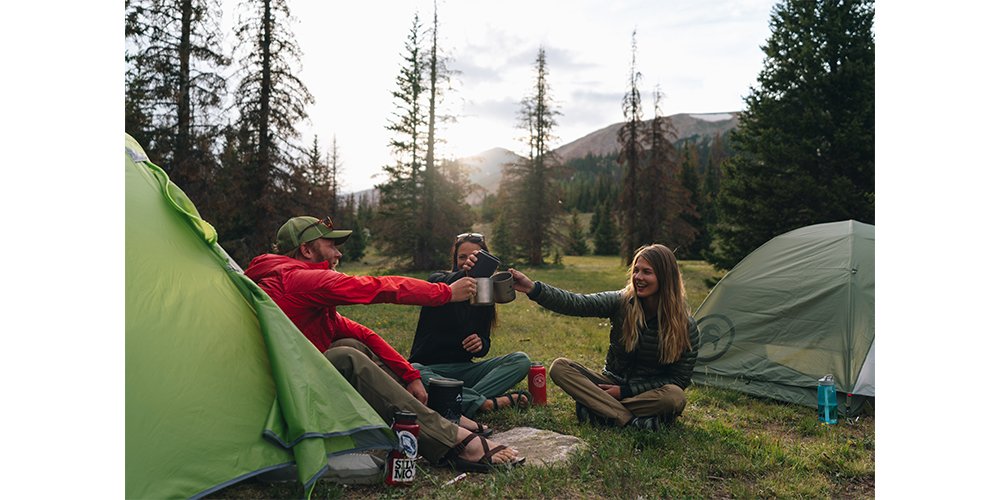
Spending your first night in the backcountry can be intimidating. If you’re nervous, try car camping first—you’ll be able to practice using all of your gear, but can easily bail if you become uncomfortable. Then, level up to a short overnight, starting with just a couple of miles. Backpacking requires more planning than a dayhike, but fear not—here’s everything you need to know to make the leap.
A lot of your dayhiking gear will be useful for backpacking, too: your boots, navigation tools, hiking clothes, first aid kit, and more. You will need additional equipment for sleeping and feeding yourself in the backcountry. But you don’t have to shell out: First-timers should consider renting overnight gear such as a tent, backpack, and sleeping bag before making big purchases, or borrowing from a friend. For hikers who only backpack a few times a year, rented gear can be more economical than owning gear, and doesn’t require storage space. In addition to your regular hiking kit, here’s what you’ll need:
You’ll be carrying more gear than usual, so you need an appropriately sized pack. For one-night trips, look for a 40 to 60 liter pack, and make sure it’s sized for you. If you’re just starting out, prioritize comfort and support over weight. Sales associates at rental or retail stores can help fit a pack to your body. Ready to buy your own? Here’s how to choose the right one.
Your shelter is your home away from home when you’re on the trail. Keep in mind that tents made for car camping are often too heavy and bulky to carry on longer backpacking trips: you may be able to press your car camping gear into service for short overnights, but if you’re buying a tent, spend the extra money to get one that’s light enough to carry, preferably no more than 3 lbs. per person. Consider how many people will sleep inside the tent, and what kind of weather you might encounter. Purchasing your first tent can be overwhelming; we broke it down for you .
Sleep System
Your sleeping bag and pad are essential to your comfort and safety while backpacking. No matter what, you won’t have a good time if you don’t have a good night’s sleep. Just like tents, sleeping bags designed for frontcountry use (think the one you used to take to middle school sleepovers) aren’t always suitable for backcountry camping. You’ll need a bag whose temperature rating matches the kind of weather you’ll encounter. Take a 40° summer-weight bag for a 30° night, and you’ll be miserable. Unless you get claustrophobic easily, your best bet is probably a mummy bag—the narrow cut will help trap heat and keep you toasty all night long, and takes up less pack space. There are many other considerations when it comes to choosing a bag: synthetic fill versus down, packability, and more. Read more about choosing the right sleeping bag here .
Your sleeping pad is just as important for keeping you warm and comfortable, but is a lot more straightforward. Inflatable pads are comfortable and packable (look for an insulated model for three-season use); foam pads work great for budget-conscious beginners and those wishing to cut pack weight.
Extra Clothes
In addition to the layers you normally take hiking, you’ll want extra clothing for around camp or in case of an emergency. Pack a set of baselayers to sleep in, extra socks, and warm layers for hanging around camp at night and in the cool morning. Unless you’re in a hot climate, hat and gloves are never a bad idea, even in summer. On a dayhike, you may be able to get away with mild discomfort, but on an overnight, it’s imperative to be prepared for any weather scenario you may encounter.
Stove and Food
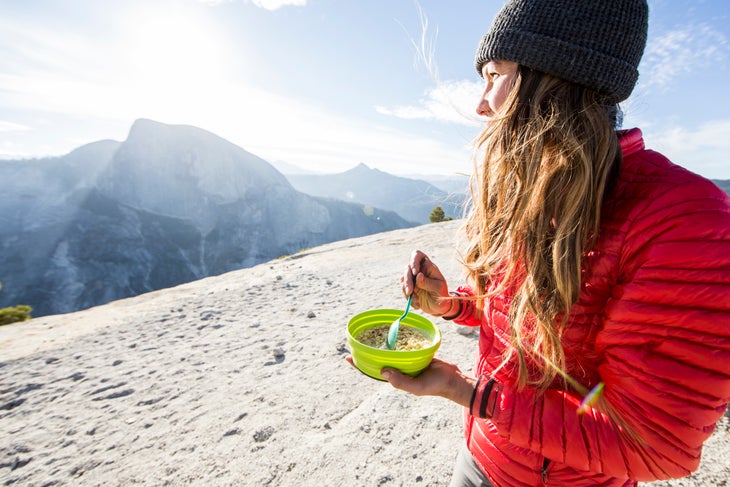
Nothing satisfies like a hot meal at the end of a long day of hiking. You have a couple options here: Freeze-dried backpacking meals are lightweight and only require boiling water to prepare. Alternatively, try cheffing it up . For cooking, a canister stove is your best, cheapest bet: You can grab a decent, direct-from-manufacturer model for less than $30 on Amazon. Practice operating your stove at home before bringing it into the backcountry, and make sure you have plenty of fuel.
The number of calories you need to consume each day of your trip depends on a number of factors: pack weight, bodyweight, altitude, how strenuous the hiking is, temperature and more. For a hard day of hiking, use this as a general rule of thumb: 25 to 30 calories per pound of bodyweight. It’s also never a bad idea to pack extra food for an overnight trip. Don’t forget the spork!
Water Treatment
If you’re experienced with long dayhikes in hot weather, you may already have your water filtration system dialed. Instead of chemical treatments or UV light, most beginner backpackers will be best off with a lightweight filter like a Sawyer Squeeze or Katadyn BeFree. Any of these can take care of bacteria and other common backcountry contaminants; purifiers, which also filter out viruses and heavy metals, will be overkill for most hikers in North America. Need to learn more? Read up on what type of water purification is right for you .
Additional Gear
A headlamp, trowel and TP or WAG bags, bear canister or bear bag, toiletries, and a repair kit should also be in your overnight kit. Make sure you always carry the ten essentials on a backpacking trip. Some additional items might help you enjoy your time in the backcountry. Consider packing a camping pillow, book or journal, deck of cards, camp chair, and comfy shoes to wear around camp.
Now that you’ve assembled all of your gear, it’s time to get it all on your back. Packing your backpack might seem straightforward, but a proper pack job can make the difference between a comfortable hike and a sore back, misplaced gear, and a general bad time. When packing your backpack, think about keeping your essential gear, like your sleeping bag, dry; filling dead space; prioritizing balance and access to items you’ll need while hiking; and weight distribution. Read our comprehensive guide to packing your bag here.
Trip Planning
For your first overnight, choose an easy route with low mileage and manageable elevation gain. Remember, you’ll hike slower with a full pack than you might on a regular dayhike. Apps like Gaia GPS are useful for finding route suggestions, trail info, and maps. Scope out camping spots ahead of time by talking to friends or rangers, reading online, or making a campsite reservation. Check before setting out that camping is permitted in the area you’re going to, and secure any necessary permits through the appropriate land management office.
Always leave a copy of your itinerary with a friend or family member at home, along with your expected return time. Let that person know when they should call for help if you haven’t come home.
On The Trail
Pace yourself.
When you’re carrying your entire home, wardrobe, and pantry on your back, you’re going to get tired. Take lots of breaks, and remember to refuel with plenty of water and snacks (200 calories per hour is a good baseline).
You may have been able to get away with minimal navigation on well-marked, shorter dayhikes, but staying on route is all the more important the further you hike. Keep in mind that as you progress deeper in to the backcountry, it will take longer for help to reach you in case of an emergency. Brush up on your map and compass and GPS skills before setting out, and carry a map of the area where you’ll be hiking. For your first overnight, it’s a good idea to choose a well-established trail where other hikers may be present.
Finding Water
You’ll need about a gallon of water per person per day, more in extremely hot weather. It’s unrealistic to assume you’ll carry all of the water you need for an overnight or multiday trip. Most backpackers carry one to three liters and refill throughout the day. For beginners, picking a trail that goes alongside a river or encounters lakes makes refilling water a cinch. In areas where water is more scarce, scope out sources on a map beforehand, and check in with local rangers or guiding services to ensure they’re currently available (some water sources are seasonal). It’s a good idea to choose a campsite with easy access to water.
Campsite Selection
As noted before, scoping out campsites ahead of time helps make for a stress-free experience your first time on the trail. If you’re looking out for campsites as you hike, keep the following in mind: An ideal campsite is sheltered from the wind and elements. Look for a stand of trees or a flat spot in the lee of a hill or some boulders. Easy access to water is useful, but make sure to pitch your tent at least 200 feet from the shore. Good campsites are well off the trail, both for your own privacy and for the experience of other hikers. Look for a flat spot where water won’t pool in case of a rainstorm. Before pitching your tent, always look up for dead branches that could crash down on your shelter during the night.
It’s always best to camp in impacted campsites—that is, where someone else has camped before. Look out for packed dirt, areas where the vegetation is visibly cleared, and established fire rings. Only camp where permitted, and avoid trampling plants (see Leave No Trace, below).
Backcountry Bathroom
If you’re spending a night or two outdoors, you’re gonna have to go at some point. With a little practice, pooping in the woods can be quite pleasant. Read up on the area you’re visiting—some wilderness zones require you to pack out all waste in WAG bags , while others allow you to bury it in a cathole . If you’re using toilet paper, you’ll either need to bury it or carry it out, depending on how dry the climate is; alternatively, leave it at home and use leaves (check to make sure they’re not poison ivy), smooth sticks, rocks, or snowballs instead.
Always go to the bathroom at least 200 feet from water sources and away from the trail. Many backpackers carry a pee cloth to stay clean on the trail.
Food Storage
When it’s time to rest your head, you’ll want to protect your food from hungry critters who might sniff out your extra trail mix. Some areas, like Yellowstone National Park, require you to store food overnight in bear canisters . In others, where trees are abundant, you can hang your food . It’s a good idea to practice this skill ahead of time and determine which food storage method is best for you and your destination.
Leave No Trace
When traveling in the backcountry, it’s important to minimize impact on the land. Read up on the 7 principles of Leave No Trace and make a plan for packing out trash, reducing your footprint, and being a good steward of the trail.
Remember that a lot of learning will occur on the trail. The more you get out, the more comfortable you’ll become with your overnight gear and systems, your individual backpacking style, and enjoying life in the backcountry. You’re likely to make some mistakes on your first overnight; consider your own safety, always have a bailout plan, and remember that it only gets more fun with practice. There’s nothing more satisfying than becoming self-sufficient in the outdoors for extended periods of time.
Want to learn more about getting into backpacking? Sign up for our Backpacking 101 online course, where you’ll learn everything from navigation to backcountry cooking.
Popular on Backpacker
Related content from the outside network, what’s it like to go on a 200-person hike better than you think., how to pack for backcountry skiing, the original yosemite firefall, hiker charges mountain lion.
Invalid email or password. Please try again.
You've shopped with us before!
Please set your password using the link below.
Create your Account
Already have an account?
Please correct the errors.
Passwords are case-sensitive, must be at least 8 characters in length, and must contain at least one special character.
- Include 8 or more characters.
- Include at least 1 special character.
For your free birthday gift!
Start your Expedition
Sign up with your email and start earning rewards with our exclusive loyalty program.
Explore More, Score More
Elevate your outdoor experience with Expedition Perks, where you earn points on purchases, get a bonus on your birthday, and more–it’s free to join!
Points On Purchases
Member Exclusives
Birthday Discount
Backpacking 101 – How to Plan and Outfit a Trip
How to plan and outfit a trip.
Hike & Camp
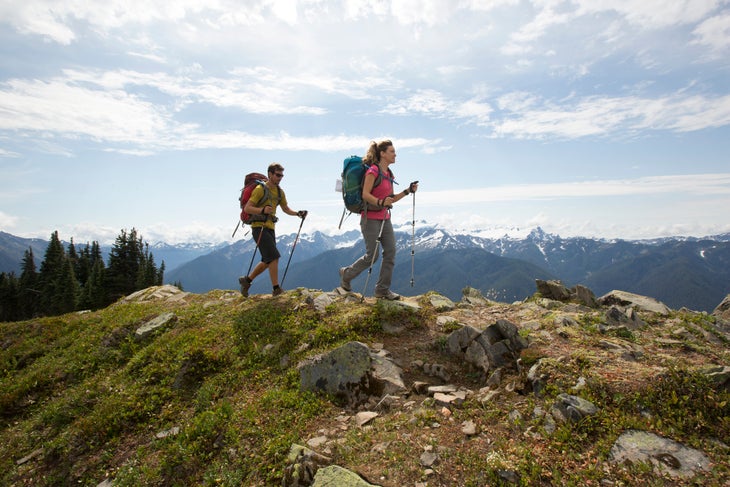
We are all drawn to the open trail, our gear on our back and map in hand, searching for some solitude next to a campfire far beyond the lights of the city.
When you decide to leave the campground behind and make the leap to the backcountry, there is a lot to consider. My first backpack was a hand-me-down Gregory and it took me years to accumulate the necessary gear to support me in the wilderness as a bona fide backpacker.
Loading up your pack, leaving the car far behind, and carrying everything you need on your back combine to raise the stakes from your standard day hike or car camping overnight. But with a little planning and preparation, you’ll be set for some of the most memorable outdoor experiences of your life.
Where to Go
Pick a place that matches your skill set and abilities, fits within your budget and time constraints and most of all is motivating for your group—for example, if you love fishing for trout or want the chance to see a mountain goat and are looking for a moderate three-day trip, the Sawtooth Mountains of Central Idaho are an ideal choice. Outdoor magazines, regional guidebooks, and online backpacking forums can be great resources for choosing a destination and selecting a trail route.
Consider the terrain, realistic abilities of your group, and the goals of your trip. Will your route be a loop? Out and back to a scenic lake for fishing? Point-to-point, including a mountain summit along the way? Will you need to shuttle a car? Depending on where you’re going, budget anywhere from three to ten miles a day. Be sure to check local regulations and restrictions before you go. Can you have campfires? Are bearproof canisters required? What permits do you need to hike or camp there?
What to Bring
What you carry in your pack will be determined by where you go, what activities you plan to do and what kind of weather you’ll likely encounter. We’ve broken down your necessities by type of backpacking you’ll be doing.
Downloadable Backpacking Checklists
Thru-Hiking / Ultralight Backpacking
Who needs this list? Backpackers spending weeks or months on the trail, often on a major thru-hike like the Appalachian Trail or the Pacific Crest Trail. They’re covering 20+ miles a day, carrying a smaller pack weighing around 20 pounds.
Planning tip: While some nights are spent outdoors, shelter, meals, and opportunities to restock are sometimes found at hostels, shelters, or towns that the trail passes through. Planning is critical to identify and schedule these opportunities.
2-10 Day Adventure Backpacking
Who needs this list? Backpackers planning backpacking adventures of two to ten days, often to remote destinations. They’re covering 6 to 12 miles a day, carrying a packs weighing up to 40 pounds.
Planning Tip: Planning all meals is generally needed; if traveling in a group, some items like stoves can be assigned and food and/or tent parts can be divided between packs for maximum efficiency.
Weekend / Overnight Backpacking
Who needs this list? Backpackers planning quick getaways and camping locations beyond the reach of car campers. They’re covering short distances to reach a campsite of choice, carrying heavier packs than long-distance backpackers.
Planning Tip: Since your campsite may not be too deep in the backcountry, there’s a chance it may have amenities like fire rings, grills, or even bathrooms. Some research or even a recon hike could pay off if it means you don’t have to carry as much gear for your weekend.
No matter what the variables, you’re almost certain to be carrying/wearing the following items. Here are some considerations to help you make your selections.
Choose an internal frame backpacking pack , preferably from a company with a lifetime warranty. For overnight trips, 35-50 liters should be sufficient; multi-day trips will require 50-75 liters. Consider the gear requirements of the activities you plan to do on your trip (fishing, climbing etc.). It is crucial to size your pack based on your torso size, not your height, but most backpacking packs come with some range of adjustability. Expert Tip: Strap your sleeping pad, fishing pole or climbing gear to the outside of your pack if you run out of room inside.
Read more about choosing a backpack
Full or mid-height hiking/backpacking boots with a Vibram sole are the backpacker standard, although you may prefer to use hiking shoes or even trail running shoes . Conventional wisdom states that the longer your trip and the heavier your pack, the more durable and burlier boot you will need to provide the proper support. On the other hand, many long-distance through-hikers will go with running shoes, keeping in mind the adage that one pound of weight on your feet is the equivalent of five pounds of weight in your pack! The breathability, waterproofing and weight of the boots or shoes are all important factors to consider. Expert Tip: Bring extra shoelaces; they are useful in a variety of situations.
Read more about selecting hiking shoes and boots
- Synthetic hiking pants and/or shorts: I tend to bring both, or convertible pants with zip-off legs. Synthetics are preferred because they dry quickly.
- Long underwear : I prefer natural fibers like wool over synthetics. Wool is more odor-resistant.
- Synthetic or merino shirt: Long sleeves help lessen your sun exposure and protects from insects.
- Midlayer fleece/hoodie: Lightweight, packable
- Waterproof jacket and pants : Gore-Tex Paclite is a good breathable, lightweight material
- Lightweight puffy jacket: Packability is key. Down is more packable, but won’t work as well as synthetic insulation when wet.
- Socks (at least two pairs): Consider the height of your boots or shoes. I prefer a mid-length wool sock . Expert Tip: Avoid cotton since it tends to cause blisters.
- Beanie and lightweight gloves : Temperatures drop quickly in the mountains and desert at night.
- Sandals or slip-on camp shoes: Your feet will thank you.
- Hat and sunglasses: The higher the elevation, the more intense the sun exposure so keep your face and eyes protected.
- Lightweight backpacking stove and fuel : Make sure to bring more than enough fuel for all your meals and to boil water. Read more about backpacking stoves
- Pot set : Remember to consider your group size and look for a cookset that packs small.
- Cooking utensils
- Bowl, cup, and spork: One for each hiker so you can have a proper toast around the fire.
- Sponge and bio-degradable soap: Expert Tip: A small pine bough works great to scrub dirty dishes.
- Water filter : Gravity filters are the easiest to use, especially for larger groups.

Sleep System and Tent/Shelter
- Sleeping bag : Down insulation has a better weight/warmth ratio than synthetic , but unless you get one filled with water-resistant down, it won’t work well if exposed to moisture. Learn more
- Inflatable or closed-cell foam pad : Choose an insulated pad since some will actually keep you cooler when flipped over.
- 3-Season tent with rainfly: If you have a dog or want comfort then go with a slightly larger tent. I use a 3-person tent for two people.
Read more about choosing a backpacking tent
Emergency / Essentials
- Headlamp : Varying modes with at least 100 lumens on the highest setting. Learn more about how to choose a headlamp
- First aid kit : Try to include pressure bandages, moleskin, medications, and emergency blanket.
- Lighter/fire starter : Turn on Caveman TV and relax.
- Map and compass or GPS : I am old-school and just bring a local map and compass.
- Accessory cord : Uses are endless, but I use mine typically to hang a Bear Bag.
- Toiletries: Sunscreen, lip balm and toothpaste are a must.
- Insect repellent : Can make or break a trip. You might want to consider insect-repellent clothing in addition/instead.
- Duct tape/repair kit
- Knife or multi-tool
- Camera /journal: To prove you were there and how amazing it was.
- Trekking poles: To reduce the strain on your knees and improve your balance with a heavy pack, consider one or two trekking poles. Expert Tip: Your trekking poles can also be used as your tent poles for certain tent setups.
- Whistle or signaling device: You won’t need it until you really need it.
- Solar charger : If your phone runs out of battery you will never get a picture of that wolverine or be able to call for help (assuming you’re in range).
- Backpacking saw : Make sure you are allowed to cut wood and have a fire. Expert Tip: Look for fallen trees, which tend to burn better.
- Binoculars : Mountain goats will not let you get too close, so if you want to see more than just small white dots, bring one along.
- Bear Spray: A requirement in Alaska but not completely necessary if you take the right precautions with your food. However, it can never hurt. Read more about bear safety in the backcountry
What to Eat
Planning & shopping.
Planning the meals for your trip is all about packing enough calories to fuel your high-output days without toting a ton of extra weight in your pack. Whether you choose to purchase pre-made dehydrated meals that come in a bag or assemble your own, create a meal plan for each day of your trip.
A gallon of water weighs more than eight pounds, so one of the easiest ways to cut a good chunk of weight from your pack is to dehydrate your food. Pasta sauces, vegetables, chunks of fruit, and mushrooms can all be dried in a home dehydrator and reconstituted in camp. Choose meals with dry base ingredients such as oatmeal, couscous, or rice. But even as you’re trying to save weight, don’t sacrifice the little extras (like a block of cheese, hot sauce, a few fresh veggies, or a chocolate bar) that will help elevate the standard camp meal.
Once you’ve assembled your food, remove any ingredients from bulky packaging and separate them out for each meal in a zip-top bag. Label them Breakfast #2, Dinner #4, etc. This will help avoid a yard sale once you’re in camp and will help keep your food bag or bear canister organized.
Carry at least two liters per person per day, and more in hot weather. Bring a water filter or purification tablets with you and check your maps ahead of time for water sources along your route so you’re not carrying more water than necessary. Check with the local ranger station on the status of natural springs, which can dry up in certain locations or times of year.
Learn more about water filtration and sterilization systems
Protection for Your Food
Whether it’s chipmunks or grizzly bears, you’ll likely need to protect your food from animals. At the very least, store your food in a durable, secure stuff sack, and when traveling in bear country, either hang your food from a tree as high as possible or carry a bearproof canister .
How to Pack
Packing a backpack properly isn’t just about making sure everything fits—where you put things will largely affect how comfortable your pack is to carry. A general rule of thumb is to put water, cooking gear, and other heavy items close to the center of your back and pack lighter weight items around them. This will help you maintain balance by keeping the bulk of the load close to your center of gravity. Keep snacks, maps, and other small items you might need throughout the day in the hip-belt pockets, side pockets, or lid of your pack for easy access.
In sum, pack your pack as follows:
- Lid: Map, snacks, and other essentials
- Sides & Top: Clothing, tent components, other light/compressible items
- Center: Water, food, and cooking gear
- Bottom: Sleeping bag
- Outside: Sleeping pad
Expert Tip: Split the weight of communal items by divvying up things like the tent and cooking gear among the group. Nobody wants to be the packhorse.
In Case of Emergency
Stay on the radar.
The idea of backpacking is to get away from it all, but that being said, always leave your trail itinerary, including where you plan on camping each night, with a friend or relative and give them contact info for local authorities in case you don’t return on time. In very remote or challenging terrain, it can be worth carrying a Personal Locator Beacon (PLB), which can track your progress via GPS and when activated will send a distress signal to local authorities and Search and Rescue teams.
Embark with Proper Skills and Gear
Hitting the trail equipped with a good first aid kit, fire-starting materials, and some basic first aid knowledge will safeguard you from most minor mishaps. Know how to start a fire, where to collect water, and how to build a basic shelter.
Expert Tip: Take a basic first aid course or, even better, become a Wilderness First Responder (WFR).
Getting Ready to Go
Take a car camping trip, short overnight trip, or even just camp out in your backyard for a night with the gear you plan to use. Becoming familiar with your gear and making sure it works properly before you leave can save you big problems on the trail.
Strapping on a 50-pound pack and walking eight miles in a brand new pair of hiking boots can turn into a blistery nightmare. Wear your hiking shoes or boots on short day hikes or even to work to help break them in. Your feet will thank you later. Make sure to address ‘hot spots’ immediately to prevent blisters from forming .
- Learn about Leave No Trace principles . This essential concept helps preserve the wilderness for everyone to enjoy. Read about it and practice it religiously.
- Make a Checklist . Print out one of the lists above and keep it with your gear.
- Fit your backpack properly before setting out. A good fit helps prevent sore spots and back pain.
- Take toilet paper off the roll, fold it into small accordions, and give each hiker his or her own TP in a re-sealable baggie. This is more convenient and saves packing space.
- In some areas, the BLM or Forest Service requires hikers to pack out their waste , including human waste. Find out before you go, and purchase waste bags if necessary.
- Check the weather and be prepared for some down time. Consider bringing a deck of cards—it’s small, light, and versatile—and a small book.
Prepping for your first backcountry backpacking trip takes some work, but if you do the research and assemble the right gear, it can open the gates to endless travels and a lifetime of epic trips.
- How to Choose a Backpacking Tent
- How to Choose the Right Camping Sleep System
- Tips for Choosing a Campsite
- Low-Impact Camping Principles
- Backpacking Stove Systems: Canister or Liquid Gas
How to Plan Your First Backpacking Trip
By Josh Laskin

All products featured on Condé Nast Traveler are independently selected by our editors. However, when you buy something through our retail links, we may earn an affiliate commission.
Lying in my warm-weather sleeping bag , I watched frost slowly build on the outside of my tent for hours before realizing I wouldn’t be able to sleep that night. I tried to control my chattering teeth, and thought back to just hours earlier when sunshine and 70-degree temperatures welcomed me and my brother to the summit of Algonquin Peak, just outside of Lake Placid , New York. It was our first time backpacking—carrying our gear to camp over a multi-day hiking trip —and it was obvious we had a lot to learn.
And learn I would: In the following years I came to love backpacking, while working as an occasional weekend guide for New York City-based Destination Backcountry Adventures . I backpacked in national parks across the U.S. , became a wilderness-therapy guide in Maine , and eventually relocated to a small town in New Hampshire’s White Mountains. Over the years, I collected knowledge I was missing on that first night at the base of Algonquin Peak—the importance of using a sleeping pad (not just that sleeping bag) for insulation, how to dress properly, and what to bring and leave behind. With a little more research ahead of time, though, I could have avoided learning the hard way.
From a novice-turned-pro, here are a few things to consider before spending your first night in the backcountry—for a much better first try than mine.
All products featured in this story are independently selected by our editors. However, when you buy something through our retail links, we may earn an affiliate commission.

A lightweight, durable tent is a must-have for your first backpacking experience.
Bring the appropriate gear
These days, there’s no shortage of gadgets designed to make your time outdoors as comfortable as possible. But when you’re halfway up the side of a mountain with a 65-liter backpack full of stuff, you’ll likely realize you would’ve been more comfortable if you had left some at home.
There are a number of companies, such as Outdoor Research , MSR , and Big Agnes , to name a few, that make lightweight, backpacking-specific gear. While you might shell out a little more for it, you’ll be much happier than if you choose to haul around that heavy Coleman tent and sleeping bag you've had in the attic for years.
Basic things you’ll need are a lightweight backpacking tent and sleeping bag , which come rated for specific temperatures—pick one that’s designed for 15 to 20 degrees lower than the weather you expect to encounter—a camp stove with fuel and something to cook in . You’ll also need a sleeping pad to provide insulation from the ground, a headlamp with extra batteries, storm-proof matches , water treatment filter , iodine tablets or a small dropper of bleach , and a backpack to carry it all in.

The right outerwear is just as important as solid base layers.
Dress accordingly
Showing up to the trail in jeans and a cotton T-shirt might not be huge a problem on a three-mile day hike, but it can quickly become dangerous for overnight backpacking when you spend the day sweating and evening temperatures drop significantly. Cotton is heavy, absorbs water, and doesn’t dry easily, which can lead to hypothermia in extreme cases. In general, avoid cotton for backpacking: Companies like Arc’teryx and Patagonia make synthetic, lightweight, and packable clothing better designed for the task at hand.
It’s also a good idea to bring even more layers than you think you’ll need, especially to mountainous regions. Nights tend to get significantly colder than days—and a fleece or puffy jacket with a rain shell goes a long way during cool nights on windy summits. You’ll also never regret having an extra pair of socks to change into at camp.

Alex Erdekian

CNT Editors

Jesse Ashlock

Charlie Hobbs
Footwear is a matter of preference. Some prefer the support and durability of full-grain leather hiking boots when carrying a heavy pack, while others prefer lightweight synthetic boots or even trail-running shoes . Regardless of what you prefer for hikes, also bring a pair of lightweight camp shoes to change into at the end of a long day—your feet will thank you.
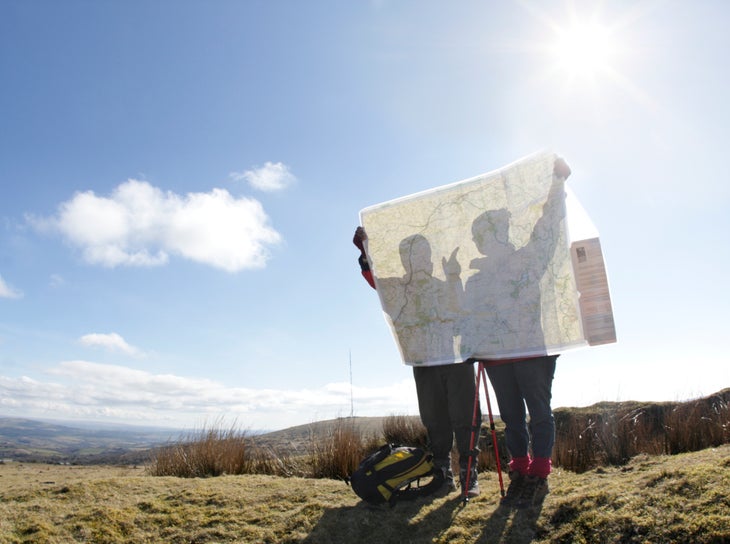
Plan ahead for every step
“Plan ahead and prepare” is the first of the seven Leave No Trace principles, which every backpacker should follow. These principles are designed to keep users of natural spaces safe, while also minimizing human impact in the outdoors, with guidelines on respecting wildlife, traveling and camping on durable surfaces, and disposing of waste properly, to list a few. In addition to learning the “LNT’s,” familiarize yourself with reading a topographic map to determine your mileage, spot water sources, decide where to set up camp, and map your overall route and evacuation routes for each day on paper. Gaia GPS is a helpful interactive map tool for plotting out your course, and can offers insights about elevation, water sources, and the length of a route so you can plan rest stops. The app also has the ability to download maps for offline use, if your phone GPS will work during the journey—but it's crucial to plot out the route on a paper topographic map in case you lose service.

Map out your journey, step by step.

Don't forget to bring (and know how to use) a compass.
It’s also helpful to make a meal plan so you don’t over- or underpack. The simplest way to go is to bring dehydrated meals, like the ones by Good To-Go , which are lightweight and require nothing more than hot water. Eventually, as your comfortability with backpacking increases, you can start getting creative with different campsite recipes you can make yourself.
Ensure you have emergency essentials, as well. The quickest and easiest option is to purchase a prepared first-aid kit designed for backpacking, although you can put one together yourself. In addition to the map you used to plan the trip, bring a compass (and know how to use it), whistle, an emergency bivy or mylar thermal blanket , a knife, gear-repair kit or simple duct tape, and extra clothes and food. A satellite phone or personal locator beacon (PLB) can also be useful in remote areas where cell reception is hard to find.

Going with an expert can be a worthwhile investment for your very first trip.
Hire a guide
While research is helpful, no amount of preparation can equate to actual experience. Backpacking with a guide isn’t a necessity, but it can help you avoid some of the discomfort that is inevitably going to occur during your first few trips. An experienced backpacker knows how to properly dispose of waste, where (and where not) to set up camp, how to choose a backpacking route based on available water sources and fitness level, and other skills that can only be sharpened by spending time in the field.

REI Adventures offers a number of group and private backpacking trips in the U.S. and beyond perfect for learning the ropes. In fact, they’ve recently added 17 new domestic itineraries, including a five-day backpacking trip in Yosemite that incorporates an ascent of the famous Half Dome. And 57 Hours , an online platform that connects outdoor enthusiasts with certified guides, also offers a number of backpacking itineraries.
No matter when you start backpacking, know that the learning continues, and that's part of the adventure. Every time I venture into the backcountry, I find a new skill or trick to make the experience more fun and comfortable. For example, in recent years, I replaced my water filtration pump and iodine tablets with a bleach dropper—an easier method than pumping that provides better tasting results than iodine tablets. Those lessons come with experience. But you don’t need to be a pro with perfected methods and systems to hit the trail; you just need to be prepared, so you can safely get that crucial firsthand experience of your own.
By signing up you agree to our User Agreement (including the class action waiver and arbitration provisions ), our Privacy Policy & Cookie Statement and to receive marketing and account-related emails from Traveller. You can unsubscribe at any time. This site is protected by reCAPTCHA and the Google Privacy Policy and Terms of Service apply.

Built by Backpackers, for Backpackers
Backpack Map is the ultimate backpacking resource -- a comprehensive, curated site that covers over 500 trip destinations across the United States. With site links, maps, restrictions, estimated trip durations, and more, you'll find a multitude of new places to explore. And the best part? It's absolutely free.
Search the Map

A Beginner’s Guide to Planning a Backpacking Trip
The question of how to plan a backpacking trip is one you should never be afraid to ask! Even the most seasoned Everest climber started somewhere!

The question of how to plan a backpacking trip is one you should never be afraid to ask! Planning your first backpacking trip can be very overwhelming. From deciding on how much to take with you on your hike, to deciding which route to take, there’s a lot to think about. Before you get too overwhelmed, just remember that even the most experienced backcountry hikers and campers all started somewhere and have likely felt the same way that you do now.
We know how daunting the prospect of planning your first trip can be so we’ve put together this handy guide that will tell you everything you need to know about heading out into the backcountry for the first time so that your backpacking trip will be a success!
Every adventure starts with a plan!
Heading out into the great outdoors can be daunting. But don’t worry, we’ve got your back! Our world-renowned scavenger hunts include more than 400 different activities in hundreds of cities around the globe. Every hunt is hand-crafted and includes trivia and challenging games to entice you along. Whether you’re in the mood for cheeky bar crawls , creepy ghost tours , or classy art walks , our Let’s Roam app has an adventure that will help introduce you to your new location!
How to Plan a Backpacking Trip
Below you’ll find a step-by-step guide to planning a backpacking trip. You can do these in order or jump around a little bit based on what works for you. The most important thing is that you cover all the steps and are adequately prepared for your big adventure. Not bringing the right gear or enough food and water can make even the easiest trail significantly harder and it can even make the trip dangerous.
Decide where you want to go.
This should be your very first step as it can have a big impact on everything else. For example, planning a backpacking trip high into the Rockies where you’ll be staying at rustic campsites is going to be very different from trekking in Patagonia where you have plenty of hostels and refugios to choose from. These will both be different from hiking through waterfalls in the Amazon jungle or going down into the Grand Canyon and the gear that you’ll need will be drastically different for all of these adventures.
If this is your first hike you must do as much research as possible on a destination before deciding that this is where you want to go. We highly recommend starting with an easy destination. Short, two to three-day trips that are close to home are ideal to start with and as you become more comfortable, you can start doing longer trips a bit further away. You may also want to start by doing fewer miles each day than you would normally do on a day hike. It’s very different hiking with a heavy backpack than it’s a light daypack and it’s better to cover shorter distances so that you don’t overdo it
Also, think about how far off the beaten track you want to go. While it may seem dreamy to be completely away from the hustle and bustle of daily life, surrounded by breathtaking nature, and feeling like it’s just you against the elements, this can quickly turn into a nightmare if anything goes wrong. And when you’re backpacking, something can always go wrong. If you truly want to go off-grid, you need to be both mentally and physically prepared for the experience.
Research the logistics.
Once you have decided roughly where you want to go, you now need to figure out the logistics (I.e. how you’ll make it work). Some questions that you should ask yourself at this point include:
- What will the weather be like?
- Is this the right time of year to go to this destination?
- How many hours of daylight can you plan for?
- Are there any dangerous wild animals that I need to be aware of?
- Do you need permits? If so, how long do they take to acquire?
- Is there potable water available?
- What is the terrain like?
- How do you get to the trailhead?
- What will the elevation gain be?
- Are there any mosquito-born diseases prevalent in the area such as malaria or dengue?
- Are you going into bear country?
All of the answers to these questions will have a big impact on how long you can hike, what you need to take with you, and where you can go. You can use guidebooks, backpacking websites, social media, backpacking, and thru-hiking forums, etc to find information as well as navigation websites like Gaia which will help you get more familiar with the terrain of your destination and help you find both free camping spots and established campsites.
When you’re compiling the answers to these questions, make sure that you jot down where you found particular information. During your research, you may run into contradictory information, and knowing where you found things can help you decide which one is more accurate.
During this phase, don’t forget to reach out to your fellow adventurers to ask for their advice. There are also many Facebook groups that you can join where people share general advice on backpacking as well as location-specific information. Read as many trip reports as you can about a particular area and have a list of questions ready that will cover anything that seems questionable. Remember, there are no dumb questions and it’s important to get clarification on anything that you’re confused about or want to get clarification on to have the safest and most enjoyable backpacking trip possible.
Also, do not forget to check the website of the park that you’re going to for weather updates, trail updates, and other useful information. There’s no point in planning an entire trip around a particular section of a national park and then finding out it’s closed.
Invite some friends along.
Once you have a rough idea of where you’re going and how difficult it will be, it’s time to invite some friends to join you! If you know people who love backpacking, they are an obvious first choice. Having a few people with you has many benefits. Not only is it safer and more fun to hike in a group but it can also help you divide the weight of the gear that you’ll be carrying. For example, a two-person tent weighs significantly less than two one-person tents and you can easily divide up things like cooking equipment, food, and so on.
Just a warning, be careful who you invite and consider whether or not they will be able to handle the hike that you’re expecting to do. Having someone with you that is not physically able to do the hike can slow you down and cause some major logistical issues, especially if it’s a multi-day hike. If you do invite someone who is a bit of a newbie, make sure to check with them what their longest hike has been, whether they enjoy camping, etc. Although it may feel a little like you’re vetting your friends, this can save you a huge amount of hassle and stress in the long run. Even better, you can even do a few practice hikes together before you go on your big adventure. This will give you an idea of whether or not you’re compatible and what you need to look out for if you decide to go together.
Choose your gear.
Once you have an idea of where you’re going and what the weather will be like, you can start choosing suitable gear and creating your “gear list”. This includes things like tents, sleeping bags, a sleeping pad, cooking equipment, water bottles and water filters, food and snacks, clothing, jacket, sunhat, shoes, rain gear, headlamps, bear canisters, power banks, first aid kit, hygiene products, etc as well as odds and ends like duct tape, a knife, and medical tape. Don’t ignore the importance of having a headlamp. It may seem like your cell phone flashlight will work just as well when you’re at a campsite but when you’re out on the trail hiking in the dark, you want to have both of your hands-free. This will come in handy (pun intended) in case you stumble and need to catch yourself or if you find yourself on rough terrain and have to rely on walking sticks.
If you’re a beginner backpacker, don’t panic. There are plenty of backpacking checklists and gear guides that you can find online that can serve as useful guides when you’re putting together your gear. Before you go crazy trying to check every item off the packing list, think carefully about what you’ll actually need. It’s easy to go overboard when you’re at home worrying about every possible predicament but keep in mind that you’re likely to be carrying all of this equipment on your back at some point so make every pound of it count.
If you aren’t sure what is “too” heavy, a good rule of thumb is that your pack shouldn’t be more than 20% of your body weight. Anything heavier than that is going to be very challenging even for the strongest of hikers. Don’t forget that most hikes and campsites follow a leave-no-trace policy which means that anything you bring with you, you need to take with you. This includes human waste, used toilet paper, and feminine hygiene products. You’ll need to consider this when it comes to your gear and what you’ll use to carry your trash and waste out with you.
When you have picked out all of your gear, make sure to try packing it all into your backpack. Make sure that there’s plenty of space for water, especially if you may be covering long distances between water sources. Practice walking around with the full pack on your back to make sure that it’s sitting correctly on your back and hips and that it’s comfortable. If you’re unsure of how a backpack is supposed to fit, there are plenty of online guides available. Alternatively, you can take your bag to an outdoor shop like REI and ask one of the staff members to check for you. (if you go this route, try to buy something while you’re there.)
You should also make sure to break in your hiking boots if you bought new ones. Ideally, this would be done through a series of shorter hikes that allow you to identify any trouble spots where blisters are forming and either find a way to fix them (insoles, pads, etc) or buy a new pair of boots that work better for you. Never, ever rely simply on reviews when choosing boots. Everyone’s feet are shaped differently as your height and weight can also play a role in how your boots fit.
Figure out how you’ll get back home.
When it comes to planning your trip, it’s easy to get lost in the details of the hike itself and forget that at some point it will come to an end! This means that you’ll need to figure out a way to get home afterward. If you’re starting and ending at the same spot, this should be relatively easy. However, if you’re hiking from point to point, things are likely to get way more complicated.
This is the time when you need to figure out exactly how you’ll get to the starting point and back to your car or another form of transport that you may be using. Keep in mind that some national parks do not allow private vehicles and offer shuttle services instead as a way to ease traffic congestion. If this is the case, you’ll need to figure out how frequently the shuttles run and what time the last shuttle of the day is. The last thing you want is to finish a long day of hiking and find out that you have no way to get back to your car.
Plan your food.
When it comes to planning your food, it’s very easy to overdo it. Many people are worried about being hungry so they find themselves packing too much food and then regretting it when they are carrying around excess weight in their bag (or their stomach!).
One of the best ways to plan what food to pack is to base it on a certain amount of calories per day. The average consumption level is around 2,250 to 2,750 calories per day depending on the intensity of your hike as well as the size of your body. Sadly, hiking doesn’t burn off nearly as many calories as we often think it does so you probably won’t need as much food as you think you will.
When putting together your “meal plan”, you can choose from either DIY meals and snacks or fancy store-bought backpacking meals . These tend to be very expensive so if you’re looking for ways to cut down costs, this is definitely one of them! This can also be helpful if you’re vegetarian since although it seems like more and more pre-packaged backpacker meals are coming onto the market, very few of them are actually vegetarian-friendly.
Get your mind and body shape.
Hiking is great for our physical and mental health but you certainly don’t want to injure yourself at the beginning of your trip (or anytime during your trip to be fair) or not be able to finish the trip because it’s too tough. It’s important to make sure that you’re up to the task physically and mentally before setting out on your backpacking trip. This can greatly help increase your chances of being able to complete it.
One good way to do this is to go on a few tough day hikes or some overnight weekend trips. You can also try car camping with a few long hikes mixed in. This will give you an idea of what equipment you need and what you may be able to leave behind. If this isn’t possible, try to hit the gym as often as you can and focus on working muscle groups that you would normally use during a hike. This will usually be very different from yoga classes or running on a treadmill. While those are both great for you, they don’t help strengthen the muscles that you need them to.
While you’re building up your strength and stamina physically, it’s just as important to build yourself up mentally. Unless you’re doing a technical hike, you’re probably more likely to run into a mental block than a physical one. To “practice”, try to hike when you’re really tired. Throw in some early morning hikes and a few nighttime hikes to see how it goes. You may be surprised at how much this can help when you set out for your backpacking trip.
Check and recheck everything.
Before you set out on your backpacking adventure, make sure that you check and recheck everything. This includes your backpacking gear list, your food, the weather, and everything and anything else you can think of. Reread trip reports, double-check the website of the park you’re visiting, and log onto their Facebook page for any additional updates. This is your final chance to make sure that you have everything ready and that the weather will cooperate with you. If you learn something that can impact your trip, this is your time to try and resolve it before it becomes a bigger issue. This step is just as important as when you did your initial research so make sure that you tie up any loose ends before they begin to unravel!
Don’t leave anything until the last minute.
There are always jokes about people who pack last minute for a vacation. You know the ones, someone is running around two hours before their flight throwing stuff into a suitcase. This is what you definitely don’t want to do when backpacking. Packing last minute makes it easy to forget something and this can mean the difference between life and death. Instead, try packing everything into your backpack at least a week before the trip. This will give you time to change anything (take stuff out, put stuff in) and still be able to repack in plenty of time for your departure.
Share your itinerary.
Before you head out, make sure that you share your itinerary with someone that you trust. Ideally, this would be someone who has also backpacked before and understands some of the issues that could arise, and, most importantly, knows how to help if anything goes wrong. Leave their contact details and your itinerary stashed somewhere in your car near the trailhead or campsite as well so that in the event you don’t return at your intended time, someone near the trail may be able to help. You can also stop by any ranger station and inform them of your route and how long you expect it to take.
Ready for the world?
We hope that this guide has left you ready to pack your backpack and set off into the wilderness on your next adventure. As always, we would love to have your feedback and please let us know if there’s anything that we may have missed. This will help our readers be as prepared as possible!
If you need any additional information about destinations around the world, don’t forget to check out our travel guides . These were written by our own in-house travel experts who have roamed around the globe from Acadia to Yosemite and everywhere in between! You can also download the Let’s Roam app which is full of great user-generated content for destinations all around the world as well as our fun-filled scavenger hunts. They’re a great way to learn more about a destination and have a wonderful time doing it.
Frequently Asked Questions
The first thing you need to do when planning a backpacking trip is deciding where to go! This will impact the gear you take and how you will start and end the trip.
If this is your first backpacking trip , it is a good idea to do a short trip close to home. Once you feel comfortable, you can start going on longer trips.
If you are looking for more info on towns near your destination, download the Let’s Roam app . This app is full of useful, user-generated content that will help you find the best restaurants and hotels.
Featured Products & Activities
How to Plan a Backpacking Trip: the Ultimate Guide (2023)
Camotrek is reader-supported. When you buy through links on our site, we may earn an affiliate commission. See the disclosure page for more information.
No matter if you’re heading out for a quick overnighter or embarking on a multi-week expedition, the most fulfilling experiences await those who understand the art of planning a backpacking trip and getting ready for their adventure. Sure, adventures are unpredictable by definition. However, “ careful planning ” is the key to having a safer, and more enjoyable hiking trip.
Experienced hikers are well aware of the undeniable truth behind the adage, “Failing to plan is planning to fail.” Planning, in its essence, involves more than just gathering your gear and embarking on a journey without a predetermined route or objective. While this approach may be suitable for familiar territories, particularly when weather conditions can alter initial route plans, it can also be embraced in unexplored areas, especially for those who thrive on embracing the unpredictable.
A “reasonable backpacker” prefers to plan his hike. This entails considering and reviewing various aspects such as:
- Route selection and timing : Using a backpacking trip planner can be invaluable in determining the most suitable route and estimating the time needed to complete each section of the hike.
- Weather forecast : Relying solely on historical temperature data can lead to inaccurate predictions, so it’s essential to check the latest weather forecast for more reliable information.
- Water availability and sources : Assessing the availability of water along the route and identifying potential sources ensures you can stay properly hydrated during your journey.
- Terrain features, vegetation, and wildlife : Familiarizing yourself with the terrain, plant life, and wildlife in the area helps you anticipate any potential challenges or dangers you might encounter.
- Proper and tested equipment : Ensuring you have the right gear, including comfortable hiking footwear, clothing suitable for the weather conditions, and properly functioning equipment, is crucial for a safe and enjoyable backpacking trip.
- Potential hazards and attention to detail: Consider all potential hazards along the trail, including steep slopes, slippery surfaces, river crossings, or potential encounters with wildlife. Paying attention to even the smallest details can prevent an adventure from turning into a disaster.
There are three main questions you need to answer during the planning stage of your hiking adventure. They are the following:
- Who will be joining you?
- Where will you go?
- When will you go?
Answering these questions will allow you to fine-tune your gear and food selection, develop a realistic timeline, and anticipate potential problems.
How do I start planning a backpacking trip? What should my main considerations be? Do I need a permit to go backpacking? We’ll answer these and many other questions. We will also give you practical tips as well as a blueprint for planning your next hiking trip.
Let’s jump in.

Table of Contents
Evaluate your experience, skills, and knowledge. What are your goals?
Pick realistic goals, and save the ambitious projects for when you have the necessary experience and fitness level. Especially before doing a long hiking trip , it is wise to do a couple of shorter trips such as day hikes or two-day trips. These shorter trips serve as valuable opportunities to assess your overall fitness, evaluate the functionality of your hiking boots, test your gear (especially essential items like your rain jacket, sleeping bag, sleeping pad, and shelter), and even consider the compatibility of your hiking partners if you have any. A big trip may quickly be cut short by a pair of ill-fitting boots or bad physical condition.
Many backpackers have the dream of conquering a long-distance trail in one continuous journey, which is an ambitious endeavor. While some set off with a vague route in mind and still manage to complete the entire trail, a significant number give up within the first few days or weeks, even with some planning. Failure can be attributed to various reasons such as heavy packs, sore feet, exhaustion, unexpected weather, rugged terrain, and trail conditions. For a long-distance hike, especially one lasting several weeks, detailed planning is highly recommended. It’s advisable to gradually progress by starting with shorter yet challenging trails. As you gain comfort and experience, you’ll acquire the necessary knowledge and determination to finish a long walk.
Preparing for a long trek involves managing logistics, selecting appropriate footwear and gear, and understanding the potential hazards of the chosen trail. This preparation phase can be quite demanding, often proving to be one of the most challenging aspects of the entire hiking experience. However, it is crucial to not only prepare for your trip but to do so effectively. It is essential to be realistic about how the requirements of your planned journey align with your physical capabilities.
The first step in planning ahead is choosing a trip that is appropriate for your skill level. Too often people get into trouble because they underestimate the challenge of their route or overestimate their individual capabilities. It’s important to note that men and women differ in various aspects, including perception and communication, which may contribute to differences in how they handle hardships. However, the capacity to overcome challenging situations is often closely tied to experience and, to some extent, certain biological traits and genetics.
Once you evaluate your experience, skills, and knowledge, it’s time to decide about the group size.
Group size. Solo or with others?
Hiking experiences can vary greatly depending on whether you choose to hike alone or with a group. The size of your group can also have a significant impact on various aspects of your journey. Additionally, carefully selecting the right partner or partners can greatly enhance the efficiency and enjoyment of your travel. We discussed the pros, cons, and dangers of backpacking solo in a separate article so we won’t expand on hiking alone here. We’ll focus on walking with others instead.
Hiking with a group involves certain considerations. Let’s begin with the most important one – your attitude toward others. Be cheerful, helpful, and mind the person behind you especially when grabbing branches. It’s really important to be someone you would want to hike with. Be courteous with others and not only with those from your group but also with the people you meet on the trail. Furthermore, set a pace that makes the other members of your group feel comfortable and always stay close to the group to keep it together.
If you decide to travel with a single partner, it’s a good idea to select a partner who’s a more experienced backpacker than you. This will help you become more proficient in route finding and avoid common mistakes. Partnering up is easy if your soul mate enjoys backpacking and has a similar to your level of fitness. But it gets more complicated if your physical preparation level isn’t similar or you have different goals.
Be critical and don’t make any compromises if something in your partner’s attitude or manners really irritates you. Try to discuss any problems and woes you might have and solve them in a timely manner. You need to sort out potential issues in advance and relinquish unrealistic expectations.
Select an area
You can do that with some help from the Internet, guidebooks, maps, magazine articles, outdoor websites, hiking blogs, trekking agencies, local outing clubs, and guides and outfitters. First, of course, you have to decide where you want to start and finish. Most people have their own preferences based on the nature of the terrain, great stories they’ve read or heard, even on some stunning pictures and photos.
Once you have chosen your partner(s) or decided to solo hike, pull out the guidebooks and pick a trail. In addition to trail descriptions, better guidebooks will include time estimates, elevation gain and loss, and warnings about less-obvious hazards. This way you’ll get some valuable preliminary information. If you are going into less-traveled areas, you may have to glean this information from Internet blogs or topographic maps. A Web search with Google is a good place to start. Once you’ve selected an area, you can obtain up-to-date information from the land managers, fellow hikers, Internet or state/local agencies and institutions.

Photo by Andrew Gosine
Obtain up-to-date information
Try to obtain information that could be of use when planning your hike. The information you’d need is primarily about several important things such as:
Weather and average temperatures
Part of your research should include prevailing weather patterns for your destination. As mentioned above, you can first examine historical temperature data and base your decisions on it. As your departure date gets closer, start following the weather on the Internet. Try to get the most reliable and comprehensive weather forecasts. Nowadays, forecasts can be extremely punctual especially for 4-5 days ahead (specialists reliably predict the weather up to seven days in advance, though keep in mind that this might not be relevant for the mountain weather) and getting caught unprepared is foolish.
How many hours of daylight do you expect? If there will be night hiking, you’ll need lighting (a headlamp or a flashlight) and warmer clothes. On summer trips, there is enough daylight for up to 14-16 hours of hiking per day. This means that you need only a low-powered headlamp/flashlight for camp chores unless you decide to go on a night hike. Additionally, you don’t need warm clothing to have a good sleep. In contrast, you need a high-powered light for hiking after dark and warmer equipment for your winter hikes.
Sun exposure
Sunburn is easier to prevent than treat. Keep in mind that direct solar radiation can be very dangerous, especially between 10 am and 2 pm. The amount of sun exposure is a function of various factors such as cloud cover, vegetation, elevation, surface reflectivity, and the strength of the sun. These details can be obtained from different sources.
Terrain (including elevation gain and loss)
The terrain is among the most important factors when choosing proper footwear for your trip. For rough and rocky terrain (especially if you go uphill) you can play it safe and pick up hard-wearing hiking or backpacking boots. They offer better ankle support, more control, and stability in comparison with light low-cut shoes such as trail-running shoes or standard hiking shoes. However, they’re too heavy and need to be broken in before your hike; otherwise, they can ruin your trip. Additionally, trail-running shoes today are lightweight, more durable, and more reliable than before and provide enough comfort on most kinds of surfaces.
Your clothing also depends very much on the terrain you choose for your hiking trip. If trail quality, signage, and maintenance are poor, you should bring better navigational aids and more protective clothing. You can get familiar with your planned route by looking at pictures and reading descriptions of it.

Time estimates
If you don’t have experience with mountain trekking, you will be surprised that going uphill can take so much more time than hiking on even terrain. But it’s true as it is true that walking in snow is harder and more time-consuming than summer hiking. You need to take details like these into consideration when planning and estimating your timing. Having an idea of how much to lower your time and distance expectations is important, and – in case you’re wondering – your personal experience is a huge factor in determining this.
Hiking hazards
Do your research and make sure you know what kind of hazards you may encounter during your trip. Remember that preparing for a disaster does not mean that you can always avoid it; however, you’ll have a much better chance at dealing with almost any extreme situation you encounter on the trail. If you are a complete novice to the outdoors start with learning the essentials for beginning backpackers . The outdoors is not as dangerous as typically portrayed by sensationalist media stoking fear of the unknown. Nonetheless, people do get sick and injured out there, sometimes fatally. Natural hazards include unpredictable mountain weather, technical rock faces, rockfalls, crevasses, contaminated backcountry water sources, river crossings, flash floods, wildfires, and avalanches.
It can be among the last things most backpackers check out when planning their trip. However, don’t be fooled by that fact – it’s not the same to hike in an arid area with a few cactuses and crossing thick forests (with thorn bushes) or fields lush with grass. For information about vegetation density and types, check topo maps, analyze satellite imagery, find pictures and descriptions posted online.
Wildlife and insects
Use blogs and forums to find relevant information about wildlife and insects that can be a concern. The possible presence of dangerous animals (mice, raccoons, bears, snakes, etc.) affects how and whether you store and protect your food, where you cook and camp, where and when you walk (avoid night hiking in snake country), and whether you need to carry anything for self-defense ( bear spray works well against all kinds of big animals). Relentless swarms of mosquitoes, black flies, and no-see-ums can completely ruin a trip. To maximize protection from them, you can use either long-lasting insect-repellent or insect-repellent for your clothing and gear . There are so many potentially dangerous animals for a hiker so you need to be well-informed in advance about the dangers related to wildlife on a particular hiking trail.
Depending on the location, you need to carry one or more of the following: a mobile phone in a shock and waterproof case, GPS , and personal locator beacon (PLB). If something unexpected happens or if something goes wrong you may need to self-rescue, await an assisted rescue, or apply medical treatment.
Water availability
On any walk, you need to know where water sources are and what the condition of the water is likely to be. Water supply is among the most important things you want to know about a region you’ll be hiking in. Having access to enough drinking water should be one of the major considerations in planning your hiking trip. There are some places where water sources are generally reliable and others where many water sources dry up during the arid summer months. Also, sometimes you don’t have access to clean drinking water in the wilderness. Then, having a portable water filter is essential to kill all pathogens to have clean water. Before relying on a water source marked on a map, consult someone who has personal familiarity with the landscape or check guidebooks and online trip reports for past observations.
Precipitation
Your footwear, clothing, shelter, the types of materials you use, and water availability will all be affected by the amount and frequency of precipitation you can expect during a trip. In prolonged rainy weather, lightweight trail-running shoes like the Altra Lone Peak 7 are preferable to heavier, waterproof boots like the Salomon Quest 4 GTX because 1) boots won’t protect your feet from getting wet and 2) running shoes are breathable and will get dry much faster than a pair of boots.

Sorting the obtained information – what’s useful and what’s irrelevant?
It doesn’t matter how much information you have. It’s important to have enough relevant information. The Internet can overwhelm you with a massive amount of information, so you will need to sort out what’s useful from what’s irrelevant. Many trekking websites are updated regularly and provide a ton of (both relevant and irrelevant) information for your hiking expedition. Filtering out irrelevant information is critical to helping your brain process the most important information out of everything presented to you. Your experience, as well as the ability to think critically, is the key to extract what matters from what’s irrelevant.
Be critical of everything you read or hear, try to find at least two different sources about a particular topic you have an interest in, and carefully evaluate the quality and consistency of the information you get. This will help you allow yourself to reflect thoughtfully, objectively, on the data.
Plan routes
We recommend beginners to stick to trails or established routes and limit the amount of off-trail hiking into the wilderness. They should also focus their efforts on easy to medium trails. Once they have enough experience, they can always do more difficult hikes. More experienced backpackers have more options regarding the difficulty of their backpacking trips. They should plan their route taking into account factors such as the weather and environmental conditions as well as their own preferences.

Photo by Matthew Henry
OK, how to plan your route? First, pinpoint your starting location. Look carefully at the map before you set off and identify some landmarks to keep track of your progress. Then, trace your planned route carefully making note of key features you will pass on the way. It is a good idea to hike with a map in an easily accessible pocket to consult it if necessary.
Nowadays, there are also plenty of excellent backpacking route planner apps that would aid you in planning your hike. Many of them are free to use. Let’s have a look at two of the most popular apps you can use to find your next trail and plan your route – AllTrails and Hiking Project.
AllTrails is an excellent app that can be of benefit to both those who don’t know where they want to go and those who know where they want to go but need more information about a particular trail. You can find solid information, maps, photos, and reviews with accurate details for destinations from around the world. If you’re lucky, you can even find great local trails and parks you’ve never known about. In addition, AllTrails offers useful filters for refined research to help you find your perfect trail.
The community of registered backpackers, trail runners, and mountain bikers exceeds 10 million. As you can imagine, there’s never a shortage of in-depth reviews. Hence, you have so much information about some trails that you could plan your journey down to the smallest detail. What’s even better – the app is easy to use and offers real-time tracking so that you don’t get lost when hiking in unfamiliar places .
Hiking Project is a fantastic free hike route planner app that’s full of valuable information, accurate data, and a great user interface. It has many features that are useful before, during, and after a backpacking trip. For example, you can download detailed trail maps that work offline (before you hit the trail), use the maps to navigate comfortably and record your trail (during your hike), and catalog and analyze the routes that you’ve done (after your trip).
A great way to find backpacking gems and save time, this invaluable hiking tool provides specific technical and cultural information about various trails (including descriptions, elevations, history, etc.), in the US and more than 100 countries from all over the world.
Though backpacking route planner apps provide insights into the different trails, locals can also be an invaluable source of up-to-date knowledge and information, especially in remote areas. They can give you advice or guidance for route planning. Their experience can be especially helpful when you’re looking for more information about particular local sections or obscure trails that aren’t popular or well-recommended. Moreover, they can help you with any transportation-related questions as well as with finding online guides about the area you will be heading to as well as with finding valuable local forums. Perusing these forums can help you find some hidden gems.
Main problems to solve for long hiking trips
Resupplying/logistics.
You need to organize an effective supply of enough food for your entire hiking trip. Planning and successfully executing a strategy for resupply is a must for long-distance hikers. You should also know in advance where grocery stores and post offices are located on the trail. Additionally, there are companies that ship resupply packages to hikers on some of the most popular trails (valid for the US).
Many national parks throughout the world require permits. There are places where you need to apply for a permit long before your trip – especially if the place is popular among backpackers and the number of permits is restricted. Thus, it’s best to check whether permits are needed before making firm plans for an area.
Hiking footwear, clothing, and gear
Proper equipment is critical to navigating through and living comfortably in the outdoors. Many backcountry emergencies result from people being poorly equipped to meet conditions. You will need appropriate and comfortable hiking footwear that’s durable, fits well, provides excellent traction and control. Trail runners are fantastic for most 3-season hikes in various conditions and environments.
See Men’s Ultra Raptor on Amazon See Women’s Ultra Raptor on Amazon
For higher temperatures, pick up a pair of lightweight and breathable hiking shoes or trail-running shoes. For lower temperatures and rough terrain, choose high-cut boots that provide ankle support and give you more control and stability. To learn more about the different types of boots, their features, and best use, see our article where we discuss how to choose the right footwear for backpacking .
As far as clothing is concerned, “layering” is essential, especially when hiking in the mountains. Pick up a pair of proper hiking shorts or trousers depending on the weather, your preferences, and last but not least – the presence or absence of mosquitos, black flies, and other insects. Pretty much the same is valid when choosing a shirt for hiking. In general, you should know what type of hiking clothing you might need.
Know your gear
It doesn’t help to have all the right gear in your backpack if you can’t operate it. Take time to learn how to use your equipment before you leave home. Avoid going out on long trips to isolated places with untried backpacking gear. If you are using old gear, pull it out of storage and check to make sure it is in good repair before leaving. Carry a repair kit to fix your gear if something breaks down.
Specific problems related to the trail you’ve chosen
Anything that can be of interest from natural hazards to dangerous wildlife and fierce bugs such as mosquitos, flies, and gnats. In general, you want to have as much information as possible prior to your expedition as this might help you avoid risky situations.
Hiking around the world
Hiking around the world (especially if you want to do some long-distance trekking) makes planning even more complicated because, in addition to applying for a permit, you should have a valid passport, go to the embassy and apply for a visa (if you decide to go hiking in Asia, for example), buy a plane ticket, take a couple of passport photos, arrange travel insurance, and be vaccinated against tropical diseases such as malaria, leishmaniasis, Trypanosoma, etc. (if you go to a tropical country).
You may also want to scan all the documents for your trip abroad (you may wish to put everything in PDF format because it’s universal, plus there are a lot of PDF reader programs) including your personal documents, visas, driver’s license, health insurance cards, passport photos, etc. Store them online as a safety precaution. This way, you’ll have easy access to all your documents. It’s essential in case something goes wrong and you lose an important document. Sure, scanned documents cannot replace your official documents, however, they might come in handy for getting a provisional identity document as well as for getting a permit.

Photo by Dan Gold
There’s a wide range of destinations and types of journeys for everyone who’s interested in backpacking around the world .
There’s usually some seasonality and it might be more convenient to visit a place popular for winter trekking, for example, off-season when there aren’t so much buzz and hiking enthusiasts around. This way you’ll avoid the huge crowds of tourists on the trail giving you a chance to focus on exploring the area at your own pace and enjoy your excursion in solitude. Of course, this means that you must be experienced in backpacking, camping, navigation, and first aid in case something goes wrong. Safety is one of the most important things on the trail and thus the ability to govern your actions accordingly and deal with problems and injuries is especially valuable.
Emergency planning
Emergency planning ensures that you are prepared for the unexpected, that people know where and when to look for you, and that your actions are rational and predictable in spite of the emotional trauma associated with any kind of emergency situation. A contingency plan should lessen the risks involved and increase the probability of being found in case of an emergency situation. Creating an emergency plan and leaving it with friends or family means a safer hiking trip for you, fewer headaches, and less unnecessary panic for your family and friends.
Carry a first aid kit in an outer container made of durable nylon to protect the contents. Among the essentials in your first aid kit, you should include some analgesics/antibiotics/anaphylaxis (Ibuprofen, Aspirin or Acetaminophen, Sting relief pad , etc.), bandages, antiseptic towelettes, blister care pads, gauze sponges, safety whistle, water-purifying tablets , extra shoelaces, fire starter, duct tape, multi-purpose tool . The exact content of your first aid kit depends on the features of the place you will be hiking in, the chronic diseases you have, and your previous experience.
Meal planning
Planning meals is an essential part of planning a backpacking trip. You need to eat (and drink enough fluids) regularly throughout your hike, especially when hiking at altitude. Having three solid meals a day with a snack or two in between is recommended. Food plays a large part in how much you enjoy the outdoors. You’ll need lightweight, non-perishable, high in calories foods that taste good. Exhaustion after a long day on the trail can make you think about skipping your dinner which isn’t good for your health and fitness; however, knowing that you have some tasty food in your pack can make you change your mind. A warm and delicious dinner can not only make you feel better but also boost your morale.
A 90 kg person burns around 550 calories per hour of hiking (this number usually varies between 450 and 650 depending on factors like the terrain, weather conditions, the density of the air, your fitness level, your individual basal metabolism, etc.). Thus, you’ll need a lot of energy on the trail. So when planning your meals, look for foods rich in carbs, fats, and sugar – such kinds of foods will provide you enough energy for a long hiking day.
Some people bring their favorite high-carbohydrate foods such as dried fruits, chocolate, granola bars, pop tarts, snickers, energy bars, energy gels, etc., while others prefer eating fatty foods like nuts, jerky, cheese, chips, olive oil, almond or peanut butter as well as any other kind of nut butter available. Eating healthy during long hiking trips is much less important than eating regularly so the choice of foods is not really that important – as long as you take enough calories everything will be all right.

There are numerous examples of people having a pack full of all the “right stuff” and not eating it. Frankly, doing this is much worse than eating junk food on the trail. It can actually be a huge motivation for moving forward to your final destination.
Planning and packing your backpack
When packing your hiking backpack before hitting the trail, the little things can add up to make a big difference later. If you start out with a good organization system, life in the backcountry will be simpler and more pleasant. Plan carefully the contents of your pack considering the duration of your trip, the expected weather and temperatures, the features of the terrain, the potential dangers on the trail, and your specific needs.
Do the packing the day(s) before the hike when you are not in a rush. Lots of beginners try to pack in the morning of the hike and as a result forget some important things like a flashlight , toilet paper, raincoat, fire starter , etc. It can be daunting to pack for your first wilderness adventure and you don’t want to exacerbate things further by doing it in a rush.
Make detailed lists with all the backpacking gear you’ll need. Also, note what you do and do not use so that on future trips you can fine-tune the packing. Eliminate redundancy when pack planning. When deciding what to cut, think twice about eliminating insulation and food. Fleece or a sweater doesn’t weigh a lot and won’t slow you down significantly but can be very useful on the trail.
It helps to have things you will need during the day near the top of your pack. Keep things like spare clothes and food there for easy access without having to unpack other gear. Carry snacks in hip belt pockets and have your water bottle located so you can reach it without removing your pack. You can check out our posts about packing for a day hike and packing for a multi-day hike. There, you’ll find some further recommendations on packing as well as lists with basic and extra stuff essential for hiking.

Planning a hike, whether it’s a weekend getaway or an extended summer adventure, requires time and effort. It’s easy to get lost in a whirlwind of lists, logistics, maps, and meal plans. Detailed planning is crucial for any hike, particularly for long-distance journeys that span weeks or even months. However, the planning process can sometimes feel overwhelming, even more so than the actual hiking itself. It’s important to keep in mind that gathering information takes time, and there may always be gaps that you can’t completely avoid. However, don’t let this discourage you. Once you take that first step into the wilderness, all the organization and planning fade into the background. Then it’s just you and nature.
Backpacking, like any other activity, tends to yield better results when participants are prepared and have a general idea of what to expect. So be ready to face the challenges that may arise, maintain a flexible mindset, and make the most out of any circumstances encountered along the way. And most importantly – enjoy your hiking adventure!
Do you have a successful strategy you follow? How much time do you spend on planning your hikes? Drop us a line in the comments section below.
Related Articles
How to Pack for Day Trips
How to Pack for Multi-Day Trips
Hiking Backpacks
Like this post? PIN ME!!

10 thoughts on “How to Plan a Backpacking Trip: the Ultimate Guide (2023)”
Highly descriptive post, I liked that a lot. Will there be a part 2?
We are glad that you liked it. Yes, how to plan a hiking/backpacking trip is a huge topic so we could expand on our post (but there probably won’t be part 2).
I really like the tips you have given about hiking. I was planning to go on a hiking trip but wasn’t sure where to go but your article has helped me to star off planning my first hiking trip. I must say I really learnt a lot from your article. Thank you for sharing this amazing article with us.
Thanks, Monica! Glad you liked our guide on how to plan a backpacking trip.
Great article! Hiking tours help me to lower my stress level and improve control over a healthy weight. I am enjoying it together with my friends, especially during the holidays.
Thanks! Glad that you liked our guide. Yes, backpacking is fun, especially when the experience is shared with others.
Great Article , It Helped Me Alot . A Big Thanks To Autor
You’re very welcome!
Way cool! Some very valid points! I appreciate you writing this post plus the rest of the site is also very good.
Thanks, Flossie Medlock for camotrek.com
Leave a Comment Cancel reply
Save my name, email, and website in this browser for the next time I comment.
CURRENT PRICES END MAY 12
Outside Festival feat. Thundercat and Fleet Foxes.
FROM JUST $44

How to Plan a Successful Backpacking Trip in 7 Steps
Follow these steps to spend less time stressing over the details and more time on the trail

Heading out the door? Read this article on the Outside app available now on iOS devices for members! >","name":"in-content-cta","type":"link"}}'>Download the app .
This year I’m planning 29 guided backpacking trips. They are scheduled through October, run three to seven days, and are scattered throughout North America in the high desert, eastern woodlands, Mountain West, and Alaska. I will also ready my company’s more than 240 clients, who are of mixed ages, genders, fitness levels, and experience.
To pull this off efficiently and minimize mistakes, over the years I’ve developed a planning process that works for any trip and can be used by any backpacker.

1. Define Your Trip’s Parameters
General questions are a good starting point for trip planning. You don’t need definitive answers to every question right away, but you’ll want to begin narrowing your options.
Start by asking where you want to go, when, and what kind of trip it will be. Why hiking rather than car camping?
Then add more specifics. What length of time will you be traveling? What specific trails, routes, landmarks, or campsites do you want to visit? How many miles or how much vertical distance do you intend to cover? Who else do you want to join you, if anyone?
Finally, consider the logistics. Do you need permits? If so, how, when, and where will you get them? How will you get to the trailhead and back? Are there unique or notable land-use regulations or requirements you need to be aware of?
I suggest taking all these details and dropping them into a document that can be shared with emergency contacts before you leave.
2. Research Conditions

Once you have a reasonably defined trip plan, research the conditions you will likely encounter, so that you can prepare properly, mitigate risks, and rule out baseless what-if scenarios.
I’m only interested in conditions that will influence my selection of gear and supplies or demand particular skills. I recommend looking into climate, sun exposure and hours of daylight, footing (the most common types of walking surfaces), vegetation, wildlife and insects, navigational aids (signage, blazes, cairns, and posts), water availability, remoteness, and potential natural hazards like avalanches and lingering snowfields, river fords, possible flash floods or tides, or lightning.
Compile the findings of your research in a separate document, and cite your sources, so you can easily compare any contradictory information you later find elsewhere.
3. Select Gear

For a beginner backpacker, the task of gear selection is usually the most time-consuming, certainly the most expensive, and unfortunately also the most frustrating—it’s very easy to go down the rabbit hole here. A good backpacking checklist and run-down of gear is a great place to start.
To make this process easier for my clients, I give them a time-tested gear-list template that I designed, along with examples of completed gear lists for trips similar to the one they’re going to take and a copy of The Ultimate Hiker’s Gear Guide . These resources should help cut through the noise.
Clients also have email access to their guides and their group, so that they can get trip-specific advice. If you don’t have an immediate contact who really knows their stuff, I suggest a community forum like Reddit’s r/Ultralight . Make sure to tailor your gear to your itinerary and expected conditions.
4. Plan Your Food

We’re vulnerable to packing our fears. If we fear being cold at night, we bring a sleeping bag that’s excessively warm. If we fear bears, we sleep in a full-sided tent (which won’t help but may make us feel better). And if we fear being hungry, we pack too much food.
I’ve given in-depth meal-planning recommendations before, so here I’ll just go over some basic pointers. First, plan to consume 2,250 to 2,750 calories per day. (I generally assume an average caloric density of 125 calories per ounce, which means about 18 to 22 ounces daily.) If you’re older, female, petite, or on a low-intensity trip, go with the low end of this range. If any of the opposites are true, go with the high end. Variety is the spice of life, so pack foods with varying tastes (spicy, sweet, salty, sour) and textures (chewy, crunchy). Early in a trip, treat yourself with real food, like a ham sandwich, an avocado, or an apple. This will also delay the onset of culinary boredom.
For breakfasts and dinners, try these field-tested options instead of spending your hard-earned cash on exorbitantly priced freeze-dried meals or punishing yourself with thru-hiker fare like ramen noodles or Lipton Sides.
5. Create or Collect Navigational Resources

For my first hikes, I utilized whichever resources were conveniently available and seemed sufficient. Before thru-hiking the Appalachian Trail in 2002, for example, I purchased the Appalachian Trail Data Book and downloaded the Appalachian Long Distance Hikers Association’s Thru-Hikers’ Companion . To explore Colorado’s Front Range the following summer, I bought a few National Geographic Trails Illustrated maps that covered the area.
But when I started adventuring off the beaten path, I had to create some or all of these materials from scratch. Through this process, I developed what I believe to be an optimal system of maps and resources that includes large- and small-scale paper topographic maps, digital maps downloaded to a GPS app , route descriptions and tips, and a data sheet (a list of key landmarks and distances along a trail or route).
6. Gain Fitness and Skills

There’s no better way to improve your hiking fitness than by hiking, and there’s no better way to develop backpacking skills than by backpacking.
But who has the time and ability to do that? Not me, and likely not you.
The next-best option is to work out more intensely to maximize the potential of the time you do have available. Personally, I do this by running 60 to 70 miles per week. Ultralight backpacking pro Alan Dixon has a training plan that’s more hiking oriented (and more realistic). You can also read and watch skill tutorials, such as my series on navigation , pooping in the woods , finding great campsites , packing your backpack , and tying knots .
A test hike is also very valuable. This systems check is meant to be done in a relatively low-risk environment, and the goal is to get you better prepared for your actual trip. It can be done locally, like in a nearby park or even your backyard, and will give you an opportunity to use your gear, practice some skills, and identify room for improvement before you undertake a more committed itinerary. Focus on replicating the elements of a real trip: hike with a loaded pack, refill your water bottles, change layers, set up your shelter, cook a meal, etc.
7. Conduct a Final Check
In the days before your trip, complete any remaining housekeeping. Using your checklist, pack up all your gear, including your maps, resources, and permits. Buy any necessary perishable foods, like cheese, butter, and tortillas. (This trip-planning checklist has more details.) Look at a five-day weather forecast, and adjust your gear accordingly. Finally, proofread your trip-planner document, and leave it with your emergency contacts.
Want to learn more about backpacking for beginners? Check out our Backpacking 101 online course on Outside Learn , where Outside+ members get full access to our library of more than 50 courses on adventure, sports, health, and nutrition.
- Appalachian Trail
- Backcountry Camping
- Hiking and Backpacking
- Outside Learn
Popular on Outside Online
Enjoy coverage of racing, history, food, culture, travel, and tech with access to unlimited digital content from Outside Network's iconic brands.
Healthy Living
- Clean Eating
- Vegetarian Times
- Yoga Journal
- Fly Fishing Film Tour
- National Park Trips
- Warren Miller
- Fastest Known Time
- Trail Runner
- Women's Running
- Bicycle Retailer & Industry News
- FinisherPix
- Outside Events Cycling Series
- Outside Shop
© 2024 Outside Interactive, Inc
Table of contents
How to Train for Hiking & Backpacking Trips
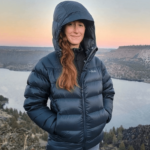
Some of the links on this page are affiliate links

If you’ve got your sights set on a difficult hike or an epic backpacking trip, it’s smart to prepare your body in the weeks and months leading up to it by doing some training. When you’re in tip-top shape, you can truly enjoy the experience instead of worrying about being sore and exhausted. Training can also be a lot of fun and you can do it at home without spending a dime.
If you’re already active and feel like you’re in good shape, you may think you don’t need to condition for your trip. But be honest with yourself – when’s the last time you put on a backpack and slogged up flights of stairs for hours upon hours? Hiking and backpacking are more than just walking, they’re an endurance sports. The more you train, the better you’ll feel when the big day comes.
The Benefits of Training

A BETTER EXPERIENCE
Training will allow you to enjoy your time on the trail more. Instead of feeling tired and miserable while hiking, you can focus on having fun and soaking in nature’s beauty. If you aren’t over-exerting yourself, you’ll have more energy left in the tank to explore side trails, take photos, savor your time in camp, or whatever brings you joy. If you have quads of steel, you’ll also be able to carry more food or luxury items, like a Kindle , mini travel game , or a flask . The benefits don’t end when the trek is over either. A fit person doesn’t need as much time to recover after a trip and their memories of the experience will be more positive.
AVOID BLISTERS & INJURIES
A little pre-trip training will help you avoid potential blisters and injuries. Developing strength and flexibility in the knees, ankles, and feet is especially critical for backpacking. Resistance training strengthens muscles and tendons while increasing the flexibility of the ligaments. This helps mitigate the risk of strains or tears. Training can also help prevent blisters by gradually toughening up the skin and by giving you time to break-in and become familiar with your footwear . Become a blister-fighting ninja by reading our How to Prevent and Treat Blisters While Hiking post .

MOTIVATION FOR LONG-TERM HEALTH & FITNESS
An upcoming adventure makes a great goal to motivate you to work on your fitness. Every time you think of those beautiful mountains you’re going to climb, your drive to walk or do squats will be reignited. It’s also a ton of fun to train since it gets you active and going outside regularly. You may even inspire your family or friends to train with you!
Conditioning doesn’t have to build up and end with a single trip either. You can use training to develop a bomber stress-relieving routine for your long-term mental and physical health. To galvanize training into your lifestyle, pencil in several challenging hikes or backpacking trips on your calendar throughout the year. For us, there’s nothing as powerful as an epic vista to incentivize ongoing exercise. Check out our Backpacking Trip Guides for inspiration.
Where to Start
Zero in on your goals.
Training is most effective when you have specific goals you want to reach, which is why it pays to do your research and get to know the route you plan to hike. Look closely at your backpacking itinerary and zero-in on logistics. Pay attention to details like how many miles you’d like to travel per day, how much elevation gain and loss there is on your route, and how much weight you’ll likely carry in your backpack . Remember to factor in food weight if you’ll have long carries between resupply points and water weight if you’ll traverse significant dry stretches. Once you have a good grasp on these facts, you can start practicing for these specific conditions. Check out our video on trip planning for more details.

NAVIGATE THE NUMBERS
It’s really helpful to know about how long it takes you to hike a mile for both training and trip-planning purposes. Your speed will change depending on your fitness level, obstacles on the trail, weather, and the weight on your back. Once you’re in shape, a good hiking pace to strive for (with a backpack on and over variable terrain), is 2-3 miles per hour. That’s about 20-30 minutes per mile. Plan to take about 30 minutes longer for every 1,000 feet of elevation gain (uphill).
The most important thing you can do to start training for a hike is to start moving regularly. It doesn’t really matter what you do, just get up and get your blood flowing for at least 20 minutes a day. Walk, dance, vigorously clean – whatever is the most accessible and enjoyable to you at the time. This will start exercising your heart and lungs – the real workhorses of hiking and backpacking. It’s best to start training about eight weeks before a big hike, but it can’t hurt to start earlier. If you’ve been sedentary for a while or your sights are set on a particularly long or challenging trip, we recommend training for at least a few months so you can ease into it gradually.

START A WALKING ROUTINE
Start walking as often as possible. Begin with a couple of easy walks per week. Then work up to doing several more intense walks mid-week and a longer hike on the weekend. Keep track of how many miles you walk, how long it takes, and how you feel. Some people like to use a phone app or a fitness watch, such as a Fitbit , to track their activity. These indicators will give you an idea of what your current fitness level is and how much you need to push yourself to be ready for your trip. Increase the length and difficulty of your walks in baby steps. The last thing you want to do while training is strain something and have to put your plans on hold. Consistently work towards small, attainable goals and make sure you’re enjoying yourself along the way.
HEAD FOR THE HILLS
Hilly terrain creates an excellent opportunity for bursts of intensity followed by periods of recovery, which builds up your endurance for backpacking like nothing else can. Alternating between high-intensity uphill sections and lower-intensity flat or downhill sections keeps your heart rate fluctuating. This type of interval training gives you a great workout in less time. It also revs up your calorie-burning ability and keeps training more interesting. Most importantly, it boosts your aerobic capacity, so you can eventually hike longer and steeper routes.

Once you’re feeling strong on your walks, start wearing a daypack to add to the challenge. Load your daypack with enough weight to account for about 25% of the total amount you plan to carry on your trek. Water bottles are heavy when full and make great weights. Gradually add more weight to the backpack until you can easily handle at least 75% of the total weight you intend to carry on your trip. Towards the end, you should transition to wearing the backpack you plan to use on your backpacking trip.That way you can practice making adjustments and troubleshoot any issues with friction or fit. If you’re not sure how heavy your backpack will be yet, check out our Ultralight Backpacking Basics Guide and our Ultimate Backpacking Checklist to learn more.

Finding the Time to Train With a Busy Schedule
We understand that it can be tough to find the time to train when you have a busy schedule. If all you can manage is a walking routine, don’t beat yourself up. Logging miles is by far the most important part of training. Bonus points if you can also carve out 20 or 30 minutes two or three times a week to do some of the following exercises. Your body will thank you for it. To maximize your time, focus on exercises that improve overall fitness and target multiple muscle groups with each repetition.
Strengthening exercises

PARTS OF THE BODY WE USE MOST WHILE HIKING & BACKPACKING:
- Core (abdominals, obliques, back)
- Legs (quadriceps, hamstrings, glutes, calves)
- Hips (hip flexors)

Top 5 Training Exercises
It’s ideal to do the following strength training exercises two or three times per week on the days you aren’t walking or doing cardio. Make sure to stretch and warm up for a few minutes before you start to protect your joints.

If you only have time for one exercise, do squats. They’re super effective at strengthening your glutes and legs, which are constantly challenged while backpacking. Stand with your feet shoulder-width apart. Keeping your knees in line with your ankles, bend at your knees and sit back as if you are sitting into a low chair behind you. Keep your chest open and upright. Then, driving your weight into your heels, stand back up, squeezing your glutes as you come up. Extra credit: Hold weight in hands while you do your squats to add resistance. Reps: 1-3 sets of 20+
Lunges will help strengthen your quads, the largest muscles in your legs so you’ll be ready to charge up those relentless uphill sections of trail. To do this exercise, start by standing with your feet together. Step your right foot forward and lunge forward. Then step your right foot back to meet your left again. Next, step your right foot to the right and lunge to the side. Bring your right foot back to meet your left. Then, step your right foot back behind you and lunge back. Bring your right foot forward to meet your left. Repeat on your left side. That’s one rep. Extra credit: Hold a weight or water bottle in each hand if you want to up your game. Reps : 1-3 sets of 10+

MOUNTAIN CLIMBERS
Mountain climbers give you a burst of cardio to help get your lungs and heart ready for backpacking. At the same time, they strengthen your core, which supports your load and provides stability on uneven terrain. Start in a high plank position with your hands directly under your shoulders on the floor and your legs extended behind you. Keep your body in a straight line and float your right knee up to meet your chest or outer right elbow (try both). Hold for a second, then, return your foot to plank position. Repeat with your left knee, using your core to keep everything tight. Repeat, as fast as you can with control, alternating sides. Reps: 1-3 sets of 20+
The step up exercise builds strength and endurance in your glutes and quad muscles, so you’ll be ready to step up and over any amount of downed logs or obstacles that stand in your way. You’ll need a stable surface, about 8 inches off the ground to step up onto. The bottom step on a flight of stairs works well. Start with your left foot on the ground and your right foot on top of the step (your right knee will be bent). Step up until you are standing with your right leg nearly straight and you’re balanced on top of the step. Pause in a balanced position with your left foot a few inches above the step. Then step down, returning your left leg and right foot to the starting position. Do all your reps on one side, then repeat the exercise on the other side. Extra credit: wear a backpack with some weight or increase the step height to add to the challenge. Reps: 1-3 sets of 20+

CALF RAISES/HEEL DIPS
Calf raises and heel dips will give you chiseled calves as well as strong ankles and feet, so you’ll be less fatigued and more stable on uneven terrain. You’ll need a stable step to do this exercise. The bottom step on a flight of stairs works well. Start with both feet on top of the step, positioned so that your weight is on your toes/balls of the feet and your heels are floating over the edge. First, stand up high on your toes, squeezing your calves and pausing at the top. Then, lower your heels, dipping them lower than the edge of the step. Come back to a neutral position, then repeat. Reps: 1-3 sets of 20+
Mental Aspects of Training

Hiking and backpacking can be intense both mentally and physically. Training will not only tone your body, but it will also help you develop mental stamina.
Your brain plays a critical role in training for a hike or big undertaking of any kind. The more you practice, the more confident you’ll become in your body and your abilities. After you reach a big goal for the first time, you’ll know what it feels like, and you’ll be certain you can do it again. You’ll likely find that you’re much tougher that you ever imagined and that you can breathe to get through challenges instead of giving up when things get hard.
If you’re having a bad day and you’re dragging, listen to music to get pumped up or push a little less if you need to. The toughest part is getting going. The hardest and most worthwhile hikes take perseverance, grit, and a positive attitude. Being present and having gratitude for the beauty around you will go a long way.

Shoes & Boots
It’s really important to wear the same footwear you’ll be wearing for your hike while you train. The more experience you have with your shoes or boots, the less likely you are to develop blisters or have problems on your trip. Wear your shoes for several weeks to get to know them and use the opportunity to nip troubles in the bud while resources are still close at hand.
We prefer to hike in trail running shoes most of the time because they’re lightweight, breathable, and they sap less energy with every step. Learn more about why we prefer trail running shoes for backpacking trips by reading or 5 Reasons to Ditch Your Boots article. We have experience with a ton of footwear and we’re happy to share it.
Check out our footwear lists for our top recommendations:
- Best Trail Running Shoes ( Men’s / Women’s )
- Best Hiking Shoes ( Men’s / Women’s )
- Best Hiking Boots ( Men’s / Women’s )
- Best Winter Boots ( Men’s / Women’s )

Training for High Altitude Hikes
It’s especially important to train before hiking and backpacking at high elevations. When we go higher than 8,000 feet (or 2,400 meters) above sea level, our bodies can start to be affected by the lower air pressure. Lower air pressure means there’s less oxygen for us to breathe and we run less efficiently because of it. It’s not uncommon to be more tired than usual, have a mild headache, or to feel like you need to breathe deeper to fill your lungs.

ALTITUDE SICKNESS
Altitude sickness, or acute mountain sickness (AMS) is a lot like a hangover. Some people are affected more than others and it can be a really miserable experience. Fortunately, there are precautions you can take to avoid it. That said, it’s important to know the signs and symptoms of AMS so you can keep it from escalating into a major issue (see HACE and HAPE below).
The first symptoms of altitude sickness are headache, loss of appetite, and trouble sleeping. If these symptoms don’t go away in a day or if they get worse you should consider descending to rest. More serious symptoms include vomiting, feeling dizzy, confusion or spaciness, feeling unable to walk, and having bluish lips or fingernails.
HACE & HAPE
High altitude cerebral oedema (HACE) or pulmonary oedema (HAPE) , are fatal conditions to look out for while hiking and backpacking at high altitude. Excess fluid in the lungs or fluid around the brain can kill you quickly. The good news is, these conditions rarely occur unless you spend a significant amount of time above 10,000 feet. Patients usually don’t present symptoms unless they spend more than 48 hours above 13,000 feet. Know the signs before you embark on an adventure in extremely high places. Shortness of breath at rest, confusion, or extreme drowsiness are signs of a life-threatening emergency.

TIPS FOR HIGH ALTITUDE SUCCESS
- Acclimate – If you’ll be traveling to a location with a much higher altitude than the place where you live, try to give yourself an extra day or two in town to get used to the lower air pressure before you start. If you plan to tackle a high mountain summit, build up to it by climbing lower mountains in the area in the weeks before if you can.
- Ascend gradually – Climb high during the day, but try not to camp more than 1,000 feet higher than you did the night before to give your body a chance to acclimate slowly (remember the phrase: climb high, sleep low).
- Adjust your pace – You may have to hike a bit slower than usual or take breaks more often. That’s okay. It’s critical to listen to your body and not push too hard.
- Drink plenty of water and eat well – Lots of water and a diet rich in carbohydrates will help stave off symptoms of altitude sickness. Snack often to fuel your body consistently.
- Avoid alcohol – Since hydration is so important at high altitude, it’s best to save the booze for celebration after your trip.
- Bring warm clothes – Temperatures fluctuate drastically during the course of a day at high elevations and conditions can change rapidly. Be prepared with a hat, gloves, and extra layers to regulate your temperature and keep you well-insulated, even in the summer.
- Wear sunscreen – The sun is extra intense at high elevations and the health of your skin plays a huge role in your ability to thermoregulate and stay well at high altitude.

Final Tips For Training
TRIP PLANNING
After you’ve had some time to train and you have an idea of what your body can handle, be honest with yourself about your fitness level and the amount of time you have left to make more progress before your trip. Revisit your trip plans and dial them in with realistic expectations. If you realize you’ve overestimated your abilities, you’ll still have time to adjust your plans. If you’re not going for a speed record, you’ll probably have a better time if you’re a bit conservative with your estimates. If you’re new to backpacking, check out our 12 Tips for Planning Great Backpacking Adventures Tutorial .

REST BEFORE THE BIG DAY – As your trip date approaches, plan to rest for a few days, or even a whole week before your trip. This will give your body a chance to fully recover so you can be at your best on the day of your trip. Light exercise is a good thing, just keep in mind that last-minute planning, packing, and travel can sap energy, so it’s best to take a break from rigorous training just before your big day. Eat well, sleep well, and get pumped!
Once you get into the habit of walking, moving, and getting outdoors, you probably won’t want to stop. We make continuous training for adventures part of our lifestyle. It helps relieve stress, gives us something to look forward to, and keeps us in shape so we’re not scrambling when the next opportunity for adventure comes up. We hope this helps you reach your goals and inspires you to plan a trip if you haven’t already.

Related Content
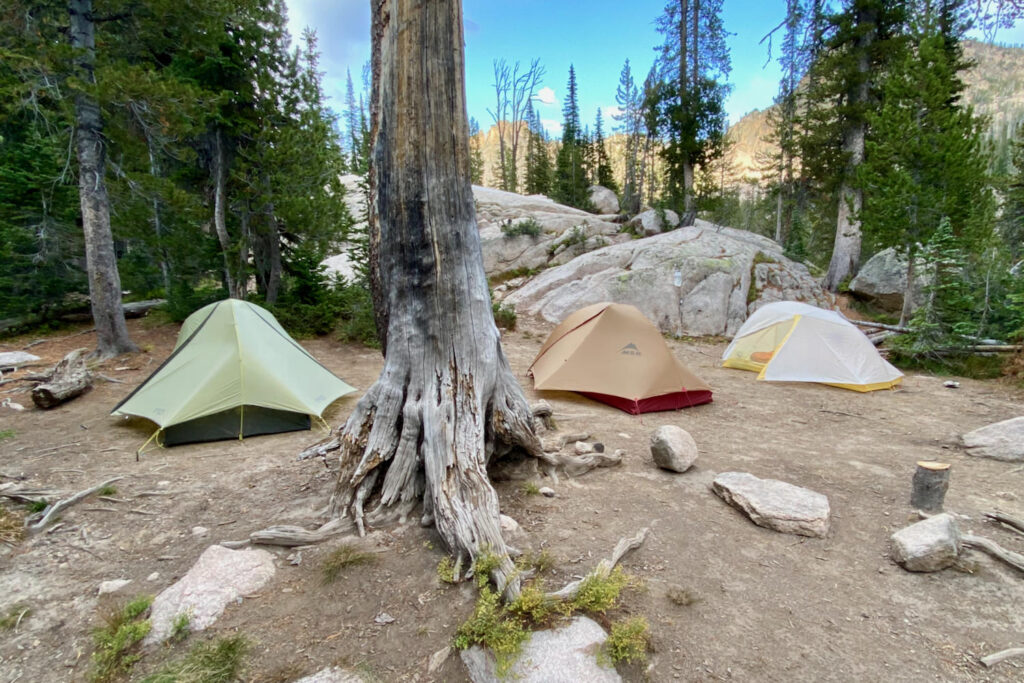
Big Agnes Tiger Wall vs. NEMO Hornet OSMO vs. MSR FreeLite
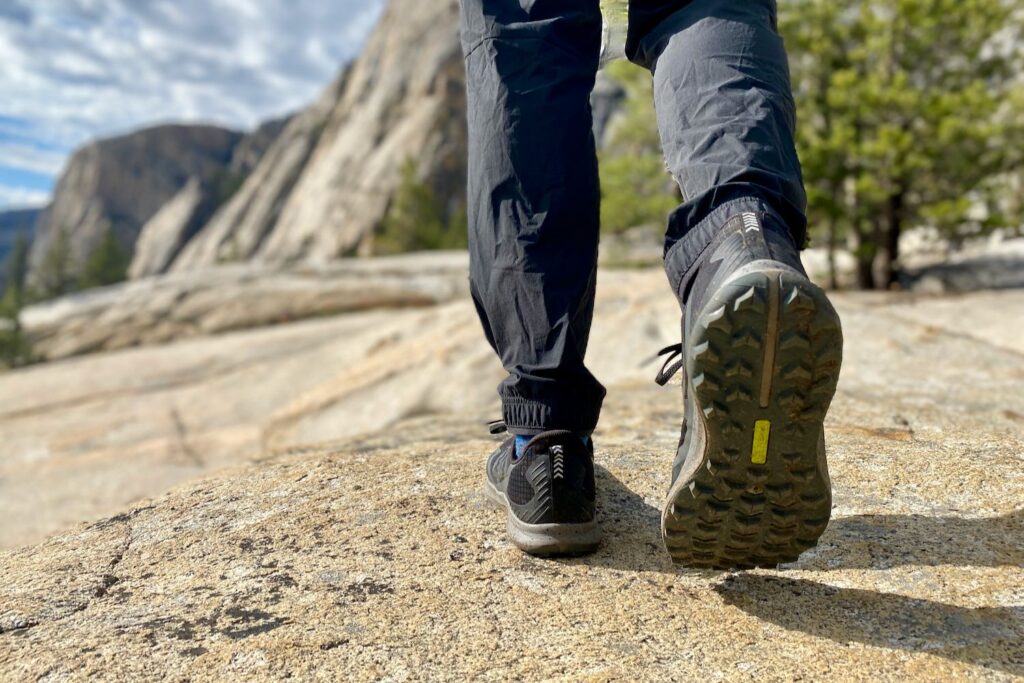
Hiking Boot & Shoe Soles for Grip, Traction & Different Terrains
Get the best content from cleverhiker & around the backpacking world.
Social media is great, but our bi-weekly newsletter is a much better way to stay in the know.
Sign up to get our curated emails with the best content from CleverHiker and around the backpacking world. You’ll be turned on to new videos, trip reports, gear reviews, inspiring outdoor stories and much more. So get in the mix!
Interactive Backpacking Trip Planner
Intrigued by backpacking, but feeling a little overwhelmed by all the details?
I completely understand. When I first went backpacking, in the company of more experienced friends, it felt like rocket science.
Since then I’ve become comfortable enough to live on the trail for months at a time, reveling in the freedom and confidence I feel there. That feeling is priceless, and I want to help you find it too.
If I could sit down with you and walk you through the entire prep process, and then go hiking with you, I would! This backpacking trip planner, essentially a guided workbook, is the closest thing I could come up with.

Introducing the Trip Planner
This Backpacking Trip Planner is a highly interactive workbook designed to walk you through all the important decisions needed to plan and prepare for a backpacking trip. It includes:
- 9 interactive worksheets covering food, water, itinerary, gear, emergency plan, and more.
- Tips and recommendations to guide new backpackers through prep and gear decisions.
- Checklists for packing and preparation to make sure you won’t forget anything important.
- Support for viewing and editing offline on your smartphone, so you can take it with you into the middle of nowhere (using the Google Sheets app on Android or iOS).
Preview the Workbook
The Backpacking Trip Planner contains 9 separate worksheets: Route, Food, Water, Camping, Itinerary, Gear, Emergency, To Do, and Future Hikes.
Each worksheet contains a mix of key questions to consider, tables with automatic calculations to help organize your details, checklists for key gear and tasks, and my own personal tips and recommendations for new backpackers.
The workbook is built in Google Sheets, so some familiarity with spreadsheets will be helpful. It’s easy to use though, and prettier than most spreadsheets, if I don’t say so myself. 🙂
Here are previews of a few sheets:

As you work through these sheets, you’ll be guided through answers to essential questions like:
How much food and water should I carry?
How far can I expect to hike each day?
What gear do I need and how do I pack it?
What sort of backup plan do I need in order to stay safe?
What else am I forgetting?
This is for you if:
You’ve never backpacked before and want help planning your first trip.
You’ve tagged along on a few trips and want to graduate to planning your own.
You’re taking on a longer or more complex trip and need help organizing all the details.
You’re excited about backpacking but worried you’ll get yourself into trouble because you don’t know what you’re doing (yet!).
This is probably NOT for you if:
You hate spreadsheets or have never used one before.
You don’t have a Google account (doesn’t have to be a Gmail address, just a Google Account) and don’t want to create one.
You’ve already done a few trips and are comfortable planning and organizing your own logistics.
You prefer to wing it and don’t have patience for detailed planning.
Why pay for this?
The Backpacking Trip Planner costs $9. I know, stuff on the internet is supposed to be free, right? I thought hard about whether to charge for this product, and how much.
I pour countless hours into creating free hiking content on this website. I’ll never make enough money to justify all the time I’ve put into that.
But here’s the thing: this planner is a step up. It’s a premium product that pulls together everything I know about backpacking prep and presents it in an easy-to-follow guided progression. It doesn’t just dump information on you. It teaches you through an interactive process, while helping you organize your thoughts at the same time.
By spending just $9 – about the cost of a dehydrated meal or a cheap pair of hiking socks – you accomplish three things: you help support this site, you keep me accountable for creating a top-notch product, and you keep yourself accountable for actually going on that backpacking trip. Consider it an investment in turning your adventure dreams into reality.
Get the Backpacking Trip Planner
Ready to jump in and make it happen? Here’s your next step:
Follow Exploring Wild on socials:
Bikepacking
Backpacking & Hiking
Adventure Travel
Donate to Tip Jar
Shop Adventure Kits
Bikepacker's Companion eBook
Adventure in Your Inbox?
Resources and inspiration to support your wildest dreams:
Recent Posts
About Exploring Wild
Privacy Policy
Trust & Transparency Policy
This site participates in affiliate programs, including Amazon Associates.
Copyright 2024 Exploring Wild, All Rights Reserved
Privacy Overview

The Hungry Hiker
Tips & Tricks on How to Plan Your Next Outdoor Adventure
How to Plan Your First (Or Next) Overnight Backpacking Trip
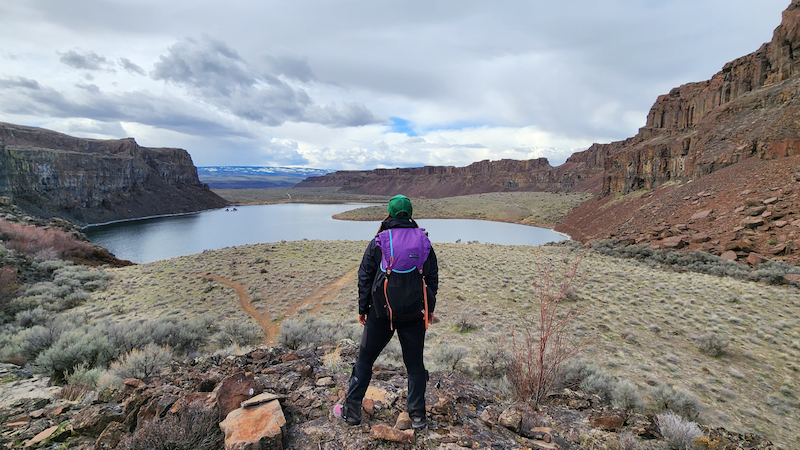
Want to go on an overnight backpacking trip and have no idea where to start with planning a trip like this? Trip planning for an overnight backpacking trip can be overwhelming and intimidating for a lot of people, especially if you’re new to backpacking.
I’m going to share with you some of my favorite tools I use to plan overnight backpacking trips, in hopes of helping you learn how to plan either your first or next overnight backpacking trip of your own.
I recently took a group of my students from my online backpacking program for women, The Confident Solo Female Backpacker System out for an early season overnight backpacking trip to Ancient Lakes , here in Washington State. This turned out to be a very fun, successful and amazing trip!
In this blog post, I’ll walk you through my entire process of how I planned this trip for my students including how I decided where to go, why I chose this specific location and some of my favorite resources I used to plan our trip. Then I’ll share with you a special online tool I created that will help you start planning your first or next overnight backpacking trip.
If you’re feeling a little overwhelmed with the trip planning process, it’s okay. Trip planning for any trip, no matter where you’re going and how long you plan on being out there can be overwhelming for a lot of backpackers, AND not just beginner backpackers, but also experienced backpackers as well.
Here’s how I planned our recent overnight backpacking trip to Ancient Lakes . Starting with how I decided where to go for our group overnight backpacking trip.
How I Decided Where To Go Overnight Backpacking
When planning a group trip for my students, I always start by taking the trip objective and the experience level of my students into consideration when deciding where to go.
My objective for this group trip was to give my students a chance to practice using their gear in a low risk setting while having fun. I knew for most of the students in the group, this would be their first overnight backpacking trip this year. This would also be considered an early season trip, a first for a majority of the group. I wanted to pick a place where they could safely and comfortably ease back into the backpacking season, apply what they’ve been learning in my program out on trail and have fun while they’re out there.
The time of year is another consideration I kept in mind when deciding where to go. We would be going on our overnight backpacking trip in March, which is still considered winter/early season here in Washington. When most places, especially at a higher elevation are still covered in snow, I knew Ancient Lakes over in Eastern Washington would be a good option, terrain and weather-wise. This time of year, the temperatures can be milder than most areas in Western Washington. There’s very little elevation gain and there’s no snow on the ground. Ancient Lakes is also a great option for this time of year because during the warmer months, the snakes and ticks come out, the area is exposed with very little shade and the water sources are extremely limited.
I also wanted to keep the total trip mileage and daily mileage in mind for my students. Since I knew this would be the first overnight backpacking trip of the year for most of the group, I didn’t want to pick a place where we’d have to hike a lot of miles just to get to camp.
Ancient Lakes has a number of different trails with multiple trailheads to access the area. I could make this trip – the hike to camp, water and our day hikes throughout the trip – as long or as short of a hike as I needed to, while keeping my students in mind.
I also didn’t want to have to deal with needing to secure a permit for this trip. There’s no permit needed to camp anywhere at Ancient Lakes. All of the tentsites are first come, first served and free. The only permit required is the Discover Pass at the trailhead.
Something else I wanted to take into consideration when choosing a place to take my students backpacking was picking an area that I was already familiar with. Since I would be leading the group, I wanted to pick a place where I felt comfortable and had been before.
I’ve day hiked the Ancient Lakes area multiple times before. I was familiar with the drive to get to the trailhead, the different trailheads we could start our trip from, the tentsites in the area, the terrain we’d be hiking through, and all of the day hike options we’d have while we were out there. I also knew that this area would be well-traveled and that we wouldn’t be the only group out there.
Part of my research for this trip included previous day hikes I’ve been on out in this area. I was familiar with the drive to get to the trailhead, the different trailheads we could start our trip from, the tentsites in the area, the terrain we’d be hiking through, and all of the day hiking options we’d have while we were out there.
I also read current trip reports for the area on both the WTA website and AllTrails , to get a feel for the current trail conditions.
Then, I looked at a map and created a route using Gaia GPS to determine our total trip and daily mileage, possible places to camp, water sources and day hiking options in the area.
While doing my research, I also learned that there would be limited water sources in the area. Even though there were lakes nearby, they wouldn’t be safe to drink out of, even if we filtered the water because all of the water in the lakes were irrigation runoff.
For this trip, we’d have to carry in a large amount of water on Day 1 and then plan to hike down to the river, which would be a 6-mile hike roundtrip from camp and back, to collect and filter safe drinking water to bring back to camp.
Also, while doing my research, I learned that since it was still considered early season (meaning that the area would be cooler days and even colder nights), local wildlife like ticks and snakes wouldn’t be an issue yet.
Checking The Conditions
Once I’ve completed my research for the Ancient Lakes area, I started checking the trail conditions, road conditions and weather forecast to get an idea of what we could expect while being out there.
Each day up until leaving for trip, I would look for any new trip reports on both the WTA website and AllTrails .
Since I knew I’d have to travel over a mountain pass to get to Eastern Washington, I also kept an eye on the road conditions for Snoqualmie Pass through the Washington State Department of Transportation (WSDOT) website .
And for weather, I checked the current weather forecast through the National Weather Service or NOAA website for the Ancient Lakes area a week prior to leaving for the trip, a couple of days before the trip and then again, the night before and morning of leaving for the trip, just to see if anything had changed.
Planning The Trip
Then for the actual planning for the trip, I used the routes I created on Gaia GPS to note total trip and daily mileage, elevation gain/loss, nearby trailheads and parking lots, possible tentsites, potential water sources and multiple day hiking options in case we wanted to make our hikes during the day shorter or longer.
Once I put together a plan for the whole trip and plotted out a route for each day we’d be out on trail, I put together my meal plan for the trip based on the number of days we were planning on being out on trail. Then I packed up my food and moved on to deciding what backpacking gear to bring for the trip.
Backpacking Gear To Bring
If you’re interested in seeing the backpacking gear I brought with me for this trip, check out my LighterPack.com list for this trip.
Keep in mind when deciding on what backpacking gear to bring for your trip, you’ll need to consider how long you plan on being out there, how many miles you plan on hiking during your trip, both daily mileage and overall trip mileage, the time of year, the forecasted weather for the area, the type of terrain you’ll be traveling through and camping on and nearby water sources..
There’s a lot of information out there about backpacking gear, but how do you sort through all of the information trying to figure out what gear is going to work for you, the type of trip you want to go on and the area and/or climate you’ll be hiking in?
I’ve put together a free Backpacking Gear Packing List you can download and print out to use when planning your trip. This packing list will help give you an idea on what gear you’ll need to bring with you for an overnight backpacking trip.
READY TO START PLANNING YOUR OVERNIGHT BACKPACKING TRIP?
Now that you’ve seen how I planned my recent overnight backpacking trip with my students using some of my favorite trip planning resources, you’re probably excited about planning your own trip, but maybe you’re still feeling overwhelmed about the whole process. This is why I created a special online tool that will help you start planning your first or next overnight backpacking trip.
Introducing The Hungry Hiker Backpacking Trip Planning Masterclass , a step-by-step guide on how to plan your first or next overnight backpacking trip.
The Hungry Hiker Backpacking Trip Planning Masterclass will cover everything (in detail) from how to prepare, research and plan for your trip to the backpacking gear you’ll need.
This masterclass also includes navigation and trip planning video tutorials and digital and printable trip planning resources along with tips and tricks for first time solo backpackers.
This online class is self-paced so you can work through all of the material at your own pace and easily fit it into you own schedule and time zone whenever you’re ready to start planning your trip. Once enrolled, you’ll have lifetime access to the class so you can refer back to it whenever you’re planning future overnight backpacking trips.
If you’re ready to finally start planning your overnight backpacking trip this year, then this masterclass will help you get to the trailhead.
CLICK HERE to learn more and sign up for The Hungry Hiker Backpacking Trip Planning Masterclass.
Disclaimer: The-Hungry-Hiker.com is a participant in the Amazon Affiliate Links and AvantlInks Program, affiliate advertising programs designed to provide a means for sites to earn advertising fees by advertising and linking to Amazon.com and other affiliated sites at no cost to you. Please note, I only link to products and services I personally use and trust.
Inspired? Pin It!

1 Comment on How to Plan Your First (Or Next) Overnight Backpacking Trip
- Pingback: I Got Tired of Waiting for Someone Else to Go Backpacking With Me - The Hungry Hiker
Leave a Reply Cancel reply
Your email address will not be published. Required fields are marked *
Save my name, email, and website in this browser for the next time I comment.
Notify me of follow-up comments by email.
Notify me of new posts by email.
Travel Europe on a Budget
The Savvy Backpacker
Backpacking Europe | Our Epic Step-by-Step Travel Planning Guide
An easy guide to budget travel in Europe.
City Guides .\33 a132798-3f3b-4585-954d-7e70cf863447{fill:#231f20}
I created this step-by-step travel guide to prove that planning budget travel doesn’t have to be daunting — whether you’re backpacking through Europe or just a budget-minded independent traveler.
This guide is broken down into different phases of the planning process:
- Initial Trip Planning
- Budgeting and Money
- Packing Lists and Advice
- Accommodation
- Transportation
- Travel Gear and Travel Services Recommendations
- More Helpful Travel Tips
Under each phase, you will find links to our most important travel articles — I suggest reading through each one. If you follow these steps you’ll be prepared to have an amazing trip to Europe.
Note: You can find even more information on this website’s the top menu.
PHASE ONE: Initial Trip Planning

These are the first steps to take when planning your trip to backpack Europe. Here you’ll start planning what cities and countries to visit, create a travel itinerary, estimate your travel costs, book your flight, and a range of other things.
You’ll probably spend a large amount of time on this phase — especially the itinerary planning.
Europe Itinerary Planning and Travel Logistics
How To Create a Europe Travel Itinerary that fits your travel style, travel goals, and budget.
I’ve also put together some sample itineraries to help give some ideas of places you might want to visit:
- Best Of Europe Mega Trip Itinerary (Travel Time: 8-10+ weeks)
- Eastern Europe MegaTrip Itinerary (Travel Time: 6-10 Weeks)
- Gateway to Eastern Europe Travel Itinerary (Travel Time: 2-4 Weeks)
- Our Most Important Tip for First-Time Travelers: Slow Down
- The Most Visited Cities in Europe
Choosing Travel Insurance
I recommend buying travel insurance for your trip to protect against any unforeseen travel mishaps. Here are some Tips For Choosing Travel Insurance .
The Savvy Backpacker’s City Travel Guides
Discover practical travel information, must-see sights, where to eat, how much to budget, public transportation tips, where to stay, and more about more than 20 of Europe’s Most Iconic Cities :
- Amsterdam Travel Guide
- Barcelona Travel Guide
- Berlin Travel Guide
- Florence Travel Guide
- London Travel Guide
- Paris Travel Guide
- Rome Travel Guide
- Seville Travel Guide
- SEE TRAVEL GUIDES FOR MULTIPLE OTHER CITIES
Related: The Best Party Cities in Europe
Finding Cheap Airfare to Europe
Your plane ticket to Europe is one of your greatest expenses. Here’s our Guide To Finding Cheap Flights To Europe .
Best Travel Guidebooks and Online Resources
From Lonely Planet and Rick Steves’ guidebooks to Wikitravel and TripAdvisor, there is a wealth of information to help you choose what to do and see. I review My Favorite Online Travel Resources .
Choosing Travel Seasons
The summer might be the busiest travel season but Europe is a great place to visit year-round. We’ve listed the positives and negatives of traveling during each season .
Pre-Departure Travel Advice
Before you head off to Europe be sure to check out this Pre-Departure Travel Checklist so you don’t overlook any small, but important, details.
Get an Affordable High-Speed Mobile Data Plan For Your Phone
Having fast and reliable mobile data for your smartphone is a requirement these days. Check out my guide on how to use your phone in Europe and our guide to the best SIM Cards and Data Plans for Europe .
If you have a newer phone, check out our guide to the best Prepaid eSIM Data Plans for Europe .
Frequently Asked Travel Questions
I get sent a lot of questions about traveling in Europe that don’t warrant their own article — so I made a Mega-List Of Random Travel Questions .
Phase Two: Budgeting and Money

Let’s dive into the million-dollar question… how much does it cost to travel through Europe? Below are some helpful articles to help you estimate how much money you’ll need to backpack Europe on a budget.
I also cover various topics like using ATMs and credit cards, exchanging currency, and other money-related issues.
Estimating Your Travel Costs
Here’s a high-level guide to estimating How Much It Costs To Backpack Europe on a budget. I break down the average cost of food, alcohol, accommodation, sightseeing, transportation, pre-trip travel expenses, and other common expenses.
City Price Guides
I’ve created In-Depth City Price Guides that cover travel costs for 30+ cities in Europe. Each city guide includes average prices for food, accommodation, sightseeing, and more.
Using Your Money in Europe
Everything you need to know about exchange rates, using ATMs, using debit/credit cards, avoiding/minimizing foreign transaction fees, and more. Check out our Guide To Using Money While Traveling In Europe and our Guide To Using Credit Cards and Debit Cards in Europe .
Daily Money-Saving Strategies
Here are some Simple Money-Saving Europe Travel Tips you can do every day to save money while traveling. Here’s our Guide To Eating On A Budget While Traveling Europe for more money-saving tips.
Phase Three: Packing Advice & Travel Gear

Packing for travel in Europe can be confusing and frustrating — especially if you’re backpacking across Europe or just trying to pack light. These guides will help you choose what clothes and travel accessories to pack and have advice on packing light.
Europe Travel Packing Lists
I’ve written numerous packing lists for multiple travel styles. Each article covers functional and fashionable clothes for traveling through Europe, helpful travel accessories, toiletries, electronics, and what items you should leave behind. Check them out!
- Backpacking Europe Packing List (for Men)
- Backpacking Europe Packing List (for Women)
- Europe Packing List (general packing list that’s not solely “backpacking” focused)
- Ultralight Travel Packing List (taking traveling light to the next level)
- Winter Europe Packing List
- Skincare, Makeup, and Beauty Essentials For Travel
The Best Travel Backpacks
I love travel backpacks and we’ve personally tested well over a dozen of the most popular backpacks. Here’s a list of the Best Travel Backpacks (Updated For 2022). Be sure to check out our Best Travel Backpacks for Women as well.
I’ve also compiled a list of the Best Carry-On Backpacks if you’re traveling light (which is highly recommended).
Related Article: Things to look for when buying a travel backpack & best travel backpacks for Europe (slightly old but still solid information).
Travel Gear Buyers Guides
I’ve reviewed a lot of travel products over the years. Here are a few of our most popular travel gear guides:
Travel Footwear
- Best Travel Shoes For Women
- Best Travel Shoes for Men
- Waterproof Boots for Women
- Waterproof Boots for Men
Travel Clothing
- Best Travel Underwear
- Best Travel Socks
- Guide To Finding Fashionable Travel Clothes
Travel Electronics
- Using Prepaid Data Plans and Smart Phones in Europe
- How To Buy A SIM Card In Europe
- Guide to Using Your Electronics in Europe
- The Best Travel Apps
Travel Aids
- Best Daypacks for Travel
- Best Packing Cubes
How To Not Look Like A Tourist
It’s not always easy to stay fashionable while also living out of a backpack or suitcase. Here are some tips for not looking like a tourist.
- Female Travel Fashion Advice
- Male Travel Fashion Advice
Travel Packing and Organization Strategies
Living out of a suitcase or backpack does pose a few challenges. Here are some Travel Packing Strategies to help you efficiently organize your travel gear and prevent wrinkles in your clothing.
Related: Tips for using Packing Cubes .
Backpack Vs Suitcase
Do you need a backpack for traveling around Europe? Of course not. Plenty of people use suitcases. Here are some Tips For Determining Your Luggage Style .
Winter Travel Packing Tips
Winter travel is great but you need to know how to dress properly for the cold. Check out our Guide To Dressing For Winter In Europe for tips on dressing in layers to keep you warm and dry without wearing a lot of bulky clothes. Also, see our Winter Europe Packing List for some of our favorite winter gear.
Phase Four: Hostels, Hotels, Rental Apartments & Other Accommodation

Accommodation is one of your biggest expenses. In this section, I’ll focus on hostels, rental apartments, and Couchsurfing.
Guide to European Hostels
Curious about staying in hostels while traveling in Europe? Check out our Guide To Hostels In Europe — it covers everything you’ve ever wanted to know about staying in hostels and how to pick the perfect hostel for your travel style.
Also, check out this handy Guide To Hostel Etiquette .
Europe’s Best Hostels
Europe has a ton of amazing hostels. We’ve listed a few of the best hostels in Europe’s most popular cities.
- Amsterdam’s Best Hostels
- Barcelona’s Best Hostels
- Berlin’s Best Hostels
- Budapest’s Best Hostels
- Dublin’s Best Hostels
- Edinburgh’s Best Hostels
- Florence’s Best Hostels
- London’s Best Hostels
- Madrid’s Best Hostels
- Milan’s Best Hostels
- Paris’ Best Hostels
- Prague’s Best Hostels
- Rome’s Best Hostels
See The Full List Of Europe’s Best Hostels By City
Couchsurfing in Europe
Couchsurfing is a super popular way to experience Europe, save money on accommodation, and meet friendly locals. Here’s our Guide to Couchsurfing in Europe .
Short-Term Apartment Rentals & Airbnb
Short-term apartment rentals — especially Airbnb — have exploded in Europe and it’s one of my favorite ways to experience Europe’s cities. But picking the perfect apartment can be a little tricky. Here’s my Guide To Renting Airbnb & Vacation Apartments In Europe .
Related: Airbnb Review: Why It’s Our Top Choice for Rental Apartments
Phase Five: Trains, Flights, and Other Transportation in Europe
Planes, Trains, and Automobiles!
Europe has a great transportation network, making it incredibly easy to zip from city to city and country to country. The hardest part is choosing which method is right for your travel style and budget.
In this section, I cover each major transportation option system and give tips on finding the best deals.
Complete Guide to Train Travel in Europe
Traveling by train is the best way to get around Europe. Check out my Guide To Train Travel in Europe to learn the ins and outs of European rail travel.
We’ve also written in-depth guides about country-specific train travel and how to score the cheapest tickets:
- Belgium Train Guide
- England Train Guide
- France Train Guide
- Germany Train Guide
- Italy Train Guide
- Netherlands Train Guide
- Portugal Train Guide
- Spain Train Guide
- Switzerland Train Guide
How To Purchase Train Tickets
There are a number of ways to purchase train tickets — from at the station to online. Read our Guide to Buying European Train Tickets to learn about the different kinds of train tickets and ways to get the best price.
Eurail Pass Explained
Many travelers purchase a Eurail Pass to explore Europe. However, with so many different passes available it can be tough to decide which, if any, rail pass is worth the price. Read my Guide To Eurail Passes to see if a rail pass is right for you.
Budget Air Travel in Europe
Europe is home to multiple budget airlines so it’s not uncommon to find flights within Europe for less than $50. My Guide To Budget Air Travel In Europe will cover how to find the cheapest tickets and help you decide if air travel is right for your trip.
Related: Our Ryanair Survival Guide will help you navigate one of Europe’s most notorious ultra-low-budget air carriers.
Traveling Europe by Car
Exploring Europe by car is a great way to discover smaller towns and villages, but it is a nightmare if you plan on only visiting large cities. My Guide To Traveling Europe By Car will cover what to look for when renting a car and tips for navigating Europe’s roads.
What’s Cheaper? Comparing Train vs Plane vs Car
I did a little comparison to find the cheapest way to travel around Europe — check out my findings . By the way, this isn’t a perfect comparison but it’s a good overview.
Bus/Coach Travel in Europe
One of the cheapest methods of travel is via long-distance coach service but it’s also the slowest. Check out our Guide To Long-Distance Coach Travel In Europe to learn more about this option for cash-strapped travelers.
Phase Six: Travel Service Reviews

There are many amazing travel products and services that will make traveling more enjoyable and less stressful — but the choices can be overwhelming. In this section read our reviews on everything from our favorite socks and underwear to backpacks and other travel services.
Airbnb Rental Strategies
Want to live like a local? Try Airbnb. Read our Airbnb Review to see why Airbnb is one of our top choices for finding great places to stay and see our top tips for finding the perfect rental.
Contiki Tour Review
Contiki tours are a popular travel option that thousands of people take each year. Read my Contiki Tour Review to see the good and bad of Contiki Tours and determine if this is a good option for you.
Hostelworld Review
See why Hostelworld is my top choice for finding and booking hostels in Europe. Read my Hostelworld Review and learn the strategies I use to find the best hostels.
Phase Seven: More Helpful Advice For Traveling Europe On A Budget

This section features general travel tips for everything from spotting tourist scams and fashion advice to solo travel pointers and group travel tips.
Avoiding Tourist Scams and Pickpockets
Don’t be one of the many tourists who get ripped off while traveling through Europe. Read our Guide To Pickpockets in Europe and our Guide to Avoiding Common Tourist Scams .
How To Use Data Plans and Smartphones in Europe
Using your smartphone and data plan in Europe can be costly. Read our Guide To Using Smartphones and Data Plans in Europe , How To Buy A SIM Card in Europe , and Guide to the Best eSIMs for Europe to make sure you don’t rack up a huge phone bill.
Solo and Group Travel in Europe
How are you going to travel around Europe — with friends, with your significant other, or maybe you want to travel solo? Check out these articles to help you make the most of your travels.
- How To Travel Solo in Europe
- Advice for Solo Female Travel
- How To Travel Europe with Friends (And Survive)
Using Electronics Abroad
Worried about using your electronics in Europe? Read our Guide To Using Your Electronics in Europe to see what kinds of electronics you can (and can’t) use in Europe.
Travel Styles and Sightseeing Strategies
Here are a few helpful articles to help you get the most out of your day-to-day travels.
- Day-To-Day Sightseeing Strategies
- Simple Money-Saving Tips While Traveling in Europe
- Avoiding Common Travel Mistakes That Are Super Easy To Make
- Why Slow Travel Is The Best Travel
Our Favorite Online Travel Resources
The websites I use to book and plan our travels .
Start Your Own Travel Blog (And How To Make Money)
Learn How To Start A Travel Blog — My 100% free guide to making your own travel blog and tips for making money to help fund your travels.
PIN THIS ARTICLE:

Budget Travel Newsletter
The best budget travel tips sent straight to your inbox.
Join My Journey
Europe travel tips, advertising & privacy policies.
TheSavvyBackpacker.com is a participant in the Amazon Services LLC Associates Program, an affiliate advertising program designed to provide a means for sites to earn advertising fees by advertising and linking to amazon.com.
© 2010 - 2024 The Savvy Backpacker
Website Design by FHOKE
Backpacker Trip Planner
Plan your next backpacker trip.
Use PlanYourTrip to prepare for you next Adventure. With this page you can try out this application to find out about it's advantages. After registration your Trip can be saved. Have fun planning your next Backpacker Trip with the PlanYourTrip Planner.
You still need some inspiration for your personal travel planning? Just take a look at our sample trips!
Nomadic Matt's Travel Site
Travel Better, Cheaper, Longer
My Step-By-Step Guide to Backpacking Europe

Backpacking Europe is one of my favorite things to do as a traveler. There isn’t a year I don’t criss-cross the continent (except 2020 when no one was crossing Europe).
During the summer, hostels burst with life, the Mediterranean sparkles, streets fill with people drinking wine and enjoying the day, and the late night setting sun leads to long wonderous days. Winter brings Christmas markets, skiing, fewer crowds, and lower prices! And Spring and Fall bring the right mix of people, temperatures, and prices that make these two my favorite seasons to travel Europe.
Since starting this website in 2008, I’ve written a lot of posts on Europe. I visit Europe multiple times a year, have been all over the continent, lived there on multiple occasions, and I have even run tours there.
With so much content on the blog, I wanted to create a resource page that will help you plan your backpacking trip to Europe with ease. That way you don’t miss anything! In this post, you’ll find all my best resources on planning a backpacking or budget trip to Europe, including destination guides, transportation tips, accommodation information, ways to meet people, and so much more!
So, without further ado, here’s everything you could ever want to know about backpacking Europe:
Table of Contents
Step 1: Plan Your Backpacking Europe Trip
Step 2: get your gear for backpacking europe, step 3: how to get amazing accommodation in europe, step 4: get around europe on the cheap, step 5: save money while backpacking europe, step 6: find out what to see and do in europe, get your in-depth budget guide to europe.

How Not to Feel Overwhelmed While Planning – Planning the perfect trip to Europe can be daunting and overwhelming. I’ve been there and I understand, but I can tell you from years of experience that the more you plan your trip, the more anxiety you will face.
How to Save for Your Trip – Is money stopping you from taking the trip of your dreams? Here are 22 easy ways to cut down on your daily expenses so you can save money to backpack Europe.
How to Find a Cheap Flight – Getting to Europe can be half the challenge. Luckily, there are a ton of flight deals to the continent now if you know when and how to look for them. This article will show you how to always get a cheap flight to Europe.
How to Earn Points for Free Flights and Hotel Stays – Free travel is my favorite kind of travel! This post shows you eight strategies I use to get over a million frequent flier points. These will get you out of your house faster, cheaper, and in comfort!
How to (Legally) Stay in Europe for More Than 90 Days – Every year, thousands of travelers wonder how they can stay in Europe for more than 90 days, which is the limit in the Schengen Zone. The good news is that there are a few different ways to stay. In this post, I share what you can do to stay legally beyond 90 days and on the continent in general.
How to Avoid Paying ATM Fees – You should never have to pay any bank fees while you are accessing your money in Europe! Here is my advice on how to avoid bank fees as your backpacking Europe.
Is Europe Safe to Visit? – Here is how to ensure you stay safe while traveling across the continent.

What to Pack for Your Trip – What should you pack on your trip? Well, there is no one right answer, but this list will give you a good place to start. It’s what I take on my trips with me (though you’ll need to make some seasonal variations, I’m sure!).
The Ultimate Packing List for Female Travelers – In this post, Kristin Addis shares her packing insights for women, so that you can travel just about anywhere without spending a fortune on gear.
How to Buy Good Travel Insurance – Travel insurance is one of the most important things you’ll need for your trip. You wouldn’t have a car without car insurance or a home without home insurance, and you can’t have a trip without travel insurance!
The Best Travel Cameras – Wondering what kind of camera you should get for your trip? This post will show you exactly what you need — no matter your budget!

How to Find a Good Hostel – This article features my best tips on how to find an affordable, clean, and fun hostel where you can meet a lot of amazing people.
The Best Hostels in Europe – This is a list of European hostels that I would definitely use again if I have the chance. Hope this helps with your next European backpacking adventure!
How to Become a House Sitter – This is a how-to guide to house-sitting, a wonderful opportunity that allows you to stay in a location rent free in exchange for watching someone’s house.
For more budget accommodation suggestions, check out my hostel hub page . It has all my favorite hostels around Europe!
If you’d rather stay in hotels, this page has all my favorite hotels in Europe .
And to find out where to stay in each city, visit my list of the best neighborhoods in Europe!

The Ultimate Guide to Saving Money with Eurail Passes – Everyone traveling to Europe wonders if they will save money by buying a rail pass or if it’s cheaper to buy tickets as they go. This detailed post outlines everything you need to know about buying a rail pass!
Europe is also an amazing destination for road trips. Countries like Iceland , Scotland, Ireland, Portugal, and Norway are all amazing places to explore by vehicle.
If you’re planning to drive around Europe, use Discover Cars to find the best rental prices. They search rental companies big and small to find you the best deals.
You can use the widget below to get a quote. It’s fast and free:

How to Save Money on Food – While traveling Europe, food often becomes a major expense. Here are some tips for saving money on food so you still can afford a nice meal out every now and then.
How to Use the Sharing Economy to Save Money – The rise of the sharing economy has made backpacking Europe so much easier and cheaper. This post lists all my favorite ridesharing, house sharing, local meeting websites so you can get off the tourist trail and experience day-to-day life with locals!
61 Tips to Make You the Savviest Traveler – These 61 travel tips will help you become an expert traveler who gets around Europe cheaper, better, longer, and smarter!
14 Major Travel Scams to Avoid – Losing money to a preventable travel scam sucks. Learn what scams to look out for in Europe and save yourself a potential headache!
How to Crush it on Couchsurfing – While Couchsurfing isn’t as popular as it once was, it’s still an option for intrepid backpackers. This post can introduce you to the basics and help you find hosts around Europe.
How to Become a House Sitter & Get Free Accommodation – Pet sitting is a great way to get free accommodation when traveling Europe. It’s easy to get started too! This post will show you everything you need to know.

Additionally, here are a few of my favorite companies in Europe. These are the comoanies I use when I’m looking for things to do, food tours, walking tours, and more!
Walks – Walks offers in-depth history, food, and cultural tours in cities around the world (especially Europe). Its small-group tours offer exclusive behind-the-scenes access other companies can’t get and use really incredible and knowledgeable guides. I can’t recommend them enough.
Devour – Devour has all kinds of amazing food tours around Europe. If you’re a foodie who wants to learn more about the history and culture behind each dish, these tours are the best on the continent. I take them every chance I get.
GetYourGuide – Get Your Guide is a huge online marketplace for tours and excursions. The site has tons of tour options in cities all around the world, including cooking classes, walking tours, street art lessons, and more! It’s a good resource to search for specific tours in any destination.
And for a complete overview of Europe in one easy-to-read post, you can check out this free guide . It covers all the basics, including ways to save money, things to see and do, when to go, and more!
This massive resource list will help you plan your trip to Europe in an easy-to-follow, step-by-step pattern so you won’t get lost, overspend, or stress out about your upcoming dream trip. Europe is one of my favorite regions of the world (which is why I spend so much time there). There’s so much variety in food, culture, and language, as well as so much history. I love the continent and hope you use these tips to plan your ultimate backpacking adventure in Europe!

My detailed 200+ page guidebook is made for budget travelers like you! It cuts out the fluff found in other guides and gets straight to the practical information you need to travel while in Europe. It has suggested itineraries, budgets, ways to save money, on and off the beaten path things to see and do, non-touristy restaurants, markets, bars, safety tips, and much more! Click here to learn more and get your copy today.
Book Your Trip to Europe: Logistical Tips and Tricks
Book Your Flight Use Skyscanner to find a cheap flight. They are my favorite search engine because they search websites and airlines around the globe so you always know no stone is left unturned!
Book Your Accommodation You can book your hostel with Hostelworld as they have the biggest inventory and best deals. If you want to stay somewhere other than a hostel, use Booking.com as they consistently return the cheapest rates for guesthouses and cheap hotels.
For suggestions on where to stay during your trip, here are my favorite hostels in Europe !
Don’t Forget Travel Insurance Travel insurance will protect you against illness, injury, theft, and cancellations. It’s comprehensive protection in case anything goes wrong. I never go on a trip without it as I’ve had to use it many times in the past. My favorite companies that offer the best service and value are:
- Safety Wing (best for everyone)
- Insure My Trip (for those over 70)
- Medjet (for additional evacuation coverage)
Looking for the Best Companies to Save Money With? Check out my resource page for the best companies to use when you travel. I list all the ones I use to save money when I’m on the road. They will save you money when you travel too.
Want More Information on Europe? Be sure to visit our robust destination guide to Europe for even more planning tips!
Got a comment on this article? Join the conversation on Facebook , Instagram , or Twitter and share your thoughts!
Disclosure: Please note that some of the links above may be affiliate links, and at no additional cost to you, I earn a commission if you make a purchase. I recommend only products and companies I use and the income goes to keeping the site community supported and ad free.
Related Posts

Get my best stuff sent straight to you!
Pin it on pinterest.

GO-BACKPACKING .COM

Planning Resources
Please feel free to download and use any of the planning resources below. it is ultimately your responsibility to ensure you are prepared for your adventures, but we hope that these resources will save you some time and effort in organizing your planning process. if you have any questions or comments, please feel free to contact us ..

Backpacking Gear Checklist
This is the backpacking gear checklist Mark and Katie use for 3+ Season trips (most summer, spring, and fall conditions and locations). For winter trips, or for more extreme conditions, they change the items on this list. This list is considered “Light” but not “Ultralight”.

Backpacking Preparation Checklist
Use this checklist to make sure you are prepared for your backpacking trip. Remember, it is YOUR responsibility to ensure you have, know, and do everything you need to have a safe and enjoyable trip.

First Aid Kit Checklist
Use this checklist to make sure you have everything you need in your backpacking first aid kit. NEVER go backpacking without a first aid kit and make sure you know how to use the items inside. See our Emergencies in the Backcountry section on the "Learn" page for more information.

Mark's Gear List
This is Mark's personal backpacking gear list. He does not take every item on this list on every trip, and some trips require additional items that are not on this list. Take a look.

Sample Topographic Map
This topographic map depicts a route through Sage Creek Wilderness Area in Badlands National Park in South Dakota. Use it as an example for your creation of personalized topographic maps using online or downloadable software.

Sample Waypoints
This is an example of a waypoints list you would print on waterproof paper and take with you on your backpacking trip. This particular list is a 22-mile, 3-day loop through Badlands National Park in South Dakota.

Backpacking Itinerary Template
Microsoft Word Document
Fill out this itinerary template for your next backpacking trip. Leave a copy in your car, and give a copy to someone who will be responsible for calling the authorities if you do not return by the expected date and time.

How to Pack a Backpack
Another great REI resource: Packing a backpack is pretty simple, but there are some tips to make the process easier and to get you better results. Check out this video to learn how to load your pack properly.

REI Backpacking Checklist
This is a comprehensive backpacking checklist from REI, which is one of Katie and Mark's top choices for outdoor equipment and information. Their backpacking checklist is "your tried-and-true guide to packing smart. The list is intentionally comprehensive so you don’t forget anything important."
REI Ultralight Backpacking Checklist
Ready to take the next step in backpacking comfort? Try going ultralight. This checklist from REI will help you get started with this new and innovative style of backcountry travel.

Wilderness Medicine
Amazon Book
Katie and Mark have the privilege of calling Dr. William Forgey, MD a personal friend. He has been called the Father of Wilderness Medicine, and rightfully so. With more backcountry experience than anyone we have ever met, Dr. Forgey (or “Doc” to his friends) is the authority on wilderness medicine. His book, Wilderness Medicine: Beyond First Aid, now in it’s 6th edition, is an invaluable resource for the backcountry traveller.Katie and Mark have the priv

Backpacking for Beginners: A Guide on the Great Outdoors
C amping in the wilderness is an incredible experience that exposes you to the beauty of wildlife and pristine landscapes. It has a history in the United States dating to the 1860s , and the draw of wilderness survival is growing as technology expands. Hitting the trail with your essentials in tow is one of the most freeing experiences you can have.
Investing in the best backpacking gear and exploring trail systems is an excellent foundation for future trips. Still, there’s much to learn and consider when learning the basics of backpacking for beginners. Minor mistakes can turn into severe situations when exploring remote hiking trails.
Fortunately, you’ve discovered the best guide to backpacking tips and tricks to make your next adventure a rousing success. Continue reading to forge a deeper connection with nature today!
Test Gear at Home
The worst place to test your backpacking gear is on the trail in the middle of a trip. Preparation is vital when heading into nature, and your home is the perfect testing ground to become familiar with your backpacking equipment. Attempting to learn how to set up your tent in the middle of a downpour is a recipe for frustration and disaster.
Speak with experienced backpackers, and many will tell you horror stories from their early backpacking experiences. Explore your gear to be prepared when hitting the trail systems. You’ll enjoy a better backpacking experience while remaining safe from start to finish.
Check the Weather
It’s also wise to check the weather forecast for the area you plan to camp and hike in. Backpacking in the mountains is dangerous due to rapid changes in weather conditions. Check the night before your trip and again when you wake up.
Cancelling your backpacking trip is the responsible decision if the weather forecast looks bleak. The weather can change from sunny and blue skies to severe thunderstorms in the blink of an eye.
Checking the trail conditions is also beneficial before embarking on your next adventure. Contact the local ranger station to get more information before heading out.
Storms and precipitation can alter the trails you plan to hike and create dangerous conditions. Ensure you have the proper gear for a safe backpacking trip if trails are covered in snow or ice. Wearing mens compression socks is also beneficial to keep your feet warm and allow for ample blood flow.
Know the Local Wildlife
You’re likely to see and encounter wildlife when planning a backpacking trip. While most animals in nature aren’t dangerous or harmful, looking at the local ecosystems and animals living in the area you’re exploring is helpful. Knowing about your temporary neighbors can keep you safe and ensure peace of mind during the trip.
The first thing to check is the presence of bears. Black, brown, and grizzly bears are dangerous mammals, so avoiding their territory during mating and birthing season is best. Bring bear spray and a food storage solution if you plan a backpacking trip in Bear Country.
Knowing the snakes native to the area is also wise. Venomous snakes can turn a memorable backpacking trip into a nightmare with one bite. Research the types of snakes and their markings to ensure your well-being during your next backpacking adventure.
Account for Elevation
Planning for elevation doesn’t apply exclusively to mountainous regions for backpacking trips. Distance is a vital factor to consider when planning an adventure, but the elevation gains will take a greater toll on your body and mind. Don’t make the mistake of thinking you can handle more miles than you have in the tank.
Backpacking mileage and elevation is different from a day hike. You’re carrying dozens of pounds on your back, so stay conservative with your ability to cover ground when carrying your backpacking gear. Consider doing a test run by taking your gear for a day hike to find your range.
Account for mileage and elevation when exploring hiking trails with friends and family. A 12-mile trail with 8,000 feet of elevation gain will push most backpackers to their limits. It’s not impossible, but preparing for the effort involved when planning a massive backpacking trip is best.
Pack Wisely
Each item you pack is something you’ll need to tote around for your backpacking trip. Plan accordingly, and eliminate any backpacking gear that isn’t essential for your trip. The pounds add up in a hurry when you’re packing.
A test run trip is ideal because it will show you the items you need and the ones you can leave at home. Bring enough warm clothing to prevent hypothermia, and find space to pack wilderness survival gear in case your adventure goes sideways.
Packing is the most essential skill to learn before hitting the trail systems. It will save you time, frustration, and your health. It’s a good rule of thumb to take notes of each item you’re bringing to have a record of the essentials.
Layer Your Clothing
Backpacking is best when done with a minimalist attitude. Minimalism is best when you have the proper backpacking gear. Layer your clothing and bring the essentials, like rain gear and an extra outer layer. Leave cotton t-shirts and jeans at home when hitting your favorite hiking trails.
The best clothes serve multiple functions to save weight. Versatility is the name of the game when picking the clothes to bring for your upcoming backpacking trip.
Use the weather forecast and climate to determine the clothes you want to take. Account for daylight and night temperatures to ensure a safe camping experience. It’s an effective way to bring the necessary clothes without overloading your pack.
Learn the Basics of Backpacking for Beginners Today
Learning the best tips for backpacking for beginners is an excellent way to prepare for your first (or next) adventure in nature. Check the weather and find hiking trails within your capabilities.
Research the wildlife in the area you’re camping in and bring the wilderness survival gear you need for safety and peace of mind. Pack wisely, and layer your clothing to stay safe and limit weight.
Camping and spending time in nature is a rewarding experience and an excellent way to make memories. Check out our Sports and Recreation content to find exciting outdoor activities today!
This article is published by NYTech in collaboration with Syndication Cloud.


Scout Backpacking 101: How To Prepare For A Troop Trek
There’s probably no activity more key to Scouting than a backpacking trip. In fact, you’ll probably participate in dozens of backpacking adventures during your Scouting career, but none of these are more important than your FIRST few backpacking trips.
Written by Eagle Scout and pro outdoor journalist, Owen Clarke. Cole here — I asked Owen to share his experience on ScoutSmarts, as he’s a true expert in backpacking and outdoor adventuring. Get ready, this article will be a real treat!
So, if you’re getting ready to embark on one of your first few backpacking trips, be prepared to learn some essential knowledge! In this article, I’ll break down everything you need to know about backpacking, including what to bring, the right mindset, and what you can expect on the trail.
Afterward, we’ll cover FIVE backpacking fails, FOUR things to expect on the trail, and then I’ll share THREE of my own wildest backpacking adventures. Finally, we’ll go over some Frequently Asked Questions! Are you ready? Let’s dive into it! 🙂
Owen Here — I remember my first backpacking trip to this day. I was 11 years old, and my troop went backpacking at Fall Creek Falls State Park in Tennessee. I built my first fire, navigated using a map and compass, and cooked and ate my first dehydrated meal. Like me, you’ll probably remember your first backpacking trip for the rest of your life !
What is Backpacking?
Let’s start with the basics. Backpacking is the process of hiking while carrying all your camping gear on your back. Backpacking trips can be a single night, or they last multiple weeks (and even months!) but they always involve at least one night spent in the wilderness.
Most backpackers bring tents, hammocks, or other shelters, but you can also backpack and sleep in huts or other pre-existing wilderness shelters. While backpacking, you’ll carry all your gear with you on your back. This includes your tent, food, water, clothing, medication, and anything else you need to get through your hike!
Owen Here — Backpacking is also one of the 130+ merit badges you can earn in Scouting. Check out our Backpacking Merit Badge Guide for more info on this challenging (but rewarding!) merit badge.
Choosing the Right Backpack
What you bring on your first backpacking trip is important (and we’ll go through a detailed packing list below). But NOTHING is more important than the pack you choose to carry all your gear. You’ll be wearing your pack all day long, for multiple days, so choose your pack wisely.
Finding the right pack is all about fit and size. Your pack size is based on your torso length, not your height. So, measure from the top of your hips to the bony bump on the back of your neck. This measurement will help you find a pack that fits you correctly.
Remember, as a young scout, you’ll need to leave some room for growth! A pack that’s slightly too big won’t be a huge problem. Be sure to add some weight to your pack and see how it feels before purchasing it!
Scout Backpacking Tip — When loaded, your pack should weigh no more than 20% to 25% of your body weight (30% at most). That means if you weigh 150 pounds, a 30-pound (loaded) pack is a solid choice.
What to Bring Backpacking
Your first backpacking trip will be a success if you pack properly. But that’s not just physical packing, it’s mental packing, too!
The Best Backpacking Mindset
Backpacking is a difficult and exciting activity. Your mindset is just as important as (if not more important than) what you carry with you in your backpack.
When you head out on your first backpacking trip, you should BE PREPARED. That means being prepared with the right gear (below) and a flexible, capable mindset to roll with the punches and address any obstacle that comes your way.
Owen Here — On a troop backpacking trip to the Appalachian Trail, I was tenting with another scout who had a learning disability. During the night, a heavy rainstorm caused a nearby creek to rise. We woke up in several inches of water! My tentmate freaked out, and I had to calm him down to stop him from flipping the tent over. This is just one example of why being prepared with a calm, cool mindset will help when backpacking !
Backpacking Gear Packing List
What you bring backpacking will vary depending on the length of your trip and the terrain you’re heading into. If you’re going to Philmont Scout Ranch , for example, you’ll be on a weeklong trek. For a two-day, one-night weekend trip, your kit might be much smaller. Below are some essentials:
- Pocketknife
- First aid kit
- Tent, hammock, bivvy sack, or another form of shelter (w/ rain fly)
- Spare clothing and socks (avoid cotton, choose moisture-wicking materials instead)
- Water bottle
- Water filtration device
- Sunglasses and sunhat
- Headlamp w/ spare batteries
- Lighter, matches, or another fire-starting source
- Map and compass
- Camp shoes (sandals or Crocs)
- Toiletries (toilet paper or wet wipes, toothbrush, toothpaste, floss, etc)
- Mess kit (spork, bowl, mug)
- Backpacking stove w/ fuel
This list just contains the bare necessities for shorter backpacking trips though. To see a full list of additional Scout camping essentials with links on where to get these reliable, tested products, check out Cole’s Ultimate Scout Camp Packing List !
Five Backpacking Trail Fails (Don’t Do This Stuff!)
1. carrying too much weight.
Hauling too much weight in your pack is probably the #1 thing scouts should avoid when backpacking . As mentioned above, your pack shouldn’t weigh more than 20% to 25% of your total body weight. Philmont suggests 30% as a decent high point, but in general, aim to carry as little weight as possible.
Remember, a pack that feels a bit heavy when you start hiking is going to feel much, much heavier after you’ve hiked a few miles. Because of this, always make it a point to drink lots of water as you trek along for 2 important reasons: 1) You stay hydrated, and 2) Your backpack gets lighter! 😉
2. Poor Food Planning
This “Trail Fail” can be broken into two categories, 1) Taking the wrong food and 2) Taking too much food . Candies and other sugary snacks provide energy, but it’s short-lived. You’re going to crash later! Healthy snacks that deliver sustained energy are a much better choice.
Check out our list of “ The 5 Best Scouting Trail Snacks ” for our favorite delicious and nutritious trail food options!
Also, when backpacking, avoid heavy foods like fresh fruit and canned food, which weigh much more than they’re worth in energy. Shoot for 2,000-3,000 calories (or no more than 1.5 pounds of food) per day for each scout. You’ll have enough energy for the trail without too much weight on your back!
3. Expecting Others to Lead
Every Scout backpacking trip will be led by a trip organizer (whether a Scoutmaster, a fellow scout, or both), but you shouldn’t just blindly follow. As a Scout, you should be self-reliant and know as much about the route and plan as the trip organizers.
Be supportive and helpful, but also ask questions, review the planned route (with your own map and compass), monitor weather conditions, and know the names of the trails, junctions, water sources, and exit points. This is a huge part of being prepared, and could save your bacon if you get separated!
4. Cotton, Cotton, Cotton!
Cotton is a killer on backpacking trips. It’s easily soaked with sweat or rain, it doesn’t dry quickly, and it’s a bad clothing choice whether in hot weather or cold weather. Instead, stick to fast-drying, moisture-wicking synthetic linens or (in cold weather) wool. Here’s an example shirt on Amazon !
5. Starting Your Hike in the Hole
When you hit the trail, you should be hydrated, well-fed, and full of energy. Sometimes, scouts will have a light breakfast, ride to the troop meeting spot, wait for a few hours, ride a few hours to the trailhead, and THEN start hiking. By that time, the little energy you had from breakfast is long gone!
Start hydrating and energizing the night before, and drink water often all day before the hike starts! On the same note, avoid sugary cereals and juices right before a hike. You’ll crash and burn before you get started.
Instead, eat heavy proteins and/or complex carbs the morning before your hike, and try to keep snacking at the meeting point and on the way to the trailhead. Remember, don’t start your hike in a hole! 😀
Four Things to Expect On The Scout Backpacking Trail
1. wrong turns.
It doesn’t matter if Bear Grylls is leading your troop, everyone is going to take a wrong turn now and then. Be prepared to retrace your steps to the proper trail junction, and orient with your map and compass as often as possible to ensure you don’t get off track!
Even in the driest of seasons, you could run into some wet weather. Always pack proper rain gear on any Scout backpacking trip, even if there’s 0% chance of rain in the forecast. That includes a rain jacket, a pack cover, and a rain fly for your tent.
3. Bug Bites
Like rain, bugs can bite almost any time of year. You might not deal with mosquito bites or ticks in the winter, but you can still come across spiders and other creepy crawlies.
The easiest way to deal with bugs is to bring bug spray. Apply it often, and apply it thoroughly. Long pants and long sleeve t-shirts help, too!
4. Bad Attitudes
Whether it’s from wrong turns, rain, bug bites, or any other obstacle on the trail, even the best scouts can get cranky during a long backpacking trip.
Be prepared to deal with grumpy scouts (and maybe even Scoutmasters!) while backpacking. Everyone is exhausted during backpacking trips, so bickering, unfortunately, isn’t uncommon. Just stay positive, encourage the people around you, and always be understanding and courteous to your fellow scouts! 🙂
My Top Three Backpacking Experiences
1. juliana trail—slovenia.
When I was just beginning my career as an outdoor journalist, I had the opportunity to be the first person to solo hike the Juliana Trail, a 167-mile route through the Slovenian Alps.
It was a fascinating journey, hiking through remote mountain valleys and rugged alpine passes (and even a couple of abandoned WWI bunkers!) for 17 days. You can read more about my adventure at Outside Online .
2. Chicago Basin—Colorado
This remote alpine basin is home to four 14,000-foot mountains! It’s so far off the beaten path that you have to take a historic steam engine from the mountain town of Durango, Colorado to reach the drop-off point. From here, you’ll hike seven miles up into Chicago Basin at 11,000 feet. Here, the awe-inspiring mountains of Windom, Sunlight, Eolus, and North Eolus tower above you!
Owen Here — I climbed these mountains as part of a goal to solo climb every mountain over 14,000 feet in Colorado last year! If you don’t have the time or money to ride the train, you can also backpack around 13-15 miles from the Purgatory Flats Trailhead, which is what I did .
3. Philmont Scout Ranch—New Mexico
I’ve been on countless backpacking adventures since I finished my Scouting career… but nothing compares to my experience backpacking at Philmont! Philmont remains the most exciting and rewarding backpacking trip of my life, even over a decade later.
Check out our in-depth guide, “Philmont Scout Ranch Explained: Your Best Prep Guide In 2022” to learn more!
Frequently Asked Questions
How long should a beginner backpacking trip be.
First-time backpackers should aim for a one-night trip . You could hike anywhere from 5 to 20 miles on this first trip, but stick below 20 miles. That way, you’ll never be more than 10 miles from either trailhead, which is a good idea if you’re a beginner and maybe still testing out new gear, like your boots and backpack.
Can you go backpacking without training?
Backpacking isn’t a technical activity like rock climbing or scuba diving, so you don’t need training. However, you should know basic wilderness skills, such as how to start a fire, how to pitch your tent, how to navigate using a map and compass, how to cook meals, and how to perform basic first aid.
Be sure you’ve practiced these skills with your troop and attended a few car camping trips before you head out on your first Scout backpacking trip!
What is the difference between backpacking and hiking?
Backpacking involves hiking, so the two activities are closely related. Backpacking is the process of hiking while carrying all your camping gear on your back.
So, every backpacking trip is a hike, but not every hike is a backpacking trip! A trip is only “backpacking” if you’re spending at least two days hiking and one night camping.
How much weight should you carry when backpacking?
How much weight you carry when backpacking depends on the length of your trip and the number of Scouts and Scoutmasters in your group. However, never carry more than 30% of your body weight in your pack.
Aim for somewhere between 20% and 25% of your body weight, but never go above 30%. That means, if you’re 150 pounds, your pack should never weigh more than 45 pounds. Ideally, it should be lighter.
How much food and water should you bring when backpacking?
Again, this will depend on the length of your trip. Bring food for three meals each day, and don’t forget to add some tasty trail snacks ! A helpful tip when planning meals with your patrol is to stick between 2,000 and 3,000 calories per Scout per day (including snacks).
For water, a good rule is to carry 1 liter (or one full Nalgene water bottle ) for every two hours of hiking. Three liters should get you through most days on the trail, but be sure to bring a water pump or other filtration system to pump more water each day.
Backpacking is a thrilling, challenging Scouting activity. While backpacking, you’ll have opportunities to learn many other useful skills, like fire-starting, first aid , navigation, shelter-building, cooking , and plant & animal identification, to name a just few!
Once you become comfortable backpacking, your chances for adventure are almost ENDLESS. Choosing the proper backpack, bringing a positive mindset, and packing properly will help you get started. Now get off the computer and get ready to go hit the trail! 😀
Owen Clarke
Owen Clarke is an Eagle Scout from Troop 7343 Huntsville, AL. For Owen, Scouting inspired a lifelong love of the outdoors, adventure sports, and travel. Today he works as a journalist, writing for top outdoor publications.
Recent Content
The Importance of Scouting (And Its Relevance Today)
Being a BSA Scout isn't just an extracurricular activity; it's a incredible journey that transforms young people into leaders, adventurers, and compassionate citizens. For some, Scouting is a...
How To Plan An Eagle Scout Project: An Easy 5-Step Guide
A large-scale service project is one of the final obstacles that you'll need to overcome to reach Scouting's highest rank: Eagle Scout. If you're a Life Scout in the process of planning your own...
- International edition
- Australia edition
- Europe edition

Paris authority slated for hiking cost of Métro and bus trips during Olympics
Union says rise unwelcome for tourists and residents – but officials say holders of regular transport passes will not be affected
Paris’s public transport authority has been accused of initiating ‘a bit of a racket’ after raising the price of Métro tickets by more than 85% and doubling the cost of bus tickets during the Olympic and Paralympic Games this summer.
A single journey ticket in the Métro will rise from €2.15 to €4, while a ticket for a city bus will double from €2.50 to €5 from 20 July – six days before the Games begin – and remain until 8 September, the transport authority RATP has announced.
Sami Kennouzi, of the CGT union at public transport company RATP, responsible for bus and tram workers, said it had not been consulted about the increase and only found out when the authority announced it.
“For us this ticket price increase doesn’t correspond to our idea of a public service and for such a global event it comes across as a bit of a racket for tourists and [local] passengers,” Kennouzi said.
City officials say most regular travellers will be unaffected by the hiked tariffs as they will already have transport passes, whose price has not risen. Those that do not have a pass have been advised to buy their tickets before 20 July.
One occasional bus user, Colombe, however, told BFM TV she would walk or cycle and avoid the bus. “Already the price for a short journey is high so I won’t be taking the bus for that price. We’ll find another solution,” she said.
Valérie Pécresse, the president of the Île-de-France regional authority, had previously said the aim of the Métro ticket hike, first announced in November, ahead of bus prices rises, was to avoid congestion at stations and urged Parisians to buy passes in advance. “I know a lot of ink has flowed on this subject … the ticket has been fixed at €4 precisely so nobody buys one,” she said in March.
She said there were an estimated 4 million occasional public transport users in the region and about 430,000 had signed up for a pass allowing them to avoid the higher ticket price. “Therefore, we have two months to convince around 3,570,000 people to do so,” she added.
The authority has set up a website to help locals plan for the Games, including details of roads and public transport showing which routes and lines will be most affected.
Three central Métro stations – Champs-Élysées – Clémenceau, Concorde and Tuileries, will be closed before the Games.
During the Games, 185km of road lanes around Paris will be reserved for vehicles carrying Olympic athletes, accredited journalists and members of official delegations.
- Olympic Games
- Paralympics

Garçons! Paris’s waiters battle it out in revived Course des Cafés

Aya Nakamura thanks fans for support over Olympics racism as she wins awards

Beetroot and beefless bourguignon as Paris Olympics embraces vegetarian cuisine

Eiffel Tower reopens to visitors after strike by workers who complained of rust

Will other cities copy Paris decision to hike parking charges for SUVs?

Hundreds evicted from France’s biggest squat months before Paris Olympics

Eiffel Tower closed as staff strike on 100th anniversary of creator’s death

‘A message of peace’: Olympic flame begins its journey to Paris

Anger over plan to name Métro station after ‘misogynist’ Serge Gainsbourg

Cambridge exhibition on 1924 Olympics throws spotlight on pioneering black athlete
Most viewed.
Money latest: These are the most in-demand holiday destinations this year
Welcome back to our Money blog, where we bring you all the latest consumer and personal finance news and tips. This week we're kicking off by talking about holidays (seeing as the sun has finally come out), and we're answering a reader's Money Problem on an undeclared management fee.
Monday 6 May 2024 14:00, UK
- Bank of England 'not yet ready to cut interest rates'
- GoFundMe and loan sharks: How Britain's poorest are burying their loved ones in 2024
- The most in-demand holiday destinations this year
Essential reads
- Money Problem: My daughter discovered undeclared £600 management fee after buying her flat - can we complain?
- Cinema first is back - so should movie lovers unsubscribe?
- 10 biggest mistakes people make in job interviews I Tell us your job interview mistakes/stories/tips in the comments box
- Train strikes in May - everything you need to know
Ask a question or make a comment
The UK economy would be better off if there were fewer buy-to-let landlords, the country's biggest investment company has said.
Legal and General Investment Management (LGIM) told The Telegraph that "unscrupulous" landlords were "taking people's deposits and giving them a bad experience".
Bill Hughes, global head of real assets at L&G, said the rental sector needs an overhaul as too many buy-to-let landlords have been "suboptimal and substandard".
L&G has built a portfolio of 10,000 build-to-rent homes in the last eight years, and predicts traditional landlords will gradually be replaced by purpose-built rental properties managed by institutions.
Single-sex toilets will be legally required in all new restaurants, bars, offices and shopping centres, the government has announced.
It is set to change building regulations later this year to make it compulsory for premises to provide separate facilities for men and women.
The move follows an increase in the use of gender-neutral toilets.
The UK has installed a record number of public electric car chargers this year, figures show.
Nearly 6,000 new chargers were installed in the first three months of the year, according to Zapmap analysis of government data.
Some 1,500 of these were rapid chargers.
A common concern among those hesitant to switch to electric vehicles is range anxiety or the fear of not being able to find a charger.
By Emily Mee , Money team
Scroll through GoFundMe and it won't be long before you see them.
There's a widow left with her husband's financial struggles. Three young siblings trying to raise funds for their mum's send-off after her sudden death. A 25-year-old domestic violence victim whose family want to give her the send-off she deserves.
There are scores of pages like this as an apparently increasing number of Britons struggle with funeral costs.
These costs have risen 126% in the last two decades, according to a recent report from SunLife.
Where families would once have paid £1,835 for a basic funeral, they are now looking at costs of £4,141 on average.
"People can't afford to bury their dead," says Pastor Mick Fleming, who runs the charity Church On The Street.
He frequently spends his time helping families pay for funerals and providing his services as a minister for free, although he says there is simply too much demand for his small charity to help everyone.
Government or local authority grants are available to help families with funeral costs, but Pastor Mick says these can come too late as undertakers will often require a partial payment upfront.
There's an even darker side to this, too.
"What we're now seeing is people who are poor can't walk into the bank and get a bank loan - the economy's tough at the minute," Pastor Mick says.
"They can't get legitimate access to money so they can't borrow it and pay a decent standard rate back, so they have to go to loan sharks."
Many then find it impossible to pay the loan back and face threats from the criminals who lent them the money, says Pastor Mick.
He recalls: "There was a middle-aged lady, she had to borrow the money to bury her son.
"She couldn't pay the money back so then she started to get threatened and intimidated. People turning up at the house.
"It was pretty horrendous. She was getting suicidal. She was heartbroken already and she just couldn't get the money together."
The pastor says he was able to negotiate on her behalf - something he is now having to do as part of his charity work - but "you can't do that for everybody".
A funeral without a service
The number of funeral-related fundraisers increased by 22% on GoFundMe last year, figures shared with Sky News reveal.
Individual donations to these fundraisers increased by almost 400,000.
Many of these are trying to avoid their loved one being given a public health funeral, which is what happens if families are unwilling or unable to pay.
Local authorities are legally obliged to carry out funerals in this case, but they are given little guidance from the government on what this should entail - meaning each council will have its own policy on what is or isn't included.
In some cases, a service will not be offered and a person will be cremated or buried without the presence of family members.
Other times, the family may be allowed to attend but they might not be able to get involved in the service.
Generally, people will be cremated, unless they have asked not to be for religious or cultural reasons.
Those who are buried will often have a grave with no marker, or they may be placed in a communal grave.
"For someone that's lost a child or a husband or a wife or any loved one where you just haven't been able to provide closure, there's a sense of guilt that goes with it," Pastor Mick says.
As long as funeral costs remain eye-wateringly high, families across the country will be dealing with that guilt.
This week will see the Bank of England announce its latest interest rates decision - and experts believe borrowers will have to wait longer to see rates come down.
Policymakers appear set to hold out for stronger signs the cost-of-living crisis has abated, with economists widely expecting the Monetary Policy Committee (MPC) to keep rates at the current level of 5.25%.
Rates have been held at this level since August last year.
At the last meeting in March, just one member of the MPC voted for rates to be cut by 0.25 percentage points, but the remaining eight members voted for no change.
Philip Shaw, chief economist at Investec, said: "This broad direction illustrates that collectively the committee is moving gradually towards a rate cut.
"It seems unlikely though to be ready to bite the bullet just yet and the Bank rate looks set to remain on hold at 5.25% for the sixth consecutive meeting."
Andrew Goodwin, chief UK economist for Oxford Economics, said data on services inflation and private sector regular pay growth has "likely extinguished any remaining hopes of a move in May".
As for whether rates could be cut in June or August, he said it is likely to be a "close call".
Economists at HSBC are also expecting the first rate cut to come in June.
Interest rates are used as a tool to help bring down UK inflation.
The brewing giant has announced it will invest £39m in revamping 600 of its pubs across the UK - a move that will create more than 1,000 new jobs.
The investment plan will also see pubs in its retail arm, Star Pubs & Bars, revitalised to appeal to those working from home.
Sixty-two pubs will be reopened this year and 94 sites are set for full refurbishments.
The remaining pubs will receive varying upgrades.
Heineken said it wanted to "broaden each pub's use and appeal" in response to an increase in people working from home, giving customers more reason to visit throughout the day.
The refurbished pubs will have dividing screens to create separate areas for different types of customers.
Lawson Mountstevens, chief executive at Star Pubs & Bars, said: "Fundamentally, the changes in people's working habits means that in a lot of these suburban locations, you've got more people who are around those areas a lot more.
"It's not rocket science. Those people are looking for pubs of a certain standard."
Aldi remained the cheapest supermarket last month, new analysis shows.
The retailer has won the crown of cheapest supermarket every month so far this year, according to research by Which?.
An average basket of 67 popular groceries cost £112.90 - more than £30 cheaper than the most expensive supermarket, Waitrose.
A basket of comparable items in Waitrose would cost £144.13 on average.
Here is the breakdown for each supermarket...
- Aldi - £112.90
- Lidl - £115.23
- Asda - £126.98
- Tesco - £128.17
- Sainsbury's - £131.02
- Morrisons - £134.87
- Ocado - £136.86
- Waitrose - £144.13.
Food price inflation has slowed to 4.5%, its lowest level since February 2022.
Despite being the most expensive, Waitrose and Ocado were the only grocers to win new shoppers in the first three months of the year, according to research by Kantar.
Every Monday we get an expert to answer your money problems or consumer disputes. Find out how to submit yours at the bottom of this post. Today's question is...
"My daughter recently bought a flat and has since learnt there is an extra £600 a year management fee that was not declared by the vendor during the sales process. We have been told that the vendor was heavily involved in negotiating the management contract. Can we complain?" J Mills
Serena Amani, managing director at Monarch Solicitors , has this advice...
The general principle when buying a property is "buyer beware", which means the onus is on the buyer to perform their due diligence before contracting to purchase.
The buyer's conveyancing solicitor interrogates the contractual documentation and raises relevant enquiries to ensure the full facts and obligations are available to the buyer to make an informed decision.
In this situation, it appears the seller has failed to disclose the management fee - we assume relating to the services provided to the estate.
We can't give specific advice as we don't have access to the contractual documentation. However, we would suggest:
- To check if the obligation to pay a management fee is set out in the lease if it is a leasehold property, or the transfer deed if it is a freehold property. These documents should contain what services are provided and what the related charges are. The most common scenario is that of a leasehold flat. In this situation the services shall be set out under the service charges section. Generally, there is a provision that allows a management company to charge a management fee as a percentage of the overall service charge bill which is shared among all the leaseholders based on the size of their apartment.
- If the obligation to pay the management fee is in the contract and your conveyancer failed to notify you of this obligation, there is a potential negligence claim against the conveyancer which can be pursued through their complaints process and escalated to the legal ombudsman.
- In the rare instance that the management fee is not stipulated in the contract, then you may wish to contact the management company to obtain certified accounts for the services provided and ask them on what contractual basis they are charging a management fee. Management companies are obliged by statute to provide this information.
- If there is no contractual basis or the fees are unreasonable then you may consider bringing a claim before the property tribunal. The tribunal has the power to make a ruling on the reasonability of the management fees. It should be noted that it can be a long and arduous process and legal fees are not always recoverable even if successful.
- Where a seller has supplied misleading information about a property that materially influenced the decision to purchase the property, this could give rise to a claim for misrepresentation. Likewise, intentional concealment of this information during the sales process could constitute a breach of contract or misrepresentation.
For more specific advice, you may wish to contact a property lawyer experienced in the conveyancing process and service charge disputes.
This feature is not intended as financial advice - the aim is to give an overview of the things you should think about. Submit your dilemma or consumer dispute via - and please leave your contact details as we cannot follow up consumer disputes without them.
- The form above - make sure you leave a phone number or email address
- Email [email protected] with the subject line "Money blog"
- WhatsApp us here .
The long-awaited arrival of the sun in the last few days may have got you thinking ahead to the summer... which for many means holidays.
New analysis sent to the Money team has revealed the holiday resorts that Britons have been searching for over the last few months - although it's not a particularly sun-soaked destination that has come out on top.
Amsterdam is the most in-demand holiday destination for the UK, according to a study by Desert Safari Dubai Tours.
The company looked at Google search data over the past 12 months to find which holiday destinations were most popular in the UK, using terms such as "holidays to", "flights to" and "trips to".
Some 57,507 searches were carried out each month for trips to Amsterdam.
The second most in-demand was Dubai , with an average of 52,544 monthly searches.
Here is the rest of the list...
- New York - 51,169
- Paris - 43,326
- Tenerife - 43,305
- Barcelona - 41,664
- Dublin - 38,801
- Gran Canaria - 33,907
- Milan - 28,549
- Istanbul - 28,097
Meanwhile, data from holiday booking site Expedia suggests Britons are chasing the sun over the summer.
Its trending destination data shows a 50% increase in searches for mainland Greece - while its islands of Santorini and Corfu remain popular.
Interest is also surging in Mediterranean gem Malta (up 25%), seen as a more affordable destination.
Searches are also up 50% for Albania , which has seen a surge in interest due to social media.
The short-haul hotspot of Tunis has seen searches rocket by 130%.
We're back for another week of consumer news, personal finance tips and all the latest on the economy.
This is how the week in the Money blog is shaping up...
Today : Every week we ask industry experts to answer your Money Problems . Today, a Money blog reader believes they may have been misled when buying their flat - but what can they do?
Tuesday : This week's Basically... explains everything you need to know about the Bank of England, ahead of Thursday's base rate decision.
Wednesday : We speak to the chef at Tom Kerridge's two-starred pub The Hand And Flowers in Buckinghamshire for his Cheap Eats.
Thursday : It's decision day for the Bank of England, and while interest rates are expected to be held at 5.25%, we may learn more about when a cut will come. Savings Champion founder Anna Bowes will be back with her weekly insight into the savings market.
Friday : We will be getting the latest GDP figures on this day - which could signal the UK is no longer in recession. Plus, we'll have everything you need to know about the mortgage market this week with the guys from Moneyfacts.
Running every weekday, Money features a morning markets round-up from the Sky News business team and regular updates and analysis from our business, City and economic correspondents, editors and presenters - Ed Conway , Mark Kleinman , Ian King , Paul Kelso and Adele Robinson .
You'll also be able to stream Business Live with Ian King weekdays at 11.30am and 4.30pm.
Bookmark news.sky.com/money and check back from 8am, and through the day, each weekday.
The Money team is Emily Mee, Bhvishya Patel, Jess Sharp, Katie Williams, Brad Young and Ollie Cooper, with sub-editing by Isobel Souster. The blog is edited by Jimmy Rice.
You filled out the job application, got the call (they're interested, phew!), but now... it's interview day.
If the thought of selling yourself to a stranger brings you out in a cold sweat, you're not alone - but you can help yourself by not making the following common mistakes...
1. Not dressing app ropriately
Paul Webley, managing director of Blaze Media Digital Marketing Agency in Merseyside, says: "If you are coming for an interview in a marketing agency, dress smart. No need to be in a suit. It's cute if you are but just dress how you would expect to dress in the job and, if in doubt, err on the side of being slightly smarter.
"With us, there are loads of photos of the team in the office on the website and socials (which you should have looked at) so there is no excuse."
Tell us your interview mistakes/stories/tips in the comments box
2. Handshake mishaps
Paul's second interview mistake is: "This one is a real pet hate and probably doesn't matter as much in the current world but... learn how to shake a person's hand. You have to do this within every job from time to time.
"There is nothing more off-putting than a limp shake. Having a firm, polite handshake is a basic human skill in business and beyond."
3. Complaining
This is another one from Paul: "We had someone a few months ago tell us that they didn't think they should have to come into the office for an interview. This was for an office-based role. If they don't think it's worth coming in then the job is not going to be for them."
4. Not checking your tech
Tas Ravenscroft, senior consultant at recruitment firm Cherry Pick People , says: "Overlooking details like the interview location or the platform being used (such as Teams), and not testing your tech beforehand, can disrupt the interview process. This is especially crucial as most first interviews are now conducted via video conferencing."
5. Bad mouthing previous employers
Tas says: "We see that candidates sometimes feel too comfortable on interview and decide to talk about their past experiences (if aggrieved) negatively, which is a big NO. Instead, my advice is to focus on the lessons learned and how you've grown from challenges in your career."
6. Not asking questions - or asking about benefits or sick pay policy
Tas says: "There are no right or wrong answers to this, but asking questions at the end of the interview is a big YES. It shows you're interested, engaged and would like the opportunity to either progress or land the role.
"I'd say in your first interview, ask about company culture, day to day tasks, expectations of this role, who's the best performer and why?
"Questions I'd stay away from are benefit-related questions, or I recently had someone ask what the sick pay policy was like in the first interview… Safe to say they didn't get invited back. If you work with a recruiter, you will have salary and benefits info before, so no need to ask on interview."
7. Not showing enthusiasm
For Mike Carlucci, managing director of Reading-based Italian-food importer Tenuta Marmorelle , this is a big one: "A lot of people at the moment are applying for everything and anything. They apply for hundreds of jobs.
"The result is that you get applicants who are not enthusiastic or passionate about the role or sector as they see it just as a job. There are few people looking for actual careers at the moment. In our industry, the food industry, you need to have passion and enthusiasm."
8. Talking too much
Andrew MacAskill, founder of Executive Career Jump , says: "Sometimes this is down to nerves, other times it is down to overthinking and often it is due to the questions being too broad, which leads to them saying lots and hoping the right answer is in there somewhere."
Ian Nicholas, global managing director at Reed , says a common slip-up people make is to carry on talking after giving their answer.
"Some interviewers may purposely leave a pause just to see how the interviewee will react under the pressure - so be confident in what you've said and know when you've finished."
9. Under-preparation
Habiba Khatoon, director of Robert Walters UK , says: "This means they haven't researched the company, are unaware of the key aspects of the role they are interviewing for and can't make connections between their CV and experience and the role.
"Most interviewers can easily catch on when a candidate has turned up unprepared and when they do, they can lose interest in that candidate quite quickly."
Italian food importer Mike agrees: "It is so important to spend five minutes to go on to the website, see what the company does, how they started and any general information you can get. This really makes someone stand out from the 100s of applicants."
10. Being late - or too early
James Rowe, managing director of the Recruitment Experts , says: "I would suggest arriving 20 minutes early to give you time to prepare, but don't walk through the door too soon! Turning up five to 10 minutes prior to your interview start time shows you're punctual but won't rush the hiring manager… they need breaks too!"
By Brad Young , Money team
Almost half of Britons (45%) subscribe to two or more streaming services, according to comparison website Finder, but box office figures show the theatre-going experience is making a comeback.
The pendulum is swinging back from streaming-first to theatre-first releases, and streaming platforms like Amazon and Apple are making moves on to the big screen with the likes of Saltburn and American Fiction, or Killers of the Flower Moon and Napoleon.
That means movie-lovers are facing a conundrum, according to a senior media analyst: should they prioritise spending cash on trips to the cinema or on streaming if they want to see the biggest and best movies?
"People are making decisions on 'what am I going to allocate to the movie theatre experience, what am I going to allocate to streaming?'" Paul Dergarabedian, of Comscore, told the Money blog.
Cinema's revival is real, according to Philip Clapp, chief executive of the UK Cinema Association.
"Certainly the major US studios see the theatrical experience, the big screen experience, as where they want their major films to be and then benefitting from the promotional buzz that comes from that," Mr Clapp said.
Disney chief executive Bob Iger said last year that theatrically released films were "great sub drivers".
"We benefit greatly from the power of our great films, they drive so much engagement and so much interest in our platforms," he said, pointing to Moana, Marvel, Star Wars and Avatar.
Mr Clapp added this year was a "key stepping stone" to an offering similar to before the pandemic, but cinema wouldn't be back to full strength until next year.
In the pandemic, studios experimented with straight-to-streaming releases, which continued even after restrictions fell away.
Mr Dergarabedian said: "When the pandemic hit it was a real stress test on the industry because a lot of people thought theatrical was dying on the vine and that it would be going away at some point in the near future - and then the pandemic accelerated that demise in the minds of some."
But audiences have voted with their feet and instructed studios they want more variety: international films, stadium concert films, videogame adaptations, prestige films and horrors.
Smile, a Paramount horror movie on a $17m budget that could have been straight-to-streaming, had a "great result" at the box office, said Mr Dergarabedian, as did Five Nights at Freddy's.
Low and mid-budget movies have been the slowest to recover but are returning to the big screen, making the theatre offering more diverse this year, Mr Clapp added.
Mr Dergarabedian said Universal's "diverse portfolio" was the one to beat: it spent the last year putting out everything from action films like Fast X, prestige movies like Oppenheimer, animations like Migration and some spookier offerings too.
Going theatrical still comes with a risk, the analyst said. A flop on the big screen leaves studios with a big hit to their bottom line, having spent large amounts on distribution and marketing.
But films "tend to have more value" once they arrive on a streaming platform if they were released in cinemas first, including lower budget movies.
Be the first to get Breaking News
Install the Sky News app for free

IMAGES
VIDEO
COMMENTS
5) Make your transportation plan. The next step in how to plan a backpacking trip is to make plans for getting to and from the trailhead. If your trail is a loop, you can typically leave your car at the trailhead parking area (check to see if there is an overnight fee or parking permit required). If you're doing a one-way hike, you have a few ...
This article is one of Backpacking Light's curated gateway pages (a trailhead, so to speak). Think of it as a starting point. Here, you'll find information and resources about how to plan a backpacking trip. We've got lists of our favorite software, gear guides for navigation and trip planning, video and podcast embeds, and other trip ...
Here's a helpful formula for estimating travel times: Average hiking speed on generally flat ground is ~2 miles per hour (generally 1-3 mph). Add 1 hour of total hiking time for every 1,000 feet of elevation gain. Plan for about 5-15 minutes of rest for every hour of hiking. With a larger group, expect more breaks.
Trip Planning. Photo: Peter Cade/Stone via Getty Images. For your first overnight, choose an easy route with low mileage and manageable elevation gain. Remember, you'll hike slower with a full pack than you might on a regular dayhike. Apps like Gaia GPS are useful for finding route suggestions, trail info, and maps.
Backpack. Choose an internal frame backpacking pack, preferably from a company with a lifetime warranty. For overnight trips, 35-50 liters should be sufficient; multi-day trips will require 50-75 liters. Consider the gear requirements of the activities you plan to do on your trip (fishing, climbing etc.).
Find planning resources (like my expert e-guides and Custom Trip Planning) with detailed information about your trip, including: • When and how to apply for a backcountry permit if one is required—which is months in advance of your trip dates for popular parks like Grand Teton, Yosemite, Mount Rainier, Glacier, and Grand Canyon.See my "10 Tips for Getting a Hard-to-Get National Park ...
In addition to the map you used to plan the trip, bring a compass (and know how to use it), whistle, an emergency bivy or mylar thermal blanket, a knife, gear-repair kit or simple duct tape, and ...
Discover your next great backpacking trip with Backpack Map, a free, comprehensive trip planner. WIth the ability to search and compare over 500 backpacking destinations across the United States as well as view site links, restrictions, maps, and more, Backpack Map is the essential guide for backpackers everywhere.
For example, planning a backpacking trip high into the Rockies where you'll be staying at rustic campsites is going to be very different from trekking in Patagonia where you have plenty of hostels and refugios to choose from. These will both be different from hiking through waterfalls in the Amazon jungle or going down into the Grand Canyon ...
Route selection and timing: Using a backpacking trip planner can be invaluable in determining the most suitable route and estimating the time needed to complete each section of the hike. Weather forecast : Relying solely on historical temperature data can lead to inaccurate predictions, so it's essential to check the latest weather forecast ...
Focus on replicating the elements of a real trip: hike with a loaded pack, refill your water bottles, change layers, set up your shelter, cook a meal, etc. 7. Conduct a Final Check. In the days ...
If you're new to backpacking, check out our 12 Tips for Planning Great Backpacking Adventures Tutorial. Plan your trip to match your goals for the most enjoyable experience. REST BEFORE THE BIG DAY - As your trip date approaches, plan to rest for a few days, or even a whole week before your trip. This will give your body a chance to fully ...
This Backpacking Trip Planner is a highly interactive workbook designed to walk you through all the important decisions needed to plan and prepare for a backpacking trip. It includes: 9 interactive worksheets covering food, water, itinerary, gear, emergency plan, and more. Tips and recommendations to guide new backpackers through prep and gear ...
The Hungry Hiker Backpacking Trip Planning Masterclass will cover everything (in detail) from how to prepare, research and plan for your trip to the backpacking gear you'll need. This masterclass also includes navigation and trip planning video tutorials and digital and printable trip planning resources along with tips and tricks for first ...
I created this step-by-step travel guide to prove that planning budget travel doesn't have to be daunting — whether you're backpacking through Europe or just a budget-minded independent traveler. This guide is broken down into different phases of the planning process: Initial Trip Planning; Budgeting and Money; Packing Lists and Advice ...
Outgoings. In this section you can plan the travel expenses of your trip. Simply assign expenses to a waypoint or to the whole trip and your expenses will be calculated. The travelers and the number of nights are included in the calculation, so you can easily and quickly adjust your travel plan and immediately see the impact on your travel budget.
Hiking Gear Preparation Checklist. 7. Just Show Up. [Show More] 1. Finding Cheap Flights. The first thing we have to do to plan a backpacking trip is to look for the best deal on flights from our home country to our destination.
Step 1: Plan Your Backpacking Europe Trip. Step 2: Get Your Gear for Backpacking Europe. Step 3: How to Get Amazing Accommodation in Europe. Step 4: Get Around Europe on the Cheap. Step 5: Save Money While Backpacking Europe. Step 6: Find Out What to See and Do in Europe. Get Your In-Depth Budget Guide to Europe!
Purchase a Premium Subscription and get a one-year subscription to The Big Outside at 33% off the usual price PLUS one custom trip plan and a free e-guide (a $380 value for $339.95).. Or choose my premier Talk to Michael Subscription and get the perks of a premium subscription along with a comprehensive phone consult and unlimited emails to talk trip brainstorming, gear, skills coaching, and ...
Backpacking Gear Checklist. This is the backpacking gear checklist Mark and Katie use for 3+ Season trips (most summer, spring, and fall conditions and locations). For winter trips, or for more extreme conditions, they change the items on this list. This list is considered "Light" but not "Ultralight".
Planning for elevation doesn't apply exclusively to mountainous regions for backpacking trips. Distance is a vital factor to consider when planning an adventure, but the elevation gains will ...
2. Rain. Even in the driest of seasons, you could run into some wet weather. Always pack proper rain gear on any Scout backpacking trip, even if there's 0% chance of rain in the forecast. That includes a rain jacket, a pack cover, and a rain fly for your tent. 3.
Paris's public transport authority has been accused of initiating 'a bit of a racket' after raising the price of Métro tickets by more than 85% and doubling the cost of bus tickets during ...
The company looked at Google search data over the past 12 months to find which holiday destinations were most popular in the UK, using terms such as "holidays to", "flights to" and "trips to".