- Recreational Day Trips
- Longer Touring Excursions
- Straight Shaft
- Solo Canoeing
- Recreational Fishing
- Longer Fishing Excursions
- High-Visibility
- Hook Retrieval
- Versa-Lok Ferrule (Adjustable)
- Snap-Button (Fixed Length)
- All Sale Paddles
- New Arrivals
- All Apparel
- Accessories
- Cosmetic Seconds
- All Sale Items
- Bending Branches Team
- National ProStaff Team
- Regional Ambassador Team
- Wood Paddle Care
- Composite Paddle Care
- Factory Tours
- Canoe Sizing Guide
- Solo Canoe Sizing Guide
- Pack Canoe Sizing Guide
- Kayak Fishing Sizing Guide
- Kayak Sizing Guide
- Rockgard® Edge Protection
- Bent vs. Straight Paddle
- Paddles for the Solo Canoeist
- Versa-Lok Ferrule System
- Snap-Button vs Plus Ferrule
- Plus Ferrule System
- New At Bending Branches
- Black Pearl ST
- Dealer Locator
- Paddle Finder
- instagram Instagram
- twitter Twitter
- Learn Blog FAQ's Cosmetic Seconds Wood Paddle Care Composite Paddle Care Factory Tours Paddle Sizing Canoe Sizing Guide Solo Canoe Sizing Guide Pack Canoe Sizing Guide Kayak Fishing Sizing Guide Kayak Sizing Guide Choosing a Canoe Paddle Rockgard® Edge Protection Grip Guide Bent vs. Straight Paddle Paddles for the Solo Canoeist Choosing a Kayak Fishing Paddle Versa-Lok Ferrule System Snap-Button vs Plus Ferrule Plus Ferrule System Product Highlights New At Bending Branches Black Pearl ST

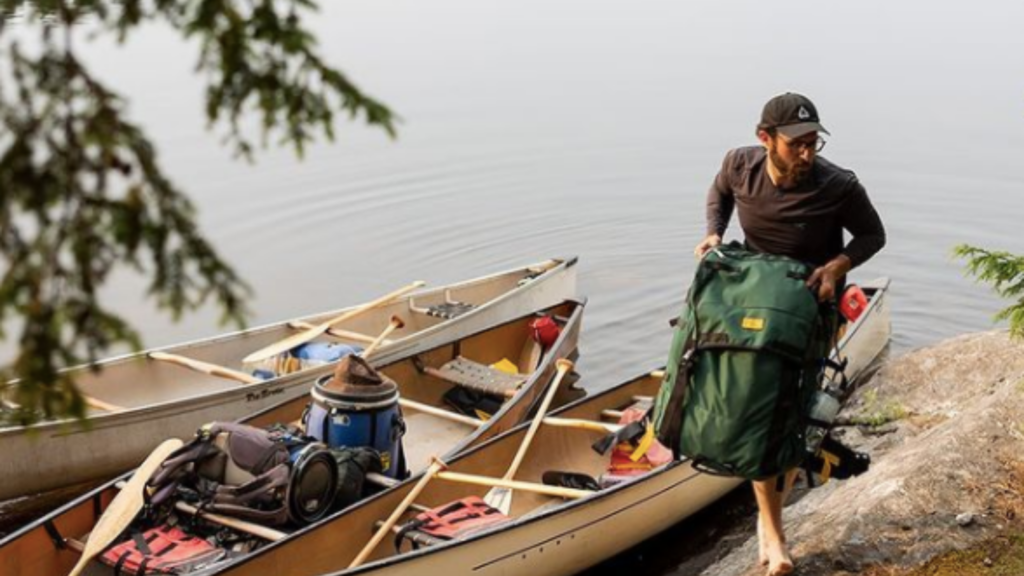
The Best Canoe Trip Portage Packs
7-minute read Choosing canoe packs will be a one-time purchase for most people if done correctly. Quality packs that are well-cared-for will do their job and last many, many years—even decades.

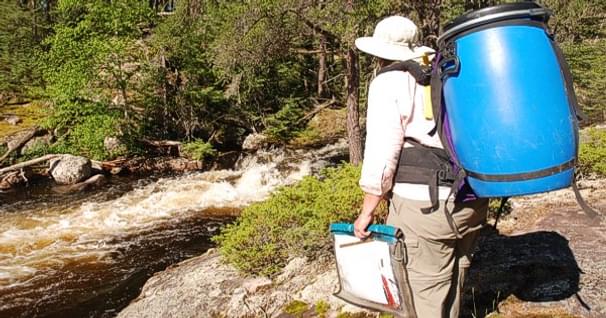
(Photo courtesy of Sharon Brodin)
In this post, we’ll focus on packs for wilderness canoe trips that involve several portages, including lengthy ones—like most you find in the Boundary Waters. These kinds of trips are different than river trips and others that have either very short portages or none at all.
What to Look for in a Canoe Trip Pack
There are a few things to take into consideration when it comes time to shop for canoe packs: What size(s) do you need? Do you plan to go on most of your trips alone or with one other person? Or do you like the idea of bringing your family or other friends along? Knowing this will help determine the best size packs for you. Your goal will be to fit all your gear into as few packs as possible to minimize the number of trips across the portages. So they’ll need to be quite large. A good rule of thumb is to buy the largest pack you can afford. Toughness. These packs will get tossed around, slung up into trees, scraped on rocks and get weather-beaten. You’ll want the material, straps and stitching to be durable enough to endure rough treatment over many trips and many years, no matter the conditions. (We have a list of suggested brands below!) Comfortable and supportive. When loaded down your packs will be heavy. You’ll want comfortable straps and solid support when you’re carrying them up and down hills, through mud, over rocks and among tree roots on those long portages. Waterproof—maybe. It’s not a deal-breaker. You can also pack everything inside a heavy-duty large garbage bag in the packs. But you can also consider a waterproof pack. The one thing you don’t want is wet gear!

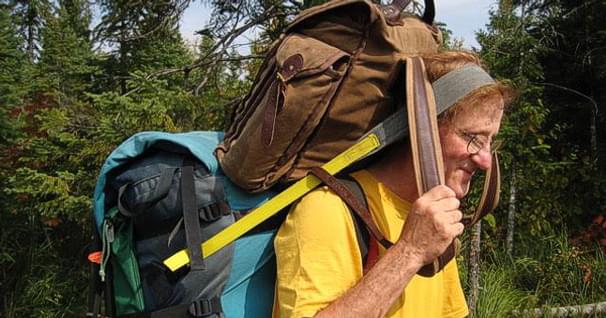
(Photo courtesy of Les Voyageurs)
Look and feel. Some canoe trippers love the idea of using packs that are more traditional. Scott Oeth, owner of Bull Moose Patrol , is one of them: “As someone with a love for the legend and lore of the northwoods, the classic canvas portage pack, ash pack basket and wooden wannigan are my favorites to use. These packs, made with natural materials, ooze canoe country romance, especially when paddling one of my wood-canvas canoes!”
How You’ll Use the Packs
If you’re with a group on your canoe trip, generally you’ll use your packs in these ways:
- Food pack. You want all your food in one pack, with a rope system for hanging if you’re in bear country (for example, the Boundary Waters or Quetico). Some like to use bear barrels for their food instead.
- Equipment pack. For your tent(s), tarp, rope, saw, stove, cooking gear, etc.
- Personal packs. For your sleeping bags, sleeping pads, clothing and toiletries. Pack light and you can double up on these—two people per personal pack.
The bigger your packs and the more you can stuff in, the less you’ll need to hike your portages more than once.
Who Makes Canoe Packs?
Duluth pack.
Camille Poirier filed a patent for the original Duluth Pack in 1882. They’ve been around! Packs from the 70s may not look pretty anymore, but they’re still being used on canoe trips, as you can see in the photo above. Duluth Pack canoe packs come with a lifetime warranty for craftsmanship. They’re made of durable canvas available in several color choices. The leather straps and metal rivets and buckles are designed to last. The Duluth Pack folks will repair normal wear and tear issues for a reasonable fee.

Besides packs, they make bow bags, thwart bags, map cases, padded seats, paddle sacks and tump lines (traditional Voyageur straps that go around your forehead). All their packs are handcrafted at their Duluth, Minnesota headquarters.
Granite Gear
Granite Gear was founded by two canoeing buddies and is headquartered in the small Minnesota town of Two Harbors. Similar in style to Duluth Pack, Granite Gear is made of denier nylon instead of canvas, making them slightly lighter. Some of their packs are waterproof with a roll-top option like you see in dry bags. They offer comfortable and adjustable straps for your shoulders and waist. They also offer a barrel harness, thwart and bow bags and other handy storage packs.

One organization that uses Granite Gear canoe packs is Les Voyageurs . This non-profit group takes young people on month-long canoe trips in the far north, so their packs have to be tough. “Our program has been using Granite Gear canoe packs for a long time, as well as a custom pack-on-frame design that we created many years ago,” said Program Director Zach Fritz.
Portage North
Kondos Outdoors was founded by a husband/wife team in 1980 in Ely, Minnesota. Their high-quality canoe packs gained a great reputation over the past decades. In 2017, Kondos was sold and is now Portage North, still at their Ely headquarters. Their line of canoe packs continues the Kondos tradition of reliability, durability and value. Their packs are traditionally designed and hand-constructed of tough denier nylon. Food packs, equipment packs, personal packs and barrel slings are all available.
Cooke Custom Sewing
Another canoe pack company started by a husband/wife team, Cooke Custom Sewing has made and sold hand-crafted portage packs since 1980. Though his wife passed a few years ago, Dan Cooke continues making packs at the Lino Lakes, Minnesota headquarters. CCS offers both traditionally-shaped portage packs and hybrid packs, barrel packs and food packs, all made from tough denier nylon. They also offer bow and thwart bags, canoe covers and seat pads.

(Photo courtesy of Bull Moose Patrol)
“If I had to pick one ‘do it all’ canoe camping pack, it would be my Cooke Custom Sewing (CCS) 60L Barrel Pack,” said Scott Oeth. “Like all of Dan Cooke's products it is very well made, robust and highly functional. The pack carries heavy loads comfortably, rides in a canoe well and with the "blue barrel" inserted, provides easy, waterproof, worry-free packing.”
Frost River
Frost River is another Duluth, Minnesota-based maker of traditional waxed canvas portage packs of all shapes and sizes. Hand-crafted to last a lifetime, you’ll find packs for your personal gear, equipment, food and kitchen, bow and thwart, pack liners, pack baskets, leather accessories and more. These are sized to fit as much as possible so you make fewer trips across every portage. “We stand behind all our craftsmanship and hardware. We guarantee the seams on your Frost River bag will stay sewn together, the rivets will hold, the zippers will work, and the buckles will do their job for as long as you (or your grandkids) have your bag,” says the Frost River website. When your packs suffer normal wear-and-tear over the decades, the team at Frost River will repair them at a reasonable rate.
SealLine is based in Seattle, Washington. Their packs and dry bags aren’t for canoe portaging specifically, but adapt well for that purpose. They’re completely waterproof and come in a variety of sizes and colors. There are other dry bag-style brands similar to SealLine that would also be good candidates for canoe trip packs.

(Photo courtesy of Caleb Young)
Scott Oeth has guided wilderness canoe trips for years. He said, “On the canoe trips I guide, I often issue participants large roll-top PVC dry bags [like SealLine] with good shoulder straps. These work pretty well, but you need to do a good job of pressing air out and getting at least three tight rolls before buckling to prevent leaking. “Also, I have concerns about these packs wearing due to abrasion over time, especially if dragged across rocky campsites and portage landings.”
* * * * *
We hope you found this helpful. Your investment in good packs will pay off with years of use and enjoyment!
Do you have questions about paddles for your canoe trip, too? Contact our friendly customer service team today: 715-755-3405 • [email protected]
More for you...
- Canoe Paddles for the Boundary Waters
- The Most Basic Canoe Strokes to Master
- Top 6 Photography Tips for Wilderness Canoeing
You may also like

How to Get Started with Canoe Camping

Canoe camping is one of the oldest forms of travel and exploration of the wild places in the United States. Native people from tribes across the continent would fashion these versatile watercraft in order to move across the landscape via navigable waterways, fish, and visit other communities. Fur trappers and explorers followed suit when America was young, hauling pelts and supplies across untracked wilderness in canoes, through regions where foot and horse travel was impractical if not impossible.
Modern canoes, obviously, look quite a bit different than their dugout or birchbark ancestors, but they are still the right craft to explore many of the beautiful places in our country to which no path leads.
The Basics of Canoe Camping

What is Canoe Camping?
Canoe camping is the water-lover’s answer to backpacking. Self-sufficiency, challenge and exploration all come together to bring paddlers to beautiful campsites on lakes and rivers throughout the country. Canoeists will pack everything they need for the trip, whether it be one night or ten, into their boat. Then they paddle and fish by day while camping under the stars at night.
Depending on your expertise and your goals for the trip, you can choose a canoe camping trip that is just right for you. Here are a few tips to get you out on the water.
1. Plan your trip
Choose a lake or reservoir near you, and plan a one or two night trip for your first time out in a canoe. By paddling still water where you end up at the same place you started, you will not have to worry about ‘shuttling’ vehicles, and you will have a quick-bail option if things aren’t working out.
Once you start paddling anywhere with a current, many more skills come into play on the water as well. You will have to know how to steer your boat in a strong current, learn about ferry angles (or crossing the current), and be extremely competent in righting a capsized boat.
Using waterway maps and compass to navigate is a whole new skill set as well, but is essential to avoid becoming stranded or lost in a wilderness area.
Especially when you are traveling on the water, it is important to never travel alone. Plan your first trip with a close friend or family member, or better yet, join up with a group of more experienced canoeists. Learning from others is the best way to grow your skills and travel safely.
2. Think Analog
Always bring a hardcopy map of the area in which you’ll be paddling. Extreme temperatures can quickly drain batteries, and wild areas often don’t have good (or any) cell phone reception.
It’s important to have a basic understanding of orienteering and know how to use a map and compass.
3. Remember the Elements
When packing and planning your trip, think carefully about the time of year and what sort of natural elements you’ll be up against. Wind plays a huge factor in any water-travel. Even a steady breeze can quickly exhaust paddlers, making for longer days as well as plummeting temperatures.
Sun-exposure is another concern, so be sure to check the packing list below and make sure you are prepared for hours without shade. For any warm or hot weather trips, bring extra water and always have water purification. Finally, expect bugs. If there’s water, there will be bugs.
4. Balance the Boat (Keep it Light)

To make your life easier and safer on your next canoe camping trip, carefully balance the weight of your gear both aft and stern and on both sides. A badly balanced canoe is much more likely to tip over and will be difficult to steer. Keep your gear simple and light to avoid weighing down the boat in the water as well. A boat low in the water is easy to swamp.
5. Practice Paddling
Spend several days paddling your canoe around on flatwater, before you load it up for the trip. Learn how to steer effectively on both sides, move around safely in the boat, and practice front and back paddling position with your partner if you have one. Far too many people assume that because they took the canoeing class at summer camp when they were 12, they will be fine.
6. Always Take Water Seriously

This is the most important tip of canoe camping. Getting out on the water for a weekend of camping is a great feeling, but rivers and lakes can be dangerous to the unprepared. Wear a life-jacket, stay sober on the water, and don’t take unnecessary risks. Know where you’re going, stick to the plan, and stay safe.
Canoe camping gear list

Much of what you pack for your canoe camping trip will be very similar to backpacking or (basic) car camping. Before the checklist, however, let’s talk about the one biggest difference.
For a successful canoe camping trip, you need to be able to keep all your stuff dry, whether from the rain, or a potential flip. For a long time, canoeists used a traditional ‘wannigan’ to protect their gear from water. More than just a fun word to say, a wannigan is a water-tight, often wooden container, built to fit snugly into the bow of a canoe. In more recent decades, the water-proof barrel, complete with trump strap for portaging, became the go-to option.
Lucky for us, modern-day drybags, like those made by NRS or Watershed, are lighter, tighter and more versatile. They can be pricey, but they’re an invaluable addition to any camping kit. When you’re not using them, you can roll them tight and even leave them outside your tent if you don’t have room. Their soft sides make them moldable to any shape, and they are much lighter if you do decide to portage.
Besides a water-proof container of some kind, you will also need to pack the following gear specific to water-travel:
- Life-jacket
- Other flotation (depending on state waterway regulations)
- Extra paddle
- Paddle gloves (depending on personal preference)
- Boat shoes/sandals
- Plenty of sunscreen
Camping Gear for Canoe Camping:
- Sleeping bag/sleeping pad
- First aid kit
- Headlamp/lantern
- Stove/cookware
- Personal mess kit/utensils
- Water storage/purifier
- Meals/snacks
Personal Gear:
- Raincoat/pants
- Mid-layer insulation
- Puffy (if applicable)
- Dry camp shoes
Selecting the Right Canoe for You
Single or double.

In all of the categories explained below, you will have the option of choosing a single or double seated canoe. If you have a dedicated adventure partner, children, or a dog, then the double will almost always be right. Doubles can be unwieldy to navigate alone, but not impossible, and they allow for you to bring more gear. Keep in mind that the added length can make storage and transport more challenging.
A single is for the light and fast canoeist who is ready for the experience whether anyone else is going or not. Single canoes are very maneuverable but do not have a great deal of room for gear. They also tend to be more affordable and easier to drive to the put-in.
Open-Deck Canoes
The traditional, open-deck canoe is a classic for a reason. Affordable, versatile and durable, these canoes can find a home on any slow-paced river or lake. Emphasis on ‘slow-paced.’ These models are not meant to go crashing through the rapids no matter what Disney’s Pocahontas taught us. Transport can be a challenge, without large trucks or trailers, but YouTube is full of ingenious solutions for the dedicated.
Within this category, you’ll have to choose from various material construction such as wood, poly, and fiberglass. Weight, cost and durability depend on the material you choose. Some will also consider opting for a square-sterned motor-mount, for returning upstream the easy way. If you plan to use a motor, make sure to carefully research captain licenses and check that you are not on a non-motorized stretch of water.
Closed-Deck Canoes
Beloved to die-hard canoeists, the closed-deck canoe keeps the traditional single blade paddle, along with the crouched position allowing the paddler to travel through more exciting waters. Also known as a ‘white-water’ canoe, closed-deck canoes cover the bow and stern storage areas, leaving only enough room for the paddler(s).
Canoe camping with one of these requires very minimalist packing but allows one to access rivers which would quickly swamp the basic model. Cost increases with this versatility, but most believe the investment to be worth it if you love canoeing.
Inflatable Kayaks, IKs, aka ‘Duckies’

A favorite of western river runners, these beauties are a fun way to play in quick current, and bumping the occasional rock won’t end your trip. Maybe from durable poly-urethene (aka hypalon), or PVC, IKs come with tie-down spots for gear bags, and use a double-bladed paddle like a kayak. They do not have much of a draft, and are perfect in shallow, rocky water, however, this also makes them difficult to paddle efficiently in flatwater to cover multiple miles a day.
The biggest appeal may be the ease of transport. IKs deflate quickly and roll down small enough to transport in a Honda Civic.
The Best Canoe Camping Spots
While canoe camping is a great option for any slow-water river or lake, there are few places across the country which boast ideal conditions for canoe camping.
The Boundary Waters Canoe Area Wilderness—Minnesota

The Boundary Waters of Minnesota has to top this list. It is the quintessential destination for canoeing and sea-kayaking. While you may not want to venture away from the visible shoreline in a canoe, as they are more difficult to navigate via dead-reckoning, there are thousands of miles of beautiful coves and cliffs to explore. Check out this insider’s ‘How to’ Guide for first-time Boundary Waters paddlers.
Everglades National Park —Florida
At the other end of the country, the Everglades offer a canoeing experience full of the beautiful details of the swamp. There are many routes to take, both through the National Park itself and the rivers nearby. As with any unique ecosystem and climate, camping in the Everglades requires special preparation and research. Paddling through the stillness of the rich air, and finding the hidden orchids and rare bird species make this a special destination.
Green River—Utah

Not into humidity? Then head out west to the Green River in Utah. Although many western rivers involve rocky rapids and narrow channels, the Green River has multiple stretches of mild gradient, winding through towering red sandstone cliffs of Labyrinth Canyon. Plan to shuttle your vehicle with a shuttle service, and spend three or four nights on the water in the high desert of Utah.
The Ozarks—Missouri, Arkansas, Oklahoma, and Kansas

As a flooded river, the calm waters of Lake Ozark offer thousands of miles of unpopulated forested shoreline to explore. This national scenic riverway spreads across Missouri, Arkansas, Oklahoma, and Kansas. The fishing offers tremendous variety, from tasty tiny panfish, to bass and giant catfish. Camping in Lake Ozark State Park is a great way to get the trip started. Because of the crowds and heat, this is a great trip to take in the spring, or go in the fall to enjoy beautiful hardwood fall colors.
Related Campgrounds:
- Trails End Campground , BWCA, MN
Popular Articles:
- Get the Latest 2024 Camping Travel Trends
- How To Find Free Camping in National Forests
- The Checklist Every First Time RVer Needs
- Find Free Camping With The Dyrt Map Layers
- The Ulimate Boondocking Guide To Free Camping
- Everything You Need To Know About Wifi For Your RV
- 7 of The Best Overland Routes in North America
- 14 Wilderness Survival Tools You Should Have in The Backcountry
- Here's What To Add To Your Primitive Camping Checklist
Lindsay DeFrates
Lindsay DeFrates is a freelance writer, mother of three, whitewater raft guide, as well as a former English teacher and Outward Bound instructor. Currently loving her sleep-deprived existence in Glenwood Springs, CO, she and the family often pack an absurd amount of stuff and their one-eyed dog, Ahab, into a mini van and get a little lost in the mountains or on the rivers of Western Colorado and Eastern Utah. She can be reached at www.roaringforkwriter.com
More Articles

25 Campers Share Their Most Ridiculous Camping Fails
This article is brought to you by Wenzel, whose butterfly chair is made with powder coated steel and water resistant polyester to ensure your next…

Go Searching for Sasquatch at These Georgia Campgrounds
The “Expedition: Bigfoot” museum is easy to pass, sitting right on the edge of Highway 551 in Georgia and surrounded by not much more than…
Canoe Packs, Barrels and Dry Sacks: A Guide to Packing Gear for Canoe Trips
- Published on November 18, 2021
It’s no surprise that canoe tripping requires a fair bit of gear and that canoe trippers love talking about their gear. However, less attention gets paid to the equipment we pack our gear into. Well, not today because in this post we’re diving into everything you need to know about canoe packs.
We’ll talk about the different types of packs, including canvas and nylon canoe packs, dry sacks and barrels. We’ll discuss which pack works best for personal gear, food and equipment and provide our top gear recommendations.
Types of Canoe Packs
Uses for a canoe pack.
- What to Look for in a Canoe Pack
Our Tops Picks for Canoe Packs
Canvas and nylon canoe packs.
Canvas is one of the original materials for canoe packs. Canvas is extremely durable and weather-resistant. In addition to canvas, you can also find the same style of canoe pack made from nylon. Nylon packs tend to be lighter than canvas packs of a similar size and are less expensive.
Both canvas and nylon are water-resistant and dry reasonably quickly, however, they are not waterproof unless you use it in conjunction with a pack liner . This means you shouldn’t pack food or personal items directly in these canoe packs. Instead, use them for everything that doesn’t need to stay dry, like a campfire grill, rope, tarp, pots and pans. Or use your canoe pack to carry multiple dry sacks (more on that below).
Dry sacks are made of durable nylon and designed to be 100% waterproof when closed correctly. Most dry sacks have a roll-top which is secured with buckles. Dry sacks typically range from 5L to 120L in size.
The 5-10L sizes are good for storing personal items in the canoe with you. We like to keep our phone/camera, sunscreen, notebook and a fire kit in a small dry sack so we can easily access them throughout the day.
20-35L dry sacks are great for personal gear like clothing and sleeping bags. However, these packs usually don’t have backpack straps ( though there are exceptions ). You can pack multiple mid-sized dry sacks inside a canvas canoe pack, allowing you to carry multiple packs at a time and use dry sacks that don’t have backpack straps.
65L and larger are typically used for personal gear, shelter and some equipment. Dry sacks of these sizes always have backpack straps for easier portaging.
Canoe Barrels
When we’re talking about canoe packs, we usually aren’t talking about canoe barrels. However, canoe barrels fill a very important role in packing your canoeing gear.
Canoe barrels are excellent for storing food. If closed correctly, canoe barrels are airtight and almost smell proof. And if the critters do smell your food somehow, pesky rodents cannot chew through a barrel. In most circumstances, bears do not open food barrels either (though there have been cases of bears chewing through barrels in Algonquin, so you still need to properly store food and keep your campsite clean!).
You might also consider a canoe barrel for personal gear if you’ll be paddling whitewater. Barrels are very durable when thrown down rapids (just ensure you have the lid securely locked) and they float.

Personal Gear
Your personal gear includes items like your sleeping bag and sleeping pad, your clothing, toiletries and items for entertainment. In most cases, each person on the canoe trip has their own personal pack. If you’re trying to pack light and share a personal pack, consider using packing cubes or tiny dry sacks to help organize your gear inside. On the larger trips we guide, participants place their clothes into a sleeping bag, and we stuff them directly in a dry pack. This keeps everything organized and makes for easy sleeping area setup.
Large dry sacks are excellent for personal gear. Consider a dry sack with shoulder straps on it so you can carry it like a backpack, like the SealLine Boundary Pack . Small dry sacks are perfect for the items you want in the canoe with you.
Some people (myself included) prefer to use a 60L canoe barrel for personal gear because of how secure and durable they are. Plus, the open top makes it easy to find items inside the barrel.
Equipment usually refers to all of the gear that is used for communal activities. This likely includes cooking gear (pots, pans, utensils, grill, stoves, oven, water filter), shelter (tents and tarps) and miscellaneous items like garbage bags, dish kits and rope.
Canvas / nylon canoe packs are often used for equipment (and, as such, are often referred to as ‘equipment packs’). Most of the equipment items don’t need to be kept dry, so it isn’t necessary to put them in a waterproof pack like a barrel or dry sack. Canvas or nylon packs tend to have more flexibility and give to them, allowing you to more easily pack awkward items like pots and grills.
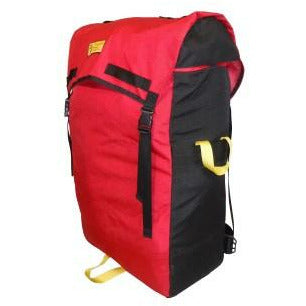
The Recreational Barrel Works Canoe Tripper Pack is a popular choice for a canvas / nylon canoe pack.
You want to carry all of your food in something that is airtight to ensure it is waterproof and ideally smell-proof (to keep critters away). Canoe barrels are the most popular choice for carrying food. In fact, many canoeists refer to them as ‘food barrels’ because they are so often filled with food. The most popular barrel is the Recreational Barrel Works 60L Barrel .
It’s important to note that food barrels are not bear-proof. While barrels do a good job of minimizing the food smell and are better than other packs, they aren’t perfect. And barrels may be durable enough to withstand the wrath of a raccoon or squirrel, however, a bear can bite through a barrel if determined. That’s why it’s so important to keep your site food-free and store your food properly overnight.
How to store your food properly is an entirely different topic that we’l likely cover in another post. However, there are two or three main schools of thought. Those that choose to hang their barrels in a tree, those that keep them on the ground dragged far enough away from the campsite, and even those who use the “bear canoe” method where you place your barrel in a canoe, and push it out on the lake (with a long line tied to shore of course).
What to Look For in a Canoe Pack
You want your canoe packs to fit all of your gear (preferably without the need to play canoe pack Tetris every morning). However, you don’t want to have packs that are so big they cannot be worn comfortably or fit inside a canoe nicely.
Canvas canoe packs are typically 75-100 L. Canoe barrels come in three sizes: 20L and 30L (great for food on a short trip or a first aid kit on a long trip) and 60L (great for food and personal gear on long trips). Dry sacks range from 5L to 120L. While it may be tempting to get a 120L dry sack (room for so much gear!) keep in mind how heavy that much gear will be.
Your canoe pack needs to be durable. The straps will get pulled when you try to force it out of the canoe; the body will get scrapped if the pack slides down rocks at a steep put-in. It’s important to be gentle with your gear, but also recognize that the wilderness is a rough place.
Body Material
Think about the material being used. Waxed canvas is a popular choice for canoe packs. For more durability, you want a heavier, thicker canvas. Many of the popular brands use a waxed canvas with a weight of around 18 oz, and this is sufficient for canoe tripping.
For dry sacks, two popular materials are polyurethane-coated polyester and nylon . Both of these are extremely durable and resistant to scrapes and abrasions.
Straps and Connection Points
The second place you’ll want to consider for durability is at the connection points between the body and the straps. When canoe packs break, most often it is at one of these connection points. How is the strap secured to the pack? Does it feel sturdy?
This will come down to the quality of the construction of the pack (and the care you take when handling the pack). Read reviews on canoe packs and avoid any that have multiple reviews about straps breaking.
Carrying Comfort
Carrying comfort is an underrated consideration when choosing a canoe pack. If you’ve ever carried a huge, lopsided pack on a long portage… you’ll know what we mean.
Canvas canoe packs can be difficult for beginners to carry. Their free-form material shape makes it easy to pack awkward-shaped equipment, like pots and fuel. But this means you have to be careful not to end up with all of the heavy objects on one side or something sharp poking out in the center of your back.
Dry sacks are fairly comfortable to carry as well, so long as they aren’t too heavy.
Canoe barrels also tend to be uncomfortable, especially when they are fully loaded. It doesn’t help that, by design, a barrel is round while your back is flat. However, you can mitigate this by choosing a barrel harness that is secure, padded and fits well for your specific body. Also, the person who carrier the barrel on the first day (when it’s heaviest) also carries it on the last day (when it’s lightest).
It may take some experimentation (and trying out your friends’ gear on future portages) to learn what kind of packs work best for your body.
Waterproofness
The degree of waterproof protection you need will depend on the type of trip you’re doing and how risk-averse you are.
Many people choose to pack their gear in 100% waterproof bags. This means their gear will stay dry in a pouring thunderstorm or in the event of a canoe tipping over. We recommend always placing safety gear (like the first aid kit and sat phone) and personal gear (like sleeping bags) in 100% waterproof packs, like a dry sack or a canoe barrel.
Some people will choose packs that are waterproof enough to stay dry in the rain but aren’t waterproof if placed underwater. Equipment that doesn’t need to stay dry (i.e. pots and pans, grills) is often placed in packs like this, usually in a canvas canoe pack. Additionally, some people will keep all of their personal gear in small, lightweight dry sacks and keep those in a backpack that isn’t waterproof.
Below we’ve highlighted a few canoe packs that we’re especially fond of.
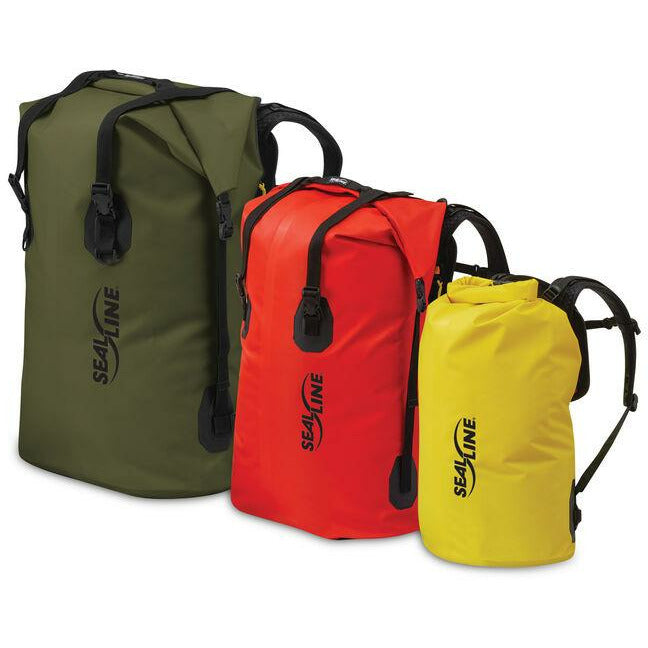
The SealLine Boundary series is one of the most popular dry sacks on the market. It offers a simple but effective design and – if closed correctly – is waterproof even in immersion. It’s available in three sizes: 35L, 65L and 115L.
Each of the sizes has a backpack harness, making them easy to portage. The harness is actually removable for added versatility.

The SealLine PRO Pack 120L is an excellent choice for a personal pack for long canoe trips. With a pack so large, it’s easy to fit all of your clothing, sleeping gear, personal items and even your tent in the same pack. The straps are comfortable for portaging and the welded seams ensure durability and waterproofness.
Canvas Canoe Pack
The Recreational Barrel Works Expedition Canoe Pack is a rugged canoe pack that will last years to come. Its simple design is easy to pack and perfect for loading kitchen gear and other equipment. The pack has adjustable shoulder and hip straps for easy portaging.
Although this canoe pack isn’t waterproof, the canvas material dries very quickly (use a pack liner for ultimate waterproofness). If you get caught in a storm or drop your pack in the lake, your pots and pans may get wet, but you won’t be carrying around a soggy pack for the rest of your trip!
Side note, the OG pack maker, Bill Ostrom, and his company Ostrom Outdoors also makes some of the finest packs around. Unfortunately we don’t carry them but make sure to check them out as well and tell Bill that Trip Shed sent you!

Canoe Barrel
The Recreational Barrel Works Canoe Barrel is the most popular maker for canoe barrels. The 60L is the standard size, though it is also available in 20L and 30L.
The barrel itself is made from durable plastic with two external handles. The lid contains an O-ring, ensuring waterproofness when secured by the metal ring.
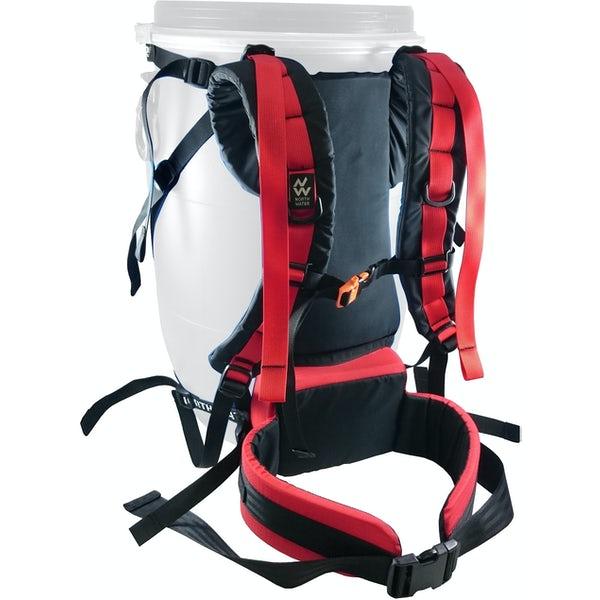
Canoe Barrel Harness
Barrels are awkward to carry on portages. To make them easier to carry, choose a comfortable barrel harness with adjustable hip, shoulder and sternum straps.
We love the North Water Quick Haul Harness as it has adjustable straps and securely attaches to the barrel (so you won’t feel it moving around while you portage). The back panel and shoulder straps are padded, to make portaging even more comfortable.
FAQs about Canoe Packs
What about the wannigan.
The wannigan had long been a staple in canoe packing. A wannigan is a large wooden box with a lid and a long strap called a tump line. To carry it on portages, the wannigan rests on your lower back with the tump resting on your forehead. It definitely takes some practice to get used to carrying it, but if you can manage it, wannigans are great for storing kitchen equipment (plus the lid is great for a kitchen counter!).
Within the last decade or so, wannigans have lost a lot of their popularity but are still used my many traditionalists. Most people opt for a combination of packs, dry sacks and barrels instead.
Can you use a backpack for canoe trips?
Yes, you can. Hiking backpacks are very comfortable to wear on long portages (they’re made for carrying, after all!). However, backpacks are not waterproof so you’ll want all of your gear to be inside small, lightweight dry sacks inside. Additionally, it’s difficult to pack large and awkward gear (pots, grills, Dutch oven) into a backpack. The main reason however, that we usually don’t use a traditional hiking pack on trips is its size in relation to the canoe. For one, canoe packs typically fit better in the canoe while paddling based on its shorter length. Additionally, hiking packs are designed to be slimmer, sit closer to the body, and as a result are taller. This ends up pushing on the inside of the canoe while you’re portaging it and can make for a bit of an awkward ride. That said, the best pack is the one you’ve got – just get out there and use it.
How do I close my dry sack to ensure it stays dry?
Most dry sacks have a roll-top with two buckles. The rolls are what keep your bag waterproof and the buckles keep the rolls secure. The biggest mistake we see with new campers and their dry sacks is not rolling the top correctly. Watch this video for a demonstration.
In Conclusion
We hope this post has helped you determine which canoe packs you need for your upcoming canoe trips. You can view all of our canoe packs here . If you have any questions, please get in touch with us and we’ll find the right pack for you!

Subscribe To Our Newsletter
Get updates and learn from the best, more to explore, the complete guide to stay warm while camping.
As temperatures drop it becomes increasingly tempting to throw on a blanket, curl up on the couch with a hot chocolate and stay as inside
Ray’s Campsite Cuisine
Campfire meals hit differently. Theres something about carrying in fresh food to a campsite and whipping up a meal to be remembered. Whether you’re hiking,
Where to See Fall Colours in Algonquin Provincial Park
Welcome to October and the arrival of peak colour in Algonquin Provincial Park! While the park is beautiful any time of year, it is especially
CampingBuffs.com
Pro Camping Tips, Gear and Reviews.

Essential Canoe Trip Pack List: Your Go-To Gear Guide for Paddling Preparedness
Ready for the ripple of water beneath your canoe but unsure of what to pack? This straightforward guide details the ultimate canoe trip pack list—everything you need and nothing you don’t for your on-water expedition. Gear up with confidence knowing you’ll have the essentials for both the paddle and the campfire.
Key Takeaways
- A well-chosen array of essential gear, including safety equipment and paddling necessities, is vital for a successful and safe canoe trip.
- Smart packing strategies, such as using dry bags for waterproofing and balancing the canoe’s load, are essential for efficiency and preventing gear from getting wet.
- Proper personal clothing, shelter and sleep systems, camp kitchen setup, and navigation and communication tools are key to comfort, safety, and enjoyment throughout the canoeing adventure.
Essential Gear for Your Canoe Trip

Embarking on a canoe trip is much like setting out on a great expedition. The canoe is your vessel, your paddles your oars, and a collection of carefully chosen gear your lifeline in the vast wilderness. Canoe tripping offers a unique way to explore and connect with nature, and canoe trips provide unforgettable experiences.
From the canoe itself to the paddles, safety equipment, and even the humble fanny pack, each item on your canoe trip packing list plays a crucial role in ensuring a smooth and safe journey.
The Canoe: Choosing Your Vessel
The canoe is the foundation of your adventure. Much like a sailor wouldn’t venture out in an unstable old ship, you must choose your canoe with care. The material, size, and weight can significantly affect your paddling experience, hence the importance of picking a model that aligns with your trip and skill level.
Whether you’re a seasoned paddler or embarking on your first canoe trip, a well-chosen canoe is a trusted ally on the water.
Paddling Essentials

Paddling a canoe resembles conducting an orchestra, where each stroke is a note and the paddle is your baton. However, orchestrating a successful canoe trip requires more than a decent paddle. Essential paddling equipment includes life jackets , spare paddles, and even a trusty fanny pack for those little extras.
These items ensure not only your safety but also your comfort and efficiency on the water.
Safety Gear Must-Haves
There’s an old saying among canoeists: “Safety first, because accidents last.” This couldn’t be more true. Essential safety gear like a first aid kit, whistle, and a throw rope is as important as your paddle or your canoe, and in many regions, a requirement to be on the water. These items are your safety net, ready to catch you when unexpected situations arise.
Packing Smart: Organizing Your Canoe Trip Gear

Similar to how a well-orchestrated symphony requires a skilled conductor, a successful canoe trip depends on smart packing. The goal? To fit your entire world – from your canoe to your camp kitchen – into a few dry bags and containers, without compromising on safety or comfort. And it’s not just about what you pack, but also how you pack it.
Dry Bags & Containers
Dry bags and containers are the unsung heroes of any canoe trip. These waterproof storage solutions are your first line of defense against the unpredictable elements, keeping your gear dry and organized despite the splashing water and sudden downpours.
From your cozy sleeping bag to your trusty first aid kit, every item in your canoe pack deserves the protection of a good dry bag.
Balancing the Load
Loading your canoe requires a balance akin to ballet – focusing on poise and precision. However, instead of executing pirouettes and pliés, you’ll grapple with dry bags, gear, and occasionally, the additional weight of a day pack. Distributing the load evenly across your canoe not only improves stability but also makes for easier and more efficient paddling.
Quick Access Items
In the world of canoeing, quick access items are the superstars. These are the items you’ll reach for without a second thought, whether it’s your water bottle during a strenuous paddle, your sunscreen on a sunny day, or a snack to refuel. Keeping these essentials within easy reach can make your canoe trip smoother and more enjoyable.
Clothing & Personal Items Checklist
In your preparations for the canoe trip, bear in mind that your clothing and personal items serve more than just being on a packing list – they essentially constitute your portable home. From your paddling gear and campsite wear to personal care essentials, each item plays a key role in ensuring comfort, safety, and enjoyment during your adventure.
Apparel for Paddling and Portaging

Whether you’re gliding through calm waters or tackling a challenging portage, the right apparel can make all the difference. Your paddling clothes should be:
- Quick-drying
- Comfortable
- Allowing you to move freely
- Protecting you from the elements
And don’t forget your portaging gear.
Just as a knight wouldn’t go into battle without armor, a canoeist shouldn’t embark on a portage without proper clothing.
Campsite Wear
After a long day of paddling and portaging, slipping into your campsite wear is like a warm hug. These are the clothes you’ll relax in, cook in, and sleep in. They should be warm, comfortable, and quick-drying, preparing you for chilly nights and dewy mornings. And with the right campsite wear, you won’t just feel great – you’ll look the part too. Be sure to check out our comprehensive camping checklist article here.
Personal Care Essentials
Personal care essentials may seem like a small part of your canoe trip packing list, but they’re vital for your comfort and hygiene. From toiletries and insect repellent to medications, these items ensure that you can take care of your personal needs even in the heart of the wilderness.
After all, a happy camper is a clean and comfortable camper.
Shelter and Sleep Systems
Much the same as a tortoise toting its home on its back, you’ll be transporting yours in your canoe. Choosing the right shelter and sleep system is crucial for a good night’s rest, preparing you for another exciting day of paddling. Whether you prefer the coziness of a tent or the freedom of a hammock, a good shelter can make your canoe camping trip all the more enjoyable.
Tents and Hammocks

Tents and hammocks are the two main contenders for your shelter of choice on a canoe camping trip. Each has its strengths and weaknesses, and the best choice depends on your personal preferences, the nature of your trip, and the camping conditions you’ll face.
Whether you choose the enclosed comfort of a tent or the open-air freedom of a hammock , make sure it suits your needs and provides a comfortable and safe place to rest at the end of the day.
Sleeping Bag and Pad
After a long day of paddling and exploring, your sleeping bag and sleeping pad are your ticket to a good night’s sleep. Choosing the right ones depends on the weather conditions, the weight you’re willing to carry, and your personal comfort preferences.
Whether you opt for the fluffy warmth of a down sleeping bag or the quick-drying convenience of a synthetic one, the right sleeping system can make all the difference in your canoe camping trip.
Extra Comforts
Sometimes, it’s the little things that make all the difference. Extra comforts like a packable pillow or earplugs might not seem essential, but they can significantly enhance your sleeping experience. After all, a well-rested paddler is a happy paddler, so why not add a touch of luxury to your wilderness adventure?
Camp Kitchen and Food Storage
Eating well is about more than just filling your stomach – it’s about fueling your adventure. Setting up a functional camp kitchen and packing the right food can turn meal times into a highlight of your day. But it’s not just about what you cook – it’s also about how you store it.
Cooking Gear and Utensils
An effective camp kitchen operates similar to a well-oiled machine, where every piece of gear has a role. From your stove to your cookware, each item should be easy to use, durable, and efficient. After all, the wilderness might be your dining room, but that doesn’t mean you can’t enjoy a good meal with the help of cooking oil.
Food Packing Strategies
Packing food for a canoe trip is a balancing act. On one hand, you want meals that are delicious and nutritious. On the other hand, you need food that’s lightweight, compact, and doesn’t require refrigeration.
The secret lies in careful planning and smart packing strategies.
Water Treatment
Water is the elixir of life – but in the wilderness, it can also be a source of danger. Ensuring you have safe, clean drinking water is vital, and there are various water filtration and purification systems that can help you achieve this, regardless of where your canoe trip takes you.
Navigation and Communication Tools
The thrill of a canoe trip lies in charting your own course and exploring the unknown. But to do so safely, you’ll need reliable navigation and communication tools. From traditional maps and compasses to modern GPS and satellite phones, these tools are your lifeline in the wilderness.
Maps and Compass
In this era of GPS and smartphones, the traditional map and compass may appear obsolete. But when you’re navigating remote waterways, they can be your best friends. Knowing how to use these tools effectively is a vital skill for any canoeist, and can make the difference between a successful trip and a disastrous one.
Emergency Communication
Being isolated on the water, far from civilization, necessitates the ability to call for assistance during emergencies. That’s where emergency communication devices come in. Whether it’s a satellite phone for remote areas or a personal locator beacon for serious emergencies, these devices can be a lifesaver on a canoe trip.
Additional Accessories and Repair Kits
As with any adventure, unexpected events often constitute the most memorable experiences on a canoe trip. But sometimes, the unexpected can also bring challenges. That’s why it’s a good idea to pack some additional accessories and repair kits.
From handy multi-tools to comprehensive repair kits, these items can help you tackle any surprises that come your way.
Useful Add-Ons
While the basics are essential, sometimes it’s the extras that can make your canoe trip truly special. These add-ons may not be necessary, but they can enhance your experience, making your trip more comfortable, efficient, or just plain fun without adding extra weight.
Repair Kits and Tools
Even with the best preparation, things can go wrong on a canoe trip. A sudden leak in your canoe, a broken paddle, or a tear in your tent can turn your adventure into a nightmare. But with a good repair kit and some basic tools, you can fix most issues on the spot and get back to enjoying your trip.
From the thrill of gliding through tranquil waters to the challenge of navigating uncharted territories, a canoe trip is an adventure like no other. But the journey is not just about the destination – it’s also about the preparation. So pack carefully, prepare thoroughly, and then paddle forth into the wilderness. The adventure awaits.
Frequently Asked Questions
How do you pack for a canoe trip.
When packing for a canoe trip, remember to pack essential personal items such as quick-drying clothing, a small towel, a lightweight long-sleeved shirt, sunscreen, and sunglasses to protect yourself from the elements and stay comfortable during your adventure.
What food is good for canoe trips?
Good options for canoe trips include snack foods like trail mix, beef jerky, carrots, peanut butter, bars, cookies, and fruit. Additionally, plan meals like taco soup, lentil chili, or spaghetti with meat sauce using dehydrated ingredients.
Where should you pack the heaviest items in a canoe?
Pack the heaviest items in the center and at the bottom of the canoe to maintain balance and maneuverability. Place medium-heavy items over the heavier gear and lighter items at the ends of the canoe.
What is the best month to go on a canoe trip?
The best month to go on a canoe trip is September due to less boat traffic and crowded campsites, despite the slightly increased risk of precipitation compared to July and August.
What kind of clothes should I wear on a canoe trip?
Wear quick-drying and comfortable clothes for paddling and portaging, and pack warm and comfortable clothes for the campsite. It’s also important to remember to bring personal care essentials.

Best Canoe Packs – Canoeing Trips Made Drier
The best canoe packs can make your portaging life much easier (and who wouldn’t want that?!) . But finding the right one for your trip might not be so easy, especially with all the different options out there.
We have put this short guide together to help give you some tips on how to choose the right one and the features that might make your canoeing trip a little less of a struggle.
Our Top Picks:
- Granite Gear Traditional 3.5 Canoe Pack (best overall)
- Harmony Barrel Portage Harness (best barrel pack)
- SealLine Black Canyon Dry Pack (best backpack)
Table of Contents
Top 5 Best Canoeing Portage Packs Reviewed
1: granite gear traditional 3.5 canoe pack (best overall).
- Dimensions: 26 x 21 x 7 inches
- Weight: 1 pound 2 ounces
- Capacity: 57.35 liters/3500 cubic inches
This Granite Gear Traditional 3.5 canoe pack is a lightweight, mid-size option that is designed to fit a range of paddlers with torso lengths from 18 to 22 inches.
This is a durable bag made from tough 210 denier Cordura nylon, which also helps to minimize the overall weight. The drawcord top can make it easier to tightly pack your gear.
A great feature of this one is the ergonomic harness system, which has wide, padded shoulder straps and an adjustable sternum strap for added support and stability. It also benefits from having a padded hip belt, for improved weight distribution, with an adjustable strap that can be tailored to fit waists from 26 inches up to 52 inches.
- Lightweight – easier to carry when loaded
- Ergonomic harness system – helps with weight distribution and carrying comfort
- Durable – tough fabric for abrasion resistance
2: Harmony Barrel Portage Harness (best barrel pack)
- Dimensions: 20 x 12 x 6 inches
- Weight: 1.34 pounds
- Capacity: n/a (barrel: 60 liters)
The Harmony Barrel Portage Harness is a harness that’s designed to work with the Harmony 60 Liter Barrel. It is built to transform the 60-liter barrel (sold separately) into a portage pack.
It features padded shoulder straps that are wide for more comfort and an adjustable sternum strap for easier carrying of loads. Another nice feature is the padded waist belt so that you can distribute weight more easily and stabilize your load.
The back panel is also padded for additional comfort and there’s a built-in load stabilizer to help with heavier gear. The harness also lets you access the barrel (not included) without having to detach it.
- Works in conjunction with the 60-liter barrel – transforms the barrel into a portage pack
- Padded straps – shoulder and waist padding for added comfort
- Load stabilizer – better weight distribution
3: SealLine Black Canyon Dry Pack (best backpack)
- Dimensions: 30 x 18.5 x 12.5 inches
- Weight: 4 pounds 10 ounces
- Capacity: 115 liters/ 7010 cubic inches
This SealLine Black Canyon Dry Pack is a completely waterproof backpack that benefits from having welded seams and a large capacity.
A great feature of this backpack is that it has a built-in suspension system to help make carrying your gear a little easier. The padded shoulder straps and hip straps are designed to make hauling your gear more comfortable, but they can also be removed if you want to use the pack as a dry bag only, making it a pretty versatile choice.
This features a roll-top closure to help keep your contents safe and dry, and it also has compression straps at the sides. Another nice feature is the light-colored fabric inside, which can make it easier to locate particular items.
- Waterproof – keeps your gear dry
- Large capacity – can hold a lot of gear
- Padded and removable straps – for comfort and versatility
4: Chinook Chemun Portage Pack
- Dimensions: 18 x 9 x 23 inches
- Weight: 3.55 pounds
- Capacity: 75 liters/4500 cubic inches (100L/6030 cubic inches expanded)
The Chinook Chemun Portage Pack is a large, lightweight pack that can be a good option if you want to stick to a tighter budget. This one is durable and made from 600 denier HDTEX ripstop polyester.
There’s plenty of room for your gear for an extended trip, with mesh side pockets for water bottles as well as paddle storage. The main compartment has a similar closure to a dry bag to help prevent water from getting inside, but it may not be entirely waterproof so you may want to also use a dry bag or trash bag for added protection.
This features padded shoulder straps and a padded mesh back panel for added comfort. There’s also a sternum strap and a removable padded hip belt with adjustable straps for stabilizing your load.
- Affordable option – budget-friendly pack
- Additional pockets – for storing a paddle, tools, and water bottles
- Padded back panel – breathable padded mesh for improved comfort
5: Frost River Camp Cook’s Kitchen Pack (best canvas bag)
- Dimensions: 19 x 19 x 12 inches
- Weight: 6 pounds
- Capacity: 71 liters/4332 cubic inches (109L/6669 cubic inches expanded)
This Frost River Camp Cook’s Kitchen Pack is a very durable option that is made out of 18 ounce waxed cotton canvas and features solid brass buckles. It has a tough double-layer waxed cotton bottom for added strength and protection from water and damp ground. It can be a great choice for cooking equipment, food, or even just as a general pack. A handy feature of this one is the utensil roll that can be snapped onto the pack and has a cover with little pockets for keeping your tools and utensils in place. The straps are made from buckskin leather and are padded for additional comfort. There’s also a tumpline to help you carry heavy loads.
- Durable canvas – heavy-duty water-resistant waxed cotton
- Quality components – comfortable, resilient, and adjustable leather straps and brass buckles
- Removable utensil roll – ideal for tools and cooking utensils
Types Of Canoe Packs
Modern barrels tend to be made from plastic and can offer a good level of waterproof protection . Because they are a solid material, they can be ideal for keeping items that are breakable or that would otherwise be crushed inside a soft pack.
Many barrels will often require you to use a separate harness so that they can be carried on your back. Harnesses can make it much easier and more comfortable to haul a barrel and they will usually have padded shoulder straps and even sometimes sternum and waist straps for better weight distribution.
A barrel can also be carried inside some other types of packs.
Canvas (Duluth)
Canvas packs, also known as Duluth packs because of their 19th-century heritage from Duluth, Minnesota, are probably one of the most durable and traditional types of canoes packs.
Cotton canvas portage packs can be heavier than some newer man-made fabrics, such as polyester, because they tend to be thicker for heavier-duty use, often with leather straps and heavy-duty buckles, and other components. This can make them last a long time.
Some Duluth packs will tend to have a wax coating which can give them added durability as well as water resistance, which can help to guard against rips and holes and can help keep your gear somewhat dry.
However, not all of these types of packs will be waterproof and you may need a separate liner.
Baskets are generally similar in shape to barrels but they may offer less protection for your gear. For example, they usually won’t be waterproof. Baskets are a traditional type of portage pack, helping to keep your gear from being squashed.
You can often use baskets inside other types of packs, such as inside a canvas pack, to provide a more rigid structure to protect your gear.
Nylon/Polyester
These types can be the more modern choice for canoeists as they can be lighter weight, meaning it can reduce the overall carrying weight when the pack is fully loaded.
Many nylon and polyester packs will tend to have some water resistance, such as a waterproof coating, to help keep the inside dry. Some may also double as dry bags so that you don’t need additional waterproof liners. However, not all nylon and polyester packs will be waterproof.
Top Features To Look Out For On A Portage Pack
Durability can be a top feature to look for since the pack will likely be thrown in and out of your canoe pretty frequently. Tough fabric and strong seams can be important as this can help prevent damage from overhanging trees or simply hauling your heavy gear.
Waterproof Material
A waterproof pack is not always necessary, as you can use dry bags or you can line the pack with a heavy-duty garbage bag to keep your gear dry. However, it can be a nice feature to have, as it can mean added protection for your equipment and can also mean the exterior of the pack dries quicker.
Size And Capacity
Capacity or volume is often measured in liters or cubic inches. This determines how much gear you can store inside the pack. The higher the number in liters or cubic inches, the more space you’ll have inside.
The size of the pack, or the exterior measurements, will usually tell you how much room it will take up in your canoe or on your back. The larger the dimensions of the pack, usually the larger the capacity – but this may not always be the case, so it can be best to check out both to make sure the pack will suit your needs.
Think about what you want to carry with you and how long your trip might be. You might need more than one pack if you’re on a longer trip and want to separate your food from your clothing and camping gear.
Comfort can be an important feature to look for because this can make it easier to carry. Wide, padded shoulder straps can be a good idea, as this can help to distribute the weight more evenly across your back. Adjustable sternum and waist straps can be an advantage too.
A tumpline can also be useful for very heavy loads, as this traditional strap can help to reduce the weight carried on your shoulders by utilizing your head.
Frequently Asked Questions
How Do You Pack A Canoe Pack?
For a canvas or polyester canoe pack, it can be a good idea to put softer gear at the back, medium-weighted gear at the bottom, and lighter weight gear at the top. Your heaviest gear should be around the middle of the pack for even weight distribution.
Video: Packing For A Weekend Canoe Trip
Are Canvas Bags The Best?
Not necessarily. If you’re looking for a lightweight, completely waterproof bag , you may not want a canvas one. On the other hand, a canvas bag can generally be tougher and can often last longer than a polyester one.
Bottom Line
The best canoe pack, in our opinion, is the Granite Gear 3.5 because it’s extra lightweight and also has a good level of adjustability in the straps, as well as thick padding for comfort.
A great runner up is the Frost River Camp Cook’s Kitchen Pack thanks to its quality materials and durability. The removable utensil roll is also pretty handy.
Before you settle on any portage pack, think about what’s most important to you in terms of features. Maybe you value waterproof protection over longevity, for example? Remember to also think about the duration of your trip and how much gear you may need to haul.
Leave a Comment Cancel reply
Amazon and the Amazon logo are trademarks of Amazon.com, Inc. or its affiliates
© Copyright 2024 by Kayak Guru.
- Fishing Kayaks
- Paddle Boards
- Life Jackets (PFDs)
- Boat Storage
- Paddling Clothing
- Paddling Accessories
- Cool New Gear
- Submit a Review
- Paddling Near Me
- Paddling Locations Map
- Download the Go Paddling app
- Paddling Trips
- Kayaking Trips
- Canoeing Trips
- Share Your Knowledge
- Add a Paddling Location
- Add Your Trip
- All Articles
- Getting Started
- Boats & Gear
- Techniques & Safety
- Camping & Survival
- Join Newsletter
- Create Account
- Message Boards
- Classifieds
- Photo of the Week
- Free Weekly Newsletter
Canoe Packs
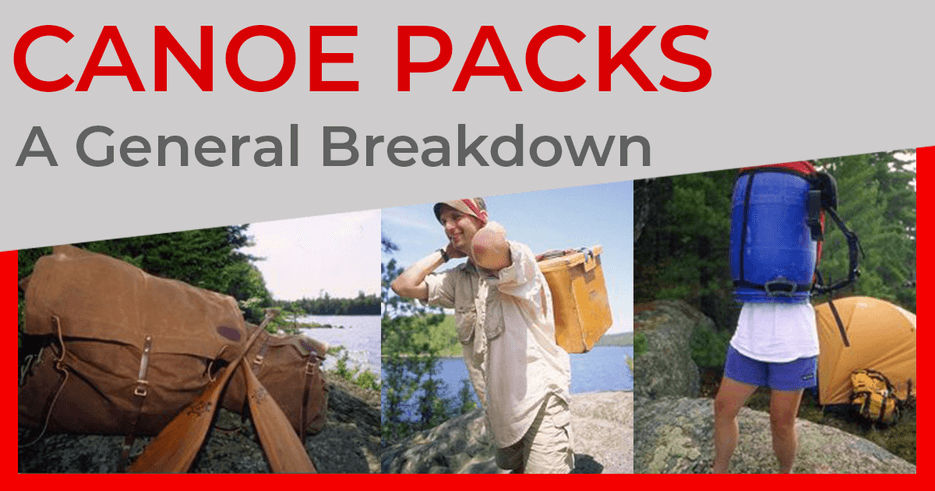
Canoe Packs - A General Breakdown
You'd think choosing a canoe pack, since it's only generally used for carrying a large volume of gear for a short period of time, would be quite simplistic. It's the complete opposite, however. There's an endless assortment of designs and models, and each one always seems to have a bunch of overzealous users who think their system for hauling equipment around is far better than all the rest.
Here's a general breakdown. Just remember, whichever one you pick I can guarantee another fellow canoeist will definitely challenge your selection when they meet you on the trail.
Canvas Packs ("Duluth Packs")

The canvas pack, or more commonly known as the "Duluth Pack," has been labeled by some canoeists as the most traditional canoe pack. Their claim is hard to beat. After all, it's original patent, by Camille Poirer (a shoe store owner in Duluth, Minnesota), dates as far back as 1882. It came with a buckled flap, fancy leather shoulder straps, a conventional tumpline, a new-age sternum strap, and even an umbrella holder. Woods Canada also produced a similar style of pack in 1909. Both styles haven't changed much since.
The canvas pack is a large volume, frameless pack, with almost unlimited space to stuff things in. They fit perfect in the canoe. They're also extremely durable and can take years of abuse. They absolutely won't break, period.
However, other canoeists think that canvas packs are a thing of the past. They're simply a sack with straps used only by a bunch of nostalgia freaks that force themselves to be uncomfortable for the sake of tradition. The canvas eventually rots, the leather breaks down, and it's impossible to waterproof your gear without using layer after layer of heavy-duty garbage bags.
I'm not sure who's right. There's no doubt that better bags have been designed since 1882. But I will say that I've abused mine for over twenty years now and it's still going strong.
~Get the BWCAW Tee~
With over 1,090,000 acres of wilderness area, the BWCAW is a paddler's paradise.
Pack Basket
The woven ash pack basket is still used extensively in Maine and the Adirondacks. It's another one of those traditional packs that doesn't make much sense to many canoeists. They're not waterproof and can be quite uncomfortable to carry. I've used one for years, however. Pack baskets are hard to beat for keeping fragile gear safe from breaking or those gawky items from jabbing you in the spine. Of course, they're not as effective as a barrel pack (see below), but they sure are nicer to look at.

Another age-old packing device is the wanigan. The word, loosely translated, comes from the Native term for "kitchen," and many youth camps are devoted to it for that very reason. The wanigan makes an excellent storage bin for a large group's cook set. Basically, it's a wooden box, usually made of quarter-inch plywood (measuring 25 inches long, 12 inches wide, 15 inches deep) that's used to carry all the pots, pans, utensils and some food items. The lid makes a perfect cutting board and the box itself comes in handy for a serving table. It's a perfect system for keeping everything organized, eliminates shuffling through packs for last-minute items, protects breakables, fits snug in the canoe, and will even float in the event of an upset. The portaging technique also makes good use of the tumpline, a system that's thought by many expert canoeists as the only true way to carry a heavy load across the trail. You just place the tump on your head, making sure not to rest it directly on your forehead or too far back that the weight wrenches your neck muscles. If only kitchen gadgets are stored in the box then it's usually light enough to even toss a small canvas pack on top as well.
I made good use of a wanigan while working for a traditional camp in the Temagami region. I'll be honest though. I hope never to see one again. Some of the guides swore by them. I swore at them. I could never understand the reasoning for carrying a big, heavy wooden box with only a strip of leather lashed across your head. To each their own I guess.

The plastic olive barrel is today's waterproof version of a wanigan. In the mid-eighties a few canoeists began picking them up at yard sales or delicatessens after realizing that the watertight containers were perfect for keeping gear dry, especially on river trips. Now you can pick them up at almost any outdoor store. Just like using the traditional wanigan, however, it's a love and hate relationship. The barrel has all the advantages of the conventional wooden box - even having the lid second as a cutting board - but in no way is the thing comfortable to carry. At least it doesn't rely exclusively on a tumpline system. The barrel also comes with shoulder straps or can be slipped inside an old canvas pack. I strongly recommend, however, you pay the extra cost for a high-quality barrel harness, like Ostrom Packs' Voyager model. You'll thank me when you hit the portage.
When purchasing a barrel make sure the O-ring seal and the metal snap-ring that fastens the lid on is not damaged. Also, get the ones that come with handles. They make it a lot easier to get the barrels in and out of the canoe. Stores usually sell them in 30 liter or 60 liter sizes.
You can also pick up smaller surplus olive barrels by visiting any place that buys olives in bulk (ie. large-chain grocery stores, delicatessens, or restaurants). Either ask for them or wait until garbage day and pick them out of their recycle bin. Two of them, resting side by side in a regular canoe pack, works' well. I also place my sleeping pad between the barrels and my back for more comfort. They have a screw-on top with a rubber washer, making the container waterproof. But the opening is a little too tight for my liking.
Internal Frame Hiking Backpack
An internal frame hiking backpack isn't necessarily used by canoeists. The frame itself always seem to make the pack fit oddly inside the canoe, taking up way too much valuable space. However, a backpack happens to be fantastic to carry on the portage. Some solo canoeists even find it a perfect option when attempting to carry the canoe and pack together in one trip. So, if you think about it, there's no real strong reasoning behind not using one, especially if that's the only kind of pack you happen to own.
Nylon Packs
In the last few years there's been a lot of hype about high-tech nylon canoe packs. They're based on one main compartment rather than several separate pockets like a backpack. But they still come with a top-notch system of shoulder straps and a hip belt, making them just as comfortable to carry then a top-of-the line internal frame hiking pack. Lots of buckles and straps help compact everything and keep the weight centralized. An individual waterproof sack keeps everything dry. And because there are so many companies developing different models, prices seem to stay competitive as well. The only thing they don't have going for them is tradition. However, my custom made Ostrom pack (the 115 liter Wabikimi design) I purchased just a year ago is such an excellent product that I'm positive it's destined to create its own legacy. It's one of the most durable and comfortable fitting canoe packs on the market.
Waterproof Packs
Rather than using various bagging devices to waterproof gear inside the pack, you can now purchase a pack that's already waterproof. PVC coated packs were first made by Cascade Design and developed by Dennis Hill of the Seattle Sports camping equipment company. Hill, while hospitalized for a knee injury, was inspired to combine the roll-down closure on an ice pack placed on his knee with the bottom design of a grocery bag.
The pack uses a suspension system reminiscent of internal-frame backpacks. It offers detachable padded shoulder straps and an anatomically shaped padded hip belt. The only thing it lacks is a padded back and vertical stays, making it extremely uncomfortable to carry with a heavy load. And due to the fact that the PVC coating allows no breathing ability, your dirty socks will smell up the interior something fierce.
Kevin Callan is the author of eight books including 'The Happy Camper: An Essential Guide to Life Outdoors'. He is a recipient of the National Magazine Award and a regularly featured speaker at North America's largest paddling events.
Related Articles
The Canoe Pack Barrel
The pack barrel's story goes back to the mid-1980s when a group of canoe guides from Ottawa, including…
Make a Tumpline for Your Pack & Canoe
Canadians love tumplines. Americans generally consider them torture devices, largely because they've…
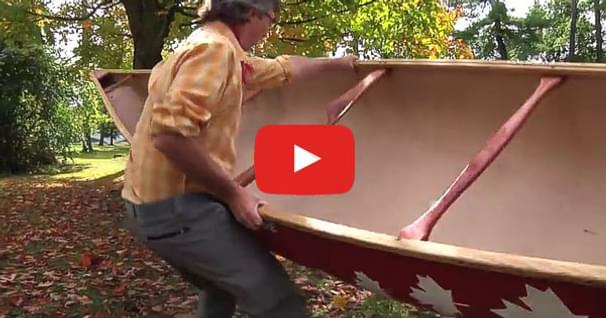
Picking Up A Canoe for Portage
In this video, Kevin Callan enlists some help in demonstrating a two-person canoe lift and a two-person…
OUTSIDE FESTIVAL JUNE 1-2
Don't miss Thundercat + Fleet Foxes, adventure films, experiences, and more!
GET TICKETS
Powered by Outside
The 11 Best Wild and Scenic River Trips in America
Some of the best wilderness in the country has no trail at all. grab a paddle and get ready for the ultimate summer on the water with these 11 trips down national wild and scenic rivers..
Heading out the door? Read this article on the new Outside+ app available now on iOS devices for members! >","name":"in-content-cta","type":"link"}}'>Download the app .

Congress established National Wild and Scenic Rivers in 1968. The designation applies to waterways that “possess outstandingly remarkable scenic, recreational, geologic, fish and wildlife, historic, cultural or other similar values,” and stipulates that they “be preserved in free-flowing condition, and that they and their immediate environments shall be protected for the benefit and enjoyment of present and future generations.” Today, there are 12,347 protected miles on 208 rivers in 40 states. Explore your aquatic heritage, starting with these 11 floats, which range from easy paddles to whitewater.
Klamath River, California
Length 286 miles Designated 1981
The ingredients for a perfect family river trip: warm water, exciting rapids, bald eagles, and waterfront camps where the fire’s sparks mingle with the stars. While the upper section of the 286-mile Klamath roils out of Oregon with Class IV power, the Lower K has a mellower pace that’s fit for an introductory rafting trip. From the put-in at Happy Camp, dip paddles into the 70°F water (average August temperature) and head west, keeping an eye on the sky for raptors, the water for otters, and the banks for black bears. One thing you won’t find: boredom. The 20-mile trip has jumping rocks and riffles aplenty, and Class II/III Savage Rapid offers up a kid-size portion of whitewater. And should you need some ideas for campfire stories, the Bigfoot Trail runs through these same Klamath mountains.
Klamath River Trip Planner
Permit None Season April to August Put-in Sluice Box Take-out Happy Creek Outfitter oars.com
Allagash Wilderness Waterway, Maine
Length 92.5 miles Designated 1970
The 92.5 miles of lakes, ponds, rivers and streams in the blueberry- and bear-filled North Maine Woods are as iconic a canoe setting as you’ll find in the U.S. Tackle a six-day, 62-mile trip from Churchill Dam to Allagash Village , which includes lakes, Class II rapids, and a .3-mile, mandatory portage around 40-foot Allagash Falls. By day, look for moose, eagles, and common terns beyond your gunwales, as well as Katahdin poking out above the mixed-forest canopy. By night, camp at any of the 40 named sites while loon calls serenade you to sleep. Best bet: Hit the water in September, when the fall colors from red maple and quaking aspen stand out against the deep greens of mixed firs.
Allagash Wilderness Waterway Trip Planner
Permit Required ($13 for nonresidents) Season May to September Put-in Churchill Dam Take-out Allagash Village Outfitter

Middle Fork of the Salmon, Idaho
Length 104 miles Designated 1968
With rapids as big as the wilderness they pass through, the 104 miles of the Middle Fork of the Salmon through the Frank Church-River of No Return Wilderness top just about every thrill-seeking rafter’s bucket list. That makes permits a tough get during the lottery window. Better bet: Wait until late summer, when crowds subside and trout are chunking up for the winter. Best part? Hot springs at camp all eight nights. Don’t miss Hospital Bar (mile 53), where a 115°F spring bubbles up into a pool so close to the river you can cast a fly while you soak.
Middle Fork of the Salmon Trip Planner
Permit Required ($10 + $4/person per day); lottery for May 23 to Sept. 3 Season May to September Put-in Boundary Creek Take-out Cache Bar Outfitter blackadarboating.com
John Day River, Oregon
Length 147.5 miles Designated 1988
This is as close as it gets to a relaxed cruise through big Western terrain. The John Day , the third-longest undammed river in the Lower 48, passes through a volcanic wonderland of black, basalt gorges and colorful, fossil-filled ash deposits. For the most part, the lower section ambles along leisurely, letting you relax, take in the scenery, and birdwatch as you drift downstream. The 70 miles from Clarno to Cottonwood are mostly Class I /II, but Class III/IV Clarno Rapids lurks around mile 5 (scout from river left; portage if you need to). Below that is smooth sailing through 1,200-foot-deep canyons and rolling, grassy hillsides at a soporific pace. Target stands of junipers to camp in the shade and look for mule deer, river otters, golden eagles, and red-tailed hawks.
John Day River Trip Planner
Permit Required ($20/group); reserve ahead May 20 to July 10; Season April to June Put-in Clarno Take-out Cottonwood Bridge Outfitter servicecreek.com

Missouri River, Montana
Length 149 miles Designated 1976
When Lewis and Clark floated the Missouri on their westward journey, they saw a landscape unmarred by human industry. The river left its mark on the party: “As we passed on, it seemed those [scenes] of visionary [enchantment] would never have an end,” Lewis wrote in 1805. You won’t regret the 10 days it takes to run the entire 149 miles, but if you don’t have an expedition-length vacation, hit the three-day, 47-mile stretch from Coal Banks to Judith Landing. There, the water courses through an 800-foot-deep canyon of white eagle sandstone, flows across the plains, and threads through layer-cake badlands within Upper Missouri River Breaks National Monument. Camping is plentiful in designated sites, including three Lewis and Clark campsites and historic Blackfeet and Flathead tribal sites with petroglyphs.
Missouri River Trip Planner
Permit Required ($4/adult per day) Season May to September Put-in Coal Banks Take-out Judith Landing Outfitter adventureboundcanoe.com
")
Rio Grande, Texas
Length 191.2 miles Designated 1978
Desert dwellers like others to think their stomping grounds are too arid and desolate for the rest of us to enjoy. Don’t be fooled. From open, cactus-filled Chihuahuan landscapes to tight, twisty canyons and shady arroyo side hikes, this 20-mile overnight through Santa Elena Canyon offers a sampler of the Rio Grande ’s best scenery. It’s also pretty picante: At mile 15, you’ll run Rockslide Rapid, which can reach Class IV in flows approaching 1,200 cfs (scout river right; there’s no portage option). When your heart rate settles, scan the skies for nose-diving peregrine falcons and the riverbanks for coyotes and wild burros. As you travel, look for grinding holes and petroglyphs from former Native American encampments. Camp on sandbars.
Rio Grande Trip Planner
Permits Required ($12); obtain in person at visitor centers. Season Year-round, but flows peak in August Put-in Lajitas Take-out Santa Elena Canyon Outfitter bigbendrivertours.com
Chattooga River, Georgia
Length 58.7 miles Designated 1974
Fans of Deliverance will be disappointed to learn that the Chattooga River, where the film was set, is not nearly as dangerous as the 1972 classic suggests. Fans of world-class river trips will not. While the rain-fed Chattooga serves up rapids from Class I to Class V, the best intermediate-friendly, two-day trip combines Sections 2 and 3 for a 20 miler that gets sportier the farther you go. The crux is Bull Sluice, a Class IV+ rapid toward the end (beware flows above 2.5 feet on the Clayton gauge). You’ll be immersed in Southeast scenery as you pass through Sumter National Forest’s mountainous woodland of red and white oak, birch magnolia, and mountain laurel—the latter reaches its peak kaleidoscope bloom in June.
Chattooga River Trip Planner
Permit Self-register at put-in. Season Year-round, but best April to September Put-in GA 28 Take-out US 76 Outfitter chattoogawhitewatershop.com

Loxahatchee River, Florida
Length 7.6 miles Designated 1985
The 8.5-mile day trip down this waterway will have you J-stroking in Jurassic Park as it meanders through a primordial swamp filled with centuries-old cypress, ferns, orchids, palms, and mangroves. While you won’t see any velociraptors, you’ll find plenty of their contemporaries: Sunning alligators often line the shores and slip into the water as you paddle by. (Encounters between boaters and alligators are rare, but keep your feet and hands in the boat, and never feed or harass them.) Head downstream from Riverbend Park to Jonathan Dickinson State Park with a prearranged shuttle, or paddle out and back from either of the two (the current is gentle enough to paddle against). The serpentine upper stretch is beginner-friendly, but involves two short portages around dams (or slide over them if going west to east). In Jonathan Dickinson State Park, the river widens into a mangrove-gnarled estuary.
Loxahatchee River Trip Planner
Permit None Season Year-round Put-in/take-out Riverbend Park or Jonathan Dickinson State Park Outfitter canoeoutfittersofflorida.com
Noatak River, Alaska
Length 330 miles Designated 1980
No, it’s not easy to pull off an epic paddle trip in Alaska. Yes, it’s worth it. In June, way up in the Gates of the Arctic National Park and Preserve , the 259,000 members of the Western Arctic caribou herd make their northward journey to their calving grounds, following the river for a portion of it. The best section of the gentle, 400-mile Noatak carves a 45-mile swath through the Brooks Range from Twelve Mile Slough to Lake Matcharak. Load crafts (inflatables are easiest to transport) into a floatplane in Bettles and fly over the granite spires of the Endicott Mountains to the slough near 8,510-foot Mt. Igikpak, where a 200-yard trail leads to the river. The waterway’s gentle gradient affords time to take in the surrounding Endicott and Schwatka Mountains and to scan the tundra benches for Alaska’s A-listers: wolves, Dall sheep, and grizzlies. Run it in June for your best shot at seeing the caribou migration, or in September for fall colors, ripe blueberries, and the aurora borealis.
Noatak River Trip Planner
Permit None Season June to September Put-in Twelve Mile Slough Take-out Lake Matcharak Outfitter arcticwild.com

Tuolumne River, California
Length 83 miles Designated 1984
For paddlers with solid whitewater chops, the Tuolumne offers thrills aplenty. The 18-mile canyon teems with Class III to V pool-drop rapids, interspersed with just enough moments of calm to let you catch your breath. Take two or three days to camp on sandy beaches, fish clear pools, and hike up side creeks. Put-in below Hetch Hetchy, and negotiate Class IV Rock Garden and Nemesis rapids in the first .5 mile. At mile 5.4, land your craft at Clavey River and grab your fishing rod to try for native coastal rainbow trout or take a dip. Just below lies Class V Clavey Falls, which requires punching through two giant hydraulic holes (or portage on river right). From here, the river calms down, with jumping rocks, swimming pools, and easier rapids before ramping back up to a Class IV per mile in the final 5 to the take-out.
Tuolumne River Trip Planner
Permit Required ($15) May 1 to Oct. 1; Season May to September Put-in Meral’s Pool Take-out Ward’s Ferry Outfitter californiawhitewater.com

Buffalo River, Arkansas
Length 15.8 miles Designated 1992
Arkansas’s paddling options are outnumbered only by its crawfish, and the Buffalo River is the state’s heart and soul. The undammed waterway sinks hundreds of feet below the rim of limestone bluffs as it flows through the Ozarks’ forested hills. Plan a mellow weekend in the 24 miles from Ponca to Pruitt, where calm waters encourage swim stops, beaches and gravel bars invite picnics, and the waterway passes beneath 550-foot-tall Big Bluff, the tallest cliff between the Rockies and Appalachians. Beach your boat for the side hike to Indian Rockhouse, a massive but shallow cave where Native Americans once sheltered. If you catch rain on your trip, add the 20-minute walk to Hemmed-In-Hollow Falls, which cascades 209 feet—the tallest waterfall in the Midwest.
Buffalo River Trip Planner
Permit None Season April to September Put-in AR 74 Take-out AR 7 Outfitter buffaloriver.com

Master Paddling a Canoe
Learn these basic canoe techniques to move well on the river.
Forward stroke WHAT: Conserve energy so you can paddle all day. HOW: Keep your paddle close to the boat (about 6 inches away). Dip the full blade of the paddle straight in and draw it straight back. Use your back and core, rather than just your shoulders. Swivel your torso slightly toward the paddle to further reduce fatigue.
J-stroke WHAT: Add a twist of the paddle to keep your canoe tracking straight. HOW: Start like a forward stroke, but twist the paddle gradually to turn your blade away from the canoe at the end of the stroke.
Sweep stroke WHAT: Change directions at speed. HOW: Pull the paddle in a C-shaped motion (the paddle head is farthest from you in the middle of the stroke) to propel yourself forward while turning. Do it in reverse to slow down while turning. ~Spencer Cox

How to Pack a Canoe
Stow gear right to maximize space and stability.
1. Balance the load. Put lighter items in the front and back of the boat, reserving the middle for heavier gear (which boosts stability) and ensuring items are balanced left to right. Use small drybags: It’s easier to fit them snugly around each other to fill empty space.
2. Keep air in your drybags. Maintain a little dead space in your bags and lash them below the inside edges of your boat. That way, they’ll lend some extra buoyancy in a capsize and will be easier to salvage if they break loose.
3. Bring a bail bucket. Cut the bottom off of a gallon-size plastic jug (keep the cap) so you can hold the handle and use it as a scoop. When possible, do this between rapids to hit the next set without water weight sloshing around and hindering balance. ~Ryan Wichelns

How to Read a River
Follow these signs for safe passage.
Downstream V: This feature generally denotes a good path through rough water. Look for lines in the river that form a “V” shape with the wider part closer to you and narrowing downriver.
Upstream V: These are the exact opposite, with the point of the V shape closer to you. An upstream V usually indicates water flowing around a rock or other hazard. Steer clear.
Holes: Water flowing rapidly over a submerged rock results in a frothy area of rough water just behind the obstacle. The force can flip canoes and drag swimmers under. Paddle hard and keep your boat straight if one grabs you; if in the water, swim to the side. Last resort: Ball up and hope the current flushes you out.
Color bands: Areas of water with slightly different colors parallel to each other indicate variable flows. Straight rivers tend to flow fastest in the center, while curving rivers flow fastest along the outside of a bend. Look downstream, and avoid entering faster bands that could force you into obstacles. Follow these signs for safe passage. ~Spencer Cox
Buy the Right Paddling Gear First
A great trip starts with great gear. Find boats, paddles, PFDs, and other water gear for any trip in our collection of paddling gear reviews .
Popular on Backpacker
Join Outside+ to get access to exclusive content, 1,000s of training plans, and more.
Healthy Living
- Clean Eating
- Vegetarian Times
- Yoga Journal
- Fly Fishing Film Tour
- National Park Trips
- Warren Miller
- Fastest Known Time
- Trail Runner
- Women's Running
- Bicycle Retailer & Industry News
- FinisherPix
- Outside Events Cycling Series
- Outside Shop
© 2024 Outside Interactive, Inc

Hi! I'm Jess.
the girl with the maps
Outdoor Adventures , Packing Lists , Travel , Travel Guides · April 2, 2023
Canoe Trip Packing List: Everything You Need for a Canoe Camping Trip
*This post may contain affiliate links, which means I'll receive a commission if you purchase through my link, at no extra cost to you. Please read full disclosure here.
Looking for a great canoe trip packing list? Here are the best tips for how to pack for a canoe trip!

Canoe camping is one of the most fun outdoor adventures you can take! I’ve been canoe camping since I was a child and I’ve learned a lot over the years. Lucky for you, I’ve made all of the mistakes one can make when it comes to packing, and I’ve narrowed my canoe trip packing list down to perfection!
This post is all about the best canoe trip packing list.
Canoe trip basics, location research, water safety, first aid kit, campsite safety , sleep system, camp kitchen, water purification, personal care, electronics.
The first item on our list will be a canoe. If you don’t own a canoe I recommend checking your local outfitter for their rental options. You should rent a canoe that weighs 50 pounds or less, especially if you’re doing a lot of portaging. Most local outfitters include canoe paddles, lifejackets and a bail kit with each rental. Ensure your paddles are appropriate for your height, that your lifejacket is the correct size and inspect your canoe for any damages before beginning your trip.
Safety is a really important topic when in the backcountry and when on the water. Canoe camping can be a challenging but really fun experience and it’s really important to have all safety items in place so that you are prepared if an issue comes up. Whether that be bad weather and water conditions, an injury or illness, or a bad encounter with wildlife. You can’t always control these things from happening but you can be prepared when they do.
One of the most important things to do before leaving on your trip is to research the location thoroughly and develop a complete understanding of the area and the trail you are taking. Identify camp locations, distances, a turn back point, and water sources. Other important items to research include who to call for help, identify threats to safety such as understanding wildlife behaviour, what to do if you encounter them and how to store food safely, and research weather warnings including storms, aggressive winds, flooding and fire rules.
Each location has their own challenges and things to be aware of. Researching the location in advance both on the organization’s website and reading past experiences from other travellers will allow you to be prepared for your trip.

When it comes to navigation most people think of a map and compass which is great! It’s essential to always bring a hard copy of a map even if you have a copy on your phone. Additionally, I never enter the backcountry without my SOS device. An SOS device is a satellite messenger meaning that it can be connected to emergency services regardless of if there is cell reception available (and there usually isn’t). There are multiple device options available. Some only let you contact EMS (when needed) and others allow you to message with family and friends in addition to having an SOS button.
I own the Garmin inReach Mini and I love it. I can send messages to my parents with a trip update and my exact GPS coordinates so they know I’m safe. The other great thing about the Garmin devices is that they can be used for navigation via the satellite connection. I use this as my main source of navigation and have my paper map as back-up.
1) Lifejacket
When canoe camping we obviously spend a lot of time on the water each day. Regardless of swimming ability, everyone in the canoe should be wearing a lifejacket. As a certified lifeguard myself, I have seen way too many situations where a strong swimmer gets into a bad situation because they rely on the fact that they can swim. Even if you can swim, water currents, weather, physical ability and health risk factors all come into play. Being in the backcountry, where you don’t have easy and quick access to help, it’s so important to ensure you are wearing all necessary safety equipment any time you are on the water.
Not all lifejackets are made equal. If you are looking to purchase a lifejacket, make sure you look to buy a paddling one as it gives you more range of motion for long days in the canoe. Here is a great affordable paddling lifejacket option.
Many lifejackets come with a whistle, but if your renting one or yours doesn’t have one, it’s important to also be wearing a whistle to call for help. This classic Fox 40 whistle is a great and affordable option. It also works after it’s been wet which is essential.
3) Emergency Bag
Every canoe camper should carry an emergency bag that can be used if you had to ditch your boat in an emergency and could only grab 1 thing. This bag should have everything you need to survive at least 1 overnight. My emergency bag is a bright yellow dry bag . It includes the following:
- 1-2 emergency meals
- Tarp for a temporary shelter
- Fire starter & lighter
- Emergency blanket
- Water filtration system
- First aid kit
4) Canoe Recovery Practice
You never know what can happen on the water. It’s important to know how to recovery your canoe and practice this before you go out on your trip. I’ve linked some of my favourite resources below. If it’s your first trip I highly recommend a guide or group trip lead by a guide as they will help you develop these skills.
- Tandem Paddling and Basic Rescue Techniques
- How to Deal with a Flipped Canoe
- How to Empty a Swamped Canoe from the Water
- How to Keep Your Canoe From Flipping

You can purchase a small and ready made first aid kit online or you can make your own. If you’re making your own you should include the following at a minimum:
- Adhesive tape
- Triangular bandage & safety pins
- Antiseptic wipes
- Gauze rolls and pads
- First aid manual
- Medication ( pain , cold , allergy , nausea/upset stomach pills and epi-pen if needed)
1) Location Specific Items
Based on your earlier research of the trail and wildlife, you can add in here the specific items that you might need. For example, if you’re in bear country, you will need to bring bear spray or if there are poisonous snakes on trail, a snake bite kit.
2) Food Storage
Again, depending on the location you will need to plan for food storage. Some places require bear canisters , some have bear lockers or bear hang available and some places require you to bear hang yourself. I did bear hangs for years and find it quite tedious now. I prefer to travel with a bear canister (if permitted). It might be a little extra weight but it makes your life way easier at camp! See below for more information on food storage in bear country:
- Backpacking Food Storage
- What to do in a Bear Encounter (And How to Avoid One)
- Bear Spray Scenarios & Demonstration

3) Leave No Trace Principles
Following the Leave No Trace Principles is an essential part of being in the backcountry. These guidelines help everyone understand how to enjoy the environment in a responsible way and take action to protect it for years to come. To learn more information about Leave No Trace, I highly recommend checking out this REI video.
At least a 40L backpack is required on most trips. If you’re going for longer you might want to look into a larger bag. Depending on the type of outdoor adventures you plan to do in the future you have a few options. If you only plan on canoe camping then I’d recommend a canoe pack. This bag is waterproof and will serve you well on all canoe camping adventures by keeping your camp equipment dry no matter the conditions. If you plan on doing a little bit of everything (backpacking, canoe camping, overseas travel), then I’d recommend a backpacking backpack. This type of bag is designed for any excursion and built to carry weight really well. If you’re using this kind of bag while canoe camping, I recommend putting gear that must stay dry in dry bags and using a packliner.

We hope you are enjoying the free travel planning tips, guides and more!
If you’ve found this post helpful, please consider contributing to our site.
There are many options for a shelter when canoe camping. The shelter you choose will depend on the time of year, weather conditions, landscape and what you feel most comfortable with. Of course, there is the classic tent set-up but there are also hammock camping options and tarp tents. I spent one summer hammock camping and I loved it! But then a little puppy joined my family and I reverted back to the classic tent shelter option. I bought my tent on Amazon 3 years ago and it has held up so well in all kinds of weather, I highly recommend checking it out!

You might be wondering – what is a sleep system? A sleep system is a combination of gear that helps you have the best sleep possible in the backcountry. After a long day of paddling or hiking, it’s essential to get a good night’s sleep which means being as comfortable as possible while sleep on the ground. The essentials include a sleeping bag and sleeping pad. Depending on your camping habits you will want to consider the type of sleeping bag and pad you are looking for, they are not all the same. Both have temperature ratings for warm or cooler weather. In addition, it is important to think about the weight of these items. If you plan to do long trips in the future, it’s important to purchase light and packable items.
I opt for a 3-season sleep system as this allows me to sleep comfortably in spring, summer and fall in Canada. This is my favourite 3-season sleeping pad – it’s also really affordable. This is my favourite 3-season sleeping bag. A packable pillow is also a really nice item to have but it’s not essential. If you’re on a budget, put your clothes in a pillowcase or your pack liner and use that as your pillow. This is my favourite packable pillow , fun fact – they upcycle bits of sleeping pads to make this!
Everyone has different preferences when it comes to a camp kitchen. Some campers like to do a full meal prep in the backcountry, some like to simply eat freeze dried meals (me) and others sit somewhere in between. Depending on your preferences you can add to this set-up as needed:
- Water bottle
- Foldable sink
- Microfiber cloth
- Garbage bag
- Biodegradable soap
- Food storage container ( dry bag , bear resistant bag , bear canister )

The great news about canoe camping is that you will have easy access to water. There are many options for filtering or purifying water. My favourite for canoe camping is the Platypus GravityWorks System . It is great for long trips and large groups. For backup I always carry water purification tablets . I include these in my emergency bag and they are also good to have incase something goes wrong with your filter system. For more information about water treatment I highly recommend reviewing this REI video.
Another item I keep with my water filtration kit is electrolyte tablets. These are great for two things, the first being that they help with hydration after long days in the sun, and the second is that the taste of warm lake water gets old, really quickly. Electrolyte tablets like, nuun tablets , are great to help with the taste of water and also with hydration.
The key thing about packing food for your canoe trip is that you need to plan a menu for each day. Throwing random ingredients into a food bag will have you dragging around way too much food and trust me, you’ll regret it on the long portages. I recommend planning breakfast, lunch, dinner, dessert and at least 3 snacks for each day. In addition, depending on the length of your trip and how deep you are in the backcountry, you should account for at least 1 emergency meal, incase you have to spend an extended period of time waiting for rescue. I opt for freeze dried meals as they are lightweight, easy to prep and clean up and most of them taste pretty good.

This category will change from person to person and in different seasons. This is what I recommend bringing as a baseline and you can add or take-away items as needed.
- Mineral sunscreen (it is important to wear mineral only as it’s safest for waterways)
- Toothpaste tabs – lightweight, low waste and you can bring the exact amount that you need
- Biodegradable soap – Campsuds can be used for dishes and body/hair as needed
- Quick dry towel
- Hairbrush & hair ties (if needed)
- Toilet paper
- Portable bidet
- Trowel – learn more about the backcountry bathroom situation here
- Prescription medication
- Lip balm with SPF
- Hand sanitizer
When it comes to electronics on the water, the most important thing is to store them in a dry bag to ensure they do not get water damage. I don’t bring many electronic items into the backcountry but these are the ones I recommend bringing:
- Head lamp – I got this amazing rechargeable headlamp on Amazon and I’ve been using it for years
- Powerbank – this cool solar one is a good option
- Phone – I recommend using your phone for photos but if necessary you could also bring a camera
- Phone charger
When canoe camping you want to pack clothing that I call “outdoor clothes” meaning that they are either built for the outdoors (durable) or its clothing that you don’t mind if it gets ruined. It’s important to avoid cotton for all clothing items as it holds smell and doesn’t dry quickly. Here is an outline of what I pack on each trip:
- Swimsuit – depends on season
- Shorts x1
- Sleep clothes x1
- Thermal layer x1 – depends on season
- Under garments – avoid cotton if you can
- Socks x1 for camp
- Hiking boots/shoes – depends on season (I wear a hiking sandal in the summer and a boot in the off-seasons )
- Camp sandal (light flip flops, because you don’t want to be in your wet shoes/sandals all evening)
- Sunglasses (polarized is best)
- Raincoat + pants – this doubles as bug gear
- Bug net – depends on season (necessary in June and July in Canada)
There you have it! This post was all about the best canoe trip packing list. Happy paddling!

Share this:
You’ll also love.

April 2, 2023 at 7:50 PM
So helpful for my next trip, thank you!

Silfra Fissure Snorkeling: The Complete Guide to Snorkeling Between Continents in Iceland

Let’s be friends!
My newsletter comes packed full of adventure planning inspiration, slow living tips, wellness resources, community updates and amazing freebies.
By providing your email address above, you expressly consent to receiving electronic communications from thegirlwiththemaps.com . You may withdraw your consent at any time. Please refer to our Terms of Use and Privacy Policy for more details.
I created this site to help you start your next life adventure. Whether that be your first hiking trip, solo travel or transitioning to a low waste lifestyle. What will you do next?
Destinations
- North America
- Sustainable Living
- Health and Wellness
- Personal Development
- Free Resources
Work With Me
This site is protected by reCAPTCHA. The Google Privacy Policy and Terms of Service apply.
- Terms of Use
- Privacy Policy
Copyright © 2024 the girl with the maps · Theme by 17th Avenue
Privacy Overview
Stay in the Loop
Subscribe for exclusive content, giveaways, new products and more!

- Backpacking
- Backcountry Cooking
- Wilderness Medicine
- Destinations
- TRIP REPORTS
The ULTIMATE Guide to Canoe Camping

Canada is a prime destination for canoe camping, with a nearly endless list of possible destinations. I’ve been canoeing all my life and still feel I have only scratched the surface. But if you’ve never been on a canoe trip before, getting started can feel pretty intimidating. Where do you go? What do you pack? Will there be bears?
In this post, I’m going to outline everything you need to know to plan your first canoe trip. From choosing a destination to packing your gear to execution – this guide will have you ready to hit the water and get paddling!
Pre-Trip Planning
Choosing your destination.
As I said, the list of destinations is practically endless. So where do you start?
If you’re new to canoe camping, you want to choose a destination that is somewhat popular and isn’t too far away , and an added bonus would be somewhere with developed facilities, like clearly marked campsites and thunder boxes.
I recommend new canoeists choose a national or provincial park. For example, if you are in Ontario I recommend either Algonquin Provincial Park or Killarney Provincial Park because they are easily accessible, fairly popular and have outfitters who set you up with gear. If you’re outside Ontario, you can find good destinations by asking your local MEC or REI (or another outdoor store in your area).
Do you need a reservation or permits? A lot of these destinations will require you to register for campgrounds or obtain a permit, which can usually be done through the park’s website or an outfitter. If all you need is a permit to be in the park, you can do this before finalizing your route (see next section).
However, some parks (like Killarney or Algonquin) require you to book specific campsites/lakes. In this case, before you can book your trip you will need to plan your route.

This post may contain affiliate links. If you make a purchase through one of these links, I may receive a small commission at no extra cost to you. Your support is much appreciated! You can learn more by reading my full disclosure .
Planning your Route
Planning your route can be challenging, especially if you are not experienced. For new canoeists, I estimate a paddling speed of 3.5 km per hour and I recommend keeping portages under 400 m .
Pro tip : Don’t plan to be paddling for a full 8 hours each day – that isn’t an enjoyable way to get started in canoe camping. Keep the trip easy so you can focus on other skills (cooking, setting up a tent) in addition to paddling. Also, you will likely overestimate your speed, so plan on only paddling 4-5 hours per day.
How long should you be out? For your first few trips, I think 1-3 nights is a good length of trip.
Once you have a rough idea of how many kilometers you want to paddle each day, as well as the length of the trip, you can choose your route. There are a few different strategies I suggest to new canoeists.
- Call the park’s outfitter (i.e. Algonquin Outfitters) and ask them what they think. The guides are extremely knowledgeable and will be able to help you choose a route that matches your abilities.
- Purchase a park map that shows campsite location, portage lengths and distances between campsites. If you call the outfitter, they can help you find the best maps for your trip
- Go to the park’s online reservation system and look at where the campgrounds are located.
- Google something along the lines of “Easy 3 day Algonquin canoe routes”. I feel this is less effective than calling the outfitter directly, but is also an option,
Regardless of how you choose your route, ensure you know where you will need to pick up equipment and leave your car while you’re canoe camping.

Pre-Trip Packing
Unless you have your own equipment, contact an outfitter about getting the gear you need. Many provincial and national parks have outfitters that service the park, or you can buy/rent gear from a place like Mountain Equipment Co-op . Here’s a fairly comprehensive list of what you’ll need for a canoe trip.
What You Will Put Everything In
In a moment I’m going to list off a lot of equipment for you to bring on your canoe trip. Before we get into all that, let’s talk about what you will put all the equipment in.
Dry Sacks : Dry sacks are bags that keep your stuff dry. You can get them as small as 5 L and as long as 50 L (the large ones often have backpack straps). I recommend going with the brand SealLine (best quality) and ordering from Altitude Sports because they’re often on sale.

Backpacks : Some people put all their personal things in small dry sacks, and then put all the dry sacks in a hiking backpack. I don’t personally do this, though some of the guides I work with swear by it. You can also get large canvas backpacks for the equipment that doesn’t need to stay dry (pots, pans, utensils, tarp). I’ve done this for canoe guiding with camps, though I now prefer to use barrels.
Barrels : I love barrels. They aren’t quite bear proof, but they are rodent proof and water proof and the large top opening makes it easy to find things inside. They are primarily used for food, but I like using them for all my gear. I will put my things in smaller bags to keep everything organized inside.

Paddling Equipment
All of the paddling equipment can be easily rented from the park’s outfitter.
Canoe : 1 per two people paddling (you can do three in a boat, but it makes the canoe more wobbly and is uncomfortable for the middle person). Wherever you’re going, you’ll likely be able to rent a boat. If you’re wondering though, my favourite flatwater canoe is the Nova Craft Prospector 17 .
Paddle : 1 for each person paddling + 1 spare
Lifejacket : 1 per person + 1 spare (Although you can get these from the outfitter, I’ve also preferred to have my own paddling lifejacket. I used the one below for ~50 nights canoe camping and still really like it.)

Safety Equipment
First Aid Kit and InReach / Satellite phone : I have a post on building a wilderness first aid kit that you can reference. You can rent an InReach and First Aid Kit from an outfitter. If I’m on a long trip, I have a 30 L barrel for the First Aid Kit and InReach / Satellite Phone. Otherwise, I keep it at the top of my 60 L barrel with my personal gear in it.
Pro Tip: It is important to keep both the First Aid Kit and the InReach / Satellite phone dry and easily accessible. You never know when you will need them.
A note about safety : Many inexperienced paddlers do not wear lifejackets or carry safety gear with them. They haven’t been camping long enough to have a close call and understand the importance of being prepared. Don’t be like these people. Wear your life jacket. Bring a first aid kit and communication device.
What to Wear While You’re Canoeing
I have a detailed post on what to wear canoeing , but here is the gist of it:
Quick Dry Pants and/or Shorts : I typically bring one pair of each. I have a pair of MEC hiking pants, but for shorts, I typically just use shorts you’d wear to the gym. Nothing fancy.
Quick Dry T-shirt : I’m still using the polyester quick-dry shirts I got in high school track and field tournaments a full 7 years later. Again, nothing fancy, it’ll get dirty anyway. A tank top works too, but I rarely paddle with anything but a T-shirt on because I get sunburned so easily. I’ve also started wearing this quick-dry anti-odour t-shirt and have found it nice.
Bathing Suit/Underwear & Sports Bra : Bathing suits are great if it’s hot and you want to go from a quick tip during the day, but some people prefer to just wear underwear and a sports bra (if applicable).
Wet Shoes : Whenever you think your feet might come in contact with water (while canoeing, when it’s raining) you wear your wet shoes. I prefer to use closed-toed trail running shoes so I can wear them during a portage or when walking through rapids too (for my last season canoe tripping I wore Salomon trail running shoes and loved them, however, the exact style has been discontinued). Some people prefer short hiking boots too.
Read This Next: Best Shoes for Canoeing: What to Look For and What to Buy

What to Have in the Canoe With You
Clear 10L dry sack : This is more a personal preference, but one of my favourite pieces of gear is a clear 10 L dry sack. Everything I might want during the day gets put in there. It keeps small things easy to access and quick to find, but it’ll also keep everything dry.

In the dry sack I pack (in roughly this order):
Toiletries : I keep my toothbrush, toothpaste and chapstick in here so I don’t lose them in my larger dry sack or barrel. Plus, I’ve usually packed up all of my stuff and loaded the canoes before I’ve eaten breakfast; having them here makes it easy. I don’t need it during the day so it goes at the bottom of the bag.
Fleece Long Sleeve Shirt : This again is more of a personal preference. I like to have a shirt handy if it’s windy or chilly on the water, and fleece dries relatively quickly if it were to get wet. I don’t take it out too often, so it’s near the bottom.
Rain Pants : If you’re going for a short trip, rain pants aren’t necessary but I strongly recommend having them. If it’s raining during the day you’ll stay much warmer if your legs are dry. Even at the site, you’ll stay so dry and be so much happier when you’re setting up your tent or cooking in the rain.
Sunscreen , bug cream , sunglasses , buff (if I’m not already wearing it), sunhat .
Disposable camera (or another type if you’re fancy).
Raincoat : Good quality raincoats need not be expensive. For a weekend in Algonquin, you don’t need a $400 Gore-Tex jacket; I’ve used a basic Patagonia Torrentshell (~$149) for three years now. It’s been used in the Canadian Arctic, on 20+ day river trips and short hiking trips in New Zealand, and still works great! I keep my raincoat at the top of the dry sack for quick access!
Update : I’ve since upgraded a lot of my camping gear, and you can read more about them in my post: My All-Time Favourite Camping Gear .

What to Wear At Your Campsite
Once my group has arrived at our campsite we all unload boats, and then some set up tents while others collect firewood. Once camp is in good shape, I change into my site clothing (weather permitting). With each canoe trip, you do you’ll learn more about what you like best. This is typically what I wear:
Dry Shoes : Tevas are popular because they dry quickly if you accidentally get them wet, they’re easy to put on and take off, and you can wear wool socks underneath.
Fleece and (Synthetic) Down : I like fleece because it’s warm and dries quickly, so I bring a pair of fleece pants and a fleece sweater. I got these Patagonia fleece pants on sale and I wear them almost every day now.
And the Patagonia Better Sweater is now in rotation with a youth large North Face long sleeve I got from a lost and found six years ago. I also have an Arc’teryx puffy down jacket I like to wear. However, I typically only wear it at the site because I don’t want it to get wet if I were to fall into the water.
Note : I’ve included links to my favourite gear which isn’t exactly inexpensive. Over the years I’ve slowly acquired a lot of high-quality clothing and equipment. But if you’re just getting started don’t stress about having fancy gear. Shop sales and thrift stores and rent if you need to. Finances should never force you indoors.

Synchilla® Fleece Pants

Long Underwear : For short and close trips, a pair of non-cotton tights and a non-cotton long sleeve are a great substitute for expensive long underwear. If you would like something a little more technical, long underwear (both pants and shirts) are either made of merino wool or synthetic material.
Merino wool is warmer and wicks away moisture better, but it’s also more expensive than synthetic. If you’re curious and want to splurge a little, this SmartWool shirt and these SmartWool pants are my favourite base layers I’ve ever owned.
Wool Socks : Warm feet are happy feet! Bring a few pairs. SmartWool is my favourite by far, but whatever brand you choose just please don’t make them cotton! Once they’re wet they’re wet forever.

What Equipment to Pack
Your equipment pack carries all the hard wear you’ll need. This covers fire starting, water purification, cooking, shelter, etc.
Matches and lighters : I bring both. Keep them in a plastic bag to prevent them from getting wet. Pro tip: Keep some in the Equipment Pack, some in the First Aid Kit and some in your personal bag. That way if one bag gets wet, they don’t all get wet.
Cooking equipment : You will need a cooking stove and fuel canister (even if you plan on cooking over a fire). If it rains or there is a fire ban, you will need a stove. If you have room in your equipment pack, you can bring a small grill for over the fire.
Cooking utensils : Bring a pot with lid, frying pan, spatula, spoon, knife and fire glove for cooking. Bring bowls and spoons/forks for eating.
Clean Up : Bring steel wool or a scrubber and biodegradable camp soap to do dishes . Bring garbage bags to put any garbage in. Do not burn garbage. Pack it in, pack it out.
Poop Kit : Bring toilet paper and hand sanitizer. If you are going somewhere that doesn’t have thunder boxes, then bring a trowel. Read more: How to Poop in the Woods .
Water purification : You can either bring Aquatabs or a Water Pump (with Aquatabs as a backup).
Shelter : Tarp and rope. You could probably get away without these on shorter trips, but having a cooking shelter when it’s raining is a real game-changer.
Bonus : I like to carry some extra carabiners and zips ties because they’re handy.
Cooking & Food Packing
In this guide, I don’t go into detail on backcountry cooking and food prep for canoe trips, because I’ve written an entire cookbook on the topic.

Sleeping Equipment
Tent : Obviously you’ll need a tent. The nice thing about canoeing (especially when you have short portages) is you don’t need to splurge on an ultralight tent. Store it in a dry sack so it stays dry throughout the day.

Sleeping pad and sleeping bag : Choose a three-season sleeping bag and sleeping pad. I also like bringing a compressible camping pillow (okay, maybe I’m a bit of a diva). If you’re worried about sleeping comfortably on trip, I have a whole post about strategies I’ve found to make sleeping in a tent better .

Pyjamas : I like to sleep in base layer pants/long sleeve shirt. I used to sleep in cotton pyjamas, but on one trip I found myself sweating a lot in the night. Since cotton takes forever to dry, my pyjamas stayed sweaty for the rest of the trip. Now I sleep in either wool or synthetic clothing.
Other Things to Bring
Here are some other items you can bring on your camping trip.
- Book, journal, pens, cards
- Headlamp and batteries
- Face wipes (I have a lot of tips for staying clean and fresh while camping )
- Compressible or blow-up pillow
- Hat and/or gloves if it’ll be cold
Once you’re packed, you’re just about ready to go! Before you head out the door, always leave a copy of your route and when you’ll be back with someone from home. That way, if something were to go wrong, someone will know where you were supposed to be and it makes finding you much easier.

Getting to Your Canoe Camping Destination
In the majority of cases, you will drive to the destination you are paddling. At least in Canada, there isn’t much of a public transportation network for accessing provincial and national parks, plus you will have a lot of equipment, so I recommend driving yourself.
For a lot of beginner canoe routes, you will be able to park right at the put-in. The “put-in” is canoeist slang for “where you PUT IN the canoe to start the trip.” Since a lot of beginner canoe routes are loops, the put-in will also be the take-out, “where you TAKE OUT canoe at the end of the trip.”
At the put-in, you will be able to load your canoe, get ready with your lifejacket and paddle, and be ready to get on your way!
Taking Your First Canoe Camping Trip
So you’ve done the preparation and packing. You’ve picked up your equipment. But now you’re standing at the shoreline, paddle in one hand, map in the other, and thinking “oh my goodness, what have I gotten myself into?”
But then you remember that you’ve read this post and you know exactly what to expect on your first canoe camping trip.
If you have no idea how to sit in a canoe or hold a paddle, do not fret. You will catch on quickly.
How do you hold a paddle? Please see an awkward photo of me below for reference. That is how you hold a paddle. In the photo, my left hand is gripping the butt of the canoe paddle and my right hand is holding the shaft.
Where do you sit in the canoe? The person in the bow (the front of the boat) is the powerhouse and lookout. Your responsibility is to look out for potential obstacles (a shallow rock or submerged log) and communicate that to the person in the back. That, and paddle. In the front, you only need to know the forward paddling stroke (though it doesn’t hurt to know how to draw – I’ll touch on this soon).
The person in the stern (back of the boat) is responsible for steering. You have three important paddling strokes to know. The forward stroke, the C-stroke and the J-stroke (though this one is kind of tricky so I’ll tell you a hack to avoid it).
In all honesty, reading a blog post about paddling strokes isn’t going to be particularly helpful. I recommend checking out YouTube videos on each of the strokes. (Wait, should I make paddling videos myself? Please comment below if you would watch me teach you how to paddle.)
Secret for the J-stroke : If you aren’t confident in your ability to do the J-stroke, what you can do instead is a pry stroke. After you do a forward stroke and the paddle is still in the water but pointed at the back of the canoe, push the water away from the back of the boat. This is called a pry and acts like a rutter (as on a sailboat or sea kayak). Check out this YouTube video on pry strokes .
This is the hardest thing about canoe camping, in my opinion. Especially in a park like Algonquin or Killarney where you have a ton of lakes and a ton of trees and it all looks, dare I say, identical?
First, you absolutely need to have recent and decent maps. You can purchase these at MEC or REI or at the outfitter directly. Store the bag in a waterproof map case or a ziplock bag to keep it dry.
Should you bring a compass ? Yes, you should. I know it sounds annoying and what if you don’t know how to read a compass? Well, I’m sure there’s a YouTube video on compass reading and they aren’t too expensive. Now, do I always carry a compass with me? No, I do not and I’m sure a lot of my friends don’t either. If you prefer not to carry one that is your choice, but my official recommendation is that you should bring one.
Ah, portaging. My least favourite part of canoe tripping. If you aren’t familiar, portaging takes place when you need to go from one lake to another or go around an obstacle in a river (like a waterfall). It involves hiking your gear from one side to another. Many people portage without having ever been taught how to do it – you pick it up quickly. Here are a few tips to make it easier for you (and some tips on portage etiquette):
- Easy portaging starts long before you hit the portage trail. When you back your boat, try to minimize the number of small, loose things you have to carry (i.e. tie water bottles and rain jackets to a backpack).
- Once you get to the portage, pull all your gear out of the water and out of the way. This will allow other people to use the portage too.
- Carry the canoe first because they are worse to carry.
- Carry the backpacks and barrels on the second trip. Load them directly into the canoes at the end of the portage.
If you want to learn more, I’ve written an entire post about how to portage (and a bunch of tips to make it easier).
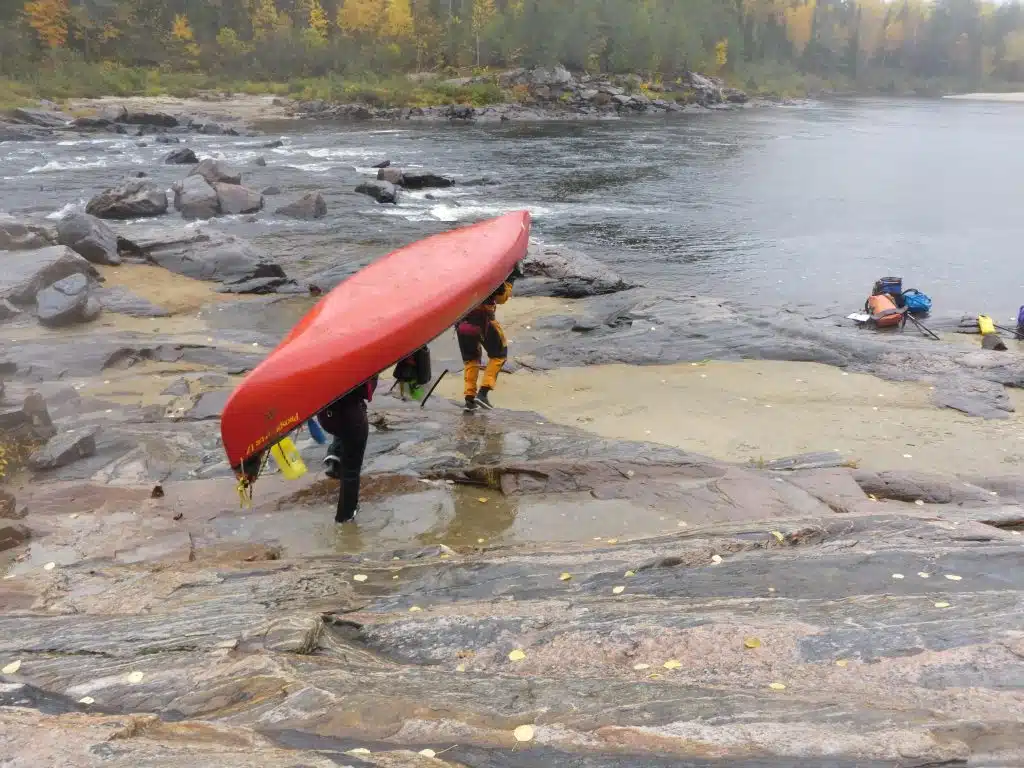
I hope this guide has inspired you to get out canoe camping, and given you the resources to do so safely. Any outstanding questions? Leave a comment below.
More Resources
- A Beginner’s Guide to Scouting Rapids
- How to Get Started in Whitewater Canoeing
- 10 Tips to Help You Sleep Better on a Camping Trip
- The Ultimate Canadian Canoeing Bucket List

Mikaela | Voyageur Tripper
Mikaela has been canoeing, hiking and camping for over ten years. She previously worked as a canoeing guide in Canada, and spent a season guiding hiking and kayaking tours in the high Arctic. Mikaela is a Wilderness First Responder and Whitewater Rescue Technician.
MY FAVOURITE GEAR

Fleece Sweater

Down Jacket

Hiking Boots

Hiking Shirt

Hiking Pants
2 thoughts on “ The ULTIMATE Guide to Canoe Camping ”
Stay in touch.
Join our community of outdoor adventurers - you'll find trip inspiration, gear discussions, route recommendations, new friends and more!

Barrels are waterproof but they are definitely not bearproof. You should hang your food.

Been meaning to update that line! Thanks for the reminder. That said, I still don’t advise people to hang barrels. 1) Barrels tend to be very heavy and I’ve heard of a few people getting themselves injured by attempting to hang a heavy barrel. 2) Most people don’t know how to properly hang food (nor are there sufficient trees for hanging food) so it’s ineffective. I advise people to use the barrel harness to secure the barrel to a tree so the bear can’t wander off with it. That said, unless you’re in an area with a lot of bear activity and habituation (Algonquin), you’re very unlikely to encounter a bear trying to mess around with your barrel.
Leave a Reply Cancel reply
Your email address will not be published. Required fields are marked *
Save my name, email, and website in this browser for the next time I comment.
- Facebook Group

Canoe Trip Pack List: 62 Essentials for Backcountry Camping

Are you planning a backcountry camping trip in North America this summer?
I have been on several canoe trips in Algonquin Park and know how overwhelming it can be to pack for a multi-day camping adventure.
Forgetting a single essential item can make your trip less enjoyable or even put your safety at risk. That is why I have compiled a comprehensive list of 65 essential items for your canoe trip pack list .

I have learnt these tips from my numerous camping trips to Algonquin Park in Ontario , plus with the help of experienced campers who have been canoe camping for over 15 years. You can trust that this list covers everything you need on your canoe camping checklist.
Whether you are a seasoned camper or a first-timer, this article is perfect for anyone planning an overnight canoe camping adventure in North America this summer.

Want to receive this canoe camping packing list as a printable or fillable checklist ?
Canoeing Trip Packing List
- Sleeping and Shelter
- Food and Water
- Safety and Navigation
- Personal Items
This portaging packing list is organised into categories.

Use the information in the categories above to learn about packing for a canoe trip in the backcountry.
Backcountry camping is a type of camping in which you have no access to running water, a toilet, mobile service, or electricity .
The main difference between backcountry camping and car camping is that you must carry all your belongings to the backcountry, either by foot or canoe.
Therefore, for backcountry canoeing, you need to pack as light as possible so it is possible to carry it.
You do not have to consider the weight and number of objects as much with car camping .
Sleeping & Shelter: Most Important Packing List Items
Some of the most important things on your packing list for canoe trips are items you will use for shelter and sleeping.
These overnight camping essentials may seem like luxury items, such as a sleeping mat or a pillow – but they will improve your sleep quality immensely.

Selecting the right tent is crucial to ensure a comfortable and safe canoe camping experience.
For extra comfort, bring a tent that can accommodate one more person than your group , as this allows for extra space for moving around and using the tent for changing or resting.
When looking for a tent, consider its durability and waterproof features to protect against weather conditions like rain and wind.
Additionally, the weight of the tent should be considered since it can be challenging to pack and carry a heavy tent on a canoe trip.
If you need more tips on choosing a tent, check out this tent guide on the REI website .
The tent we use is the MSR Hubba Bubba 3-Person Tent .
- Best Budget : NEMO Aurora Tent
- Best Luxury : MSR Hubba Bubba Tent
2. Trekking Backpack

Your canoe trip may involve hikes and portages to get to your campsite . Therefore, you need to bring a large bag that you can fill with essential canoe trip items , such as sleeping bags, a tent, equipment, and emergency items.
Ideally, you want a large rucksack that has padded shoulder straps for comfort.
Many portages, such as those around Lake Magnetawan , involve hiking for over 1km – which will take much longer than a regular 1 km hike, given you will be carrying heavy equipment.
You also need a waist strap on the bag to support your back and balance the weight of the bag.
If you purchase a high-quality trekking rucksack it will last many years. For example, we use these Gregory backpacks and they are around 10 years old.
- Best Backpack : Gregory Stout 60L Backpack ( men’s product available here )
3. Sleeping Mat

Depending on your budget, you can use a regular sleeping pad, which is like a yoga mat, or bring a self-inflating sleeping mat .
The latter will likely be more expensive but will protect your back more from feeling the rocky terrain.
Consider that if you are a side sleeper, you may need to find more specialist products because even with an inflatable sleeping mat, you will feel discomfort on your side.
The sleeping mat we use is Therm-a-Rest Prolite . It is self-inflating and easy to roll-up.
- Best Budget : Stoic Groundwork Sleeping Pad
- Best Luxury : Therm-a-Rest Prolite Sleeping Pad
4. Sleeping Bag
Another of the most crucial items on your overnight camping packing list is the sleeping bag.
There are several types of sleeping bag. You can choose a sleeping bag based on its features, such as its lowest suitable outdoor temperature and whether it is fit for males or females.
Take some time and research to discover which sleeping bag will work best for you.
For those based in Canada , MEC has an excellent selection of sleeping bags (our sleeping bags are from MEC).
- Best 3-Season Sleeping Bag : NEMO Disco 30 Sleeping Bag ( men’s product available too )
5. Camping Pillow

If you do not bring a pillow, you will soon see why a camping pillow is a necessity . Sleeping on a rolled-up piece of clothing will not be as comfortable as a blow-up pillow.
Camping pillows are packable, and many of them are inflatable, so you can adjust the firmness of the pillow.
The pillow we use while camping is NEMO Fillo Backpacking Pillow . You can adjust the firmness of the pillow using the inflation valve.
- Option 1 : NEMO Fillo Backpacking Pillow
- Option 2 : Sea to Summit Aeros Ultralight Inflatable Camping Pillow
Bring a long, strong rope to hang your food barrel from a tree branch.
Pack another rope to hang tarps or make clothing lines .

A tarp is an excellent item to add to your canoe trip gear list because it packs up small and can be valuable in case of rainfall .
You can set up additional space for daytime use or use the tarp to keep other items dry at night if there is no space inside your tent.
Therefore, make sure you purchase a heavy duty tarp that is fully waterproof.
You can various options for tarpaulin on Amazon or other camping equipment stores.
- Best Budget : Amazon Basics Waterproof Camping Tarp
- Best Luxury : Sea to Summit Escapist Tarp (Medium)
Food and Water: How to Prepare for a Canoe Trip

In this section of the canoe trip equipment list, you will find all the gear you need to help with eating and drinking while on a canoe camping trip .
You should pack enough food for the entire duration of your trip.
If your backcountry camping trip exceeds three days , you should bring dehydrated or freeze-dried food ; otherwise, the fresh food you took may not stay fresh.
Large water containers are heavy to carry in addition to your other canoe expedition gear.
So, aside from the water you already have in your water bottle, you will need to use other water sources for drinking and brushing your teeth.
Nonetheless, you cannot drink directly from most lakes due to the risk of giardia (beaver fever). The bacteria from the water can cause some severe side effects. You need to make sure you purify any lake water before drinking it.
Some destinations, such as deserts, do not recommend attempting to purify and drink their water because it can clog filters. Therefore, you will need to bring large containers of water. Remember to bring enough water for drinking, cooking, and brushing your teeth.
8. Water Filtration System

A gravity bag is an excellent way of filtering lake water and making it potable. Water is abundant while canoeing; therefore, gravity bags are a great option to use to make drinking water.
A gravity bag is more expensive than other water purification methods, but consider it an investment because you can use it for many camping trips to come.
This is the water gravity bag we use on our backcountry camping trips.
- Best Budget : Katadyn BeFree 3.0L Water Filter
- Best Luxury : Platypus GravityWorks 4.0L Filter System
9. Water Purification Tablets
These tablets are a compact and low-cost way (in the short-term) of purifying your water so it is safe to drink. However, purifying tablets can make the water taste a little different to normal, so you may prefer to use another water filter method.
It is advised to bring some water purification treatment tablets as a backup in case your gravity bag water supply fails. In this case, you will still have a method of drinking clean water.
- Aquatabs 49mg Water Purification Tablets
10. Camp Stove

Another significant item to add to your canoe trip pack list is the camping stove. This piece of gear is essential to your survival while camping, particularly if you have no access to a fire pit for cooking.
Once you have bought a stove, you should also guarantee you know how to use it.
If you have not used your camp stove since your last camping adventure, check it is working before you embark on your next canoe trip.
- Best Budget : MSR Pocket Rocket 2 Stove
- Best Luxury : Jetboil MiniMo Camping and Backpacking Stove
11. Kitchen Cookware

A good set of cookware, including knives, forks, spoons, plates, a saucepan, and a frying pan, will make meal preparation and serving a smoother experience in the backcountry.
Instead of bringing so much cutlery, you could also purchase a spork – a cross between a fork and spoon.
It is beneficial to have a cookware set that packs up inside itself.
If you are purchasing an MSR stove, there are often bundles that include some cookware.
- Stove and Cookware Bundle : including Sauce Pan, Deep Dish Bowls, two Insulated Mugs, Strainer Lid, and two Folding Sporks.
- Jetboil Frying Pan
- MSR Kitchen Utensil Set – includes Folding Spoon, Spatula, Ultralight Cutting Board, Salt & Pepper Shaker, Squeeze Bottle and Dish Towel.
In addition to knives used for eating, you need a sharper knife to cut food such as fruit or vegetables.
13. Bear-Proof Food Containers

A food barrel will keep your food safe from bears and the elements while you are on the water or in the backcountry.
It is also a great way to organise your food and keep everything in one place. You can also use it to store other scented toiletries.
When packing your food barrel at home, review the order you pack your food, with the items you will need first at the top.
A food barrel is heavy and difficult to carry when full. It is recommended to attach straps to carry the barrel like a backpack to make portages easier and allow your hands to be free to carry other objects, such as paddles.
- Food Barrel (MEC Canada)
- Straps for Food Barrel
It is also possible to purchase bear-proof bags and bear resistant food containers . These can fit inside your other backpacks and will keep your toiletries and food safe.
14. Water Bottle
Staying hydrated is essential when canoeing and camping. Bring a reusable water bottle to refill as needed along the way.
Even though insulated water bottles are good for keeping your beverage cold, I suggest bringing a lightweight plastic bottle. Plus, you will want a wide-mouth water bottle in which you can easily place an electrolyte tablet .
15. Empty Plastic Bag
Be sure to pack out everything you bring in. An empty plastic bag for waste will help you keep your campsite and the surrounding wilderness clean.
Remove packaging from new items before you leave for camping so you do not have unnecessary trash on you.
16. Espresso Maker
If you cannot go a day without coffee, you can bring a small espresso maker. It may be challenging to bring milk, so you need to drink it black.
17. Lighter
Starting a fire is essential for cooking and staying warm. Be sure to bring a lighter, as well as a backup option, such as additional lighters or waterproof matches .
18. Collapsible Sink

When backcountry camping, a collapsible sink is a useful to wash your dishes.
Washing dishes near your campsite or water source can contaminate the environment and attract wildlife. Therefore, a packable kitchen sink is handy to contain your dishwater and move it somewhere safe for disposal.
Collapsible sinks are lightweight, easy to pack, and a great item to add to your wild camping kit list.
- Best Budget : Flat Pack Sink
- Best Camping Dish Wash Station : Sea to Summit Collapsable Wash Bag
Safety Items: Canoe Camping Gear List

Some items on this canoeing equipment list are for an emergency; therefore, you hope that you will not have to use them.
Whereas, other canoe camping gear is essential; such as flashlights, a hatchet to cut wood, and a map to keep on the right path.
As well as possessing these items, you need to be up to date on your bear safety.
Many destinations across North America, such as Banff and Algonquin Park are home to bears.
You can read about being “ bear wise ” here.
Rent canoes if you do not have one. It is a major piece on a canoe gear list.
Once you have determined where you will be backcountry camping, you should investigate canoe rentals.
If you will be camping in Algonquin Park, I have given recommendations for canoe rentals for Rock Lake Access Point and Magnetawan Lake Access Point .
20. Paddles
Just as with canoes, you must bring or rent paddles to steer and propel your canoe.
Each person needs a paddle.
21. Personal Flotation Device
Many parks require you to wear personal flotation devices, also known as PFDs, or at least have them in your possession. A lifejacket can save your life in case of an emergency.
Canoe and paddle rental companies will give you lifejackets to wear for your canoe camping trip.
22. First Aid Kit

Accidents can happen, and having a first aid kit can help you take care of minor injuries, such as blisters and cuts.
Consider the number of people on your camping trip and how many days you will be camping for. As you can see in the adjacent image – the medical kit we took was enough for two people on a two day trip.
Check you also have painkillers and anti-inflammatory drugs in your first aid kit.
If you use anything from your medical kit while backcountry camping, make sure you replace it for the next trip.
- Adventure Medical Kit
Even if you visit your place of backcountry camping often, you should bring a map so that any group member can use it if needed.
Have it in a waterproof case so it will not be ruined by rain or dropped in a river.
When the sun goes down, it gets incredibly dark in the backcountry when all you have is the moonlight. You will need a reliable light to navigate in the dark and find your way around camp.
A flashlight or headlamp is useful for walking around the campsite in the evening.
A lantern is good for putting around the camp or inside your tent when winding down for the evening.
25. Hatchet and/or Sledgehammer
These tools will come in handy for preparing firewood. Plus, a sledgehammer can be used to hammer tent pegs if the ground is hard.
26. Compass
A compass can help you navigate and stay on course when you have no service.
27. Firewood
Verify whether there is a fire ban in the park before you enter.
You may not even need firewood if you have brought your camping stove. Although, if the weather is good, you can rely on wood that you gather on your camping site for cooking.
If there is no fire ban, buy wood from the park office. You cannot bring wood from outside the park.
Clothing for a Overnight Canoe Trip Packing List

When deciding what to wear on a canoe trip, bring the fewest number of clothes possible .
For shorter trips, less than three nights, you can typically get away with the daytime clothes on your back, plus an extra set in your pack.
After a few days of no access to showers on overnight canoe trips, you will embrace wearing the same clothes.
Although, you may wish to leave an extra outfit in the car for the end of the trip to travel home without smelling like a bonfire or sweat.
Keep an eye on the weather forecast in the days approaching your canoe trip. The weather can change quickly, but the forecast should indicate if you will face cold or hot temperatures or rainy conditions.
The best kinds of fabrics for backcountry camping in summer are lightweight and quick drying ; for example, exercise shirts from Lululemon or swimming trunks for men.
However, do not bring any of your best clothing that you would not like to get damaged or stained in case of any accidents or that is not easily replaceable if needed.
Read on to find all the items of clothing that should be on your backcountry camping overnight checklist.
28. Dry Bags

Before you pack any clothes on your canoe camping list, you need a waterproof bag to put them in.
Dry bags are the best for storing items that need to stay clean and dry. They are waterproof and the top folds over to stop any water from entering if the bag falls out of your canoe or kayak.
SealLine is a reputable brand of dry bags.
You need dry bags in varying sizes, for example smaller ones for your clothing , and a larger one (with straps) for sleeping bags .
- Best Large Dry Bag: 65L SealLine Dry Pack with Straps
- Best Small Dry Bag: 10L SealLine Dry Bag
29. T-Shirts
Ideally, you will bring short-sleeve t-shirts in a sweat-resistant fabric .
Full-sized t-shirts are best for canoeing because they will cover your shoulders , which can burn on a sunny day. Plus, the material will make you feel fresher for longer.
Some suggested brands for this kind of t-shirt include: Lululemon and Adidas.
- Ladies ‘ Crew T-Shirt from Lululemon
- Ladies ‘ Running T-Shirt from Adidas
- Men’s Drysense Short Sleeve Shirt from Lululemon
Shorts are typically the best clothing to wear as bottoms for canoeing. It can get warm and sweaty on summer canoe trips.
Plus, it is common to splash water on your legs when paddling, so it will dry quicker on your bare legs and shorts than on trousers.
Quick-drying shorts are better than cotton shorts.
- Ladies ‘ Mid-Rise Lined Shorts from Lululemon
- Men’s Baggies Shorts from Patagonia
31. Warm Sweater
Even though you are going on an overnight canoeing trip in summer, it can still get cold at times. You will likely need to wear a sweater, or another long-sleeved layer, such as a fleece, to keep warm once the sun has set .
Additionally, covering your arms in the evenings will help prevent mosquito bites .
It is best not to wear the same clothes to sleep in that you have cooked or eaten in (in case of any smells or remnants of food left on the materials) at night due to bears.
Therefore, ensure you have a warm enough sleeping bag or another long sleeve layer to wear for sleeping if you get cold easily.
- Gender-Free Crew Sweatshirt from Roots Canada ( available on US website here )
32. Long Pants

Another item of clothing that is good for canoeing trips is a pair of trousers, that are not jeans. This type of long pants is handy for evenings, when the temperature is cooler, and the mosquitos are out.
Leggings are typically too thin to stop mosquitos from biting through the material, so they are not the best trousers to wear in the evening on camping trips.
Sweatpants or other exercise trousers, such as these Lululemon trousers are better options for camping .
- Ladies ‘ Stretch High-Rise Pants from Lululemon
- Men’s Training Joggers from Lululemon
33. Leggings or Long Johns
It is recommended to bring leggings or other thermal pants because they are good for sleeping . If you think you may get cold legs at night, it is best to pack a pair of leggings.
I usually start by wearing leggings as it is cold at the start and middle of the night. By morning, you may want to wear shorts.
The best quality leggings for ladies, in my opinion, are from Lululemon .
- Ladies ‘ Align Leggings from Lululemon
- Men’s Thermal Leggings from Icebreaker
34. Bathing Suit
You will need some swimwear on your backcountry camping trip for several reasons. Firstly, after a long, hot portage, a refreshing dip in the lake may be just what you need. Secondly, swimming may be the only way to wash yourself during your camping expedition.
Ladies, bring a two-piece if possible because it will dry quicker and it will make going to the bathroom easier if you are exploring while wearing your bikini.
35. Daytime Socks

It is important to bring enough socks for each day to wear during the daytime because you might find your socks will get damp and sweaty.
You may prefer to wear active-wear socks as these will cope better with the dampness of the foot from hiking and paddling.
Also, check that your socks cover your whole heel to avoid getting blisters .
It is best to wear socks that come just above the ankle because it will help protect them against potential scrapes while hiking .
- Ladies ‘ Hiking Socks from Lululemon ( socks available for men here )
36. Warm Socks
I recommend bringing some thicker socks that you can wear in the evenings to cover your ankles from mosquitoes. Plus they are good to keep your feet warm at night .
Roots is my favourite shop to buy these types of socks from.
- Cabin Socks – 2 Pack
- Cabin Ankle Socks – 2 Pack
37. Underwear
This is self-explanatory, but bring enough underwear for the entire duration of your trip.
Men – you may be fine with wearing swimming trunks while canoe camping. But think about nighttime and other times you will not be wearing swimwear.
Ladies – sports bras are better than regular bras because they will hold up well to sweat. You can wear bikini tops the whole time, but you may want better support while carrying the canoe/equipment on portages or paddling.
38. Rain Jacket
You should bring some rain gear, even if it does not look like rain is in the forecast during your canoe trip.
Rain jackets are usually easy to roll up small into a bag. Plus, you can use your raincoat as an extra layer if it gets cooler.
- Best Luxury : Arcteryx Beta Rain Jacket ( Beta LT for Women ) ( Beta Lightweight for Men )
- Best Budget : North Face Rain Jacket ( Antora Jacket for Women ) ( Antora Jacket for Men )
Wide-brimmed hats are great for canoe camping because they cover more of the face and neck than baseball caps. However, a baseball cap will also work if that is what you already own.
If you already own a wide-brim hat from a safari or other similar trip, bring it.
Check the night-time temperature because it is chillier at night. If so, you may want to bring items such as a knitted hat or gloves – but this is more for spring and fall trips .
- Women’s Wide Brim Bucket Hat from Lululemon
- Sinsola Sun Hat from Arcteryx
- Abisko Sun Hat from Fjallraven
- Roots Baseball Cap from Roots
40. Sunglasses
Sunglasses will be another one of your canoe trip essentials. Do not bring your favourite pair of sunglasses in case they get lost or broken. However, make sure that the sunglasses you bring have sufficient UV protection .
You may benefit from having a string/rope to secure them around your neck when you are not wearing them.
- Sunglasses Strap
41. Old Running Shoes or Hiking Shoes
The best canoe trip shoes are durable and comfortable, but also you should be fine with them getting a little wet.
There are occasions while camping that you may accidentally step in water when getting in and out of the canoe. Therefore, you should be fine with wearing the shoes in water , or they should be able to withstand the wetness.
I suggest bringing an old pair of running shoes or sturdy hiking shoes.
I wore my Blundstone Boots when camping but I got bad blisters from the rigorous portages, so I would not recommend wearing these if you are prone to blisters.
- Women’s Hiking Shoes from Merrell ( Men’s version available here )
42. Campsite Shoes
You will need shoes to wear around your campsite, such as sandals. Campsite shoes give your feet a rest and a breath from the trainers you wear during the day.
I would avoid bringing flip-flops because it is tough to wear these with socks on, which you may want to do in the evenings.
A solid pair of sandals, such as Tevas are beneficial because they also can be used for walking and canoeing.
- Teva Sandals for Women ( Men’s version available here )
- Keen Sandals for Women ( Men’s version available here )
Toiletries: What to Pack for Backcountry Canoeing
43. biodegradable soap.

It is essential to bring biodegradable soap because it will decompose more quickly in the wild than conventional soaps.
Read about other best practices for camping and how to respect the environment, follow the Leave No Trace principles .
You will use soap to wash your dishes and to wash your body. It is one of the biggest must haves for tent camping.
- Best Budget : Campsuds Biodegradable Soap
- Best Luxury : Dr Bronner’s Pure-Castile Liquid Soap
44. Toothbrush and Toothpaste
Keeping your teeth clean while camping will help you feel fresher while away from many basic amenities. It is recommended to bring a manual toothbrush rather than an electric toothbrush.
Plus, those small travel tubes of toothpaste are handy to keep your toiletries as light as possible.
45. Sunscreen
Protecting your skin from harmful UV rays is especially when canoe camping because you may spend much of the day in direct sunlight. Facial sun cream should contain SPF 50 .
Spray sunscreens are good for the rest of the body because they can be applied while on the go. You may get sweaty while portaging or canoeing, so choose the thicker sports suntan lotions so it stays on for longer.
Here are my favourite brands of facial sunscreen:
- La Roche Posay Face Sunscreen
- Cetaphil Face Sun Protection
46. Deodorant
Do not forget basic hygiene while camping. Unscented deodorant is best to avoid attracting insects.
47. Antihistamine
If you are prone to mosquito bites, antihistamines will help relieve symptoms caused by bites, stings, or other allergens.
48. Bug Spray
Mosquitoes and other insects can be a nuisance in the backcountry, particularly while in wooded portages. You will need to apply insect repellent liberally to keep them at bay.
- OFF! Deep Woods Insect Repellent
49. Medication
Be sure to bring any necessary medication for your personal needs, such as prescription medication.
50. Antiseptic Cream
For minor cuts and scrapes, antibiotic ointment can help prevent infection. Polysporin and Neosporin are commonly found in North America.
51. Toilet Paper
Bring several rolls of toilet paper. You can buy toilet roll for camping that is designed to be biodegradable and environmentally friendly.
52. Tissues
Tissues are always handy for various uses. You can bring a small travel pack.
You will need to take your used tissues home with you.
53. Hairband
If you have long hair, it is a good idea to bring a couple of hair ties to keep your hair out of your face during physical exercise.
54. Hairbrush
You will likely wear a hat for the entire camping trip, but you should bring a compact brush or comb to keep your hair tangle-free.
Bring a microfibre towel to dry off after swimming or bathing. Microfibre towels are quick-drying, lightweight, and easy to pack up small.
Personal Items for Camping
The following items are non-essential when packing for a canoe camping trip, but you may find them useful.
56. Portable Power Bank
If you plan on taking photos on your phone while backcountry camping, you will need to bring a portable phone charger . The iPhone will only last a day or two, even when set to Airplane Mode.
57. GoPro Camera
Another option for taking photos or videos while on a canoe trip is using a GoPro . This type of camera will last longer than using a phone.
You can bring any camera that has three days’ worth of battery.
58. Mosquito Net Hat

If you are susceptible to mosquito bites, you may find it useful to bring a mosquito net hat . This will be useful during the evenings when the mosquitos come out in full force.
Some portages can be extremely buggy, so a mosquito net hat can bring some relief.
Mosquito net hats are also extremely useful for visiting places like Scotland in summer .
59. Belt Bag
Ladies and gentlemen, you may want to bring a fanny pack for any small canoe camping essentials to always keep on you, for example, lip balm, tissue, camera/phone, and allergy tablets.
Everyone is a big fan of the Lululemon belt bag , me included, but you can also find other versions of belt bags on Amazon .
60. Backpack
If you plan to embark on day trips without your main camping gear, you should bring one backpack for the group. You can fill it with food for the day, a medical kit, sunscreen, and other essential items.
If you will be portaging each day to a new campsite, you will not need a daypack.
- Osprey Tempest Hiking Backpack 20L
61. Fishing Rod
If you are into fishing, you could bring some fishing equipment. However, ensure you have the proper authority to fish locally. Many parks require permits for fishing.
62. Camp Chair
If you still have space and can carry it, you could bring a camping chair. These are better for backcountry canoe trips where you stay at one campsite , so you do not have to carry it for as long.
- Best Luxury : Ultralight Compact Camping Chair
- Best Budget : Lightweight Folding Camping Chair
63. Secure Case
If you have brought expensive camera equipment or phones, you may prefer to keep them in a safe container while on the water.
Pelican cases are shock-proof and waterproof and will prevent anything from happening to your luxury items. Check you have the right size for your camera and other precious goods.
64. Playing Cards
Another idea for passing the time is to bring cards so you can play games with other campers.
You may have some downtown during the day or evening while camping, so you can bring a book to read. I suggest packing a paperback book rather than a hardback so that it is lighter to carry.
FAQ – Canoe Trip Pack List
What to wear canoeing.
If you are canoeing in a warm climate, you should wear shorts and a T-shirt covering your shoulders. Wear quick-drying materials such as nylon or polyester, and avoid cotton as it tends to get heavy and uncomfortable when wet. A hat and sunscreen are essential when canoeing.
If it is a little cooler, you could swap out your t-shirt for a long sleeve t-shirt or add a flannel shirt on top. You should have access to a raincoat in case of a turn in the weather conditions.
Canoeing: What should I take on a canoe trip?
Some of the most important items to bring on a canoe trip include, a life jacket, paddles, map and compass, first aid kit, insect repellent, sunscreen, and a water filtration system or enough drinking water. Other useful items include dry bags, camping gear, cooking supplies, and appropriate clothing and footwear.
What shoes do you wear for canoeing?
The best canoe portage shoes are hiking boots or walking shoes due to their support, traction, and waterproof features. It is also a good idea to pack sandals to wear around the campsite and they can be worn while canoeing too.
What should I pack for a 3 day canoe trip?
No matter the length of your canoe trip, you will need roughly the same amount of essential camping gear, such as a tent, sleeping bag, and toiletries. However, you may need to adjust your packing accounting for food and clothing.
Make a meal plan for your camping trip to consider all meals, including snacks, to ensure you do not forget any food. As for clothing on a 3-day canoeing trip, you should wear one set of camping clothes and pack another set. Make sure you bring enough socks and underwear for each day.

Samantha is the founder of Continuous Roamer, a travel website focusing on adventure and the outdoors.
With a love for adventure and the great outdoors, Samantha shares tips on skiing, luxury safaris, camping, and finding hidden food gems in different destinations.
With over 20 years of skiing experience across Europe, North America, and beyond, she's also an expert in luxury accommodations and experiences.
Whether camping in Canada or dining in a Michelin-starred restaurant, Samantha always seeks out the best experiences and accommodations, and her blog highlights the best of them for her readers.
Samantha is currently living in London.
Similar Posts

Magnetawan Lake Access: How to Plan Your Backcountry Adventure
Ontario Canada has some of the best camping locations in North America because Ontario is home to the magnificent Algonquin…

Complete Guide to Algonquin Portages & Backcountry Camping
As someone who has spent the past four summers embarking on numerous backcountry camping trips in Algonquin Park, I have…

Canoe Trip Meals 101: Discover the Best Canoe Camping Meals
Canoe camping, also known as backcountry camping, is an adventure where you travel by canoe to a remote destination to…

Rock Lake Algonquin: First-Time Backcountry Camping Guide
Rock Lake Algonquin Park in Ontario, Canada is a beautiful destination for backcountry camping in Ontario. It was the first…

Yurt Camping Tobermory: Everything You Need to Know For a Memorable Trip
Before I went yurt camping in Tobermory I tried to do some research online. Other than what Parks Canada, the…
Barrel-Hauling Backpack: Granite Gear Vapor Flatbed
Share this:.
- Click to share on Facebook (Opens in new window)
- Click to email a link to a friend (Opens in new window)

[leadin]For long trips into the backcountry, some folks opt to use 60-liter barrels to haul food and equipment. Dave and Amy Freeman are spending a full year in the Boundary Waters, and they have started using this system to haul large loads of food and electronics.[/leadin]

Dave and I are newbies to using blue barrels on canoe trips. We figured our full-year expedition in the Boundary Waters Canoe Area Wilderness was a great time to try them out.
We have been using Granite Gear packs for years, so we hoped that the brand’s barrel harness system — the Vapor Flatbed — would be as good as its Superior One or Quetico packs. After two full months of use, our experience with the Vapor Flatbeds (carrying 60-liter barrels) is positive.
Granite Gear Vapor Flatbed Review

Available: Now ($150)
Where To Test It: On your next canoe camping trip. Dave and I first saw blue barrels with harness systems being used for river trips in Canada, in particular, on the Yukon and Peel Rivers.
Barrels are appealing to use while canoeing because they are waterproof, seal in food smells, and are difficult for bears to break into. We decided to give it a shot while we are canoeing in the Boundary Waters Canoe Area Wilderness during our Year in the Wilderness .

Who’s It For : Anyone who wants to carry a barrel — 60 liter or 30 liter, a large dry bag, or any other sort of big load.
‘Blue Barrel’ Pack System Tested
After nearly 70 days of continuous use this fall, I have decided that I really like the Vapor Flatbed for carrying our barrels.

We have traveled to 102 lakes so far — you can imagine how many times we have carried our barrels across portages. We have been using one barrel for our food and the other for our technology equipment, so the weight of the loads has varied.
After a resupply, the load in one barrel has been as much as 65 lbs . The Vapor Flatbed is totally comfortable to carry with this much weight.
Like all Granite Gear packs, the thickly padded hip belt is comfortable and can be cinched down tight enough so you are carrying most of the weight on your hips instead of your shoulders.
It has all the necessary bells and whistles for adjusting the load just right, with wide shoulder straps, load lifting straps, stabilizer straps on the hip belt, and even a sternum strap.

I’ve seen Dave muscle through many portages just carrying packs with the shoulder straps. Given my smaller frame and less muscle mass, I don’t have that option. When carrying a fully-loaded barrel in the Vapor Flatbed with all straps adjusted properly, I can truck along just as fast as Dave on any portage.
The ample padding along your back is also key. We initially wondered if the bottom of the barrel would dig into your back. With this system, it doesn’t. Honestly, it feels like carrying any other backpacking backpack.

We have been pretty hard on the barrels and Vapor Flatbeds, setting them down on any number of rough surfaces, from gravel to granite, and they are hardly showing signs of wear.
I threw a couple of fastex buckles in the repair kit when I saw how many are used on the Flatbeds — two sets of three running down the sides of the barrel and on over the top, one on each shoulder strap, and the big one for the hip belt. They must be sufficiently beefy, because we haven’t broken one yet, despite plenty of pulling, adjusting, and even smacking on rocks.

Granite Gear was smart to pad the bottom, too. We like how we can plop it in the canoe and then it slides around easily as we adjust our load. The company was also smart to put two handles at the top. When maneuvering gear in a canoe, and lifting a barrel onto your back, you can never have too many handles to grab. We’ve lifted the full load just with these handles and they seem to be reinforced sufficiently.
Granite Gear Vapor Flatbed
- Weight: 2 lbs. 4 oz.
- Material: 210D Nylon Cordura
- Torso Sizes: Regular
- Suspension: Vapor
- Interchangeable Belt
- Same harness as Granite Gear backpacks
- Unique panel system allow you to carry odd shaped loads
- Padded hip belt with hip stabilizer straps personalizes fit, and wide shoulder straps secure the load with a slider sternum strap and load lifter straps
- Padded bottom absorbs some impact and prevents scratches to your canoe
- Works with a 30 liter barrel or a 60 liter barrel; barrel not included
- More Info/Buy Now
Flaw: The only flaw I have found so far is that I need to re-tighten the straps that secure the barrel on occasion. I have noticed that these straps will loosen ever so slightly when they get wet. Basically, I do a quick check of these straps whenever we start our day, to make sure the barrel is held in place as tightly as possible. I might have to tighten a strap or two.
Final Thoughts: When I’m carrying a loaded barrel with the Vapor Flatbed, it feels like I’m carrying my favorite Granite Gear backpack. They know all the padding, straps, and strength of materials needed for carrying a substantial load — and they managed to create a great harness system that can be secured to a 30 liter or 60 liter barrel, dry bag, jerry can, or other large object.

—Amy Freeman and her husband Dave are spending a year in the Boundary Waters Canoe Area Wilderness in an effort to protect the Boundary Waters from a series of sulfide-ore copper mines that are proposed along the edge of our nation’s most popular Wilderness. Throughout their Year in the Wilderness they are sharing regular reviews on GearJunkie.com. Amy and Dave were named National Geographic Adventurers of the Year in 2014.
Follow Us On
Subscribe Now
Get adventure news and gear reviews in your inbox!
Join Our GearJunkie Newsletter
Gear Top Stories Deals
- Buyer’s Guides
- Air Conditioning
- Backpacking
- RV / Motorhomes
- Portable Power Stations
- Solar Panels
- Solar Powered Generators
6 Best Solar Generators in 2024 Reviewed
4 best solar generators for house boats in 2024 reviewed, 4 best backup power sources for security systems in 2024, 5 best solar generators for container houses in 2024 reviewed, what is a solar battery, 4 best solar generators for camping, 16 gardening gifts, the complete guide to canoe camping, ecoflow delta pro faq: everything you need to know, what is a hybrid solar system , how many watts does an electric dryer use, milliamps to amps conversion, what is the solar spectrum, what is a silicon wafer for solar cells, the complete guide to solar inverters.
Table of Contents
Immerse yourself in adventure and tranquility with this exciting watersport. Canoe camping is like traditional backpacking; however, the only way to reach the campsite is by boat. Paddling on the water is an excellent alternative to hiking during hot summer or a unique way to enjoy the winter landscape.
Whether you’re a beginner paddler or an experienced canoeist, thoughtful preparation is needed for a successful adventure. This guide provides relevant tips on choosing a destination, planning a route, effectively packing, staying safe on the water, and more.
How To Prepare for Canoe Camping
Choose a destination.
There are a few considerations when deciding on a location for canoe camping. You’ll need to pick a destination that matches your comfort level, balancing your skill set and sense of adventure.
If this is your first canoe camping experience, choose somewhere popular with marked campsites. Having marked campsites will make camping easier as you adjust to canoeing and camping combined. A good place to start is searching for local boat-in-only campsites. Look for National and State Parks nearby, and you’ll experience canoeing to the campsite but still have access to restrooms, tables, and flat ground.
However, experienced primitive campers and canoeists can opt for more remote locations without amenities. National and State Forests with rivers are the best options for escaping into the remote wilderness. There are usually rules in these locations associated with fires, trash, wildlife, and camping locations, so familiarize yourself with those before heading out.
Plan Your Route
After choosing your destination, it’s time to plan your route. This part can be tricky if you’re new to canoeing. Consider how fast you paddle, as this will dictate your daily travel distance. A good rule of thumb is to go 3.5 kilometers per hour at most. Then, think about how long you want to paddle each day.
Exploring and relaxing are some of the best aspects of canoe camping, so give yourself plenty of time each day to enjoy it. Leave enough time to set up camp, cook dinner, and enjoy the great outdoors.
Now, you can decide how far you want to travel each day. Don’t try to overexert yourself; otherwise, the trip will be less enjoyable. Paddling for 8 hours a day is likely too much for a beginner. Stick closer to 4 or 5 hours to leave plenty of extra time if you paddle slower or have an emergency.
To start, beginner canoeists should stay for 1-3 nights. As they gain experience, they can increase the length of the trip.
When looking at maps of the area, consider how many times portaging is necessary. Portaging is when an obstacle requires the canoe to be picked up and moved instead of paddled. For example, suppose you must go from one lake to another through shallow water or avoid a waterfall. In that case, it’s easiest to portage by unloading all your gear onto dry ground, moving the canoe, and then making a second trip for the gear.
While considering all this, decide how far to canoe each day and how many days your trip will be. Then, you can start looking at the finer details, such as food supplies, clothing, and needed equipment. Call national and state parks to utilize park guides who are experts on the park routes and can provide advice. Google and social media are other resources for discovering campgrounds and routes that others have taken.
How To Pack for Canoe Camping
When narrowing down what food to bring, consider the length of your trip and how much you can fit. Meal planning is critical to overlapping ingredients for easier packing and ensuring enough meals. Ensure each meal has sufficient calories —paddling can burn more than you think.
High-protein and high-calorie grab-and-go snacks can easily supplement our body’s needs between meals. Consider what spices and cooking oils/butters are needed for the planned meals. Water-tight barrels are perfect for keeping food dry in case of a flip. Water tablets or a water pump are great options for water purification.
Kitchen Equipment
Of course, a camp kitchen is needed. The type of kitchen equipment required will depend on how dispersed the camping location is. For remote locations, EcoFlow Portable Power Stations make utilizing electrical equipment, like a coffee maker, easy.
Consider packing pots and pans, a camp stove, some fire starter, cutlery, cups, plates, a can opener, and hand sanitizer. Recharge this portable power station with EcoFlow Portable Solar Panels for continuous power in remote areas. Consider which portable solar panel meets your boating and camping needs .
The type of clothing to pack depends on the season, and how much depends on how long the trip is. However, generally, you should pack a swimsuit, quick-dry shorts and shirts, close-toed hiking shoes, and waterproof sandals. At night, a fleece jacket, long pants, and cozy wool socks will keep you warm while at the campsite. Layers are essential to packing lightly and efficiently.
Paddling Accessories
This includes paddles, the canoe, life jackets, and other safety equipment. You’ll need at least one paddle, one lifejacket for everyone, and one extra set, just in case. Make sure the lifejackets fit correctly, and all equipment fits into the canoe.
A satellite phone and a first aid kit are essential safety items to have on hand. Pack both of them to ensure they stay dry. A wilderness first aid kit contains more extensive tools and medicine than a household kit. Everything should be in-date, and there should be enough for everyone on the trip.
Outside of an emergency satellite phone, plenty of other tech can make the trip fun. Cellphones and tablets can be used to keep in touch with the outside world. Speakers can play music at night or while paddling during the day. If you like photography, bring a camera and laptop to take and edit photos.
Keep all your devices charged with EcoFlow RIVER 2 Series Portable Power Stations , the most compact portable power stations. With these, you can maximize canoe space without compromising your power needs.
Camping Equipment
At night, you’ll need somewhere to sleep. A tent provides shelter overnight, but you don’t have to splurge on one. A lightweight backpacking tent is compact enough for easy storage in the canoe. A sleeping bag and pad are also necessary for warm, comfortable sleep after a long paddling. Again, backpacking-grade ones are perfect for storing in the canoe. The tent, bags, and pads must be stored in water-tight containers or bags.
Personal Hygiene
Pack what is needed for bathing, teeth brushing, and medication. Make a plan for going to the bathroom. Bring enough toilet paper or reusable bags based on the length of the trip. Also, pack chapstick, sunscreen, bug spray, lotion, and sore muscle cream.

Keeping Safe While Canoe Camping
While canoe camping is all about adventure, the most important aspect is staying safe while on the water or setting up camp. You never know when you’ll find yourself in an emergency, so being overprepared is always a good idea. Keep reading for some safety precautions to take while still enjoying the sport.
- Share your itinerary and location with others. This is good practice before any camping journey. Tell a trusted friend or park ranger where you plan to go, by which days, and when you’ll be back. It’ll be easier to find you if you get lost or there’s an emergency.
- Watch the weather. Being outside means encountering all types of weather. Check the weather before the trip. Pay attention to rain, high winds, fog, and heat index. When packing, include the appropriate apparel and gear for each type of condition.
- Always wear a life jacket. Even if you’re an experienced swimmer, capsizing is unexpected. Don’t take a chance; wear a life jacket.
- Know your limits and only paddle where you feel comfortable. Never overexert yourself on the water. If you don’t have the energy to go further, it’s best to stop and rest. Don’t go out on water that you aren’t comfortable. Lakes are usually calm, but rivers can have unsafe currents.
- Take a canoeing safety course. These courses are designed to teach you how to handle specific emergencies on the water, such as capsizing or getting lost. They also provide safety tips, such as checking the canoe for leaks before heading out. They may also recommend specific safety gear always to have onboard.
Top Tips for Taking Your First Canoe Camping Trip
Practice packing before leaving.
Don’t wait until you’re about to launch into the water only to discover you can’t fit all your essentials into the canoe. To avoid this, practice packing everything into the canoe at home or wherever it’s stored.
Invest in Dry Bags
Dry bags are the best way to pack clothing, camping supplies, and toiletries. You don’t need to spend a fortune on dry bags; invest in durable ones so everything stays dry. Dry bags come in all sizes and are usually measured in liters. Barrels are an excellent option for storing food, but a dry bag will also work. Choose whatever meets your needs and storage limitations.
Bring Plenty of Fire Starters And Matches
Pack extra matches, fire starters, and lighters. This will prevent you from arriving at your campsite only to realize there’s no way to light a fire. The fire can provide everyone with warmth, the ability to cook, and an enjoyable nighttime activity. If one option fails, gets wet, or is lost, there is a backup.
Have a Backup Plan
Sometimes, things don’t go to plan. Consider possible scenarios that could alter the original plan. The boat can become damaged, someone can hurt their wrist, or the weather significantly changes. A backup plan also means you can call for help from the appropriate authorities if something happens.
Joy in The Journey And Destination
As with every activity, there’ll be frustrating times as a beginner. Remember that the joy of canoe camping is in paddling to the destination and in outdoor camping once there. While on the trip, maintain a balance of both. If paddling is more brutal than usual one day, it’s okay to camp early and relax. Be patient with yourself as you embark on this new kind of adventure.
Pack in Evenly
Distribute the gear weight effectively in the canoe. Experienced canoeists refer to this as trimming, or how much of the canoe is underwater. Having the stern heavier and the bow lighter in rapid waters can make navigating easier.
Backup Power Solutions
With easy-to-use power solutions like the EcoFlow RIVER 2 Series Solar Generator , there’s no reason not to pack the best one for your canoe. You’ll never need to worry about electrical outlets while camping. Solar generators combine portable power stations with solar panels to generate and store solar energy regardless of location. If you also plan to fish, consider solar generators supporting all your fishing electronics .
Start Planning Early
If this is your first canoe camping trip, start planning as soon as possible. This allows plenty of time to hash out all the details. Book camping permits in advance, purchase equipment, take safety classes, and practice using gear without worrying about time constraints.
Frequently Asked Questions
Canoe camping can be called “canoe tripping” or “canoe” touring. All three phrases convey the combination of traveling and camping by canoe. These trips usually involve multiple days and nights in the wilderness.
Sleeping in a canoe is generally considered unsafe. Canoes are unstable and prone to easily overtipping, and tossing and turning during sleep can increase this chance. It’s best to paddle to shore and set up camp for a safe and stable night’s rest.

Final Thoughts
For a successful canoe camping trip, choose a location that matches your skill level and take time to plan your route carefully. Consider your paddling speed, how long you want to paddle, and how many days the camping trip should last.
When packing gear, plan out meals and tools, clothing for the number of days and activities, safety precautions, and backup electrical power. The compact, lightweight EcoFlow RIVER 2 Series Solar Generator is the best option for portability.
To prepare for and minimize emergencies, incorporate safety measures such as life jackets, weather knowledge, and sharing your itinerary. Now, you’re ready to paddle away into the tranquility of the water and relax under the stars during your next adventure!
Share this article
Sign Up for Emails
And unlock a delightful surprise!
I agree to EcoFlow's Privacy Policy and Terms of Service.
Popular posts
Why solar generators are your first & best choice for camping, 6 reasons why all homeowners should have a solar power generator, ecoflow power kits: a deep dive into the off-grid solar systems changing the game, mini portable air conditioners: 10 things to consider before you buy, lifepo4 vs. lithium ion batteries: what’s the best choice for you, related posts, what’s the difference between single-phase and 3-phase electricity, the ultimate camping gifts guide, leave a reply cancel reply.
Save my name, email, and website in this browser for the next time I comment.
- Privacy Policy
- Terms of Use
© Copyright - EcoFlow, Inc.
Invalid email or password. Please try again.
You've shopped with us before!
Please set your password using the link below.
Create your Account
Already have an account?
Please correct the errors.
Passwords are case-sensitive, must be at least 8 characters in length, and must contain at least one special character.
- Include 8 or more characters.
- Include at least 1 special character.
For your free birthday gift!
Start your Expedition
Sign up with your email and start earning rewards with our exclusive loyalty program.
Explore More, Score More
Elevate your outdoor experience with Expedition Perks, where you earn points on purchases, get a bonus on your birthday, and more–it’s free to join!
Points On Purchases
Member Exclusives
Birthday Discount
Packing for a Multi-Day Kayaking Trip
Camping out of your kayak offers a feeling of freedom that few adventures on shore can match.
You paddle down rivers or float across open water during the day, and kick back by a campfire at night. Experienced multi-day paddlers can easily pack their boats for many days on the water, but your first time packing for more than a day’s paddle can be pretty stressful. Here are some pointers for planning your trip, a sample packing list, advice on organizing and keeping track of your gear, and tips on packing a whitewater or touring kayak for your first multi-day paddling trip on the river, lake, or ocean.
Gathering Your Gear & Supplies
Think like a backpacker. The gear required for a multi-day backpacking trip is very similar to the gear required for a multi-day kayaking trip. And just like a backpacking trip, weather, season, distance, trip duration, and group size all affect the type of gear and supplies you’ll need. The farther you go, the more supplies you need; the nastier the weather, the heavier and more serious your gear will become; and the larger your group, the more you can split up group gear to lighten the load of each boat. A detailed plan is necessary when preparing for any multi-day trip, and it will help guide your gear choices so you know what you have to pack.
Keep in mind that the type of water you’ll be traveling on will also affect the type of gear you need to carry. A river trip will require additional protective equipment for whitewater and perhaps a group toilet solution (such as a groover) if you’re traveling through government-controlled land, while a trip on open water will require additional navigational equipment, signaling and safety gear, and more. The type of water you travel on will also dictate the type of boat you use, and thus the storage space available for gear.
The Type of Boat Makes the Difference
Touring and sea kayaks are designed for comfort, efficiency, and most importantly, gear storage. A multi-day trip on open water requires gear and supplies, and these boats are designed with the storage space to hold it. Often, watertight bulkheads seal these storage spaces off from the rest of the boat and waterproof hatches offer quick access. Additionally, a touring kayak may have the added advantage of a day hatch where you can store small essentials that won’t fit or don’t belong in your PFD.
Whitewater kayaks are designed for performance first and gear storage second. Unless you’re paddling a creeker or a crossover-style hull, space is limited. Any storage space fore or aft of the cockpit may or may not be accessible by a hatch cover, and this storage space is rarely sealed off from the rest of the boat. This style of open storage space drastically simplifies packing, but it also leaves your gear more exposed. A little ingenuity and creativity will guide your hand when you’re packing a whitewater boat.
Both touring and whitewater boats require the same basic set of gear for a multi-day trip.
How to Organize & Pack Your Gear
You have the right gear. Now it’s time to pack your boat. While organization techniques are largely personal, even a basic plan can go a long way towards keeping track of your gear—nothing wastes more time and energy than completely loading and unloading a boat just to find that one rope or the spare batteries you desperately need. One simple organization strategy is to pack your gear into dry bags based on similar use. Pack one bag for clothing, one for sleeping gear, one for safety or first-aid, etc. Then you can label your dry bags clearly with waterproof tape and marker, or use dry bags of a variety of colors. Create a checklist of what’s in each bag, including your personal gear and any group gear that’s split among different boats in the group. Run through the checklist the morning before you leave, and then stash it somewhere that’s easy to find. You’ll have a quick reference for each bag and who’s carrying what when your group is large.
Add a high-capacity spare duffel bag for any trip with a portage. This bag can help you quickly round up and transport items in your boat that aren’t packed in a dry bag. Also, a spare bag can be used to move camping gear from your boat to your camp spot if you decide to camp away from the beach.
Dry bags come in a variety of shapes, sizes, weights, and colors. Use dry bags that are small enough to fit through the openings of your fore and aft hatches. It’s much easier to load and balance the weight of a boat with many small bags than it is with a few large bags. A brightly colored dry bag is particularly useful for your first aid kit, repair kit, or rescue kit. The bright color makes it easily recognizable among a pile of gear and quick for anyone in your group to find.
Always assume that your gear will get wet. The most waterproof hatch covers leak, dry bags eventually wear out, and boats roll and fill with water—it happens. Keep vital camp gear like your sleeping bag and insulating layers in your most secure dry bag. Garbage bags can be used to line or double-line the inside of dry bags for added protection. Squeeze as much air as possible out of each dry bag. Inches count when space is limited, so do everything you can to maximize fore and aft hatch space. Store everything else in older dry bags, compression sacks, or nylon duffels to keep loose items together.
Load Your Boat
There’s just as much art as science involved in loading a boat. Weight distribution and ease of access are your two primary concerns. Every boat has a maximum weight capacity, and you shouldn’t exceed it. Again, think like a backpacker. Simplify your gear selection and leave behind anything that isn’t vital. You should keep a few simple luxuries so you can still enjoy your trip, but choose wisely. Sharing gear among members of your group can drastically reduce the amount of weight in each boat. Instead of carrying two full kitchen kits, stoves, or bear bags, carry one of each and assign each to one boat.
A boat should be loaded with the weight low and centered. Lighter items should be packed far into the bow and stern and heavier items close to the cockpit. A properly balanced boat will have even fore-aft trim and will feel more stable in the water than an unloaded boat—maybe surprising, but true. Pack bags you need to access frequently closer to the hatches. Anything absolutely vital, like spare water or a small first aid kit, should be within reach of the cockpit. Water is heavy and prone to sloshing around, which can upset the balance of your boat quickly. Keep water low and close to the center of the boat. At most, you should carry a half gallon to a gallon of water—remember, you can always pump or purify more.
Fuel bottles are small and easy to jam into tight spaces, but beware: potentially hazardous liquids should be separate from your food. Stash fuel bottles at the very end of the bow or stern. You won’t need the fuel until you’re unloading your boat anyway, so isolate it in case of potential leaks. Electronics and large, metallic items should be far from navigational instruments or your compass. A few degrees of compass interference can cost you serious time and energy when you’re on the water.
The kind of food you bring is very much a personal choice. Some people can live off dried goods and protein bars, while others prefer fresh fruits and veggies. One tip for keeping perishables cold is to pack your fruits or veggies below the water line and close to the hull where cold water can help produce stay cool. Although you run the risk of bruising your apples or avocados, this below-the-water-line method is an easier way to keep food fresh longer, without the use of ice. Packaged food, fruits with tough skins, and the like can be packed loosely in your bags while foods affected by sogginess should be stashed inside a small dry bag.
Keep small essentials like a first aid kit, GPS, or backup knife in a day hatch if you have one. Every boater should have a knife and whistle attached to his or her PFD anyway, but a day hatch can offer additional quick-grab storage. Anything small and absolutely vital that won’t fit in your day hatch or your vest can be stored around, beneath, or behind your seat, but keep big dry bags and gear well behind the foot rests and free of your body and legs. In an emergency, you need to be able to roll your boat or wet exit without gear in your way.
Once you’re seated and your spray skirt is sealed around the cockpit, reaching past it isn’t an option unless you stop and undo the skirt. A deck bag can be attached to the deck of your sea or touring kayak to give you quick-reach storage if you don’t have a day hatch built into your boat. Whitewater boaters have to be craftier and plan carefully what’s stored in the pockets of their PFDs and near their seats. A deck bag isn’t an option, but safety essentials like a throw bag or bailing equipment should be within reach all the same. Many experienced whitewater kayakers will store small, vital gear in and around their seat by sliding their seat forward a few inches, releasing the back rest, stashing the gear inside, and then buttoning everything back up.
Keep the deck of your boat free and clear of heavy gear. A heavy or overloaded deck can make your boat dangerously top heavy, nearly impossible to roll, and prone to high wind on the open water. The deck of a touring kayak can hold a spare paddle under the stern bungees, a bilge pump just ahead of the cockpit under the bow bungees, and a small compass mounted to the front of the cockpit. Besides a groover or a throwbag (depending on personal preference), the deck of a whitewater boat should be completely clear. In heavy, churning whitewater, anything attached to the outside of a boat can quickly detach itself without warning.
Quick Recap
- Always assume your gear will get wet
- Use many small dry bags instead of a few large dry bags
- Pack heavy bags and gear low and close to the cockpit
- Pack light bags and gear at the ends of bow and stern
- Keep weight distribution even from bow to stern and side to side
- A properly balanced boat will feel stable and paddle easily
- Keep the deck free and clear of heavy, bulky gear
- Never forget the coffee
It might seem overwhelming at first, but packing a kayak is like packing for a car-camping trip—you just have to be a little more creative with space. Take a dry run with your fully packed boat and make any weight adjustments before you set off with your group. It never hurts to practice at home, too. After all your planning and organization, the hard work will pay off when you’re sitting at a campsite on a shore far away from the hustle and noise.
Essential Gear for River Trips
How to choose a kayak, whitewater kayak essentials: build your kit, downloadable checklist.
- Search Please fill out this field.
- Manage Your Subscription
- Give a Gift Subscription
- Newsletters
- Sweepstakes
- Nature Travel
8 U.S. Canoe Trips That'll Transport You Into the American Wild
Paddle through these waters for wildlife sightings, stunning scenery, and more.
Evie Carrick is a writer and editor who’s lived in five countries and visited well over 50. She now splits her time between Colorado and Paris, ensuring she doesn't have to live without skiing or L'As du Fallafel.
:max_bytes(150000):strip_icc():format(webp)/evie-carrick-df91be43396540c492c4141c56a71a9e.jpg "backpack canoe trips")
Editor’s Note: Travel might be complicated right now, but use our inspirational trip ideas to plan ahead for your next bucket list adventure.
You don’t have to strap on a giant backpack or hike 10 miles to get out into the wilderness — finding solitude can be as easy as loading up a canoe, pushing off, and dropping a line in the water. On a canoe trip, you need not worry about squeezing past others on a narrow trail or lugging around liters of water — everything you need is right in the boat with you.
These canoe trips take you from above the Alaskan Arctic Circle to the swamps of Georgia and are guaranteed to provide a much-needed reset (with a side of adventure). Plus, they’re all in the U.S., making it easy to find a nearby route that suits your style, whether it be braving rapids and overcoming grueling portages or sitting back with a line in the water and a beer in your hand.
1. Salmon River, Idaho
Also known as The River of No Return, the Salmon River takes boaters through 46 miles of recreational river trail, before reaching the 79-mile section of designated “wild” river. Canoers looking to take on the full 46-mile recreational route can put in at North Fork and take out at Corn Creek — a journey with tall canyon walls and some of the oldest known rocks in the state — or apply for a permit to venture into the “wild” section of the Salmon River.
2. Boundary Waters Canoe Area Wilderness, Minnesota
For a paddle that’s just as beautiful as it is remote, it’s hard to top the Boundary Waters Canoe Area Wilderness in northeast Minnesota. The wilderness area, which is composed of 1,500 miles of canoe routes over 19,000 acres and 1,100 bodies of water, is accessible primarily by canoe. Here in the deep north, boaters are rewarded with scenery that’s still wild and unparalleled solitude.
3. Northern Forest Canoe Trail, New York to Maine
This 740-mile trail starts in New York and ends in Maine, passing through Vermont, Quebec, and New Hampshire along the way. While there’s nothing like the satisfaction that comes from completing the entire stretch, you can take your pick of the route’s 23 rivers and streams, 59 ponds and lakes, and 65 portages to create your own shortened itinerary — whether it be a day trip or a long weekend excursion .
4. Noatak River, Alaska
If true isolation is at the top of your list, it doesn’t get much more remote than the Noatak River . Located above the Arctic Circle, this river route passes through a glacial valley, alpine tundra, deep canyons, and open plains. As you float this easy to moderate river, you can drop in a line or keep an eye out for Alaskan wildlife , including grizzly bears, caribou, and sheep.
5. Okefenokee National Wildlife Refuge, Georgia
If the cooler weather up north doesn’t sound appealing, consider a trip to Georgia, home of the Okefenokee National Wildlife Refuge . Heavily forested cypress swamps and “swamp prairies” offer two different takes on watery terrain that lure canoers looking for a multiday excursion in the South’s lush wilderness.
6. Green River, Utah
Utah’s Green River is a great choice if you’re a newbie to the canoeing world, or if you’ll be traveling with small children. The river is wide and mellow, with plenty of wildlife and scenery. You can drop in at Green River State Park and take out at Ruby Ranch two days later, or float all the way to the confluence of the Green and Colorado Rivers.
7. Buffalo National River, Arkansas
The beautiful Buffalo River passes through the Ozark Mountains and traverses alongside giant bluffs as it runs through quiet pools and tumbling rapids on its way to the White River. Once you reach the confluence, make sure to dip a toe to feel the distinction between the typically cooler White River and the warmer Buffalo waters. This trip can be as short as an afternoon paddle or as long as a multiday journey on the Buffalo River’s 153 miles — either way, you’ll want to keep your fishing gear on hand for the river’s renowned smallmouth bass fishing.
8. Tuolumne River, California
Thrill seekers will find their match on the Tuolumne River , which runs through deep gorges and forests on its way from the high Sierra Nevadas to the Central Valley. Along the way, you’ll be treated to wildlife sightings and excellent trout fishing as you navigate your way around Class IV rapids. Although the Tuolumne put-in is near Yosemite, the 149-mile body of water doesn’t have too much boating traffic, thanks to regulations on the number of trips permitted to launch each day.
Related Articles
Prove It First: Commonsense Protection For The Boundary Waters & Lake Superior. Take Action
A Guide to Backpacking and Hiking the Boundary Waters
July 8, 2019 Recreation
By Zach Johns

Another wave splashed over the bow of the canoe, hitting me in the face as my dad and I paddled straight into a headwind on Knife Lake while paddling in the BWCA . It was one of those days where you normally would just stay in camp and not paddle, but I was due back at work the next day.
Yes, one of the very things that we go to the wilderness to escape was causing me to struggle across this huge lake.
I closed my eyes and paddled hard. “One…two…three…four…” I counted each stroke until I got to 100 then opened my eyes again. The shore didn’t seem an inch closer. In fact, it almost seemed farther away!
I gritted my teeth and began to fantasize about that wonderful portage at the end of the lake.
Yes, I used the words “wonderful” and “portage” in the same sentence.

I admit – I love portages! It’s not just on those windy days, either. Most of my time in the wilderness tends to be on foot as I am more of a backpacker than a canoeist. Don’t get me wrong, I love to paddle, I truly do, but there is just something wonderful about mucking around the bush on your own two feet.
Like many Minnesotans, my first experience in the “backcountry” was when I discovered the Superior Hiking Trail, an amazing footpath which weaves its way among the Sawtooth Mountains of Lake Superior’s North Shore. With over 300 miles of sweeping mountaintop vistas, cascading rivers and endless forests, I could probably hike it for the rest of my life and never tire of it.
However, every person who likes testing themselves in the outdoors needs to raise the bar every now and then. After completing the entire Superior Hiking Trail (what was done at that time) in 1998, I looked for a new challenge. I decided to explore some of the trails in Minnesota’s only true wilderness: the BWCA .
First on my list was the Kekekabic trail.
“The Kekekabic Trail is one of the toughest, meanest rabbit tracks in North America … It is the kind of trail that would break the heart of a man who didn’t have what it takes to go into the wilderness and try to ‘smooth it.’” Those words were written by Whitney Evans on a Boy Scout trip in 1949. 50 years after they were written, I wanted to see if I had “what it takes.”
Unfortunately, 1999 was the year of the epic Fourth of July windstorm that decimated much of the BWCA. In that mostly pre-internet era, I failed to do enough research, but figured three months was enough time to get the trail cleared.
We set off. My companions and I hiked straight into the heart of the blowdown and straight back out with our trails between our legs and a hernia to show for it.
And so began my introduction to the trails of the BWCA. It quickly became a torrid love affair.

The hiking trails of the Boundary Waters are NOT like your typical state park trail or even the Superior Hiking Trail. They are the real deal. In many places you are barely able to tell there is a trail at all. You can’t just let your mind wander and hike on cruise control. You have to pay attention to where you are, otherwise you might find yourself turned around, confused and scrambling to retrace your steps.
You can also leave trail luxuries like bridges and puncheon behind for the most part. You might find yourself rock hopping, balancing atop beaver dams or wading through deep water. Plus, most of the trails in the BWCA have no escape route. Cell service is virtually nonexistant and unlike the Superior Hiking Trail, where there is a trailhead every ten miles or so, once you’re in, you’re in. You are committed to either make it to the end of the trail or go back to where you started.
That’s what I love about hiking in the Boundary Waters.
It’s raw and real and trekking there has a real sense of danger. In many cases, the distance just getting to most trailheads can be quite the expedition. Once you’re just a few yards down the trail, all you will hear is the sounds of the wild: Birds and squirrels, the wind and the rain, the wolves and the loons. And running into any other hikers? It’s very rare indeed. You’re more likely to cross paths with someone hauling a canoe over a portage than another hiker. Even that is pretty unlikely.
I think my last canoe trip in the Boundary Waters was in 2002. Since then I have backpacked the Kekekabic twice and the Border Route, Angleworm and Sioux-Hustler trails. I’ve day hiked to the summit of Eagle Mountain a half dozen times and have winter camped on Hegman Lake three times, hiking to its pictographs a half dozen times as well. This last Memorial Day weekend I went on a dayhike on the Powwow Trail. I can’t wait for volunteers to clear it so I can backpack its length.
Sometimes I wonder why I spend so much time in a place called a “Canoe Area Wilderness” on foot. It’s not that I don’t enjoy canoeing — I love it! But on foot, it just seems like you can get a little deeper into places few have ever seen. You still get to enjoy the beautiful lakes as most campsites are nestled beside them and I challenge you to find a more spectacular spot in the Boundary Waters the high upon the cliffs of the Border Route.
For those of you who are curious, below is a guide to a few of the most popular routes in the Boundary Waters. Think of it as an appetizer for future adventures. Hopefully you’ll be inspired to lace up your boots, load a pack and venture into the wilderness to find out if you have “what it takes.”

A SELECTION OF BWCA HIKING TRAILS
By Matt Davis
First thing to keep in mind is that while volunteers tirelessly work to open and maintain, these are wilderness trails. Unlike popular trails most of us are used to there is not always a bridge and sometimes, there’s not always a trail. Pile of rocks or a piece of red ribbon tied to a tree might guide you. Even then, getting lost is easy. And, just like in “Oregon Trail,” sometimes you need to ford the river.
Embrace it!
The Border Route Trail
Distance: 65 miles from the Magnetic Rock Trailhead to the eastern terminus at Otter Lake Road.

Difficulty: Hikers should be in good physical shape and have solid navigation skills. Even if there were no fallen trees, overgrown sections or places where the trail simply disappeared, the Border Route would be a challenge. Numerous steep climbs and descents, along with the remote nature, makes this one tough puppy.
Access Points: The Border Route Trail (BRT) begins at the Magnetic Rock Trail head, which can be accessed by following the Gunflint Trail (Country Road 12) west from Grand Marais. For those wishing to begin at the eastern end, follow Otter Lake Road, just north of Hovland.
Why you should hike it: Bragging rights — this is after all, the longest trail in the Boundary Waters! It’s also affords stunning views from the top of cliffs and takes you to parts of the BWCA no paddler sees.
Description: The idea for the Border Route trail , to create a wilderness hiking trail that would follow the border chain of lakes (the Voyageur highway), was conceived of in the 1970s by volunteers from the Minnesota Rovers Outdoors Club. It was completed in the 1990s,
Known for its rugged topography and for dramatic vistas. About half of it — from the east end of Gunflint Lake to above John Lake — passes through the Vento unit of the BWCAW. It is still maintained by volunteers of the non-profit Border Route Trail Association during spring and fall trail clearing trips.
At its western end, the ambitious hiker can connect the Border Route Trail with the Kekekabic Trail and the Superior Hiking Trail (in the east). Recently, these three trails have become part of the 4,600-mile North Country National Scenic Trail.
The Kekekabic Trail
Distance: 41 miles from the Snowbank Lake Road trailhead east to the Gunflint Trail.
Difficulty: Difficult. Rocky, rugged, remote, with plenty of deadfall to crawl around, the Kekekabic goes through the heart of the Boundary Waters. Like all the trails in the BWCA, be sure your navigation skills are tuned.
Access Points: From Ely, access the eastern end of the trail at entry point #56 and take out at entry point #74 on the Gunflint trail.
Why you should hike it: Solitude, great camping, full immersion in the wilderness, sights like Mueller Falls, and the list goes on.
Description: The Kek is famous for being very remote, it’s very primitive wilderness character (it crosses countless beaver dams), and for providing great opportunities for finding solitude.
The Kek was built by the Civilian Conservation Corps in the 1930s to provide access from the Fernberg Road to the fire tower above Kekekabic Lake. It was built for utility instead of for maximizing scenery. The eastern half was built by Boy Scouts in the late 1940s to connect the fire tower with the Gunflint Trail.
After being nearly forgotten, the trail was brought back to life in 1990 by volunteers affiliated with the non-profit Kekekabic Trail Club . The Club reorganized in 2015 as the Kekekabic Trail Club Chapter of the NCTA and continues to do trail clearing trips, trail promotion, and publishing of the Kek guidebook.
PowWow Trail
Distance: 30 mile loop.
Difficulty: Even when the trail is cleared and reopened, this is a challenging hike, for all the reasons other wilderness trails in the BWCA are challenging.
Access Points: From Ely, entry point #86.
Why you should hike it: The Powwow skirts 15 lakes, which is reason enough. Plus, once it is fully cleared, later this year, take the opportunity to make some of the first steps on this newly-restored trail.

Description: The Pow Wow trail got punished by natural disasters. The 1999 blow down, followed by the 2007 Pagami Creek Wildfire threatened to erase this historic trail from the wilderness. In the last couple of years, volunteers put in hundreds of hours to reopen the trail. As of 2018, 25 of the 30 miles have been cleared and volunteers plan to clear the rest — thereby reopening the trail — by the end of 2019.
Sioux-Hustler Trail
Distance: 32 miles
Difficulty: Very, very difficult. Experienced backpackers have been turned back. Be prepared to get frustrated, maybe even scared.
Access Points: Boundary Waters entry point #15, right off the Echo Trail.
Why you should hike it: If you’ve hiked the other trails in the BWCAW, and want an even burlier challenge, with more blowdown, more isolation and more opportunities to get lost this is your ticket. Obviously, this isn’t for everyone. But, you’re not “everyone.”

Description: Of all the multi-day hikes in the BWCAW, the Sioux Hustler might be the most challenging . At times the trail simply disappears. Other times it gets swallowed by a swamp and bog or is blocked up by a beaver dam. To repeat: This is not a trail for the faint of heart. Competing it will make you grateful for the hard work volunteers put into these trails.
Making the trails connection

On a final note, after twenty-five plus years of advocacy by Minnesota hiking trail volunteers and twelve-plus years of work with Congress by the North Country Trail Association (NCTA), the Kekekabic (Kek) and Border Route Trails (BRT) are FINALLY official parts of the North Country National Scenic Trail (NCT)!
This happened in March 2019 with passage of the John D. Dingell, Jr. Conservation, Management, and Recreation Act, which contained the NCT’s Route Adjustment legislation in it. This legislation made the Arrowhead Re-route official, updated the NCT’s estimated length to 4,600 miles, and also extended the NCT into Vermont to meet up with the Appalachian Trail.
The North Country National Scenic Trail now extends 4,600-plus miles from Lake Sakakawea State Park on the west side of the Missouri River in North Dakota through Minnesota, Wisconsin, Michigan, Ohio, Pennsylvania, New York to the Appalachian Trail in Vermont (see the attached map).
The inclusion of the Kek and BRT within the Boundary Waters drastically increased the amount of miles of the NCT passing through Wilderness Areas. This section is by far the most significant Wilderness hiking to be found along the entire NCT. The North Country Trail Association is partnering with the National Park Service, Superior National Forest, the Border Route Trail Association, and our Kekekabic Trail Club Chapter to find, train, and equip the volunteers needed to maintain these two great hiking trails.
ABOUT THE AUTHORS
ZACH JOHNS grew up in the St Croix River Valley idolizing Grizzly Adams, Jeremiah Johnson and Smokey Bear. His childhood was full of car camping and day hikes. While attending the University of Minnesota-Duluth his life was changed when he discovered backpacking and canoe camping. After graduating in 1995 he moved to the Iron Range to be closer to the BWCA and North Shore of Lake Superior. He’s been hiking, paddling and skiing ever since.
MATTHEW DAVIS lives in Detroit Lakes, Minnesota and has worked since 2006 as the Minnesota & North Dakota Regional Trail Coordinator for the non-profit North Country Trail Association . He is an avid hiker, skishoer, mountain biker, and also a long-time trail volunteer. His family has visited and hiked in all of Minnesota’s State Parks.
Do Your Part to Protect the Boundary Waters
Continue reading, opening the wild.
A man who became paralyzed after an accident strives to create a wilderness resort for people with disabilities near the…
Fighting to protect clean water and the BWCA at the capitol
There has not been a legislative hearing on sulfide mining in over a decade. We're working to change that and…
From the Boundary Waters to the Iditarod
Follow a young woman’s journey from dog sledding in the Boundary Waters to racing in the Iditarod, the most famous…

Explored Planet
The 17+ Most Beautiful Backpacking Trips In The United States
Posted: May 31, 2024 | Last updated: June 1, 2024

Getting the opportunity to see America's great outdoors is the chance of a lifetime. There are areas all over the country that are surrounded by peaceful nature, scenic landscapes, and exciting wildlife. One of the best ways to travel around the United States is backpacking.
It's great for those on a budget because it's a low-cost form of travel, and all essentials can be found in a backpack. Backpacking has resurfaced as a mainstream form of tourism favored by people of all ages. Anyone who considers themselves even a little bit adventurous will find fulfillment after backpacking through these stunning American trails. Read on to learn more about these incredible trips!

Rim To Rim Offers Views Of The Grand Canyon
Backpackers can easily make a four-day trip out of a visit to the Rim to Rim trail at Grand Canyon National Park. The trail is about 24 miles long with overhead views of the famous Grand Canyon. The trek includes views of billions of years of rock formations and concludes at the sandy banks of the Colorado River.
Experienced backpackers suggest starting from the north end because it's about one thousand feet higher than the south end. Before heading out it's important to note that you will need a shuttle for the return trip and a permit that can only be granted by entering a lottery.

Lake Aloha Trail At South Lake Tahoe Is Great For Beginners
If backpacking seems like it will be too extreme, there are certain areas that are perfect for beginners. One of those locations is the Lake Aloha Trail in South Lake Tahoe. The entire trail is about 12 miles and shouldn't take longer than two to three days to complete.
Backpackers will get picturesque views of the alpine lakes and vibrant wilderness as they travel up to 1,800 feet above sea level. Those who know the area suggest getting a camping reservation early and going during the off-season. The end of the trail surrounds the water at Lake Aloha where backpackers can go for a refreshing swim.
Read More: Geography Facts That Will Have You Questioning Your Place On Earth

Long Trail In Vermont Is America's Oldest Long-Distance Trail
The Long Trail starts at the Massachusetts border to Canada but goes through the Green Mountains of Vermont. It's America's oldest long-distance trail, built between 1909 and 1930. Backpackers should expect to pass rugged peaks, woodland ponds, hardwood forests, alpine sedge, and swift-flowing streams.
This is one of the most difficult treks in the country because it goes on for almost 185 miles and can take up to a month to complete. Even the most experienced backpackers should be aware of the exposed terrain that can become muddy after harsh weather.

Visitors Must Receive A Permit Before Entering Zion National Park Traverse In Utah
The Point-to-Point Trail at the Zion National Park Traverse in Utah is the classic American backpacking adventure. It stretches almost 50 miles and backpackers will end up traveling upward of 8,200 feet in elevation. Here, visitors will see narrow canyons, lush valleys lined with red rock, and gorgeous vistas that overlook the best spots of the park.
Backpackers should start at Lee Pass trailhead and take an optional side trip to climb Angel's Landing. It's crucial that everyone obtains a backcountry permit before entering the park.

Teton Crest Trail In Wyoming Offers Many Activities
This backpacking trip isn't for beginners. Teton Crest Trail at the Grand Teton National Park in Wyoming is one of the hardest treks in the country, but it's worth it. It offers beautiful views of the mountains and local wildflowers. The trail starts at the top of a 10,000-foot mountain and suddenly drops into a valley. Then, it climbs up the opposite ridgeline.
The entire trail is over 25-miles long and is steep all the way through. There are also numerous activities to try while backpacking the trail such as rock climbing, backcountry skiing, and canoeing.

North Carolina's Art Loeb Trail Is Highly-Ranked By National Geographic
National Geographic ranks the Art Loeb Trail at Pisgah National Park in North Carolina as one of the best backpacking trips of all time. It's named after Arthur Loeb, a conservationist and avid hiker who loved to be surrounded by the mountains in North Carolina.
Some of the highlights of the trail include the Black Balsam region and the Shining rock wilderness with exposed quartz that shines brightly in the sun. It spans a total of 30.1 miles and is usually traveled south to north. The trip takes about two to three days with plenty of campsites along the way.

Enchanted Valley In Olympic National Park Has 10,000 Waterfalls
The locals near Washington's Olympic National Park call Enchanted Valley the "valley of 10,000 waterfalls." It's almost as if you're stepping into a fairy tale because this trail includes tons of waterfalls, mossy woodlands, streams, rivers, and spacious meadows. The length of the trail ranges from 26 to 30.6 miles, depending on the route you take.
It's located in the East Fork Quinault River Valley, which has an old-growth rainforest (pictured), a historic chalet, and tons of bears. Wilderness camping permits are required for overnight stays, which should be made at least six months in advance.

View An Active Volcano At Mount Hood National Forest's Timberline Trail
Many are drawn to Timberline Trail at Oregon's Mount Hood National Forest because it features an active volcano (pictured). The trail circles the mountain as backpackers climb an elevation of roughly 9,000 feet and go the distance of 38.3 miles over the course of four to five days.
It's important to be aware of where you're going because the trail has several merges where people can easily get lost. One of the most exciting parts of the trek is seeing how the plants and geology evolve as backpackers travel through deep forests, barren lava flows, and more.

Kesugi Ridge At Denali State Park Is A Backpacker's Paradise
Alaska is a backpacker's paradise. Kesugi Ridge at Denali State Park has the most stunning panoramas of the Alaskan mountains including America's tallest mountain, Mount McKinley. People who've backpacked here before say the most important thing to bring is bear spray. This is because the area is saturated with an excessive number of bears.
The best time to travel the trail is during summer and early fall and the heavy fog can make it difficult to see your surroundings. Kesugi Ridge stretches almost 30 miles and has a lake that's perfect for water activities.

Visit McKittrick Ridge In Texas During Cooler Weather Months
Those who want to be completely off the grid should check out McKittrick Ridge in Texas. It has one of the most diverse ecosystems in the country with views high above the desert floor and breathtaking foliage during the fall. McKittrick Ridge is quite a strenuous trip because it reaches an elevation of over two thousand feet and has 10 miles of rough terrain.
Since it can get difficult, it's best to do the hike in the fall or winter so as to not get overheated. Make sure to pack plenty of water as well because there are no water supply points anywhere throughout the trail.

Experience Solitude At Sawtooth Range In Idaho
One of the reasons people choose to go backpacking is to escape the stresses of daily life. Sawtooth Range in Idaho is one of the most isolated places where backpackers will most likely not see too many other people. The mountain range got its name from the jagged peaks and reaches a maximum elevation of 10,751 feet.
There are about 40 different trails to choose from that total about 350 miles and they can be used for backpacking, hiking, horseback riding, and cycling. Sawtooth Range is also home to hundreds of lakes that were created by vanished alpine glaciers.

Intermediate To Advanced Backpackers Will Enjoy Three Sisters Loop In Oregon
The Three Sisters Loop features the third, fourth, and fifth tallest mountains in Oregon, which exceed 10,000 feet in elevation. Here, backpackers will find about half of Oregon's glaciers, three volcanic peaks, alpine tundra, lakes, lava fields, and dense forests. The 50-mile loop takes anywhere from three to six days to complete.
First-timers should be aware that it is often crowded with limited areas for camping. In order to beat the crowds and harsh weather, backpackers should go between late July and October. The trip is a good fit for intermediate to advanced backpackers and the trail is well-marked.

The Wonderland Trail At Mount Rainier National Park Is A True Wonderland
Backpacking through The Wonderland Trail at Washington's Mount Rainier National Park may actually feel like you're in some kind of wonderland. This 93-mile trek goes through lowland forests, valleys, alpine mountains, rivers, and more. The constant changing of altitudes can make it a tough journey.
Most people complete the trail in five to ten days, depending on their personal pace. Since the hike is a loop, you can decide which way to go. The most popular way is to go clockwise because you'll go downhill on the steepest sections. Backpackers should consider going between mid-July and September to miss the snow.

John Muir Trail In California Can Take 20 To 30 Days To Finish
The John Muir Trail across California's Sierra Nevada mountains is nothing short of a challenge. The trail stretches over 221 miles, reaches a cumulative elevation of 47,000 feet, and takes anywhere from 20 to 30 days to finish. One of the hardest parts of the trip isn't even the trip itself, rather it's getting a permit.
Backpackers should enter the online lottery for the trail at least six months in advance to secure a spot. It's named after John Muir, a naturalist who advocated for the preservation of wildlife in the United States.

Continental Divide Trail At Glacier National Park Is One Of The Longest Trails In The World
Become one with nature while backpacking along the Continental Divide Trail in Glacier National Park. This is one of the longest trails in the world at 3,100 miles and runs through five states including Montana, Idaho, Wyoming, Colorado, and New Mexico. While there make sure to check out the gigantic glaciers, cascading waterfalls, and towering Rocky Mountain peaks.
Continental Divide Trail was designed by Congress as a National Scenic trail in 1978 and is considered to be America's most dramatic and wild backcountry. Some hazards backpackers may encounter include falling, hypothermia, dehydration, lightning, and landslides.

Little River Trail At Great Smoky Mountain National Park Is A Gem
Hidden away in Tennessee's Great Smoky Mountain National Park is the majestic Little River Trail. It's approximately 12 miles long with plenty of rivers, fireflies, and peaceful scenery. This trail only takes about two days to get across with the highest elevation point at 412 feet, so it is great for beginners.
Since this national park tends to attract a lot of tourists, experts recommend going between mid-March and April. This is also a great time to see the thousands of wildflowers in bloom. Reservations and permits are required for this backcountry trip.
The Appalachian Trail Stretches From Georgia To Maine
One of the longest backpacking routes in the world is the Appalachian Trail, which stretches all the way from Springer Mountain, Georgia to Mount Katahdin, Maine. It's about 2,200-miles long with at least two million visitors every year. The 14-state trail was completed in 1937 after over a decade of work and goes through mostly forests and other wildlands.
The Appalachian Trail, along with the Continental Divide Trail and the Pacific Crest Trail, are known as the Triple Crown of Hiking due to their long distances. Be aware that this trail can be dangerous to novice backpackers because it's very isolated and has rugged terrain.

Pacific Crest Trail Extends From The California-Mexico Border To The Canada-United States Border
Some may know the Pacific Crest Trail as the backdrop for the Oscar-winning Reese Witherspoon movie Wild . This long-distance trail extends across the Pacific coast all the way from the California-Mexico border to the Canada-United States border. It stretches about 2,653 miles long and reaches an elevation of 13,153 feet.
The route is mainly through forests and protected wilderness areas away from civilization, but features pristine mountainous backdrops and all kinds of wildlife. This is also one of the most difficult backpacking trails in the world, so travelers should watch out for hazards such as bears, mountain lions, landslides, forest fires, avalanches, and more.

Pemigewasset Wilderness Loop In New Hampshire Is A Challenge
Pemigewasset Wilderness Loop is located in the heart of New Hampshire's White Mountain National Forest and is the state's largest wilderness area. The trail was established in 1984 and takes up 45,000 acres. This trek takes about two to three days to finish with extraordinary views of the panoramic vistas and scenic summits.
It's also a popular recreation area throughout the year where people come to hike, cross-country ski, and rock climb. This trip should only be done by experts because many of the sections of the trail are exposed, the weather can be harsh, and there are a lot of bears.

Half Dome In Yosemite National Park Is A Bucket List Adventure
Backpacking Half Dome in California's Yosemite National Park is a special bucket list adventure. This 16-mile trip takes about two days to complete. You'll be sure to pass waterfalls, steep cliffs, the sub-dome, flower fields, and more. Although a two-day trip doesn't seem like much, it's actually pretty strenuous with rocky sections, granite slopes, and summits with high elevations.
The area is most suitable for backpacking anywhere from June to September, but summer rain is a possibility. Permits are required to enter Half Dome, which can be found through an online lottery system.
Read More: Flight Attendants Reveal Secrets Of Flying And What It's Really Like Working For An Airline
More for You
Stephen King Election Remark Takes Internet By Storm
“The whole thing that’s happening to Spike is B.S.”: Edward Norton Protested Against Unjust Criticism Against His $25.3 Million Movie
Using This 4-Word Phrase Instead of 'Thank You' Will Improve Work Relationships and Make You a Better Leader
Why You Should Leave A Jar Of Dry Coffee Grounds In Your Garage
Common over-the-counter medicine linked to increased dementia risk
The Only Major Actors Still Alive From Gilligan's Island
Woman Warned Not To Paint Her House White Amazes Internet With The Results
Trump campaign sends Bob Good cease-and-desist over yard signs
I grew up in the US, while my wife grew up in the UK. She had a better education and now has a better understanding of the world.
Once a Cheater, Always a Cheater? Here’s What Couples Therapists Think
‘Home hack queen’ shares trick to rid your yard of pesky weeds: ‘I have been doing this for years’
Before 'Blue Bloods' Comes to an End, Take a Look Back on the Career of Donnie Wahlberg
These Are The 7 Things Stroke Doctors Say You Should Never, Ever Do
Romney scorches Bragg's 'political decision' in Trump case: 'Malpractice'
Leaked Audio of Anthony Edwards Talking Trash to Dallas Mavericks Goes Viral
20 American Foods That the Rest of The World Just Can’t Stomach
The Little-Known Wax Paper Trick That Will Keep Your Microwave Sparkling Clean
Walton Goggins Got the Opportunity of a Lifetime When Harrison Ford Knocked on his Door While Filming Their $174 Million Blockbuster
How to stay asleep all night if you keep waking up — an expert explains
Expert gardener demonstrates 'simple' trick for boosting tomato production: 'I instantly got higher yields'
- Find A Forest
- Light and Seed Magazine
- Our Forests, Our Water
- National Forest Week™
- National Forest Leadership Council
- Annual Reports
- Recent Press and Media Inquiries
- Press & News
- Donate to Plant Trees
- Small Business Tree Planting Partnerships
- Corporate Tree Planting Partnerships
- Grant Programs & Resources
- Pacific Northwest and Alaska Program
- Northern Rockies Program
- Southwest Program
- Eastern Regional Program
- Rocky Mountain Program
- California Program
- Collaboration Resources
- Treasured Landscapes, Unforgettable Experiences
- Ways to Give
- Sporting Clays Invitational
- Conservation Finance Program
- Volunteer Opportunities
- Give Monthly
- Remember or Honor a Loved One
- Plant Trees
- Plant Trees in Honor or Memory
- Launch a Business Partnership
- Other Ways to Give
- Light & Seed™ Magazine
- Leadership Council
- Financial Accountability and Transparency
- Sierra Nevada Program
- Southern California Program
- Tree Planting Program
- Collaboration
- Contracting RFPs
- Grant Opportunities
- Wood For Life
- Youth Engagement
- Contracting Opportunties
- Matching Awards Program
- Collaborative Capacity Program
- Stewardship Funds
- Grantee Resources
- Shop NFF Gear
- Conservation Connect
- A Toolbox of Resources
- Partnerships on Every Forest
- Conservation Connect Fellowship Program
- Corporate Partnerships
- Reforestation Program
- Start a Fundraiser
- The Sapling Program
- Planting for Our Climate
National Forest Week
Support Your National Forests
Plant Trees Now
Southern California Forest Fund
Fourteen Best Places to Canoe and K...
Fourteen Best Places to Canoe and Kayak on National Forests
Category: Paddling
by Hannah Featherman
Boundary Waters Canoe Area Wilderness Superior National Forest, Minnesota
One of the most famous paddles in the country if not the most famous is the Boundary Waters Canoe Area Wilderness in Northern Minnesota. The Area contains more than 1200 miles of canoe routes and upwards of 2000 campsites. More info.
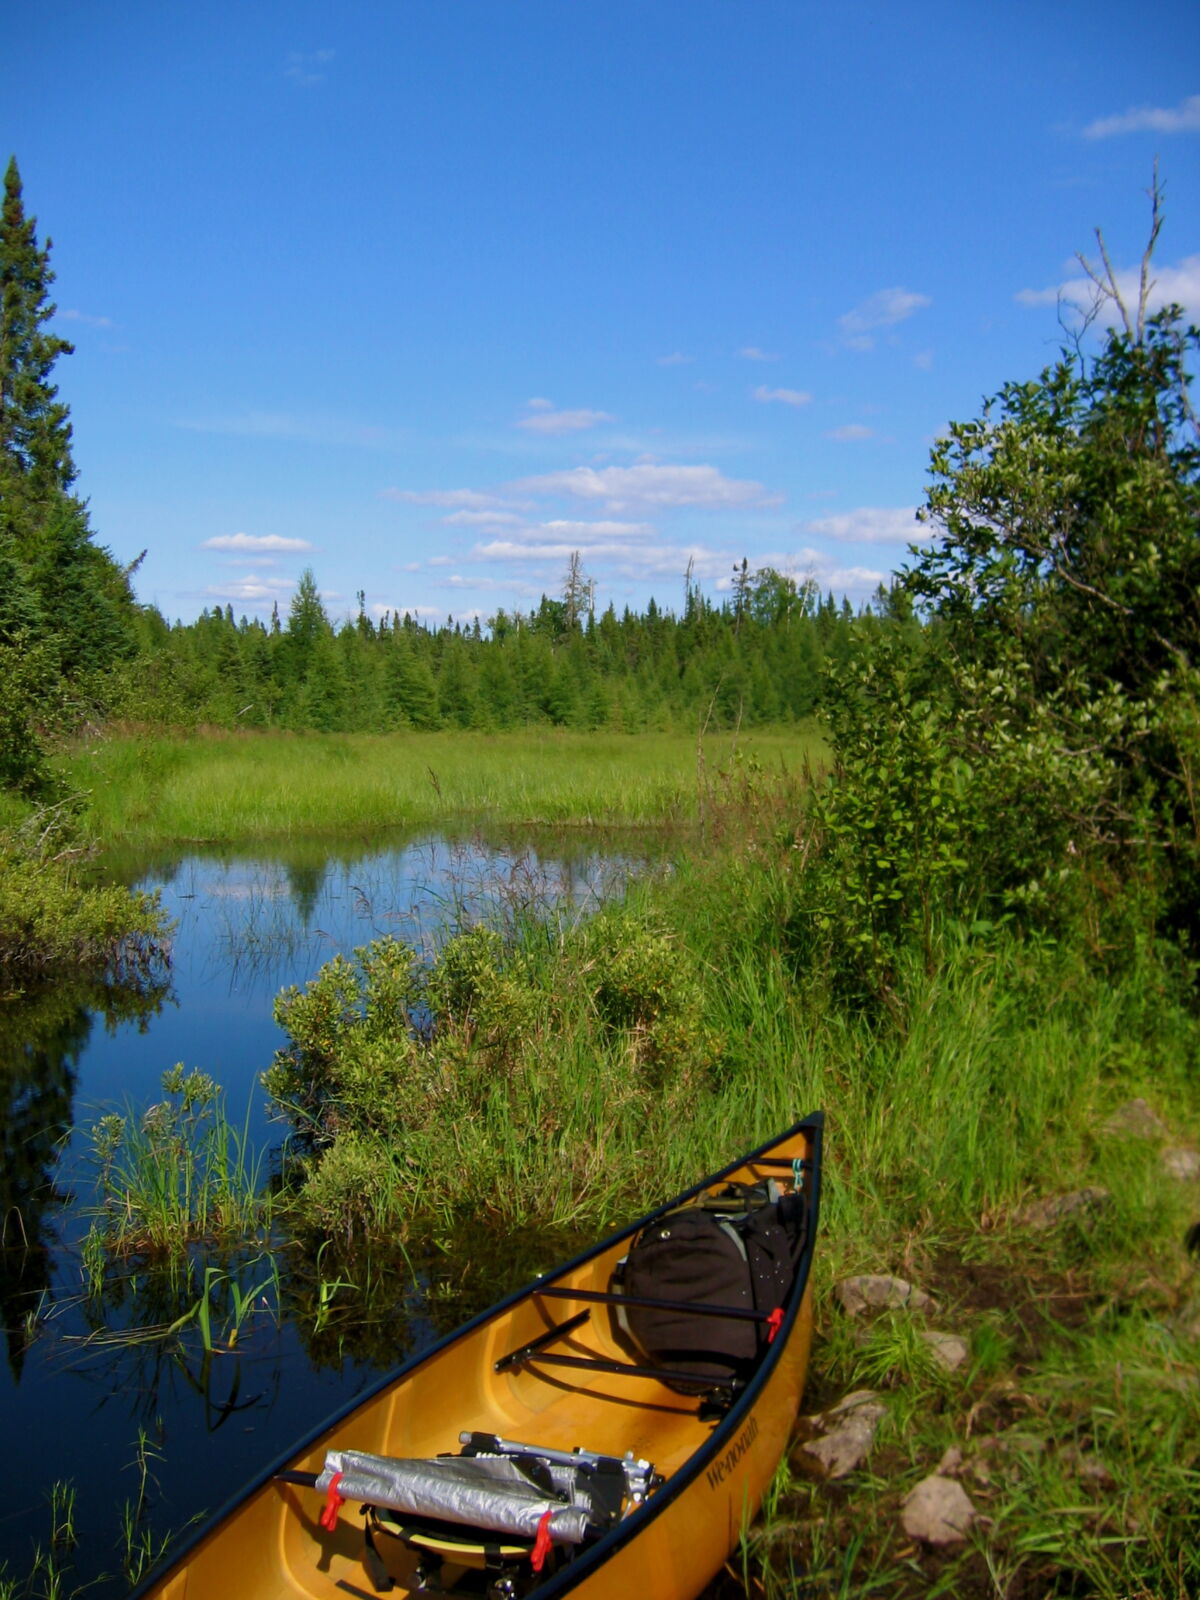
Prince William Sound Chugach National Forest, Alaska
The next time you head up to Alaska, be sure to plan to kayak Prince William Sound where you’ll be surrounded by towering glaciers and joined by orcas. Within the sound, sixteen rustic Forest Service cabins offer respite during your journey on the Chugach. More info.
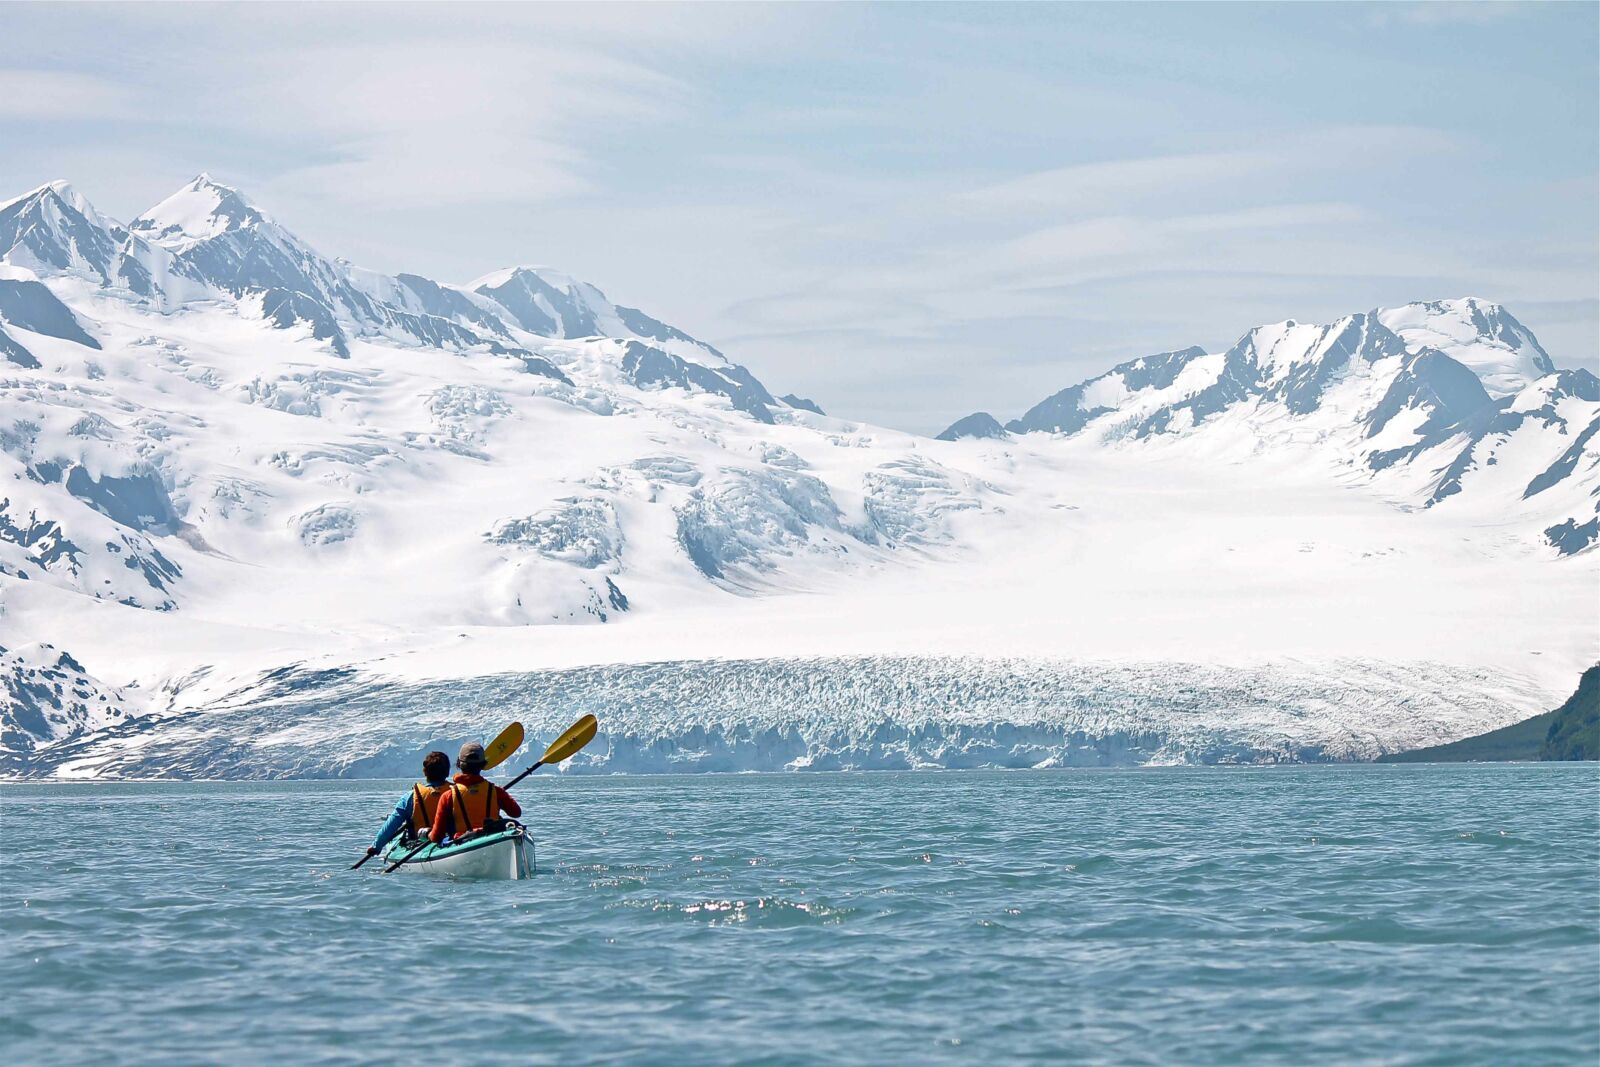
Elisabeth Gustafson
Juniper Run Ocala National Forest, Florida
Paddle down seven miles of the Juniper Run within the Ocala National Forest. Crystal clear waters will steer you through a lush landscape before widening downstream. For a small fee you can be shuttled back up to your car. More info.
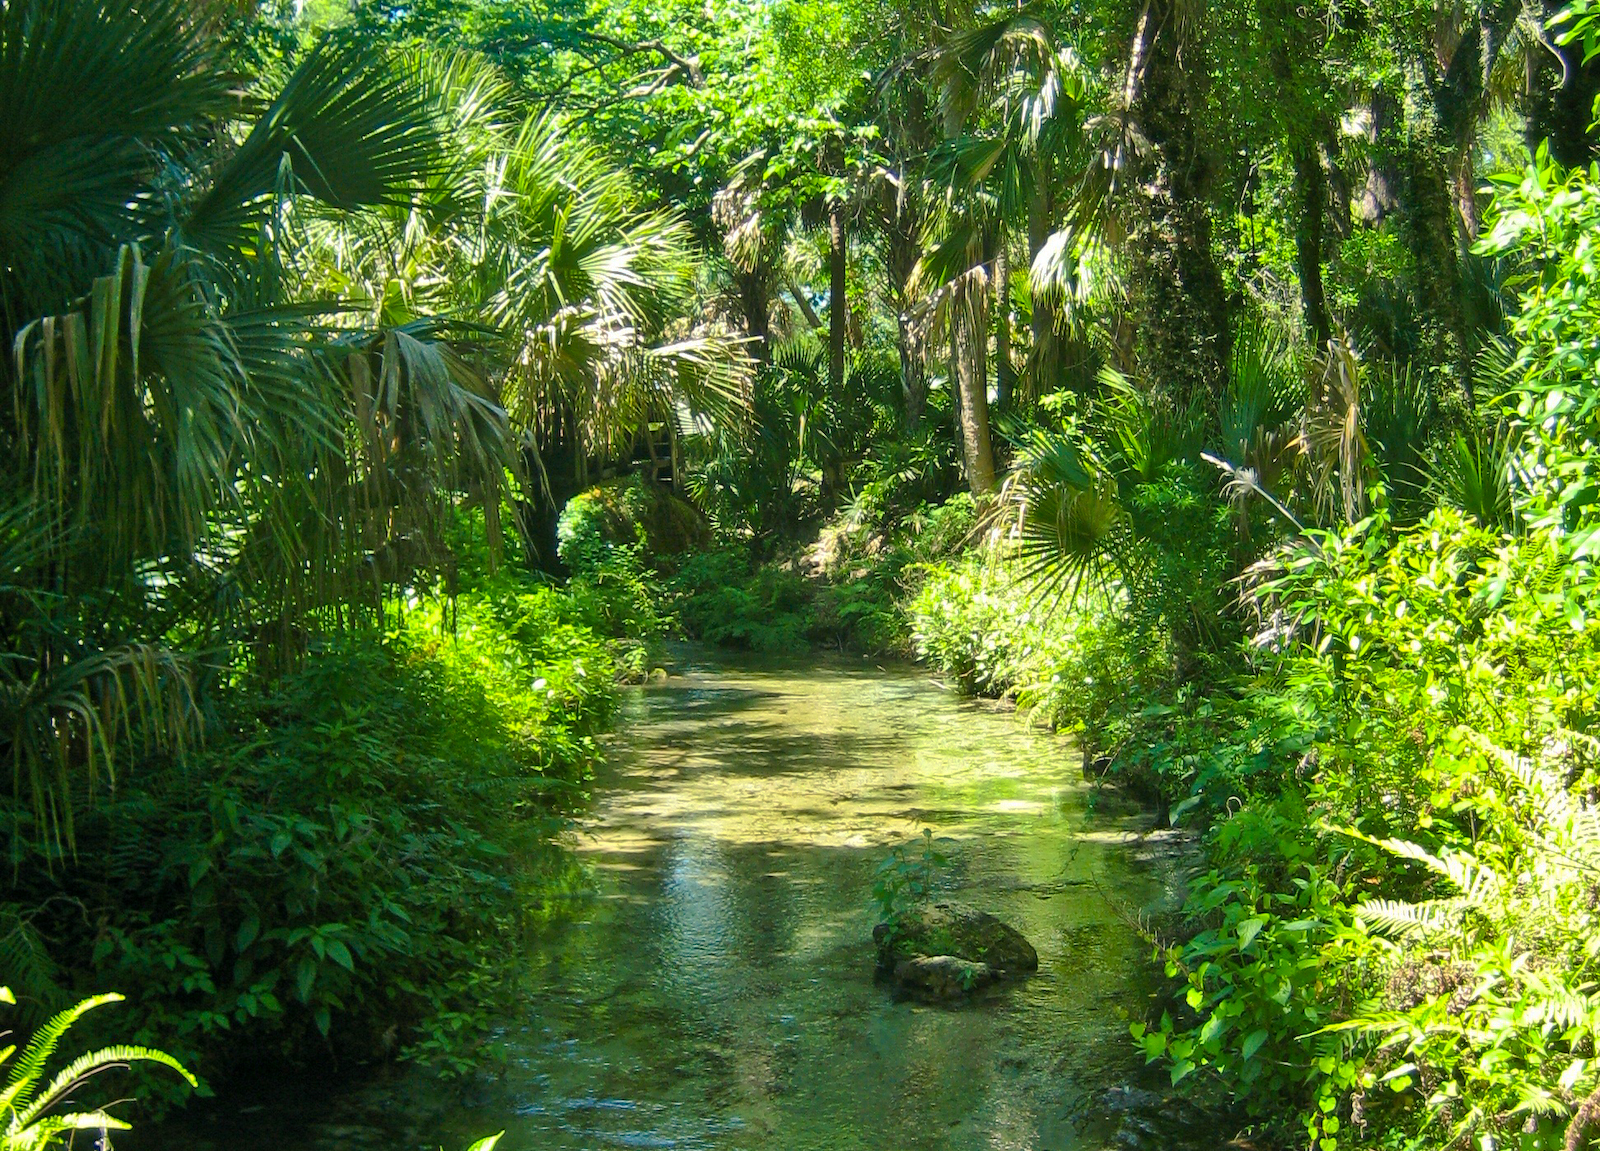
Photo by Sandra Friend
Eleven Point National Scenic River Mark Twain National Forest, Missouri
In 1968 the Eleven Point National Scenic River was established as a Wild and Scenic River. Grab your canoe for a meandering journey through the stunning Ozark hills of southern Missouri. Along the river, you can camp at one of eight camps. More info.
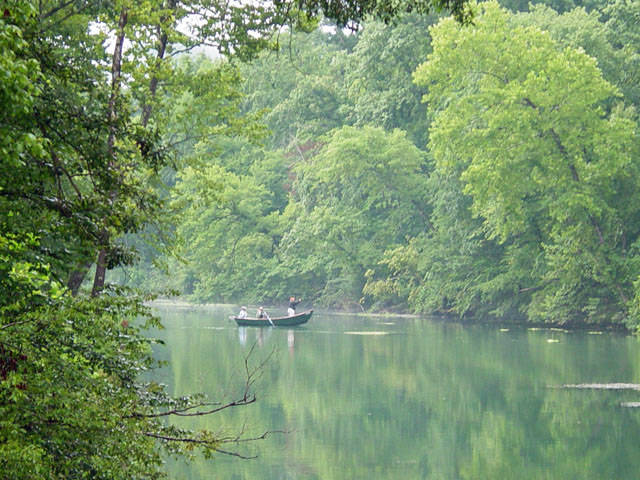
AuSable, Manistee, Pere Marquette and Pine, White River Huron-Manistee National Forest, Michigan
The Huron-Manistee is home to five Congressionally designated Wild and Scenic rivers, all feature a beautiful landscape. The Pine River has the faster average flow of any river in lower Michigan which can induce light rapids. The Manistee appeals to anglers searching for salmon, steelhead, brown trout, small mouth bass and walleye. More info.
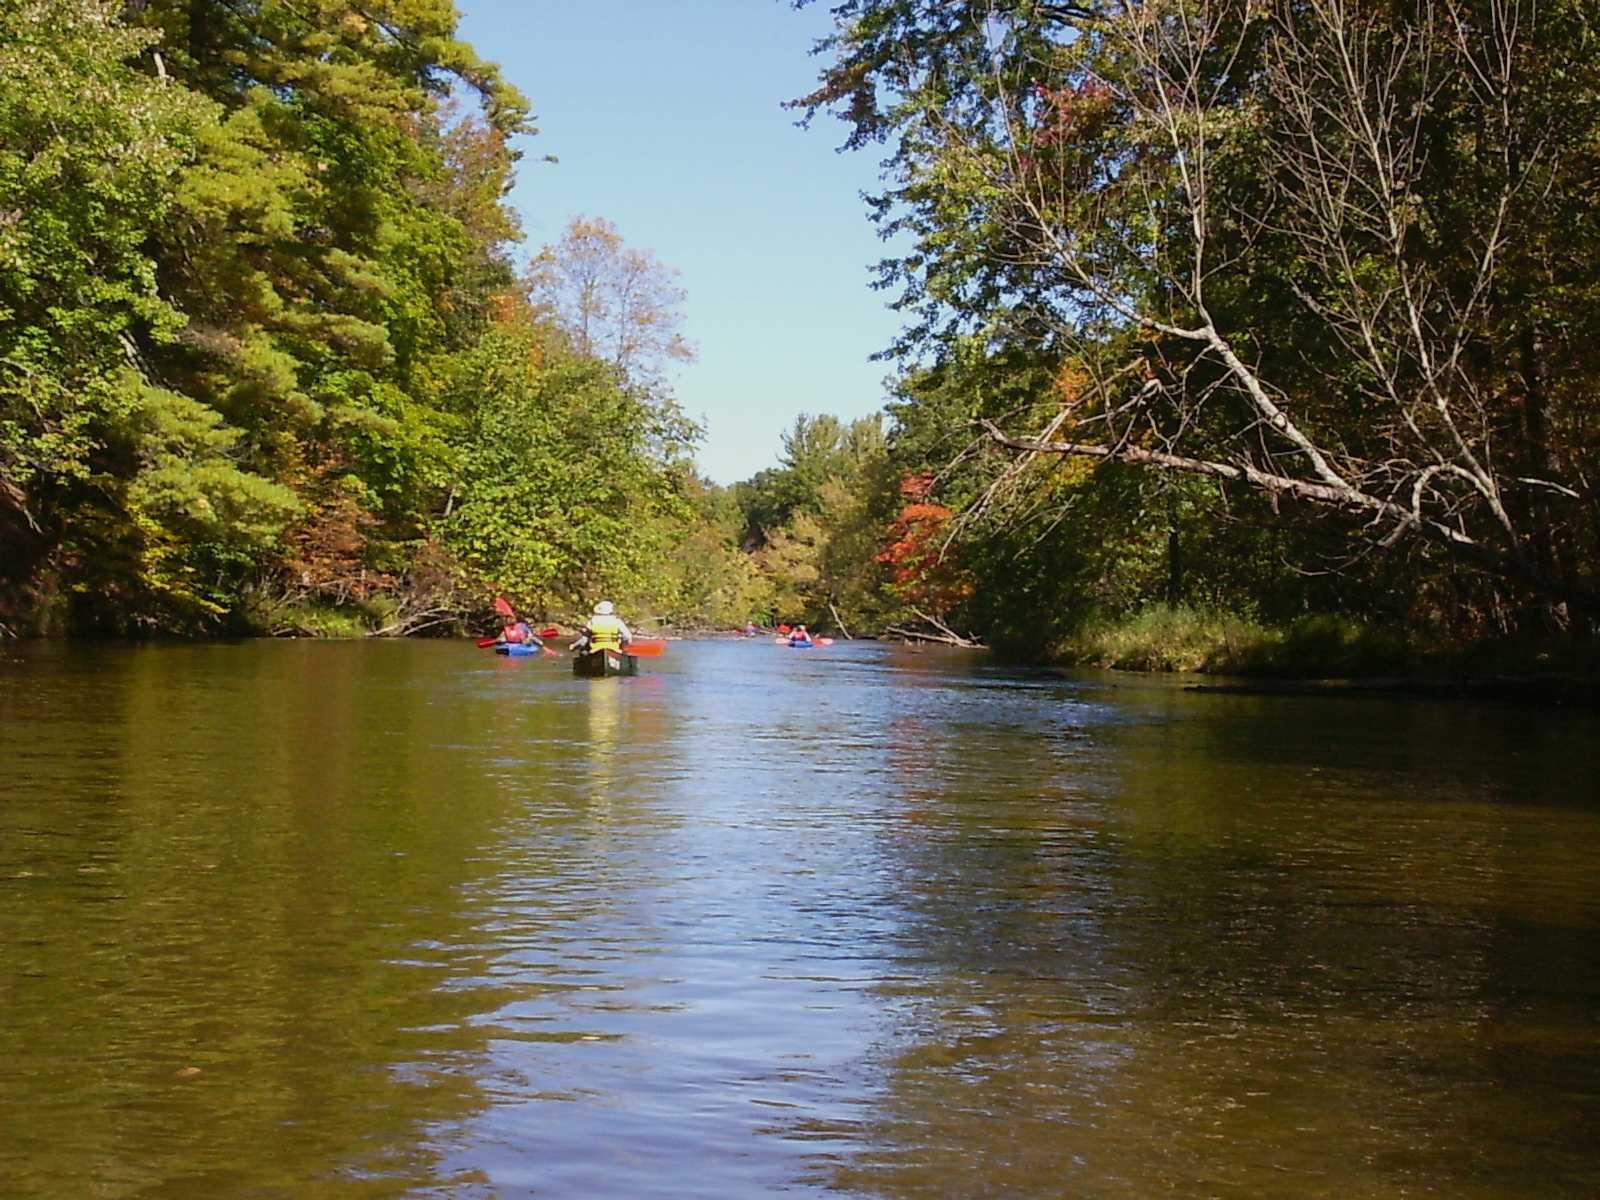
Indian River Canoe Trail Hiawatha National Forest, Michigan
In the upper peninsula of Michigan, check out the 51 mile-long Indian River, a Wild and Scenic River as of 1992. The canoe trail features canyon-like banks, sharp curves and broad marshland reaches. You’ll be surrounded by northern hardwoods, mixed conifers and rolling hills. Camping is also available to extend your journey over a few days. More info.
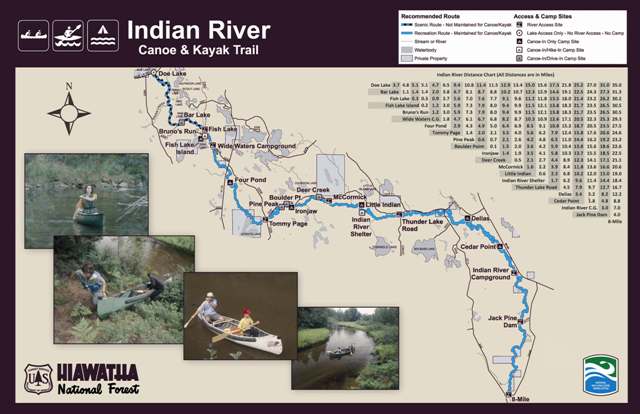
Wambaw Creek Wilderness Canoe Trail Francis Marion National Forest, South Carolina
Just north of Charleston, South Carolina, the Wambaw Creek Wilderness Canoe Trail features majestic cypress tupelo stands and abundant wildlife. Take note that the creek is tidal and about three hours later than Charleston. More info.
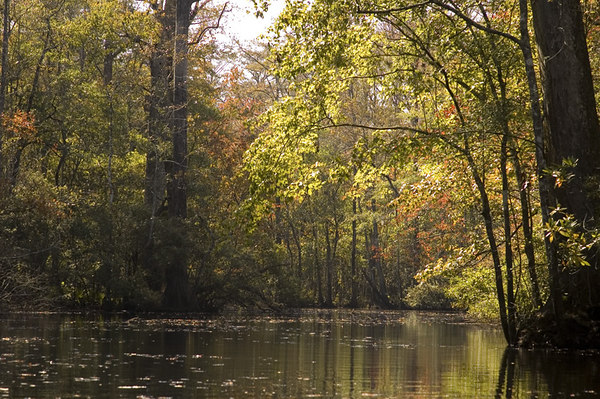
Tyger River Canoe Trail Sumter National Forest, South Carolina
Take a float down the Tyger River Canoe Trail on the Sumter National Forest in Northwestern South Carolina. Along the way you’ll have ample opportunities to see a variety of wildlife and birds. More info.
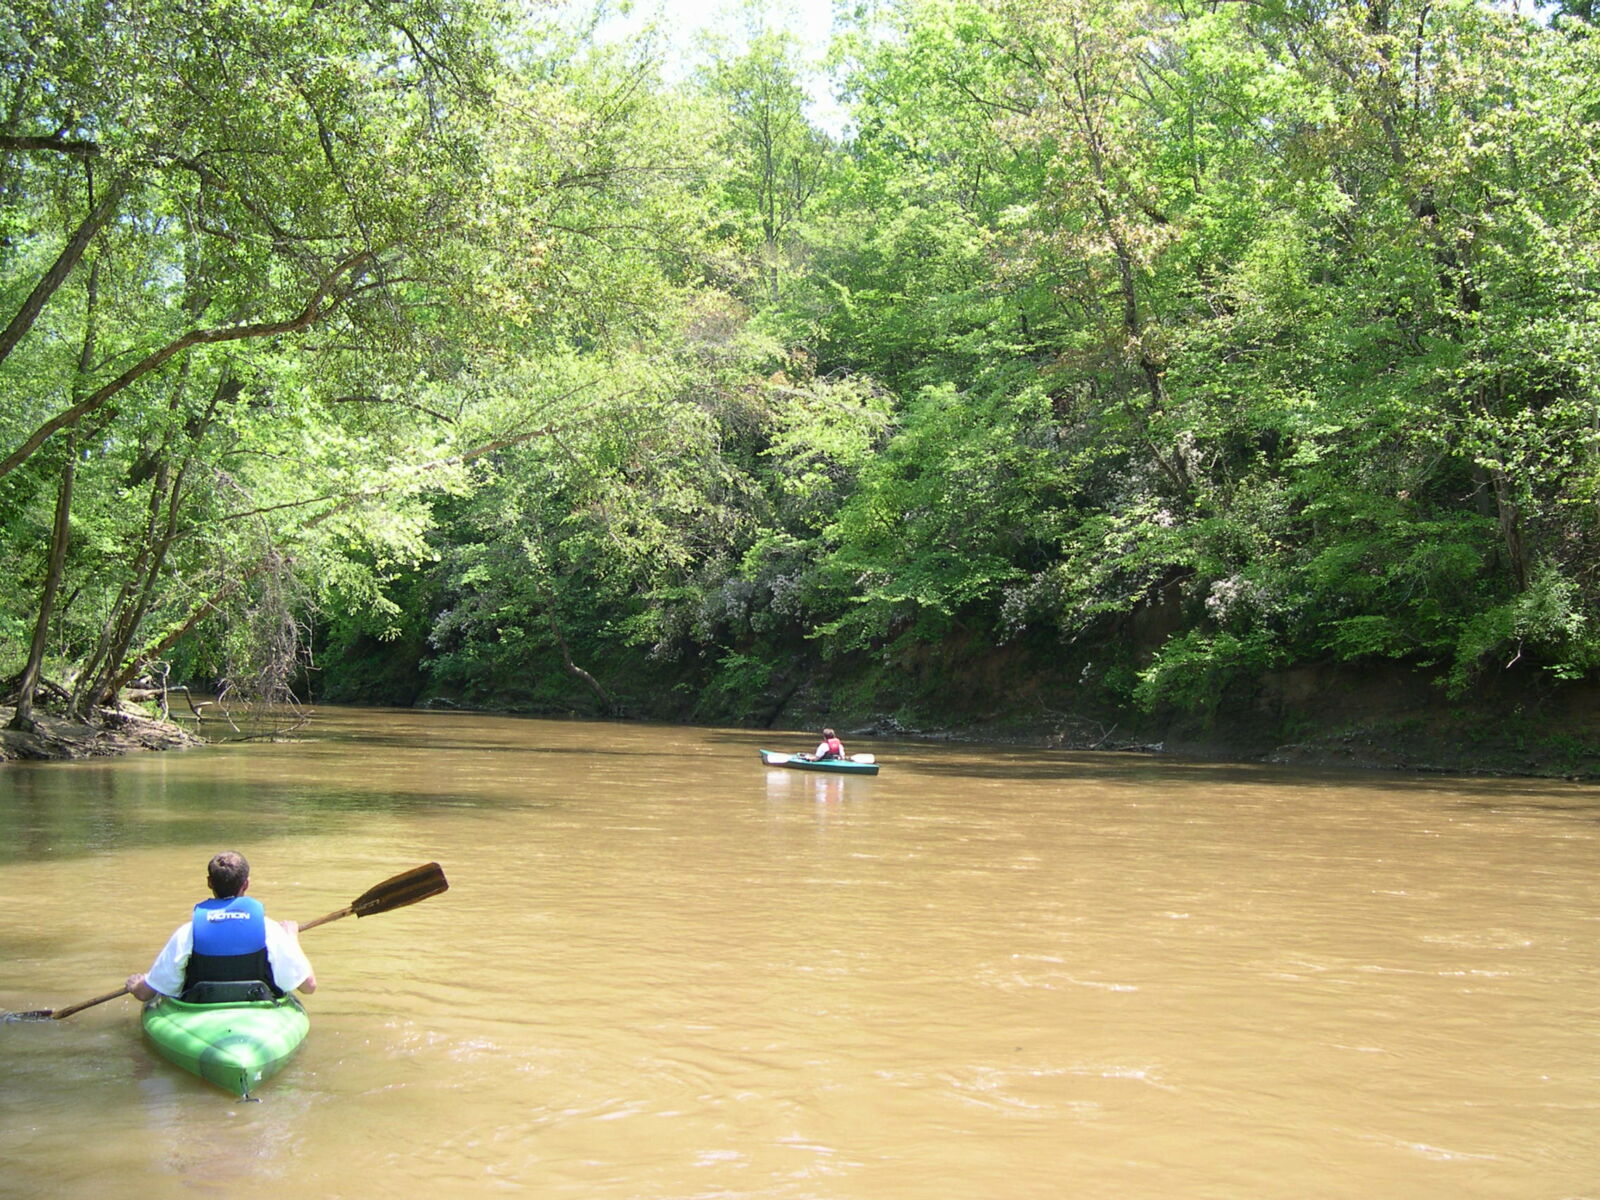
Clearwater Canoe Trail Lolo National Forest, Montana
Take the afternoon and float the Clearwater River Canoe Trail near Seeley Lake, Montana. The slow-moving waterway is part of a chain of lakes in the Seeley-Swan area of Western Montana. As you paddle down, you won’t be lacking for views of surrounding mountains. More info.
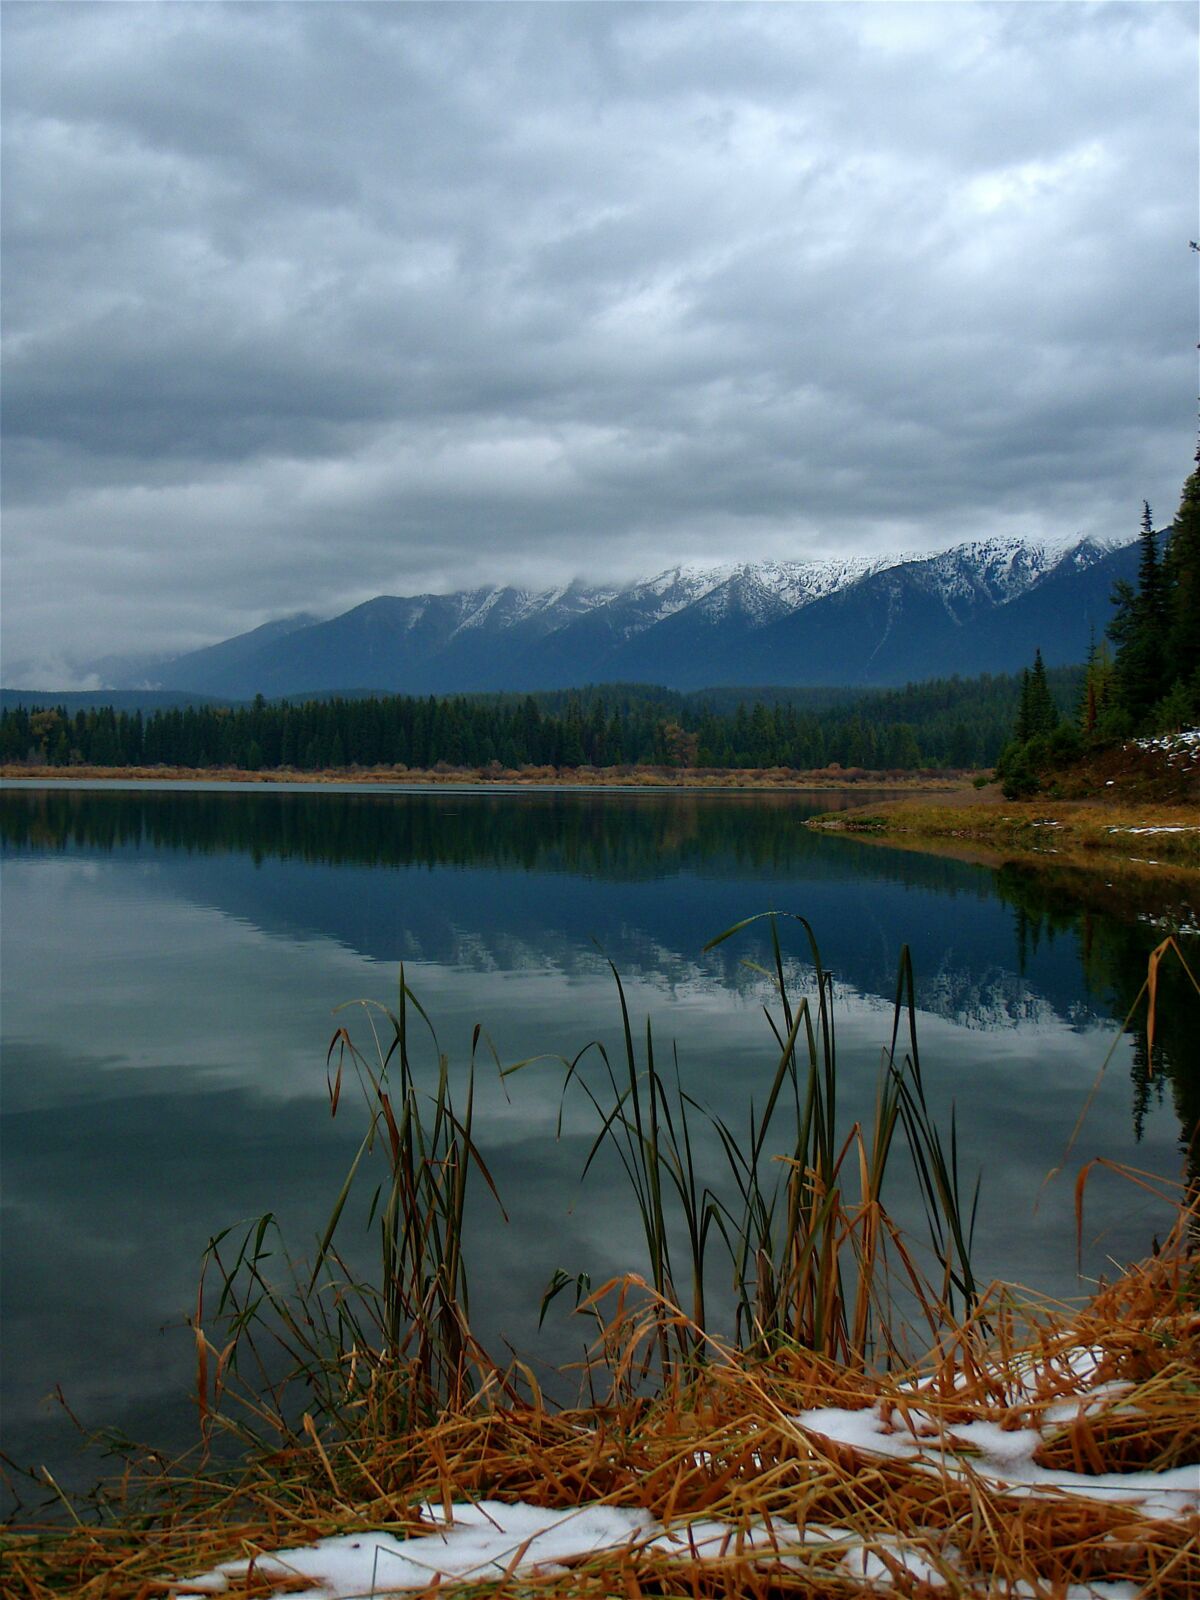
Mulberry River Ozark National Forest, Arkansas
If you find yourself in the Ozarks, make time to float the Mulberry River, a beautiful and wild mountain stream flowing through the Ozark National Forest. Make your launch at the Redding Recreation Area complete with a developed campground and access to hiking. More info.
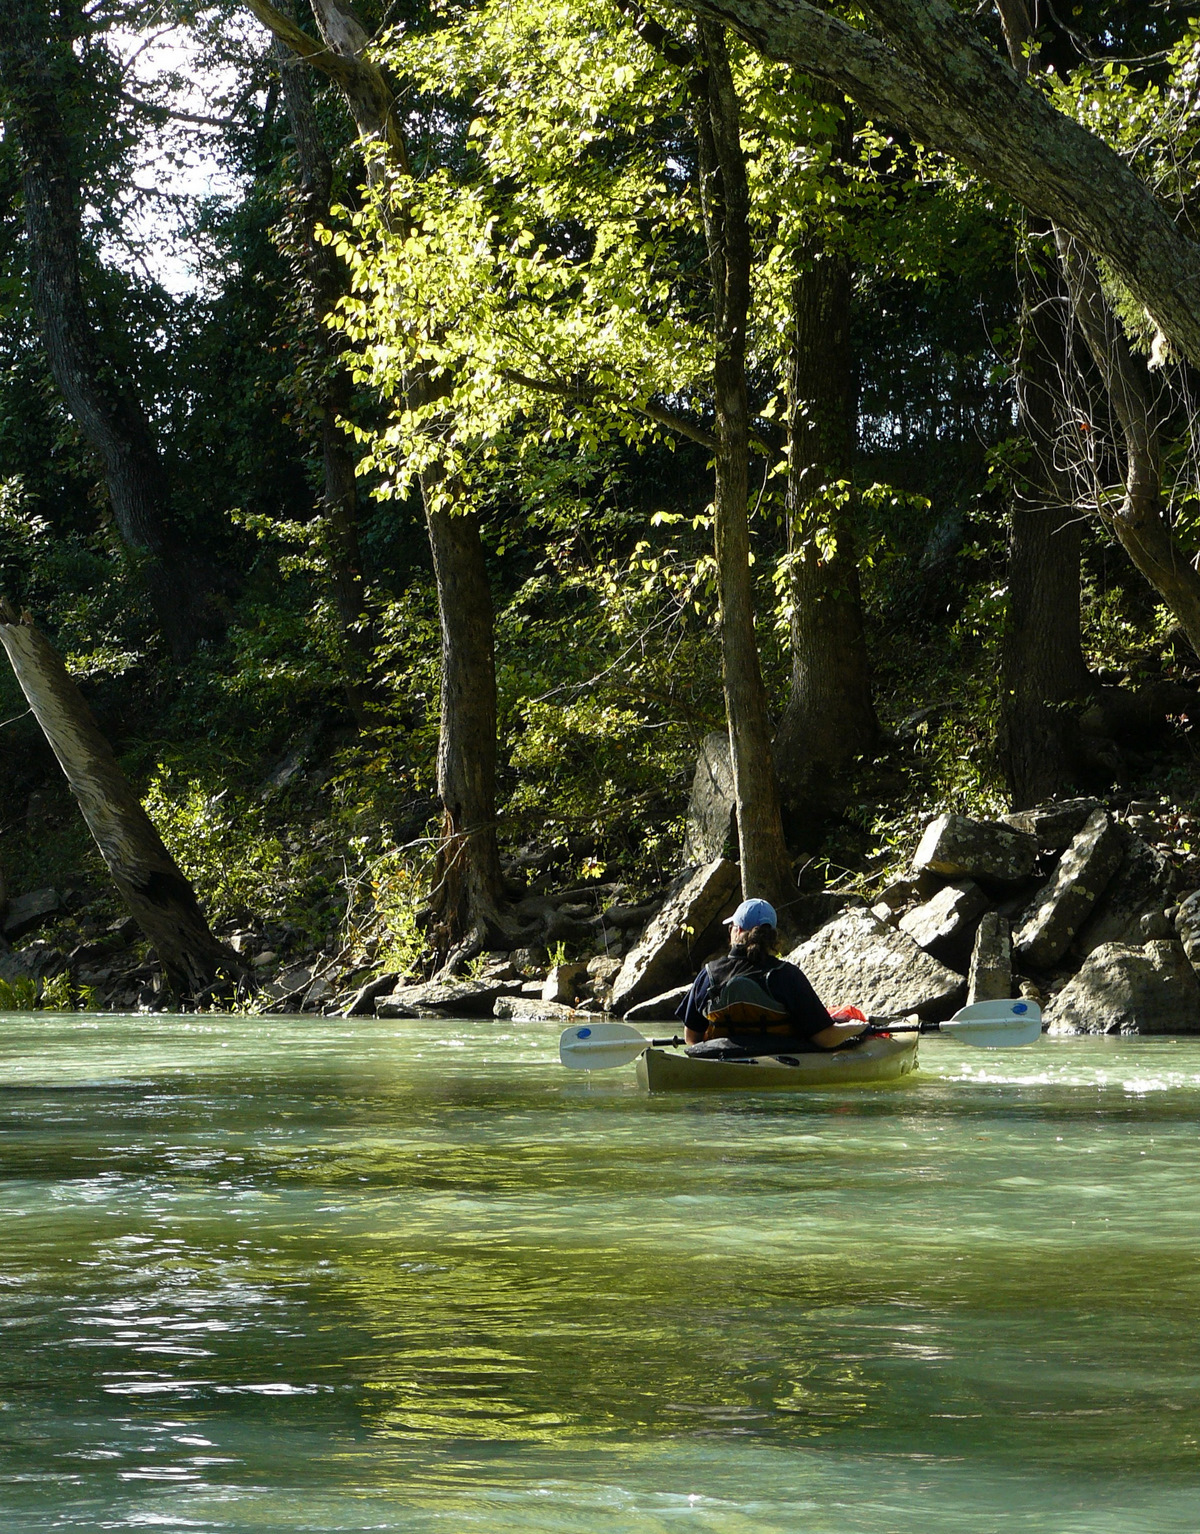
Lake Chelan Okanogan-Wenatchee National Forest, Washington
Lake Chelan stretches fifty miles through the North Cascades with the picturesque down of Chelan at the base. Paddle your way up the lake and relax at one of the 25 campsites on the shore or explore the Lake Chelan-Sawtooth Wilderness. More info.
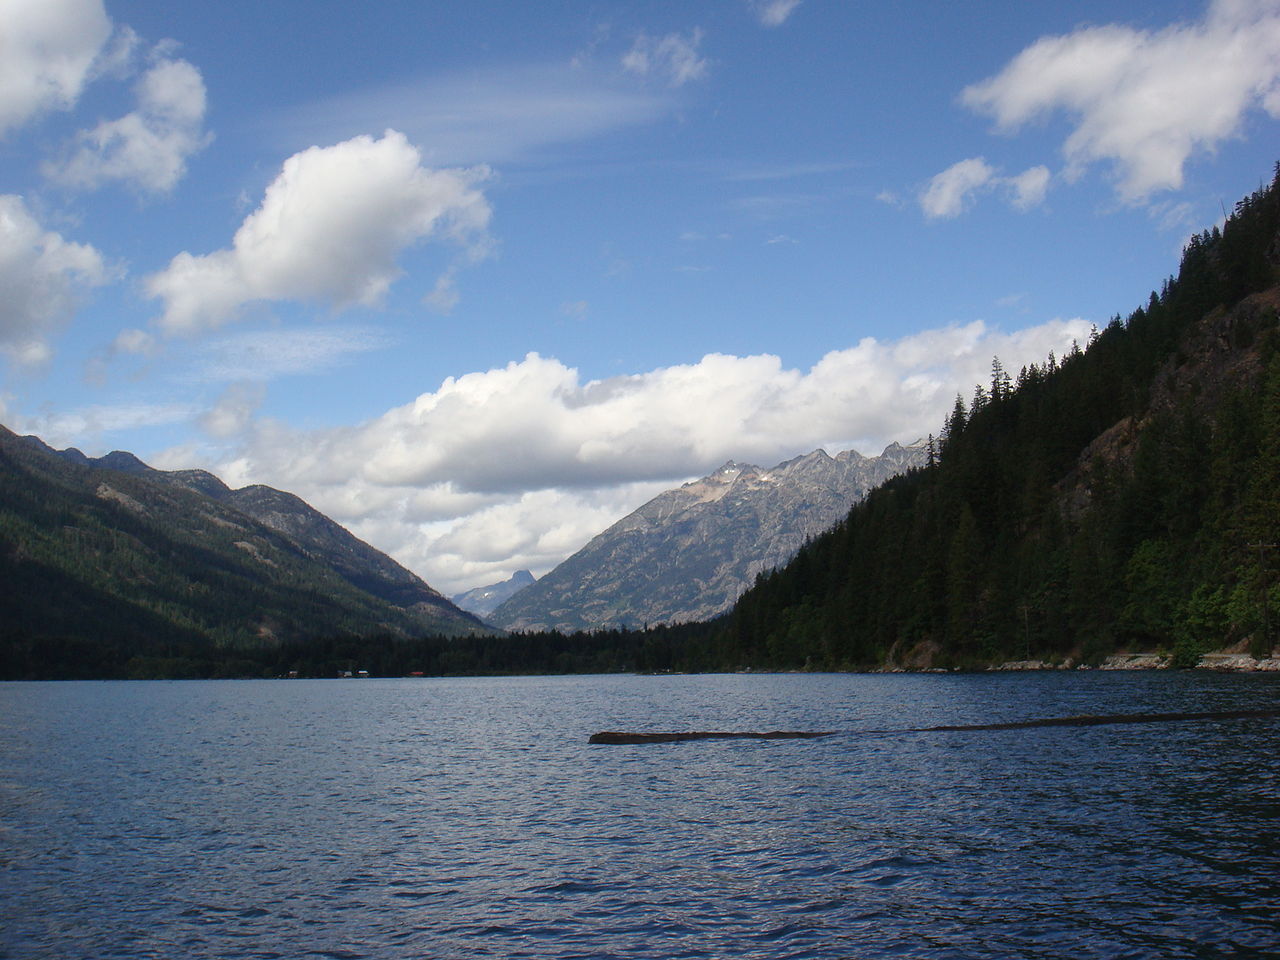
North Fork Flathead River Flathead National Forest, Montana
Alongside Glacier National Park, the North Fork of the Flathead flows cool and clear. Peaks from Glacier will watch you as you float by along one of the most scenic places in the country. More info.
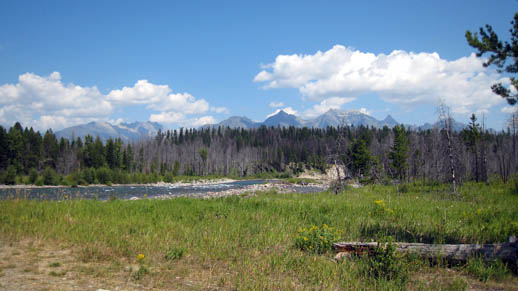
Lake Tahoe Lake Tahoe Basin Management Unit, California and Nevada
Spanning California and Nevada, Lake Tahoe’s iconic landscape and surroundings make it ideal for your next paddling vacation. With campgrounds and hiking a plenty, you won’t be lacking for adventure on and around the lake. More info.
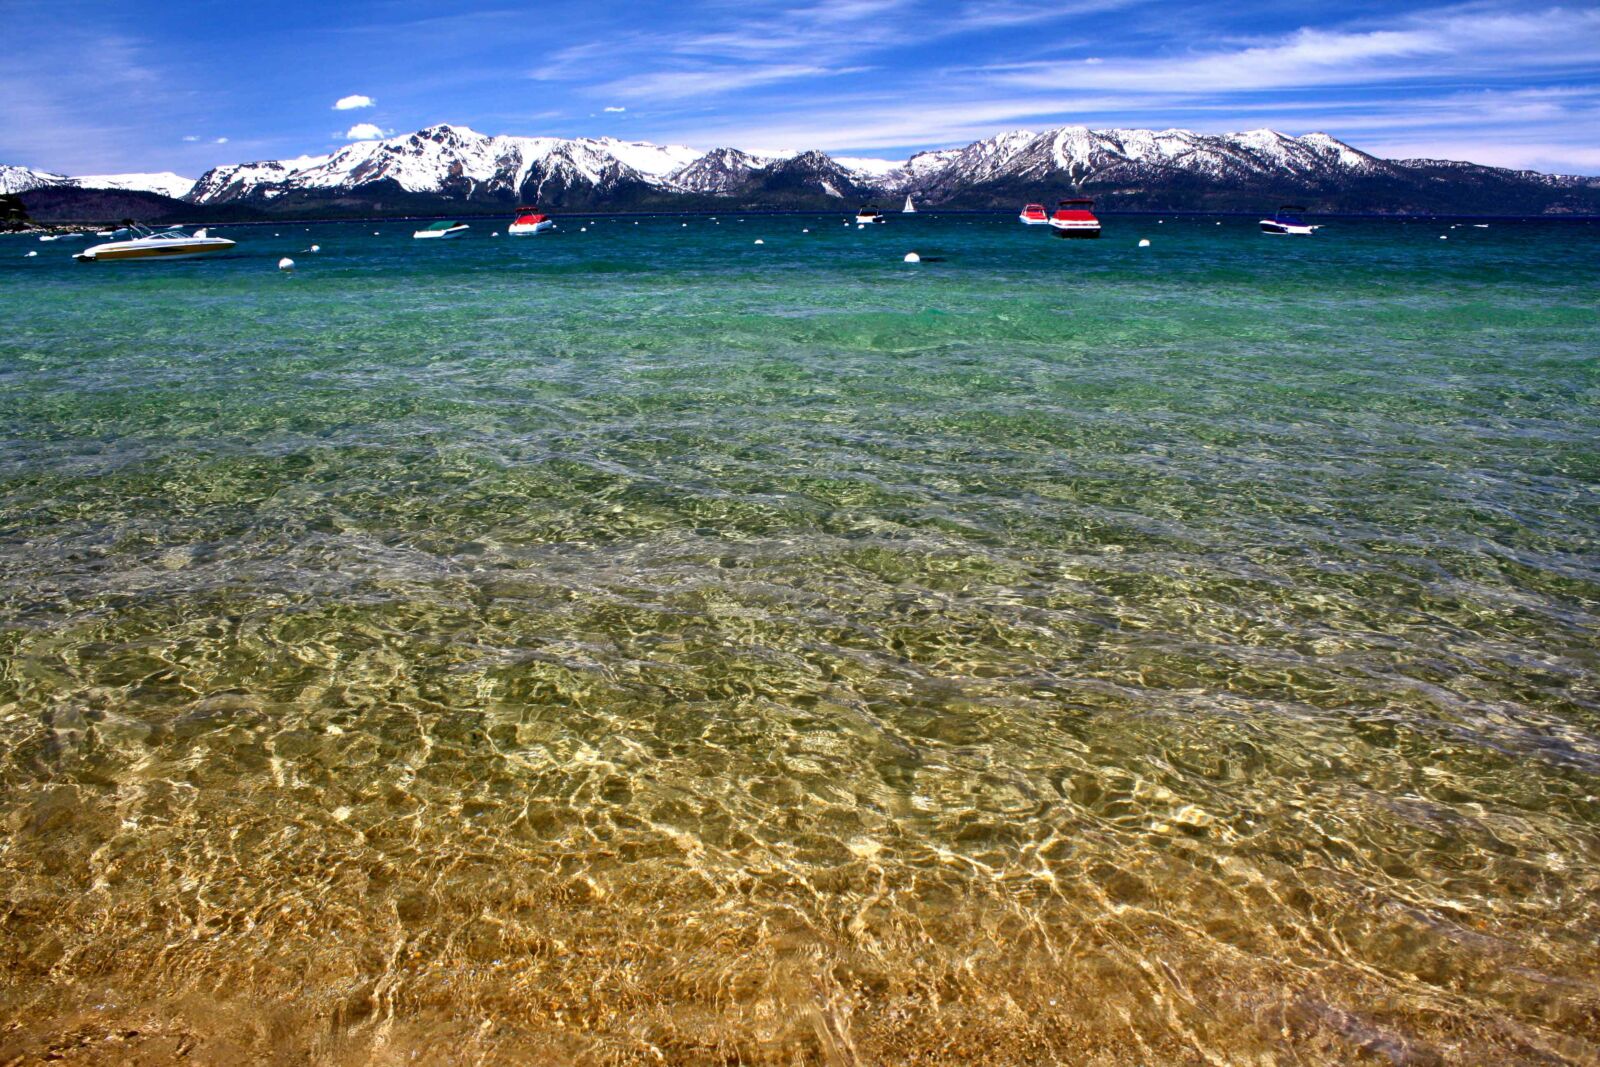
Photo by Michelle Turner
Green River Ashley National Forest
Speaking from personal experience, the Green River was one of the most fun river experiences I’ve ever had. Just down the way from the Flaming Gorge National Recreation Area, the Green features rugged scenery and cold, cold water. More info.
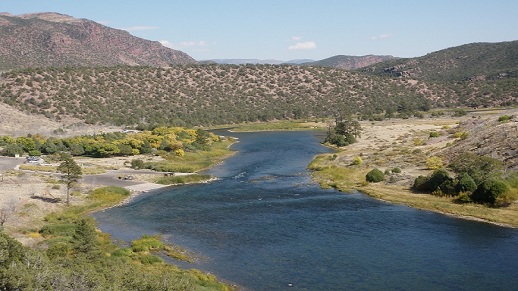
California's rivers were too hard to pick from!
Mokelumne – Eldorado/Stanislaus National Forest Truckee River – Tahoe National Forest Upper Sacramento – Shasta-Trinity National Forest Klamath – Klamath National Forest
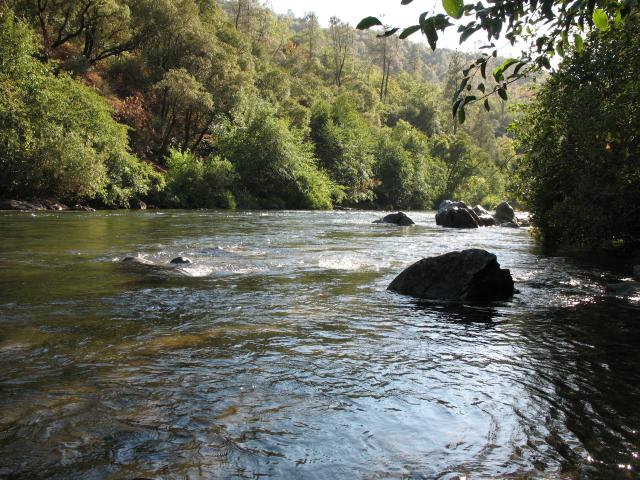
There’s nothing like getting out on the water and floating your boat. Want to know what floats the NFF’s boat? You do! Yes, individuals like you provide the largest source of critical unrestricted funding that enables the NFF to carry out its mission. Please consider giving today . Thank you. And, of course, happy paddling!
Related Blog Posts
Ten of the best places to paddle on national forests, a paddler’s guide to leaving no trace, the water is calling: nine unforgettable fishing and boating experiences on national forests, receive national forest news and updates.
Sign-up for our email newsletter and stay connected.
Wolf River Canoe Trips
General info.
- Wikipedia: Wolf River
- Ghost River State Natural Area
- Wolf River Wildlife Management Area
- Wolf River Conservancy

Paddling the Wolf River
There are many ways to experience the Wolf River, but paddling in a canoe, kayak, or stand-up paddle board arguably provides the most immersive experience and the greatest connection with nature. Approximately 75 miles of the Wolf River is open for paddle craft. Learn more about paddling on the Wolf River in this section and refer to the events calendar for upcoming paddling trips. We nearly always have a first Saturday paddle trip, and we would love for you to join us!

Activity Calendar

First Saturday Paddle -Germantown Pkwy to Kennedy Park

Discover the Greenway 5K+

The Endangered Whorled Sunflower and Conserving Native Plants

Family Fun Paddle on the Wolf River

First Saturday Paddle - July

First Saturday Paddle - August

Greenway Soiree
Frog Chorus Walk

Paddle the Greenway

Mother’s Day Paddle on the Wolf River
May First Saturday Paddle - Lost Swamp

Drink a Beer Save a River - May

City Nature Challenge: Bioblitz at Epping Way

Earth Day on the Wolf River Greenway

Landfills, Waste, and Recycling

First Saturday Paddle April, Ghost Section

World Water Day Service Project
River Paddling FAQs
- Blues City Kayaks | 901.762.1133 | [email protected]
- Ghost River Rentals | 901.485.1220 | [email protected]
- Kayak Memphis Tours | 901.482.2942 | [email protected]
- Wolf River Canoe Tr ips | 901.877.3958
- Ghost River Rentals provides shuttle services along the Wolf River. Contact Mark Babb or Don Hailey at 901.485.1220, or visit their website: ghostriverrentals.com
- Wolf River Canoe Trips provides shuttle service in Fayette County. Contact Sarah or John Wilburn at 901.877.3958 for more info.
- Blues City Kayaks provides tours and rental kayaks in Shelby and Fayette Counties. Visit their website for more info: bluescitykayaks.com
There are 12 boat access points on the Wolf River from Michigan City, MS to the Mississippi River. Explore the interactive map to help find a section right for you. The map highlights each river section and shows all of the boat access sites including a Google Maps link for each.
Interactive Map
Safety on any paddling trip depends on the paddler’s planning and preparation. Before beginning a paddle trip on the Wolf River, please review and carefully consider this important Safety Information .
For a first trip on the Ghost River section of the Wolf, a guide is essential for inexperienced paddlers and very helpful to experienced paddlers. Sections below the Ghost section can be negotiated without a guide, though it is best not to go alone. The Wolf River Conservancy provides experienced volunteer trip leaders on planned monthly paddle trips on the Ghost River and other Wolf River sections, helping to arrange equipment rentals and shuttle services. See our Activity Calendar for upcoming trips.
While the entire Wolf River is a Class I stream (no whitewater), it does have many obstacles and unpredictable currents that often send unprepared paddlers through dense shrubbery and fallen tree branches. Even during its slow flow, the Ghost River section requires use of moderate canoeing/paddling skills to safely negotiate some of its obstacles. The trip is moderately strenuous, and, in the event of a medical emergency, significant difficulties can be encountered in aiding or evacuating a victim. The section between Germantown Pkwy. and Walnut Grove Rd. does not offer many obstacles and is the best section for beginners. During high water conditions (over 8 ft. on the nearest river gauge), any section of the Wolf can be dangerous. Please review our Safety Information .
The Ghost River trip from LaGrange to Bateman Rd. takes about 6 hours, including a short lunch break. This section should never be started later than 7 hours before sunset. The Bateman to Moscow trip takes about 3 hours. Germantown Pkwy. to Walnut Grove Rd. normally can be traveled in about one hour.
For the Ghost River section, fuel up with a high-carbohydrate breakfast before setting off. Take at least one-half gallon of water per person, a lunch (which may have to be eaten in the canoe in high water), sunscreen, life jacket (wear it), Epi-Pen or inhaler for those with severe allergies or asthma, supplies and a mobile phone. Please review all Safety Information .
Remember: In the event of a medical emergency, significant difficulties can be encountered in aiding or evacuating a victim. Don’t take anything in the boat that you can’t afford to lose or get wet. Dress in layers in cool weather so you can adjust for the temperature. Bring a change of clothes and a small towel in a dry-bag or large Ziploc plastic bag.
Yes, as the Wolf River provides them a perfect habitat, and most are harmless water snakes. The venomous cottonmouths, aka water moccasins, rarely bother people who don’t bother them first.
Pinecrest Camp and Retreat Center in La Grange, TN offers camping by reservation only. See more information on camping at Pinecrest at this link.
The only public access overnight camping near the Wolf River is in the Holly Springs National Forest, which is less than a 20-minute drive from the Michigan City boat launch. Please follow rules for dispersed camping on National Forest lands. All other public land in the Wolf River watershed is day-use only.
Short River Hikes
Whether you want to go for pleasant after-work stroll or bike ride, or follow a boardwalk into a wild natural area which preserves some of the mid-south's most beautiful habitat, the wolf river has something to offer.
This list does NOT include the Wolf River Greenway trail itself, but several of the trails below intersect the Greenway - For information and updates on the Wolf River Greenway Project, click here.
John F. Kennedy Park (4575 Raleigh LaGrange Rd.) is the fifth largest park in Memphis at 260 acres. Built in the mid-1990s by the Conservancy and volunteers, this 1.25 mile trail (one way) begins atop a hill at a gravel trailhead parking across from the Alzheimer's Center. Walk down the hill following yellow signs and enter the forest where the trail winds through big trees. The trail becomes a boardwalk for a quarter mile through a high quality bottomland hardwood forest. The trail then zigzags across the Wolf River Greenway and along the banks of the Wolf River. You can make it a loop trail by walking the park roads back to the gravel trailhead parking.
For a map of John F. Kennedy Park, click here.
Started by an boy scout troop in 2019 and finished to the beach by volunteers on MLK Jr. Day in 2020, this unpaved hiking and mountain biking trail connects to Phase 9 of the Wolf River Greenway at 2630 Epping Way Drive, Memphis, TN. The 2-5 ft wide path squeezes between the river and the Conservancy's 20-acre lake for over 0.5-mile to a large beach in a major bend of the river. The total out-and-back distance from the parking area at Epping Way cul-de-sac to the beach and back is roughly 1.7 miles. Wolf River Conservancy is planning to extend this trail all the way around the lake to connect back with the Greenway for a nice loop trail.
Designated in 1988 by Wolf River Conservancy and local partners, Lucius Burch SNA is located in Shelby Farms along the Wolf River and is accessed from: Walnut Grove Road near the bridge over the river, near Germantown Road and Walnut Bend at the paved parking area or at the gravel parking area at the Raptor Center. The northern section can also be accessed on foot or bike via the Shelby Farms Greenline, Unpaved hiking and biking trails afford good river views. Old channelized streams and exotic invasive plants, such as privet, illustrate some of the effects of channelization and urbanization. Conversely, pockets of high quality bottomland hardwood forest with a state-listed species are found along the trails as well. For a map, see the trails in the dark green areas in the south and western portions of Shelby Farms Park: click here for rough trail map.
The Germantown Greenway is a 4-mile paved trail in the Wolf River Nature Area, which can be accessed from Wolf River Blvd. between Kirby and Riverdale, between Riverdale and Germantown Pkwy., or from Germantown Pkwy. at the Chik-Fil-A parking lot. The trail includes interpretive signs, benches, butterfly gardens, and wetlands. Thanks to the efforts of WRC and community leaders, the Germantown Greenway now connects to the Wolf River Greenway. One day there will be a continuous trail extending 15 miles west to the Mississippi River and 15 miles east to Collierville-Arlington Rd.
For a map of the Germantown Greenway and surrounding area, please click here.
The trailhead for this short unpaved trail is located on Kimbrough Rd just south of Wolf River Blvd. Look for the kiosk next to a gravel parking lot. Recently, TDEC Division of Natural Areas removed exotic invasive privet to restore the habitat. For a complete description and a map, click here.
Overton Park is an amazing ecological refuge within the heart of Memphis and lies within the Wolf River watershed. Enjoy old growth hardwood forest on the many paved and unpaved trails within the park and natural area. Overton Park Conservancy stewards and manages this park in partnership with city of Memphis. DIRECTIONS For more information on the park and Overton Park Conservancy, visit overtonpark.org.
Peterson Lake Nature Center encompasses a 0.7 mile long boardwalk from Peterson Lake, a natural oxbow, through forest and wetlands to the banks of the Wolf River. At the end of the boardwalk, you can see part of the Wolf River restoration project, i.e., one of the rip-rap weirs created by the U.S. Corps of Engineers to stop the degradation of the river caused by channelization. Deer and other wildlife are frequently seen along the boardwalk, and there are abundant cypress, tupelo, and other trees. DIRECTIONS to Johnson Park, follow Bill Morris Pkwy. (385) to Byhalia Rd., go left or north, and stay on Byhalia Rd. which will dead-end at Johnson Park. Keep driving past the play areas and the lake. The road makes a small loop and becomes a parking lot. Look for the Peterson Lake Nature Center sign and the beginning of the boardwalk.
For more information, visit the Collierville Parks website.
A large park north of Collierville contains over 2,000 acres of woods and wetlands along both sides of the Wolf River. The 5-mile crushed limestone trail is open 7 days a week from dawn to dusk and can be accessed at the Collierville-Arlington Rd. bridge where there is a gravel parking lot on the north side of the river. The park can be accessed at its western end from Bethany Rd. Eventually, the trail will extend for 8 miles to Houston-Levee Rd. The farm fields north of the woods are now open for hiking and biking. The map below shows a trail on the farm roads. There are two parking areas off Collierville-Arlington Rd.,one on the north side of the bridge, and one farther north at the main trailhead. On the map, TR-1,2,4,5,6 all represent the tributary weirs. There is no hunting and no ATV (four-wheeler) use allowed. Day-use only. The County sheriff’s deputies have begun checking the parking areas after dark.
Wolf River Wildlife Area Map
A short unpaved trail along the Wolf River leads from the parking lot to a boardwalk through a first-class wetland with tupelo and cypress trees. The entrance to the Clark Preserve is .25 miles north of the Wolf River Café and Rossville Square. Go over the bridge and turn into the parking lot on your right. The Clark Preserve is owned by The Nature Conservancy. For a complete description and a map, click here.
Clark Preserve information from The Nature Conservancy.
The area around the boat ramp was protected by Wolf River Conservancy in 2016 and 2018 and is now part of Ghost River State Natural Area. This boat ramp at Bateman Bridge offers access to the Wolf River. There is no trail, but wading is possible here because the bottom of the river is sandy and the river is usually fairly shallow. Shoes are recommended. Take Hwy 57 east through Moscow and take a right onto Bateman Rd. DIRECTIONS. For a map of the area, click here.
The 0.5-mile Mineral Slough trail and boardwalk traverses a fine stretch of bottomland hardwood swamp characteristic of the Wolf River floodplain. The Ghost River is a section of the Wolf River in which the river seems to disappear, widening into a broad, vegetation-filled swamp. It is a popular destination for paddlers and has been named one of the best wetland canoe trails in the country. DIRECTIONS. To read a complete description and for a map, click here.
This is a beautiful hike to the source of the Wolf River, a large spring-fed pond about .25 miles from the trailhead, in the hills of Benton County, Mississippi. Look for natural springs trickling out of the earth and the unique purple sands along the stairs on the trail. Click here for DIRECTIONS: on Hwy 72 heading east, ff you cross the Tippah County line, you've gone too far. Turn right or south at the small brown sign for Baker's Pond onto Tower Rd., and bear right where the road forks. Look for the Baker’s Pond trailhead parking area on the left. The trail used to connect to Mt. Pleasant Cemetery, but a large tornado destroyed that portion of the forest and has overgrown the trail. Restoration efforts are being made to repair the trail.
Baker's Pond Map
Safety Information
Paddling the Wolf River in a canoe or kayak can be a wonderful experience. The quality of that experience, however, will depend largely on your training, planning, and follow-through.
The Wolf River Conservancy recommends always paddling in groups of two or more, regardless of your skill level or experience. The level of skill you need to paddle the Wolf River depends on your physical condition, prior training and experience, and the paddling conditions of each river section. If in doubt about your skills or how to find appropriate training, or for any other questions, please contact a Wolf River Conservancy Volunteer River Guide, a local outfitter or paddling retailer, or the American Canoe Association, of which the Wolf River Conservancy is an affiliate.
Your trip will be much more enjoyable, comfortable, and certainly safer if you bring along appropriate clothing, gear, and other items, including a change of clothing in the event of a capsize, emergency gear, medications, and a first aid kit. Any river trip involves an element of risk, and it is necessary to be prepared for emergencies. Please read this Safety Information and consider these rules and recommendations carefully in planning your trip.
Participants in Wolf River Conservancy float trips will be required to wear an approved Personal Flotation Device (PFD) while on the water. These are provided by the outfitters along with boat and paddle for those renting. Paddlers arranging their own trips are required by state law to have an approved Personal Flotation Device (PFD, or life jacket) for each person on board; children 12 years old or younger are required to wear a PFD at all times while on the water. Click here for more information on Personal Flotation Devices .
The Conservancy recommends that everyone wear a U.S. Coast Guard Approved life jacket (PFD) while onboard any kind of human-powered, natural-powered or motorized boat, on any body of water, at all times. Remember, a life jacket (PFD) must be properly fitted and sized to the person wearing it and must be worn correctly to work!
Although the Wolf is rated as a class one river (no whitewater), conditions can rapidly change. It is imperative that paddlers realistically evaluate their experience and abilities in regard to an anticipated trip, especially if considering bringing children along. If in doubt, ask a Conservancy River Guide. Paddlers of any skill level should check both weather conditions and water level prior to departure.
No paddler, regardless of experience level, should paddle alone. Beginners are advised to seek out some type of formal training before paddling; afterwards, paddle only with highly experienced guides for the first few trips. The Conservancy membership trips are well-suited for beginners, depending on the river section, because they are led by experienced paddlers familiar with the route who provide limited basic instruction at the beginning of the trip. Please do not paddle with children as passengers unless you are an experienced paddler yourself.
Always check weather conditions and water level before your trip. Do not attempt a trip if the forecast indicates severe weather such as a thunderstorm. Do not attempt a trip during flood conditions. For weather conditions and forecast, use this link . The Conservancy recommends not paddling any section of the Wolf River if the USGS River Level Gauge closest to the section being paddled reads 8 feet or above for most paddlers. Use the following links to check water levels:
Gauge at LaGrange
Gauge at Rossville
Gauge at Collierville
Gauge at Germantown Pkwy
Gauge at Hollywood St
Gauge at Mississippi River
Our Interactive Map provides a description for each of the accessible sections of the Wolf River, helping paddlers to choose the section that best meets their needs.
Always bring plenty of drinking water, regardless of the season. We recommend a half gallon or more per person for all-day trips.
Always bring necessary allergy medications and emergency supplies such as a first aid kit, prescription medications you might need, a change of clothes to carry with you in the boat, flashlight, whistle, compass, rain gear, cell phone, sunscreen, insect repellent, snacks, etc., and a waterproof “dry” bag to hold these items. Local outfitters are a good source for other suggestions as well as ready-made kits and supplies; these can also be found online.
Have a float plan. Always tell someone where you are going and when you expect to return.
Always wear clothes and shoes suitable for conditions. Denim and other types of cotton clothing are not recommended to be worn in or around water or while boating at any time of the year. Fast-drying synthetic polyester materials, which can be layered for cold weather conditions, are preferred. Shoes which fit securely are recommended. Avoid crocs and flip flops can easily slip off the foot when wet, and waders or rubber boots which could fill with water. Water shoes or some form aquatic “bootie” are highly recommended. Protect your feet at all times.
Cold weather clothing suggestions: Neoprene booties, synthetic (e.g., fleece) or wool fabrics worn in layers, a hat, gloves. Avoid cotton clothing. During cold weather, it is essential to bring a full set of rain gear and at least one change of clothes in a dry bag in the boat with you to prevent possible hypothermia.
Warm weather clothing suggestions: Neoprene booties or water shoes which fit securely, layered clothing, including synthetic fabrics, and a hat with a brim or visor. A change of clothes in a dry bag is recommended. Be sure to bring sunscreen and insect repellent as well.
Other items to consider: Food and snacks, binoculars, camera, field guides, cell phone, sunscreen, insect repellent. Again, if you want to keep it dry, store it in a waterproof bag.
This is dangerous if a boat capsizes and not advised for the Wolf River.
Familiarity with basic boating safety rules is strongly advised, especially for those arranging their own trips. More information can be found on the TWRA Boating website and TWRA Paddlesports Laws .
14 best business travel backpacks for every budget

If you travel regularly for work, you won't need us to tell you that a good travel backpack is essential. That's especially true if a backpack can double as a decently sized carry-on luggage item while still housing your laptop in an easily accessible compartment.
We looked at some of the best (and most stylish) backpacks out there to take the hassle out of searching for the best item.
Without further ado, here are the best business travel backpacks that maximize form and function across various budgets.
Amazon Basics Laptop Backpack, $33.47
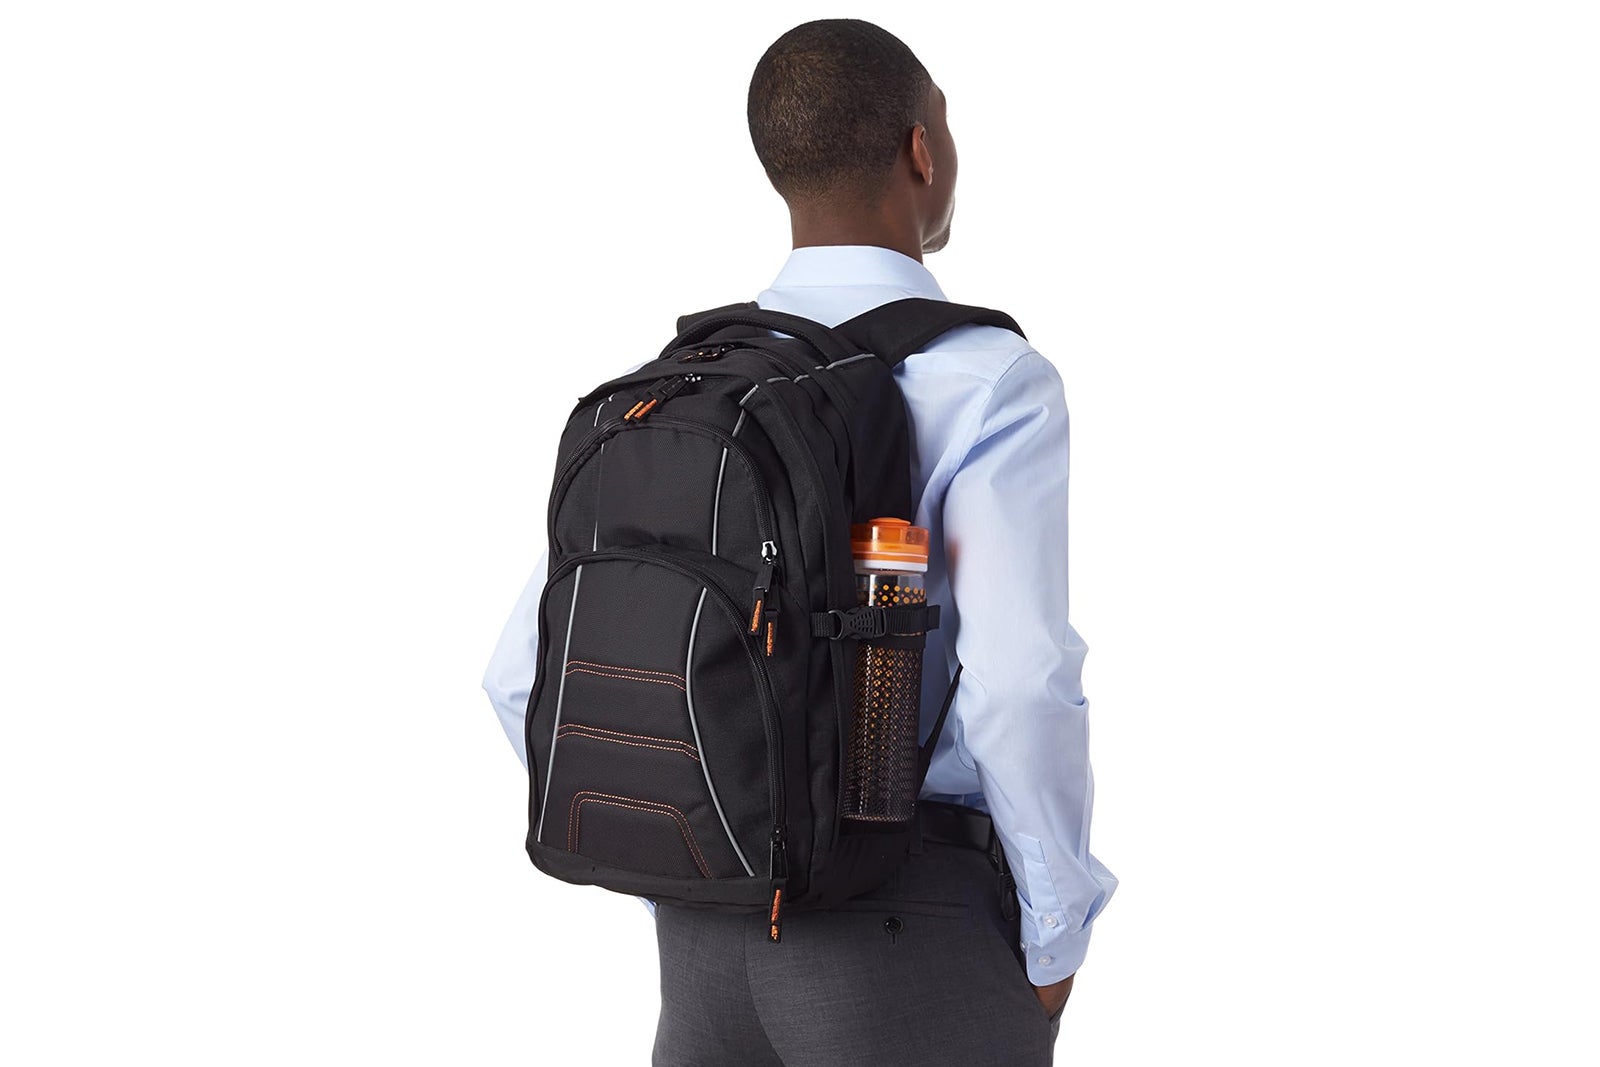
If you don't want to break the bank, the Amazon Basics range offers a reliable and, dare we say, fairly stylish backpack for less than $40.
The bag has a dedicated (and padded) laptop sleeve that can easily hold a laptop up to 17 inches in size; it has additional compartments for pens, keys, cellphones and other items.
There's also a water bottle pocket on both sides of the bag for easy access when you're on the go.
Buy from $33.47
Lenovo Legion Gaming Laptop Bag, $55.19 (normally $79.99)
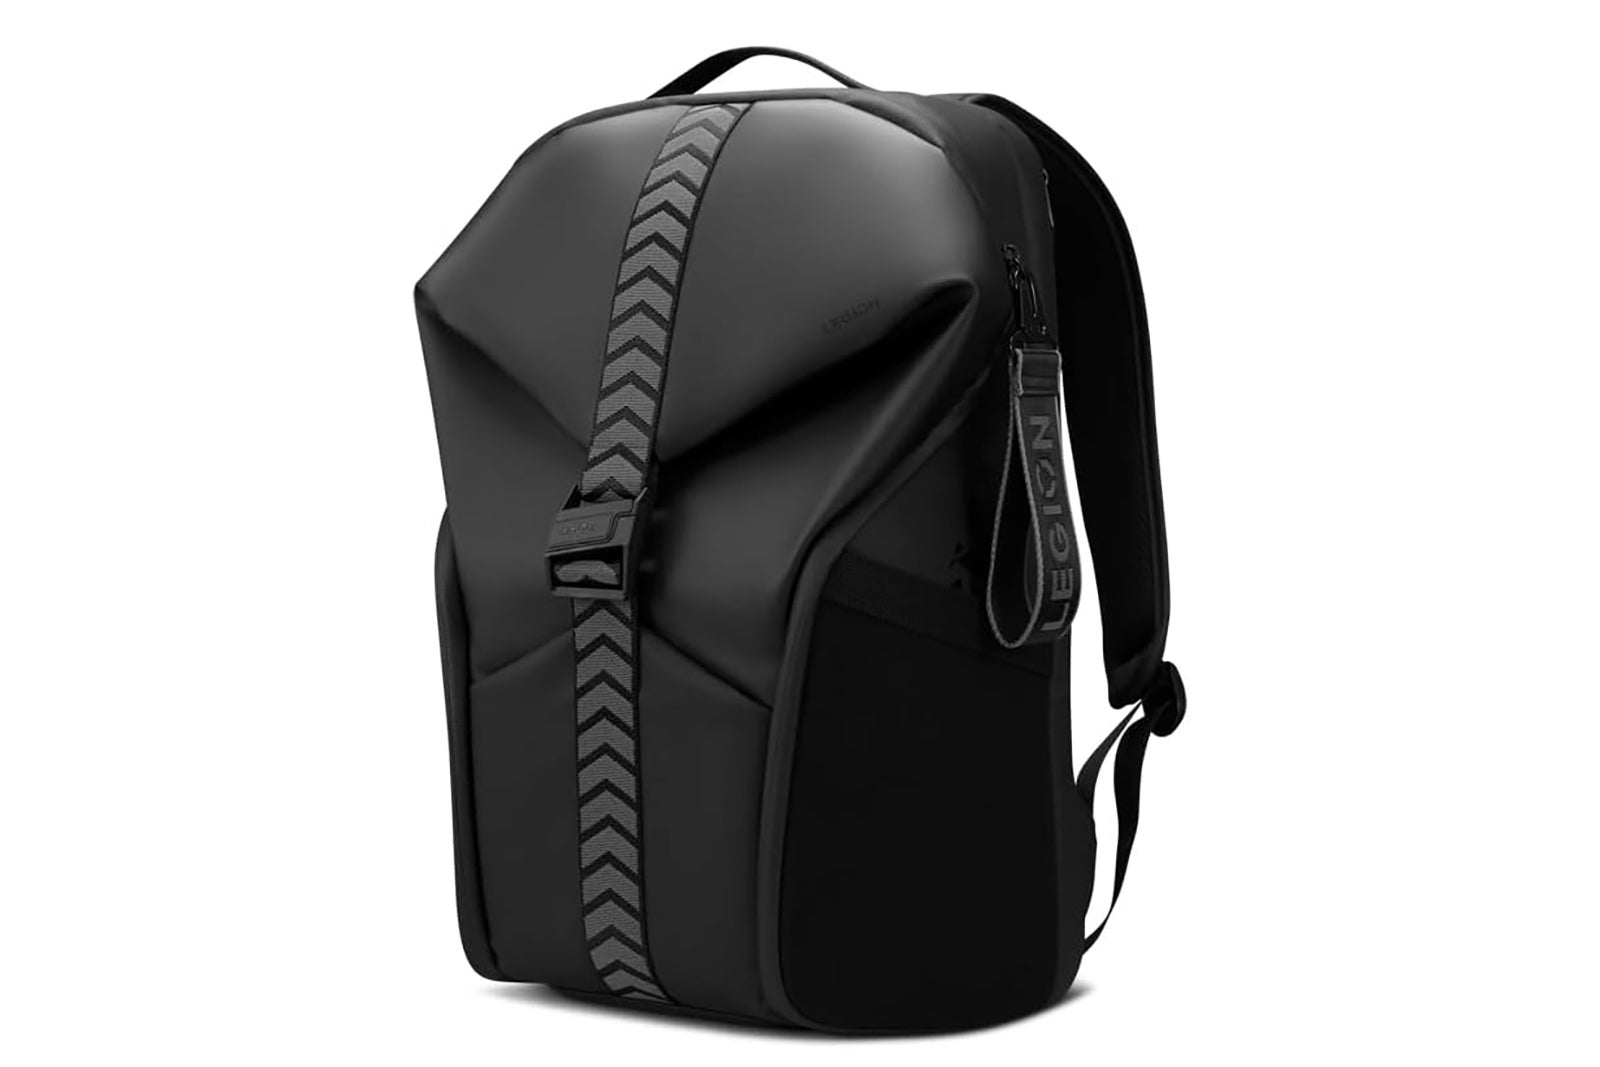
Admittedly, we've never seen Batman carry a backpack, but if he did, we're pretty sure it'd look something like this robust bag by Lenovo. It has a 20-liter capacity and room for a 16-inch laptop, alongside seven inside pockets to suit all your work travel needs — including a hidden compartment for valuables.
Built for carrying electronic items, the bag features foam antishock bumpers on the corners of the laptop compartment for extra protection against bag drops and other jolts.
There's also a high-quality magnetic lock to keep your items safe.
Buy from $55.19 (normally $79.99)
Tangcorle Travel Carry On Backpack, $58.90
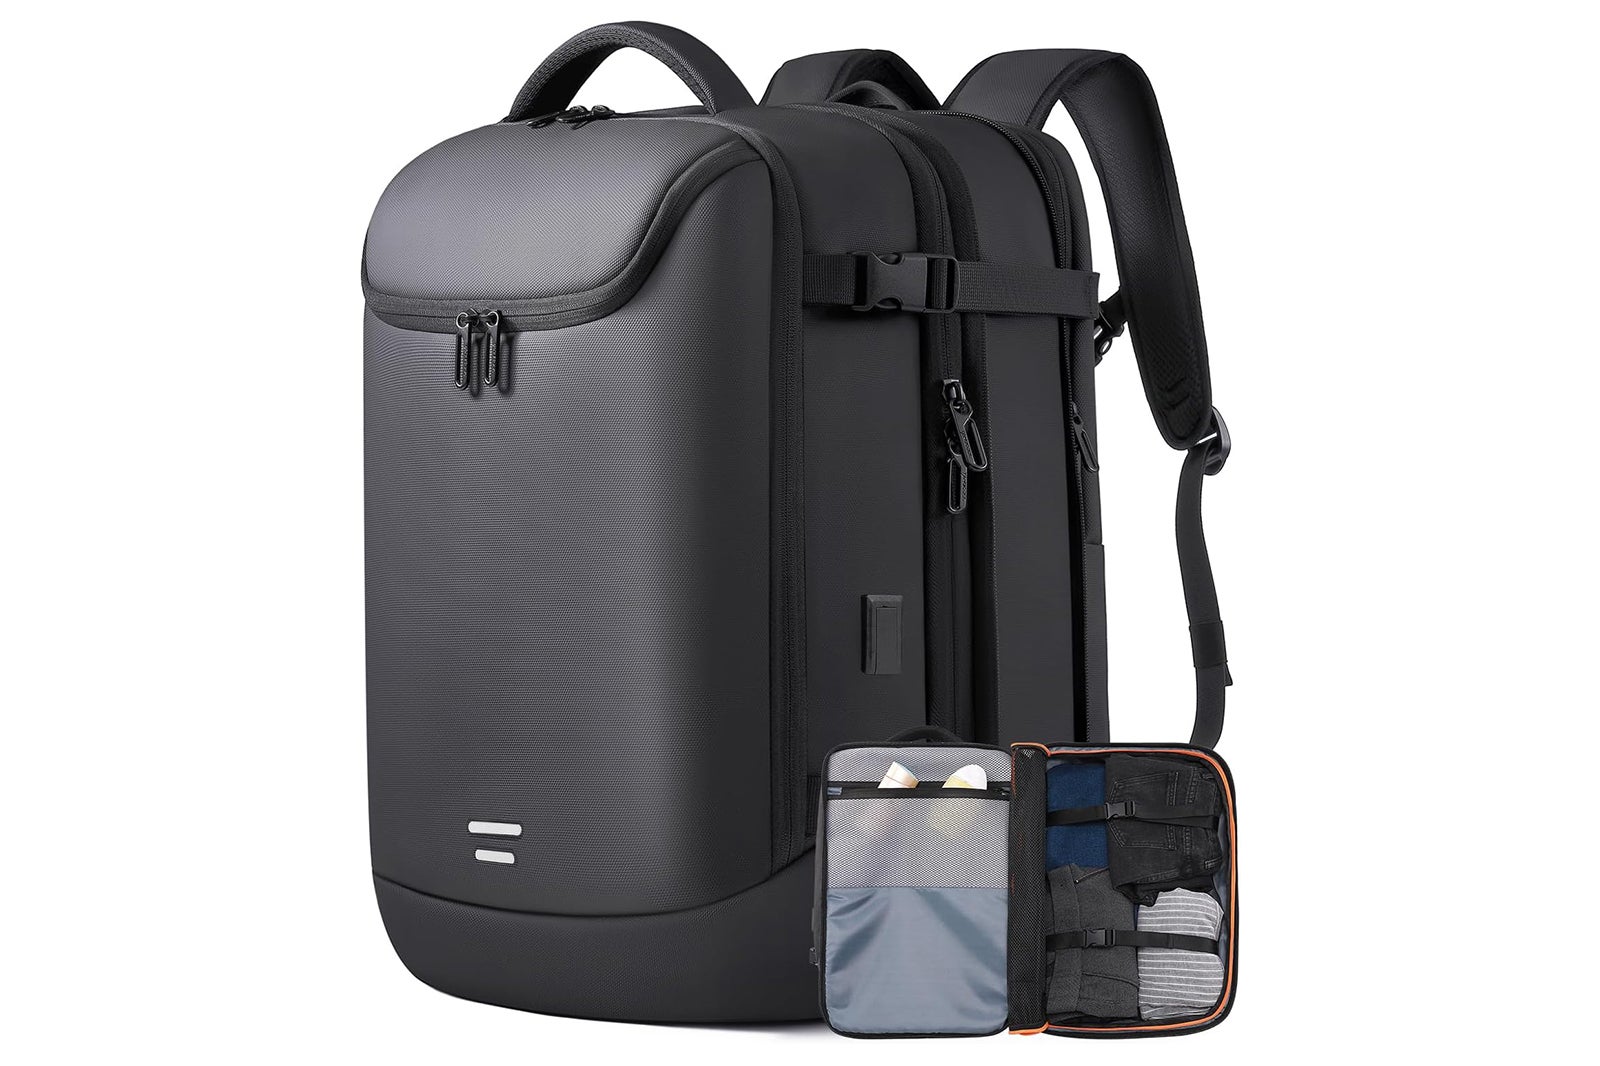
Part backpack and part carry-on suitcase, this bag has an expandable design. This means it has a capacity of 36 to 50 liters and should easily fit the maximum carry-on size for most airlines.
Other features include an external USB port with a built-in charging cable, allowing you to attach your own power bank and keep your devices charged while on the go.
The main compartment is similar to one in an ordinary carry-on suitcase and can easily store five to seven days' worth of clothes, depending on how you like to pack. It is perfect for long weekends and short business trips.
Buy from $58.90
Samsonite Novex Laptop Backpack, $69.99 (normally $99.99)
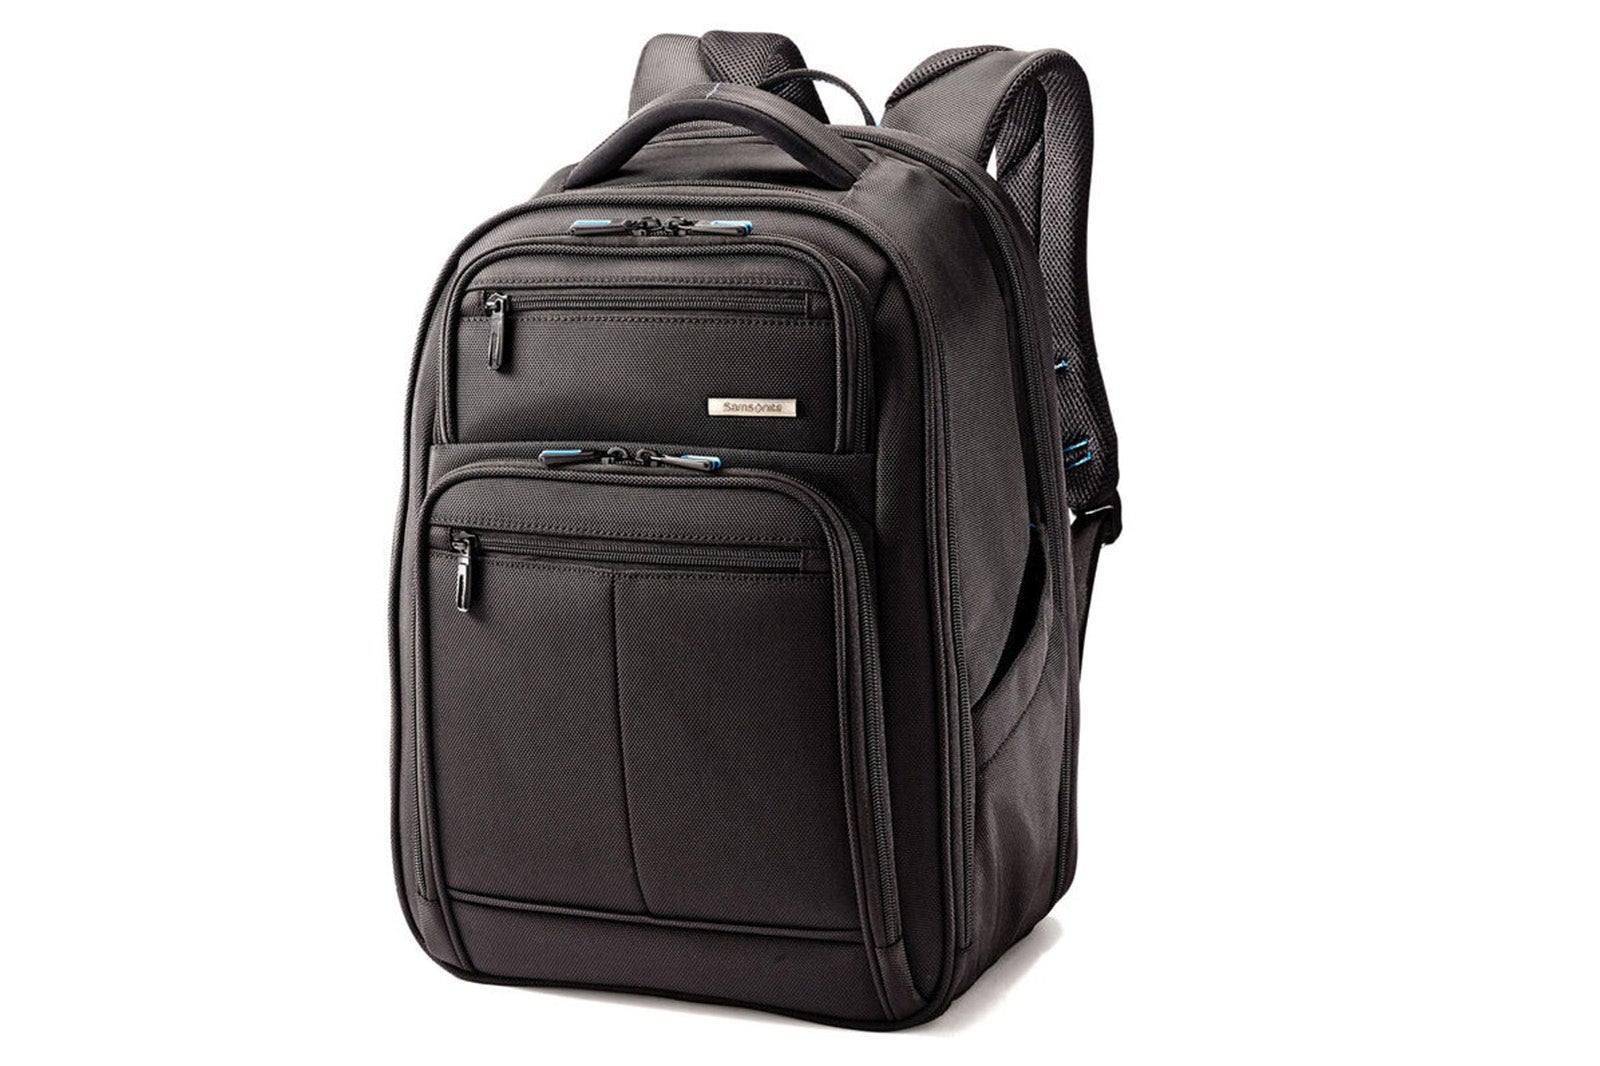
If you are shopping for a travel backpack from a reliable brand with a more down-to-earth budget, this Samsonite bestseller has a lot going for it.
Despite its price, the Novex Laptop Backpack doesn't compromise on the basics. The separate laptop and tablet pocket features a special webbing system that provides extra durability in case you drop the backpack. Plus, thanks to the special supportive lining on the top front pocket, you won't have to worry about misplacing your headphones, glasses or cellphone.
The main storage compartment has room for all the essentials, though you may not find it large enough for a full change of clothes or a pair of shoes.
Buy from $69.99 (normally $99.99)
The North Face Recon Everyday Laptop Backpack, $109
A modern classic, the Recon Everyday Laptop Backpack is a popular, on-trend design you'll frequently see on the backs of young professionals in buzzy city centers.
The backpack has two external water bottle holders and a main compartment capable of carrying up to 30 liters. Its laptop sleeve is also sizable and should easily hold machines up to 18 inches.
Perhaps its most interesting feature is the comfortable design of its shoulder straps, which are certified by the American Chiropractic Association.
Buy from $109
Ogio Renegade Backpack, $128.24 (normally $149.99)
If you're looking for the bag with the most pockets, this might be it. Ogio's flagship backpack has dedicated space for everything (laptop and iPad included) and then some. With a phone pocket, two zippered side pockets and five main pockets, you might just get lost looking around for your gear.
No matter how full you stuff this nearly 30-liter backpack, you shouldn't have much of a problem carrying it around, thanks to its supportive padded back panel and shoulder straps. This makes it easy to lug it around the airport or corporate campus.
Buy from $128.24 (normally $149.99)
Incase ARC Daypack, $129.95
Apple aficionados will no doubt be familiar with Incase, a popular brand of cases and protection solutions for iPhones, iPads and Macs.
The laptop pocket is big enough for a 16-inch computer, and it's lined in faux fur for additional protection. Its travel tech compartment also includes RFID-blocking technology, preventing thieves from stealing your digital information.
A water- and stain-resistant coating, two dedicated water bottle holders, and a pass-through system for rollaboard bags make this the ideal bag for anyone going from the gym to the office to the airport. If you need something bigger, Incase also makes a larger A.R.C. travel pack.
Need more convincing? Both bags are made from a sustainable mixture of recycled polyester, giving the company its A.R.C. acronym, which stands for "a responsible carry."
Buy from $129.95
Aer Pro Pack 20L, $179

As far as business travel backpacks go, Aer's is certainly quite stylish. It comes in three colors (black, navy and olive), and it's made of sustainable materials without compromising on durability. A separate laptop compartment safeguards your most precious technology, while the main compartment is large enough for all your chargers and other travel accessories.
The standout feature is the main compartment's 180-degree flat-open zipper system, giving you unobstructed access to all your belongings.
There's even a hidden pocket to store an AirTag or other tracker so that you can locate your bag even if it's stolen or misplaced.
Buy from $179
Away The Everywhere Zip Backpack, $195
Made with water-resistant nylon, the Everywhere backpack by Away has a full wraparound zip that provides access to the main compartment. Not only can you fit more things in an orderly fashion, but you'll also be able to easily see your things when you need to retrieve them from the backpack.
Alongside the main compartment, the bag also houses a 15-inch laptop pocket with a magnetic locking zipper and padded shoulder straps for comfort. It's available in five colors — including the limited-edition garnet colorway.
Buy from $195
Timbuk2 Never Check Expandable Backpack, $209
The Timbuk2 Never Check Expandable Backpack has space for everything and then some. The padded rear pocket is the perfect spot for a laptop, so you won't have to dig through the main compartment to find your computer.
The main compartment is spacious and can expand by nearly 3 liters, giving you more room for your belongings. Plus, the front pocket has a dedicated organizer with multiple pockets, so you'll never forget where you put your passport, charger and cables.
Buy from $209
Nomatic 20L Backpack, $279.99
Although you may not have heard of Nomatic, this brand receives rave reviews from its loyalists. The company's bestselling backpack comes in two sizes: 14 liters and 20 liters. Both are expandable by nearly 20%.
The flat rectangular design may be controversial at first glance, but at least you can't complain about finding space for all of your gizmos. The bag has a staggering 24 unique storage compartments, ranging from enclosed pockets to mesh nets. It's a great bag for those who like to stay extremely organized when they're on the road.
Buy from $279.99
Briggs & Riley Traveler Backpack, $329
The Briggs & Riley backpack has an impressive amount of storage capability thanks to its multitude of pockets and 180-degree, lie-flat opening that allows unfettered access to every nook and cranny.
The laptop sleeve and tablet sleeve are in the same area as the main packing compartment, but they're separated by a zippered inner pocket to keep your clothes all by themselves.
There's also a so-called PowerPocket that fits an external battery pack and keeps a charging cable within easy reach — perfect for a quick boost of juice while you're on the go.
Buy from $329
Tumi Alpha Bravo Navigation Backpack, $525
Though Tumi makes a handful of durable bags, the Navigation Backpack excels for a wide range of travel needs. It features a separate padded laptop compartment (that can fit even the largest MacBooks), a main storage area and plenty of other smaller pockets.
It also has a zip expansion feature if you decide to grab some souvenirs during your travels.
The backpack comes in five colors, giving you plenty of choices to match your personal travel style.
Buy from $525
Rimowa Flap Backpack Large, $1,725
If you're looking to make a statement and are willing to spend some serious cash, Rimowa's travel bags are the way to go.
This luxury Italian-made large canvas Flap Backpack features a padded laptop sleeve and a large drawstring compartment to fit all of your travel essentials. It is secured by a flap-top enclosure with a magnetic buckle emblazoned with the Rimowa logo.
Buy from $1,725
Related reading:
- Key travel tips you need to know — whether you're a beginner or expert traveler
- The best travel credit cards
- The 18 best places to travel in 2024
- 6 real-life strategies you can use when your flight is canceled or delayed
- 8 of the best credit cards for general travel purchases

Virtual Tour
Experience University of Idaho with a virtual tour. Explore now
- Discover a Career
- Find a Major
- Experience U of I Life
More Resources
- Admitted Students
- International Students
Take Action
- Find Financial Aid
- View Deadlines
- Find Your Rep

Helping to ensure U of I is a safe and engaging place for students to learn and be successful. Read about Title IX.
Get Involved
- Clubs & Volunteer Opportunities
Recreation and Wellbeing
- Student Government
- Student Sustainability Cooperative
- Academic Assistance
- Safety & Security
- Career Services
- Health & Wellness Services
- Register for Classes
- Dates & Deadlines
- Financial Aid
- Sustainable Solutions
- U of I Library

- Upcoming Events
Review the events calendar.
Stay Connected
- Vandal Family Newsletter
- Here We Have Idaho Magazine
- Living on Campus
- Campus Safety
- About Moscow

The largest Vandal Family reunion of the year. Check dates.
Benefits and Services
- Vandal Voyagers Program
- Vandal License Plate
- Submit Class Notes
- Make a Gift
- View Events
- Alumni Chapters
- University Magazine
- Alumni Newsletter

U of I's web-based retention and advising tool provides an efficient way to guide and support students on their road to graduation. Login to VandalStar.
Common Tools
- Administrative Procedures Manual (APM)
- Class Schedule
- OIT Tech Support
- Academic Dates & Deadlines
- U of I Retirees Association
- Faculty Senate
- Staff Council
Outdoor Program
Sandra Townsend, Outdoor Program and Youth Programs Director
Physical Address: 1000 Paradise Creek St. Moscow, ID 83844
Mailing Address: 875 Perimeter Drive MS1230 Moscow, ID 83844-1230
Phone: 208-885-6810
Fax: 208-885-2340
Email: [email protected]
Web: Outdoor Program
Intramural Sports
Nick Patrick, Coordinator of Intramurals and Sport Clubs
Phone: 208-885-2058
Email: [email protected]
Web: Intramural Sports
Climbing Center
Nathan Moody, Assistant Director, Outdoor Program Climbing Center and Programs
Email: [email protected]
Web: Climbing Center
Outdoor Rental Center
Hans Zander, Outdoor Program Coordinator - Rental Center
Phone: 208-885-6170
Email: [email protected]
Web: Rental Center
875 Perimeter Drive MS1230 Moscow, ID 83844-1230 SRC Info Desk Phone: 208-885-7529
Outdoor Rental Center Phone: 208-885-6170
Email: [email protected]
Web: Recreation and Wellbeing
Fitness Program
Ben Sturz, Director of Recreation & Fitness Services
Phone: 208-885-2204
Email: [email protected]
Web: Fitness Program
Trips & Activities
The Outdoor Program offers a wide variety of services and activities to the University community. Cooperative trips are cost sharing. Participants supply their own food and own personal equipment through rental or purchase. Required pre-trip meetings are held to work out trip details. Listed fees are for transportation, group gear and instruction (if provided).
Trip registration is available in the Outdoor Program Office beginning January 10, 2024.
Registration for trips is completed in person at the Outdoor Program office located in the Student Recreation Center (SRC). All sign-ups open on the first day of the semester and are first-come, first-served.
Download Adobe Reader
Find an Outdoor Adventure
Come explore the great outdoors with the Outdoor Program this fall! We've got rafting, hiking, backpacking, kayaking, climbing and women's only trips.
Hike and Bike
Wilderness backpacking trips, day hikes and outdoor rock climbing.
Intro to whitewater kayak clinic, advanced whitewater kayak clinic and swiftwater training.
View Water Trips
Explore the beauty of the Northwest with scenic trails, panoramic view, snow transportation and more.
View Snow Trips
Women-led Programming
Programming is open to all genders, women-led trips, clinics and activities focus on encouraging to build confidence in the outdoors.
View Women-led Programming
- 5 WA beginner backpacking trips for this summer
Backpacking can be intimidating. You have to haul all your food, water and shelter into the backcountry and sleep there — but you are self-sufficient! You are carrying everything you need on your back. How cool is that? Plus, being in the backcountry means more peace and quiet.
Start small — a single night in a not-too-remote location with a manageable amount of miles and elevation gain. It’s important to remember that even if you’re used to long or grueling day treks, adding 25 to 35 pounds makes hiking a lot more challenging.
Here are five great beginner backpacking trips that offer stunning scenery without venturing deep into the wilderness. As always, bring the right gear and research trail conditions before you go.
Related OUTDOORS
- 10 WA races, walks and outdoor events for summer 2024
- 6 Mount Rainier hikes that won’t require a reservation this summer
- 8 essential things to do during summer in Seattle
- Trailhead Direct shuttle service returns for summer 2024
- 5 great hike-campground combos in WA
- Whitewater rafting is a springtime rush for WA adventurers
Shi Shi Beach
Fish Hatchery Road, Neah Bay (Olympic Coast)
Round-trip distance : 8 miles
Elevation gain : 200 feet
Pass : Makah Recreation Pass and Olympic National Park wilderness permit
Beach backpacks are great for beginners because the elevation gain is minimal. Shi Shi Beach is no exception. Just a 2-mile, relatively flat hike over bridges and boardwalks will lead you to the beach, though there are steep switchbacks right before reaching it. Set up your tent anywhere in the next 2 miles (both on the beach or in campsites in the trees) and make your way toward Point of Arches, a stunning set of sea stacks and the unofficial end of this hike. Spend your day exploring tide pools and your evening around a driftwood fire. Always be sure to have a waterproof layer — you might wake up to fog and mist — and you are required to bring a bear canister on this hike.
Lena Lake
Forest Service Road 25, near Eldon (Olympic Peninsula)
Round-trip distance : 7.2 miles
Elevation gain : 1,300 feet
Pass : Northwest Forest Pass
The hike to Lena Lake makes a great first backpacking trip for experienced day hikers; if the hike up to your campsite at the lake doesn’t wear you out, set up camp, leave your packs behind, and keep hiking! But first, to get to the lake, you will pass through second-growth and old-growth forest, over lovely bridges, and by lots of water. There are 28 campsites near the lake; stay 100 feet away from the shore. This is a beautiful final destination, but intrepid hikers can add 3 more miles (and 2,600 feet of elevation) to get to Upper Lena Lake. Surrounded by meadows and peaks, these lakes are an oasis.
Guide to a great Seattle summer in 2024
- Dinner at a Movie takes the best-ever Seattle summertime day trip
- 5 best day trips from Seattle, chosen by our food and film critics
- Seattle Shakespeare in the park and more outdoor performances in summer 2024
- 8 essential things to do during summer in Seattle
- Outdoor movies and drive-ins around Seattle in summer 2024
- Seattle’s signature summer events, from Seafair to solstice
- 5 Seattle-area restaurants with nice patios and good food
- Get a jump-start on 2024 Summer Book Bingo with these 4 books
Talapus and Olallie Lakes
Forest Service Road 9030, near Snoqualmie Pass (Interstate 90)
Round-trip distance : 6.2 miles
Elevation gain : 1,220 feet
This is the perfect intro to backpacking for Seattleites, because in less than an hour, you will be able to reach the trailhead. The less-than-2-mile hike to the first lake, Talapus, is gently graded on a wide trail. You can stop here if you’ve had enough or press on to Olallie. The trail becomes a bit steeper but still comfortable. Spend the day and night leisurely at camp, and in the morning, the lakefront sites offer lovely views to wake up to (and a perfect jumping-off point if the weather is warm enough for a swim).
Lake Valhalla
Forest Service Road 6700, near Wellington (Highway 2)
Round-trip distance: 7 miles
Elevation gain: 1,500 feet
Lake Valhalla offers a comfortable introduction to backpacking with the option to stretch your legs farther. The start of the hike features most of the elevation gain, as you switchback through trees, but the undulating grade of this trail is manageable. Make note of the trail leading up to Mount McCausland — if you have enough energy, it’s worth the extra mile or so to see sweeping views. At Lake Valhalla, you’ll find established campsites overlooking the water, making this a perfect spot for the night.
Anderson and Watson Lakes
Forest Service Road 1107, Concrete (Highway 20)
Round-trip distance: 6 miles
Elevation gain: 1,100 feet
Pass required: Northwest Forest Pass
Anderson and Watson Lakes lets you choose your own backpacking adventure. Feeling tired? Camp at Lower Anderson Lake. Want to press on? Head to Watson Lakes. Either way, you won’t be let down. At the beginning of this hike, you’ll walk on boardwalks through meadows as well as through old-growth. After a couple of miles, you’ll have the option of heading down to Lower Anderson Lake and settling there, or continuing on to Watson Lakes. Both are great options, and beautiful, too, surrounded by meadows and rocky walls.
Most Read Life Stories
- Meet Seattle artist Casey Curran, whose Met Gala design went viral
- Why North Cascades National Park is WA’s wildest
- 8 North Cascades National Park adventures for this summer
- Jollibee fried chicken chain to open in Seattle next week
- Seattle's Wing Luke Museum to reopen exhibit that sparked staff walkout
The opinions expressed in reader comments are those of the author only and do not reflect the opinions of The Seattle Times.
Kayak/hiking/scooter tour & tacos, the best in Rosarito

- Air-conditioned vehicle
- Bottled water
- ATV tour 1 hour
- Rosarito Beach Hotel, Blvd. Benito Juárez 31, Zona Centro, 22700 Playas de Rosarito, B.C., Mexico At lobby rosarito Beach hotel
- Our service is door to door Rosarito, Bajamar Ocean Golf Bajamar golf resort area or la fonda restaurant If you come by the boat you can arrive by Uber just 30 minutes from the pier Leave your adventure in the hands of the experts
- Puerto Nuevo Baja Hotel y Villas, Carretera Libre a Ensenada 4490 Puerto Nuevo, 22740 Playas de Rosarito, B.C., Mexico
- Not wheelchair accessible
- Confirmation will be received at time of booking
- Not recommended for travelers with back problems
- Not recommended for pregnant travelers
- No heart problems or other serious medical conditions
- Most travelers can participate
- This experience requires good weather. If it’s canceled due to poor weather, you’ll be offered a different date or a full refund
- This experience requires a minimum number of travelers. If it’s canceled because the minimum isn’t met, you’ll be offered a different date/experience or a full refund
- This tour/activity will have a maximum of 6 travelers
- All sales are final and incur 100% cancellation penalties.
Similar experiences

- Departure52127000029 0 contributions 5.0 of 5 bubbles Rosarito getaway This is my second time doing business with them, Great Service! We got picked up from our hotel, driver was courteous. The employees were very welcoming as well. Highly recommended ✊🏽 Read more Written May 13, 2024
- A5785OImonicag 0 contributions 5.0 of 5 bubbles ATV Fun and great views ! Micheladas were good as well tour guides were great and friendly good people didn’t charged after flipping like they said they would Read more Written May 10, 2024
- brandyhU7369MF 0 contributions 5.0 of 5 bubbles Amazing ride This was such a great time! We had so much fun I would recommend! They pick you up from your location, and before the trip is over they gift you with snacks and micheladas . Read more Written April 30, 2024
- Traveler40133578844 0 contributions 5.0 of 5 bubbles Birthday party "Thank you for providing excellent service your attention to detail and friendly demeanor ypu guys made a celebration even more enjoyable. Keep up the fantastic work Banraplang Sun and Neeraj Alana living star and Raymond Read more Written April 29, 2024
- mariaelsav2024 0 contributions 5.0 of 5 bubbles Fun experience! We were a group of 11 and all had a GREAT time! The employees were very attentive and made sure that everything was taken care of since most of us were inexperienced! We would definitely do this again! Read more Written April 28, 2024
- H8104IWcristinao 0 contributions 5.0 of 5 bubbles Must do!! Amazing view!! The view was amazing! The horses are beautiful! The guide was friendly which made the ride just flow. First time but will not be the last. Definitely fell in love! Can’t wait to do it again :) Read more Written April 13, 2024
- Teresa M 0 contributions 5.0 of 5 bubbles Amazing experience A must do in Rosarito. The guides were very friendly. The horses and the view were the highlight of our trip. I will definitely be back to do it again! Read more Written March 5, 2024
- Vee l 0 contributions 5.0 of 5 bubbles Mellow wine tasting If you’re looking for a more mellow wine tasting experience good place to . You’re pretty much on your own to enjoy the pretty garden set up they had Read more Written February 4, 2024
- Trail777264 0 contributions 1.0 of 5 bubbles Disappointed Very short no micheladas tour guide didn’t speak to us at all.tacos were ok but limited to only two Read more Written December 15, 2023
- moneekers 0 contributions 5.0 of 5 bubbles Fun times, next time bring first aid kit We did all 3, the ATVs, horseback riding and the micheladas. Note that these are in all 3 different locations. Wish I would have seen them on the strip to buy directly from them as TA takes a good chunk from them. 1. ATV - this is very off road and the terrain varies and can sometimes be difficult to maneuver. They did have us drive a few laps to see what we can do, but ultimately you have to know your own limits. Our ages were 43, 42, 18, 17, and 14. My niece (18) fell and injured herself cause she continued when she shouldn't have. Everyone stopped, helped her (this is a family and seems like the boys were a bit young and shocked), they brought a van to pick her up and take her back to our hotel. What would have made this better if there was a first aid kit provided by the tour. She had a bad wound to her finger that needed antiseptic and a wrap. But now we know for next time. Also if you do these things, make sure you have medical insurance in Mexico, this could have been much worse. But the rest of us that stayed behind we still had lots of fun, they took us to a spot for pictures, it was gorgeous. I didn't have time to give them a tip so I'm making sure they get their credit here. 2. Horseback riding - this was with older gentlemen as our guides and if you're scared no need to worry, they will hold the strap to your horses to guide them so you don't have to do it. The saddles are a little stiff and may cause your bottom to be a bit sore, but that's cause we're not used to it, so just a little caution there. They took us to a spot and even took our pictures for us in different angles <3 it was really thoughtful and appreciated. 3. Drinks - I had a michelada and my kids had a smoothie they gulped down lol the michelada came with nachos and the kids had a bionoco. I would ask for the bionico cause I'm not a fan of the nacho cheese lol but it was still good. Read more Written November 28, 2023
- 708frankline 0 contributions 5.0 of 5 bubbles Aventura al aire libre "It was an awesome experience! I took my children and they loved it! They were always supervising and making sure we were safe. Super fun experience to go with family and friends. Highly recommended! It was a pleasure meeting them. Will definitely be back soon!" Read more Written November 20, 2023
- 316tessh 0 contributions 5.0 of 5 bubbles Amazing experience Our tour guide Javier picked us up and took us out today. Was absolutely amazing experience and we got to see everything we wanted. highly recommend. Read more Written September 14, 2023
- Sss1303 0 contributions 1.0 of 5 bubbles Things to know before booking I booked what seemed to be an amazing hike and zipline tour but because there were no other bookings the tour guide offered for me to pay an extra ticket and go alone but would not refund me. I would advise people against this tour as it’s either a scam or possible contact them before booking to make sure there are other people going to ensure that they would not cancel the tour on you while not supplying you a refund. Super disappointed. Read more Written July 13, 2023
- chrisbE6283ZX 0 contributions 5.0 of 5 bubbles Rosarito experience! Very friendly guide! And great experience! Highly recommend!! You get to enjoy great scenery and not to mention eat the best tacos!! Read more Written June 8, 2023
- kpremaire 0 contributions 5.0 of 5 bubbles Too Much Fun!! Host were great and this was a great experience. Scenery was beautiful with ocean views and exciting terrain with large and steep hills. I will definitely be doing this again. Read more Written May 30, 2023
More to explore in Rosarito

Most Recent: Reviews ordered by most recent publish date in descending order.
Detailed Reviews: Reviews ordered by recency and descriptiveness of user-identified themes such as wait time, length of visit, general tips, and location information.
Kayak/hiking/scooter tour & tacos, the best in Rosarito provided by Experiencias baja tours & transportación
IMAGES
VIDEO
COMMENTS
Durable, waterproof and small critter resistant, barrels are a popular choice for storage on canoe trips. Level Six's Adjustable Barrel Pack hugs 30- and 60-liter barrels snuggly like a beer can in a koozie. Somehow the length of the back pad and shape of the shoulder straps allow this harness to quickly fit different torso lengths. The hip ...
Kondos Outdoors was founded by a husband/wife team in 1980 in Ely, Minnesota. Their high-quality canoe packs gained a great reputation over the past decades. In 2017, Kondos was sold and is now Portage North, still at their Ely headquarters. Their line of canoe packs continues the Kondos tradition of reliability, durability and value.
W hile canoe trips are about enjoying the great outdoors, exploring the wilderness and challenging yourself, packing the necessary gear makes it all possible.. Before you head to the put-in, run carefully through our canoe trip packing list to make sure you have the essentials covered. We have broken things down into kitchen, gear, and safety items and added some of our expert advice along the ...
Canoe camping is the water-lover's answer to backpacking. Self-sufficiency, challenge and exploration all come together to bring paddlers to beautiful campsites on lakes and rivers throughout the country. ... For a successful canoe camping trip, you need to be able to keep all your stuff dry, whether from the rain, or a potential flip. For a ...
Waxed canvas is a popular choice for canoe packs. For more durability, you want a heavier, thicker canvas. Many of the popular brands use a waxed canvas with a weight of around 18 oz, and this is sufficient for canoe tripping. For dry sacks, two popular materials are polyurethane-coated polyester and nylon.
Paddling Essentials. Paddling a canoe resembles conducting an orchestra, where each stroke is a note and the paddle is your baton. However, orchestrating a successful canoe trip requires more than a decent paddle. Essential paddling equipment includes life jackets, spare paddles, and even a trusty fanny pack for those little extras.
1: Granite Gear Traditional 3.5 Canoe Pack (best overall) Dimensions: 26 x 21 x 7 inches. Weight: 1 pound 2 ounces. Capacity: 57.35 liters/3500 cubic inches. CHECK PRICE ON REI.
Canoe packs, also known as portage packs, are a specially designed type of backpack used on canoe trips that require portaging (carrying your gear over land to access the next waterway). Some of the best canoe trips in North America require portaging, often multiple times, so a purpose-made pack is essential. Here's how to get the right one.
The frame itself always seem to make the pack fit oddly inside the canoe, taking up way too much valuable space. However, a backpack happens to be fantastic to carry on the portage. Some solo canoeists even find it a perfect option when attempting to carry the canoe and pack together in one trip.
The 92.5 miles of lakes, ponds, rivers and streams in the blueberry- and bear-filled North Maine Woods are as iconic a canoe setting as you'll find in the U.S. Tackle a six-day, 62-mile trip from Churchill Dam to Allagash Village, which includes lakes, Class II rapids, and a .3-mile, mandatory portage around 40-foot Allagash Falls. By day ...
Canoe Trip Basics. The first item on our list will be a canoe. If you don't own a canoe I recommend checking your local outfitter for their rental options. You should rent a canoe that weighs 50 pounds or less, especially if you're doing a lot of portaging. Most local outfitters include canoe paddles, lifejackets and a bail kit with each ...
Pro tip: Don't plan to be paddling for a full 8 hours each day - that isn't an enjoyable way to get started in canoe camping. Keep the trip easy so you can focus on other skills (cooking, setting up a tent) in addition to paddling. Also, you will likely overestimate your speed, so plan on only paddling 4-5 hours per day.
Best Luxury: Jetboil MiniMo Camping and Backpacking Stove. 11. Kitchen Cookware. A good set of cookware, including knives, forks, spoons, plates, a saucepan, and a frying pan, will make meal preparation and serving a smoother experience in the backcountry.
Granite Gear Vapor Flatbed Review. Available: Now ($150) Where To Test It: On your next canoe camping trip. Dave and I first saw blue barrels with harness systems being used for river trips in ...
Again, backpacking-grade ones are perfect for storing in the canoe. The tent, bags, and pads must be stored in water-tight containers or bags. Personal Hygiene. Pack what is needed for bathing, teeth brushing, and medication. Make a plan for going to the bathroom. Bring enough toilet paper or reusable bags based on the length of the trip ...
Touring and sea kayaks are designed for comfort, efficiency, and most importantly, gear storage. A multi-day trip on open water requires gear and supplies, and these boats are designed with the storage space to hold it. Often, watertight bulkheads seal these storage spaces off from the rest of the boat and waterproof hatches offer quick access.
3. Northern Forest Canoe Trail, New York to Maine. This 740-mile trail starts in New York and ends in Maine, passing through Vermont, Quebec, and New Hampshire along the way. While there's ...
He later became a guide himself, leading multi-week backpacking, cycling, and canoeing trips throughout northern New England and maritime Canada. Elizabeth Paashaus considers backpacking the gateway to her love for the outdoors, and has now been backpacking for over two decades. She knows the ins and outs of the outdoor gear industry from her ...
Distance: 41 miles from the Snowbank Lake Road trailhead east to the Gunflint Trail. Difficulty: Difficult. Rocky, rugged, remote, with plenty of deadfall to crawl around, the Kekekabic goes through the heart of the Boundary Waters. Like all the trails in the BWCA, be sure your navigation skills are tuned.
John Muir Trail In California Can Take 20 To 30 Days To Finish. The John Muir Trail across California's Sierra Nevada mountains is nothing short of a challenge. The trail stretches over 221 miles ...
Ross Lake Canoe trip — Tuesday, Aug. 1, 2023. Ross Lake - The Good, The Bad, and the Ugly! We decided to do a canoe trip on Ross Lake this Summer for a little variety from our traditional multi-day backpacking trip. Also, we didn't get in to our preferred WTA week-long trail maintenance trip so we needed a new adventure!
Eleven Point National Scenic RiverMark Twain National Forest, Missouri. In 1968 the Eleven Point National Scenic River was established as a Wild and Scenic River. Grab your canoe for a meandering journey through the stunning Ozark hills of southern Missouri. Along the river, you can camp at one of eight camps. More info.
We offer canoe rentals in the headwaters of the Wolf River in Fayette County, Tennessee. This spring-fed stream provides a wonderful wetland experience. The Wolf River begins in Holly Springs National Forest in the red clay hills of Benton County, Mississippi. The river flows north into Tennessee then travels 90 miles westward to its mouth at ...
Contact Mark Babb or Don Hailey at 901.485.1220, or visit their website: ghostriverrentals.com. Wolf River Canoe Trips provides shuttle service in Fayette County. Contact Sarah or John Wilburn at 901.877.3958 for more info. Blues City Kayaks provides tours and rental kayaks in Shelby and Fayette Counties.
Tumi Alpha Bravo Navigation Backpack, $525. TUMI. Though Tumi makes a handful of durable bags, the Navigation Backpack excels for a wide range of travel needs. It features a separate padded laptop compartment (that can fit even the largest MacBooks), a main storage area and plenty of other smaller pockets.
Trips & Activities. The Outdoor Program offers a wide variety of services and activities to the University community. Cooperative trips are cost sharing. Participants supply their own food and own personal equipment through rental or purchase. Required pre-trip meetings are held to work out trip details. Listed fees are for transportation ...
Forest Service Road 9030, near Snoqualmie Pass (Interstate 90) Round-trip distance: 6.2 miles. Elevation gain: 1,220 feet. Pass: Northwest Forest Pass. This is the perfect intro to backpacking for ...
per adult (price varies by group size) LIKELY TO SELL OUT*. Off Road Tour Experience plus Winery visit in Baja. 90. 4WD Tours. from. $77.00. per adult. Sunset ATV ride in the mountains & horses on the beach.