The Enlightened Mindset
Exploring the World of Knowledge and Understanding
Welcome to the world's first fully AI generated website!

Changing from Meters to Yards with the Bushnell Tour v4: A Comprehensive Tutorial

By Happy Sharer
Introduction
When it comes to accurately measuring distances, golfers know that having the right tool is essential. One of the most popular devices for measuring distances on the course is the Bushnell Tour v4, a laser rangefinder that has been designed to provide reliable and accurate readings. But while the device is great for measuring distances in meters, many golfers struggle when it comes to converting those measurements into yards. In this article, we’ll explore how to easily change from meters to yards with the Bushnell Tour v4.

Overview of the Bushnell Tour v4
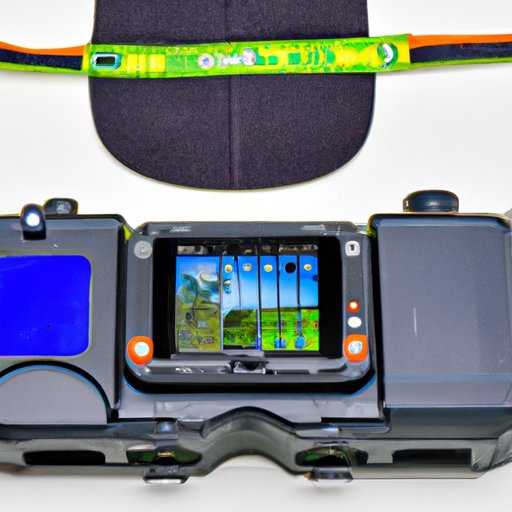
The Bushnell Tour v4 is a laser rangefinder that has been designed to provide golfers with accurate information about the distances they need to hit their shots. It features a 6x magnification lens, which allows golfers to easily identify and measure targets up to 1,000 yards away. The device also features the Slope-Switch technology, which allows users to select between two modes – Tournament Legal and Slope – so that golfers can access more precise yardage readings for their shots. Additionally, the Bushnell Tour v4 is equipped with PinSeeker Technology, which helps golfers accurately identify and lock onto the pin up to 300 yards away.
Step-by-Step Guide to Converting Meters to Yards with the Bushnell Tour v4
Converting from meters to yards with the Bushnell Tour v4 is actually quite simple, once you understand the necessary conversion calculations. Here is a step-by-step guide to help you get started:
Understanding the Necessary Conversion Calculations
The first step to converting from meters to yards with the Bushnell Tour v4 is to understand the necessary conversion calculations. To convert from meters to yards, you need to multiply the distance in meters by 1.0936133. For example, if you want to convert 150 meters to yards, you would multiply 150 by 1.0936133, which would give you 164.04199 yards.
How to Set up and Access the Meter to Yard Conversion on the Bushnell Tour v4
Once you have a basic understanding of the conversion calculations, you can then set up and access the meter to yard conversion on the Bushnell Tour v4. To do this, first switch the device to either the Tournament Legal or Slope mode. Then press and hold the “Mode” button until the “M/Y” option appears on the screen. Once this option is selected, the device will automatically convert any distance measured in meters to yards.
Examples of Using the Meter to Yard Conversion Function
To better understand how to use the meter to yard conversion function on the Bushnell Tour v4, let’s look at a few examples. For instance, if you measure a target that is 150 meters away in the Slope mode, the Bushnell Tour v4 will display the distance as 164.04199 yards. Alternatively, if you measure a target that is 250 meters away in the Tournament Legal mode, the Bushnell Tour v4 will calculate and display the distance as 273.39622 yards.

How to Easily Calculate Distance in Yards with the Bushnell Tour v4
In addition to being able to quickly and easily convert distances from meters to yards with the Bushnell Tour v4, the device also offers several different modes of measurement to ensure accurate readings. Let’s take a look at some of these modes and how to use them for accurate yardage readings.
Explaining the Different Modes Available for Accurate Measurement
The Bushnell Tour v4 offers four different modes of measurement: Standard Mode, Slope Mode, Scan Mode, and Pinseeker Mode. Standard Mode is the default setting and provides the user with an accurate reading of the target up to 1,000 yards away. Slope Mode allows users to access elevation changes and adjust their shot accordingly. Scan Mode allows users to scan across the landscape and receive continuous feedback on the distances of multiple targets. Lastly, Pinseeker Mode allows users to accurately and quickly lock onto the flagstick up to 300 yards away.
Tips for Utilizing the Different Modes for Accurate Yardage Readings
To make sure you are getting accurate yardage readings with the Bushnell Tour v4, it is important to utilize the different modes available. When using Standard Mode, be sure to point the device directly at the target for the most accurate reading. When using Slope Mode, it is important to remember that the device does not account for wind, so you should factor this in when adjusting your shot. When using Scan Mode, be sure to keep the device steady and move it slowly to get the most accurate readings. Finally, when using Pinseeker Mode, make sure to center the flagstick in the crosshairs of the device for the most accurate readings.

A Comprehensive Tutorial on Changing from Meters to Yards with the Bushnell Tour v4
Now that you have a basic understanding of the different modes of measurement available on the Bushnell Tour v4, let’s take a look at a comprehensive tutorial on changing from meters to yards with the device. This tutorial will provide you with all the tips and tricks you need to make sure your conversions are accurate and reliable.
Setting Up the Bushnell Tour v4 for Both Metric and Imperial Measurements
The first step in using the Bushnell Tour v4 to convert from meters to yards is to set up the device for both metric and imperial measurements. To do this, press and hold the “Mode” button until the “M/Y” option appears on the screen. Once this option is selected, the device will automatically convert any distance measured in meters to yards.
Accessing and Understanding the Meter to Yard Conversion Options
After setting up the device for both metric and imperial measurements, you can then access the meter to yard conversion options. To do this, press and hold the “Mode” button until the “M/Y” option appears on the screen. Once you have selected this option, you can then select either the Tournament Legal or Slope mode to begin measuring distances in yards.
Tips for Utilizing the Meter to Yard Conversion Function Properly
To make sure you are utilizing the meter to yard conversion function properly, there are a few tips to keep in mind. First, make sure you are pointing the device directly at the target for the most accurate reading. Second, remember that the device does not account for wind when using Slope Mode, so you should factor this in when adjusting your shot. Finally, when using Pinseeker Mode, make sure to center the flagstick in the crosshairs of the device for the most accurate readings.
Quick and Easy Ways to Convert Distances from Meters to Yards Using the Bushnell Tour v4
Now that you have a basic understanding of how to use the Bushnell Tour v4 to convert distances from meters to yards, let’s take a look at some quick and easy ways to make sure your conversions are accurate and reliable. Here are a few tips to keep in mind:
Learning How to Use the Different Modes of Measurement to Ensure Accurate Conversions
To ensure accurate conversions, it is important to learn how to use the different modes of measurement available on the Bushnell Tour v4. When using Standard Mode, be sure to point the device directly at the target for the most accurate reading. When using Slope Mode, remember that the device does not account for wind, so you should factor this in when adjusting your shot. When using Scan Mode, be sure to keep the device steady and move it slowly to get the most accurate readings. Finally, when using Pinseeker Mode, make sure to center the flagstick in the crosshairs of the device for the most accurate readings.
Tips for Utilizing the Meter to Yard Conversion Feature Effectively
To get the most out of the meter to yard conversion feature on the Bushnell Tour v4, here are a few tips to keep in mind: First, make sure you are setting up the device for both metric and imperial measurements by selecting the “M/Y” option on the device. Second, remember to select either the Tournament Legal or Slope mode to begin measuring distances in yards. Finally, when using Pinseeker Mode, make sure to center the flagstick in the crosshairs of the device for the most accurate readings.
Learn How to Use the Bushnell Tour v4 to Transform Meters into Yards with Ease
By following the steps outlined in this article, you should now have a better understanding of how to use the Bushnell Tour v4 to transform meters into yards with ease. By taking the time to learn the necessary conversion calculations, setting up the device for both metric and imperial measurements, and understanding the different modes of measurement available, you can ensure that your conversions are accurate and reliable.
Measuring distances accurately on the golf course is essential for ensuring your shots are on target. With the Bushnell Tour v4, you can easily convert distances from meters to yards and get accurate readings with its various modes of measurement. By following the steps outlined in this article, you should now have a better understanding of how to use the Bushnell Tour v4 to transform meters into yards with ease.
Summary of Key Points
• To convert from meters to yards with the Bushnell Tour v4, you need to multiply the distance in meters by 1.0936133. • The Bushnell Tour v4 offers four different modes of measurement to ensure accurate readings: Standard Mode, Slope Mode, Scan Mode, and Pinseeker Mode. • To set up the device for both metric and imperial measurements, press and hold the “Mode” button until the “M/Y” option appears on the screen. • To ensure accurate conversions, make sure to point the device directly at the target when using Standard Mode, remember to factor in wind when using Slope Mode, keep the device steady and move it slowly when using Scan Mode, and center the flagstick in the crosshairs of the device when using Pinseeker Mode.
Final Thoughts
Learning how to use the Bushnell Tour v4 to convert distances from meters to yards is an essential skill for any golfer. By taking the time to understand the necessary conversion calculations, setting up the device for both metric and imperial measurements, and utilizing the different modes of measurement available, you can ensure that your conversions are accurate and reliable. Now that you know how to use the Bushnell Tour v4 to transform meters into yards with ease, you can focus on improving your game and hitting your shots with precision.
(Note: Is this article not meeting your expectations? Do you have knowledge or insights to share? Unlock new opportunities and expand your reach by joining our authors team. Click Registration to join us and share your expertise with our readers.)
Hi, I'm Happy Sharer and I love sharing interesting and useful knowledge with others. I have a passion for learning and enjoy explaining complex concepts in a simple way.
Related Post
Exploring japan: a comprehensive guide for your memorable journey, your ultimate guide to packing for a perfect trip to hawaii, the ultimate packing checklist: essentials for a week-long work trip, leave a reply cancel reply.
Your email address will not be published. Required fields are marked *
Expert Guide: Removing Gel Nail Polish at Home Safely
Trading crypto in bull and bear markets: a comprehensive examination of the differences, making croatia travel arrangements, make their day extra special: celebrate with a customized cake.

How To Change Bushnell Rangefinder From Meters To Yards? The Complete Procedure
If you own a Bushnell rangefinder, you may be familiar with its default measurement unit, which is usually set to meters. However, in many situations, it’s essential to switch to yards for more accurate readings. Whether you’re a golfer, a hunter, or an outdoor enthusiast, changing the units on your Bushnell rangefinder is a simple process that can significantly enhance your experience. This is why I am here with an in-depth guide on how to switch between meters and yards on your Bushnell rangefinder. So, take a few minutes and read the entire article.

Table of Contents
Step-by-Step Guide: Changing from Meters to Yards
You’ll be glad to know that the procedure is pretty simple. Once you apply the procedure, you can also reverse the procedure easily. Shuffling into any mode is more convenient than you imagine. Here are the steps to follow –
Step 1: Before you can make any adjustments, ensure your Bushnell rangefinder is powered on. Simply press the power button. Upon activation, it will display the last used mode and units, typically in meters.
Step 2: Find the “Mode” button on your rangefinder. It is usually labeled “MODE” or features an icon resembling a targeting reticle. This button is crucial for accessing the settings.
Step 3: Now, press and hold the “Mode” button for approximately 3 to 5 seconds. Keep holding it until you see the unit indicator at the bottom of the display change from m (meters) to yds (yards).
Step 4: As the display changes to yards, release the “Mode” button. Your Bushnell rangefinder is now set to display distance measurements in yards.
Step 5: To confirm that the change has been successfully implemented, point your rangefinder at an object with a known distance and take a measurement. You should now see the distance displayed in yards instead of meters.
Step 6: Should you need to revert to meters for any reason, simply repeat the process by pressing and holding the “Mode” button for 3 to 5 seconds until the unit indicator changes from yds to m .
Step 7: It’s important to note that your Bushnell rangefinder possesses the handy feature of automatically remembering the last used mode and units. Consequently, if you set it to yards, it will return to yard mode the next time you power it on, eliminating the need to reconfigure it each time.
The steps outlined above are generally applicable to a wide range of Bushnell rangefinder models. Nevertheless, it’s important to keep in mind that button labels and icons may vary from one model to another. In such cases, referring to your specific manual can be immensely helpful in ensuring a seamless transition between measurement units.
Frequently Asked Questions (FAQs)
Can i switch between yards and meters on all bushnell rangefinder models.
Indeed, the process is relatively consistent across most Bushnell rangefinders. However, variations in button labels and icons may exist. Consult your user manual for specific model instructions.
What’s the advantage of changing from meters to yards on my rangefinder?
The choice between meters and yards typically depends on personal preference or the requirements of your sport or activity. For instance, golf predominantly uses yards, while other pursuits may prefer meters for certain measurements.
Can I change units while in the middle of a round of golf?
Absolutely. You can switch units at any time, even during a round of golf. Simply follow the steps outlined in the guide, and your Bushnell rangefinder will seamlessly adapt to your desired unit.
Will changing units affect the accuracy of my rangefinder’s measurements?
No, changing units from meters to yards, or vice versa, won’t impact the accuracy of your rangefinder’s measurements. The rangefinder’s laser technology remains consistent.
Can I set a default unit of measurement for my rangefinder that it will always start in?
Yes, your Bushnell rangefinder will automatically recall the last used unit. So, if you predominantly use yards, it will power on in yard mode, saving you time and effort.
Switching the units on your Bushnell rangefinder from meters to yards is a straightforward process that offers you flexibility and precision when measuring distances. Whether you’re an avid golfer, a dedicated hunter, or a nature enthusiast, being able to alternate between meters and yards with ease can make a substantial difference in your overall experience. While the process remains consistent across most Bushnell models, button labels and icons may slightly differ. To ensure a smooth transition, consult your user manual for model-specific guidance.
Similar Posts

How to Increase Draw Weight on A Recurve Bow? Step-by-Step Tips
Recurve bows are a popular type of bow for archery. They are known for their smooth draw and accurate shooting. Recurve bows come in a variety of draw weights, which is the amount of force required to draw the bow to full draw. If you are an experienced archer, you may want to increase the…

Red Dot Sight vs Reflex Sight: A Comprehensive Comparison
As a passionate shooter and hunter, I’ve come to appreciate the vital role that optics play in improving accuracy and enhancing overall performance. When it comes to selecting the ideal sight for your firearm, two popular options stand out: red dot sights and reflex sights. While these two sight types may appear quite similar at…

What Size Scope Rings Do I Need For a 50mm Objective? Finding the Perfect Scope Ring
As a passionate rifle enthusiast, I’ve embarked on many hunting and shooting adventures, and the importance of having the right equipment cannot be overstated. One crucial aspect of ensuring a successful outing is properly mounting your optics, such as a rifle scope, on your firearm. Selecting the correct size of scope rings is paramount to…

Are Red Dot Sights Accurate? Accuracy of Red Dot Optics
In the world of firearms and shooting sports, the quest for accuracy is an ever-present endeavor. Whether you’re a competitive shooter, a law enforcement officer, or a casual enthusiast, the ability to consistently hit your target is of paramount importance. The advent of red dot sights has brought about a significant shift in the way…
Leave a Reply Cancel reply
Your email address will not be published. Required fields are marked *
Save my name, email, and website in this browser for the next time I comment.

How do I set my Bushnell Tour V4 to yards?
Answered by Spencer Vinyard
To set my Bushnell Tour V4 to yards, I follow these steps:
1. Power off the device: Before making any changes, I ensure that the unit is powered off.
2. Press and hold the Power/Fire button: I press and hold the Power/Fire button on the device. This is usually located on the top or side of the device.
3. Wait for 7 seconds: I continue to hold the button for approximately 7 seconds. During this time, nothing happens on the display.
4. Display begins cycling: After the 7 seconds, the display on the device starts to cycle through different options. This is where I can select between yards and meters.
5. Release the Power/Fire button: Once the units I want are displayed, I release the Power/Fire button to select it. On the display, I will see either “Y” for yards or “M” for meters.
6. Confirm the selection: To ensure that the change is applied, I double-check the display to see if it now shows the selected units (yards or meters).
By following these steps, I can easily set my Bushnell Tour V4 to yards. It’s a simple process that allows me to choose the unit that I am most comfortable with for my golfing needs.
BUSHNELL SERVICE SITE
- Tour V4 Instruction Manual
Instruction manual for the Bushnell Tour V4 and V4 Shift laser rangefinders. Apr 27, 2020 • Knowledge
Apr 27, 2020 1.9 MB pdf
Trending Articles
- Tour V3 Instruction Manual
- V5 Instruction Manual
- Installing iGolf Sync Application on Computer
- Tour V2 Instruction Manual
- Tour V6 Shift
- Tour V5 - Limited Edition
- Phantom 3 Slope GPS
- Wingman Mini GPS Speaker
- Phantom 2 Golf GPS
- Wingman View GPS Speaker
- ION Elite Watch
- Tour Cap (B)
- Tour Cap (Structured)
- Player Towel
- Replacement Parts
- Register your device
- Find a Stockist
New User? Register Now
- Register Now
Support for your Tour V4 Shift Laser Rangefinder (Product #s: 201760P, 201760).
• Getting Started • FAQs • Manuals • Warranty • Replacement Parts
GETTING STARTED
Please register your device on bushnellgolf.com . This registration is for receiving Bushnell Golf support, product discounts, and new product information.
Next, install the Bushnell Golf App on your phone. The Bushnell Golf App can be found by searching your phone's app store or via the below links.
• Android • Apple
Open the Bushnell Golf App and add your rangefinder as a device.
• The first field is the serial number from the bottom of the device. • The 2nd field is the manufacture date that is also on the bottom of your rangefinder in YYYYMM format. • If you get an error that the serial number is already in use, you will need to e-mail iGolf at [email protected] requesting the serial number be released. Please include your serial number from your rangefinder with this e-mail.
Registration through the Golf app also creates your user ID and password at the Bushnell iGolf website https://bushnell.igolf.com /. This will be the website for software and course updates. Laser rangefinders don't really need software updates.
Your initial battery should last for a few months. If you start to experience any issues with the performance, replace the battery with a high quality (Panasonic, Duracell, or Energizer), CR-2 3 Volt Lithium battery that is right out of the package. Once you replace the battery, press & hold the fire button for 10 seconds. We recommend carrying at least 1-2 spares in your golf bag so that you always have a fresh new battery for full functionality.
I see debris in the lens?
The issue you described sounds like your device may have some solar burns. Over time, the device can develop small dots due to sun exposure. The dots are cosmetic and should not affect the actual performance of the device. In some cases, the amount of solar burn has become substantial enough to interfere with the viewing area. In this event, please contact Bushnell Golf Support for options.
My Tour V4 is off by 10 yards?
The Tour V4 can be used to measure distance in yards or meters. The unit measure indicators are located in the lower right portion of the LCD. To select between yards and meters (starting with the unit power off), press and hold the Power/Fire button. After 7 seconds, the display will begin to cycle through the options: Yards or meters. When the units you want are displayed, release the Power/Fire button to select it. Y for Yards or M for Meters. The Tour V4 will return to the last unit of measure setting used each time the unit is turned on.
The display is out of focus.
Power the unit on by pressing the power /Fire button once. Rotate the eyepiece in either direction until the display icons and numbers are in focus.
TWO-YEAR WARRANTY
Bushnell Golf guarantees the Tour V4 Laser Rangefinder to be free of defects in materials and workmanship for two years from the date of purchase. This warranty does not cover consumer-caused damages such as misuse, abuse or repairs attempted by someone other than our authorized technicians.
WARRANTY FAQ
Is the tour v4 waterproof, can i clean the tour v4 .
Yes, follow these steps.
1. Blow away any excessive dust or debris on exterior (or use a soft brush). 2. To remove dirt or finger prints, clean with the supplied micro fiber cloth rubbing in a circular motion. Use of a coarse cloth or unnecessary rubbing may scratch the lens surface and eventually cause permanent damage. The included washable microfiber cleaning cloth is ideal for the routine cleaning of your optics. Simply breathe lightly on the lens to provide a slight amount of moisture, then gently rub the lens with the microfiber cloth. 3. For a more thorough cleaning, photographic lens tissue and photographic-type lens cleaning fluid or isopropyl alcohol may be used. Always apply fluid to the cleaning cloth - never directly on the lens.
When do I replace the battery?
Replace the battery when the unit does not turn on, display does not illuminate, or the display goes blank when attempting to power the laser. Use a good quality 3 -volt lithium battery (CR2). Insert into the compartment with the negative (flat) end first (positive end facing out towards the battery cover). We recommend replacing the battery at least once every six months.
REPLACEMENT PARTS
Replacement Battery Cap for Tour V4, Tour V4 Shift, or Hybrid
Replacement Eye Cup for Tour V4, Tour V4 Shift, or Hybrid
Phone - Can’t find the answer to your question in our support section? Best for hard to describe troubleshooting or urgent matters like cancelling an order.
+61 08 8268 5841
Email - The best way to ensure your question gets to the right expert. Complete the Contact Us form and we’ll email you back in 24-48 hours.
PRODUCT REGISTRATION
About bushnell golf, find a stockist.
What are you looking for?
- You don't have any items in your cart.
- {property.name}: {property.value}
Shipping & taxes calculated at checkout

- Bushnell Manuals
- Measuring Instruments
- TOUR V4 SHIFT
Bushnell TOUR V4 SHIFT Manual
- User manual (76 pages)
- User manual
- page of 64 Go / 64
Table of Contents
- Troubleshooting
- Product View
- Introduction
- How Our Digital Technology Works
- Ranging Accuracy
- Getting Started
- Replacing the Battery
- Adjusting the Eyepiece
- Operational Summary
- Liquid Crystal Display (LCD) Indicators
- Mode and Unit of Measure Options
- Active Laser
- Pinseeker (LCD Indicator)
- Obtaining Slope Yardages +/-
- How to Use Slope +/-
- About TOUR V4 SHIFT with Slope Technology
- The Advantage of Slope Technology
- Optical Design
- Magnification and Coatings
- Specifications
Advertisement
Available languages
- ENGLISH, page 1
- FRANÇAIS, page 16
- ESPAÑOL, página 28
- DEUTSCH, seite 40
- ITALIANO, pagina 52
Quick Links
- 1 Table of Contents
- 2 Getting Started
- 3 Mode and Unit of Measure Options
- 4 How to Use Slope +/-
- 5 Troubleshooting
- Download this manual
Related Manuals for Bushnell TOUR V4 SHIFT

Summary of Contents for Bushnell TOUR V4 SHIFT
- Page 1 ENGLISH/FRANÇAIS/ESPAÑOL/DEUTSCH/ITALIANO Model: 201760 10-16...
Page 2: Table Of Contents
- Page 3 POWER/FIRE EYEPIECE SLOPE SWITCH 201760 Model #...
- Page 4 “zero” in on the flag without acquiring background targets. The TOUR V4 SHIFT weighs a mere 5.6 ounces and made to fit into the palm of your hand. TOUR V4 SHIFT also features an adjustable eyepiece, 5X magnification, and is capable of providing distance from 5 to 1000 yards with incredible one yard accuracy! Like other Bushnell laser rangefinders, the TOUR V4 SHIFT is not dependent upon reflectors, and will provide distance to trees, bunkers, and virtually any object on any golf course in the world.
Page 5: English
- Page 6 REPLACING THE BATTERY Your TOUR V4 SHIFT comes with a battery already installed, so it’s ready to use right away. To replace the battery, remove the battery cap by lifting the battery cap tab and then rotating counter clockwise. Insert a CR-2 3-volt lithium battery into the compartment negative end first, then replace the battery cap.
- Page 7 Y for Yard indicator is turned off. If you are changing from meters to yards, the opposite will occur. The TOUR V4 SHIFT will return to the last unit of measure setting used each time the unit is turned on.
- Page 8 PinSeeker (LCD Indicator - ) Ever have trouble getting distance to the flag? This advanced mode allows easy acquisition of the flag without inadvertently getting distances to background targets (i.e. trees) that have stronger signal strength. Press the POWER/FIRE button to turn the unit on. Next, align the aiming circle reticle onto the flag that you want distance to.
- Page 9 -20 to +20 degrees of elevation. The Tour V4 Shift will automatically compute an angle compensated range based upon distance and slope angle determined by the laser rangefinder and built-in inclinometer. This data is then combined with internal algorithmic formulas dealing with average club use and ball trajectories.
- Page 10 OPTICAL DESIGN Magnification and Coatings The TOUR V4 SHIFT features 5x magnification and Multi-Coated optics. A liquid crystal display (LCD) is mounted within the optical system and when activated, displays a reticle for targeting, yards/meters, and Mode indicators. Inherent in the manufacturing process are small black spots that appear in the optical system.
- Page 11 Includes battery & carrying case Optical Coatings: Multi-Coated Patent #’s: (Tour V4 Shift - Slope Technology) | 7,239,377 | 7,859,650 | 7,535,553 CLEANING Gently blow away any dust or debris on the lenses (or use a soft lens brush). To remove dirt or fingerprints, clean with a soft cotton or microfiber cloth, rubbing in a circular motion.
- Page 12 TWO-YEAR LIMITED WARRANTY Your Bushnell product is warranted to be free of defects in materials and workmanship for two years after the date of purchase. In the event of a defect under this warranty, we will, at our option, repair or replace the product, provided that you return the product postage prepaid. This warranty does not cover damages caused by misuse, improper handling, installation, or maintenance provided by someone other than a Bushnell Authorized Service Department.
Page 13: Troubleshooting
- Page 14 FCC NOTE This equipment has been tested and found to comply with the limits for a Class B digital device, pursuant to Part 15 of the FCC Rules. These limits are designed to provide reasonable protection against harmful interference in a residential installation.
- Page 15 FRANÇAIS ALIMENTATION/DÉCLENCHEMENT OCULAIRE SLOPE SWITCH 201760 Modèle n°...
- Page 16 Le TOUR V4 SHIFT pèse seulement 141 g (5,6 oz.) et est conçu pour tenir dans le creux de la main. Le TOUR V4 SHIFT est également doté d'un oculaire réglable, d'un agrandissement 5X et peut fournir une distance de 4,5 m à 914 m (5 à 1 000 yard), avec une précision incroyable à...
Page 17: Français
- Page 18 REMPLACEMENT DE LA BATTERIE Votre TOUR V4 SHIFT est livré avec une batterie, prêt à l'emploi. Pour remplacer la batterie, retirez le capot en soulevant sa languette, puis en le faisant tourner dans le sens inverse des aiguilles d'une montre. Insérez une batterie au lithium CR-2 3 volts dans le compartiment, borne négative en premier, puis replacez le capot de...
- Page 19 OPTIONS DE MODE ET D'UNITÉ DE MESURE Le TOUR V4 SHIFT peut mesurer des distances en yards ou en mètres. Les indicateurs d'unité de mesure se trouvent en bas à droite de l'affichage LCD. Pour sélectionner les yards ou les mètres (en commençant avec l'unité...
- Page 20 PinSeeker (Indicateur LCD – ) Vous rencontrez des difficultés pour obtenir la distance du drapeau ? Ce mode avancé vous permet d'acquérir facilement le drapeau, sans obtenir par inadvertance les distances de cibles en arrière-plan (par ex. arbres) qui possèdent une force de signal supérieure. Appuyez sur le bouton POWER/FIRE (Alimentation/Déclenchement) pour allumer l'appareil.
- Page 21 COMMENT UTILISER SLOPE +/- ™ Le Tour V4 Shift permet de sélectionner ou de désélectionner le mode pente plus facilement que jamais. Pour utiliser la fonction pente, faites simplement glisser le logo Tour V4 Shift pour que l'inscription « ...
- Page 22 CONCEPTION OPTIQUE Grossissement et revêtements Le TOUR V4 SHIFT est doté d'un grossissement 5x et d'une optique multicouche. L'affichage LCD est intégré dans le système optique et, lorsqu'il est activé, il affiche un réticule pour la visée, les mètres/yards et les indicateurs de Mode.
- Page 23 Revêtements optiques : multicouche Comprend une batterie et un étui de transport N° de brevet : (Tour V4 Shift – Technologie Slope) | 7,239,377 | 7,859,650 | 7,535,553 NETTOYAGE Retirez délicatement la poussière ou les débris sur les objectifs (ou utilisez une brosse douce à objectif ).
- Page 24 GARANTIE LIMITÉE DE DEUX ANS Votre produit Bushnell est garanti exempt de défauts matériels et de main-d'œuvre pendant deux ans à compter de la date d'achat. Si un défaut venait à se révéler pendant cette période de garantie, nous réparerons ou remplacerons le produit, à notre discrétion, si vous nous renvoyez le colis du produit prépayé.
- Page 25 DÉPANNAGE Si l'appareil ne s'allume pas/l'affichage LCD ne s'allume pas : • Appuyez sur le bouton POWER/FIRE (Alimentation/Déclenchement). • Contrôlez la batterie et remplacez-la si nécessaire. Si l'appareil ne répond pas aux appuis sur le bouton, remplacez la batterie par une batterie au lithium 3 volts de bonne qualité.
- Page 26 TRAITEMENT DES DÉCHETS D’ÉQUIPEMENTS ÉLECTRIQUES ET ÉLECTRONIQUES (En vigueur dans l’Union européenne et autres pays européens ayant des systèmes de collecte des déchets séparés) Cet équipement contient des composants électriques et/ou électroniques et par conséquent ne doit pas être éliminé en fin de vie avec les autres déchets ménagers. Vous devez au contraire vous débarasser de ce produit afin qu’il soit recyclé...
- Page 27 ESPAÑOL ENCENDIDO/DISPARO VISOR CONMUTACIÓN DE PENDIENTE 201760 Modelo n.º...
- Page 28 El TOUR V4 SHIFT solamente pesa 160 gramos y cabe en la palma de la mano. El TOUR V4 SHIFT también cuenta con un visor ajustable y aumento de 5X, y puede proporcionar distancias de 5 a 1000 yardas con una increíble precisión de una yarda.
Page 29: Español
- Page 30 AJUSTE DEL VISOR El TOUR V4 SHIFT está equipado con un visor ajustable (Ajuste de +/– 3 dioptrías) que permite enfocar la pantalla LCD en relación con la imagen. Basta con girar el visor hasta que la distancia de la retícula y del objeto queden enfocados.
- Page 31 OPCIONES DE MODO y UNIDAD DE MEDIDA El TOUR V4 SHIFT se puede utilizar para medir distancias en yardas o en metros. Los indicadores de unidad de medida están ubicados en la parte inferior derecha de la pantalla LCD. Para seleccionar yardas o metros (empezando con la unidad apagada), pulse y mantenga pulsado el botón ENCENDIDO/DISPARO.
- Page 32 PinSeeker (Indicador LCD: ) ¿Tiene dificultades para obtener la distancia a la bandera? Este modo avanzado permite la fácil adquisición de la bandera sin obtener inadvertidamente las distancias a los objetivos del fondo (por ejemplo, árboles), que tienen una señal más fuerte. Pulse el botón ENCENDIDO/DISPARO para activar la unidad.
- Page 33 ángulo exacto de la pendiente con −20 a +20 grados de elevación. El Tour V4 Shift calculará automáticamente un rango de ángulo compensado en base al alcance y al ángulo de pendiente determinados por el telémetro láser y el inclinómetro incorporado. Estos datos se combinan entonces con fórmulas algorítmicas internas que se ocupan del uso de palo promedio y las trayectorias de las bolas.
- Page 34 Aumento y revestimientos El TOUR V4 SHIFT cuenta con una óptica de aumento de 5x y revestimiento múltiple. La pantalla de cristal líquido (LCD) está montada dentro del sistema óptico y, cuando se activa, muestra una retícula para segmentación, yardas o metros, e indicadores de modo.
- Page 35 Revestimiento óptico: múltiple Incluye batería y estuche de transporte Números de patente: (Tour V4 Shift con tecnología Slope) | 7 239 377 | 7 859 650 | 7 535 553 LIMPIEZA Sople suavemente cualquier polvo o suciedad en las lentes (o use un cepillo suave para lentes). Para eliminar la suciedad o las huellas de dedos, límpielo con un paño de algodón o de microfibra suave, frotando con un...
- Page 36 GARANTÍA LIMITADA DE DOS AÑOS Los productos de Bushnell están garantizado como libres de defectos en materiales y mano de obra durante dos años después de la fecha de compra. En el caso de un defecto bajo esta garantía, nosotros, a nuestra discreción, repararemos o reemplazaremos el producto, siempre que lo devuelva con portes pagados.
- Page 37 SOLUCIÓN DE PROBLEMAS Si la unidad no se enciende o la pantalla LCD no se ilumina: • Suelte el botón ENCENDIDO/DISPARO. • Compruebe la batería y, si es necesario, reemplácela. Si la unidad no responde a las pulsaciones de teclas, reemplace la batería con una batería de litio de 3 voltios de buena calidad.
- Page 38 ELIMINACIÓN DE EQUIPOS ELÉCTRICOS Y ELECTRÓNICOS (Aplicable en la UE y otros países europeos con sistemas de recogida separada) Este equipo contiene elementos eléctricos o electrónicos y por tanto no debe eliminarse con los residuos domésticos normales. En cambio, debe eliminarse en los correspondientes puntos de recogida para reciclaje previstos por las comunidades.
- Page 39 DEUTSCH EIN/MESSEN OKULAR SLOPE SWITCH 201760 Model Nr.
- Page 40 Vergnügen entwickelt wurde. Diese Anleitung beschreibt die Anpassungen und Funktionen des Geräts und bietet Anweisungen zur Pflege. So können Sie die optimale Leistung aus diesem optischen Instrument herausholen. Lesen Sie sich diese Anweisungen vor der Verwendung Ihres TOUR V4 SHIFT bitte durch, um die optimale Leistung und eine lange Lebensdauer zu garantieren.
Page 41: Deutsch
- Page 42 ERSTE SCHRITTE AUSTAUSCH DER BATTERIE Im Lieferumfang des TOUR V4 SHIFT ist eine bereits installierte Batterie enthalten, sodass das Gerät sofort einsatzbereit ist. Wenn Sie die Batterie austauschen müssen, entfernen Sie den Deckel des Batteriefachs, indem Sie die Lasche des Batteriefachs anheben und dann entgegen dem Uhrzeigersinn drehen. Setzen Sie eine CR2 3-Volt- Lithiumbatterie mit dem negativen Ende voran in das Fach ein und tauschen Sie dann den Batteriedeckel.
- Page 43 Sie die EIN/MESSEN-TASTE erneut nach unten. LCD-DISPLAYANZEIGEN Auf dem LCD-Display des TOUR V4 SHIFT werden Symbole angezeigt, die beim Messen mit dem Laser, bei Erreichen eines Ziels und in den Zielmodi die ausgewählte Maßeinheit darstellen. Die Funktionen sind im...
- Page 44 PinSeeker (LCD-Anzeige – Hatten Sie jemals Probleme damit, die Entfernung zur Fahne zu bestimmen? Dieser fortgeschrittene Modus ermöglicht Ihnen die einfache Erfassung der Fahne, ohne versehentlich Entfernungen zu Hintergrundzielen (z. B. Bäumen) zu bestimmen, die stärkere Signale aussenden. Drücken Sie die EIN/MESSEN-TASTE, um das Gerät einzuschalten. Passen Sie dann das Visierkreuz auf die Fahne an, deren Entfernung Sie bestimmen möchten.
- Page 45 Entfernung und bei Neigung mit weniger Entfernung). SO VERWENDEN SIE SLOPE +/– ™ Mit dem Tour V4 Shift ist das Hinzufügen und Abziehen von Neigungen einfacher denn je. Mit der Slope-Funktion müssen Sie nur das Tour V4 Shift-Logo ziehen, bis „Slope Edition“ sichtbar wird. Zum Zurücksetzen der Funktion, ziehen Sie das Logo einfach nach unten.
- Page 46 OPTISCHES DESIGN Vergrößerung und Vergütungen Das TOUR V4 SHIFT hat eine 5-fach-Vergrößerung und mehrfach vergütete Optik. Im optischen System ist ein LCD installiert, das, wenn es aktiviert ist, ein Fadenkreuz für die Zielausrichtung in Yard/Meter und die Modus-Anzeige anzeigt. Aufgrund des Fertigungsprozesses werden kleine schwarze Punkte im optischen System angezeigt. Sie gehören zu den natürlichen Eigenschaften eines LCD und können im Fertigungsprozess nicht vollständig entfernt...
- Page 47 Optische Vergütungen: mehrfach vergütet Batterie und Tragetasche enthalten Patent Nummern: (Tour V4 Shift – Slope Technology) | 7,239,377 | 7,859,650 | 7,535,553 REINIGUNG Pusten Sie Staub und Schmutz auf der Linse vorsichtig ab (oder wischen Sie mit einem weichen Linsenpinsel).
- Page 48 ZWEIJÄHRIGE GARANTIE Ihr Bushnell-Produkt hat ab dem Kaufdatum eine zweijährige Garantie dahingehend, dass er frei von Material- und Herstellungsfehlern ist. Wenn ein Fehler im Sinne dieser Garantie auftritt, werden wir das Produkt nach unserem Ermessen reparieren oder ersetzen, vorausgesetzt, Sie schicken das Produkt mit vorausbezahlten Porto zurück.
- Page 49 STÖRUNGSBEHEBUNG Wenn sich das Gerät nicht einschalten lässt/sich das LCD Display nicht erhellt: • EIN/MESSEN-Taste drücken. • Batterie prüfen und gegebenenfalls austauschen. Wenn das Gerät nicht auf Drücken der Einschalttaste reagiert, ersetzen Sie die Batterie durch eine qualitativ hochwertige 3-Volt-Lithiumbatterie. Wenn sich das Gerät abschaltet (das Display erlischt beim Versuch, den Laser zu starten): •...
- Page 50 ENTSORGUNG VON ELEKTRISCHEN UND ELEKTRONISCHEN GERÄTEN (Gültig in der EU und anderen europäischen Ländern mit getrennten Sammelsystemen) Dieses Gerät enthält elektrische und/oder elektronische Bauteile und darf deshalb nicht im normalen Haushaltmüll entsorgt werden. Stattdessen sollte es an den entsprechenden Sammelstellen für Recycling der jeweiligen Gemeinden abgegeben werden.
- Page 51 ITALIANO ACCENSIONE/AZIONE OCULARE SLOPE SWITCH 201760 Modello #...
- Page 52 Il TOUR V4 SHIFT pesa solo 158,7 grammi (5,6 once) e sta comodamente nel palmo della tua mano. Il TOUR V4 SHIFT dispone inoltre di un oculare con ingrandimento 5X ed è in grado di fornire distanze da 5 a 1000 iarde con un'incredibile precisione alla singola iarda! Al pari degli altri telemetri laser Bushnell, il TOUR V4 SHIFT non dipende da riflettori ed è...
Page 53: Italiano
- Page 54 REGOLAZIONE DELL'OCULARE Il tuo TOUR V4 SHIFT è dotato di un oculare regolabile (Regolazione di +/– 3 diottrie), il quale ti consente di mettere a fuoco lo schermo LCD relativo all'immagine. Ruota semplicemente l'oculare fino a quando il reticolo e l'oggetto distanziato sono entrambi a fuoco.
- Page 55 OPZIONI MODALITÀ e UNITÀ DI MISURA Il TOUR V4 SHIFT può essere utilizzato per misurare distanze in iarde o metri. Gli indicatori dell'unità di misura sono posizionati nella parte in basso a destra dello schermo LCD. Per scegliere tra iarde e metri (iniziando con l'unità...
- Page 56 PinSeeker (Indicatore LCD – ) Hai mai avuto problemi a ottenere la distanza relativa alla bandiera? Questa modalità avanzata consente la facile acquisizione della bandiera senza ottenere inavvertitamente la distanza degli obiettivi sullo sfondo (ossia gli alberi) che hanno una maggiore forza di segnale. Premi il pulsante ACCENSIONE/AZIONE per attivare l'unità.
- Page 57 COME USARE SLOPE +/– ™ Il Tour V4 Shift rende la variazione dell'inclinazione più facile che mai. Per utilizzare la funzione slope, fai semplicemente scorrere il logo Tour V4 Shift in modo che la dicitura “Slope Edition” sia visibile. Per rendere nuovamente conformante il dispositivo, sposta il logo verso il basso.
- Page 58 DESIGN DELL'OTTICA Ingrandimento e rivestimento Il TOUR V4 SHIFT dispone di ingrandimento 5x e di ottiche con rivestimento multiplo. Uno schermo a cristalli liquidi (LCD) è montato su un sistema ottico e, quando attivato, mostra un reticolo per il puntamento, iarde/metri e indicatori della modalità.
- Page 59 Diametro obiettivo: 20 mm Comprende batteria & custodia Rivestimenti ottica: rivestimento multiplo Brevetti #: (Tour V4 Shift – Tecnologia Slope) | 7,239,377 | 7,859,650 | 7,535,553 PULIZIA Soffia via delicatamente polvere o detriti presenti sulle lenti (o usa uno spazzolino per lenti morbido).
- Page 60 GARANZIA LIMITATA DI DUE ANNI Il tuo prodotto Bushnell è garantito esente da difetti relativi a materiali e lavorazione per due anni dalla data di acquisto. In caso di difetto durante tale periodo di garanzia, provvederemo, a nostra discrezione, alla riparazione o sostituzione del prodotto, a condizione che tu abbia spedito il prodotto a tue spese. La presente garanzia non copre i danni derivanti da errato utilizzo, uso improprio, installazione o manutenzione fornita da soggetti diversi da un servizio di assistenza autorizzato Bushnell.
- Page 61 RISOLUZIONE DEI PROBLEMI Se l'unità non si accende – lo schermo LCD non si illumina: • Premi il pulsante ACCENSIONE/AZIONE. • Controlla e se necessario sostituisci la batteria. Se l'unità non risponde alla pressione dei tasti, sostituisci la batteria con una batteria al litio da 3 volt di buona qualità.
- Page 62 SMALTIMENTO DI APPARECCHIATURE ELETTRICHE ED ELETTRONICHE (Vigente presso i Paesi UE e altri Paesi europei con sistemi di raccolta differenziata dei rifiuti) Il presente apparecchio componenti elettriche e/o elettroniche e non può pertanto essere smaltito come rifiuto domestico ordinario. Al contrario, dovrebbe essere smaltito presso punti di raccolta destinati al riciclaggio, in base alle istruzioni delle amministrazioni locali.
- Page 64 9200 Cody, Overland Park, KS 66214 4 rue Diderot, Suresnes, France 92150 ©2016 Bushnell Outdoor Products Bushnell,™, ®, denotes trademark of Bushnell Outdoor Products...
This manual is also suitable for:
Rename the bookmark, delete bookmark, delete from my manuals, upload manual.
How to Fix a Golf Rangefinder? A Comprehensive Guide for Golfers
A friend once asked. While I didn’t have a direct answer, I wished he had been more specific. This is a rather broad question. When addressing how to fix a golf rangefinder, it all depends on the part and the problem.
- 1) How to fix golf rangefinder?
- 2) Which are the main parts of a golf rangefinder?
- 3.1) Blank Display
- 3.2) No Readings
- 3.3) Unclear Readings
- 3.4) Difficulty in capturing the target
- 4) How to hold golf rangefinder steady?
- 5) How to calibrate a golf rangefinder?
- 6.1) Not all Golf Rangefinders are created equal
- 7) Why is My Bushnell Rangefinder Not Showing Yardage
- 8) Why is My Bushnell Rangefinder Blurry
- 9) How to Find Bushnell Rangefinder Replacement Parts
- 10) Why Did My Bushnell Rangefinder Stopped Working
- 11.1) Method #1 – Resetting the Batteries
- 11.2) Method #2 – Using Clear Display Button
- 12.1) Warranty Terms
- 13) How to Get Your Bushnell Rangefinder Repair Manual
- 14) What type of battery does the Bushnell Tour V2 use?
- 15) Steps When Doing a Bushnell Tour v2 Troubleshooting
- 16.1) Problems with Bushnell Tour V2 Slope Edition?
- 17) How do you turn on a Bushnell Tour V2?
- 18) How to Reset Bushnell Tour v2 Golf Rangefinder
- 19) How do I change my Bushnell Tour V2 from meters to yards?
- 20.1) Replacing the battery
- 20.2) Changing Bushnell Tour v3 Rangefinder meters to yards
- 20.3) Target range cannot be obtained
- 21.1) Bushnell Tour V4 Problem – LCD does not illuminate
- 21.2) Bushnell Tour V4 Problem – Display goes blank
- 21.3) Bushnell Tour V4 Problem – Cannot obtain the target range
- 22) Bushnell Tour V4 Troubleshooting Tips
- 23) How do I change my Bushnell Tour V4 meters to yards?
- 24) What to do when Bushnell Tour v4 Stuck in Setup Mode
- 25) What kind of battery does a Bushnell Tour v4 Battery Uses
- 26) What is the battery life of a Bushnell Tour v4 Battery
- 27) What size is the Bushnell Tour v4 Battery size
- 28) What is a Bushnell Tour v4 Battery Cap
- 29) How to change a Bushnell Tour v4 Battery
- 30) How to Restore Factory Defaults doing a Bushnell Tour v4 Hard Reset
- 31) What is a Bushnell Tour v5 Shift
- 32) Troubleshooting a Bushnell Tour v5 Shift Problems
- 33) Why is your Bushnell Tour v5 Shift Slope not Working
- 34) What type is a Bushnell Tour v5 Shift Battery
- 35) What are the known Bushnell Tour v5 Problems
- 36) Why is the Bushnell Tour v5 Manual Important
- 37) How to do Bushnell Tour v5 Hard Reset
- 38) How do I turn on my Callaway 300 Pro Rangefinder?
- 39) How do you turn off the slope on a Callaway 300 Pro?
- 40) How do you change a Callaway 300 Pro Rangefinder from Meters to Yards?
- 41) Tec Tec Tec Rangefinder Problems and Troubleshooting
- 42) What To Do If Your Boblov Rangefinder Not Working
- 43) Final Thoughts
- 🔧 To fix a golf rangefinder, it’s important to identify the specific problem.
- 👀 Common problems include a blank display or broken lenses.
- 👉 The procedure for fixing each problem may vary.
- 🏌️♂️ Major parts of a rangefinder include the lens, display, power button, focus ring, and measurement button.
- 🤔 Knowing the different parts of a rangefinder can help in diagnosing and fixing issues.
- 💡 It’s recommended to consult the manufacturer’s manual before attempting any repairs.
- 👨🔧 It may be necessary to seek the help of a professional repair service for some issues.
#GolfRangefinder #GolfTools #DeviceRepair #GolfEquipment #Troubleshooting

Typically, there are different parts of a rangefinder. They are all subject damage. And, fixing each part might not need the same procedure.
For instance, we have the mode button, eyecup, battery chamber cover, and objective lenses.
How to fix golf rangefinder?
When addressing how to fix a gold rangefinder, it’s only fair that I also address the common problems experienced.
Fixing a blank display might not require the same procedure as repairing broken lenses.
Which are the main parts of a golf rangefinder?
Why is knowing the different parts of a rangefinder important? Well, this helps one quickly pinpoint the problem. For instance, knowing a specific part helps you decide which method to use for fixing.
Typically, rangefinders have the following:
- mode button
- battery chamber
- strap eyelet
- objective lenses
- power button
Knowing these parts also helps you check for issues with ease. Of course, getting conversant with the different parts also helps in maintenance.
What are the Common Problems with Golf Rangefinders
In order to know how to fix a golf rangefinder, we first address the different possible problems. There are various problems, including blank displays and inaccurate data.
Some people also face issues like difficulty in reading the measurements and some people ask how to keep a golf rangefinder steady.
Note that, a broken or completely dysfunctional rangefinder is fixed by professionals. The DIY steps highlighted below only apply to simple problems requiring basic knowledge.
For that reason, don’t attempt to repair your broken rangefinder if you aren’t an expert.
Of course, some problems stem from the inability of the user to understand the new technology. Rangefinder technology has seen a steady rise over time.
Currently, we have sophisticated models requiring more skills.
Below are the common problems you’d expect to encounter:
Blank Display
This is a common problem. Before attempting anything else, try changing the mode. Changing the mode always solves the problem for most people.
However, if this step fails, then it could be an indication for a more serious condition.
So, what do you do next? If switching modes doesn’t solve a blank display, go back to your manual. Read word by word, sentence by sentence, and letter by letter.
I mean, read carefully. Try crossing all the t’s and dotting all the I’s before attempting anything else.
Using the manual, try transitioning through all the modes once more. This could involve other modes not included in the mode button.
The blank display could also result from loose connections. This is a rather tricky situation requiring professional assistance.
For that reason, unless you are a professional, consider contacting the manufacturer.
Opening the device to fix loose connections could void your warranty. So, just contact the manufacturer for extra assistance.
However, as earlier said, if you are a professional, you could attempt fixing the loose connections.
Simply open the device, spot the loose connections, and fix them. However, this is only for professionals!
No Readings
This is another common problem associated with rangefinders. What causes it? Well, there are various causes of faulty readings.
Albeit common, this is a rather tricky problem. Like the previous problem, faulty readings could result from a change in mode.
For that reason, use the mode button to change the modes. Of course, you should use the manual when solving this problem.
Why use a manual? Well, different manufacturers recommend different steps for solving it.
Most of these problems depend on the brand of rangefinder you own. That’s why most solutions work on a specific rangefinder and fail on another.
Unclear Readings
This problem occurs quite often. It also indicates a change in mode. However, this might not be the case. So, you should carefully inspect the device.
The first step is trying to change modes. If that fails, try combing through the manual for any suggestions. Different brands could offer different solutions.
If these steps fail too, check the lenses as well. They could be blurred by dirt or other substances. If that’s the case, you should clean it.
Cleaning the lenses requires utmost care. You don’t watch to scratch them, do you? There are specific liquids for cleaning, better use them.
Of course, the lenses could also have stains on the insides. In that case, dissemble the rangefinder and use a wet soft cloth to wipe any dirt or dust. You could also consider replacing the lenses.
In case all the steps fail, consider contacting the manufacturer of further assistance.
Difficulty in capturing the target
Still, looking for how to fix golf rangefinder ? This is another common problem.
How do you solve it? Well, this calls for some serious steps. It mostly results from faulty readings. So, fixing faulty readings could, consequently, fix it.
To perfectly focus on the target, always keep the rangefinder clean. For instance, regularly clean the lenses. Besides dirty lenses, this issue could also be as a result of weak batteries.
What do you do when the batteries are weak? Of course, get a new pair.
Of course, ensure you have tested all the other steps before buying new batteries. I mean, this ought to be the last step.
Fixing new batteries requires minimal skills. Simply open the battery chamber and connect them. In case of any problem, refer to the user manual.
How to hold golf rangefinder steady?
An amateur once rushed to me, looking quite worried. Don’t ask how I knew he was worried, I can tell!
“Excuse me, sir, how do you keep your rangefinder steady?” He asked. I blankly stared at him then answered, “I don’t really know, I guess it’s through practice.”
I could only say then that practice is the answer on how to hold a rangefinder steady.
Well, I am going to give the same answer, there’s no formula for holding your golf rangefinder steady.
However, since you came looking for some suggestions, I have a few for you on how to keep a golf rangefinder steady.
For a steady golf rangefinder, always buy something big enough to fit into both hands. Using two hands enhances rangefinder stability.
One of the secrets on how to keep a golf rangefinder steady is by using one that suits you. Make sure you are comfortable holding the unit.
Different rangefinders can have a different fit which can affect how to hold a rangefinder steady.
Another is to do some steady hand exercises. There are strength exercises that can improve your dexterity. That might be your answer on how to hold a rangefinder steady.
Something else, to learn how to hold a rangefinder steady, PRACTICE! PRACTICE! PRACTICE!
How to calibrate a golf rangefinder?
How do I calibrate my rangefinder ? This varies from one manufacturer to the other. However, from my experience with Bushnell Neo, I can offer a few tips.
To calibrate, try finding a place within the course where the device indicates zero meters from the first green. At that point, all the other points go off a similar amount.
However, the feature isn’t pre-programmed, so it works with created maps.
How to change golf rangefinder from meters to yards?
Are you searching for how to change golf rangefinder from meters to yards? Do you always ask, “how do I change my rangefinder from meters to yards?”
Well, I got you. This question pops up quite often on different platforms. However, no one ever seems to have a convincing answer.
Lift your hand- have you ever successfully hard-reset a phone? And, did you use the same method for iPhone and Samsung phones?
If your answer to the first question is yes, then the obvious answer for the second one is a big NO!
So, what’s the relation between the two, a phone and a rangefinder? Well, calm down, I’m coming there. First, calibrating your rangefinder greatly depends on the brand.
Just like hard resetting a phone, different manufacturers recommend different steps.
So, you ask, “How do I change my rangefinder from meters to yards?” For our discussion, I am going to use a Bushnell Tour V3.
This device offers a switch in readings between yards and meters.
However, the process isn’t an ABC, like most people would want to assume. It involves a few steps. I will walk you through the steps below.
Not all Golf Rangefinders are created equal
As a disclaimer, though, these steps might not work for all golf rangefinders, so consult with the manufacturers if not using Bushnell Tour V3 .
Before buying, you can already ask them “how do I change my rangefinder from meters to yards?”
By default, the rangefinder offers readings in yards. However, for your convenience, you can change to meters. So, how do you do that?
First, switch the device off completely. This step should be a problem for most people. That’s because there’s a button for that purpose.
After you turn it off, attempt to turn it on but still hold the power button for like five minutes. I mean, even after it turns on, keep holding the button for like five minutes.
After the five minutes, the readings start interchanging between meters and yards. At this point, you simply choose the meters.
To go back to yards, you repeat the procedure then choose the yard readings.
Of course, reading the manual helps one get the instructions on how to change between meters and yards.
However, not all brands offer this feature so you need to be careful when making a purchase.
If it is important to you, ask right away, “how do I change my rangefinder from meters to yards?”
Why is My Bushnell Rangefinder Not Showing Yardage
If your Bushnell rangefinder not showing yardage on the screen then try out different environments, figure it needed a calibration adjustment.
This is something that the manufacturer recommends doing every year or two as it’s very likely for your device to shift slightly over time due to its sensitive optics.
The good news is that the process of calibrating a Bushnell rangefinder won’t show yardage is easy!
- All you need are these simple steps:
- Turn off your device
- Remove any lens caps from front
- Point the range finder at an object at least 50 yards away
- Press and hold down both buttons until the word “Calibrating” appears on the screen
The words ‘calibrating’ will be displayed for about one minute and then your Bushnell rangefinder not showing yardage problem should be fix at this point.
Why is My Bushnell Rangefinder Blurry
Golfers have been using Bushnell Rangefinders for years to measure the distance between themselves and their target. Recently, golfers have begun noticing that their Bushnell rangefinder is blurry or has a foggy film over it.
This can mean one of two things: either your battery needs to be changed, or there is dirt or debris on the lens. If you clean off the lens with a lens cleaning cloth, your rangefinder will work as expected again.
Another reason, it turns out that you must recalibrate your rangefinder every time you change from fairway to rough terrain and vice versa in order to get clear pictures again.
Follow the section above, Bushnell Rangefinder Not Showing Yardage, for step-by-step to recalibrate your Bushnell rangefinder being blurry.
How to Find Bushnell Rangefinder Replacement Parts
One thing that can happen with your Bushnell rangefinder is that they can break down due to wear and tear or just because it gets dropped too much.
If this happens then you may need Bushnell rangefinder replacement parts in order to fix your device. There are two main things that people look for when they need Bushnell rangefinder replacement parts.
Read your Bushnell rangefinder product manual and try to identify exactly the name of the part that you want to replace.
Search online where they can order anything from a single Bushnell rangefinder component to an entire kit of Bushnell rangefinder replacement parts.
If your device is still under warranty you can contact Bushnell if they will replace the part and repair it for free.
Consult your product manual on how to initiate a Bushnell golf rangefinder repair and parts replacement.
Why Did My Bushnell Rangefinder Stopped Working
Are you frustrated and wondering, Why Did My Bushnell Rangefinder Stopped Working? What is the cause of this issue?
There may be an easy fix. Your Bushnell rangefinder has stopped working because it is probably just dirty and needs to be cleaned.
You can clean your rangefinder by going into the menu settings and finding “clean.” The instructions will tell you how to proceed from there.
Other reasons would be that the Bushnell rangefinder needs the battery to be replaced or just needs to be recalibrated.
If these are not the issue and you still can’t get it working, contact Bushnell customer service for assistance.
How Do I Reset My Bushnell Rangefinder
Do you ever find yourself in the middle of a game and your Bushnell rangefinder stopped working? And now wondering, How Do I Reset My Bushnell Rangefinder?
We will show you 2 ways on how do you reset a Bushnell rangefinder.
Method #1 – Resetting the Batteries
- Remove the battery cap on the back of the unit
- Take out the battery and put it back in again
- Turn on your device by pushing down on both buttons at once for 2 seconds
Method #2 – Using Clear Display Button
Use the “Clear Display” button on the back of the device. This will clear all current readings from your screen and allow you to start fresh with a new reading.
Your have reset your Bushnell rangefinder is now ready to help you play golf.
How to Get Bushnell Rangefinder Repair
If you have a legitimate Bushnell Rangefinder , you should have a 2-year warranty. This warranty entitles you to a free Bushnell rangefinder repair.
Below, I will share with you how to get a Bushnell rangefinder repair.
To check if your Bushnell Laser Rangefinder is authentic, check for the serial number sticker on the outer package. If the serial number is missing or obscured, the unit may be counterfeit.
If this is the case, Bushnell will not honor any warranties.
However, if the serial number is intact, you can take advantage of professional help for your Bushnell rangefinder repair. To do so, you can go to the repair request site .
Simply input your information. The site encourages the input of the e-mail address so they can send you updates.
Make sure to input the product description so they know what they will deal with. By doing this, you help them act on your request faster.
As a result, your Bushnell rangefinder repair would happen much faster.
In the comments, you can put which particular Bushnell golf rangefinder parts you need help with.
Below are the common Bushnell golf rangefinder parts and some conditions on Bushnell’s 2-year warranty.
Warranty Terms
When discussing how to get Bushnell rangefinder repair, we need to consider their warranty terms.
Bushnell ensures that your laser rangefinder should be free of defects for 2 years.
If a defect does occur, Bushnell can repair or replace your laser rangefinder if you provide the following:
- Check/money order in the amount of $10.00 for postage and handling cost
- Name, address, and daytime contact number for product return
- An explanation of the defect
- Copy of your dated proof of purchase
Do not include any accessories when sending your rangefinder. Take note that the warranty will not cover damages resulting from misuse and improper handling.
Installation and maintenance done by a non-Bushnell representative will also void the warranty.
If you are past the 2-year warranty, you can still ask for help from your manufacturer. They also sell Bushnell golf rangefinder parts if needed.
However, the installation of Bushnell golf rangefinder parts may still be best left to professionals.
How to Get Your Bushnell Rangefinder Repair Manual
If you are a Bushnell rangefinder owner, then you know how frustrating it can be when your device malfunctions.
A Bushnell rangefinder repair manual is an indispensable tool for any Bushnell rangefinder owner since it provides information on the most common problems and what to do about them such as when your Bushnell rangefinder not showing yardage or Bushnell rangefinder won’t show yardage, Bushnell rangefinder blurry or just researching for Bushnell rangefinder replacement parts.
The Bushnell rangefinder repair manual also includes a Bushnell rangefinder troubleshooting guide that will give you step-by-step instructions for repairing many different types of issues with your device.
The Bushnell rangefinder repair manual is an important document for anyone who has a Bushnell rangefinder that needs to be serviced or repaired.
But how do you obtain it? If you have lost or misplaced your Bushnell rangefinder repair manual, then don’t worry!
Just follow the links below:
- Bushnell Pro Xe Manual
- Bushnell Xe Manual
- Bushnell Golf Pro Xe Manual
- Bushnell Pro Xe User Manual
- Bushnell Pro Xe User Guide
- Bushnell Pro Xe Quick Start Guide
- Bushnell Tour V5 Manual
- Bushnell Tour V5 Quick Start Guide
- Bushnell Tour V4 Manual
- Bushnell Tour V4 User Guide
- Bushnell Tour V4 Quick Start Guide
- Bushnell Tour V3 Manual
- Bushnell Pro X2 Manual
- Bushnell Tour X Manual
- Bushnell Hybrid Lazer/GPS Rangefinder Manual
- Bushnell Hybrid Lazer/GPS Rangefinder Quick Start Guide
- Bushnell Phantom GPS Rangefinder Manual
- Bushnell Phantom GPS Rangefinder Quick User Guide
- Bushnell iON2 GPS GPS Rangefinder Manual
- Bushnell iON2 GPS GPS Rangefinder Quick User Guide
What type of battery does the Bushnell Tour V2 use?
The Bushnell Tour V2 uses a 3-volt lithium battery. This type of battery is known for its long life and reliability.
Typically, 3-volt lithium battery is often used in small electronic devices because it provides a long shelf life and high energy density.
Steps When Doing a Bushnell Tour v2 Troubleshooting
Bushnell Tour V2 troubleshooting can be a difficult process. However, there are a few things you can do to try and fix the issue.
First, check to make sure that the laser is properly calibrated.
Second, make sure that the batteries are fresh and properly installed.
Finally, clean the lens of the laser with a soft, dry cloth.
If you still cannot get the laser to work properly, then you may need to contact Bushnell customer service for further assistance.
Are you Experiencing a Bushnell Tour v2 Problems
There have been a few reports regarding the Bushnell Tour V2 problems.
Some users have reported that the device will not turn on, while others have said that it is not accurately measuring distances.
It is unclear at this time if these problems are widespread or if they are isolated incidents.
If you are experiencing any problems with your Bushnell Tour V2, please contact customer service for assistance.
Problems with Bushnell Tour V2 Slope Edition?
There are several complaints about the Bushnell Tour V2 Slope Edition.
Some users say that the device is inaccurate, while others have had problems with the battery life.
Additionally, some people find the device difficult to use, especially when trying to get accurate readings on hills.
How do you turn on a Bushnell Tour V2?
To turn on your Bushnell Tour V2, hold down the power button for three seconds.
The device will emit a startup sound and the display will light up. You can then release the button.
If the device does not turn on, make sure that the batteries are properly installed and/or replaced.
How to Reset Bushnell Tour v2 Golf Rangefinder
To reset your Bushnell Tour V2, follow these steps:
- Press and hold the power button for 10 seconds.
- Remove the battery cover and batteries from the back of the unit.
- Re-install the batteries and battery cover.
- Press and hold the power button for 3 seconds to turn on the unit.
How do I change my Bushnell Tour V2 from meters to yards?
In order to change your Bushnell Tour V2 from meters to yards, you will need to follow these steps:
- Press the mode button on the front of the unit until “M” or “Y” appears in the lower left-hand corner of the display.
- Use the up and down arrow buttons to scroll through the options until “Y” (for yards) is highlighted.
- Press the mode button again to lock in your selection.
How to Operate and Repair a Bushnell Tour v3 Rangefinder
Do you have the Bushnell tour v3 laser rangefinder? If so, I can provide you some tips on Bushnell tour v3 repair.
With the help of the Bushnell tour v3 manual, here are the Bushnell tour v3 instructions.
I will provide you with Bushnell tour v3 instructions on how to operate and repair a Bushnell Tour v3 Rangefinder. You will also know how to change the Bushnell tour v3 meters to yards.
Replacing the battery
To remove the Bushnell Tour v3 battery cap, lift the tab and rotate the cap counter-clockwise. Put in a new CR-2 3-volt lithium battery with the positive end first. Then, put the battery cap back.
The Bushnell tour v3 manual recommends that you replace the Bushnell Tour v3 battery every year. Also, replace the battery when the low battery indicator is displayed in the in-view readout.
For many concerns, replacing the Bushnell Tour v3 battery may be the easiest way to do Bushnell tour v3 repair.
Changing Bushnell Tour v3 Rangefinder meters to yards
For some, it is important to change the Bushnell tour v3 meters to yards.
To see the current unit being used, check the indicator in the lower right portion of your LCD. To change it, press and hold the POWER/FIRE button.
The Bushnell tour v3 meters to yards instructions indicate that the following options will show up:
- Yards w/ JOLT
- Meters w/ JOLT
To convert your Bushnell tour v3 meters to yards, release the POWER/FIRE button when the LCD states “yards” or “yards w/ JOLT.”
According to the Bushnell tour v3 manual, the JOLT feature is a signal feature.
It will give you a vibration signal when the Pinseeker technology detects the flag. Try this feature when you change Bushnell tour v3 meters to yards.
Target range cannot be obtained
Check that the LCD is illuminated and the POWER/FIRE button is being depressed.
If this does not work, ask for professional help on Bushnell tour v3 repair. There are other problems that can arise.
Sometimes, the Bushnell tour v3 manual is enough to help you with your Bushnell tour v3 repair.
Generally, the manual can answer most queries on how to operate and repair a Bushnell Tour v3 Rangefinder.
However, always ask an expert if needed. Sometimes, the Bushnell tour v3 instructions may be too vague for non-experts.
How to Repair a Bushnell Tour v4 Rangefinder Problems
The Bushnell Tour V4 rangefinder is a great tool for golfers who need accurate distance measurements. However, it’s not perfect.
If you have this type of laser rangefinder instead, you might encounter some of these Bushnell Tour v4 problems. Sometimes, the rangefinder malfunctions and doesn’t work properly.
If you’re having problems with your Bushnell Tour v4 rangefinder, there are a few things you can do initially to try and fix it at home.
There are some common problems that users have with the device. One problem is that the mode button can be difficult to press including issues with the accuracy of the readings and the battery life.
Another problem is that the user manual does not always explain how to change the mode.
First, remove the Bushnell Tour v4 battery from the rangefinder and let them sit overnight. Then, turn off the power switch and wait 24 hours.
Afterward, replace the batteries and turn the power back on. This should fix most issues.
If this still doesn’t work, try removing the Bushnell Tour v4 battery cover and cleaning out the contacts inside that the laser is clean.
Additional instructions for doing this can be found in the Bushnell Tour v4 manual.
If you are still having problems, here are some tips on how to repair problems with your Bushnell Tour v4 rangefinder.
Bushnell Tour V4 Problem – LCD does not illuminate
- Make sure to depress the POWER/FIRE button
- Check if you have not changed the battery in 12 months or the low battery indicator was on. If so, replace your battery with a good quality 3-volt lithium battery.
Bushnell Tour V4 Problem – Display goes blank
The display goes blank when attempting to power the laser
This is one of the most common Bushnell tour v4 problems. But the answer to this is pretty simple.
This might just mean the Bushnell Tour v4 battery is due for replacement. Try replacing the Bushnell Tour v4 battery with a good quality 3-volt lithium battery. If that doesn’t work, seek professional help.
Bushnell Tour V4 Problem – Cannot obtain the target range
Some Bushnell tour v4 problems such as this one may have many root causes.
If you find your Bushnell tour v4 rangefinder not working, try the following:
- Check if LCD is illuminated
- Check if the POWER/FIRE button is depressed
- Check for any obstructions to the objective lenses (lenses closest to the target)
- Check if the unit is held steady while the POWER/FIRE button is being depressed
For other reasons for your Bushnell tour v4 rangefinder not working, consult the Bushnell Tour V4 manual. Again, read everything: word for word, point by point.
Sometimes, as simple dirt on the lens can be the reason for your Bushnell tour v4 rangefinder not working.
Again, if this is the case, use a microfiber cloth. Do not use any abrasives or rough cloth.
I hope this helped you on how to repair a Bushnell Tour v4 rangefinder.
If you still find your Bushnell Tour v4 Rangefinder not working, it would be best to seek professional help.
If your unit is still covered by the warranty, repair for your Bushnell tour v4 problems will still be free of charge.
Bushnell Tour V4 Troubleshooting Tips
If you’re having problems with your Bushnell Tour V4 rangefinder, there are several things you should try before calling tech support.
Here are some tips to help you troubleshoot your Bushnell Tour V4 rangefinder.
- Make sure the Bushnell Tour v4 batteries are fully charged.
- Check the battery connections.
- Try another set of batteries.
- Bushnell Tour V4 hard reset the rangefinder.
- Clean the lens.
- Use a soft cloth to clean the screen.
- Turn off the power switch.
- Remove the battery cover.
- Press down firmly on the top right corner of the display unit.
- Press down firmly on both sides of the display unit.
- Hold the bottom left corner of the display unit and press firmly downward.
- Press down firmly on each side of the display unit.
- Press down firmly on top of the display unit.
- Press down firmly on either side of the display unit until the display unit turns off.
- Replace the battery cover.
- Reinstall the battery pack.
- Restart the rangefinder.
- Call Tech Support and follow the instructions given over the phone.
Additionally, refer to the Bushnell Tour v4 manual to get more in-depth information on Bushnell Tour V4 Troubleshooting guide.
How do I change my Bushnell Tour V4 meters to yards?
To change your Bushnell Tour V4 from meters to yards, simply press and hold the MODE button for 3 seconds.
The mode button is located on the top of the device, just behind the power button.
The display will then alternate between yards and meters.
Release the button to select the desired unit of measure.
Another thing to keep in mind is that if you’re using a rangefinder that uses both yardage and metric measurements, you’ll need to convert the distance into either one before entering it into the device.
This is especially true if you use GPS technology to calculate distances.
What to do when Bushnell Tour v4 Stuck in Setup Mode
Bushnell Tour V4 stuck in setup mode can be frustrating, but there are a few things you can try to get it working again.
First, make sure the batteries are fresh and installed correctly.
Next, try resetting the device by pressing and holding the power button for 10 seconds.
If that doesn’t work, try connecting the Tour V4 to a computer via the USB cable and see if that clears the problem.
If none of these solutions work, then you may need to contact Bushnell customer support for further assistance.
What kind of battery does a Bushnell Tour v4 Battery Uses
The Bushnell Tour v4 battery uses a 3-volt battery, which is not included.
When ordering batteries for this device, make sure to purchase CR2 lithium batteries, as other types will not work.
These can be found at most stores that sell electronics or online.
What is the battery life of a Bushnell Tour v4 Battery
The Bushnell Tour V4 battery has great life thanks to its use of CR2 batteries.
These batteries are known for their long life and reliability, so you can be sure that your device will have plenty of power to last through even the longest rounds of golf.
What size is the Bushnell Tour v4 Battery size
The Bushnell Tour V4 battery uses a 3-volt lithium battery (CR2). We recommend that you use a Bushnell Lithium Battery for the longest life.
If you use an alkaline battery, your rangefinder’s performance may be reduced in cold weather and you may get fewer measurements per battery.
What is a Bushnell Tour v4 Battery Cap
The Bushnell Tour V4 Battery Cap is a small, black cap that attaches to the back of the Bushnell Tour V4 laser rangefinder.
This cap holds one CR2 battery, which is used to power the rangefinder.
The Bushnell Tour V4 Battery Cap is made of plastic and has a small hole in the center for the battery’s positive terminal.
There are also two small metal tabs on the inside of the cap that make contact with the negative terminals on the batteries.
How to change a Bushnell Tour v4 Battery
To change the Bushnell Tour V4 Battery on your golf rangefinder, first remove the two screws on the back of the device.
Next, use a small Phillips head screwdriver to remove the battery cover. Inside, you will see the battery compartment with a small tab.
Use a flathead screwdriver to gently pry up the tab and then slide the old battery out.
To insert the new battery, line it up with the positive and negative symbols in the compartment and then gently push it down until it clicks into place.
Finally, replace the battery cover and screw it back into place.
How to Restore Factory Defaults doing a Bushnell Tour v4 Hard Reset
To perform Bushnell Tour v4 Hard Reset, you need to hold down the power button for about 5 seconds.
Once the power button is pressed for 5 seconds, the rangefinder will reset, clear any stored data, return the rangefinder to its factory defaults and be ready to use again.
After performing the Bushnell Tour v4 hard reset, you’ll see a message saying “Reset Complete”.
This means that the Bushnell Tour v4 rangefinder has successfully returned to its factory default settings.
What is a Bushnell Tour v5 Shift
The Bushnell Tour V5 Shift is a top-of-the-line laser rangefinder that gives golfers the ability to get yardages to the front, back, and center of the green with one device.
It features Bushnell’s exclusive “Shift” technology, which allows the user to accurately compensate for elevation changes.
The Bushnell Tour V5 Shift also has a built-in slope function, which gives the user an accurate reading even when the flagstick is not visible.
It also has the JOLT technology that gives users a short vibration when the laser locks onto the flagstick.
This is a great feature for those who want to make sure they are getting yardages to the right target.
The Bushnell Tour V5 Shift is a high-quality laser rangefinder that provides golfers with accurate yardages to the flagstick.
Troubleshooting a Bushnell Tour v5 Shift Problems
Bushnell Tour V5 Shift problems are a common issue with this golf laser rangefinder model.
Many users have reported that the device will randomly shift between yards and meters, or will show an inaccurate reading.
Sometimes, the problem can be fixed by simply recalibrating the device. Other times, more extensive troubleshooting may be necessary.
If you’re your Bushnell Tour V5 shift problems are starting to show up, there are a few things you can try to troubleshoot the issue.
First, make sure that the batteries are fresh and installed properly.
Next, check to see if the laser is dirty or obstructed in any way – if so, clean it off and try again.
Finally, if the problem persists, you may need to contact customer support for further assistance.
In any case, it is important to consult the Bushnell Tour v5 Shift manual or contact customer support for help with this issue.
Why is your Bushnell Tour v5 Shift Slope not Working
When your Bushnell Tour V5 shift slope is not working, the solution may be to simply turn the device off and then on again.
If that does not work, then the next solution would be to reset the device by holding down the power button for 10 seconds.
If that also does not work, it is recommended that you take your Bushnell Tour V5 shift to a Bushnell service center to have it repaired or replaced.
What type is a Bushnell Tour v5 Shift Battery
Bushnell Tour V5 Shift Battery is a great product for those who are looking for a reliable and affordable battery for their golfing needs.
This battery is designed to work with the Bushnell Tour V5 laser rangefinder, and it provides plenty of power to keep the rangefinder running for a long time.
The battery is also very easy to install, and it comes with all the necessary accessories.
The Bushnell Tour V5 Shift battery uses a type of battery that is not common in other devices.
This can make it difficult to find replacements, but the company does sell them on their website.
The battery life is good, but it will eventually need to be replaced.
What are the known Bushnell Tour v5 Problems
Some Bushnell Tour V5 problems that have been reported include the laser rangefinder shutting down unexpectedly.
Problems with the yardage readings being inaccurate and Issues with the unit not holding a charge for very long.
While some of these problems can be easily fixed by the user, others may require sending the unit back to Bushnell for repairs or replacement.
Why is the Bushnell Tour v5 Manual Important
The Bushnell Tour V5 manual is a comprehensive guide that covers all aspects of using and caring for your Bushnell Tour V5 laser rangefinder.
It includes information on how to set up and use your device, as well as troubleshooting tips and maintenance advice.
Whether you’re a first-time user or an experienced pro, the Bushnell Tour V5 manual is an essential resource for getting the most out of your laser rangefinder.
How to do Bushnell Tour v5 Hard Reset
In order to do Bushnell Tour V5 hard reset when it stops working, simply press and hold the power button for about 10 seconds.
This will reset the device and clear any errors that may have caused it to malfunction.
How do I turn on my Callaway 300 Pro Rangefinder?
To turn on your Callaway 300 Pro rangefinder, simply press and hold the power button for two seconds.
The device will emit a short beep to indicate that it is powered on. You can then release the button.
How do you turn off the slope on a Callaway 300 Pro?
To turn off the slope feature on the Callaway 300 Pro, simply press and hold the “mode” button for three seconds.
This will cycle through the various modes until the slope mode is disabled.
The Callaway 300 Pro is a professional-grade golf laser rangefinder that comes with a variety of features and functions.
One of those functions is the “slope” feature, which can be turned on or off depending on the user’s preference.
How do you change a Callaway 300 Pro Rangefinder from Meters to Yards?
To change a Callaway 300 pro rangefinder from Meters to Yards, first press and hold the Mode button for 3 seconds.
Next, use the Up and Down arrows to select your desired units (Meters or Yards).
Lastly, press the Mode button again to confirm your selection and exit this menu.
Tec Tec Tec Rangefinder Problems and Troubleshooting
There have been reports of Tec Tec Tec rangefinder problems, mostly concerning its accuracy.
Some users have complained that the device is not accurate enough, while others have said that it is completely inaccurate. There have also been reports of the device breaking down after a short period of use.
The following are some of the most common problems that people experience when using their Tec Tec Tec Rangefinders:
1) Does not function at all. This could mean that the batteries are dead or that they were improperly installed. Make sure that the batteries are fully charged before trying to use the rangefinder again. Also, make sure that the rangefinder has power by plugging in an AC adapter.
2) Gives incorrect readings. This usually means that the rangefinder is out of calibration. You should take the rangefinder to a professional who can calibrate it for you.
3) Malfunctions after a certain amount of usage. This could mean that one of the internal components is damaged. In this case, you should contact the manufacturer for help.
4) Breaks down after a short period. It may be defective. Contact the manufacturer for replacement parts.
5) Stops working when the battery dies. Replace the batteries immediately.
6) Doesn’t work on certain types of terrain. For example, it won’t work well on wet grass.
7) Doesn’t always pick up the target correctly. This could be due to poor lighting conditions or because the target was too far away from the rangefinder.
8) Gets stuck in the “on” position. This happens when the batteries die. To get rid of this problem, turn off the rangefinder and remove the batteries. Then, replace them and turn the rangefinder back on.
If you are still having trouble with your Tec Tec Tec golf rangefinder, there are a few common problems that you can check for and try to fix yourself.
First, make sure that the batteries are fresh and properly installed. If the batteries are low or installed incorrectly, the rangefinder will not work properly.
Next, check to see if the lens is clean and free of any dirt or debris. If the lens is dirty, it will affect the accuracy of the rangefinder.
Finally, make sure that the unit is properly calibrated. If it is not, it will not give accurate readings.
If the above steps don’t resolve your problem, then it might be time to contact the manufacturer for assistance.
What To Do If Your Boblov Rangefinder Not Working
If your Boblov rangefinder not working, there are several things you should try before calling a professional repair shop.
- First, make sure the batteries are fully charged.
- Second, try turning off and back on again.
- Third, remove and reattach the battery cover.
- Fourth, press down firmly on the power button until the indicator light turns green.
- Finally, turn the unit over and shake it vigorously.
If none of those solutions works, then you’ll probably need to get a replacement rangefinder.
There are plenty of options available online, but if you don’t feel comfortable doing that yourself, then you might consider hiring someone who specializes in fixing golf equipment and call a professional repair shop.
Final Thoughts
If you came looking for how to fix golf rangefinder, you have the answer. Besides that, I also included some bonus tips.
After reading this, you should now know how to keep a golf rangefinder steady plus notes on Bushnell rangefinder repair.
For more info, visit us more often. I still got more tips under my sleeves.
More Information
Golf rangefinder - related articles.

How to Use a Golf Rangefinder – All You Need to Know

How to Clean a Golf Rangefinder? Required for Avid Golfers

Can You Use a Golf Rangefinder for Hunting? Golfing vs Hunting

What Is Slope in Golf Rangefinder?

Can You Use a Rangefinder in a Golf Tournament?
Check-out our product reviews & recommendations.
Last Updated on December 4, 2023 by Paul Roger Steinberg
IMAGES
VIDEO
COMMENTS
Changing the Bushnell V4 to Yards. Bushnell V4 rangefinder is a versatile device that can measure distances up to 1000 yards with an accuracy of +/-1 yard. By default, it is set to measure distances in meters but you can switch it to yards with ease. Here are the step-by-step instructions to change your Bushnell V4 to yards: 1.
The ranging accuracy of the TOUR V4 is plus or minus one yard/meter under most circumstances. The maximum range of the instrument depends on the reflectivity of the target. The maximum distance for most objects is 700 yards/640 meters while for highly reflective objects the maximum is 1000 yards/914 meters.
Tour v4 Slope Quick Start Guide. The TOUR V4 can be used to measure distances in yards or meters. Users also have the option of turning the SLOPE feature ON or OFF. To select between yards/meters and SLOPE on/off, Wait for the unit to timeout and fully power down. Press and hold the POWER/FIRE button. The display will begin to cycle through the ...
The first step in using the Bushnell Tour v4 to convert from meters to yards is to set up the device for both metric and imperial measurements. To do this, press and hold the "Mode" button until the "M/Y" option appears on the screen. ... • To convert from meters to yards with the Bushnell Tour v4, you need to multiply the distance in ...
The Tour V4 can be used to measure distance in yards or meters. The unit measure indicators are located in the lower right portion of the LCD. To select between yards and meters (starting with the unit power off), press and hold the Power/Fire button. After 7 seconds, the display will begin to cycle through the options: Yards or meters.
To change your Bushnell rangefinder to yards, follow these step-by-step instructions: 1. Power off the unit: Make sure your rangefinder is turned off before proceeding. 2. Locate the Power/Fire button: The Power/Fire button is typically located on the top or side of the rangefinder. It may be labeled with a power symbol or have a distinct shape. 3.
Step 3: Now, press and hold the "Mode" button for approximately 3 to 5 seconds. Keep holding it until you see the unit indicator at the bottom of the display change from m (meters) to yds (yards). Step 4: As the display changes to yards, release the "Mode" button. Your Bushnell rangefinder is now set to display distance measurements in ...
On the display, I will see either "Y" for yards or "M" for meters. 6. Confirm the selection: To ensure that the change is applied, I double-check the display to see if it now shows the selected units (yards or meters). By following these steps, I can easily set my Bushnell Tour V4 to yards.
The TOUR V4 features 5x magnification and Multi-Coated optics. A liquid crystal display (LCD) is mounted within the optical system and when activated, displays a reticle for targeting, yards/meters, and Mode indicators. Inherent in the manufacturing process are small black spots that appear in the optical system.
Apr 27, 2020. 1.9MB. pdf. View AllFiles. Instruction manual for the Bushnell Tour V4 and V4 Shift laser rangefinders.
Page 9 -20 to +20 degrees of elevation. The Tour V4 Shift will automatically compute an angle compensated range based upon distance and slope angle determined by the laser rangefinder and built-in inclinometer. This data is then combined with internal algorithmic formulas dealing with average club use and ball trajectories.
Done deal. Like all the best laser rangefinders, the V4 Slope requires no set up and is very easy to use. Though there is only one button on the Tour V4 Slope, there are four modes: yards with and without slope and meters with and without slope. The ability to turn off slope is important as it makes the Tour V4 Slope tournament legal.
The TOUR V4 SHIFT weighs a mere 5.6 ounces and made to fit into the palm of your hand. TOUR V4 SHIFT also features an adjustable eyepiece, 5X magnification, and is capable of providing distance from 5 to 1000 yards with incredible one yard accuracy! Like other Bushnell laser rangefinders, the TOUR V4 SHIFT is not dependent upon reflectors, and ...
Watch Golf Monthly's Bushnell Tour V4 laser rangefinder review, where we take a closer look at some if its new features Become a FREE SUBSCRIBER to Golf M...
Like other Bushnell laser rangefinders, the TOUR V4 is not dependent upon reflectors, and will provide distance to trees, bunkers, and virtually any object on any golf course in the world. Page 5: English RANGING ACCURACY The ranging accuracy of the TOUR V4 is plus or minus one yard/meter under most circumstances.
The Tour V4 can be used to measure distance in yards or meters. The unit measure indicators are located in the lower right portion of the LCD. To select between yards and meters (starting with the unit power off), press and hold the Power/Fire button. After 7 seconds, the display will begin to cycle through the options: Yards or meters.
The TOUR V4 SHIFT features 5x magnification and Multi-Coated optics. A liquid crystal display (LCD) is mounted within the optical system and when activated, displays a reticle for targeting, yards/meters, and Mode indicators. Inherent in the manufacturing process are small black spots that appear in the optical system.
The Tour V4 Slope (and all Bushnell's slope-measuring rangefinders) uses a built-in inclinometer, as well as an algorithm that factors in distance, elevation and trajectory to calculate a distance a shot will play.. So on top of producing an actual distance to the flag, say 150 yards, the Tour V4 Slope will also provide a "plays-like" distance.
Page 4 "zero" in on the flag without acquiring background targets. The TOUR V4 SHIFT weighs a mere 5.6 ounces and made to fit into the palm of your hand. TOUR V4 SHIFT also features an adjustable eyepiece, 5X magnification, and is capable of providing distance from 5 to 1000 yards with incredible one yard accuracy!
flag without acquiring background targets. The Tour V2 is the most compact laser rangefinder on the market, weighing a mere 6.6 ounces and made to fit into the palm of your hand. Tour V2 also features and adjustable. eyepiece, 5X magnification, and is capable of providing distance from 5 to 1000 yards with incredible one yard.
For some, it is important to change the Bushnell tour v3 meters to yards. To see the current unit being used, check the indicator in the lower right portion of your LCD. To change it, press and hold the POWER/FIRE button. The Bushnell tour v3 meters to yards instructions indicate that the following options will show up: Yards w/ JOLT
changing from yards to meters, a change in unit of measure will be indicated by the illumination of the M for meter indicator while the Y for Yard indicator is turned off. If you are changing from meters to yards, the opposite will occur. The TOUR V2 will return to the last unit of measure setting used each time the unit is turned on. ACTIVE LASER
The ranging accuracy of the TOUR V3 is plus or minus one yard/meter under most circumstances. The maximum range of the instrument depends on the reflectivity of the target. The maximum distance for most objects is 700 yards/640 meters while for highly reflective objects the maximum is 1000 yards/914 meters. Note: You will get both longer and ...